Useful Upcycling Projects for Old Tables
Upcycling is not just a trend; it's a lifestyle choice that promotes sustainability and creativity. If you have old tables lying around, you might be surprised to learn just how many useful and stylish projects you can undertake to breathe new life into them. Instead of tossing out that worn-down piece of furniture, why not transform it into something functional and beautiful? This article explores a variety of upcycling projects that can enhance both the functionality and aesthetics of your home while also being eco-friendly.
Imagine walking into your living room and spotting a stunning coffee table that used to be an old dining table. Or picture a quaint bench made from a repurposed side table, adding character to your patio. The possibilities are endless! Upcycling not only helps reduce waste but also allows you to express your personal style in a unique way. So, grab your tools, unleash your creativity, and let’s dive into some exciting projects that will turn your old tables into functional masterpieces.
Before we get into the nitty-gritty of specific projects, it’s important to understand the benefits of upcycling. Not only does it save money by reusing materials, but it also reduces the demand for new furniture, which can have a significant impact on our environment. By choosing to upcycle, you're making a conscious decision to promote sustainability while also adding a personal touch to your home decor.
As we explore these upcycling projects, keep in mind that the key is to let your imagination run wild. Whether you prefer a rustic farmhouse aesthetic or a sleek modern look, there are countless ways to customize your old tables. So, are you ready to roll up your sleeves and get started on your upcycling journey?
One of the most enjoyable aspects of upcycling old tables is the opportunity for a creative makeover. You can completely change the appearance of your table through various techniques. Here are some popular methods:
- Painting: A fresh coat of paint can do wonders. Choose colors that complement your existing decor, or go bold for a statement piece.
- Staining: If you prefer a more natural look, consider staining your table to enhance the wood grain.
- Decoupage: This technique allows you to apply decorative paper or fabric to your table, creating a unique design that reflects your personality.
By combining these techniques, you can create a one-of-a-kind piece that not only serves a purpose but also becomes a conversation starter in your home. Don’t be afraid to experiment and mix different styles to find what works best for you!
Now that you have a vision for your table's new look, it’s time to consider how you can enhance its functionality. Old tables can be transformed into a variety of useful furniture pieces, such as:
- Desks for your home office
- Benches for extra seating
- Storage solutions to keep your space organized
By maximizing the utility of your old tables, you not only reduce waste but also create pieces that fit seamlessly into your lifestyle. Let's explore some specific transformations that can elevate your space.
Have you ever thought about converting an old table into a stylish desk? With a few simple modifications, you can create a workspace that is both functional and aesthetically pleasing. Start by choosing a table that is the right height for a desk. Then, consider adding organizational features such as:
- Drawer units for storing office supplies
- Floating shelves above the desk for books and decor
Incorporating ergonomic designs can also enhance comfort, making your workspace more enjoyable. With the right finish, your upcycled desk can become the centerpiece of your home office.
To further enhance the functionality of your desk, integrating storage solutions is essential. You can add drawers or shelves to keep your workspace organized and clutter-free. This not only improves productivity but also maintains a clean aesthetic. Consider the following options:
| Storage Option | Description |
|---|---|
| Drawers | Built-in or attached drawers for easy access to supplies. |
| Shelves | Open or closed shelving to display books and decorative items. |
Choosing the right storage solution can make all the difference in creating a functional workspace.
When it comes to upcycling, selecting the right paint or stain finish is crucial. Not only does it protect your furniture, but it also enhances its appearance. Consider the style of your existing decor and choose a finish that complements it. Whether you opt for a matte, glossy, or distressed look, the finish can significantly impact the overall vibe of your space.
Another fantastic way to upcycle your old tables is by converting them into benches. This project is perfect for adding extra seating to your patio or entryway. With a bit of creativity, you can design a bench that not only looks great but also fits your space perfectly. Imagine a charming bench made from a repurposed dining table, complete with cushions for comfort!
Once you've revamped your old tables, it's time to add some decorative accents to make them truly shine. Consider incorporating elements like stenciling, mosaics, or decorative hardware. These accents can turn a simple table into a statement piece that adds character to your home.
Mosaics are a fantastic way to add color and texture to your old table surfaces. You can create vibrant patterns that showcase your artistic flair. Whether you use tiles, glass, or even colorful stones, the result will be a stunning focal point in your room.
If you're looking for a simpler way to personalize your table, stenciling is a great option. There are countless stencil designs available, allowing you to apply intricate patterns and motifs that reflect your style. This technique is not only easy to execute but also offers endless possibilities for customization.
As you embark on your upcycling journey, it's essential to keep eco-friendly practices in mind. Focus on using sustainable materials and techniques that minimize your environmental impact. Here are some tips to consider:
- Use non-toxic paints and finishes.
- Source materials locally to reduce your carbon footprint.
- Repurpose items you already have instead of buying new ones.
By following these tips, you can create beautiful, functional pieces for your home while being kind to the planet.
Q: What types of tables are best for upcycling?
A: Almost any type of table can be upcycled! Look for sturdy pieces that can withstand modifications, such as dining tables, side tables, or even coffee tables.
Q: Do I need special skills to upcycle furniture?
A: Not at all! Many upcycling projects are beginner-friendly. With some basic tools and a bit of creativity, you can successfully transform your old tables.
Q: How can I ensure my upcycled table is durable?
A: Choose high-quality paints and finishes, and be sure to prep the surface properly before applying them. Regular maintenance will also help prolong the life of your upcycled furniture.
In conclusion, upcycling old tables is not only a fun and creative endeavor but also a sustainable choice that benefits both your home and the environment. So, gather your materials and start transforming those old tables into something extraordinary!
Creative Table Makeovers
Are you staring at an old table, wondering what to do with it? You're not alone! Many of us have those forgotten pieces of furniture lurking in the corner, gathering dust. But what if I told you that with a little creativity and effort, you can breathe new life into these tables? are not just about aesthetics; they can also add a personal touch to your home while promoting sustainability. Whether you're looking to match your decor or simply want to have fun with a DIY project, there are countless ways to transform your old tables into stunning focal points.
One popular method for refreshing the look of your old tables is through painting. A fresh coat of paint can dramatically change the appearance and feel of your table. You can opt for bold colors to make a statement, or soft pastels for a more subtle look. If you're feeling adventurous, consider using a two-tone technique where the tabletop is a different color than the legs. This adds depth and visual interest. Don't forget to use a primer to ensure that the paint adheres well and lasts long!
Another exciting technique is staining. This method allows you to showcase the natural beauty of the wood while adding a rich hue. Staining can enhance the grain of the wood, giving your table a more sophisticated appearance. Remember to choose a stain that complements your existing furniture. If you're not sure where to start, here’s a quick comparison of paint versus stain:
| Feature | Paint | Stain |
|---|---|---|
| Finish | Opaque, can hide imperfections | Transparent, highlights wood grain |
| Durability | Generally more durable | May require more frequent reapplication |
| Color Options | Wide range of colors | Limited to wood tones |
If you're looking for something truly unique, decoupage is a fun and artistic way to revamp your table. This technique involves gluing paper cutouts onto the surface and sealing them with a protective finish. You can use anything from vintage book pages to beautiful wrapping paper. The possibilities are endless! Imagine a table adorned with floral patterns or a collage of your favorite travel memories. Not only does decoupage add personality, but it also creates a conversation piece that reflects your style.
Don’t forget the power of textiles. If your table has a removable top, consider covering it with a beautiful fabric. This can be a great way to introduce patterns and textures into your space. You can use a staple gun to secure the fabric underneath the table, making it both stylish and easy to change out whenever you feel like a refresh.
Lastly, if you want to take your makeover to the next level, think about incorporating decorative hardware. New knobs, handles, or even legs can completely transform the look of your table. This small change can make a big impact and give your piece a modern twist. Mixing and matching hardware styles can create an eclectic vibe, making your old table feel like a brand-new statement piece.
So, whether you choose to paint, stain, decoupage, or embellish with textiles and hardware, your old table can become a beautiful addition to your home. Embrace the challenge of upcycling—it's not just about saving money, but also about creating something that is uniquely yours. Who knew that a little creativity could turn a neglected table into a cherished centerpiece?
- What materials do I need for painting my old table? You will need sandpaper, primer, paint, a brush or roller, and a sealant for protection.
- Can I use regular craft paper for decoupage? Absolutely! Just make sure to use a good adhesive and seal it properly to protect the surface.
- How do I choose the right stain for my wood table? Consider the existing colors in your room and test a small area first to see how it looks before applying it to the whole table.
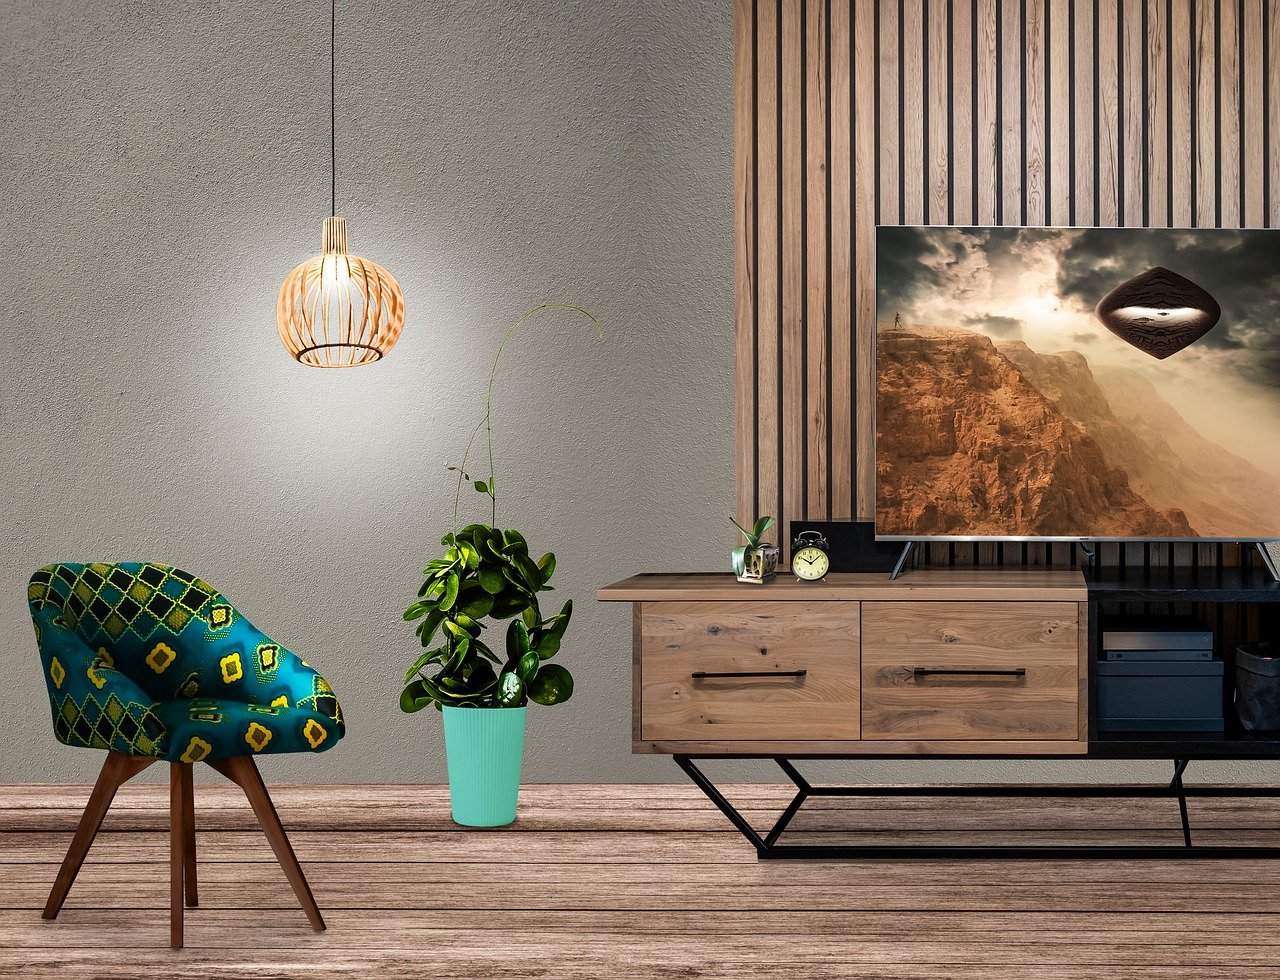
Functional Furniture Transformations
Are you tired of looking at that old table gathering dust in the corner of your room? Instead of tossing it out, why not transform it into something incredibly functional? Upcycling furniture is not just about giving it a new look; it’s about enhancing its utility while contributing to sustainability. Imagine turning that forgotten table into a stylish desk or a cozy bench, adding both charm and functionality to your space. Let’s dive into some creative ideas that will breathe new life into your old tables!
One of the most popular transformations is converting a table into a desk. With the rise of remote work, having a dedicated workspace is essential. A simple table can be transformed into a chic desk that suits your home office needs. Start by considering the size and shape of your table. A rectangular table can easily serve as a spacious desk, while a round table might work well in a cozy nook. The first step is to sand down the surface to prepare it for painting or staining. Choose a color that complements your existing decor—perhaps a vibrant hue to energize your workspace or a muted tone for a more professional look.
Next, think about incorporating organizational features into your desk design. You could add drawers or shelves beneath the table to keep your workspace tidy. This not only maximizes storage but also minimizes clutter, allowing you to focus on your tasks. If your table doesn’t have built-in storage, consider attaching a small set of drawers or a rolling cart that can slide under the table. The key is to ensure that everything you need is within reach, making your work environment both efficient and aesthetically pleasing.
But wait, there’s more! If you have a larger table, why not turn it into a bench? This is particularly great for outdoor spaces or entryways. A rustic table can be transformed into a charming bench that adds seating for guests or family. Start by removing the legs and securing the tabletop to a sturdy frame that you can build or repurpose from other materials. Add some cushions for comfort, and you’ll have a unique piece that not only serves a purpose but also acts as a conversation starter.
When it comes to finishing touches, selecting the right paint or stain is crucial. Not only does it protect your newly upcycled furniture, but it also enhances its visual appeal. Consider using eco-friendly paints or stains that are low in volatile organic compounds (VOCs). This not only benefits the environment but also ensures a healthier indoor air quality. If you’re feeling adventurous, you can even experiment with different finishes—like a matte or glossy look—to give your furniture a distinctive flair.
In conclusion, upcycling old tables into functional furniture pieces is a rewarding project that combines creativity with sustainability. Whether you choose to create a desk, a bench, or any other functional item, the possibilities are endless. By giving your old furniture a new purpose, you not only save money but also contribute to a more sustainable lifestyle. So grab your tools, unleash your creativity, and start transforming your old tables today!
- What tools do I need for upcycling furniture? Basic tools like a screwdriver, sander, paintbrush, and measuring tape are essential. Depending on your project, you might also need a drill or saw.
- Can I upcycle any type of table? Absolutely! Most tables can be upcycled, but consider the material and condition. Solid wood tables are often the easiest to work with.
- How do I ensure my upcycled furniture is durable? Choose high-quality finishes and ensure that all joints and attachments are secure. Regular maintenance will also help prolong the life of your furniture.
Turning Tables into Desks
Have you ever looked at an old table and thought, “This could be more than just a surface to gather dust”? If so, you’re in for a treat! Transforming your tired old table into a stylish desk is not only a fun project, but it can also breathe new life into your workspace. Imagine creating a unique desk that reflects your personality while being functional and eco-friendly. Let’s dive into the step-by-step process of turning your forgotten table into a stunning desk that you’ll be excited to use every day.
First things first, you need to assess the condition of your table. Is it sturdy? Does it have any scratches or dents? These factors will influence your design choices. If the tabletop is in decent shape, you can simply sand it down to remove imperfections and prepare it for a fresh coat of paint or stain. If it’s a bit wobbly, consider reinforcing the legs or adding a crossbar for extra support. Remember, a desk should be as sturdy as it is stylish!
Once you’ve prepped your table, it’s time to get creative. Think about the style you want to achieve. Do you prefer a sleek, modern look, or something more rustic and homey? For a modern touch, a glossy white finish can work wonders, while a deep stain can add warmth and character to a rustic design. Here’s a quick table to help you choose the right finish:
| Style | Recommended Finish |
|---|---|
| Modern | Glossy White or Black |
| Rustic | Dark Stain or Distressed Paint |
| Industrial | Metallic Paint or Raw Wood |
| Vintage | Pastel Colors or Chalk Paint |
After selecting your finish, apply it evenly across the surface. Don’t rush through this step! Take your time to ensure a smooth application, and consider multiple coats for a professional look. While the paint or stain dries, you can think about adding some organizational features to your desk. Perhaps you want to incorporate a few drawers for storing office supplies or a shelf for books and decor. These features not only enhance functionality but also keep your workspace clutter-free.
When it comes to adding storage solutions, think outside the box! You can attach small drawer units to the side of your desk or even repurpose old crates or boxes as open shelving. The key is to integrate these elements seamlessly into your design. For instance, if you’re going for a rustic look, wooden crates can add charm while providing ample storage.
Finally, let’s not forget about ergonomics. A desk is only as good as its comfort level. Make sure the height of your desk is suitable for your chair and that you have enough legroom. You might want to consider adding a keyboard tray or monitor stand to elevate your workspace, ensuring that you maintain good posture while working. After all, a beautiful desk is of little use if it causes discomfort!
In conclusion, turning an old table into a desk is not just a project; it’s a journey of creativity and sustainability. With a little imagination and effort, you can create a personalized workspace that inspires productivity and reflects your style. So grab that old table, roll up your sleeves, and let the transformation begin!
Q: Can any old table be turned into a desk?
A: Yes! Most old tables can be repurposed, but ensure it’s sturdy enough to support your work needs.
Q: What tools do I need for this project?
A: Basic tools like sandpaper, paintbrushes, a screwdriver, and possibly a saw for modifications are typically required.
Q: How long does the transformation take?
A: Depending on your design and drying times, it could take anywhere from a few hours to a couple of days.
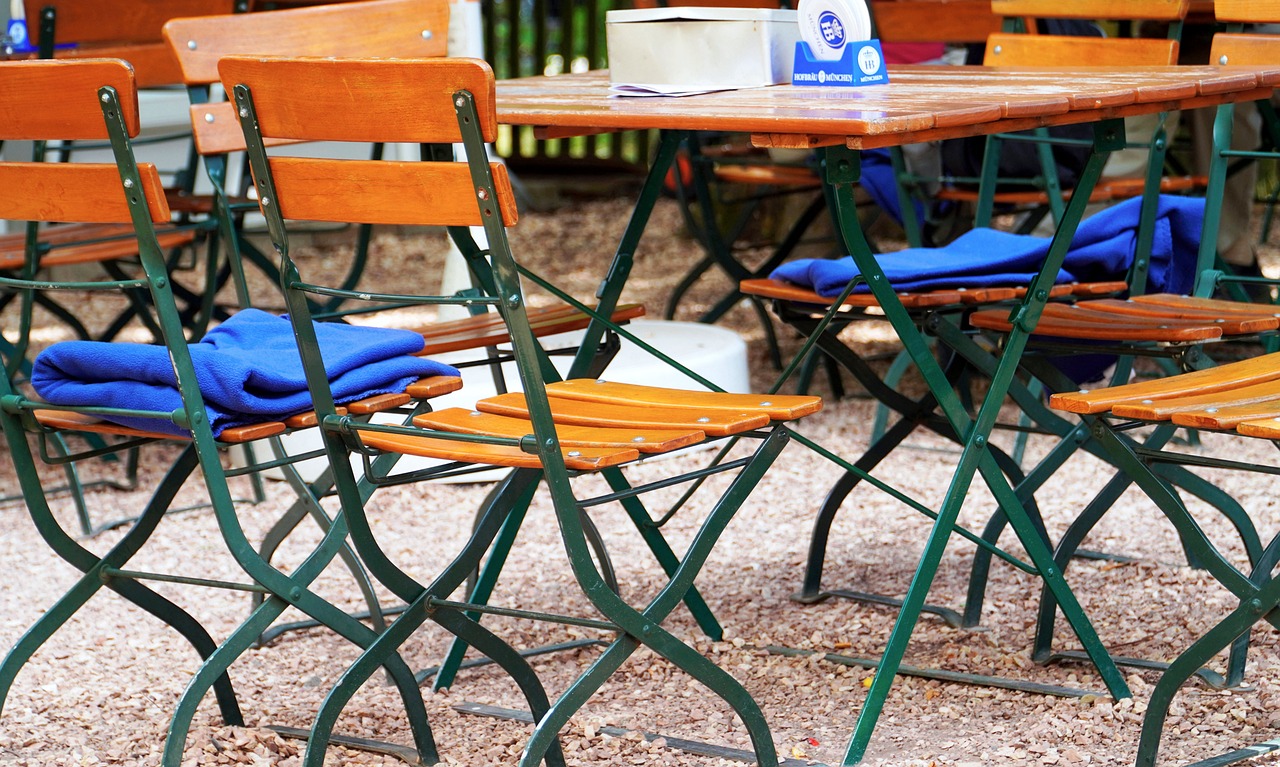
Adding Storage Solutions
When it comes to repurposing old tables, one of the most exciting aspects is the opportunity to incorporate storage solutions that can transform a simple piece of furniture into an organizational powerhouse. Imagine taking an old dining table that has seen better days and turning it into a stylish desk with built-in storage. Not only does this enhance its functionality, but it also helps keep your workspace tidy and clutter-free. So, how do you go about adding these clever storage features?
First off, consider the space available. If you’re working with a larger table, there’s ample opportunity to integrate drawers or shelves. For instance, you can attach shallow drawers underneath the tabletop for easy access to office supplies or craft materials. If you’re feeling adventurous, you can even create a pull-out drawer that doubles as a writing surface, perfect for jotting down quick notes without cluttering your desk.
Another fantastic option is to add open shelving beneath the table. This not only provides a modern look but also allows you to display decorative boxes or baskets that can house various items. You can paint these boxes in colors that complement your decor, turning them into an integral part of your design rather than just storage solutions. Here’s a quick breakdown of how to approach this:
| Storage Solution | Description | Benefits |
|---|---|---|
| Drawers | Built-in drawers under the table surface for easy access. | Keep small items organized and out of sight. |
| Open Shelving | Exposed shelves beneath the tabletop for display and storage. | Creates a modern look and allows for decorative storage. |
| Rolling Carts | Attach a rolling cart to the side of the table for mobility. | Provides additional storage that can be moved as needed. |
Don’t forget about the importance of aesthetics. When adding storage solutions, think about the materials and colors you use. A mismatched drawer can throw off the entire look of your upcycled table, so aim for a cohesive design. You might want to use reclaimed wood for the drawers that matches the table’s finish or paint everything in a uniform color to create a seamless appearance. Remember, the goal is not just to add storage but to do so in a way that enhances the overall beauty of the piece.
Lastly, if you're not particularly handy with tools, there are plenty of pre-made storage solutions available that can be easily attached to your table. Items like under-desk storage bins or attachable side shelves can be found at most home improvement stores. With a little creativity and some DIY spirit, your old table can become a functional masterpiece that meets your storage needs while adding character to your space.
- Can any old table be upcycled for storage solutions? Yes, almost any table can be transformed with the right approach and creativity!
- What tools do I need for adding storage to my table? Basic tools like a drill, screws, and a saw may be needed depending on the complexity of your project.
- Are there eco-friendly materials I can use? Absolutely! Look for reclaimed wood or sustainable materials to keep your project environmentally friendly.
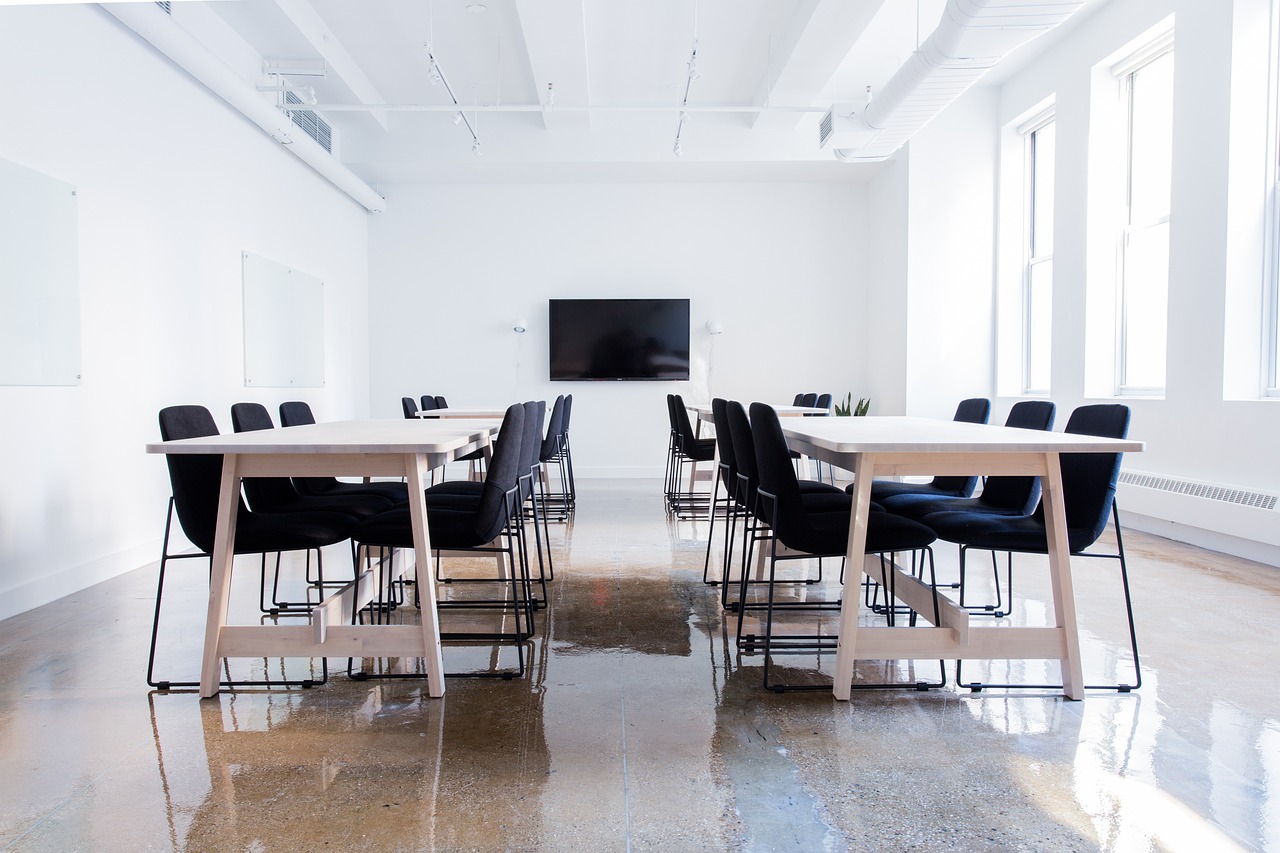
Choosing the Right Finish
When it comes to upcycling old tables, one of the most crucial steps is . The finish not only protects the wood but also enhances its appearance, making it a vital decision in your transformation journey. Think of your table as a blank canvas; the finish is the paint that brings your masterpiece to life! You want something that not only looks great but also stands up to the wear and tear of everyday use.
There are several types of finishes to consider, each with its unique characteristics and benefits. Here’s a quick rundown:
| Finish Type | Characteristics | Best For |
|---|---|---|
| Paint | Completely covers the surface, available in various colors. | Bold, modern looks; great for furniture that needs a fresh start. |
| Stain | Enhances the natural grain of the wood while adding color. | Traditional styles, or when you want to showcase the wood's beauty. |
| Varnish | Provides a hard, protective coating; available in glossy or matte finishes. | Durable surfaces for high-use areas, like dining tables. |
| Oil | Penetrates the wood, offering a natural look and feel. | Pieces that need a soft, natural finish; easy to reapply. |
| Wax | Creates a soft sheen and adds a layer of protection. | Low-traffic items; requires more frequent maintenance. |
Choosing the right finish also depends on the style of your home. For a farmhouse aesthetic, a distressed paint finish might be perfect, while a sleek, modern home could benefit from a glossy varnish. Remember, the finish should complement your existing decor and reflect your personal style. It’s like choosing the right outfit for a special occasion; you want to feel comfortable and confident!
Additionally, consider the functionality of the table. If it’s going to be a dining table, for example, you’ll want a finish that can withstand spills and scratches. On the other hand, a side table that will hold decorative items may not need as robust a finish. It's all about finding the right balance between aesthetics and practicality.
Lastly, don't forget about the application process. Some finishes are easy to apply with a brush or cloth, while others may require spray application or even professional help. Make sure to read the instructions carefully and follow them to achieve the best results. After all, a well-finished table is not just a piece of furniture; it’s a statement piece that tells a story of creativity and sustainability!
- What is the best finish for outdoor tables? - For outdoor tables, a weather-resistant varnish or oil is recommended to protect against moisture and UV damage.
- Can I mix different finishes? - Yes, mixing finishes can create a unique look, but be sure to test on a small area first to see how they interact.
- How often should I reapply the finish? - It depends on the type of finish and usage. Generally, oil finishes may need reapplication every 6 months, while varnish can last several years.
Transforming Tables into Benches
Have you ever looked at an old table and thought, "This could be something more?" Well, you're not alone! Transforming tables into benches is not only a fun DIY project, but it also adds a unique touch to your home or garden. Imagine a charming bench made from a rustic table, where you can sit and enjoy your morning coffee or host gatherings with friends and family. It’s like giving your furniture a second chance at life!
To start your transformation, you'll want to consider the style and size of the table you're working with. A sturdy, well-built table can easily be converted into a bench with just a few modifications. Here are some steps to guide you through the process:
- Assess the Table: Check the condition of the table. Ensure that the legs are stable and the surface is intact. If there are any damages, consider how they can be incorporated into the design.
- Remove Unnecessary Parts: If your table has a leaf or extension, remove those parts to create a more streamlined look. You want the bench to be comfortable and inviting, so less is often more.
- Reinforce the Structure: Depending on the original design, you may need to add additional support to the legs to ensure stability when people sit on it. This can be done with brackets or extra wood pieces.
- Sand and Finish: Give the surface a good sanding to remove any rough spots or old paint. Choose a finish that complements your decor—whether it’s a sleek stain, a bold paint color, or a natural wood finish.
Once you've completed these steps, you can add cushions or pillows to enhance comfort. This is where you can really express your style! Choose fabrics that match your home’s aesthetic or go bold with vibrant colors and patterns. It’s like dressing up your new bench for a special occasion!
Additionally, think about the placement of your new bench. Will it be an outdoor feature on your patio, or will it serve as extra seating in your entryway? The versatility of an upcycled bench allows it to fit seamlessly into various spaces in your home. Plus, it’s a fantastic conversation starter! Guests will be curious about its origin and appreciate the effort you put into creating something unique.
So, if you're ready to roll up your sleeves and get creative, transforming an old table into a bench can be a rewarding project. It’s not just about recycling; it’s about reimagining and reinventing. And remember, every scratch and dent tells a story, making your new bench not just a piece of furniture, but a piece of history!
Q: What type of table works best for a bench transformation?
A: Sturdy, solid wood tables are ideal. Look for tables with a strong base and a flat surface. Avoid tables that are too wobbly or have extensive damage.
Q: Do I need special tools for this project?
A: Basic tools like a saw, drill, and sandpaper are usually sufficient. If you plan to add more intricate designs or supports, additional tools may be required.
Q: Can I use the bench outdoors?
A: Yes! Just make sure to use weather-resistant finishes and materials if you plan to place it outside. This will help protect your bench from the elements.
Decorative Accents for Upcycled Tables
When it comes to giving your upcycled tables a unique flair, decorative accents can make all the difference. Imagine transforming a plain old table into a stunning centerpiece that not only serves a purpose but also tells a story. By incorporating various decorative elements, you can breathe new life into your furniture, making it a true reflection of your personality and style. Whether you are drawn to the charm of rustic designs or the sleek lines of modern decor, the right accents can elevate your table from ordinary to extraordinary.
One popular method to enhance the visual appeal of your upcycled tables is through the use of stenciling. This technique allows you to create intricate patterns or motifs that resonate with your style. You can choose from a variety of stencil designs, ranging from floral patterns to geometric shapes. The best part? Stenciling is not just for the experienced DIYer; anyone can achieve beautiful results with a little patience and practice. Simply select your desired stencil, secure it on the table surface, and apply paint or a stain to bring your vision to life. The outcome can be a stunning, personalized piece that stands out in any room.
Another captivating way to enhance your tables is by incorporating mosaics. This artistic approach involves creating colorful patterns using small pieces of glass, tile, or even broken pottery. Not only does this technique add a vibrant touch to your furniture, but it also allows for immense creativity. You can design anything from simple borders to elaborate scenes, making your table a true work of art. Plus, mosaics are durable and can withstand the test of time, ensuring your upcycled table remains a cherished piece for years to come.
To give your table an even more polished look, consider adding decorative hardware. Items like unique knobs, handles, or even ornate hinges can transform the functionality of your table while enhancing its aesthetic appeal. For example, replacing standard drawer pulls with vintage-style knobs can instantly add character and charm. When selecting hardware, think about the overall theme of your decor. Mixing and matching different styles can create an eclectic look, while cohesive hardware can lend a more unified feel.
Lastly, don’t underestimate the power of finishing touches. A simple coat of varnish or a layer of wax can protect your upcycled table while enhancing its natural beauty. Choose finishes that complement the colors and textures of your decor, whether it’s a glossy finish for a modern look or a matte finish for a rustic vibe. These finishing touches not only add to the table's durability but also help tie together the various decorative elements you’ve chosen.
In summary, decorative accents can transform your upcycled tables into stunning focal points in your home. Whether you choose to stencil, mosaic, or enhance with hardware, the possibilities are endless. So, roll up your sleeves and get creative! Your old table is just waiting for a makeover that will not only beautify your space but also showcase your artistic flair.
Q: What types of paint are best for stenciling on tables?
A: Acrylic paints are highly recommended for stenciling as they adhere well to various surfaces and come in a wide range of colors.
Q: Can I use broken dishes for mosaics?
A: Absolutely! Broken dishes are a fantastic option for mosaics, adding a unique touch and a variety of colors and patterns.
Q: How do I ensure my decorative accents last over time?
A: Applying a protective finish, such as polyurethane or wax, can help preserve your decorative accents and keep them looking fresh.
Incorporating Mosaics
When it comes to adding a splash of personality and creativity to your upcycled tables, mosaics are an incredible option. They not only breathe new life into your old furniture but also create a stunning focal point that can elevate the entire room. Imagine transforming a plain, worn-out table into a vibrant masterpiece that tells a story. The beauty of mosaics lies in their versatility—whether you prefer bold colors or subtle shades, there’s a mosaic design that can perfectly complement your style.
To get started with your mosaic project, gather some essential materials. You’ll need:
- Tiles: These can be ceramic, glass, or even repurposed dishes. The key is to choose tiles that resonate with your aesthetic.
- Adhesive: A strong glue or tile adhesive will ensure your pieces stay in place.
- Grout: This will fill the gaps between your tiles, giving your design a polished look.
- Sealer: A good sealer will protect your mosaic from wear and tear, ensuring it lasts for years.
Once you have your materials, the process begins. Start by cleaning the surface of your table thoroughly. This step is crucial because any dust or grease can interfere with the adhesive. Next, sketch out your design on paper or directly on the table surface. This will serve as your guide as you place the tiles. The beauty of mosaics is that you can go as intricate or as simple as you like. You might choose to create a geometric pattern, a floral design, or even a scenic depiction of your favorite place.
After you’ve laid out your design, it’s time to adhere the tiles. Apply the adhesive to the back of each tile and press it firmly onto the table. Make sure to leave small gaps between the tiles for the grout. Once the adhesive has dried, mix your grout according to the package instructions and apply it over the tiles, filling in the gaps. Wipe away any excess grout with a damp sponge to keep your tiles clean and vibrant.
Finally, once everything is dry, apply a sealer to protect your mosaic from spills and scratches. This step not only enhances durability but also adds a beautiful sheen to your creation. With just a bit of effort, your old table can transform into a stunning piece of art that reflects your unique style and creativity.
Incorporating mosaics into your upcycled tables is not just about aesthetics; it’s also a way to express yourself and make your home truly yours. So, roll up your sleeves and get ready to create a conversation starter that will impress your guests and spark joy in your everyday life!
Q: What types of tiles are best for mosaics?
A: You can use ceramic, glass, or even broken china for your mosaic projects. Choose tiles that suit your style and are durable enough for the table's intended use.
Q: How do I clean my mosaic table?
A: Use a soft cloth and mild soap to clean your mosaic table. Avoid harsh chemicals that could damage the grout or tiles.
Q: Can I use outdoor tiles for an indoor table?
A: Absolutely! Outdoor tiles are often more durable and can add a unique flair to your indoor decor.
Q: Is it necessary to seal my mosaic?
A: Yes, sealing your mosaic is important to protect it from moisture and stains, ensuring it lasts longer.
Using Stencils for Design
Stenciling is a fantastic way to breathe new life into your old tables, transforming them from mundane to magnificent with just a few strokes of a brush. Imagine your once-dull tabletop now adorned with intricate designs that reflect your personal style! The beauty of stenciling lies in its versatility; you can choose from a variety of patterns, from elegant florals to geometric shapes, allowing you to customize your table to match your home decor seamlessly.
Before diving into the fun part, it's crucial to prepare your surface properly. Start by giving your table a good clean to remove any dust and grime, and then lightly sand the surface to ensure the stencil adheres well. Once you've done that, it’s time to select your stencil design. You can either purchase pre-made stencils or create your own using materials like cardstock or plastic sheets. The key is to choose a design that resonates with you—something that will make you smile every time you see it.
Next, let’s talk about the application process. Here’s a simple step-by-step guide to help you get started:
- Gather Your Supplies: You’ll need your chosen stencil, paint (acrylic works well), a stencil brush or foam sponge, painter's tape, and a sealant for finishing.
- Position the Stencil: Secure your stencil on the table using painter's tape to prevent it from shifting while you paint.
- Apply the Paint: Using a stencil brush, lightly dab the paint over the stencil, ensuring you don’t overload the brush to avoid paint bleeding under the stencil.
- Remove the Stencil: Carefully lift the stencil off to reveal your design. If you notice any imperfections, don’t worry! A small brush can help you touch up those areas.
- Seal Your Work: Once the paint is dry, apply a clear sealant to protect your design and enhance its longevity.
Stenciling not only adds a personal touch to your furniture but also serves as a conversation starter when guests come over. It’s like adding a piece of art to your home that you can create yourself! Plus, if you’re feeling particularly adventurous, you can even stencil the legs or sides of the table for a cohesive look.
Don’t be afraid to experiment with colors and patterns. You can create a monochromatic look for a more sophisticated appearance or go bold with vibrant hues for a playful vibe. The possibilities are endless! Remember, the goal is to express your creativity while giving your old table a fresh, new look.
- What type of paint should I use for stenciling on wood? Acrylic paint is highly recommended for its quick drying time and ease of use. It adheres well to wood surfaces and offers a variety of colors.
- Can I use stencils on surfaces other than tables? Absolutely! Stencils can be applied to various surfaces such as walls, chairs, and even fabric items like cushions.
- How do I clean my stencil after use? Simply wash it with warm soapy water and let it dry completely before storing it away for your next project.
- Is stenciling difficult for beginners? Not at all! Stenciling is beginner-friendly and can be a fun project for anyone looking to enhance their home decor.
Eco-Friendly Upcycling Tips
Upcycling old tables is not just a fun and creative way to breathe new life into furniture; it’s also a fantastic opportunity to embrace eco-friendly practices that contribute to a more sustainable world. By choosing to upcycle, you're already taking a step towards reducing waste, but there are several additional tips to ensure your project is as green as possible. First and foremost, consider using non-toxic paints and finishes. These products are better for both your health and the environment, as they contain fewer volatile organic compounds (VOCs) that can pollute indoor air quality.
Another essential tip is to source your materials responsibly. If your project requires additional components like hardware or paint, look for items made from recycled materials or those produced by companies with sustainable practices. This way, you’re not only giving your old table a new purpose but also supporting brands that prioritize the planet.
When it comes to tools, opt for hand tools over power tools whenever possible. Not only does this reduce energy consumption, but it also offers a more intimate connection to your project. Imagine the satisfaction of sanding down a tabletop by hand, feeling the grain of the wood beneath your fingers as you transform it into something beautiful. Plus, using hand tools often leads to a more precise finish, allowing your creativity to shine.
Additionally, think about how you can integrate natural materials into your design. For instance, consider using reclaimed wood for any repairs or enhancements. Not only does this add character to your piece, but it also helps divert materials from landfills. You could even incorporate elements from nature, such as stones or driftwood, to create unique decorative features that are both stunning and sustainable.
Moreover, always remember to prioritize local sourcing. By purchasing materials from local suppliers, you reduce the carbon footprint associated with shipping goods over long distances. This practice not only supports your community but also fosters a sense of connection to the materials you’re using. When you know the story behind your supplies, it adds a special touch to your upcycled creation.
Lastly, don’t underestimate the power of community sharing. Before you toss out that old table, see if you can find someone in your neighborhood or local online groups who might have a use for it. Perhaps a friend is looking for a project, or a local school could use it for their art classes. Sharing resources not only fosters a sense of community but also encourages a culture of sustainability.
In conclusion, upcycling old tables can be a rewarding endeavor that aligns with eco-friendly principles. By focusing on non-toxic materials, local sourcing, and community sharing, you can create beautiful, functional pieces while also making a positive impact on the environment. Your creativity can shine through while you contribute to a more sustainable future, one table at a time!
- What is upcycling? Upcycling is the process of transforming waste materials or unwanted products into new items of better quality or for better environmental value.
- How can I ensure my upcycling project is eco-friendly? Use non-toxic paints, source materials locally, and consider incorporating reclaimed or natural materials into your design.
- Can I upcycle any type of table? Yes! Most tables can be upcycled, but the type of transformation may depend on the material and condition of the table.
- What tools do I need for upcycling furniture? Basic hand tools like sanders, screwdrivers, and paintbrushes are often sufficient for most upcycling projects.
Frequently Asked Questions
- What are some easy ways to upcycle an old table?
Upcycling an old table can be a fun and rewarding project! You can start by painting or staining the table to give it a fresh look. Another great idea is to use decoupage techniques to apply beautiful paper or fabric to the surface. If you're feeling adventurous, consider turning it into a unique piece of furniture, like a bench or a desk!
- Can I turn my old dining table into a desk?
Absolutely! Transforming an old dining table into a desk is a fantastic way to repurpose furniture. You can simply add some organizational elements like drawers or shelves underneath to keep your workspace tidy. With a little creativity, you can also customize the finish to match your home office decor!
- What materials do I need for a mosaic table project?
For a mosaic table project, you'll need a few essential materials. Gather tiles, glass pieces, or even broken china for your mosaic design. You'll also need adhesive, grout, and a sealant to protect your masterpiece. Don’t forget your creativity and a design plan to guide you!
- How can I make my upcycled table eco-friendly?
Making your upcycled table eco-friendly is all about using sustainable materials and methods. Opt for non-toxic paints and stains, and consider sourcing reclaimed wood or recycled materials for any additional features. This way, you not only create a beautiful piece but also contribute positively to the environment!
- What are some decorative accents I can add to my upcycled table?
There are countless decorative accents you can add to your upcycled table! Think about using stencils to create unique designs, or adding decorative hardware like knobs and handles for a stylish touch. You could also incorporate fabric elements, such as a table runner or placemats, to enhance its visual appeal.


