Create DIY Wall Decals for a Personalized Decor
Are you tired of your plain walls and looking for a way to inject some personality into your living space? Look no further! Creating your own wall decals can be a fun and fulfilling project that not only enhances your decor but also reflects your unique style. Imagine transforming a dull wall into a vibrant canvas that showcases your creativity. In this article, we'll dive into the exciting world of DIY wall decals, exploring the materials you need, the design process, and the techniques for cutting and applying your decals flawlessly.
Making wall decals is more than just a craft; it’s an opportunity to express yourself and customize your environment. Whether you want to create a serene atmosphere with nature-inspired designs or energize your space with bold geometric patterns, the possibilities are limitless. Plus, it's a chance to tap into your inner artist, so grab your scissors and let’s get started!
Throughout this guide, we'll cover everything from choosing the right materials to ensuring your decals last. By the end, you'll be equipped with all the knowledge you need to create stunning wall decals that will wow your friends and family. So, are you ready to embark on this creative journey? Let’s make your walls come alive!
Before you start dreaming up designs, it’s essential to select the right materials for your wall decals. The durability and appearance of your decals depend significantly on what you choose. Most DIY enthusiasts gravitate towards materials like vinyl, paper, and various adhesive types. Each material has its own pros and cons, so let’s break them down:
| Material | Pros | Cons |
|---|---|---|
| Vinyl | Durable, easy to clean, water-resistant | Can be more expensive, requires cutting machine |
| Paper | Inexpensive, easy to cut and apply | Less durable, can get damaged by moisture |
| Adhesive Types | Variety of options for different surfaces | Some may leave residue when removed |
When choosing materials, consider where you’ll be placing your decals. For high-moisture areas like kitchens or bathrooms, vinyl is often the best choice due to its water-resistant properties. On the other hand, if you’re looking for something temporary, paper decals can work wonders without breaking the bank.
Now comes the exciting part: designing your decal! This is where your creativity can truly shine. Think about what themes resonate with you and how you want to express them on your walls. Brainstorming ideas can be as simple as jotting down your favorite quotes, drawing inspiration from your favorite hobbies, or even using design software to visualize your concepts.
Inspiration can strike from anywhere! Here are some effective ways to gather ideas:
- Nature: Look at the colors, shapes, and patterns found in nature.
- Art: Explore different art styles and movements for unique designs.
- Online Platforms: Websites like Pinterest and Instagram are goldmines for creative ideas.
Nature offers an endless array of inspiration. Think about incorporating floral patterns, leafy motifs, or even abstract shapes that mimic natural elements. Imagine a delicate vine wrapping around your door frame or a burst of colorful flowers brightening up a dull corner. These designs not only bring a refreshing touch to your space but also create a calming atmosphere.
If you're leaning towards a more modern aesthetic, geometric shapes might be your best bet. These designs can add a contemporary flair to your decor, making it feel fresh and stylish. Consider creating a large geometric mural that serves as a focal point in your room or smaller decals that can be arranged in a playful pattern.
Once your design is ready, it’s time to cut and apply your decals! This stage is crucial for ensuring that your hard work pays off with a professional-looking finish. If you’re using a cutting machine, familiarize yourself with its settings and capabilities. These machines can handle intricate designs, making it easier to achieve precision.
Cutting machines can significantly simplify the process of creating your decals. They allow you to cut complex shapes with ease. Be sure to calibrate your machine properly and choose the right blade settings for your material. With a little practice, you’ll be able to create stunning designs effortlessly!
Applying your decals correctly is just as important as designing them. Here are some tips to ensure a flawless application:
- Positioning: Take your time to position your decal before sticking it down.
- Smoothing: Use a credit card or a smoothing tool to eliminate air bubbles.
- Long-lasting Finish: Press firmly to ensure adhesion, especially on the edges.
To keep your wall decals looking fresh, proper maintenance is key. Regular cleaning can enhance their appearance and longevity. Use a soft cloth and mild cleaning solution to wipe down your decals without damaging them.
Keeping your decals clean is essential for maintaining their vibrancy. Avoid harsh chemicals that can cause fading or peeling. Instead, opt for gentle cleaning methods that preserve the integrity of your designs.
When it’s time to refresh your decor, knowing how to remove your decals safely is crucial. Use a heat gun or hairdryer to gently warm the decal, making it easier to peel off without damaging your walls. Taking this extra step can save you from costly repairs!
Q: Can I use wall decals on textured surfaces?
A: Yes, but it’s best to choose a strong adhesive and ensure the decal is pressed firmly to avoid lifting.
Q: How long do DIY wall decals last?
A: With proper care, vinyl decals can last several years, while paper decals may need replacing sooner.
Q: Can I reuse my decals?
A: Generally, wall decals are designed for one-time use, but if removed carefully, some vinyl decals can be reapplied.
Choosing the Right Materials
When it comes to creating your own wall decals, one of the most crucial steps is selecting the right materials. After all, the materials you choose can significantly impact the durability, appearance, and overall success of your project. The most popular materials for DIY wall decals include vinyl, paper, and various adhesive types. Each of these options has its unique characteristics, benefits, and drawbacks that you should consider before diving into your creative process.
Vinyl is perhaps the most favored choice among DIY enthusiasts for a reason. It is highly durable, easy to clean, and can withstand various environmental conditions. Vinyl decals can last for years without fading or peeling, making them perfect for long-term decor. Additionally, they come in a wide range of colors and finishes, including matte and glossy, allowing you to customize your design to suit your style. However, the downside is that vinyl can be more expensive than other materials, especially if you're looking for high-quality options.
On the other hand, paper decals are an excellent choice for those who prefer a more budget-friendly option. They can be printed in vibrant colors and intricate designs, making them visually appealing. However, paper decals are less durable and may not hold up as well in humid or high-traffic areas. If you opt for paper, consider using a protective coating to enhance their lifespan. Paper decals are ideal for temporary decor or seasonal changes, allowing you to easily switch up your space without breaking the bank.
When it comes to adhesives, the type you choose can make a significant difference in how well your decals adhere to the wall. There are several options available, including removable, permanent, and repositionable adhesives. Removable adhesives are perfect for renters or those who like to frequently change their decor, as they allow you to peel the decals off without damaging the paint underneath. Permanent adhesives, while more durable, can be challenging to remove and may leave residue. Repositionable adhesives offer a middle ground, allowing you to move your decals if needed without losing their stickiness.
To help you make an informed decision, here's a quick comparison table of the materials:
| Material | Durability | Cost | Best For |
|---|---|---|---|
| Vinyl | High | Medium to High | Long-term decor |
| Paper | Low to Medium | Low | Temporary decor |
| Adhesives | Varies | Low to Medium | Versatile applications |
In conclusion, the choice of materials for your DIY wall decals can greatly influence your project's success. Whether you lean towards the longevity of vinyl, the affordability of paper, or the versatility of different adhesives, understanding the pros and cons of each option will empower you to create stunning, personalized decor that reflects your unique style. So, take your time, explore your options, and let your creativity flow!

Designing Your Decal
When it comes to , this is where the magic truly happens! It’s your chance to let your imagination run wild and create something that reflects your unique style. Start by brainstorming ideas that resonate with you—think about the themes, colors, and images that speak to your personality and the vibe of your space. Are you drawn to playful designs, or do you prefer something more elegant? This is your canvas, so don’t hold back!
Once you have a general idea, it’s time to get a little more technical. Consider using design software to bring your vision to life. Programs like Adobe Illustrator or free alternatives like Inkscape can help you create stunning graphics. These tools allow you to manipulate shapes, colors, and sizes with precision, ensuring your final design is exactly what you envisioned. If you're not familiar with these programs, don’t worry! There are plenty of tutorials available online that can guide you through the process.
As you dive into your design, creating templates can be a game-changer. Templates serve as a blueprint for your decal, making it easier to visualize how it will look on your wall. You can sketch your ideas on paper or use digital tools to draft your layout. If you’re feeling adventurous, consider incorporating multiple elements into one cohesive design. For instance, you might combine geometric shapes with floral patterns, creating a unique blend that’s both modern and organic.
Finding inspiration for your wall decal designs can often come from unexpected places. Here are a few suggestions to spark your creativity:
- Nature: Look around you! Nature is a treasure trove of inspiration. From the intricate patterns on leaves to the vibrant colors of flowers, there’s so much to draw from.
- Art: Visit local galleries or browse online platforms like Pinterest and Instagram. Artists often have a unique way of interpreting the world that can ignite your creative spark.
- Everyday Objects: Sometimes, the simplest things can inspire the most beautiful designs. Consider the patterns found in textiles, wallpapers, or even architecture.
As you gather ideas, keep a sketchbook or a digital folder of images that resonate with you. This collection will serve as a valuable resource when you start designing your decals. Remember, the goal is to create something that not only beautifies your space but also tells a story about who you are.
Incorporating elements from nature into your wall decals can bring a refreshing touch to your decor. Imagine a serene landscape mural or a delicate vine winding around your room. You can opt for floral patterns, which can add a pop of color and a sense of tranquility, or abstract shapes that mimic natural forms, like waves or clouds. The key is to capture the essence of the outdoors and bring it inside, creating a peaceful oasis in your home.
If you’re looking for a more modern flair, consider incorporating geometric patterns into your designs. These shapes can add a contemporary edge to your space and can be customized in various ways. Think about triangles, hexagons, or even circles arranged in an eye-catching layout. You can use contrasting colors to make the shapes stand out or stick to a monochromatic palette for a more subtle effect. The possibilities are endless!
Ultimately, designing your decal is all about expressing yourself and enhancing your living space. So, let your creativity flow, experiment with different ideas, and most importantly, have fun with the process!
Inspiration Sources
Finding the right inspiration for your DIY wall decals can transform your creative process from mundane to extraordinary. Inspiration can come from virtually anywhere, and tapping into various sources can lead to unique and personalized designs that truly reflect your style. Whether you're an avid nature lover, a fan of modern art, or someone who enjoys the geometric precision of architecture, there’s a world of ideas waiting to be explored.
One of the most rewarding ways to gather inspiration is by immersing yourself in nature. Think about the vibrant colors of a sunset, the intricate patterns of leaves, or the fluid shapes of water. Nature is a treasure trove of designs that can evoke feelings of tranquility and beauty. For instance, floral patterns can breathe life into your living space, while abstract shapes inspired by natural landscapes can add a refreshing twist. Imagine a wall adorned with delicate vines or a striking mountain silhouette—these elements can create a serene atmosphere in any room.
Another fantastic source of inspiration is the world of art. From classic masterpieces to contemporary installations, art can ignite your creativity and push the boundaries of your imagination. Visit local galleries, browse online art platforms, or even explore social media accounts dedicated to art. You might find that a particular color palette or brushstroke technique resonates with you, prompting ideas for your own decals. Plus, consider the emotional impact of art—what do you want your wall decals to convey? Happiness, calmness, or perhaps a sense of adventure?
Additionally, the realm of geometric patterns offers a modern and stylish approach to wall decals. These designs can range from simple shapes to complex tessellations, providing a clean and organized aesthetic that complements contemporary decor. Look for inspiration in architecture, textiles, or even digital design. The symmetry and repetition found in geometric patterns can create a striking visual impact, making your walls a focal point of your home.
Lastly, don’t underestimate the power of online platforms such as Pinterest, Instagram, and design blogs. These platforms are brimming with ideas and tutorials that can spark your creativity. You can search for specific themes, colors, or styles, and save your favorite inspirations to revisit later. The beauty of these resources is that they allow you to see how others have interpreted similar ideas, which can help you develop your unique twist.
In summary, the key to creating stunning wall decals lies in your ability to draw inspiration from diverse sources. Whether you find it in nature, art, geometry, or online platforms, the possibilities are endless. So, take a moment to explore, gather ideas, and let your imagination run wild. Your walls are a blank canvas waiting for your personal touch!
Q: What materials do I need to create wall decals?
A: You'll need vinyl or paper, adhesive, a cutting machine (if applicable), and design software. The materials you choose will depend on your desired effect and durability.
Q: Can I use any design software for creating decals?
A: Yes, there are several design software options available, including Adobe Illustrator, Canva, and even free tools like Inkscape. Choose one that suits your skill level and design needs.
Q: How do I ensure my decals adhere properly to the wall?
A: Make sure the wall surface is clean and dry before application. Use a smoothing tool to eliminate air bubbles and ensure a strong bond.
Q: Can I remove wall decals without damaging the paint?
A: Yes, if you follow proper removal techniques, such as gently peeling from one corner and using heat to loosen the adhesive, you can remove decals without damaging the wall.
Nature-Inspired Designs
When it comes to creating wall decals that breathe life into your living space, are a fantastic choice. Think about it: nature is a treasure trove of colors, shapes, and patterns just waiting to be explored. From the delicate curves of leaves to the bold lines of mountains, the natural world offers endless inspiration that can transform your walls into a canvas of tranquility and beauty.
Imagine walking into a room adorned with a stunning mural of a serene forest or a vibrant floral pattern that feels like spring has sprung indoors. The beauty of nature can evoke feelings of calm and joy, making it a perfect theme for your home decor. Here are some ideas to get those creative juices flowing:
- Floral Patterns: Flowers can bring a burst of color and life to any space. Whether you choose large, bold blooms or delicate, intricate designs, floral decals can create a stunning focal point in your room.
- Animal Silhouettes: Incorporating animal shapes can add a playful touch. Think of a majestic deer or a whimsical bird perched on a branch, which can bring a sense of the wild indoors.
- Scenic Landscapes: A beautiful sunset, a tranquil beach, or a misty mountain range can transport you to your favorite outdoor spot every time you glance at your walls.
To effectively integrate these nature-inspired designs, consider the color palette of your room. Earthy tones like greens, browns, and soft blues can create a cohesive look, while brighter colors can add a pop of vibrancy that energizes the space. Additionally, you can play with different textures by combining matte and glossy finishes, which can enhance the visual interest of your decals.
Moreover, the size of your decals matters. Large, statement pieces can create a dramatic effect, while smaller decals can be grouped together to form a lovely collage. Don't shy away from experimenting with scale; after all, the beauty of DIY projects lies in your ability to customize them to fit your unique style.
Finally, when designing your nature-inspired decals, think about the emotions you want to evoke. Do you want a calming retreat that promotes relaxation? Or perhaps a lively atmosphere that inspires creativity? Whatever your vision, let the wonders of nature guide your design choices, and watch as your walls come alive with personality and charm.
Q1: How do I choose the right colors for my nature-inspired decals?
A1: Consider the existing color scheme of your room. Earthy tones work well for a calming effect, while brighter colors can energize the space. Use nature as your guide; think of the colors you see in your favorite landscapes.
Q2: Can I use multiple nature themes in one room?
A2: Absolutely! Mixing different nature themes, like floral and animal designs, can create a whimsical and eclectic feel. Just ensure that the colors and styles complement each other for a cohesive look.
Q3: How do I ensure my decals last longer?
A3: Use high-quality materials and follow proper application techniques. Additionally, keeping your decals clean and avoiding direct sunlight can help maintain their vibrancy over time.
Geometric Patterns
When it comes to adding a modern touch to your decor, are a fantastic choice. These designs can create a sense of order and symmetry in your space, making them visually appealing and captivating. Imagine walking into a room where the walls are adorned with striking triangles, circles, and hexagons, each telling a story of creativity and style. The beauty of geometric patterns lies in their versatility; they can be bold and vibrant or soft and subtle, depending on your personal taste and the atmosphere you want to create.
To get started with geometric wall decals, consider the following approaches:
- Mix and Match: Combine different geometric shapes and sizes to create a dynamic visual effect. Think about layering smaller shapes over larger ones or using contrasting colors to make certain elements pop.
- Color Schemes: Choose a color palette that complements your existing decor. Monochromatic schemes can provide a sleek look, while vibrant, multi-colored patterns can energize the space.
- Placement: Consider where you want to apply these decals. A statement wall can benefit from a large geometric design, while smaller decals can be used to accentuate furniture or other decor elements.
Incorporating geometric patterns into your wall decals can be as simple or as complex as you want it to be. For instance, you could create a large mural featuring overlapping circles and triangles, or opt for smaller decals that mimic the look of wallpaper. The key is to find a balance that enhances your space without overwhelming it.
Additionally, geometric patterns can be a great way to express your personality. Whether you lean towards minimalism or enjoy bold statements, there’s a geometric design that will resonate with you. You might even find inspiration from architectural elements or modern art that can be translated into your wall decals.
Lastly, don't forget the power of negative space. Sometimes, the absence of design can be just as impactful as the presence of intricate patterns. By leaving sections of your wall bare, you can create a striking contrast that draws the eye and adds depth to your decor.

Using Design Software
When it comes to creating stunning wall decals, using the right design software can make all the difference. Imagine having the ability to bring your wildest design ideas to life with just a few clicks! Whether you're a seasoned designer or a complete novice, there’s a plethora of software options available that can help you craft the perfect decal. From user-friendly interfaces to advanced features, these tools can streamline your creative process and ensure that your designs are nothing short of spectacular.
One of the most popular software choices among DIY enthusiasts is Adobe Illustrator. This powerful vector graphics editor allows you to create intricate designs that can be easily resized without losing quality. It’s perfect for those who want to incorporate detailed illustrations or custom typography into their wall decals. If you're looking for something a bit less complex, Canva is an excellent alternative. With its drag-and-drop functionality and a wide range of templates, even beginners can whip up eye-catching designs in no time.
Another fantastic option is Silhouette Studio, especially if you own a cutting machine. This software is tailored specifically for designing projects that will be cut out, making it a breeze to create custom decals that fit your vision. Plus, it offers features like layering and color adjustments, which can enhance the depth and vibrancy of your designs.
To help you choose the right software for your needs, consider the following factors:
- User Experience: Opt for software that feels intuitive and easy to navigate, especially if you're new to design.
- Features: Look for tools that offer features like layering, color adjustments, and the ability to export in various formats.
- Compatibility: Ensure that the software you choose is compatible with your cutting machine if you plan to use one.
Once you’ve selected your design software, the next step is to dive into the creative process. Start by sketching out your ideas on paper or brainstorming themes that resonate with your personal style. Once you have a clear concept, use the software to create a digital version. Don’t hesitate to play around with different colors, fonts, and layouts until you find the perfect combination that speaks to you.
Remember, the beauty of DIY wall decals lies in their personalization. This is your chance to express yourself and transform your living space into a reflection of who you are. So, unleash your creativity and let the design software be your canvas!
Cutting and Application Techniques
Once you've poured your heart and soul into designing your wall decals, the next step is to bring those designs to life through precise cutting and flawless application. This phase is crucial because it can make or break the overall aesthetic of your project. Imagine spending hours crafting a beautiful design only to have it ruined during application—definitely not the outcome you want! So, let’s dive into the essential techniques that will help you cut and apply your decals like a pro.
The first step to achieving a clean cut is to use the right tools. A cutting machine is a game-changer for DIY enthusiasts. These machines can handle intricate designs that would be nearly impossible to cut by hand. Popular options include the Cricut and Silhouette, both known for their user-friendly interfaces and versatility. If you're new to using a cutting machine, don't worry! Most models come with detailed instructions, and there are countless tutorials online that can help you get started. Just remember, practice makes perfect, so don’t hesitate to experiment with different materials and settings until you find what works best for you.
Once you've cut your decals, it’s time to apply them to your walls. This is where the real magic happens! But before you dive in, ensure that the wall surface is clean and dry. A dusty or greasy surface can prevent your decals from adhering properly, leading to peeling or bubbling. For best results, use a mild detergent solution to wipe down the area, and let it dry completely. Now, let's talk about the application process. Here are some tips to ensure a smooth and successful application:
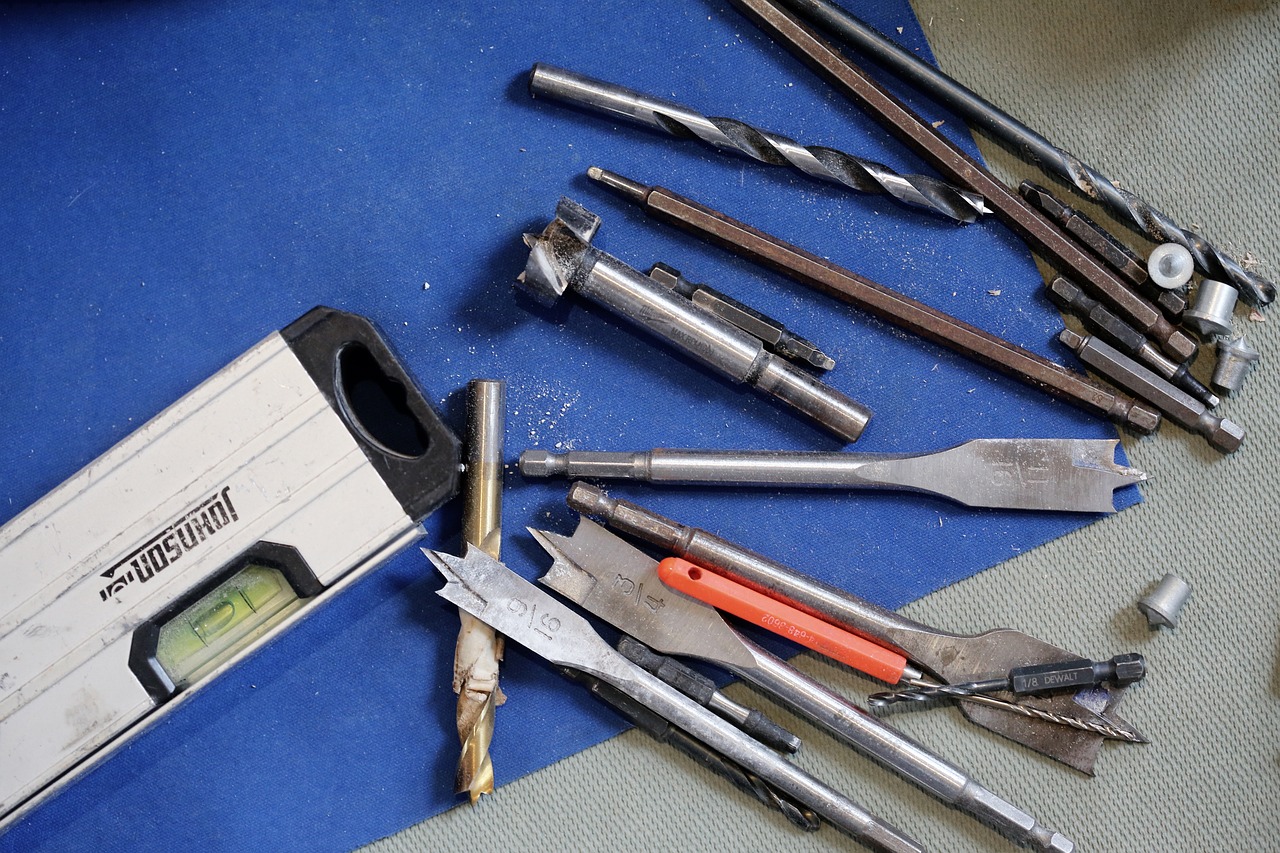
- Positioning: Before you peel off the backing, hold the decal up to the wall to visualize the placement. Use a level to ensure it’s straight—trust me, you’ll be glad you did!
- Use Transfer Tape: Transfer tape is your best friend when it comes to applying decals. It helps to keep your design intact while you move it from the backing to the wall.
- Smoothing: Start from the center of the decal and work your way outwards. Use a smoothing tool or a credit card to eliminate air bubbles and ensure a strong bond.
- Final Touches: After the decal is applied, gently peel away the transfer tape at a sharp angle to avoid lifting the decal off the wall.
Now, let’s talk about the longevity of your decals. Proper application techniques are essential for ensuring that your decals last as long as possible. After applying your decals, avoid washing the walls for at least 48 hours. This gives the adhesive time to bond effectively with the surface. Also, keep in mind that some wall textures may not hold decals as well as smooth surfaces. If you're applying decals to textured walls, consider using a stronger adhesive or a thicker vinyl for better durability.
In summary, cutting and applying your DIY wall decals can be a fun and rewarding process. With the right tools and techniques, you can achieve professional-looking results that will transform your living space into a personalized haven. Remember, the key is to take your time and pay attention to detail. Your walls deserve it!
Q: What materials are best for cutting decals?
A: Vinyl is the most popular choice due to its durability and ease of use. However, paper and specialty materials can also work for different effects.
Q: Can I reuse my wall decals?
A: While some decals can be removed and reapplied, it's best to check the manufacturer's guidelines. Generally, reusable decals are made from high-quality vinyl.
Q: How do I fix bubbles in my decals?
A: Use a pin to poke a tiny hole in the bubble and gently press out the air. Then, smooth it down with a credit card or smoothing tool.
Using a Cutting Machine
When it comes to creating stunning wall decals, using a cutting machine can elevate your DIY game to a whole new level. These machines are designed to cut intricate designs with precision, allowing you to bring your creative visions to life without the hassle of manual cutting. Whether you're a seasoned crafter or just starting out, understanding how to operate a cutting machine effectively can make all the difference in the quality of your decals.
First things first, let’s talk about the different types of cutting machines available on the market. You’ll find models ranging from basic manual cutters to advanced digital machines that connect to your computer. The most popular options include brands like Cricut and Silhouette, which offer a range of features that can cater to both beginners and experienced users. When selecting a machine, consider factors such as cutting size, material compatibility, and ease of use. Here’s a quick comparison table to help you out:
| Machine | Cutting Size | Material Compatibility | Price Range |
|---|---|---|---|
| Cricut Explore Air 2 | 12" x 24" | Vinyl, Paper, Iron-On | $250 - $300 |
| Silhouette Cameo 4 | 12" x 10' | Vinyl, Fabric, Paper | $300 - $350 |
| Brother ScanNCut | 12" x 24" | Vinyl, Paper, Fabric | $300 - $400 |
Once you’ve chosen your cutting machine, the next step is to familiarize yourself with its software. Most cutting machines come with user-friendly software that allows you to create or import designs easily. You can use pre-made templates or design your own from scratch. This is where your creativity can truly shine! Remember to take your time during this phase; the more effort you put into your design, the better your final product will be.
Now, let’s dive into the actual cutting process. After you’ve set up your design, you’ll need to select the appropriate material and adjust the machine settings accordingly. Each material has its own thickness and texture, so make sure to consult your machine’s manual for the best settings to use. Once everything is set, load your material into the machine and hit the cut button. Watch in awe as your machine works its magic, cutting out your design with precision.
After cutting, it’s time for the fun part: weeding! This is the process of removing the excess material from your decal, leaving only the design you want to apply. Take your time here; a steady hand will ensure that you don’t accidentally pull away any parts of your design. Use a weeding tool for those tiny bits that can be tricky to grab. Once you’ve weeded your decal, you’re ready for application!
Using a cutting machine not only saves you time but also opens up a world of possibilities for your wall decals. With a little practice, you’ll be able to create stunning designs that reflect your personal style and enhance your living space. So, grab your cutting machine and let your creativity flow!
- What materials can I use with a cutting machine? Most cutting machines can handle vinyl, paper, fabric, and even thicker materials like cardstock. Always check your machine’s specifications for compatibility.
- Do I need to buy special software? Most cutting machines come with their own software, but you can also use popular design programs like Adobe Illustrator or Inkscape to create custom designs.
- How do I maintain my cutting machine? Regularly clean the blade and cutting mat, and ensure the machine is stored in a dust-free environment to prolong its lifespan.
Application Tips
Applying your DIY wall decals can feel like an art form in itself, and getting it right is crucial for achieving that polished look you desire. First and foremost, preparation is key. Before you even think about peeling off the backing, make sure the wall surface is clean, dry, and smooth. Dust, grease, or moisture can lead to peeling or bubbling, which is something no one wants to deal with after all that hard work. A simple wipe-down with a damp cloth and a little bit of mild soap can do wonders. Allow the wall to dry completely before you proceed.
Once your wall is ready, it’s time to position your decal. This is where some people go wrong. Instead of just eyeballing it, consider using a level or measuring tape to ensure that your design is straight and centered. You can even use painter's tape to temporarily hold your decal in place before making a final commitment. This way, you can step back and see how it looks from different angles. Trust me, it’s worth the extra effort!
When you're ready to apply, start from one edge and slowly peel the backing away while smoothing the decal onto the wall. A handy trick is to use a credit card or a smoothing tool to push out any air bubbles as you go. This technique not only helps to adhere the decal but also prevents unsightly bubbles that can ruin your design. If you do encounter a bubble, don’t panic! Just gently lift the decal back up and use the smoothing tool to work the air out, then press it back down.
After applying, give your decal some time to adhere properly. Avoid touching or cleaning it for at least 24 hours. This waiting period allows the adhesive to bond effectively with the wall surface, ensuring that your beautiful design stays put for as long as possible. And remember, patience pays off! Rushing through the application process can lead to mistakes that might be hard to fix later.
Lastly, don’t forget about the finishing touches. Once your decal is applied and settled, take a step back and admire your work! If you notice any edges lifting, you can apply a bit of heat from a hairdryer to soften the adhesive and press it back down. This little trick can help your decals last longer and look fresher. With these tips in mind, you’re well on your way to transforming your space with stunning wall decals that reflect your unique style.
- How do I choose the right wall decal for my space? Consider the size, color, and theme of your room. Choose designs that complement your existing decor.
- Can I apply wall decals to textured walls? While it’s possible, smooth surfaces are ideal for better adhesion. Textured walls may cause the decals to lift over time.
- How do I clean my wall decals? Use a soft, damp cloth to gently wipe away dust. Avoid harsh chemicals that could damage the decal.
- Will wall decals damage my paint? If applied and removed correctly, most decals should not damage your paint. Always test a small area first.
Maintenance and Removal
Once you've adorned your walls with your stunning DIY wall decals, the next step in your journey is to ensure they remain in pristine condition. Just like any artwork, maintenance is key to keeping your creations looking fresh and vibrant. Regular care not only enhances the visual appeal of your decals but also extends their lifespan, allowing you to enjoy your personalized decor longer. So, how do you maintain your wall decals? It’s simpler than you might think! Start by gently dusting them with a soft cloth or a duster to prevent dirt and grime buildup. Avoid using harsh chemicals or abrasive materials, as they can damage the decals. A mild soap solution can be used for more stubborn spots, but always test it on a small area first to ensure it doesn’t affect the adhesive or the color.
When it comes to removal, knowing the right techniques can save you from a lot of headaches and potential wall damage. If you're ready to update your decor or simply want a change, follow these steps for a smooth removal process. First, gently heat the decal with a hairdryer on a low setting; this softens the adhesive, making it easier to peel off. Start at one corner and slowly pull the decal away from the wall at a 45-degree angle. If you encounter resistance, apply a bit more heat. For any leftover adhesive, a little rubbing alcohol on a soft cloth can do wonders without harming your wall's surface. Remember, patience is key here; rushing the process can lead to tears in the decal or damage to your paint.
To further illustrate the maintenance and removal process, here’s a handy table summarizing essential tips:
| Task | Tips |
|---|---|
| Cleaning | Use a soft cloth; avoid harsh chemicals; mild soap solution for tough spots. |
| Removing | Use a hairdryer to heat the decal; peel slowly at a 45-degree angle; use rubbing alcohol for residue. |
By following these maintenance and removal tips, you can ensure that your wall decals not only look great but also come off easily when it’s time for a new look. Treat your decals with care, and they will reward you by remaining a beautiful part of your home decor for years to come.
Here are some common questions regarding the maintenance and removal of wall decals:
- How often should I clean my wall decals? It's best to dust them regularly, about once a month, to keep them looking their best.
- Can I reuse my wall decals? While some decals can be reused, it's often challenging to maintain their original adhesive quality. If you plan to reuse them, handle them with care during removal.
- What if my decals start to peel? If you notice peeling, try pressing them back down gently. If they continue to lift, you may need to replace them or apply some adhesive to the edges.
- Are there specific cleaning products I should avoid? Yes, avoid any products with bleach or strong solvents, as they can damage the decals.

Cleaning Your Decals
Keeping your wall decals clean is essential to maintain their vibrant appearance and ensure they last as long as possible. Just like a beautiful painting, a little care can go a long way in preserving the beauty of your designs. But how do you effectively clean these decals without damaging them? Let’s explore some simple yet effective methods to keep your wall art looking fresh and fabulous.
First and foremost, it’s important to know the material of your decals. Vinyl decals are generally more durable and can withstand a bit more scrubbing than paper decals, which are more delicate. For vinyl decals, you can use a damp cloth with a mild soap solution. Just make sure to avoid abrasive cleaners or scrubbers, as these can scratch the surface and ruin the design. Gently wipe the decal, following the contours and edges to ensure you don’t lift any corners.
For paper decals, a gentler approach is necessary. Instead of scrubbing, use a soft, dry cloth to dust off any dirt or debris. If there are stains, lightly dampen the cloth with water and gently blot the area. Remember, the key is to be as gentle as possible to avoid tearing the material.
Here are some additional tips to keep in mind:
- Frequency: Clean your decals regularly, ideally once a month, to prevent dirt buildup.
- Spot Cleaning: For spills or stains, address them immediately to prevent them from setting in.
- Test First: Always test any cleaning solution on a small, inconspicuous area first to ensure it doesn’t damage the decal.
In terms of cleaning solutions, stick to mild dish soap mixed with water for a safe and effective option. Avoid using any harsh chemicals or solvents, as these can degrade the adhesive and the material of the decal over time. If your decals are particularly grimy, consider using a mixture of vinegar and water, but again, test it out first!
Lastly, remember that the environment can affect your decals. Humidity, dust, and sunlight can all play a role in how your decals age. If you notice that your decals are fading or getting dirty more quickly, it might be time to reassess their placement or consider a protective coating that can help shield them from wear and tear.
By following these simple cleaning tips, you can keep your wall decals looking as stunning as the day you applied them. A little maintenance goes a long way in ensuring your personalized decor continues to bring joy and inspiration to your living space.
Here are some common questions about cleaning wall decals that might help you further:
- Can I use window cleaner on my decals? It's best to avoid window cleaners as they often contain ammonia, which can damage the adhesive.
- How often should I clean my decals? Cleaning them once a month is a good rule of thumb, but you can adjust based on your environment.
- What if my decal starts to peel? If you notice peeling, gently press it back down. If it doesn’t stick, you may need to reapply adhesive or replace the decal.
Removing Decals Safely
When it's time to refresh your living space or simply change your wall decor, knowing how to remove your wall decals safely is essential to avoid damaging your walls. Imagine putting in all that effort to create a stunning design, only to find unsightly residue or peeling paint when it’s time to take it down. To prevent such mishaps, there are several techniques you can employ that will make the removal process smooth and stress-free.
First and foremost, it's important to gather the right tools before you start the removal process. You’ll want to have a hairdryer, a plastic scraper or a credit card, and some adhesive remover on hand. The heat from the hairdryer can help loosen the adhesive that holds the decal in place, making it easier to peel off without tearing. This method is especially useful for vinyl decals which tend to adhere more firmly.
Begin by gently heating the decal with the hairdryer. Hold it about 6 inches away from the surface and move it back and forth to evenly distribute the heat. This will soften the adhesive. Once the decal feels warm, start at one corner and slowly lift it with your plastic scraper or credit card. Work your way across the decal, applying gentle pressure to avoid ripping it. If you encounter resistance, apply more heat to that area and try again.
In some cases, especially with older decals, you might notice that some adhesive residue is left behind. This is where your adhesive remover comes into play. Apply a small amount to a cloth and gently rub the residue until it dissolves. Always test the remover on a small, inconspicuous area first to ensure it won’t damage the paint underneath. If you prefer a more natural approach, a mixture of vinegar and water can also work wonders for removing sticky residues.
It's also worth noting that if you’re dealing with larger decals or murals, you may want to consider enlisting a friend to help. Having an extra set of hands can make the process much easier and ensure that you’re both pulling in the right direction, minimizing the risk of tearing the decal or damaging the wall.
Finally, once the decal and any residue are removed, give your wall a good wipe down with a damp cloth to remove any remaining particles. This will leave your wall fresh and ready for your next creative endeavor. Remember, taking the time to remove your decals carefully not only preserves your wall's integrity but also sets the stage for your next masterpiece!
- Can I remove wall decals without damaging the paint? Yes, if you follow the proper techniques, such as using heat and gentle scraping, you can remove decals without damaging the paint.
- What if my decals are old and brittle? Older decals may require more care. Use heat to soften them and be extra gentle when peeling them off.
- How can I clean adhesive residue from my walls? Use an adhesive remover or a mixture of vinegar and water to clean any leftover residue.
Frequently Asked Questions
- What materials do I need to create DIY wall decals?
To create your own wall decals, you'll need a few essential materials. The most common options include vinyl for durability, transfer tape for easy application, and a cutting machine if you're aiming for intricate designs. You might also want to have a design software to help you create your templates and a cleaning cloth to prep your wall surface.
- How do I design my wall decal?
Designing your wall decal is all about expressing your creativity! Start by brainstorming ideas based on your personal style. You can use design software to create templates or draw inspiration from nature, art, or geometric patterns. Don't forget to consider the colors and shapes that will complement your existing decor!
- What cutting techniques should I use for my decals?
When it comes to cutting your decals, using a cutting machine can make the process much easier. Ensure your design is compatible with the machine, and follow the manufacturer's instructions for optimal results. If you're cutting by hand, use a sharp craft knife and a cutting mat to achieve clean edges.
- How can I apply my wall decals correctly?
Applying your wall decals requires a bit of finesse. Start by cleaning the wall surface thoroughly to ensure a good bond. Use transfer tape to position your decal accurately, and smooth it out with a squeegee or credit card to eliminate air bubbles. Patience is key here—take your time for a flawless finish!
- How do I maintain my wall decals?
To keep your wall decals looking fresh, regularly clean them with a damp cloth. Avoid harsh chemicals that could damage the vinyl. If your decals start to peel or fade, it might be time to refresh them or try a new design!
- What’s the best way to remove wall decals without damaging the paint?
When it's time to change your decor, removing wall decals can be tricky. Start by gently lifting a corner of the decal with a plastic scraper. Slowly peel it away, keeping the angle low to minimize damage. If you encounter resistance, use a hairdryer to warm the adhesive, making it easier to remove.


