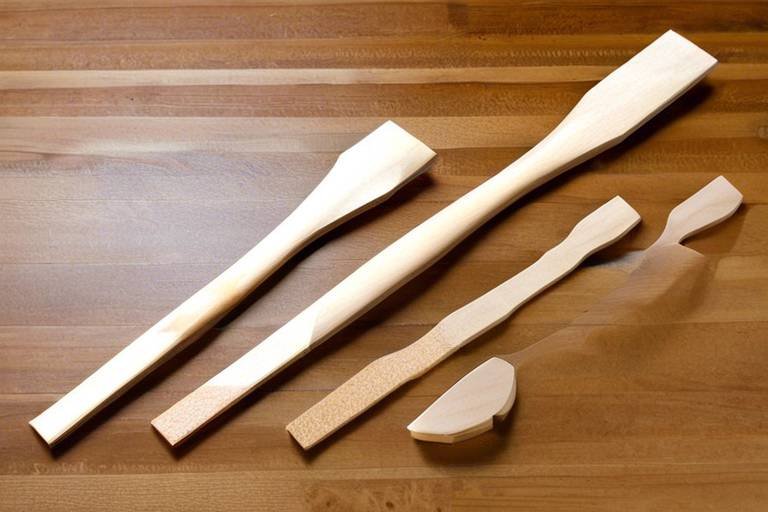
Wood Stabilizing Tutorial: Step-by-Step Guide
Welcome to your ultimate guide on wood stabilizing! If you’re a woodworking enthusiast or a DIYer, you’ve probably encountered the challenges that come with using natural wood. From cracks to uneven grain patterns, these imperfections can affect not only the aesthetics of your projects but also their durability. But fear not! Wood stabilization is here to save the day. This process involves filling the wood's pores with resin, making it stronger and more visually appealing. In this tutorial, we will walk you through every step of the wood stabilization process, ensuring that you have all the knowledge needed to enhance your wood projects.
So, what exactly is wood stabilization? Simply put, it’s a method that improves the strength and look of wood by infusing it with resin. Why is this important, you ask? Well, unstabilized wood can warp, crack, or even split over time, especially when exposed to moisture or varying temperatures. By stabilizing the wood, you’re essentially giving it a protective shield that enhances its longevity. Imagine investing time and effort into crafting a beautiful piece, only to have it deteriorate due to environmental factors! Stabilization not only prevents such scenarios but also allows for greater versatility in your projects, enabling you to use more exotic woods that might otherwise be too unstable.
Before diving into the stabilization process, it’s crucial to gather the right materials. Here’s a quick list of essential items you’ll need:
- Stabilizing Resin: This is the star of the show! Choose a high-quality resin suitable for wood stabilization.
- Vacuum Chamber: A vacuum chamber is necessary to remove air from the wood, allowing the resin to penetrate effectively.
- Safety Equipment: Always prioritize safety! Wear gloves, goggles, and a mask to protect yourself from fumes and spills.
- Wood Pieces: Select the wood you want to stabilize; it can be anything from burl to spalted wood.
Gathering these materials ensures a smooth and successful stabilization process. Remember, the quality of your materials directly impacts the final outcome, so don’t skimp on anything!
Now that you have your materials, let’s talk about resin. Selecting the right resin for wood stabilization is crucial, as different resins have unique properties. You’ll typically encounter two main types: epoxy and polyester resins. Each has its own strengths and weaknesses, so understanding these can help you make the best choice for your project. Epoxy resins tend to have superior adhesion and are less prone to yellowing over time, making them a popular choice for many woodworkers. On the other hand, polyester resins are generally cheaper and cure faster, but they may not provide the same level of durability. It’s all about weighing the pros and cons based on your specific needs.
To simplify your decision-making, here’s a quick comparison:
| Feature | Epoxy Resin | Polyester Resin |
|---|---|---|
| Durability | High | Moderate |
| Curing Time | Longer | Shorter |
| Cost | Higher | Lower |
| Clarity | Excellent | Good |
This table should help you visualize the differences and make an informed decision based on your project requirements.
Want to add a splash of color to your stabilized wood? You can! Incorporating coloring agents into your resin can drastically enhance the visual appeal of your final product. There are various options available, from liquid dyes to powder pigments. The key is to experiment and find the perfect shade that complements your wood. Just remember to use coloring agents that are compatible with your chosen resin for the best results.
Preparation is half the battle! Before you start the stabilization process, ensure that your wood is clean, dry, and cut to the desired size. Cleaning the wood removes any dirt or oils that could interfere with resin adhesion, while drying is essential to prevent moisture from causing issues later on. You might even consider using a bandsaw or a planer to achieve a uniform thickness, which can help with even resin penetration.
Now that you’re equipped with the right materials and knowledge, let’s dive into the stabilization process step-by-step. First, you’ll want to set up your vacuum chamber. Creating a vacuum environment is crucial for removing air from the wood and allowing the resin to fill every pore. Once your chamber is ready, it’s time to apply the resin. Make sure to cover the wood evenly and ensure complete saturation. After that, allow the resin to cure properly for the best results.
After the stabilization process is complete, don’t rush to finish your project just yet! Proper curing is vital. Follow the manufacturer’s instructions for curing times, as these can vary based on the resin used. Once cured, you can sand the wood to achieve a smooth finish and explore various finishing options to give it that professional touch. Whether you prefer oil, varnish, or a simple wax finish, the choice is yours!
- How long does the stabilization process take? The entire process can take anywhere from a few hours to a couple of days, depending on the materials used and curing times.
- Can I stabilize wood at home? Yes! With the right materials and safety precautions, wood stabilization can be done at home.
- Is wood stabilization worth it? Absolutely! Stabilizing wood enhances its durability and appearance, making it a worthwhile investment for any woodworking project.
Understanding Wood Stabilization
Wood stabilization is a fascinating process that transforms ordinary wood into a durable and visually stunning material. Imagine taking a piece of wood that might otherwise crack, warp, or absorb moisture and turning it into a resilient masterpiece that can withstand the test of time. This is precisely what wood stabilization achieves. By filling the natural pores of the wood with resin, we enhance not only its durability but also its appearance. Whether you're crafting furniture, turning pens, or creating art pieces, understanding this process is essential for achieving the best results.
So, why should you consider stabilizing wood? The benefits are numerous. First, stabilization significantly reduces the wood's susceptibility to environmental changes. This means that your beautifully crafted projects will maintain their shape and integrity, even in fluctuating humidity and temperature conditions. Additionally, stabilized wood often displays enhanced colors and patterns, making it visually appealing. Imagine a piece of wood that was once dull and lifeless, now transformed into a vibrant work of art!
Furthermore, wood stabilization is particularly beneficial for exotic and rare woods that may be difficult to work with in their natural state. By stabilizing these materials, you can unlock their potential, allowing for intricate designs and detailed craftsmanship that would otherwise be impossible. In essence, wood stabilization not only protects your investments but also elevates your creative possibilities.
In this tutorial, we will explore the various techniques and materials involved in the wood stabilization process. We'll dive into the different types of resins available, how to prepare your wood, and the step-by-step process to ensure a successful stabilization. But before we get into the nitty-gritty, let's take a moment to understand the core principles behind this transformative technique.
To sum it up, wood stabilization is not just a method; it's a game-changer for woodworkers and artisans alike. By embracing this process, you're not only enhancing the longevity of your projects but also unlocking new realms of creativity. So, are you ready to dive deeper into the world of wood stabilization? Let's get started!
Materials Needed for Stabilizing Wood
When it comes to wood stabilization, having the right materials at your fingertips is essential for achieving a successful outcome. Think of it as preparing for a big cooking adventure; you wouldn’t want to start without all your ingredients lined up, right? The same principle applies here. In this section, we’ll delve into the key materials you'll need to ensure your wood stabilization project runs smoothly and effectively.
The first and foremost item on your list should be stabilizing resin. This is the heart of the stabilization process, filling the pores of the wood and providing that much-needed durability and aesthetic appeal. There are various types of resins available, such as epoxy and polyester, each with its own unique properties and applications. Choosing the right one is crucial, so keep that in mind as you gather your supplies.
Next, you'll need a vacuum chamber. This piece of equipment is vital for creating a low-pressure environment that helps to draw the air out of the wood. Without a vacuum chamber, you may find that the resin doesn’t penetrate deeply enough, leaving your wood vulnerable to damage. Setting it up properly ensures that your stabilization process is as effective as possible.
In addition to resin and a vacuum chamber, don’t forget about safety equipment. Wood stabilization often involves working with chemicals, so it's important to protect yourself. This includes gloves, goggles, and a respirator to guard against fumes. It’s always better to be safe than sorry, right?
Lastly, you might want to consider some coloring agents if you’re looking to enhance the visual appeal of your stabilized wood. These can be added to your resin to create stunning effects and finishes that really make your project stand out. There are a variety of options available, including dyes and pigments, so you can truly customize the look of your wood.
To summarize, here’s a quick overview of the materials you’ll need:
- Stabilizing resin
- Vacuum chamber
- Safety equipment (gloves, goggles, respirator)
- Coloring agents (dyes, pigments)
By gathering these materials beforehand, you’ll set yourself up for a seamless wood stabilization experience. Remember, preparation is key, and having everything you need in one place will help you focus on the fun part: creating beautiful, durable wood pieces that you can be proud of!
Here are some common questions that people often have about the materials needed for wood stabilization:
- What type of resin is best for beginners? Epoxy resin is often recommended for beginners due to its ease of use and excellent bonding properties.
- Can I stabilize wood without a vacuum chamber? While it is possible, using a vacuum chamber significantly improves the effectiveness of the stabilization process.
- Are there any alternatives to commercial safety equipment? While it's best to use professional gear, you can use a well-fitted mask and protective eyewear as a temporary measure.

Choosing the Right Resin
Choosing the right resin for wood stabilization is a critical step that can significantly influence the final outcome of your project. With numerous options available on the market, it can feel overwhelming to determine which resin will best suit your needs. The two most popular types of resins are epoxy and polyester, each with unique characteristics and ideal applications.
When selecting a resin, you should consider several factors, including the type of wood you are working with, the desired finish, and the environmental conditions the stabilized wood will face. For instance, epoxy resins are known for their superior bonding strength and clarity, making them an excellent choice for intricate wood pieces where aesthetics are paramount. On the other hand, polyester resins tend to be more affordable and cure faster, which might be beneficial for larger projects or when time is of the essence.
Here’s a quick comparison to help you understand the key differences:
| Property | Epoxy Resin | Polyester Resin |
|---|---|---|
| Bonding Strength | High | Moderate |
| Curing Time | Longer | Shorter |
| Clarity | Crystal Clear | Less Clear |
| Cost | Higher | Lower |
In addition to the type of resin, you may want to consider incorporating coloring agents to enhance the visual appeal of your stabilized wood. Various pigments and dyes are available that can add a unique touch to your project. This can be particularly fun when working with exotic woods or creating custom pieces where the color plays a vital role in the design.
Ultimately, the choice of resin should align with your project goals. If you aim for a high-end finish with exceptional durability, epoxy might be your best bet. However, if you are looking for a quick turnaround and a budget-friendly option, polyester could be the way to go. Always remember to test a small sample before committing to a large batch, as this will help you gauge how the resin interacts with your wood and its overall appearance.

Epoxy vs. Polyester Resins
When it comes to wood stabilization, one of the most critical decisions you'll make is choosing between epoxy and polyester resins. Both types of resins have their unique properties, advantages, and disadvantages, which can significantly impact the outcome of your project. Understanding these differences is key to making an informed choice that aligns with your specific needs.
Epoxy resins are known for their superior strength and durability. They create a robust bond that is resistant to moisture, chemicals, and temperature fluctuations. This makes epoxy an excellent choice for projects that require long-lasting performance, especially in outdoor settings. Additionally, epoxy resins have a low viscosity, allowing them to penetrate deep into the wood fibers, ensuring thorough stabilization. However, they can be more expensive and may require additional curing time compared to polyester resins.
On the other hand, polyester resins are often more affordable and cure faster than their epoxy counterparts. This can be a significant advantage for hobbyists or those working on time-sensitive projects. Polyester resins also tend to have a more vibrant finish, which can enhance the visual appeal of the wood. However, they are generally less durable than epoxy and may not hold up as well under harsh environmental conditions.
| Property | Epoxy Resin | Polyester Resin |
|---|---|---|
| Durability | High | Moderate |
| Curing Time | Longer | Shorter |
| Cost | Higher | Lower |
| Moisture Resistance | Excellent | Good |
| Finish | Clear, can be tinted | Vibrant, often more colorful |
In summary, the choice between epoxy and polyester resins boils down to your specific project requirements. If you prioritize strength and durability, especially for outdoor applications, epoxy might be your best bet. However, if you're looking for a quicker, more cost-effective solution with a vibrant finish, polyester could be the way to go. Ultimately, understanding the nuances of each resin type will empower you to achieve the best results in your wood stabilization endeavors.
- What is the best resin for beginners? For beginners, polyester resin is often recommended due to its ease of use and quicker curing time.
- Can I mix epoxy and polyester resins? It is not advisable to mix the two, as they have different chemical compositions and curing processes.
- How do I know if my wood is properly stabilized? Properly stabilized wood will feel solid and have a glossy finish, with no visible air pockets or voids.

Coloring Agents for Resin
When it comes to wood stabilization, the choice of coloring agents for resin can significantly impact the final appearance of your project. Not only do these agents allow you to add a personal touch to your wood, but they also help in enhancing the natural beauty of the wood grain. Imagine transforming a simple piece of wood into a stunning work of art that catches the eye and sparks conversation!
There are several types of coloring agents you can use, each offering unique properties and effects. Here are some popular options:
- Dyes: These are highly concentrated coloring agents that penetrate the wood and resin deeply, providing vibrant colors. They are perfect for achieving a translucent effect, allowing the wood grain to show through.
- Pigments: Unlike dyes, pigments are opaque and sit on top of the resin. They provide a solid color and are excellent for creating a more uniform appearance. Pigments can be mixed with resin to achieve a variety of shades.
- Metallic Powders: If you’re looking for a touch of glamour, metallic powders can be added to your resin. These powders create a shimmering effect that can make your stabilized wood truly stand out.
When selecting a coloring agent, consider the following factors:
- Compatibility: Ensure that the coloring agent is compatible with the type of resin you are using. Some dyes and pigments may not mix well with certain resins, which can affect the final outcome.
- Color Fastness: Choose agents that are resistant to fading over time, especially if the finished product will be exposed to sunlight.
- Mixing Ratios: Pay attention to the recommended mixing ratios for achieving the desired color intensity. Too much coloring agent can lead to a compromised resin structure.
To achieve the perfect color, it’s often beneficial to experiment with small test batches. Mix different ratios of coloring agents with the resin and apply them to scrap pieces of wood. This way, you can see how the colors develop as the resin cures, ensuring that you’re satisfied with the final shade before applying it to your main project.
In conclusion, the right coloring agents can elevate your wood stabilization projects from ordinary to extraordinary. By thoughtfully selecting and applying these agents, you can create stunning pieces that showcase both the beauty of the wood and your personal style.
Q: Can I use food coloring as a coloring agent for resin?
A: While food coloring can technically be used, it is not recommended as it may not provide the desired durability or color fastness. It's better to use dyes or pigments specifically designed for resin work.
Q: How do I ensure even coloring throughout the resin?
A: To achieve even coloring, mix the coloring agent thoroughly with the resin before application. Stir well and consider using a vacuum chamber to remove any air bubbles that may affect the appearance.
Q: Will the color change after curing?
A: Some coloring agents may change slightly after curing due to chemical reactions. Always conduct tests with small amounts to see how the color appears once cured.

Preparing the Wood for Stabilization
Before you dive headfirst into the exciting world of wood stabilization, it's crucial to prepare your wood properly. Think of this step as the foundation of a house; if it’s not solid, everything built on top can crumble. The preparation process not only ensures that the resin penetrates effectively but also enhances the overall quality of your finished product. So, how do you get your wood ready for this transformative journey?
First and foremost, cleaning is key. You want to remove any dirt, dust, or debris that may have settled on the surface. A simple wipe down with a damp cloth can do wonders. But don’t stop there! If your wood has been exposed to the elements, you might need a more thorough cleaning. Using a soft brush or even a gentle soap solution can help eliminate stubborn grime. Just remember to let it dry completely afterward; moisture is the enemy when it comes to resin adhesion.
Next up is drying. This step is vital because any residual moisture can interfere with the resin's ability to bond with the wood. Ideally, you want your wood to have a moisture content of less than 10%. If you're unsure, using a moisture meter can give you a precise reading. If the wood feels damp, consider placing it in a warm, dry area or using a heat gun to speed up the process. However, be careful not to overheat the wood, as this can cause it to crack or warp.
Once your wood is clean and dry, it’s time to cut it to the desired size. This step might seem trivial, but think of it as tailoring a suit. You want the wood to fit perfectly into your project. Use a sharp saw to make clean cuts, and don’t forget to sand the edges lightly to remove any splinters or rough spots. This will not only improve the appearance but also help the resin to flow better during the stabilization process.
Finally, consider the type of wood you are working with. Different woods have varying densities and porosities, which can affect how well they absorb the resin. For instance, softer woods like pine may soak up the resin differently than harder woods like oak. Understanding these characteristics can help you adjust your technique accordingly. If you're working with particularly dense or oily woods, you might want to use a pre-treatment to enhance resin penetration.
In summary, the preparation of wood for stabilization is a multi-step process that includes cleaning, drying, cutting, and understanding the type of wood you’re dealing with. Each step is equally important, and skipping one could jeopardize the entire stabilization process. So, take your time and ensure that your wood is in prime condition before applying that resin!
- What types of wood are best for stabilization? Generally, softer woods are easier to stabilize, but many hardwoods can also benefit from the process.
- How long should I let the wood dry? Ideally, allow at least 24 hours for drying, but using a moisture meter can provide a more accurate assessment.
- Can I stabilize wood that has been previously treated? Yes, but make sure to thoroughly clean and sand the surface to ensure proper adhesion of the resin.
The Stabilization Process
Stabilizing wood might seem daunting at first, but with a clear step-by-step approach, you'll find it to be a rewarding experience! The stabilization process is crucial for enhancing the durability and beauty of your wood projects, and it involves several key steps that ensure the resin penetrates effectively. Let's dive into the details!
First and foremost, you'll need to set up your workspace. Make sure you have a clean, well-ventilated area to work in. This is not just about aesthetics; a tidy workspace helps you avoid accidents and makes the process smoother. Gather all your materials, including the wood pieces you wish to stabilize, the stabilizing resin, and your vacuum chamber. Having everything at hand will prevent disruptions during the process.
Next up is the vacuum chamber setup. This is where the magic happens! The vacuum chamber is essential for removing air from the wood, allowing the resin to penetrate deeply and evenly. To set it up, place your wood inside the chamber, ensuring that it’s not overcrowded. Seal the chamber tightly and start the pump. You’ll want to monitor the vacuum gauge; a pressure of around 25 inches of mercury is ideal. This process typically takes about 30 minutes to an hour, depending on the type of wood and its density.
Once you’ve established a good vacuum, it’s time to apply the resin. Carefully mix your stabilizing resin according to the manufacturer’s instructions. Pour the resin into the vacuum chamber, ensuring that it completely covers the wood. This step is critical: you want to ensure that every nook and cranny of the wood is saturated. After pouring, let the chamber run for an additional 15 to 30 minutes. This will help the resin to penetrate the wood fibers fully.
After the resin has been applied and the vacuum process is complete, it's time to cure the wood. Remove the wood from the chamber and allow it to sit for the recommended curing time, which typically ranges from 24 to 72 hours, depending on the type of resin used. Make sure the wood is placed in a dust-free environment to prevent contaminants from settling on the surface. Once cured, you’ll notice that the wood feels more robust and has a glossy finish.
Finally, once the wood is fully cured, you can move on to the finishing touches. Sand the surface to achieve a smooth finish, and consider applying a clear coat or oil to enhance its appearance even further. This step not only adds to the aesthetic appeal but also provides an extra layer of protection against wear and tear.
In summary, the stabilization process involves careful preparation, effective vacuuming, thorough resin application, and proper curing. By following these steps, you'll transform ordinary wood into a stunning, durable material that can stand the test of time!
- How long does the stabilization process take? The entire process can take anywhere from a few days to a week, depending on the type of wood and resin used.
- Can I stabilize wood without a vacuum chamber? While it's possible, using a vacuum chamber significantly enhances the effectiveness of the stabilization process.
- What types of wood can be stabilized? Most woods can be stabilized, but softer woods tend to absorb resin more effectively.
- Is the stabilized wood safe for food contact? It depends on the type of resin used. Always check the manufacturer's guidelines to ensure safety.
Setting Up the Vacuum Chamber
Setting up a vacuum chamber is a pivotal step in the wood stabilization process, and it can be both exciting and a bit daunting. Imagine it as creating a mini-laboratory where your wood will undergo a transformation that enhances its durability and aesthetics. The vacuum chamber works by removing air from the wood, allowing the resin to penetrate deeply into its fibers. This is essential because trapped air can prevent the resin from saturating the wood completely, leading to uneven stabilization.
To get started, you’ll need a few key components for your vacuum chamber setup. First, ensure you have a sturdy vacuum chamber that can withstand the pressure changes. You can either purchase a ready-made chamber or build one yourself using materials like thick acrylic or metal. If you opt for the DIY route, make sure all seals are airtight to prevent any leaks. Additionally, a vacuum pump is necessary to create the vacuum environment; a two-stage pump is recommended for optimal results.
Here’s a simple breakdown of the setup process:
- Choose the Right Location: Find a stable surface to set up your vacuum chamber. It should be away from direct sunlight and any potential hazards.
- Prepare the Chamber: Before placing your wood inside, clean the chamber thoroughly to remove any dust or debris that could interfere with the process.
- Load the Wood: Place your prepared wood pieces inside the chamber. Ensure they are arranged in a way that allows for even exposure to the resin.
- Seal the Chamber: Secure the lid tightly to create an airtight seal. This step is crucial for effective vacuuming.
- Connect the Vacuum Pump: Attach the vacuum pump to the chamber’s valve. Make sure the connection is secure to prevent air leaks.
Once everything is set up, turn on the vacuum pump and watch as the pressure inside the chamber drops. It’s fascinating to see the air being sucked out, and you may even notice the wood expanding slightly as the air is removed. This is a good sign that the chamber is working effectively. Keep an eye on the pressure gauge; you want to reach a vacuum level that is sufficient for your resin to penetrate the wood adequately. Typically, a vacuum of around 25 inches of mercury (Hg) is ideal for most stabilization processes.
During this stage, it’s also important to monitor the time. Depending on the type of wood and its moisture content, you may need to maintain the vacuum for anywhere from 30 minutes to several hours. The longer you can keep the vacuum, the better the saturation will be. After the vacuuming process is complete, you can proceed to apply the resin, knowing that the wood is well-prepared for the next step in its transformation.
In summary, setting up a vacuum chamber is not just about following steps; it's about understanding the science behind wood stabilization. With the right setup and a bit of patience, you’ll be on your way to creating beautifully stabilized wood that not only looks stunning but also stands the test of time.

Applying the Resin
When it comes to applying resin for wood stabilization, precision and technique are key to achieving the best results. After you've prepared your wood and set up your vacuum chamber, it's time to get your hands dirty and dive into the exciting part of the process—applying the resin! This step can make or break your project, so let’s break it down into manageable parts.
First off, ensure that your workspace is clean and free of dust or debris. A clean environment will help prevent any unwanted particles from contaminating your resin. Before you start, gather all your materials, including the resin, mixing tools, and any additional equipment you might need, such as brushes or spatulas for application. It’s like prepping for a big meal; you wouldn’t want to be scrambling for ingredients halfway through cooking, right?
Once you’ve got everything ready, it’s time to mix your resin according to the manufacturer’s instructions. Typically, this involves combining the resin with a hardener in a precise ratio. Make sure to mix it thoroughly to avoid any inconsistencies that could affect the final product. Think of it as making a cake; if you don’t mix the ingredients well, you might end up with a lumpy batter!
Now comes the fun part—applying the resin! Using a brush or a spatula, carefully apply the mixed resin to the surface of the wood. It’s important to work the resin into the wood’s pores, ensuring that every nook and cranny is saturated. If you’re stabilizing a piece with intricate details or deep grain, don’t rush this step. Take your time and make sure the resin penetrates deeply. You might even want to use a vacuum chamber to help draw the resin into the wood, enhancing saturation.
For larger pieces or if you’re working with multiple items, you can also submerge the wood in a container filled with resin. This method can be particularly effective for ensuring complete saturation. Just remember to monitor the wood to ensure it doesn’t float; you want it fully submerged! After you’ve applied the resin, it’s a good idea to let it sit for a few minutes to allow any air bubbles to rise to the surface. You can gently tap the wood or use a heat gun to help release these bubbles.
Once you’re satisfied that the resin has been applied evenly, it’s time to let it cure. The curing time will depend on the type of resin you’re using, so be sure to check the manufacturer’s recommendations. Typically, you’ll want to leave the wood in a dust-free environment to cure for at least 24 hours. Think of this as letting your cake cool before frosting; you want it to be just right before you move on to the next step!
In conclusion, applying resin for wood stabilization is a process that requires care and attention. By following these steps and taking your time, you can ensure that your wood is not only stabilized but also looks fantastic. Remember, the quality of your application will directly impact the final product, so treat this step with the importance it deserves!
- How long does the resin take to cure? The curing time can vary based on the type of resin used, but it generally takes between 24 to 72 hours.
- Can I apply resin in a humid environment? It's best to apply resin in a controlled environment with low humidity to prevent curing issues.
- What should I do if I see bubbles in the resin? You can gently heat the surface with a heat gun or torch to help release air bubbles.
Curing and Finishing Stabilized Wood
Once you've successfully completed the wood stabilization process, the next crucial step is curing and finishing the stabilized wood. This phase is essential for achieving that polished, professional look that not only enhances the aesthetic appeal but also adds to the durability of your wood project. Curing involves allowing the resin to harden completely, while finishing involves sanding and applying protective coatings to achieve a smooth surface.
The curing time can vary based on the type of resin used and environmental conditions. Typically, epoxy resins require a longer curing time than polyester resins. For instance, epoxy may take anywhere from 24 to 72 hours to cure fully, while polyester might be ready in as little as 12 to 24 hours. It's essential to follow the manufacturer's instructions for the specific resin you are using to ensure optimal results. Here's a quick reference table for curing times:
| Type of Resin | Curing Time |
|---|---|
| Epoxy Resin | 24 to 72 hours |
| Polyester Resin | 12 to 24 hours |
After the resin has cured, it's time to move on to the finishing touches. Start by carefully sanding the surface of the stabilized wood. This step is vital as it removes any imperfections and ensures a smooth finish. Use a variety of sandpaper grits, starting with a coarser grit (around 80-120) to shape the surface, and gradually moving to finer grits (up to 400) for a polished look. Remember to sand in the direction of the wood grain to avoid scratches.
Once you've achieved the desired smoothness, you can consider applying a finish. There are several options available, depending on the look you want to achieve:
- Oil Finishes: These penetrate the wood and enhance its natural grain, providing a warm, rich appearance.
- Polyurethane: A durable option that creates a protective layer on the surface, ideal for items that will experience wear and tear.
- Lacquer: Quick-drying and provides a high-gloss finish, perfect for decorative pieces.
When applying any finish, ensure that the wood is clean and free from dust. Each type of finish has its application method, so be sure to follow the instructions carefully. Typically, you would apply multiple coats, allowing each coat to dry thoroughly before applying the next. This will ensure a robust and beautiful final product.
In conclusion, curing and finishing your stabilized wood is not just about aesthetics; it's about protecting your hard work and ensuring that your project stands the test of time. By following these steps, you can achieve a stunning finish that highlights the unique characteristics of the wood while also enhancing its durability.
Q: How long should I wait before sanding the stabilized wood?
A: It's best to wait until the resin is fully cured, which can take anywhere from 12 to 72 hours depending on the type of resin used.
Q: Can I use any type of finish on stabilized wood?
A: Yes, but it's recommended to use finishes that are compatible with the type of resin you used for stabilization. Always check the manufacturer's recommendations.
Q: What should I do if the surface feels sticky after curing?
A: This could indicate that the resin did not cure properly. Ensure that you followed the correct mixing ratios and curing times. If it's still sticky, you may need to sand it down and reapply the resin.
Frequently Asked Questions
- What is wood stabilization?
Wood stabilization is a process that involves filling the pores of wood with resin to enhance its durability and appearance. This technique is especially useful for soft or porous woods that might otherwise be prone to cracking or warping.
- Why should I stabilize wood?
Stabilizing wood can significantly improve its strength and longevity. It also prevents moisture absorption, which can lead to warping and cracking. Plus, stabilized wood can have a stunning finish that enhances its natural beauty, making it perfect for furniture and decorative items.
- What materials do I need for wood stabilization?
To stabilize wood, you'll need a stabilizing resin, a vacuum chamber, safety equipment like gloves and goggles, and possibly some coloring agents if you want to add a pop of color to your project. Gathering the right materials is crucial for achieving the best results.
- How do I choose the right resin?
Choosing the right resin depends on your project requirements. Epoxy resins are known for their strength and clarity, making them ideal for high-quality finishes. Polyester resins, on the other hand, are often more affordable and cure faster but may not provide the same level of durability. Consider your project's needs before making a choice!
- What is the difference between epoxy and polyester resins?
Epoxy resins are typically stronger and more resistant to heat and chemicals, making them suitable for high-performance applications. Polyester resins cure faster and are easier to work with, but they may not be as durable in the long run. Understanding these differences can help you make an informed decision for your wood stabilization project.
- How do I prepare wood for stabilization?
Preparing wood for stabilization involves cleaning it thoroughly to remove dirt and debris, drying it completely to eliminate moisture, and cutting it to size if necessary. Proper preparation ensures that the resin penetrates effectively, resulting in a successful stabilization process.
- What is the stabilization process like?
The stabilization process typically involves setting up a vacuum chamber to remove air from the wood, applying the resin evenly, and allowing it to cure. Each step is crucial for ensuring that the resin fully saturates the wood and provides the desired durability and appearance.
- How long does it take for the resin to cure?
Curing times can vary based on the type of resin used and environmental conditions. Generally, epoxy resins may take anywhere from 24 to 72 hours to cure fully, while polyester resins can cure more quickly. Always refer to the manufacturer's instructions for specific curing times.
- Can I finish stabilized wood like regular wood?
Absolutely! Once the stabilization process is complete and the resin has cured, you can sand and finish the stabilized wood just like you would with untreated wood. This allows you to achieve a professional look that showcases the beauty of the wood grain.


