Woodworking: How to Build a Wooden Wardrobe
This article explores the essential steps and techniques for building a wooden wardrobe, including materials, tools, and tips to ensure a successful project from start to finish. Building your own wardrobe can be an incredibly rewarding experience. Not only do you get to customize it to fit your style and needs, but you also gain valuable woodworking skills along the way. Imagine standing back and admiring a beautiful piece of furniture that you crafted with your own hands! In this guide, we’ll walk you through everything you need to know, from selecting the right wood to the final finishing touches.
Selecting the appropriate type of wood is crucial for durability and aesthetics. The wood you choose will not only affect the wardrobe's strength but also its overall appearance. When considering wood types, think about the look you want to achieve, as well as how much wear and tear the wardrobe will endure. Here are some of the best options for wardrobe building:
- Oak: Known for its strength and beautiful grain, oak is a popular choice for furniture.
- Pine: A more affordable option, pine is lightweight and easy to work with, making it great for beginners.
- Maple: This hardwood is durable and has a fine, consistent grain, perfect for a sleek finish.
- Cherry: Cherry wood ages beautifully, deepening in color over time, which adds character to your wardrobe.
Each type of wood has its unique characteristics and charm, so consider what fits your personal style and the overall decor of your room.
A well-equipped workshop is key to a successful woodworking project. Having the right tools can make the difference between a smooth build and a frustrating experience. Below, we outline the essential tools needed for building a wooden wardrobe, including both hand tools and power tools.
Hand tools play a significant role in woodworking and are often favored for their precision. Here are some must-have hand tools for wardrobe construction:
- Saw: A good quality saw is essential for making clean cuts.
- Chisels: Useful for carving and shaping wood, chisels come in various sizes.
- Hammer: A reliable hammer is necessary for driving nails and assembling components.
- Screwdriver: Essential for installing hardware and securing parts together.
Accurate measurements are critical in woodworking. To ensure precision in your wardrobe project, consider investing in the following measuring and marking tools:
- Tape Measure: A flexible tape measure is essential for measuring lengths accurately.
- Square: This tool helps ensure that your cuts are straight and angles are correct.
- Pencil: A good marking pencil is vital for making clear, visible lines on your wood.
Cutting tools are essential for shaping wood. Depending on your project, you might need a variety of cutting tools:
- Table Saw: Ideal for making straight cuts and ripping boards.
- Jigsaw: Great for making curved or intricate cuts.
- Miter Saw: Perfect for making precise crosscuts at various angles.
Power tools can significantly enhance efficiency. Here’s a look at some essential power tools for building a wooden wardrobe:
- Drill: A power drill is indispensable for creating holes and driving screws.
- Sander: A sander speeds up the smoothing process, giving your wardrobe a polished finish.
- Router: Useful for adding decorative edges and creating joints.
A well-thought-out design is vital for functionality and style. Before you start cutting wood, take some time to sketch out your ideas. Think about the dimensions and layout of your wardrobe, as well as any additional features you want, such as shelves or drawers. A good design will not only look great but also serve your needs effectively.
Creating a sketch can help visualize the final product. Grab a piece of paper and start drawing your wardrobe design. Don’t worry about making it perfect—just get your ideas down. This will help you plan the dimensions and layout effectively, ensuring that everything fits together seamlessly.
Finishes and hardware can elevate your wardrobe’s appearance. Consider options for stains, paints, and hardware that will complement your design. A well-chosen finish can enhance the wood's natural beauty, while the right hardware can add a touch of elegance.
Following a clear construction process is essential for success. In the next sections, we will outline the step-by-step procedure to build your wooden wardrobe from start to finish. Whether you’re a seasoned woodworker or a beginner, these guidelines will help you create a stunning wardrobe that you can be proud of.
Q: How long does it take to build a wooden wardrobe?
A: The time it takes can vary depending on your skill level and the complexity of the design. On average, it could take anywhere from a weekend to a couple of weeks.
Q: What is the best wood for a wardrobe?
A: Popular choices include oak for durability, pine for affordability, and cherry for its beautiful aging process.
Q: Do I need special skills to build a wardrobe?
A: Basic woodworking skills are helpful, but many beginners successfully build wardrobes by following detailed plans and instructions.
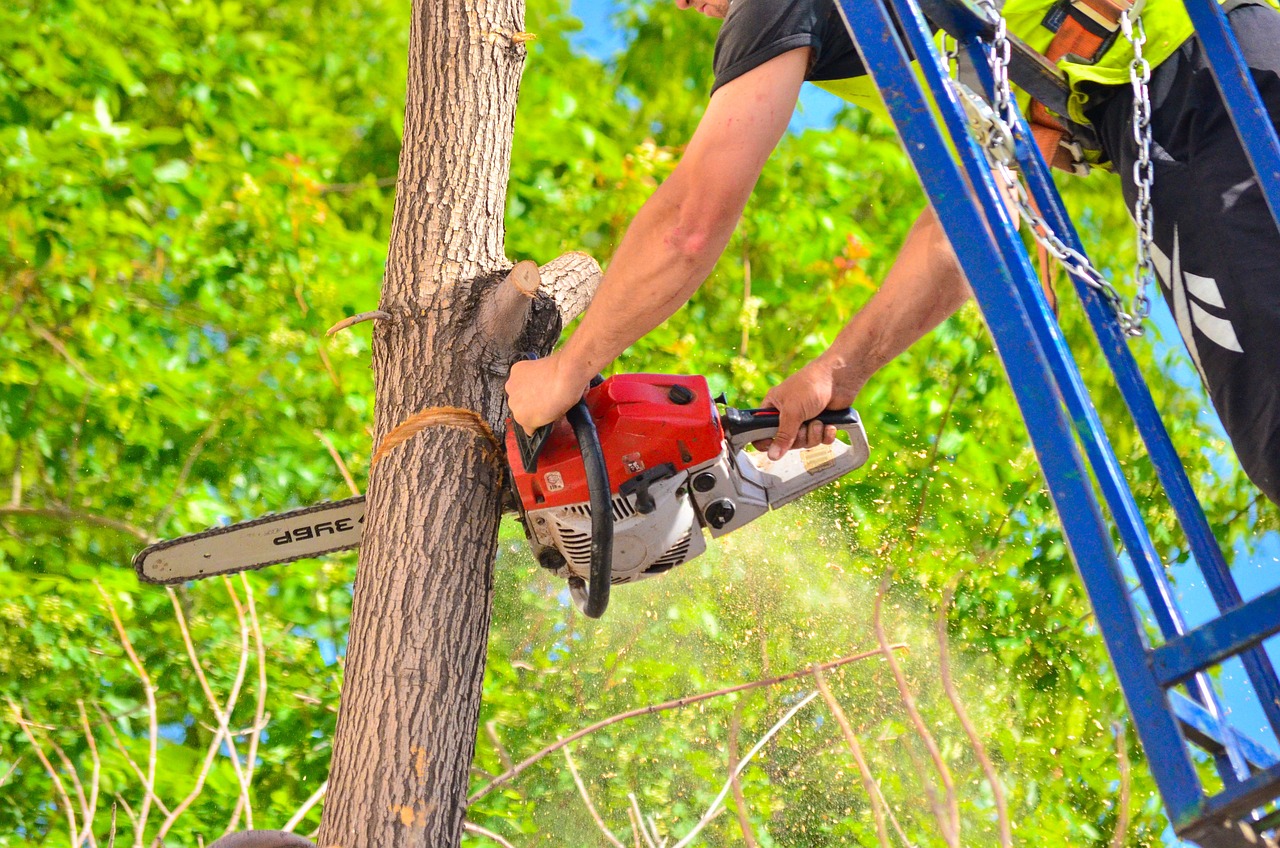
Choosing the Right Wood
When it comes to building a wooden wardrobe, the first and perhaps most crucial step is choosing the right type of wood. Not only does the wood you select impact the durability of your wardrobe, but it also plays a significant role in its overall aesthetic appeal. With so many options available, it can be overwhelming to decide which wood is best suited for your project. Let's break down some of the most popular choices and their unique characteristics.
First on the list is Oak. Known for its strength and durability, oak is a hardwood that can withstand the test of time. It has a beautiful grain pattern that adds character to any piece of furniture. If you're looking for a wardrobe that can handle heavy clothing and last for generations, oak is a fantastic choice.
Another excellent option is Maple. This wood is slightly lighter than oak but is equally sturdy. Maple has a fine, consistent grain that gives it a smooth finish, making it perfect for modern designs. Plus, it takes stains and paints beautifully, allowing you to customize your wardrobe’s look to match your personal style.
If you're seeking something a bit more exotic, consider Mahogany. This rich, reddish-brown wood is a favorite among furniture makers for its luxurious appearance and resistance to warping. Mahogany is perfect for those who want to create a statement piece in their bedroom. However, it can be on the pricier side, so keep that in mind when budgeting for your project.
For a more budget-friendly option, Pine is a softwood that is widely available and easy to work with. While it may not be as durable as hardwoods, pine can still create a beautiful wardrobe, especially when treated with the right finishes. Its light color and natural knots give it a rustic charm that's perfect for a cozy, casual space.
Ultimately, the choice of wood will depend on your specific needs, budget, and desired aesthetic. To help you decide, here’s a quick comparison of the woods mentioned:
| Type of Wood | Durability | Appearance | Cost |
|---|---|---|---|
| Oak | High | Beautiful grain, sturdy | Moderate |
| Maple | High | Smooth finish, fine grain | Moderate |
| Mahogany | Very High | Rich color, luxurious | High |
| Pine | Moderate | Rustic charm, light color | Low |
In summary, choosing the right wood for your wardrobe is not just about aesthetics; it's about finding a balance between durability, cost, and style. Take your time to evaluate what works best for your needs, and don’t hesitate to consult with a local lumber expert if you have any questions. Remember, the right wood can make all the difference in transforming your wardrobe from a simple storage solution into a stunning centerpiece for your room.
- What is the best wood for a wardrobe? - Oak, maple, and mahogany are excellent choices, depending on your budget and desired appearance.
- How do I choose the right finish for my wooden wardrobe? - Consider the wood type and your personal style. Stains and paints can enhance the wood's natural beauty.
- Can I use softwood for my wardrobe? - Yes, softwoods like pine can be used, but they may not be as durable as hardwoods.
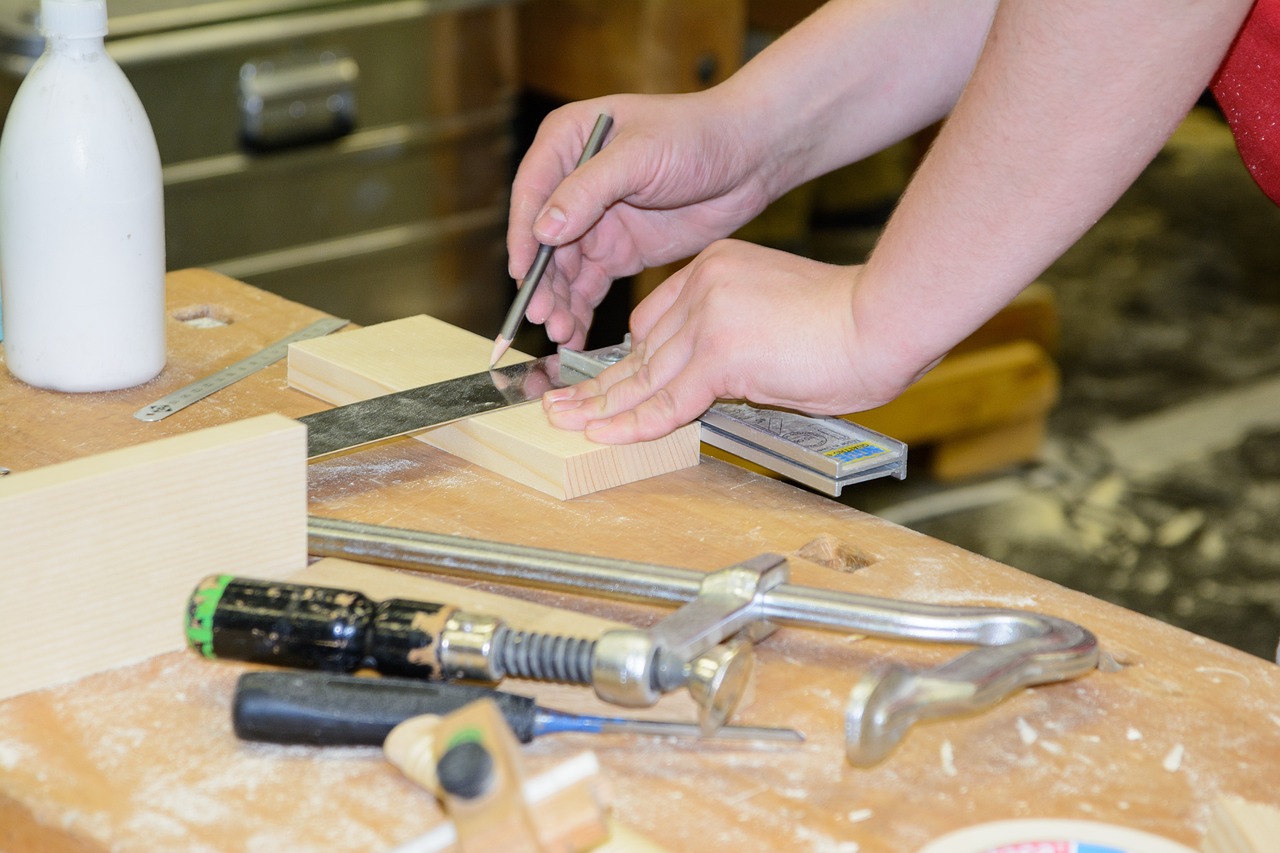
Essential Tools for Woodworking
When it comes to woodworking, having the right tools is like having the right ingredients for a delicious recipe. You wouldn't bake a cake without flour, would you? Similarly, building a wooden wardrobe requires a well-equipped workshop to ensure that your project runs smoothly and efficiently. The essential tools for woodworking can be categorized into two main types: hand tools and power tools. Each type has its unique advantages and is crucial for different stages of the wardrobe construction process.
Hand tools are often the unsung heroes of woodworking, providing precision and control that power tools sometimes lack. Imagine delicately chiseling away at a piece of wood to create intricate details; that’s where hand tools shine. Some must-have hand tools for wardrobe construction include:
- Saws: For cutting wood to size, a handsaw or a coping saw can be invaluable.
- Chisels: These are essential for carving and detailing, allowing you to create beautiful joints and designs.
- Hammers: A reliable hammer is necessary for driving in nails and assembling components.
- Clamps: These help hold pieces together securely while the glue dries or during assembly.
On the other hand, power tools can significantly enhance your efficiency and save you time. They are especially useful for larger cuts and repetitive tasks. Think of power tools as your trusty sidekick, helping you tackle the heavy lifting. Essential power tools for building a wooden wardrobe include:
- Table Saw: Perfect for making straight cuts and ripping lumber to width.
- Drill: A must-have for making holes and driving screws into the wood.
- Sander: This tool smooths surfaces and edges, giving your wardrobe a polished finish.
- Miter Saw: Ideal for making angled cuts, especially for frames and corners.
When selecting tools, it’s important to consider their quality and durability. Investing in high-quality tools can save you money in the long run, as they will last longer and perform better. Additionally, familiarize yourself with each tool's proper usage and safety precautions to avoid mishaps. A well-organized workspace, with your tools easily accessible, can also make a huge difference in your workflow.
To summarize, having the right tools is fundamental to your woodworking success. Whether you prefer the tactile feel of hand tools or the efficiency of power tools, understanding their roles will empower you to tackle your wardrobe project with confidence. So, are you ready to gear up and get started on your woodworking adventure?
Q: What is the best type of wood for building a wardrobe?
A: Popular choices include oak, maple, and plywood, each offering different durability and aesthetic qualities.
Q: Do I need to have advanced skills to build a wardrobe?
A: Not necessarily! With the right tools, materials, and guidance, even beginners can successfully build a wardrobe.
Q: How long does it typically take to build a wooden wardrobe?
A: The time can vary based on design complexity and skill level, but expect anywhere from a few days to a couple of weeks.
Q: What should I do if I make a mistake while building?
A: Mistakes are part of the learning process. Assess the error, and if possible, adjust your plan or fix it creatively!

Hand Tools Overview
When it comes to woodworking, especially for a project as intricate as building a wooden wardrobe, having the right hand tools is absolutely essential. These tools not only allow for precision but also give you the ability to shape and refine your work in ways that power tools sometimes cannot. Imagine trying to carve a delicate design into your wardrobe using only a jigsaw—frustrating, right? That's where hand tools come into play, providing the finesse needed for detailed work.
Let's dive into some of the must-have hand tools that will serve you well throughout your wardrobe-building journey. Each tool has its unique purpose and can significantly impact the quality of your final product. Here’s a quick rundown of the essential hand tools you should consider:
- Chisels: Perfect for carving and shaping wood, chisels come in various sizes and types. They allow for fine detailing and can help you create intricate designs on your wardrobe.
- Saws: A good hand saw is indispensable. Whether it’s a panel saw for larger cuts or a coping saw for intricate curves, having a variety will make your life easier.
- Planes: Hand planes are fantastic for smoothing surfaces and achieving a perfect finish. They can help you adjust the thickness of your boards and ensure everything fits together seamlessly.
- Files and Rasps: These tools are excellent for refining edges and surfaces, allowing you to achieve a smooth finish that feels good to the touch.
- Clamps: While not a cutting tool, clamps are crucial for holding pieces together as glue dries or as you make precise cuts. They ensure that your wardrobe components stay aligned and secure.
By incorporating these hand tools into your woodworking arsenal, you’ll find that you can tackle a variety of tasks with confidence. Remember, the key to using hand tools effectively lies in practice. The more comfortable you become with each tool, the more skilled you’ll be at executing your designs. Moreover, hand tools allow for a more tactile experience, connecting you directly with the wood, which can be incredibly satisfying.
In summary, while power tools can speed up the process, hand tools bring a level of craftsmanship that is hard to replicate. They allow for creativity and personal touch, making your wardrobe not just a functional piece of furniture, but a work of art. So, gather your tools, and let’s get started on creating something beautiful!
Q: Do I really need all these hand tools to build a wardrobe?
A: While you can get by with a few essential tools, having a variety will greatly enhance your ability to create intricate designs and achieve a professional finish.
Q: Can I use power tools instead of hand tools?
A: Absolutely! Power tools can speed up the process, but hand tools provide precision and detail that are sometimes necessary for finer work.
Q: How do I maintain my hand tools?
A: Regular cleaning, sharpening, and proper storage will keep your hand tools in excellent condition. Always ensure that blades are sharp and tools are free from rust.
Measuring and Marking Tools
When it comes to woodworking, especially in building a wooden wardrobe, accuracy is everything. This is where come into play, ensuring that every cut is precise and every joint fits perfectly. Imagine trying to assemble a jigsaw puzzle with pieces that don’t quite match; that’s what happens when your measurements are off. So, let’s dive into the essential tools that will help you achieve that perfect wardrobe.
First and foremost, a tape measure is your best friend. It’s flexible, easy to use, and can measure long lengths, making it ideal for larger pieces of wood. When using a tape measure, always remember to pull it taut for the most accurate reading. Alongside your tape measure, a square is crucial for ensuring your cuts are at right angles. A framing square or a combination square can help you check your corners and mark straight lines, which is vital for the wardrobe's stability.
Next up is a marking gauge. This handy tool allows you to mark consistent lines along the wood grain, giving you a precise guide for cutting. It’s especially useful for creating mortises or dados, where accuracy is key. Additionally, a pencil or marking knife should be on your list. A sharp pencil can make fine lines that are easy to see, while a marking knife provides a more permanent and precise mark, which is particularly useful for intricate cuts.
For those who want to take their precision up a notch, consider investing in a laser level. This tool projects a straight line across surfaces, helping you ensure that everything is aligned perfectly. It’s especially beneficial when installing shelves or doors in your wardrobe. Lastly, don’t forget about a caliper. While it may not be as commonly used, it’s incredibly helpful for measuring the thickness of wood and ensuring that all your components fit together seamlessly.
In summary, having the right measuring and marking tools can make all the difference in your woodworking project. Here’s a quick overview of the tools mentioned:
| Tool | Purpose |
|---|---|
| Tape Measure | Measures long lengths of wood accurately. |
| Square | Ensures cuts are at right angles. |
| Marking Gauge | Marks consistent lines along the wood grain. |
| Pencil/Marking Knife | Creates visible and precise marks for cutting. |
| Laser Level | Projects straight lines for alignment. |
| Caliper | Measures thickness of wood for component fitting. |
With these tools in hand, you’ll be well-equipped to tackle the measuring and marking phase of your wardrobe project. Remember, precision leads to perfection, and investing time in accurate measurements will pay off in the long run.
- What is the best wood for building a wardrobe? - Popular choices include oak, maple, and plywood due to their durability and aesthetic appeal.
- Do I need power tools to build a wardrobe? - While hand tools can suffice, power tools can significantly speed up the process and improve precision.
- How can I ensure my wardrobe design is functional? - Consider your storage needs, available space, and the items you plan to store when designing your wardrobe.
- What finishes are best for wooden wardrobes? - Stains, paints, and varnishes can enhance the wood's beauty and protect it from wear and tear.
Cutting Tools
When it comes to woodworking, having the right is essential for achieving precise and clean cuts. The quality of your tools can significantly impact the final outcome of your wooden wardrobe. Imagine trying to build a beautiful piece of furniture with dull blades or inadequate equipment—it's like trying to paint a masterpiece with a brush that's falling apart! To avoid such frustration, let’s delve into the most important cutting tools you’ll need.
First and foremost, a circular saw is a must-have in your toolkit. This power tool is perfect for making straight cuts and can handle a variety of wood thicknesses. Its versatility makes it an excellent choice for cutting large panels or sheets of wood, which is often required when constructing the main body of your wardrobe. However, remember that safety is paramount; always use protective gear and follow the manufacturer’s guidelines.
Next up is the jigsaw. If your wardrobe design includes curves or intricate shapes, this tool will be your best friend. A jigsaw allows you to navigate tight corners and create unique designs that a circular saw simply can’t achieve. Just like a sculptor chiseling away at a block of marble, the jigsaw lets you bring your creative vision to life.
Another invaluable tool is the table saw. This tool is ideal for making consistent cuts and can help you achieve perfect dimensions for your wardrobe components. It’s especially useful when you need to rip large boards into narrower strips or when you want to ensure that all your cuts are uniform. Think of it as your woodworking assistant, always ready to help you make the precise cuts you need.
For finer details, a router can be incredibly useful. This tool is perfect for adding decorative edges or grooves to your wardrobe panels. It helps you achieve that professional finish that can elevate your project from ordinary to extraordinary. Just imagine the satisfaction of running your fingers over a beautifully routed edge—it’s those little details that make a big difference!
Finally, don’t forget about hand saws, such as the panel saw or back saw. These tools are essential for making smaller, more controlled cuts, especially when working on intricate details or when you need to make adjustments on the fly. Hand saws can be a bit more labor-intensive, but they offer a level of control that power tools sometimes lack.
In summary, having a variety of cutting tools at your disposal not only makes the construction of your wooden wardrobe easier but also enhances the overall quality of your work. Each tool serves a specific purpose, and knowing when and how to use them effectively will set you on the path to success. So, gear up, and let those cutting tools help you carve out your masterpiece!
- What type of saw should I use for cutting wood? A circular saw is great for straight cuts, while a jigsaw is ideal for curves. A table saw is best for consistent cuts.
- How can I ensure my cuts are accurate? Always measure twice and cut once. Using a straightedge or guide can also help improve accuracy.
- Do I need to use safety gear when using cutting tools? Yes, always wear safety goggles, ear protection, and a dust mask to protect yourself while woodworking.
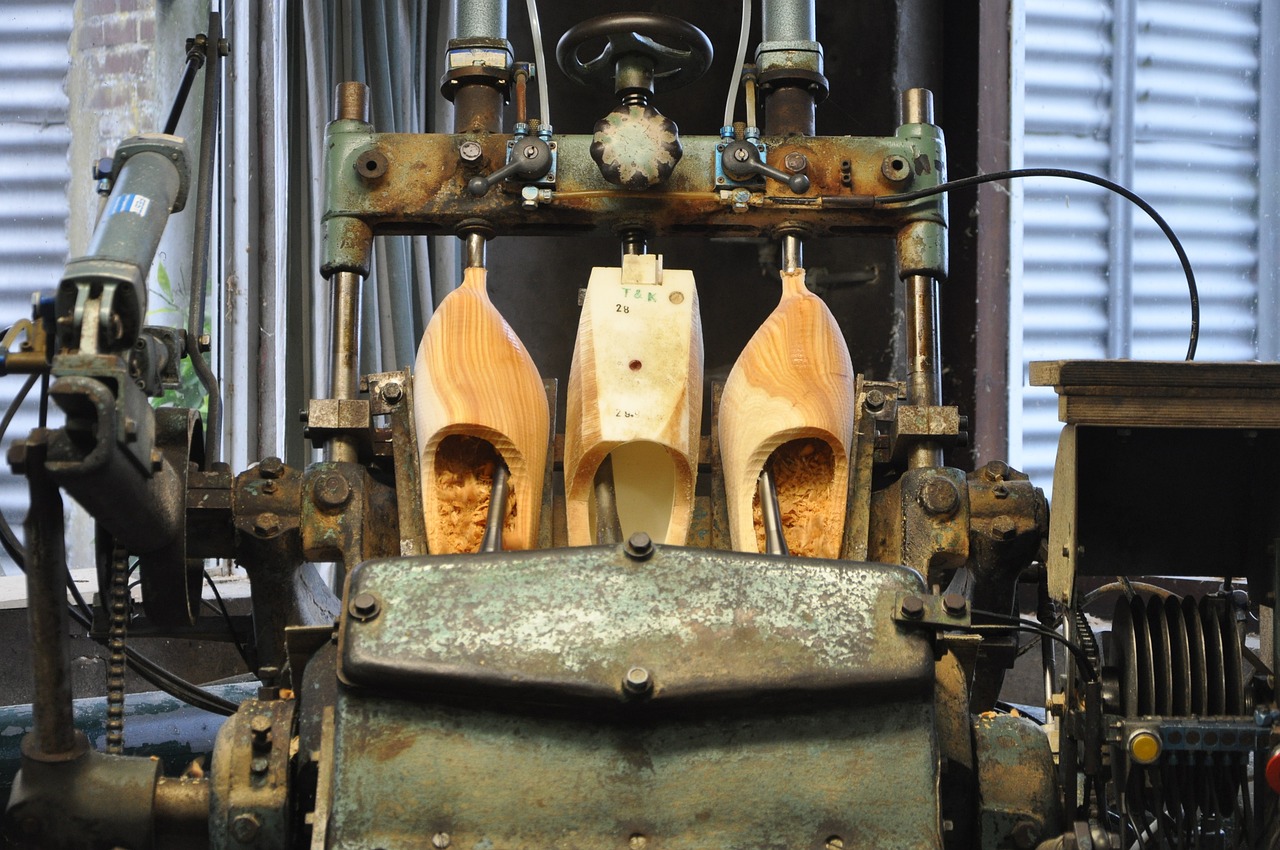
Power Tools Overview
When it comes to woodworking, having the right power tools can be a game-changer. These tools not only enhance your efficiency but also help you achieve a level of precision that hand tools might struggle to match. Imagine trying to cut through thick wood with just a hand saw; it can be exhausting and time-consuming! In contrast, power tools do the heavy lifting, allowing you to focus on the artistry of your project.
There are several essential power tools that every woodworker should consider adding to their toolkit. Let's take a closer look at some of these must-have tools:
- Table Saw: This is the heart of any woodworking shop. A table saw allows for precise cuts and can handle large sheets of wood with ease. Whether you're ripping boards or making crosscuts, a table saw is indispensable.
- Router: A router is perfect for shaping edges and creating intricate designs. It can be used for everything from hollowing out areas of wood to creating decorative edges on your wardrobe.
- Drill/Driver: This tool is essential for drilling holes and driving screws. A cordless drill is especially handy, providing the freedom to move around without being tethered to a power outlet.
- Orbital Sander: For that smooth finish, an orbital sander is your best friend. It helps to eliminate rough spots and prepares the wood for staining or painting.
- Miter Saw: This tool is excellent for making precise angle cuts, especially useful when constructing frames or corners in your wardrobe.
Using these power tools effectively not only speeds up the construction process but also enhances the overall quality of your wooden wardrobe. Each tool serves a unique purpose, and mastering their use can elevate your woodworking skills to new heights. Just like a painter needs brushes of various shapes and sizes, a woodworker benefits from a diverse set of power tools to tackle different challenges.
Before you dive into your project, it's essential to familiarize yourself with each tool's operation and safety precautions. Always remember to wear protective gear, such as goggles and ear protection, to keep yourself safe while enjoying the thrilling world of woodworking. The right tools combined with proper techniques can transform your vision into a stunning reality!
Q: What safety precautions should I take when using power tools?
A: Always wear safety goggles, ear protection, and a dust mask. Ensure your workspace is clean and free of distractions.
Q: Can I use power tools if I am a beginner?
A: Absolutely! Many power tools are user-friendly, but it's crucial to read the manual and practice on scrap wood before starting your actual project.
Q: Are there any power tools that are essential for beginners?
A: Yes! A drill/driver, circular saw, and sander are great starter tools that can handle a variety of tasks.
Designing Your Wardrobe
Designing your wardrobe is a crucial step that can make or break the overall functionality and aesthetic appeal of your space. It’s not just about throwing some wood together; it’s about creating a piece that complements your home while serving your storage needs. So, how do you embark on this creative journey? First, you need to consider the layout of the wardrobe in relation to the room. Think about where it will be placed: will it be a standalone piece or built into a nook? This decision will influence the dimensions and design features you choose.
Next, let’s talk about dimensions. It’s essential to measure the available space accurately. A wardrobe that’s too tall or wide can overwhelm a room, while one that’s too small may leave you frustrated with storage limitations. To help you visualize, consider creating a simple sketch with your room’s dimensions. This will not only guide you in choosing the right size but also help you determine how many shelves, drawers, or hanging spaces you might need. Remember, the more organized your wardrobe is, the easier it will be to maintain!
When it comes to features, think about your personal storage habits. Do you have a lot of shoes? Maybe you need a dedicated shoe rack. Are you a fan of folded clothes? Consider adding adjustable shelves. Here are some features you might want to include:
- Hanging Rods: Perfect for dresses and suits.
- Drawers: Great for keeping smaller items like accessories or folded clothes.
- Shelves: Ideal for bags, shoes, or even decorative items.
- Mirrors: Adding a mirror can enhance the functionality and appearance of your wardrobe.
Now, let’s not forget about style! The design of your wardrobe should reflect your personal taste and the overall decor of your home. Are you leaning towards a modern minimalist look, or do you prefer something more traditional? Choosing the right finish is also key. Whether you opt for a natural wood finish, a bold paint color, or a sleek laminate, make sure it harmonizes with your existing furniture.
In addition to aesthetics, consider the practicality of your design. Ensure that the doors swing open smoothly and that there’s enough clearance for any drawers. If you’re working with a small space, sliding doors might be a smart choice. They save space and give a contemporary feel. Also, think about lighting. Adding LED strips inside the wardrobe can illuminate your clothes and accessories, making it easier to find what you need.
Finally, once you have a solid design in mind, it’s time to gather all your materials and tools. A well-thought-out design is not just about looks; it’s about functionality and ease of use. Take your time to refine your ideas and don't hesitate to seek inspiration from various sources. Pinterest, woodworking blogs, and even local furniture stores can provide a wealth of ideas to help you finalize your wardrobe design.
Q: How do I determine the ideal dimensions for my wardrobe?
A: Measure the space where you plan to place the wardrobe and consider both the height and width. Think about what you will store in it to decide on the depth.
Q: What materials should I use for a durable wardrobe?
A: Solid woods like oak, maple, or birch are excellent choices for durability. Plywood is also a good option for a budget-friendly yet sturdy alternative.
Q: Can I customize my wardrobe design?
A: Absolutely! Customizing your wardrobe allows you to tailor it to your specific needs and preferences, making it a one-of-a-kind piece in your home.

Sketching Your Design
When it comes to building a wooden wardrobe, is an essential first step that can set the tone for your entire project. Think of it as the blueprint for your masterpiece; without it, you might find yourself lost in a sea of wood and tools. So, grab a pencil and some graph paper, and let’s dive into the creative process!
Start by visualizing the wardrobe in your space. Consider its dimensions and how it will fit into your room. Ask yourself questions like: How much storage do I really need? What style do I want to achieve? Will it have shelves, drawers, or hanging space? The answers to these questions will guide your sketching process. It’s like mapping out a treasure hunt where the treasure is your perfect wardrobe!
As you sketch, focus on the layout and proportions. A well-designed wardrobe not only looks good but also functions seamlessly. Use the graph paper to create a scale drawing; this will help you understand how much space each component will take up. You can break your design down into sections. For example, if you’re planning to have:
- A section for hanging clothes
- Drawers for smaller items
- Shelves for shoes or accessories
Each section should be clearly marked in your sketch. This way, you can visualize how each part interacts with the others, ensuring that everything fits together harmoniously. You may also want to consider the overall aesthetic—will it be modern, rustic, or a blend of styles? Incorporating design elements like curves or straight lines can significantly affect the wardrobe's look.
Don't forget to include details in your sketch, such as the type of doors you want—sliding, hinged, or bi-fold. Think about the hardware too; knobs, handles, and hinges can drastically change the wardrobe's appearance. You might even want to jot down notes about the materials you plan to use, such as the type of wood or finishes that will enhance the overall design.
Once your sketch is complete, take a step back and evaluate it. Does it meet your needs? Is it visually appealing? If you’re unsure, don’t hesitate to ask for feedback from friends or family. Sometimes a fresh pair of eyes can catch things you might have overlooked. Remember, this sketch is the foundation of your project, so take your time and make it count!
In conclusion, sketching your design is a crucial step that combines creativity with practicality. It’s your chance to express your vision while ensuring that your wooden wardrobe will be both functional and stylish. So, let your imagination run wild, and happy sketching!
Here are some common questions that people often ask when it comes to sketching their wardrobe designs:
- What tools do I need to sketch my design? All you need is some graph paper, a pencil, and a ruler for precise lines.
- Can I use software to create my wardrobe design? Absolutely! There are many design software options available that can help you visualize your project in 3D.
- How detailed should my sketch be? Aim for a balance; enough detail to guide your build, but not so much that it becomes overwhelming.
Choosing Finishes and Hardware
When it comes to building your wooden wardrobe, one of the most exciting yet crucial steps is choosing the right finishes and hardware. This choice not only affects the wardrobe's overall aesthetic but also its durability and functionality. Imagine walking into your room and being greeted by a beautifully finished piece of furniture that complements your style—it's a game changer! So, let’s dive into what you need to consider.
First off, let’s talk about finishes. The finish you choose can enhance the wood's natural beauty, providing protection against wear and tear while adding a splash of color. There are several types of finishes to consider:
- Stains: These penetrate the wood, allowing the grain to show through while adding color. They come in various shades, from light to dark, and can be mixed to achieve a custom hue.
- Paint: If you’re looking for something bold or want to match a specific color scheme, paint is your best bet. It provides a solid color finish and can completely change the look of your wardrobe.
- Varnishes and Sealers: These provide a protective layer over the wood, making it resistant to moisture and scratches. They can be clear or tinted, depending on your needs.
Next up is hardware. The right hardware can elevate your wardrobe's design from ordinary to extraordinary. Think about the handles, hinges, and drawer slides you’ll use. Choosing hardware isn’t just about functionality; it’s also about style. Here are a few things to keep in mind:
- Style: Choose hardware that complements the overall design of your wardrobe. For instance, sleek metal handles can give a modern look, while ornate knobs can add a touch of vintage charm.
- Finish: The finish of your hardware should match or harmonize with your wardrobe’s finish. For example, if you choose a dark stain for your wardrobe, consider using matte black or antique brass hardware.
- Functionality: Make sure the hardware you select is not only aesthetically pleasing but also functional. Consider the weight of the doors and drawers and choose hardware that can support them effectively.
To help you visualize your options, here’s a simple table that outlines different types of finishes and their characteristics:
| Type of Finish | Description | Best For |
|---|---|---|
| Stain | Enhances the wood grain while adding color. | Natural wood aesthetics |
| Paint | Provides a solid color finish, hiding the wood grain. | Bold and modern designs |
| Varnish | Protective layer that adds shine and durability. | Long-lasting protection |
In conclusion, the choices you make regarding finishes and hardware can significantly impact the look and longevity of your wooden wardrobe. Take your time to explore various options, and don't be afraid to experiment with different combinations. After all, this wardrobe is not just a piece of furniture; it’s an expression of your personal style!
Q: How do I choose the right stain for my wardrobe?
A: Consider the wood type and the existing color scheme in your room. Test a small area first to see how the stain looks once dried.
Q: What type of hardware is best for heavy doors?
A: Look for heavy-duty hinges and handles that are rated for the weight of your doors to ensure durability and functionality.
Q: Can I change the hardware later if I want a different look?
A: Absolutely! Hardware is relatively easy to replace, allowing you to refresh the look of your wardrobe without a complete overhaul.

Step-by-Step Construction Process
Building a wooden wardrobe can seem like a daunting task, but with a clear plan and the right techniques, it can be an incredibly rewarding project. This will guide you through each phase, ensuring that you create a wardrobe that is not only functional but also a beautiful addition to your home.
First and foremost, preparation is key. Before you even think about assembling your wardrobe, you need to prepare the wood. Start by cutting your wood to the correct dimensions based on your design. Use a table saw for straight cuts and a miter saw for angled cuts. Once the pieces are cut, sanding is essential. Sand each piece thoroughly to remove any rough edges or splinters. This step is crucial as it ensures a smooth surface that will accept stains and finishes better. After sanding, consider treating the wood with a protective sealant to enhance its durability.
Once your wood is prepared, it’s time to move on to assembly. Lay out all the pieces according to your design. Start by assembling the frame of the wardrobe. Use wood glue and screws to secure the corners, ensuring that everything is square. It’s a good idea to use clamps while the glue dries to hold everything in place. As you work, constantly check for level and square alignment. Remember, a well-assembled frame is the backbone of your wardrobe.
Next, you’ll want to add the shelves and any additional compartments. Depending on your design, you may need to install support brackets or shelf pins. Make sure to measure and mark where these will go before drilling. This will help you maintain uniformity and ensure that your shelves are level. If you’re adding drawers, now is the time to install the drawer slides. They should be positioned accurately to allow for smooth opening and closing.
After the main structure is in place, it’s time to focus on the doors. If you’re using hinged doors, install the hinges on the frame first, then attach the doors. Ensure they swing freely and align correctly. If you’re opting for sliding doors, install the track system carefully according to the manufacturer’s instructions. This step is crucial for ensuring that your wardrobe doors function properly.
Finally, once everything is assembled, it’s time for the finishing touches. This includes sanding any rough edges one last time and applying your chosen stain or paint. Make sure to do this in a well-ventilated area and allow ample drying time. After the finish has dried, you can install the hardware, such as knobs or handles, to complete your wardrobe. Don’t forget to step back and admire your work; you’ve just built something amazing!
Here are some common questions that may arise during your wardrobe-building journey:
- How long does it take to build a wooden wardrobe? - The time it takes can vary based on your experience level and the complexity of your design. However, most projects can be completed in a weekend.
- What type of wood is best for wardrobes? - Hardwoods like oak or maple are excellent choices for durability and aesthetics, while plywood can be a cost-effective alternative.
- Do I need any special skills to build a wardrobe? - Basic woodworking skills are helpful, but even beginners can successfully build a wardrobe with patience and the right guidance.
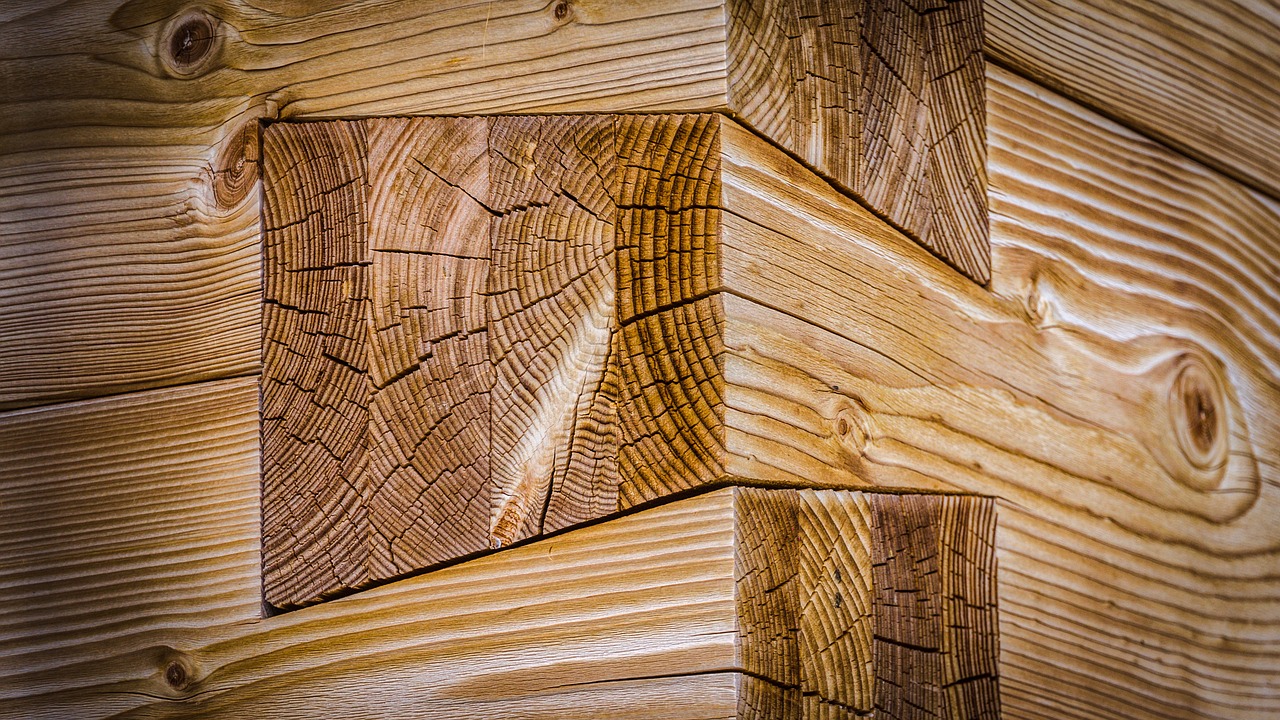
Preparing the Wood
Before diving into the exciting world of wardrobe building, it's essential to understand that preparation is the foundation of a successful woodworking project. Just like a chef prepares their ingredients before cooking, you need to prepare your wood properly to ensure a smooth and enjoyable building experience. This phase involves several critical steps, including cutting, sanding, and treating the wood, all of which will contribute to the final quality of your wardrobe.
First and foremost, you need to select the right pieces of wood. Look for boards that are straight and free of defects like knots or warps. Once you’ve chosen your wood, it’s time to cut it to the appropriate dimensions. Use a reliable saw, whether it’s a table saw or a circular saw, to achieve clean, precise cuts. Remember, measure twice, cut once—this old saying holds true in woodworking. A small error in measurement can lead to significant issues down the line.
After cutting your pieces, the next step is sanding. Sanding is crucial because it smooths out any rough edges and prepares the wood for finishing. Start with a coarse grit sandpaper, such as 80-grit, to remove any major imperfections. Then, progress to finer grits (like 120 and 220) to achieve a silky-smooth surface. This process not only enhances the wood's appearance but also helps the finish adhere better. Don’t skip this step! Skipping sanding can lead to a less-than-perfect finish that could ruin all your hard work.
Once the wood is sanded to perfection, it’s time to treat it. This could involve applying a wood conditioner to prevent uneven stain absorption or using a wood preservative to protect against moisture and pests. Depending on the type of wood you are using, you might also want to consider applying a sealant to enhance durability. Proper treatment will extend the life of your wardrobe and keep it looking beautiful for years to come.
In summary, preparing your wood is not just a step in the process; it’s a crucial phase that sets the stage for the entire project. By carefully selecting, cutting, sanding, and treating your wood, you lay the groundwork for a stunning and functional wooden wardrobe. So, take your time during this phase, and remember that the effort you invest here will pay off in the final product!
- What type of wood is best for a wardrobe? - Hardwoods like oak, maple, or cherry are excellent choices for durability and aesthetics.
- How do I know if my wood is ready for sanding? - If the surface feels rough or has visible imperfections, it's time to sand.
- Can I skip treating the wood? - Skipping treatment can lead to issues like warping or pest damage, so it's not advisable.
- What tools do I need for preparing wood? - A saw, sandpaper, and a wood conditioner or sealant are essential for preparation.
Assembling the Wardrobe
Assembling your wooden wardrobe is where all your hard work starts to pay off. It’s like putting together a puzzle, where each piece needs to fit perfectly to create the final masterpiece. Before diving into assembly, make sure you have all your components ready, including the sides, top, bottom, shelves, doors, and any additional features like drawers or hanging rods. Having a clear workspace can make this process much smoother, so clear off any clutter and gather your tools.
First, you’ll want to start with the main structure. Begin by standing the side panels upright and attaching the bottom panel. This is often done using wood glue and screws for a sturdy hold. Remember, precision is key here; any misalignment could lead to issues later on. Use a level to ensure everything is straight and plumb. If you’re feeling adventurous, you can even use pocket hole joinery for a cleaner look, which hides the screws from view.
Next, attach the top panel in the same manner. Once the frame is secure, it’s time to add the shelves. If your design includes adjustable shelves, consider using shelf pins that allow you to change the height as needed. This flexibility can be a game-changer for organizing your wardrobe. Don’t forget to check that everything is square; you can do this by measuring the diagonals of the frame. If they are equal, your frame is square.
Once the main structure is assembled, it’s time to focus on the doors. If you’re using hinged doors, attach the hinges to the doors first, then position them on the wardrobe frame. Make sure to pre-drill your holes to prevent the wood from splitting. If you’re opting for sliding doors, ensure that the tracks are level and securely fastened. The last thing you want is for your doors to stick or slide unevenly!
After the doors are in place, it’s time to install any additional features like drawers or hanging rods. For drawers, you’ll want to attach the slides first to the wardrobe frame and then to the drawer boxes. Ensure that they glide smoothly in and out, as this will be crucial for functionality. Attention to detail here can make a world of difference in the overall user experience of your wardrobe.
Finally, take a step back and admire your work! Before you call it a day, double-check all your screws and fittings. If you notice any loose parts, tighten them up. It’s always a good idea to do a quick inspection to ensure everything is secure and functioning as it should.
In summary, assembling your wardrobe can be a rewarding experience. By taking your time and following these steps, you’ll ensure that your wardrobe not only looks great but stands the test of time. Remember, a well-assembled wardrobe is the foundation of a great storage solution!
Here are some common questions that people often have when assembling their wooden wardrobe:
- What tools do I need for assembly? Basic tools include a screwdriver, drill, level, and measuring tape. If you’re using pocket hole joinery, you’ll need a pocket hole jig as well.
- How long does it take to assemble a wardrobe? The time varies based on complexity, but generally, it can take anywhere from a few hours to a full day.
- What if my wardrobe doesn’t fit together perfectly? Don’t panic! Adjustments can often be made with shims or by loosening screws to realign components.

Finishing Touches
The on your wooden wardrobe are what truly elevate its appearance and functionality. It’s like putting on the final coat of paint to a masterpiece; these last steps can make all the difference. After all the hard work you’ve put into building your wardrobe, you want it to look stunning and perform well. In this section, we’ll explore the essential steps to ensure your wardrobe not only looks great but also stands the test of time.
First, let’s talk about sanding. This is a crucial step that cannot be overlooked. Sanding smooths out any rough edges and imperfections, giving your wardrobe a polished look. Start with a coarse grit sandpaper to remove any major flaws, and then gradually move to a finer grit for a silky finish. Remember, the goal here is to create a surface that feels as good as it looks. Don’t rush this process; take your time to ensure every inch is smooth.
Once sanding is complete, it’s time to consider finishing. The choice of finish can dramatically impact the overall aesthetic of your wardrobe. You can opt for stains, paints, or even a clear sealant, depending on the look you want to achieve. If you prefer the natural beauty of the wood to shine through, a stain can enhance the grain while adding color. On the other hand, if you’re looking for something more vibrant, a coat of paint can transform your wardrobe into a bold statement piece.
When applying stains or paints, it’s important to follow a few steps for the best results:
- Ensure the surface is clean and free from dust.
- Apply the stain or paint using a brush or cloth, following the wood grain.
- Allow adequate drying time between coats, usually at least 4 hours.
- Consider applying a protective topcoat for added durability.
After the finish has dried, it’s time to move on to installing hardware. The right hardware can complement your wardrobe’s design and functionality. Whether you choose sleek modern handles or classic knobs, make sure they align with your overall style. Proper installation is key; use a level to ensure everything is straight and secure. This attention to detail not only enhances the look but also ensures smooth operation.
Finally, don’t forget about the doors and drawers. Installing these components requires precision and care. Make sure the hinges are aligned correctly and that the doors swing open and close without any obstruction. For drawers, ensure they glide smoothly on their tracks. A well-installed wardrobe is not just about aesthetics; it’s about functionality too!
In summary, the finishing touches are what will make your wooden wardrobe truly shine. From sanding and finishing to installing hardware and ensuring smooth operation, each step is vital. Take your time, be meticulous, and soon you’ll have a stunning wardrobe that not only looks great but also serves its purpose effectively.
Here are some common questions regarding the finishing touches on wooden wardrobes:
- How long should I wait between coats of stain or paint? It’s recommended to wait at least 4 hours, but always check the manufacturer's instructions for specific guidelines.
- Can I use a spray finish instead of a brush? Yes, spray finishes can provide a smooth, even coat, but ensure you do so in a well-ventilated area.
- What type of protective topcoat should I use? A polyurethane topcoat is great for durability and can be found in both water-based and oil-based options.
Applying Stains and Paints
This article explores the essential steps and techniques for building a wooden wardrobe, including materials, tools, and tips to ensure a successful project from start to finish.
Selecting the appropriate type of wood is crucial for durability and aesthetics. This section discusses the best wood options for wardrobe building and their unique characteristics.
A well-equipped workshop is key to a successful woodworking project. Here, we outline the essential tools needed for building a wooden wardrobe, including hand tools and power tools.
Hand tools play a significant role in woodworking. This subsection covers the must-have hand tools for wardrobe construction and their specific uses.
Accurate measurements are critical in woodworking. This section highlights the measuring and marking tools necessary for precision in your wardrobe project.
Cutting tools are essential for shaping wood. Here, we discuss various cutting tools to use for wardrobe construction and their applications.
Power tools can significantly enhance efficiency. This part details the essential power tools for building a wooden wardrobe and their benefits.
A well-thought-out design is vital for functionality and style. This section guides you through the design process, including layout, dimensions, and features to consider.
Creating a sketch can help visualize the final product. This subsection explains how to effectively sketch your wardrobe design for better planning.
Finishes and hardware can elevate your wardrobe’s appearance. This part discusses options for stains, paints, and hardware to complement your design.
Following a clear construction process is essential for success. This section outlines the step-by-step procedure to build your wooden wardrobe from start to finish.
Preparation is key to a smooth build. This subsection covers the steps for cutting, sanding, and treating wood before assembly.
Assembly requires careful attention to detail. Here, we explain how to assemble the wardrobe components effectively for a sturdy final product.
The finishing touches can make a significant difference. This section discusses the final steps, including sanding, finishing, and installing hardware to complete your wardrobe.
When it comes to to your wooden wardrobe, attention to detail is paramount. The right finish not only enhances the wood's natural beauty but also provides protection against wear and tear. Before diving into the application process, ensure that you have selected a stain or paint that complements your design. There are various types of stains available, including oil-based, water-based, and gel stains, each offering unique characteristics and finishes.
To begin the application, ensure that your wood surface is clean and smooth. Sand the surface thoroughly with fine-grit sandpaper, and wipe away any dust with a damp cloth. This step is crucial as it allows the stain or paint to adhere better, resulting in a more even finish. Once the surface is prepped, you can choose to apply a stain or a paint based on your desired look:
- Stains: Ideal for showcasing the natural grain of the wood. Apply with a brush or cloth, and remember to wipe off the excess after a few minutes to achieve the desired depth of color.
- Paint: Provides a solid color finish. Use a high-quality brush or roller for application, and consider using a primer for better coverage and adhesion.
After applying your chosen finish, allow it to dry completely before adding additional coats or moving on to the next steps. Depending on the product, you may need to sand lightly between coats to achieve a smooth surface. Once you've achieved your desired finish, consider sealing your wardrobe with a clear topcoat for added protection. This final layer will safeguard against scratches and stains, ensuring your wardrobe remains beautiful for years to come.
To ensure longevity, regular maintenance is essential. This section provides tips on how to care for and maintain your wooden wardrobe over time.
Regular cleaning helps preserve the wood's finish. This subsection offers effective methods for cleaning and dusting your wooden wardrobe.
Preventing damage is key to maintaining your wardrobe. This part discusses common issues and how to protect your wooden wardrobe from wear and tear.
Here are some common questions regarding woodworking and building a wooden wardrobe:
- What type of wood is best for a wardrobe? - Hardwoods like oak, maple, and cherry are excellent choices for durability and aesthetics.
- How long does it take to build a wooden wardrobe? - Depending on your skill level and the complexity of the design, it can take anywhere from a few days to a couple of weeks.
- Do I need special tools to build a wardrobe? - While basic hand tools will suffice, having power tools can significantly speed up the process and improve precision.
Installing Doors and Drawers
When it comes to in your wooden wardrobe, precision and attention to detail are paramount. These components not only enhance the functionality of your wardrobe but also contribute significantly to its overall aesthetic. Imagine opening your beautifully crafted wardrobe to find that every door swings smoothly and each drawer glides effortlessly. This is the kind of satisfaction that comes from proper installation.
To start, ensure that you have all your materials ready. You will need hinges for the doors, drawer slides for the drawers, and a few basic tools like a screwdriver, a level, and a measuring tape. Before you dive in, take a moment to measure the height and width of your wardrobe openings. This will ensure that your doors and drawers fit perfectly without any awkward gaps.
When installing the doors, begin by attaching the hinges to the doors first. Make sure to align them correctly; a common mistake is to misplace the hinges, which can lead to doors that don't close properly. Once the hinges are secured, hold the door in place against the wardrobe frame and mark the spots where the hinges will attach to the frame. Use a level to ensure that the door is straight before fastening it in place.
For the drawers, the installation process is slightly different. Start by assembling the drawer boxes if you haven't done so already. Once assembled, attach the drawer slides to the sides of the drawer boxes. It's crucial to follow the manufacturer's instructions here, as different slides may have different installation methods. After the slides are secured, you can then attach the corresponding parts of the slides to the wardrobe interior. This is where having a level comes in handy again—make sure everything is even to prevent any wobbling.
Here’s a quick checklist to keep in mind during installation:
- Ensure all parts are aligned correctly.
- Double-check measurements before making any cuts or attachments.
- Use a level frequently to maintain straightness.
- Test the doors and drawers after installation to ensure they operate smoothly.
Once everything is installed, take a step back and admire your work. You’ve transformed raw wood into a functional piece of furniture that not only serves a purpose but also adds character to your space. Remember, the key to a successful installation lies in patience and precision. Rushing through this process can lead to misalignments and functionality issues down the road.
Q: How do I ensure my doors and drawers are aligned properly?
A: Use a level to check the alignment of doors and drawers frequently during installation. Adjust the hinges or slides as needed to achieve a perfect fit.
Q: What type of hinges and slides should I use?
A: The choice of hinges and slides depends on the weight and design of your doors and drawers. For heavier doors, consider using concealed hinges, while for drawers, full-extension slides provide better access.
Q: Can I install doors and drawers without help?
A: Yes, it is possible to install them alone, but having a second pair of hands can make the process easier, especially when holding doors in place while securing hinges.
Maintenance Tips for Wooden Wardrobes
To ensure the longevity and beauty of your wooden wardrobe, regular maintenance is essential. Just like a classic car needs regular oil changes and tune-ups to keep running smoothly, your wardrobe requires some TLC too. The key to maintaining your wardrobe lies in understanding the materials and finishes used, as well as adopting a few simple habits that can prevent wear and tear over time.
One of the first steps in maintaining your wooden wardrobe is cleaning and dusting. Dust can accumulate quickly, and if left unchecked, it can scratch the surface of the wood. Use a soft, lint-free cloth to gently wipe down surfaces. For more stubborn dirt, a slightly damp cloth can be effective. However, avoid using excessive water as it can warp the wood. A good rule of thumb is to clean your wardrobe every few weeks, especially if it’s in a high-traffic area.
In addition to regular cleaning, it’s crucial to be proactive in preventing damage. Wood is susceptible to various environmental factors, including humidity and direct sunlight. To protect your wardrobe, consider placing it in a well-ventilated area where it won’t be exposed to extreme temperatures or moisture. Using a dehumidifier in damp climates can also help maintain an optimal environment for your wooden furniture. Furthermore, you might want to invest in furniture coasters or felt pads to place under heavy items, preventing scratches and dents.
Another important aspect of maintenance is periodic inspections. Check for signs of wear, such as loose hinges, squeaky doors, or uneven drawers. Addressing these issues early on can save you from larger repairs down the line. Tightening screws and applying lubricant to moving parts can keep your wardrobe functioning smoothly. It's like giving your wardrobe a little check-up every now and then!
Finally, consider applying a fresh coat of finish or polish every year or so. This not only enhances the wood's natural beauty but also adds a layer of protection against scratches and stains. Choose a finish that complements the wood type and color of your wardrobe. When applying finishes, always follow the manufacturer's instructions for the best results. Remember, a little maintenance goes a long way in preserving the charm and functionality of your wooden wardrobe.
- How often should I clean my wooden wardrobe? It's advisable to clean your wardrobe every few weeks to prevent dust accumulation.
- What type of polish should I use? Use a polish that is suitable for the specific type of wood your wardrobe is made from to enhance its natural beauty.
- Can I use water to clean my wardrobe? Use a damp cloth sparingly. Excessive water can warp the wood, so it's best to avoid soaking the surface.
- How can I prevent scratches on my wardrobe? Use coasters or felt pads under heavy items to prevent scratches and dents on the surface.
Cleaning and Dusting
Regular cleaning and dusting of your wooden wardrobe is not just about aesthetics; it's essential for maintaining its beauty and longevity. Over time, dust and grime can accumulate, dulling the wood's finish and potentially leading to damage if not addressed. Think of your wardrobe as a cherished piece of art; just like a painting needs care to preserve its vibrancy, your wardrobe deserves the same attention. So, how do you keep it looking its best?
Start with a soft, lint-free cloth. Microfiber cloths are fantastic for this purpose, as they effectively trap dust without scratching the surface. When dusting, it's best to work from the top down. This way, any dust that falls will be cleaned up as you move lower. Make sure to pay special attention to corners and crevices where dust tends to accumulate. You might be surprised at how much dust can hide in those little nooks!
For deeper cleaning, you can use a damp cloth. Just remember to wring it out thoroughly; excess moisture can damage the wood. A solution of mild soap and water can also be effective for stubborn spots. After wiping down the surface, follow up with a dry cloth to ensure no moisture lingers. This is crucial because water can warp the wood or lead to mold if it seeps into joints.
Additionally, consider using a wood polish or conditioner periodically. This not only helps to enhance the wood's natural beauty but also provides a protective layer against dust and moisture. When applying polish, always follow the manufacturer's instructions to avoid any mishaps.
Lastly, don't forget about the interior of your wardrobe! It's easy to overlook the inside, but dust can accumulate there too. A quick wipe down with a dry cloth can keep it fresh. If you store clothing in your wardrobe, consider using breathable garment bags to protect your items from dust while also allowing airflow.
In summary, a consistent cleaning routine will keep your wooden wardrobe looking stunning and extend its lifespan. Think of it as a small investment of time that pays off in the long run. After all, a well-maintained wardrobe enhances not only your space but also your daily life.
- How often should I clean my wooden wardrobe? It's best to dust your wardrobe weekly and perform a deeper clean every month.
- Can I use water to clean my wooden wardrobe? Yes, but ensure to use a damp cloth rather than soaking it, as excessive moisture can damage the wood.
- What type of polish should I use? Look for a polish specifically designed for wood, preferably one that is non-toxic and safe for indoor use.
- How can I prevent dust from accumulating in my wardrobe? Regular cleaning and using breathable garment bags for clothing can help minimize dust buildup.
Preventing Damage
When it comes to maintaining the beauty and functionality of your wooden wardrobe, is paramount. Just like a well-tended garden flourishes, your wardrobe will thrive with a bit of care and attention. Here are some key strategies to keep your wooden wardrobe looking pristine:
First and foremost, avoid direct sunlight. Wood is a natural material that can fade, warp, or crack when exposed to harsh sunlight for extended periods. If possible, position your wardrobe away from windows or use curtains to block out direct sunlight. Think of it as giving your wardrobe a cozy, shaded spot to rest, away from the harsh rays that can cause deterioration over time.
Next, consider the humidity levels in your home. Wood is sensitive to changes in humidity, which can lead to expansion and contraction. Ideally, you want to maintain a consistent humidity level between 40-60%. Using a dehumidifier or humidifier can help regulate these levels, ensuring your wardrobe remains stable and intact. Imagine your wardrobe as a delicate flower that needs just the right amount of moisture to bloom beautifully.
Another vital aspect is to regularly check for scratches and dents. These imperfections can accumulate over time, especially if you’re frequently opening and closing doors or drawers. If you notice any damage, address it promptly to prevent further issues. A simple wood filler can work wonders for small scratches, while a touch of stain can help blend the repair into the surrounding area. It’s like giving your wardrobe a little spa treatment to keep it looking its best!
Additionally, be mindful of heavy items stored within the wardrobe. Overloading shelves can lead to sagging or even breaking. Ensure that the weight is evenly distributed and avoid placing excessively heavy objects on top. It’s a bit like balancing a scale; too much weight on one side can tip the whole thing over.
Lastly, cleaning your wardrobe regularly is essential. Dust and grime can accumulate and dull the finish over time. Use a soft, damp cloth to wipe down surfaces, and avoid harsh chemicals that can strip the wood of its natural oils. Think of it as giving your wardrobe a gentle wash, preserving its shine and elegance.
In summary, by following these preventive measures, you can ensure that your wooden wardrobe remains a beautiful and functional part of your home for many years to come. Remember, a little effort goes a long way in preserving the charm and integrity of your cherished furniture.
- How often should I clean my wooden wardrobe? It's best to clean your wardrobe every few months to prevent dust buildup and maintain its finish.
- Can I use any type of cleaner on my wooden wardrobe? No, avoid harsh chemicals. Use a mild soap solution or a cleaner specifically designed for wood.
- What should I do if my wardrobe gets scratched? Use a wood filler for small scratches and touch up with stain or polish to blend it into the surrounding area.
- Is it okay to place a humidifier near my wardrobe? Yes, maintaining proper humidity levels can help prevent wood from cracking or warping.
Frequently Asked Questions
- What type of wood is best for building a wardrobe?
Choosing the right wood is crucial for both durability and aesthetics. Hardwoods like oak, maple, or cherry are popular choices due to their strength and beautiful grain patterns. Softwoods like pine can also be used, especially if you're looking for a budget-friendly option, but they may not be as durable in the long run.
- What essential tools do I need for woodworking?
To build a wooden wardrobe, you'll need a mix of hand tools and power tools. Essential hand tools include a saw, chisel, hammer, and measuring tape. For power tools, a circular saw, drill, and sander are highly recommended. Having the right tools will make your project much easier and more enjoyable!
- Can I design my wardrobe myself?
Absolutely! Designing your wardrobe can be a fun and creative process. Start by sketching your ideas on paper, considering the dimensions and features you want. Think about how you’ll use the wardrobe and what will fit your space best. Don’t hesitate to let your imagination run wild!
- How do I prepare the wood before assembly?
Preparation is key! You should start by cutting the wood to the required dimensions, then sanding it to ensure a smooth finish. Treating the wood with a sealant can also help protect it from moisture and damage. Taking the time to prepare your materials will pay off in the final product!
- What are the finishing touches I should consider?
Finishing touches can truly elevate your wardrobe. Applying stains or paints can enhance the wood's natural beauty, while selecting the right hardware can add a stylish flair. Don’t forget to install doors and drawers properly to ensure they function well and look great!
- How do I maintain my wooden wardrobe?
Regular maintenance is essential for longevity. Cleaning and dusting your wardrobe with a soft cloth can help preserve the finish. Additionally, be mindful of preventing damage by avoiding excessive moisture and direct sunlight. A little care goes a long way in keeping your wardrobe looking new!


