Designing DIY Throw Pillow Covers for Your Home
Are you ready to transform your living space into a cozy haven with some stylish throw pillows? Designing DIY throw pillow covers is not just a fun and creative outlet; it's also a fantastic way to add a personal touch to your home decor. Imagine walking into your living room and being greeted by vibrant colors and patterns that reflect your unique personality! Whether you’re a seasoned crafter or just starting out, this article will guide you through the process of creating beautiful pillow covers that are sure to impress.
Throw pillows are like the sprinkles on a cupcake—they add that extra flair that can make all the difference. With just a little bit of fabric, some basic sewing skills, and a sprinkle of creativity, you can easily create stunning pillow covers that will elevate the aesthetic of any room. From choosing the right fabric to adding personal touches, we will cover everything you need to know to get started on this exciting DIY project.
So, grab your sewing machine, put on your favorite playlist, and let’s dive into the world of DIY throw pillow covers! You’ll not only learn practical skills but also unleash your inner designer. Are you ready to make your home feel more inviting and stylish? Let’s get started!
Selecting the appropriate fabric is crucial for the durability and aesthetic appeal of your throw pillow covers. Consider factors like texture, color, and pattern to match your home decor. Fabrics such as cotton, linen, and velvet can bring different vibes to your space. For instance, cotton is breathable and easy to clean, while velvet adds a touch of luxury and warmth. Think about how you want your pillows to feel and look in your space—this is where your design journey begins!
Before starting your DIY project, gather all necessary tools and materials. Here’s a quick list of what you’ll need:
- Sewing machine
- Fabric scissors
- Measuring tape
- Fabric of your choice
- Thread that matches your fabric
- Iron and ironing board
- Optional: embellishments like buttons, embroidery thread, or fabric paint
Having everything on hand will ensure a smooth crafting experience, allowing you to focus on your creative ideas without interruptions.
Accurate measurements are vital for a professional-looking pillow cover. Start by measuring the dimensions of your pillow insert. A common size is 18x18 inches, but make sure to check your specific pillow dimensions. Once you have your measurements, add an extra inch for seam allowance on all sides. This will ensure that your pillow fits snugly inside the cover without being too tight.
Different pillow sizes require different fabric dimensions. Here’s a quick reference for standard pillow sizes:
| Pillow Size | Fabric Dimensions (with seam allowance) |
|---|---|
| 16x16 inches | 17x17 inches |
| 18x18 inches | 19x19 inches |
| 20x20 inches | 21x21 inches |
Make sure to adjust your measurements accordingly for a perfect fit!
Explore various cutting techniques that help achieve clean edges and reduce fraying. Using sharp fabric scissors will make a significant difference in the quality of your cuts. Consider using a rotary cutter for larger pieces of fabric, as it can provide more precision. Remember, precision in the cutting process is key to a polished finish!
Familiarize yourself with basic sewing techniques needed for constructing your pillow covers. Start with simple straight stitches, and ensure you maintain a consistent seam allowance. If you're new to sewing, practice on scrap fabric before working on your pillow covers. It’s all about building confidence and getting comfortable with your sewing machine!
Personalizing your pillow covers can make them truly unique. Discover various embellishment techniques, such as embroidery, fabric paint, and appliqué that can enhance your design. Imagine adding your initials or a fun quote to your pillow cover—what a conversation starter that would be!
Understanding color theory and pattern coordination can elevate your pillow cover design. Consider the existing colors in your decor and choose fabrics that complement them. For instance, if your living room features neutral tones, you might want to add a pop of color with a bright patterned fabric. Creating harmonious combinations can make your space feel cohesive and well-designed.
Creating seasonal or thematic pillow covers is a fun way to refresh your home decor. Think about designing covers that reflect holidays or seasonal changes—like warm colors for fall or bright florals for spring. This not only keeps your home feeling lively but also allows you to express your creativity throughout the year!
Proper care and maintenance of your DIY pillow covers will ensure their longevity. Always check the care label on your fabric, as different materials require different washing methods. In general, here are some practical tips:
- Wash your pillow covers in cold water to prevent fading.
- Air dry them or tumble dry on low heat to maintain their shape.
- Store them in a cool, dry place to avoid mildew.
With these tips, your beautiful creations will remain fresh and vibrant for years to come!
Q: Can I use any fabric for my pillow covers?
A: While you can use a variety of fabrics, it's best to choose materials that are durable and easy to clean, such as cotton or polyester blends.
Q: How do I ensure my pillow covers fit my pillows perfectly?
A: Measure your pillow insert and add an inch for seam allowance to get the right fabric dimensions.
Q: What if I don’t have a sewing machine?
A: You can sew by hand, but it will take longer. Consider using fabric glue for a no-sew option!

Choosing the Right Fabric
When it comes to designing your own throw pillow covers, is absolutely crucial. Not only does it impact the overall aesthetic of your home, but it also determines the durability and functionality of your pillows. Imagine sinking into your couch, surrounded by vibrant, cozy pillows that not only look good but feel great too! This is where fabric selection plays a pivotal role.
First, consider the texture of the fabric. Are you aiming for something soft and plush, or do you prefer a more structured, crisp finish? Fabrics like velvet or chenille offer a luxurious feel, making them perfect for a cozy atmosphere. On the other hand, cotton or linen can provide a more casual, breathable option, ideal for a relaxed vibe. Think about how you want your space to feel—do you want it to be inviting and warm, or sleek and modern?
Next, color is another significant factor. The color of your pillow covers should ideally complement your existing decor. You can choose bold, vibrant colors to create a striking contrast against neutral furniture, or go for soft pastels for a more serene, understated look. Don't forget to consider the patterns as well! Floral, geometric, or abstract designs can add personality and flair to your space. However, it's essential to ensure that the patterns work harmoniously with your other decor elements.
To help you visualize your options, here's a quick reference table comparing different fabric types:
| Fabric Type | Texture | Durability | Best Use |
|---|---|---|---|
| Cotton | Soft and breathable | Moderate | Casual, everyday use |
| Linen | Textured and crisp | Moderate | Summer and airy looks |
| Velvet | Luxurious and plush | High | Formal and cozy settings |
| Canvas | Sturdy and durable | High | Outdoor or high-traffic areas |
Finally, think about the maintenance of the fabric. Some materials may require special care, like dry cleaning or hand washing, while others can be tossed in the washing machine. If you have kids or pets, opting for stain-resistant fabrics can save you a lot of hassle in the long run. In the end, the right fabric choice will not only enhance the beauty of your throw pillows but also ensure they withstand the test of time.
So, the next time you embark on a DIY pillow cover project, take a moment to consider the fabric. It’s the foundation of your design and can make all the difference in how your finished product looks and feels. Happy crafting!
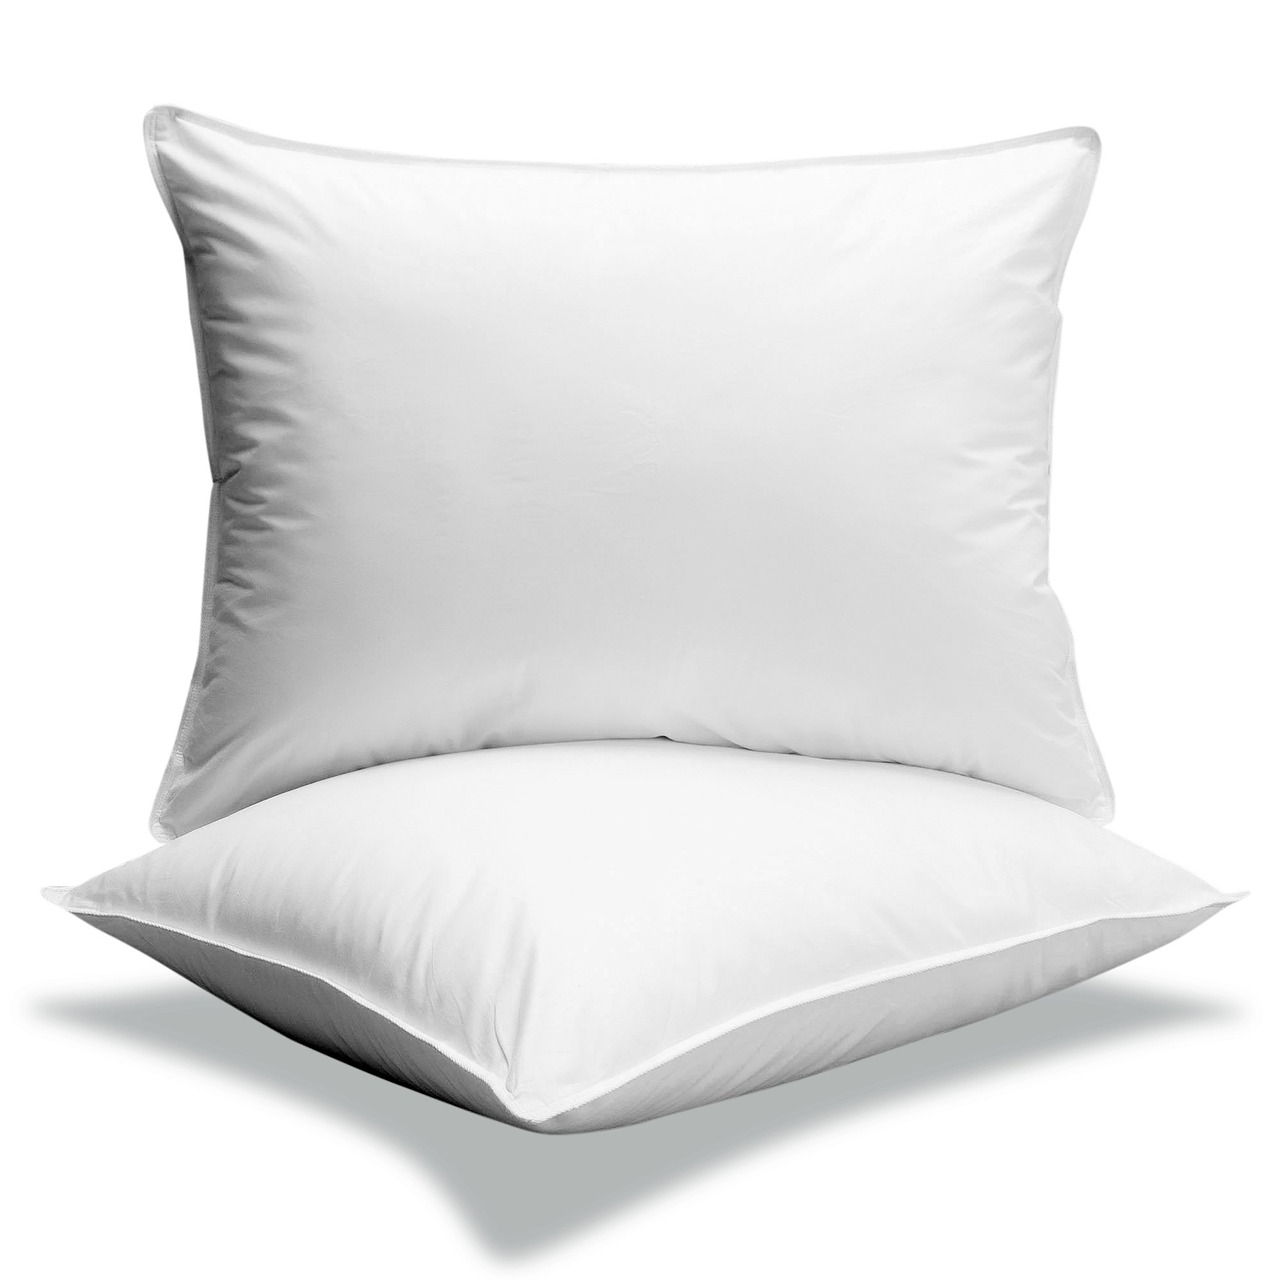
Essential Tools and Materials
Before diving into the exciting world of DIY throw pillow covers, it's essential to gather all the necessary tools and materials. Having everything at your fingertips not only streamlines the process but also enhances your creativity. Think of it like preparing a delicious meal; you wouldn’t want to start cooking without all your ingredients laid out, right? So, let’s explore what you’ll need to embark on this fun crafting journey!
First and foremost, you'll need some fabric. The type of fabric you choose can make or break your pillow cover project. Opt for materials that are not only visually appealing but also durable. Cotton, linen, and canvas are fantastic choices because they are easy to work with and come in a variety of colors and patterns. Before you rush out to buy fabric, consider the overall vibe of your living space. Do you want something bold and vibrant, or are you leaning towards soft and subtle? This decision will guide your fabric selection.
Next up is your sewing machine. If you’re serious about DIY projects, investing in a reliable sewing machine is a must. It doesn’t have to be the fanciest model on the market; just something that gets the job done efficiently. If you don’t have a sewing machine, don’t fret! Hand-sewing is also an option, though it may take a bit longer. Just be prepared to channel your inner seamstress!
In addition to fabric and a sewing machine, you’ll need some basic sewing supplies. Here’s a quick rundown of essential tools:
- Scissors: A good pair of fabric scissors is crucial for clean cuts.
- Measuring tape: Accurate measurements are key to a well-fitted pillow cover.
- Pins: These will hold your fabric in place while you sew.
- Thread: Make sure to choose a color that matches or complements your fabric.
- Iron: Pressing your fabric before and after sewing can make a huge difference in the final look.
Now, let’s not forget about embellishments! If you want to add a personal touch to your pillow covers, consider having some additional materials on hand. This could include:
- Fabric paint: Great for adding unique designs and patterns.
- Embroidery floss: Perfect for stitching names or decorative elements.
- Appliqué fabric: Use this to create interesting shapes and textures.
Lastly, you might want to have a few other items ready, such as a rotary cutter for precise cutting and a cutting mat to protect your surfaces. Having these tools will not only make your project easier but also more enjoyable. Imagine the satisfaction of creating something beautiful from scratch with your own hands!
In conclusion, gathering all the essential tools and materials before starting your DIY throw pillow cover project is a fundamental step that sets the stage for success. With the right fabric, sewing machine, and a few embellishments, you’ll be well on your way to transforming your living space into a cozy haven. So, roll up your sleeves, unleash your creativity, and let the crafting begin!
Q: What type of fabric is best for throw pillow covers?
A: Cotton, linen, and canvas are excellent choices due to their durability and variety of designs.
Q: Can I make pillow covers without a sewing machine?
A: Yes, you can hand-sew your pillow covers, although it may take more time.
Q: How do I choose the right size for my pillow cover?
A: Measure your pillow insert and add seam allowances to determine the fabric dimensions.
Q: What are some easy embellishment techniques?
A: Fabric paint, embroidery, and appliqué are great ways to personalize your pillow covers.

Measuring and Cutting Fabric
When it comes to creating your own throw pillow covers, measuring and cutting fabric accurately is a skill that can make or break your project. Imagine putting in hours of effort, only to find that your pillow cover is too small or, worse, uneven. To avoid this, you need to start with precise measurements. First, grab your pillow form and measure its dimensions. Most standard pillows come in sizes like 16x16 inches, 18x18 inches, or 20x20 inches. But don’t just stop there; consider the desired overlap for your cover. Typically, adding an extra inch or two on each side allows for a snug fit and accommodates seams.
Now that you’ve got your measurements, it’s time to cut the fabric. Use a rotary cutter or sharp fabric scissors for clean edges. A cutting mat can also be a lifesaver, providing a flat surface and protecting your workspace. When laying out your fabric, ensure it’s wrinkle-free. A quick press with an iron can make a world of difference, giving you a smooth surface to work with.
For those who love a little math, you can create a simple table to calculate the fabric needed based on your pillow size:
| Pillow Size (inches) | Fabric Needed (inches) |
|---|---|
| 16 x 16 | 18 x 18 |
| 18 x 18 | 20 x 20 |
| 20 x 20 | 22 x 22 |
After measuring and cutting, it's crucial to check for any fabric flaws. Look for imperfections such as stains or uneven patterns, as these can detract from the overall aesthetic of your pillow cover. If you find any, simply adjust your cutting layout to avoid those areas. Remember, a little attention to detail during this phase can save you a lot of headaches later on!
Once you’ve cut your pieces, it’s advisable to label them if you’re working with multiple covers or complex patterns. This way, you won’t mix them up during assembly. You can use small fabric tags or simply write on a piece of paper and pin it to the fabric. This organization will help you maintain clarity as you move on to the sewing phase.
In summary, the measuring and cutting process is foundational to your DIY throw pillow project. By taking the time to measure accurately, cut precisely, and keep your workspace organized, you’ll set yourself up for success and create beautiful, professional-looking pillow covers that enhance your home decor.

Understanding Pillow Sizes
When it comes to designing your own throw pillow covers, understanding pillow sizes is absolutely essential. You wouldn’t want to create a stunning cover only to find it doesn’t fit the pillow you have at home, right? Just like finding the perfect pair of jeans, the right size can make all the difference! So, let’s dive into the world of pillow sizes and help you get it just right.
Throw pillows typically come in various standard sizes, which can be categorized into two main types: decorative and functional. Decorative pillows are usually smaller and used primarily for aesthetics, while functional pillows are larger and designed for comfort. Here’s a quick overview of the most common pillow sizes:
| Pillow Size | Dimensions (inches) | Common Uses |
|---|---|---|
| 18 x 18 | 18 x 18 | Standard decorative throw pillow |
| 20 x 20 | 20 x 20 | Large decorative pillow, great for layering |
| 16 x 24 | 16 x 24 | Rectangular lumbar pillow for back support |
| 12 x 20 | 12 x 20 | Small lumbar pillow, perfect for accenting |
| 26 x 26 | 26 x 26 | Oversized pillow for a dramatic touch |
Now, you might be wondering how to determine the right size for your throw pillow cover. It’s all about the look you want to achieve and the space you have available. For instance, if you’re aiming for a cozy and inviting atmosphere, a mix of different sizes can add depth and interest to your decor. Think of it like creating a beautiful bouquet of flowers; varying the sizes and shapes can make the arrangement more visually appealing.
When measuring your pillows, keep in mind that the dimensions listed above refer to the pillow itself, not the cover. To ensure a snug fit, add about 1 inch to each dimension for seam allowances. For example, if you have an 18 x 18 pillow, you’ll want to cut your fabric to 19 x 19 inches. This little trick helps to ensure that your pillow cover hugs the pillow perfectly, avoiding any awkward sagging or loose fabric.
In addition to standard sizes, it’s also important to consider the thickness of the pillow. Some pillows are plush and fluffy, while others are flatter and more structured. The thickness can affect how the cover fits and how it looks once assembled. If you’re using a particularly thick pillow, you might want to adjust your cover dimensions slightly to accommodate its fullness.
So, whether you’re going for a chic, minimalist look or a bold, eclectic vibe, understanding pillow sizes is the first step in creating the perfect throw pillow cover. With the right measurements and a bit of creativity, you can transform your living space into a stylish haven that reflects your personal taste!
Cutting Techniques
When it comes to crafting your own throw pillow covers, play a pivotal role in achieving a professional finish. Precision in cutting not only ensures that your fabric pieces fit together seamlessly, but it also helps prevent fraying, which can ruin the aesthetic of your hard work. One of the most effective methods is to use a rotary cutter and a cutting mat. This combination allows for smooth, straight cuts and is particularly useful for cutting multiple layers of fabric at once. Imagine slicing through your fabric like a hot knife through butter—this technique makes that a reality!
Another important aspect is the use of fabric scissors. Invest in a good pair of fabric scissors that are sharp and specifically designed for cutting fabric. Regular scissors can cause the fabric to fray and lead to uneven edges. When cutting, always remember to keep the scissors at a slight angle and use long, smooth strokes to ensure clean edges. You want your cuts to be as straight as the lines on a ruler, so don't rush through this step!
Additionally, if you’re working with patterned fabric, it’s essential to align the patterns before cutting. This step ensures that your designs will match up perfectly when the pillow cover is assembled. You might find it helpful to use pins or fabric weights to hold the fabric in place while cutting. Think of it as setting the stage for a performance; everything needs to be just right for the show to go on without a hitch!
For those who are more visual learners, here’s a quick table summarizing some cutting techniques:
| Technique | Description |
|---|---|
| Rotary Cutter | Ideal for straight cuts, especially on multiple layers. |
| Fabric Scissors | Sharp scissors designed specifically for cutting fabric. |
| Pattern Alignment | Ensures that patterns match when cutting and sewing. |
| Pins/Fabric Weights | Holds fabric in place to prevent shifting during cutting. |
Lastly, don’t forget about safety! Always cut away from your body and keep your fingers clear of the blade. A little caution goes a long way in ensuring that your DIY project is both enjoyable and safe. With these cutting techniques in your arsenal, you’re well on your way to creating stunning throw pillow covers that will elevate your home decor!

Basic Sewing Techniques
When it comes to creating your own throw pillow covers, mastering some is essential. You don’t need to be a professional seamstress to achieve beautiful results; with a little practice and patience, you can turn your ideas into reality. First off, let’s talk about the most fundamental technique: straight stitching. This is the backbone of nearly every sewing project. To sew a straight line, you’ll want to ensure that your fabric is aligned properly and that you maintain a consistent distance from the edge. Using a sewing machine can make this a breeze, but if you’re hand-sewing, a steady hand is key.
Another important aspect to consider is seam allowances. This refers to the space between the edge of the fabric and the line of stitching. A typical seam allowance is about 1/4 to 1/2 inch, depending on the thickness of your fabric and the look you’re going for. It’s crucial to measure this accurately, as it can affect the fit of your pillow cover. If you cut too close to your stitching, you risk the seams unraveling over time. To help visualize this, here’s a simple
| Fabric Type | Recommended Seam Allowance |
|---|---|
| Cotton | 1/4 inch |
| Denim | 1/2 inch |
| Knits | 1/4 inch |
| Home Decor Fabric | 1/2 inch |
Now, let’s not forget about the importance of pressing. After you sew each seam, it’s a good idea to press it flat with an iron. This not only helps set the stitches but also gives your pillow cover a more polished look. If you skip this step, your seams might look puckered or uneven. Remember, a well-pressed seam can elevate your project from amateur to professional!
In addition to straight stitching, you should also familiarize yourself with a few other techniques. For instance, zigzag stitching is excellent for preventing fraying on the edges of your fabric. This is especially useful for fabrics that tend to unravel easily. Another technique worth mastering is the backstitch, which reinforces the beginning and end of your seams, ensuring they hold up over time.
Finally, don’t underestimate the power of finishing techniques. Techniques like serging or using pinking shears can help give your pillow covers a clean edge and prevent fraying. If you’re feeling adventurous, you might even want to try your hand at decorative stitches to add a unique flair to your designs. The key is to practice and experiment; the more you sew, the more comfortable you’ll become with these techniques.
So, whether you’re stitching up a cozy throw pillow for your couch or crafting a vibrant accent for your bedroom, mastering these basic sewing techniques will set you on the path to success. With a little creativity and a lot of practice, you’ll be well on your way to creating stunning DIY throw pillow covers!
- What type of fabric is best for throw pillow covers? Cotton and linen are popular choices due to their durability and ease of cleaning.
- Do I need a sewing machine to make pillow covers? While a sewing machine makes the process faster, you can certainly hand-sew your pillow covers if you prefer.
- How do I wash my DIY pillow covers? Most pillow covers can be machine washed in cold water. Always check the fabric care label for specific instructions.
- Can I use old clothes to make pillow covers? Absolutely! Upcycling old clothing is a fantastic way to create unique pillow covers while being environmentally friendly.

Adding Personal Touches
When it comes to DIY throw pillow covers, the magic truly happens when you start to add your own personal touches. This is where your creativity can shine, transforming a simple fabric cover into a statement piece that reflects your personality and style. Think of your pillow covers as a blank canvas, ready for your artistic flair. Whether you're a seasoned crafter or just dipping your toes into the world of DIY, there are countless ways to make your pillow covers uniquely yours.
One of the most exciting ways to personalize your pillow covers is through embellishments. You might consider embroidery, which allows you to stitch patterns or quotes that resonate with you. Imagine curling up on your couch with a pillow that features a beautiful floral design or a motivational phrase that inspires you every day. If you’re not confident in your embroidery skills, don’t worry! Fabric paint is another fantastic option. It’s easy to use and can produce stunning results. Just grab some fabric paint and a brush, and let your imagination run wild.
Another popular method is appliqué, where you sew pieces of fabric onto your pillow cover to create shapes or designs. This technique can add depth and texture to your pillows, making them eye-catching and inviting. For instance, you could cut out shapes of leaves or stars from contrasting fabrics and sew them onto a solid-colored pillow cover for a striking visual effect. The best part? You don’t have to be an expert sewer to achieve great results; just a bit of patience and creativity will go a long way!
Moreover, don’t forget about the importance of color and pattern coordination. Understanding how colors interact can dramatically enhance your design. For example, if your living room features earthy tones, consider using fabrics in warm colors like rust, mustard, or olive green. You can also mix patterns, but be sure to keep a consistent color palette to maintain harmony. This approach not only elevates your pillow covers but also ties your entire room together, creating a cohesive look that feels intentional and well thought out.
Lastly, consider creating seasonal or thematic designs. Imagine swapping out your pillow covers for the holidays, or even changing them with the seasons. For instance, in the fall, you could use fabrics with rich oranges and browns, adorned with pumpkin motifs. In the spring, lighter fabrics with floral designs can bring a fresh and lively vibe to your space. This not only keeps your decor feeling fresh but also allows you to express your creativity throughout the year.
In conclusion, adding personal touches to your DIY throw pillow covers is not just about aesthetics; it’s about creating pieces that tell your story and enhance your living space. So gather your materials, unleash your creativity, and let your pillows reflect who you are!
- What type of fabric is best for pillow covers? Cotton and linen are popular choices for their durability and ease of cleaning.
- Can I use a sewing machine for this project? Absolutely! A sewing machine can make the process faster and more efficient.
- How do I clean my DIY pillow covers? Most fabric covers can be machine washed on a gentle cycle, but always check the fabric care label.

Color and Pattern Coordination
When it comes to designing your DIY throw pillow covers, can make all the difference between a drab decor and a stunning visual masterpiece. Imagine walking into a room where the pillows not only complement the furniture but also add a splash of personality and warmth. To achieve this, you need to understand the basics of color theory and how different patterns interact with one another.
First, let’s talk about color theory. Colors can evoke emotions and set the mood of a room. For instance, warm colors like reds, oranges, and yellows can create a cozy and inviting atmosphere, while cool colors like blues and greens offer a sense of calm and tranquility. When selecting colors for your pillow covers, consider the existing color palette of your space. A good rule of thumb is to choose a dominant color that matches your decor and then introduce one or two accent colors to create visual interest. This can be achieved by using a color wheel, which helps you identify complementary colors that work well together.
Next, let’s explore patterns. Patterns can add depth and texture to your pillow covers, making them a focal point in your room. However, mixing patterns can be tricky. A successful approach is to mix a variety of patterns while maintaining a cohesive look. For example, you might pair a bold geometric pattern with a softer floral print. To create harmony, ensure that the colors in the patterns share at least one common hue. This way, the designs will look intentional rather than chaotic.
To help you visualize this, consider the following table that outlines different types of patterns and how they can be paired:
| Pattern Type | Suggested Pairing |
|---|---|
| Stripes | Floral |
| Polka Dots | Plaid |
| Geometric | Textured Solid |
| Animal Print | Abstract |
Furthermore, don’t shy away from using textures to enhance your designs. A mix of smooth and rough fabrics can create a tactile experience that draws people in. For example, pairing a soft velvet pillow with a chunky knit one can add a luxurious feel to your space. Remember, it’s all about balance. Too many bold patterns can overwhelm the eye, while too many muted tones can lead to a boring aesthetic.
Lastly, consider the seasonal aspects of your color and pattern choices. You can refresh your home decor by changing your pillow covers with the seasons. For instance, in spring, you might opt for light pastels and floral patterns, while in autumn, rich earth tones and plaid designs could take center stage. This not only keeps your decor feeling fresh but also allows you to express your creativity throughout the year.
In conclusion, mastering color and pattern coordination can elevate your DIY throw pillow covers from simple crafts to stunning decor pieces that reflect your personal style. So, grab your fabric swatches, let your imagination run wild, and create pillow covers that not only look fabulous but also make your home feel inviting and uniquely yours!
- What fabric is best for DIY pillow covers? Cotton and linen are popular choices due to their durability and ease of care.
- How do I wash my DIY pillow covers? Most can be machine washed on a gentle cycle. Always check the fabric care instructions.
- Can I use old clothes to make pillow covers? Absolutely! Upcycling old clothes is a great way to create unique pillow covers.

Seasonal and Thematic Designs
Creating seasonal and thematic throw pillow covers is not just a fun project; it’s a fantastic way to breathe new life into your home decor throughout the year. Imagine transforming your living space with vibrant colors and playful patterns that reflect the changing seasons or upcoming holidays. Whether it’s the cozy hues of autumn, the fresh pastels of spring, or the festive spirit of the winter holidays, your throw pillows can be the perfect canvas for your creativity.
One of the best parts about designing seasonal pillow covers is the opportunity to express your personality and style. You can choose fabrics and designs that resonate with you or that match the mood of the season. For example, during fall, you might opt for rich oranges, deep reds, and earthy browns, using fabrics like burlap or soft cotton to evoke that warm, cozy feeling. In contrast, summer might inspire you to use bright, tropical prints or light, airy fabrics that bring a sense of freshness into your home.
When planning your designs, consider the following themes that can guide your creativity:
- Holidays: Create covers that celebrate specific holidays like Christmas, Halloween, or Thanksgiving. Think about using motifs like snowflakes, pumpkins, or festive ornaments.
- Seasons: Reflect the essence of each season. Spring could feature floral patterns, summer might showcase beach themes, autumn can highlight leaves, and winter can bring in snowflakes.
- Personal Interests: Incorporate your hobbies or interests into your designs. If you love gardening, why not create pillow covers with botanical prints?
To help you get started, here’s a simple table outlining some ideas for seasonal themes and corresponding design elements:
| Season | Design Elements | Color Palette |
|---|---|---|
| Spring | Floral patterns, butterflies, and pastel colors | Pinks, yellows, greens |
| Summer | Beach scenes, tropical prints, and bright colors | Turquoise, coral, sunny yellow |
| Autumn | Leaves, pumpkins, and warm textures | Oranges, reds, browns |
| Winter | Snowflakes, holiday motifs, and cozy patterns | Whites, blues, deep greens |
Once you’ve decided on a theme, gather your materials and let your imagination run wild! Use fabric paint to add unique designs, or try your hand at sewing appliqués for a more textured look. The beauty of DIY is that there are no strict rules—just guidelines to spark your creativity. And remember, these seasonal designs can be easily swapped out, allowing you to refresh your living space as often as you like!
In conclusion, designing seasonal and thematic pillow covers can transform your home into a vibrant reflection of the time of year. So, roll up your sleeves, grab your fabric, and let your creativity flow. Your home will thank you for it!
Q: How do I choose the right fabric for seasonal designs?
A: Consider the season's mood and the intended use of the pillows. For example, lightweight cotton is great for summer, while heavier fabrics like velvet are perfect for winter.
Q: Can I use fabric paint on any type of fabric?
A: Most fabric paints work well on cotton, linen, and canvas. However, always check the label to ensure compatibility with your chosen fabric.
Q: How often should I change my seasonal pillow covers?
A: It’s entirely up to you! Many people change their pillow covers with each season or holiday, while others may prefer to switch them out a few times a year.
Q: What are some easy embellishment techniques for DIY pillow covers?
A: You can try embroidery, fabric appliqué, or even adding buttons and tassels for a fun touch. These techniques can elevate your designs and make them truly one-of-a-kind.

Care and Maintenance
Taking care of your DIY throw pillow covers is essential to ensure they remain vibrant and intact for years to come. Just like any other cherished item in your home, these pillows deserve a little TLC. First and foremost, always check the care label on your fabric before washing. Some fabrics may require special handling, while others can be tossed into the washing machine without a second thought. Generally, it's advisable to wash your pillow covers in cold water on a gentle cycle to prevent any shrinkage or color fading.
When it comes to drying, air drying is often the safest route. This method helps maintain the integrity of the fabric and prevents any potential damage from high heat. If you're in a hurry, using a low-heat setting in the dryer can also work, but be sure to keep an eye on them to avoid any mishaps. Additionally, if your pillow covers feature embellishments like embroidery or appliqué, consider laying them flat to dry, as this will help preserve the design.
Storing your pillow covers properly is another crucial aspect of maintenance. If you switch out your pillows seasonally or just want to keep them tucked away for a while, ensure they are clean and dry before storing them in a cool, dry place. Avoid folding them in a way that could create creases; instead, consider rolling them or placing them flat in a storage bin. This will help maintain their shape and prevent any unwanted wrinkles.
It's also a good idea to spot clean any stains as soon as they occur. For minor spills, dab the area gently with a cloth and a mild detergent mixed with water. Avoid scrubbing, as this can damage the fabric and make the stain worse. If the stain persists, you might need to consult a professional cleaner, especially for delicate fabrics.
In summary, the care and maintenance of your DIY throw pillow covers involve:
- Washing in cold water on a gentle cycle
- Air drying whenever possible
- Storing them properly to maintain shape
- Spot cleaning stains promptly
By following these simple yet effective care tips, you can keep your throw pillow covers looking fresh and beautiful, enhancing your living space for years to come.
Q: Can I machine wash all types of fabric used for pillow covers?
A: Not all fabrics are machine washable. Always check the care label for specific washing instructions to avoid damaging your pillow covers.
Q: How often should I wash my throw pillow covers?
A: It depends on usage. A good rule of thumb is to wash them every 2-3 months, or more frequently if they are exposed to spills or dirt.
Q: What should I do if my pillow covers get wrinkled?
A: You can use a steamer or an iron on a low setting to gently remove wrinkles. Always check the fabric type to avoid heat damage.
Q: Are there any specific products I should use for cleaning?
A: Use mild detergents and avoid bleach or harsh chemicals, as they can fade colors and damage fabrics.
Q: How can I maintain the shape of my pillow covers?
A: Store them flat or rolled, and avoid folding them in a way that could create creases. Regular fluffing can also help maintain their shape.
Frequently Asked Questions
- What type of fabric should I use for my throw pillow covers?
Choosing the right fabric is essential for both durability and aesthetics. Look for materials that are easy to clean and match your home decor. Popular choices include cotton, linen, and polyester blends that offer a balance of comfort and style.
- Do I need special tools to make pillow covers?
While you don't need a lot of fancy tools, having a sewing machine, sharp scissors, and measuring tape will make the process much smoother. A rotary cutter and mat can also be helpful for precise cutting.
- How do I measure for the right pillow cover size?
To measure accurately, start by determining the size of your pillow insert. Then, add an extra inch to each side for seam allowances. This ensures your cover fits snugly without being too tight or loose.
- What are some basic sewing techniques I should know?
Familiarizing yourself with basic techniques like straight stitching, backstitching, and sewing seams will help you create professional-looking covers. Practice on scrap fabric if you're new to sewing!
- Can I personalize my pillow covers?
Absolutely! Personalizing your pillow covers is a fun way to express your style. Consider adding embellishments like embroidery, fabric paint, or appliqué to make each cover unique.
- How can I coordinate colors and patterns effectively?
Understanding color theory is key to creating harmonious designs. Use a color wheel to find complementary colors, and consider mixing patterns that share a common color to maintain balance.
- What are some ideas for seasonal or thematic pillow covers?
Creating seasonal covers can be a delightful project! Think about using fabrics with holiday motifs or seasonal colors, like warm tones for fall or bright pastels for spring, to refresh your decor throughout the year.
- How do I care for my DIY pillow covers?
To keep your pillow covers looking their best, follow care instructions based on the fabric type. Generally, machine washing on a gentle cycle and air drying is a safe bet. Always check for any specific care recommendations!


