Creating DIY Fabric Garlands for Your Nursery
Welcome to the enchanting world of DIY fabric garlands! If you're looking to add a touch of whimsy and charm to your nursery, then you're in the right place. Crafting your own fabric garlands is not just a fun project; it’s a way to personalize your child’s space and create a cozy atmosphere that feels just right for your little one. Imagine the joy of seeing those vibrant colors and playful patterns hanging delicately around the room, transforming the mundane into something magical. In this guide, we will explore the delightful process of creating these garlands, from choosing the right materials to assembling and decorating your nursery with your beautiful creations.
Selecting the perfect fabrics is crucial for your garland's aesthetic and durability. You want materials that not only look great but also stand the test of time. Consider options such as cotton, linen, and felt. Each of these fabrics has its unique qualities:
- Cotton: Soft, breathable, and available in countless patterns, cotton is a classic choice.
- Linen: Known for its durability and natural texture, linen adds a touch of elegance.
- Felt: Easy to work with and available in vibrant colors, felt is perfect for creating fun shapes.
When choosing fabrics, think about the patterns, colors, and textures that complement your nursery's theme. Whether you're going for a soft pastel look or bold, vibrant hues, the right fabric can tie the entire room together beautifully.
Gathering the right tools and materials is essential for a successful DIY project. Here’s a quick rundown of what you’ll need:
- Scissors
- Sewing machine (or needle and thread for hand sewing)
- Fabric glue
- Twine or string for hanging
- Measuring tape
Having these tools at your disposal will make the crafting process smoother and more enjoyable. It’s like having a trusty toolbox filled with everything you need to create your masterpiece!
Accurate measurement and cutting are vital steps in creating your garland. You wouldn’t want your pieces to be uneven or too small, right? Start by measuring the length you want your garland to be. A good rule of thumb is to aim for a length that allows for some draping without being overly long. Once you have your measurement, mark it on the fabric with a fabric marker. Then, carefully cut your fabric into the desired shapes. Precision here will help you achieve a polished and professional look in your project.
Explore different shapes you can create for your garland, such as triangles, circles, or hearts. Each shape adds a unique touch and can be tailored to fit your nursery's decor. For example, triangles can give a festive vibe, while circles might evoke a more playful atmosphere. Don’t hesitate to mix and match shapes for a more dynamic look!
Discover how to effectively mix various patterns and colors in your fabric choices. The key here is to maintain a balance; too many clashing patterns can overwhelm the eye. Aim for a harmonious look by choosing a few main colors and incorporating different patterns that share those hues. This way, your garland will be visually interesting without being chaotic.
Once your fabric pieces are ready, it's time to assemble your garland. You can string your fabric pieces together using twine or string, ensuring they are secure and visually appealing. Consider spacing your pieces evenly to create a uniform look. You might want to add knots or bows between pieces for an extra touch of charm!
Fabric garlands can transform your nursery's ambiance. Think about placing them above cribs, along walls, or even draped over furniture to create a cozy and inviting atmosphere. A well-placed garland can become a focal point in the room, drawing attention and sparking joy.
Consider creating seasonal or themed garlands to keep your nursery fresh and exciting. For instance, you could make pastel garlands for spring and vibrant colors for summer. This way, you can easily update the decor throughout the year, keeping things lively and engaging for both you and your little one.
Proper maintenance ensures your garlands remain beautiful over time. Regularly check for any loose threads or dirt. For cleaning, gently wipe with a damp cloth or hand wash if necessary. When not in use, store them in a cool, dry place to prevent any damage. This way, your DIY creations will continue to look their best in your nursery!
Q: What fabrics are best for nursery garlands?
A: Cotton, linen, and felt are excellent choices due to their durability and variety of patterns.
Q: How do I secure the fabric pieces on the string?
A: You can use fabric glue, sew them, or tie knots to secure the pieces on the string.
Q: Can I use garlands for occasions other than everyday decor?
A: Absolutely! You can create themed garlands for birthdays, holidays, or any special occasions.
Q: How do I clean my fabric garlands?
A: Gently wipe them down with a damp cloth or hand wash if necessary, and store them properly when not in use.
Choosing the Right Fabrics
When it comes to creating beautiful fabric garlands for your nursery, selecting the right fabrics is not just important—it's essential! Think of fabrics as the paint on a canvas; they set the tone for the entire space. You want to choose materials that not only look great but are also durable enough to withstand the test of time, especially in a nursery setting where little hands may tug at them. So, what are the best options to consider? Let's dive in!
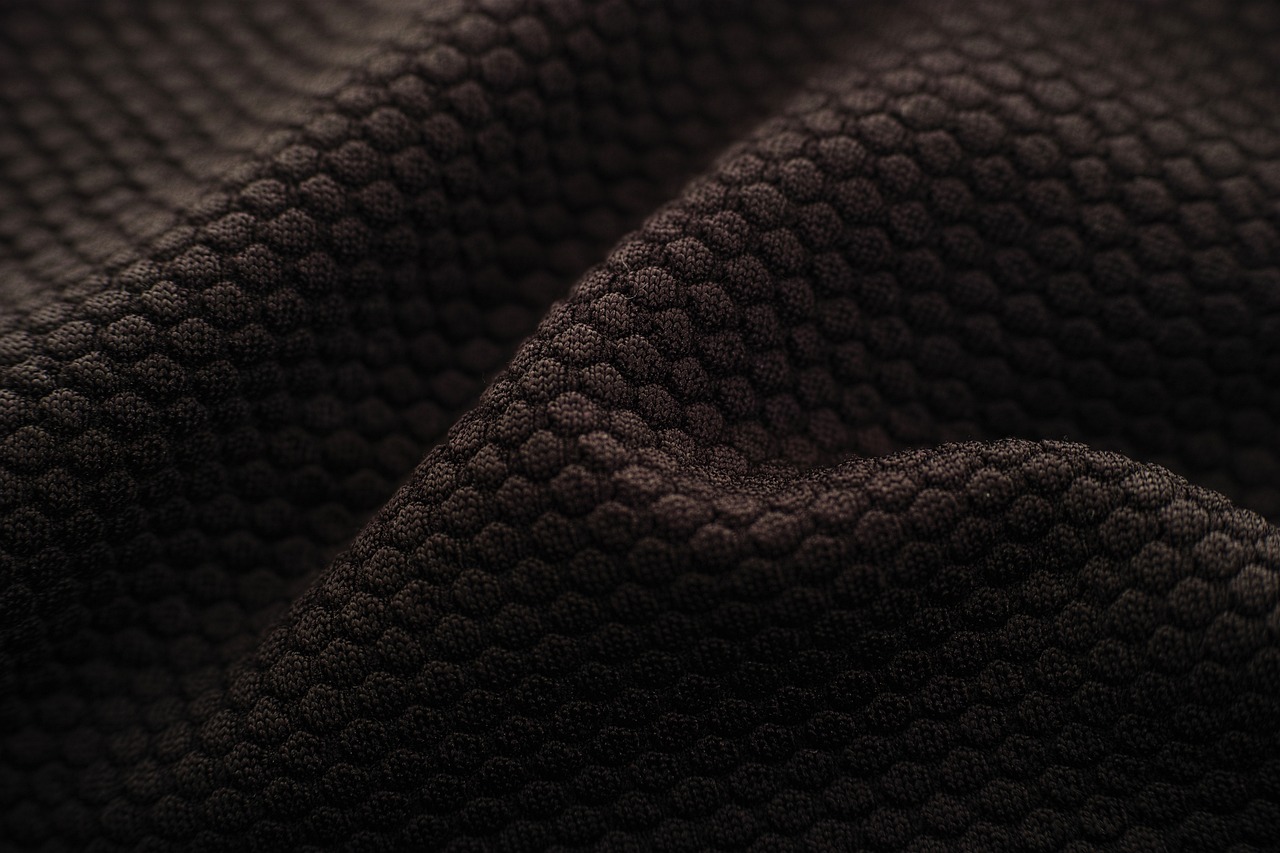
First up, cotton. This fabric is a classic choice for DIY projects, and for good reason. It’s soft, breathable, and comes in an endless array of colors and patterns. Whether you’re going for pastel shades or vibrant prints, cotton has you covered. Plus, it’s easy to work with, making it perfect for beginners. You can find cotton fabric with whimsical prints like animals, stars, or even floral designs that can seamlessly blend into your nursery’s theme.
Next, we have linen. This fabric has a more textured feel and a natural look that can add a touch of elegance to your garland. Linen is a bit more challenging to sew than cotton, but the results can be stunning. It drapes beautifully and can give your garland a sophisticated vibe. If you’re aiming for a more rustic or organic feel in your nursery, linen might just be the perfect fit.
Then there's felt. If you want a fabric that’s easy to cut and does not fray, felt is your go-to option. It’s available in a wide range of colors and is particularly great for creating shapes like hearts or stars, which can add a playful touch to your garland. Felt is also very forgiving if you’re just starting out with sewing, as it doesn’t require hemming. Plus, it’s soft and safe for little ones, making it ideal for nurseries.
When selecting your fabrics, consider the color palette of your nursery. You want your garland to enhance the overall aesthetic rather than clash with it. Think about the existing colors on the walls, bedding, and other decor items. For instance, if your nursery features soft pastel colors, you might want to choose fabrics that complement those tones, creating a harmonious look. On the other hand, if you’re going for a bolder theme, don’t shy away from vibrant colors and patterns that can make your garland pop!
Another factor to keep in mind is the texture of the fabrics. Mixing different textures can add depth and interest to your garland. Imagine combining the softness of cotton with the ruggedness of linen or the plushness of felt. This interplay can create a visually appealing garland that captivates attention. Just remember to keep a balance; too many textures can overwhelm the eye, so aim for a cohesive look.
In summary, choosing the right fabrics for your DIY garland involves considering not just the aesthetics but also the functionality. Here’s a quick recap of fabric options:
| Fabric Type | Pros | Cons |
|---|---|---|
| Cotton | Soft, breathable, versatile | Can wrinkle easily |
| Linen | Elegant, natural look | More challenging to sew |
| Felt | Easy to cut, no fraying | Limited color options |
Ultimately, the fabrics you choose will play a crucial role in the final look and feel of your nursery garland. Take your time to explore various options, and don’t hesitate to mix and match to find the perfect combination that suits your style!
Essential Tools and Materials
When embarking on your DIY fabric garland journey, having the right tools and materials can make all the difference. Think of this as gathering your painter's palette before creating a masterpiece; each item plays a vital role in achieving the desired result. For starters, you'll need a good pair of scissors. A sharp pair ensures clean cuts, which is crucial for a polished look. If you’re feeling adventurous and want to explore intricate designs, consider investing in a rotary cutter and a cutting mat. These tools make it easier to slice through multiple layers of fabric, saving you time and effort.
Next up is your fabric selection. You might be tempted to rush this part, but trust me, the right fabric can elevate your garland from ordinary to extraordinary. Look for materials like cotton, which is both durable and easy to work with, or felt, which adds a delightful texture. If you’re going for a more elegant touch, linen can be a beautiful choice as well. Consider the colors and patterns that will complement your nursery's theme, as these choices will set the tone for your entire space.
Now, let’s talk about the adhesives. Depending on your chosen method of assembly, you might need fabric glue, which is perfect for securing shapes without sewing. If you’re opting for a more traditional approach, a sewing machine will become your best friend. It allows you to stitch your fabric pieces together quickly and securely. Don’t forget to have some thread on hand that matches your fabric colors, as this will help maintain a cohesive look.
As you prepare to assemble your garland, you’ll also need twine or ribbon for stringing your fabric pieces together. These materials come in various colors and textures, so choose one that enhances your overall design. For those who want to add a little extra flair, consider embellishments like pom-poms or beads that can be threaded along with your fabric pieces, adding a playful touch to your creation.
Lastly, let’s not overlook the importance of a measuring tape. Accurate measurements will ensure that your garland hangs perfectly in your nursery. A fabric ruler can also be handy for ensuring straight edges and consistent sizes. With these tools and materials in hand, you’re well on your way to creating a stunning fabric garland that will brighten up your child’s space.
Q: What type of fabric is best for making garlands?
A: Cotton is a great choice due to its durability and ease of handling. Felt is also popular for its texture, while linen can add an elegant touch.
Q: Can I use a sewing machine for my garland?
A: Absolutely! A sewing machine can help you quickly and securely stitch your fabric pieces together, making the process much easier.
Q: How do I clean my fabric garlands?
A: Most fabric garlands can be spot cleaned with a damp cloth. If they need a deeper clean, check the fabric care instructions, as some may be machine washable.
Q: How do I store my garlands when not in use?
A: Store your garlands in a cool, dry place. You can fold them neatly or hang them up to prevent creasing.
Measuring and Cutting Fabric
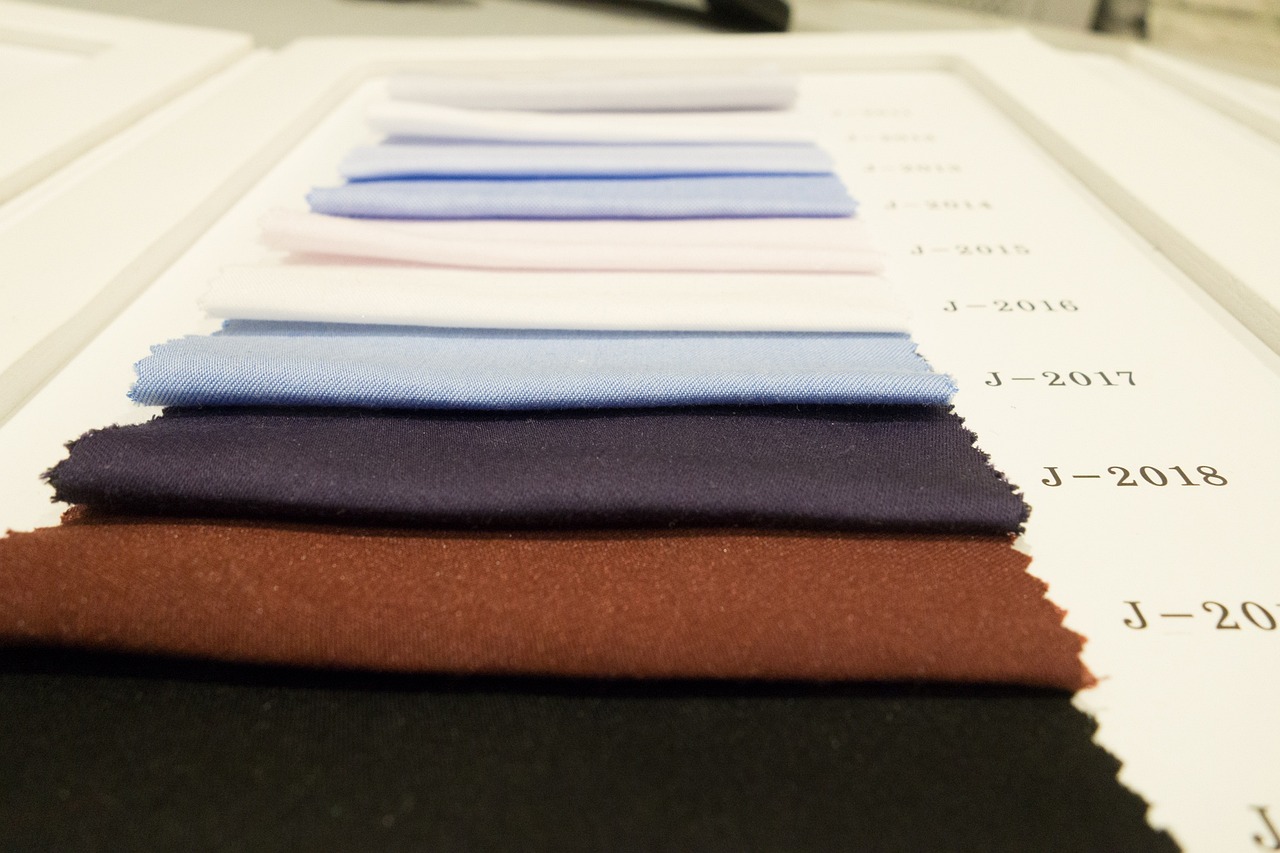
When it comes to creating your DIY fabric garland, the steps of measuring and cutting fabric are not just important; they are absolutely crucial for achieving that polished, professional look you desire. Think of measuring as the foundation of your project—without a solid base, everything else can go awry. So, grab your measuring tape and let’s dive into the details!
First, you'll want to determine the length of your garland. This depends on where you plan to hang it. For instance, if you’re draping it above a crib, a length of around 5 to 7 feet is usually ideal. However, if you're placing it along a wall or across a window, you might want to extend that to 10 feet or more. Once you have your length figured out, measure out the same distance on your fabric and mark it with a fabric marker or chalk. This will be your guide for cutting.
Next, let’s talk about cutting. It’s not just about snipping away at the fabric; it’s about precision. To achieve clean edges and avoid fraying, use sharp fabric scissors. For shapes like triangles or circles, you can create templates from cardboard or sturdy paper. This way, you can trace around them, ensuring uniformity in your pieces. When you're ready to cut, take your time—rushing can lead to uneven edges that detract from the overall look of your garland.
Here’s a quick tip: if you're cutting multiple pieces, stack your fabric layers together and cut through several at once. This not only saves time but also ensures that all your pieces are the same size. Just remember, the more consistent your pieces are, the more visually appealing your garland will be. Once you’ve cut out all your shapes, take a moment to inspect them. Are they all the same size? Are the edges clean? If not, don’t hesitate to trim them a bit more.
To give you an idea of how to organize your cutting process, here’s a simple table:
| Shape | Dimensions | Tip |
|---|---|---|
| Triangle | 5"x7" | Use a ruler for straight lines. |
| Circle | 4" diameter | Use a bowl as a template. |
| Heart | 4"x4" | Fold fabric to create symmetry. |
After cutting, it’s a good idea to lay out your pieces before you start assembling. This allows you to visualize how they will come together and make any last-minute adjustments to colors or shapes. Remember, measuring and cutting fabric isn’t just a task; it’s the first step in bringing your creative vision to life. So, take your time, enjoy the process, and soon enough, you'll have beautiful fabric pieces ready to transform your nursery!
Q1: How do I ensure my fabric pieces are the same size?
A1: Use templates and stack your fabric layers when cutting to maintain uniformity.
Q2: What tools do I need for measuring?
A2: A measuring tape, fabric scissors, and a fabric marker or chalk are essential.
Q3: Can I use any type of fabric for my garland?
A3: While you can use various fabrics, cotton, linen, and felt are popular choices for their durability and ease of use.
Creating Various Shapes
When it comes to crafting your DIY fabric garland, the shapes you choose can dramatically influence the overall aesthetic of your nursery. Imagine walking into a room adorned with playful triangles, whimsical circles, or charming hearts. Each shape tells a story and adds a unique flair that can complement your child's space beautifully. So, how do you decide which shapes to create? Let's dive into the world of fabric shapes and explore some exciting options!
Firstly, **triangles** are a classic choice for garlands. They can evoke a sense of celebration and are incredibly versatile. You can create a series of colorful triangles that flutter in the breeze, reminiscent of flags at a festive event. To make these, simply cut your fabric into equilateral triangles, ensuring they are all the same size for a cohesive look. You can also mix and match different fabrics to create a stunning visual effect.
Next up, we have **circles**. These shapes can bring a sense of softness and playfulness to your nursery. Think of them as the gentle bubbles in a warm bath, inviting and comforting. To make circular shapes, use a round template (like a cup or a lid) to trace onto your fabric, then cut them out. You can layer different sizes of circles for added depth or even create a cascading effect by varying their lengths on the garland.
Then, there are **hearts**, which are perfect for adding a touch of love to your nursery decor. They symbolize affection and warmth, making them ideal for a child’s space. To craft heart shapes, fold your fabric in half and draw half a heart shape along the fold. When you cut it out, you'll have a perfectly symmetrical heart that you can embellish with stitching or fabric paint for extra charm.
But why stop at just these shapes? You can also consider **stars**, **clouds**, or even **animals** to create a theme that resonates with your child's interests. For instance, if your little one loves the night sky, a garland of stars can create a dreamy atmosphere. Alternatively, if you want to inspire a sense of adventure, animal shapes can spark curiosity and imagination.
When creating your garland, keep in mind the size and proportion of each shape relative to the others. A variety of sizes can create visual interest, but it's crucial to maintain balance. For example, if you mix large triangles with tiny circles, the overall effect may feel disjointed. Instead, think of your garland as a harmonious piece of art, where each shape contributes to a unified theme.
In conclusion, the shapes you choose for your fabric garland can significantly impact the vibe of your nursery. Whether you opt for classic triangles, playful circles, or heartfelt shapes, each piece will contribute to a warm and inviting atmosphere. So, gather your fabrics and let your creativity flow as you design a garland that not only beautifies your child's space but also reflects their personality!
Mixing Patterns and Colors
When it comes to for your DIY fabric garland, the goal is to create a visually stunning piece that captures the essence of your nursery's theme. Think of your garland as a canvas where you can paint with fabric! The right combination can evoke feelings of joy and warmth, making the nursery a delightful space for both you and your little one. So, how do you achieve that perfect balance?
First, consider starting with a color palette. Choose a few colors that resonate with the overall theme of the nursery. For instance, if your nursery has a soft pastel theme, you might select shades of mint, blush, and light yellow. On the other hand, a vibrant jungle theme could inspire you to choose deep greens, bright oranges, and sunny yellows. Once you have your colors, you can play with different patterns to add depth and interest.
Next, think about the types of patterns you want to incorporate. Mixing geometric patterns with floral designs can create a delightful contrast. For example, pairing a bold striped fabric with a delicate floral print can add a touch of whimsy. However, it’s crucial to maintain some level of cohesion. You might want to follow a simple rule: one dominant pattern paired with a couple of complementary ones. This way, your garland won’t feel chaotic but rather harmonious.
Another effective technique is to use the 50-30-20 rule from interior design. This rule suggests that you use 50% of a dominant color, 30% of a secondary color, and 20% of an accent color. Applying this to your fabric choices can help you create a balanced look. For example, if your dominant color is a soft blue, you could use a floral pattern with blue accents, a secondary color like yellow for some pieces, and then sprinkle in a few bright red accents for a pop of color. This method not only keeps your garland visually appealing but also ensures that it complements the rest of your nursery decor.
Don’t forget to consider the scale of your patterns. Mixing large-scale prints with smaller ones can create a dynamic look. For instance, a large polka dot fabric can be beautifully paired with a small floral print, adding layers of texture and interest. But remember, too many large patterns can overwhelm the space, so use them sparingly.
Finally, as you mix and match, always keep the emotional tone of the nursery in mind. You want your fabric garland to evoke positive feelings and create a cozy atmosphere. So, whether you choose soft, muted tones or bright, bold colors, ensure they align with the vibe you want to create. After all, a nursery is a sanctuary for both you and your child, and the right garland can add that special touch!
- What fabrics are best for garlands? Cotton, linen, and felt are great options due to their durability and variety of patterns.
- How do I clean my fabric garland? Hand wash with mild detergent and air dry to maintain the fabric's integrity.
- Can I use a sewing machine for my garland? Yes, a sewing machine can speed up the process, especially for larger projects.
- How often should I change my garland? Changing your garland seasonally or for special occasions can keep your nursery feeling fresh and inviting.
Assembling the Garland
Once you've meticulously cut your fabric into the desired shapes, it's time to bring your vision to life by . This step is where your creativity truly shines, as you can experiment with different arrangements and patterns. First, you’ll need to decide on the method of stringing your fabric pieces together. A popular choice is using twine or ribbon, which adds a rustic charm to your garland. You can also opt for fishing line if you prefer a more invisible look, making the fabric shapes appear as if they are floating in the air.
To start assembling, lay out your fabric pieces in the order you want them on the twine or ribbon. This is a crucial step because once you start attaching them, it can be challenging to rearrange them without disrupting the entire garland. A good rule of thumb is to alternate colors and patterns to create a visually appealing flow. For instance, if you have a mix of floral and geometric patterns, try placing them in a sequence that balances the two. You might find that a triangle, circle, triangle, circle pattern works beautifully, or perhaps a more random arrangement suits your style better.
Next, you’ll need to secure each piece onto the twine. There are a few methods to do this:
- Sewing: If you have a sewing machine, this is a quick and effective way to attach your fabric shapes. Simply sew along the top edge of each piece, leaving enough space between them to allow for some movement.
- Fabric Glue: For a no-sew option, fabric glue works wonders. Apply a line of glue along the top edge of each fabric piece and press it onto the twine. Be sure to hold it in place for a few seconds to ensure it adheres properly.
- Safety Pins: If you want a temporary solution, using safety pins can be a fun way to attach your fabric pieces. This method allows for easy adjustments if you change your mind about the layout later on.
Once all your pieces are secured, give your garland a gentle shake to see if any adjustments are needed. This is the moment to ensure everything hangs evenly and looks just right. If you find any pieces that are too close together or unevenly spaced, don’t hesitate to make those adjustments now.
Finally, once you’re satisfied with the arrangement, it’s time to hang your beautiful DIY garland! Choose a location that will showcase your hard work, like above a crib, across a wall, or even draped along a shelf. Remember, the goal is to create a cozy and inviting atmosphere for your nursery, and your garland will undoubtedly add that special touch!
1. How do I choose the right fabric for my garland?
Choosing the right fabric depends on the overall theme of your nursery. Cotton is a great choice for its durability and variety of patterns, while felt offers a soft texture. Consider mixing different fabrics for added interest!
2. Can I wash my fabric garland?
Yes, you can wash your fabric garland! However, it's best to check the care instructions for each fabric type. If possible, hand wash gently and air dry to maintain the integrity of your designs.
3. How long should my garland be?
The length of your garland should be determined by where you plan to hang it. Measure the space before you start cutting your fabric to ensure you have enough length. A good rule of thumb is to allow for some extra length to create a nice drape.

Decorating Your Nursery with Garlands
When it comes to decorating your nursery, fabric garlands are like the sprinkles on a cupcake—they add that perfect finishing touch that makes everything feel complete! These charming decorations not only enhance the aesthetics of the space but also create a warm and inviting atmosphere for your little one. Imagine walking into a nursery adorned with colorful garlands swaying gently in the breeze, instantly lifting your spirits and making the room feel more alive. So, where should you hang these delightful creations? Here are some popular ideas to inspire your decorating journey:
- Above the Crib: This is a classic spot for garlands. Hanging them above the crib not only draws the eye upwards, making the space feel larger, but also adds a whimsical touch to your baby's sleeping area.
- Along the Walls: Use garlands to frame windows or doors, or even as a border along the top of the walls. This can create a cozy nook that feels both playful and serene.
- On Shelves: If you have open shelving in the nursery, draping a garland across the front can add a pop of color and texture, making the shelves feel more curated and inviting.
- In Corners: Consider using garlands to fill empty corners of the room. This can be particularly effective if you have a reading nook or a cozy chair for late-night feedings.
Another fantastic idea is to create a focal point by hanging a larger garland as a statement piece. For example, you can drape a beautiful fabric garland over a large piece of art or a mirror, drawing attention to that area and enhancing the overall design of the nursery. Not only will this make the space more visually appealing, but it will also create a sense of cohesion, tying different elements of the room together.
Don't forget about the lighting! Consider stringing your garland near a light source, such as a lamp or fairy lights. This can create a magical glow during the evening hours, casting soft shadows and making the nursery feel enchanting. Plus, it’s a great way to add some extra character and charm to the room.
Ultimately, the key to decorating your nursery with garlands is to let your creativity shine! Mix and match different shapes, colors, and patterns to reflect your personal style and the personality of your little one. Remember, this is a space where memories will be made, so make it as unique and special as your child!
| Question | Answer |
|---|---|
| How do I hang fabric garlands safely? | Use removable adhesive hooks or tacks to avoid damaging walls. Ensure they are securely fastened to prevent any accidents. |
| Can I wash my fabric garlands? | Yes! Most fabric garlands can be spot cleaned or machine washed on a gentle cycle, depending on the materials used. |
| What types of fabrics are best for garlands? | Cotton, linen, and felt are great choices as they come in various colors and patterns, are durable, and are easy to work with. |
| How often should I update my nursery decor? | Consider updating your decor seasonally or for special occasions to keep the nursery feeling fresh and exciting! |
Seasonal and Themed Garlands
Creating for your nursery is a fantastic way to keep the space feeling fresh and exciting, while also celebrating the different times of the year. Imagine walking into a room that evolves with the seasons, where each garland tells a story of celebration and joy. Whether it's the vibrant colors of autumn leaves or the soft pastels of spring flowers, your garlands can reflect the beauty of nature and festivities.
One of the best aspects of crafting these garlands is that they allow for personal expression. You can tailor your designs to fit various holidays or seasons, creating a cozy atmosphere that feels unique to your family. For instance, during the fall, you might opt for garlands made of orange, brown, and gold fabrics, shaped like leaves or pumpkins. In contrast, winter could inspire you to use whites and blues, perhaps incorporating snowflakes or stars.
Here are some ideas to inspire your seasonal garland creations:
- Spring: Pastel colors with floral patterns, featuring shapes like flowers and butterflies.
- Summer: Bright, vibrant colors with beach themes, using shapes like suns, waves, and flip-flops.
- Autumn: Warm tones with leaf and pumpkin shapes, celebrating harvest time.
- Winter: Cool colors with snowflakes, stars, and holiday motifs, perfect for the festive season.
In addition to seasonal themes, you can also create garlands that reflect specific interests or milestones. For example, if your child loves animals, consider crafting a garland featuring their favorite creatures. Or perhaps you want to celebrate their birthday with a garland that highlights their favorite colors and shapes, making their special day even more memorable.
To keep things even more engaging, think about switching out the garland decorations as the seasons change. This not only keeps your nursery looking fresh but also gives your little one something new to enjoy and explore. It's a simple yet effective way to introduce them to the concept of seasons and the beauty that each one brings.
As you embark on this creative journey, remember that the key is to have fun. Involve your children in the crafting process, letting them choose colors and shapes that resonate with them. This not only makes the project more enjoyable but also helps your child develop their own sense of style and creativity.
In summary, seasonal and themed garlands are more than just decorative items; they are a way to bring warmth, joy, and a touch of magic to your nursery. So gather your materials, unleash your creativity, and watch as your nursery transforms into a delightful space that reflects the changing seasons and the love of your family.
Q: How often should I change my seasonal garlands?
A: It's entirely up to you! Many people like to change their garlands with each season, while others may switch them out for holidays or special occasions.
Q: Can I use any type of fabric for my garlands?
A: While you can technically use any fabric, it's best to choose materials that are durable and easy to work with, like cotton or felt, especially if you want your garlands to last.
Q: How do I store my garlands when not in use?
A: Store your garlands in a cool, dry place, away from direct sunlight. Using a box or a fabric bag can help protect them from dust and damage.
Maintaining Your Fabric Garlands
Once you've poured your heart and soul into creating those stunning fabric garlands, the last thing you want is for them to lose their charm over time. Just like any beloved decor piece, is essential to keep them looking fresh and vibrant. First and foremost, consider the environment in which your garland resides. If your nursery gets a lot of sunlight, be aware that prolonged exposure can lead to fading. To combat this, try to hang your garland in a spot that receives indirect light, or rotate its position occasionally to distribute the exposure evenly.
When it comes to cleaning, most fabric garlands can be spot cleaned with a damp cloth and mild detergent. However, if your garland is particularly dirty or has accumulated dust, you might want to give it a more thorough wash. Before diving in, check the fabric care labels; some materials, like felt, may require special handling. For machine-washable fabrics, you can toss them in a laundry bag and wash them on a gentle cycle. After washing, air-dry your garland to prevent any shrinkage or distortion of shapes.
Storage is another crucial factor in maintaining the integrity of your garlands. If you plan to take them down for any reason—perhaps to switch to a seasonal theme—make sure to store them properly. Instead of cramming them into a box, which can lead to creases and wrinkles, consider hanging them or laying them flat in a container. This way, they’ll maintain their shape and remain ready for display when you want to bring them back out.
In addition to these care tips, consider giving your garlands a little refresh every now and then. You can easily switch out a few pieces or add new shapes to keep things exciting. This not only breathes new life into your decor but also allows you to adapt your nursery's look as your child's personality and preferences evolve. Remember, fabric garlands are not just decor; they are a canvas for your creativity. So, embrace the opportunity to maintain and reinvent them!
- How often should I clean my fabric garlands? It’s best to clean them every few months or as needed, depending on dust accumulation and exposure to sunlight.
- Can I use fabric softener when washing my garlands? It’s advisable to avoid fabric softeners, as they can leave a residue that affects the fabric's texture.
- Are all fabrics machine washable? No, always check the care instructions for each fabric type before washing. Some may require hand washing or spot cleaning only.
- What’s the best way to store fabric garlands? Store them in a cool, dry place, hanging them or laying them flat to avoid creasing.
Frequently Asked Questions
- What fabrics are best for DIY fabric garlands?
When choosing fabrics for your garland, consider materials like cotton, linen, and felt. These fabrics are not only durable but also come in a variety of patterns and colors that can beautifully complement your nursery's theme. Opt for breathable materials, especially if your nursery is small, to keep the atmosphere light and airy.
- What tools do I need to make a fabric garland?
To create your fabric garland, you'll need a few essential tools: scissors, a sewing machine (or fabric glue if you prefer no-sew options), twine or string for hanging, and some measuring tape to ensure accuracy. Having these items ready will make your crafting experience smoother and more enjoyable!
- How do I measure and cut fabric for my garland?
Measuring and cutting fabric accurately is key to achieving a polished look. Use a measuring tape to determine the lengths you need for each piece, and mark them lightly with a fabric pencil before cutting. For shapes, consider using templates to ensure consistency. This will help you create a professional-looking garland that’s sure to impress!
- Can I mix different patterns and colors in my garland?
Absolutely! Mixing patterns and colors can add visual interest and personality to your garland. Aim for a balance between bold and subtle designs, and consider using a color palette that ties together the overall decor of your nursery. This way, your garland will not only stand out but will also harmonize with the rest of the room.
- What are some creative ways to hang my fabric garland?
There are countless ways to display your fabric garland! You can hang it above the crib, along a wall, or even drape it over a bookshelf. For a whimsical touch, consider using removable adhesive hooks or clips that won’t damage your walls. The key is to choose a spot where the garland can truly shine and enhance the nursery's cozy atmosphere!
- How can I create seasonal or themed garlands?
Creating seasonal or themed garlands is a fun way to keep your nursery fresh! Think about using fabrics that reflect holidays, seasons, or even your child’s favorite characters. You can easily swap out pieces to match the occasion, making your garland a versatile decoration that evolves with your child’s interests.
- What maintenance do fabric garlands require?
To keep your fabric garlands looking their best, regular maintenance is essential. Dust them gently with a soft cloth, and if needed, spot clean with a damp cloth. For deeper cleaning, check if the fabric is machine washable. Additionally, store them in a cool, dry place when not in use to prevent any damage.


