
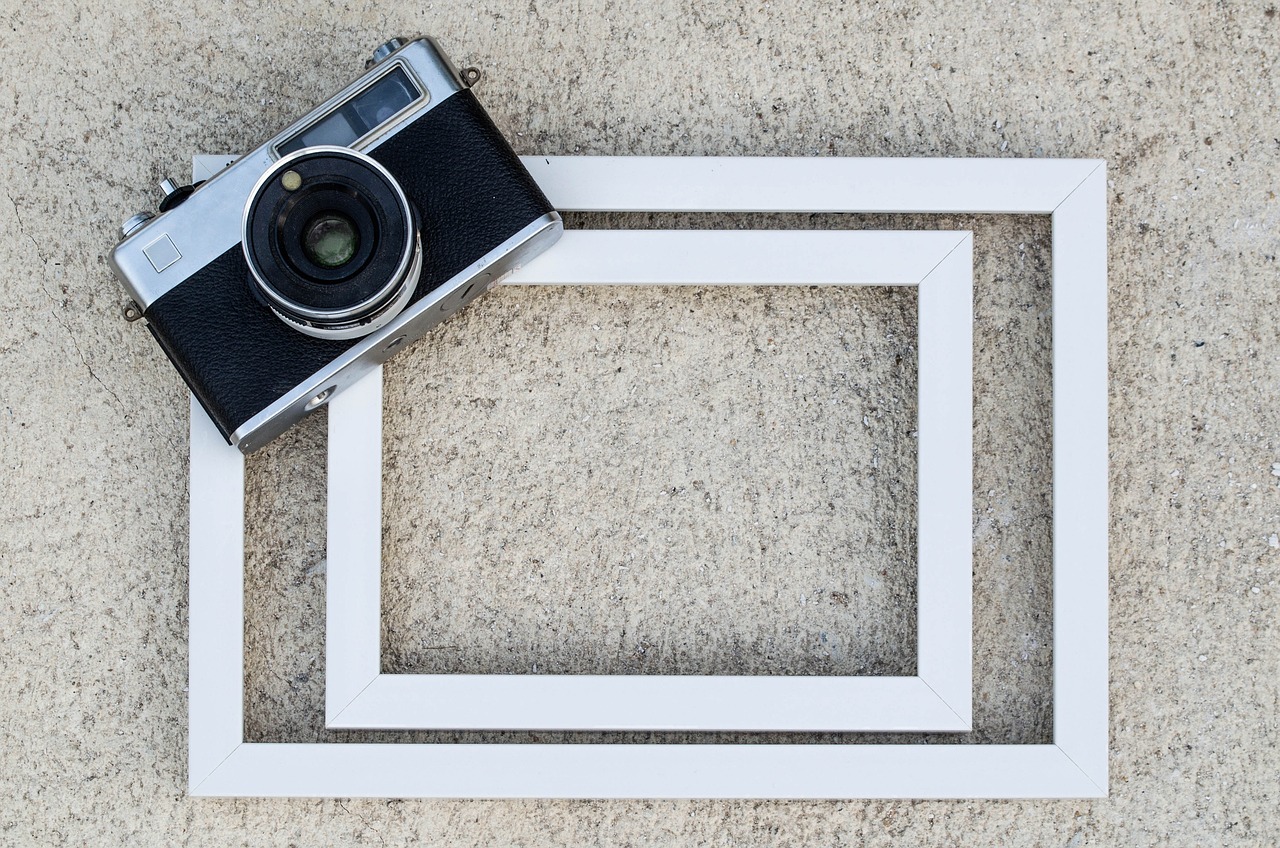
How to Create DIY Rustic Photo Frames
Creating your own rustic photo frames is not just a fun project; it's a way to add a personal touch to your home decor. Imagine showcasing your favorite memories in a frame that reflects your style and creativity! In this guide, we’ll walk you through the entire process, from gathering materials to the final touches that make your frames unique. Whether you’re a seasoned DIY enthusiast or a beginner looking to try something new, this article is tailored for you. So, grab your tools and let’s dive into the world of rustic charm!
Before we jump into crafting, let’s gather the essential materials. Having the right tools and supplies at hand will make the process smoother and more enjoyable. Here’s a list of what you’ll need:
- Wood: Reclaimed or new wood, depending on your preference.
- Nails and Glue: For assembling your frame securely.
- Sandpaper: To smooth out rough edges.
- Paint or Stain: To finish your frame with a rustic look.
- Tools: A saw, hammer, and measuring tape are essential.
With these materials in hand, you’re ready to start your DIY adventure!
The type of wood you choose plays a crucial role in the overall appearance of your rustic photo frame. Different woods have unique characteristics that can enhance your design. For instance, softwoods like pine are lightweight and easy to work with, while hardwoods like oak offer durability and a stunning grain pattern. Consider your aesthetic preferences and the texture you want to achieve. Let’s explore some options!
Using reclaimed wood is a fantastic way to add character and history to your frames. Not only does it have a story to tell, but it also contributes to sustainability by repurposing materials that might otherwise go to waste. You can source reclaimed wood from old furniture, pallets, or even barn wood. Just think about the charm it will bring to your photos!
Reclaimed wood offers numerous advantages, including:
- Environmental Impact: Using reclaimed wood reduces the demand for new lumber and helps preserve forests.
- Unique Aesthetics: Each piece of reclaimed wood has its own distinct texture and color, making every frame one-of-a-kind.
- Durability: Older wood is often denser and more durable than new wood, ensuring your frame lasts for years.
To work effectively with reclaimed wood, proper preparation is key. Start by cleaning the wood to remove any dirt or debris. Next, sand the surface to smooth out rough patches and splinters. This will not only make your frame safer to handle but also enhance the paint or stain application. Finally, treat the wood with a sealant to protect it from moisture and wear.
If reclaimed wood isn’t available, don’t worry! New wood can be just as beautiful when finished correctly. Softwoods like pine or fir are great options for rustic frames, as they can be easily shaped and stained. Additionally, consider using plywood for a more uniform look. You can achieve various finishes with paint or stain to give your frame that rustic vibe you’re aiming for.
Now that you have your materials and wood selected, let’s get into the nitty-gritty of crafting your rustic photo frame. Follow these detailed instructions to ensure a smooth and enjoyable experience.
Accurate cutting is vital for a well-fitted frame. Measure your wood pieces carefully, keeping in mind the size of the photo you want to display. Use a saw to cut the wood to the desired dimensions. Remember, “measure twice, cut once” is a mantra worth following to avoid mistakes!
Once your pieces are cut, it’s time to assemble them. Start by laying out the pieces in a square or rectangular shape, depending on your design. Use nails or wood glue to join the corners securely. For added strength, consider using corner brackets. Once assembled, give your frame a good sanding to smooth out any rough edges.
Q: Can I use any type of wood for my rustic frame?
A: Yes! While reclaimed wood is popular for its character, new wood also works great. Choose based on your preference and availability.
Q: How can I personalize my frame?
A: You can personalize your frame by adding embellishments like twine, dried flowers, or even painting it in your favorite colors.
Q: What is the best way to hang my frame?
A: Use picture hanging hardware or sawtooth hangers for easy mounting. Ensure they are securely attached to support the weight of the frame.

Materials Needed
Creating your own rustic photo frames is not only a fun project but also a great way to showcase your favorite memories in a unique way. To embark on this creative journey, you’ll need to gather a few essential materials. The right materials can make all the difference in achieving that charming, rustic look that we all adore. Here’s a quick rundown of what you’ll need:
- Wood: The star of your project! You can choose between reclaimed wood for that vintage vibe or new wood for a fresh start.
- Nails and Screws: These will help you hold the frame together securely.
- Wood Glue: A strong adhesive is crucial for ensuring your frame remains sturdy.
- Sandpaper: To smooth out any rough edges and give your wood that polished rustic finish.
- Paint or Stain: Depending on your style, you might want to add a coat of paint or stain. This is your chance to get creative!
- Tools: A saw, hammer, and drill are essential for cutting and assembling your frame.
Now that you have a list of materials, let’s break it down a bit more. The wood you choose is particularly important. If you opt for reclaimed wood, not only are you giving new life to old materials, but you’re also adding a story to your frame. On the other hand, if you prefer new wood, you have the freedom to select a type that best suits your aesthetic preferences. Pine, cedar, or even oak can work wonders depending on the look you’re aiming for.
Don’t forget about the finishing touches! A little paint or stain can transform your frame from ordinary to extraordinary. Whether you want a distressed look or a sleek finish, the right color can enhance the overall rustic charm. Additionally, consider adding some decorative elements like twine or embellishments to personalize your frame further. These small details can really make your project stand out!
In summary, gathering the right materials is the first step in creating stunning rustic photo frames. With the right wood, fasteners, tools, and finishing touches, you’ll be well on your way to crafting beautiful pieces that not only display your memories but also reflect your personal style. So, roll up your sleeves, and let’s get crafting!
Choosing the Right Wood
When it comes to crafting your own rustic photo frames, is like picking the perfect canvas for an artist. The type of wood you select can dramatically affect the overall aesthetic and durability of your frame. So, how do you make the best choice? Let's dive deep into the world of wood!
First off, consider the different types of wood available to you. Each type has its own unique characteristics that can enhance the rustic charm of your frame. For instance, softwoods like pine are often lighter and easier to work with, while hardwoods such as oak or walnut offer a more robust and elegant finish. The grain patterns, color variations, and even the texture can play a huge role in how your frame turns out.
Moreover, think about the finish you want for your frame. If you’re aiming for a weathered look, you might want to choose wood that has natural imperfections, like knots or rough edges. On the other hand, if you prefer a smoother finish, opt for a wood type that can be sanded down easily. Here’s a quick overview of some common wood options:
| Wood Type | Characteristics | Best For |
|---|---|---|
| Pine | Lightweight, easy to work with, can be painted or stained | Beginner projects, children’s frames |
| Oak | Durable, beautiful grain, heavy | High-quality frames, heirloom pieces |
| Walnut | Rich color, strong, expensive | Luxury frames, statement pieces |
| Reclaimed Wood | Unique textures, eco-friendly | Rustic, vintage-style frames |
Another important aspect to consider is the source of your wood. If you’re leaning towards a more sustainable choice, reclaimed wood is an excellent option. It not only has a story to tell but also contributes to environmental conservation. However, if you’re going for new wood, make sure to select sustainably sourced materials to keep your crafting eco-friendly.
Ultimately, the right wood for your rustic photo frame will depend on your personal style and the overall vibe you want to achieve. Are you going for a cozy, farmhouse feel, or something more modern with a rustic twist? Remember, the wood you choose is not just a material; it's a fundamental part of your artistic expression. So, take your time, explore your options, and let your creativity flow!
Reclaimed Wood
When it comes to creating rustic photo frames, is often the star of the show. This type of wood carries a rich history, having been salvaged from old barns, factories, and other structures. Imagine the stories these pieces could tell! Using reclaimed wood not only brings a unique character to your frames but also makes a statement about sustainability. By choosing to repurpose wood that would otherwise end up in a landfill, you're contributing to a healthier planet.
Finding reclaimed wood can be an adventure in itself. You can often source it from local salvage yards, flea markets, or even online marketplaces. Keep an eye out for wood that has interesting textures, knots, and imperfections—these features add to the charm of your finished product. However, before you start crafting, it's crucial to understand how to work with reclaimed wood effectively. Here are some tips to keep in mind:
- Inspect the Wood: Look for any signs of damage, such as rot or insect infestations. A little wear can add character, but make sure the wood is structurally sound.
- Clean Thoroughly: Reclaimed wood can be dusty or dirty, so give it a good scrub. Use a mixture of soap and water, and let it dry completely.
- Sanding: Sand the surface to remove any rough spots or splinters. This will not only make it safer to handle but also prepare it for finishing.
One of the greatest benefits of using reclaimed wood is its environmental impact. By opting for this sustainable choice, you’re reducing demand for new lumber, which helps preserve forests. Additionally, reclaimed wood often has a distinctive texture that new wood simply can't replicate. The weathered look, combined with the rich colors that develop over time, can give your photo frames a truly authentic rustic feel.
Moreover, reclaimed wood can be a conversation starter. Imagine your guests admiring your frames and asking where you found such unique materials. You can share the story of the wood's past life, adding an extra layer of interest to your decor. Whether it’s oak from an old barn or pine from a vintage home, each piece has its own tale to tell.
In summary, incorporating reclaimed wood into your DIY photo frames not only enhances their aesthetic appeal but also aligns with eco-friendly practices. So, as you embark on your crafting journey, keep an eye out for those hidden gems that can transform your frames from ordinary to extraordinary.
Q: Where can I find reclaimed wood?
A: Look for local salvage yards, flea markets, or online marketplaces like Craigslist or Etsy. Many cities also have specialized stores that focus on reclaimed materials.
Q: Is reclaimed wood safe to use for crafting?
A: Yes, as long as you inspect it for damage and clean it properly. Sanding the wood can also help eliminate any potential hazards like splinters.
Q: Can I use reclaimed wood for outdoor projects?
A: While reclaimed wood can be used outdoors, it's essential to treat it with a weather-resistant finish to ensure its longevity against the elements.
Benefits of Reclaimed Wood
Using reclaimed wood for your DIY rustic photo frames comes with a multitude of benefits that go far beyond aesthetics. First and foremost, reclaimed wood is an environmentally friendly choice. By opting for wood that has been salvaged from old buildings, barns, or furniture, you are actively participating in the fight against deforestation. It’s like giving a second life to materials that have history and character, rather than contributing to the demand for new lumber.
Moreover, reclaimed wood offers a unique aesthetic that new wood simply can’t replicate. Each piece tells a story through its distinctive textures, knots, and weathered finishes. When you incorporate reclaimed wood into your frames, you add a touch of authenticity and charm that can transform any photo into a cherished memory. Imagine framing a family portrait in wood that once adorned a rustic barn; it’s a conversation starter and a piece of art in its own right!
Additionally, reclaimed wood is often more durable than new wood. Many reclaimed pieces come from old-growth forests, which means the wood is denser and more resilient. This durability not only ensures that your frames will stand the test of time but also adds to their rustic appeal. You can rest easy knowing that your handcrafted frame is built to last.
Here are some key benefits of using reclaimed wood:
- Eco-Friendly: Reduces the need for new lumber and helps preserve forests.
- Unique Character: Each piece has its own history and charm, adding personality to your frames.
- Enhanced Durability: Often more robust than new wood, ensuring longevity.
- Cost-Effective: Salvaged wood can sometimes be less expensive than purchasing new materials.
Lastly, using reclaimed wood can also be a cost-effective option, especially if you can source it locally. Many people find that they can acquire reclaimed wood for a fraction of the price of new lumber, making it a budget-friendly choice for DIY enthusiasts. So, not only do you get to create something beautiful, but you also save some bucks in the process!
In conclusion, the benefits of using reclaimed wood are numerous, making it an excellent choice for crafting rustic photo frames. By choosing this sustainable option, you're not just creating art; you're also making a statement about your values and appreciation for the environment. So, why not embrace the charm and character of reclaimed wood in your next DIY project?
Q1: Where can I find reclaimed wood?
A1: Reclaimed wood can often be found at local salvage yards, lumber suppliers, or even online marketplaces that specialize in reclaimed materials. You can also check with local contractors or builders who may have leftover materials from renovations.
Q2: Is reclaimed wood safe to use for crafting?
A2: Yes, reclaimed wood is safe to use for crafting as long as it has been properly treated and cleaned. Make sure to inspect the wood for any signs of damage or pests before using it in your projects.
Q3: Can I use reclaimed wood for outdoor frames?
A3: While reclaimed wood can be used for outdoor projects, it’s important to treat it with a weather-resistant finish to protect it from the elements. This will ensure that your frames remain beautiful and intact over time.
How to Prepare Reclaimed Wood
Preparing reclaimed wood for your DIY rustic photo frames is essential to ensure that the final product not only looks great but also lasts. First things first, cleaning your reclaimed wood is crucial. You never know what kind of dirt, grime, or even old paint might be lurking on the surface. A good scrub with a mixture of warm water and mild soap can do wonders. Use a soft brush to get into any grooves or crevices, and make sure to rinse thoroughly. Once cleaned, allow the wood to dry completely; this step is vital as any moisture can affect the adhesion of paints or finishes you may apply later.
Next up, it's time to sanding. This is where the magic happens! Sanding not only smooths out rough patches but also brings out the wood's natural beauty. Start with a coarse sandpaper (around 80 grit) to remove any stubborn imperfections, and then gradually move to a finer grit (like 220) for a smooth finish. Remember, the goal is to achieve a surface that feels pleasant to the touch and looks inviting. If you're working with wood that has a lot of character, like old barn wood, you might want to be a bit gentler during this step to preserve its unique textures.
After sanding, it's important to treat the wood. This can involve applying a wood conditioner or a sealant, especially if you plan to stain or paint it. A wood conditioner helps the stain apply evenly, preventing blotchiness. If you prefer a natural finish, consider using a clear sealant to protect the wood while showcasing its natural grain. Apply the treatment according to the manufacturer's instructions, allowing sufficient drying time between coats. Don’t rush this step; a little patience goes a long way in achieving a professional look.
Finally, always keep safety in mind. When working with reclaimed wood, it’s wise to wear a mask and goggles, especially during the sanding process. Old wood can harbor dust and even chemicals from previous treatments, so protecting yourself is paramount. Once your wood is prepared, you’ll be ready to dive into the fun part—crafting your rustic photo frames!
- Can I use any type of reclaimed wood? Yes, you can use various types of reclaimed wood, but ensure it is structurally sound and free from harmful chemicals.
- How do I know if the wood is safe to use? Look for wood that has been treated for indoor use and avoid any that smells musty or has signs of mold.
- What tools do I need for preparing reclaimed wood? Basic tools include a saw, sander, wood glue, and clamps. Safety gear like gloves and a mask are also recommended.

New Wood Options
When it comes to crafting your own rustic photo frames, the choice of wood can make a **huge difference** in both appearance and durability. If you can’t get your hands on reclaimed wood, don’t worry! There are plenty of new wood options that can help you achieve that charming, rustic look you desire. One of the most popular choices is pine, known for its light color and ease of workability. Pine is not only affordable but also takes stains and paints beautifully, allowing you to customize your frame to match your home decor.
Another excellent option is cedar, which is naturally resistant to decay and has a lovely aroma. Its reddish hues can add warmth to your frame, and it can be left unfinished for a more natural look or stained for a richer appearance. If you’re looking for something a bit more robust, consider oak. Oak is a hardwood that offers strength and durability, making it ideal for frames that will be moved around or hung in high-traffic areas. Its distinct grain patterns can really elevate the overall aesthetic of your frame.
Here’s a quick rundown of some popular new wood options:
| Type of Wood | Characteristics | Best Uses |
|---|---|---|
| Pine | Lightweight, easy to work with, takes stains well | Frames, furniture, crafts |
| Cedar | Natural resistance to decay, aromatic, warm tones | Outdoor frames, rustic decor |
| Oak | Strong, durable, beautiful grain patterns | High-quality frames, heirloom pieces |
When selecting new wood, consider the **finish** you want for your frame. You can opt for a matte finish for a more understated look or a glossy finish to make the colors pop. Additionally, don’t shy away from experimenting with different stains. A dark walnut stain can create a striking contrast against lighter photos, while a whitewash can give your frame a more vintage feel. The beauty of using new wood is that you have the flexibility to create a truly unique piece that reflects your personal style.
In conclusion, whether you choose pine, cedar, or oak, each type of new wood offers its own unique charm and character. The key is to think about how you want your frame to look and feel in your space. With the right wood and a little creativity, you can craft a rustic photo frame that not only showcases your cherished memories but also enhances your home decor.
- Can I use plywood for my rustic photo frame? Yes, plywood can be a great option as it is sturdy and comes in various finishes. Just ensure it has a nice veneer for a more rustic look.
- What tools do I need for cutting new wood? A miter saw or a hand saw will work well for cutting the wood accurately. Make sure to have a measuring tape and square for precise measurements.
- How do I achieve a distressed look on new wood? You can achieve a distressed look by sanding the edges, using a hammer to create dents, and applying a stain that highlights the wood grain.

Step-by-Step Instructions
Creating your own rustic photo frame can be an incredibly rewarding project, and with the right guidance, you can craft something truly special. To start, gather your materials and set up a comfortable workspace. It's essential to have everything on hand to avoid interruptions during your creative process. Here’s a simple roadmap to guide you through the steps of making your rustic photo frame.
First, you'll need to cut the wood into the desired dimensions. Measure your wood pieces accurately to ensure they fit together perfectly. This step is crucial because even a slight miscalculation can lead to a frame that looks unbalanced. Use a saw to cut your wood, and remember to wear safety goggles to protect your eyes. If you’re using reclaimed wood, you might find that it has irregular edges, which can add to the rustic charm, but be cautious while cutting.
Next, it's time to assemble the frame. Start by laying out your cut pieces on a flat surface. This will give you a visual of how they will come together. Begin joining the corners of the frame; you can use nails, wood glue, or even screws for a more secure hold. If you opt for glue, make sure to clamp the pieces together until the glue dries. This step is like putting together a puzzle—each piece needs to fit just right to create a beautiful picture frame.
Once the frame is assembled, sand the edges to smooth out any rough spots. This not only enhances the look of your frame but also makes it safer to handle. Use sandpaper with a fine grit for the best results. After sanding, you may want to stain or paint your frame to enhance its rustic appeal. Choose a color that complements your decor or the photos you plan to display. Applying a coat of varnish can also protect the wood and give it a lovely sheen.
Finally, it's time to add the backing and glass. Cut a piece of cardboard or thin plywood to the size of your frame to serve as the backing. If you have glass, cut it to size, or you can use acrylic for a lighter option. Secure the backing in place with small nails or clips. Your rustic photo frame is now ready to showcase your favorite memories!
Q: Can I use any type of wood for my rustic photo frame?
A: While you can use various types of wood, reclaimed wood often provides the best rustic look due to its unique textures and history. However, new wood can also work well if you choose the right finish.
Q: What tools do I need to create a rustic photo frame?
A: Basic tools include a saw, hammer, nails, wood glue, sandpaper, and a measuring tape. If you want to add more detail, clamps and a drill can be helpful.
Q: How can I personalize my rustic photo frame?
A: Personalization can be achieved through painting, staining, or adding decorative elements like twine, burlap, or stencils. Let your creativity shine!
Cutting the Wood
When it comes to creating your own rustic photo frames, accurately is absolutely crucial. Think of it as the foundation of a house; without a solid base, everything else is bound to crumble. To begin, gather your materials and tools, including a measuring tape, a saw (preferably a miter saw for precise angles), and safety gear like goggles and gloves. Safety first, right? You don’t want to end up with a splinter or worse!
Start by measuring the dimensions of the photo you want to frame. It’s essential to have a clear idea of the size before you start cutting. For example, if you’re framing a 5x7 photo, you’ll want to add a bit of extra length to the wood pieces to create a border around the picture. A good rule of thumb is to add at least an inch on each side for a more substantial frame. This way, you can achieve that rustic charm while ensuring your photo is securely held in place.
Once you have your measurements, mark the wood using a pencil. It’s tempting to skip this step, but trust me, a clear mark will save you a lot of headaches later on. When cutting, make sure to follow your lines closely. If you’re using a miter saw, adjust the angles according to your design—most rustic frames have a simple rectangular shape, but you can get creative with angles for a more unique look.
Here’s a quick tip: if you’re new to cutting wood, practice on some scrap pieces first. This will help you get a feel for the saw and ensure that your final cuts are clean and precise. Remember, a smooth cut not only looks better but also makes the assembly process a breeze. After cutting, take a moment to sand down the edges. This step is often overlooked, but it’s essential for achieving that polished rustic finish. Use a medium-grit sandpaper to smooth out any rough edges and then follow up with a fine-grit paper for a nice touch.
Finally, once you’ve cut and sanded your wood pieces, lay them out in the order they’ll be assembled. This is a great time to visualize your frame and make any last-minute adjustments. If you’re feeling particularly adventurous, you might even want to experiment with different wood stains or paints at this stage to see how they complement your design. Ultimately, the goal is to create a frame that not only showcases your photos but also adds a touch of character to your home.
- What type of saw is best for cutting wood for photo frames? A miter saw is ideal for making precise cuts, especially for angled edges.
- How can I ensure my cuts are straight? Always measure twice and cut once. Use a square to check your angles before cutting.
- Do I need to sand the wood after cutting? Yes, sanding is crucial to remove splinters and give your frame a smooth finish.
- Can I use plywood for rustic frames? Absolutely! Plywood can provide a unique look, especially if you choose a high-quality finish.
Assembling the Frame
Assembling your rustic photo frame is where the magic truly happens! This is the moment when all your hard work pays off, and you see your vision come to life. First and foremost, make sure you have all your cut pieces within reach. It’s like putting together a puzzle, and you want to ensure that each piece fits perfectly. Start by laying out your wood pieces on a flat surface, arranging them in the order they will be assembled. This not only gives you a visual guide but also helps you catch any mistakes before you start joining them together.
When it comes to joining the wood, there are several techniques you can employ. The most common methods include using nails, wood glue, or a combination of both. If you’re feeling adventurous, consider using corner brackets for added strength, especially if your frame will hold larger pictures. Here’s a quick breakdown of the options:
| Joining Method | Advantages | Disadvantages |
|---|---|---|
| Nails | Quick and easy to use | Can split the wood if not careful |
| Wood Glue | Creates a strong bond | Requires drying time |
| Corner Brackets | Extra strength and stability | May be visible if not painted over |
For a simple yet effective method, start by applying wood glue along the edges of the pieces you want to join. Hold them together for a few seconds to allow the glue to set. Once you’ve glued the corners, reinforce the joints by hammering in nails at a 45-degree angle. This technique, often referred to as “toenailing,” provides additional stability and prevents the frame from coming apart over time. Remember, patience is key here; don’t rush through this part, as a well-assembled frame will stand the test of time.
After you’ve secured the frame, it’s time to let your creation dry. If you’ve used wood glue, allow at least 30 minutes for it to set properly before moving on to the next steps. During this drying time, you can clean up your workspace or even start thinking about how you want to decorate your frame later on. Once everything is dry, you can sand down any rough edges or excess glue for a smooth finish. This not only enhances the frame’s appearance but also makes it safer to handle.
Finally, once your rustic frame is fully assembled and dried, it’s time to showcase your favorite memories! Whether you choose to leave it in its natural state or add a splash of color with paint or stain, your DIY rustic photo frame will surely be a conversation starter. Remember, the beauty of crafting is in the details and imperfections that make your frame uniquely yours!
- Can I use any type of wood for my rustic photo frame? Yes, you can use both reclaimed and new wood. Each has its own charm!
- How long should I let the glue dry? It’s best to let the glue dry for at least 30 minutes, but follow the manufacturer's instructions for best results.
- What if I don’t have nails? Wood glue alone can be sufficient, but adding brackets can provide extra support.
Frequently Asked Questions
- What materials do I need to create a rustic photo frame?
To craft your own rustic photo frame, you'll need basic materials such as wood (either reclaimed or new), nails, glue, sandpaper, and paint or stain for finishing. Tools like a saw, hammer, and measuring tape are essential for accurate cutting and assembly.
- Can I use any type of wood for my frame?
While you can use various types of wood, opting for reclaimed wood adds a unique character and history to your frame. However, if reclaimed wood isn't available, new wood types like pine or cedar can also create beautiful rustic frames.
- How do I prepare reclaimed wood for my project?
Preparing reclaimed wood involves cleaning it thoroughly to remove dirt and debris, sanding it to achieve a smooth finish, and treating it with a wood conditioner if necessary. This ensures your frame is not only attractive but also durable.
- What are the benefits of using reclaimed wood?
Reclaimed wood is environmentally friendly as it repurposes old materials, reducing waste. It also offers a distinct aesthetic with unique textures and colors, adding character to your rustic photo frames that new wood simply can't match.
- What is the best way to cut wood for my frame?
For accurate cuts, measure your wood pieces carefully and mark your dimensions clearly. Using a miter saw or a hand saw can help achieve precise angles, especially for corners. Always wear safety gear when cutting wood!
- How do I assemble the frame securely?
Assembling your frame can be done using nails and wood glue for extra strength. Start by joining the corners and ensuring everything is aligned. You can also use clamps to hold the pieces together while the glue dries for a sturdy finish.
- Can I personalize my rustic photo frame?
Absolutely! Personalization options are endless—consider adding decorative elements like stencils, carvings, or even a splash of color with paint. You can also attach mementos or quotes to make your frame uniquely yours.


