Creating DIY Hand Painted Mugs for Your Kitchen
Are you ready to unleash your inner artist and add a splash of personality to your kitchen? Hand-painted mugs are not just functional items; they are canvases for your creativity! Imagine sipping your morning coffee from a mug that you decorated yourself, showcasing your unique style and flair. In this article, we will explore the delightful process of crafting hand-painted mugs, offering tips, techniques, and inspiration that will not only enhance your kitchenware but also personalize your drinking experience.
Creating your own mugs can be a therapeutic and fulfilling activity. It's a chance to express yourself, whether you're channeling your favorite colors, patterns, or even quotes that resonate with you. The best part? You don't need to be a professional artist to make something beautiful! With the right materials and techniques, anyone can create stunning designs that will impress friends and family. So, grab your brushes and paints, and let’s dive into the world of DIY hand-painted mugs!
Before you start painting, it's essential to select the appropriate materials for your DIY project. The right choice of paints, brushes, and mugs can make all the difference in the outcome of your artwork. For instance, ceramic paints are specifically designed for use on ceramic surfaces and will ensure that your designs are vibrant and long-lasting. On the other hand, acrylic paints can also be used, but you’ll need to seal them properly to prevent chipping.
When it comes to brushes, a variety of sizes and shapes will allow you to experiment with different techniques. Flat brushes are great for bold strokes, while fine-tipped brushes are perfect for intricate details. And let’s not forget about the mugs themselves! Selecting a smooth, blank canvas is crucial for your designs to shine. Consider the following types of mugs:
- Ceramic Mugs: These are the classic choice and provide a perfect surface for paint.
- Porcelain Mugs: Slightly more delicate, but they offer a beautiful finish.
- Stoneware Mugs: They have a rustic charm and are quite durable.
A tidy and organized workspace is essential for any DIY project. You want to set up your painting area in a way that fosters creativity and efficiency. Consider using a large table covered with newspaper or a plastic tablecloth to protect your surfaces from paint spills. Make sure to have good lighting, as this will help you see the details of your work better. Keep all your materials within arm's reach, so you can focus on painting without interruptions.
From paints to stencils, gathering all necessary supplies beforehand will streamline your crafting process. Here's a comprehensive list of what you'll need to get started:
- Mugs (ceramic, porcelain, or stoneware)
- Paints (ceramic or acrylic)
- Brushes (various sizes)
- Stencils (optional)
- Palette for mixing colors
- Sealant (for durability)
Different paints yield varying results, so it’s essential to explore your options. Here are some popular types of paints you might consider:
| Type of Paint | Pros | Cons |
|---|---|---|
| Ceramic Paint | Durable, vibrant colors | Requires baking to set |
| Acrylic Paint | Easy to use, quick drying | Needs sealing for durability |
| Porcelain Paint | Great for fine details | Can be tricky to apply |
The type of mug you select can impact your painting experience. A smooth, even surface is ideal for painting, allowing your artwork to come to life without any bumps or imperfections. Think about the shape too; a classic round mug might be easier to paint than one with a unique design. Ultimately, choose a mug that resonates with your style and will serve as the perfect canvas for your creativity.
Finding inspiration is a key part of the creative process. One of the best ways to spark your imagination is to look around you! Nature, art, and even your favorite quotes can serve as fantastic sources of inspiration. Consider browsing social media platforms like Pinterest or Instagram for ideas. You can also explore local art galleries or even your own collection of books for design concepts. Remember, your designs should reflect your personality, so don’t be afraid to experiment!
Mastering painting techniques can elevate your mug designs from ordinary to extraordinary. This section covers various methods, from freehand painting to using stencils for precision. Whether you prefer a spontaneous approach or a more structured method, there’s a technique that will suit your style.
Freehand painting allows for creativity and spontaneity. To enhance your skills, focus on brush control and color blending. Start with light strokes and gradually build up your design. Remember, practice makes perfect, so don’t be discouraged if your first attempt isn’t flawless!
Stencils can help achieve clean lines and intricate designs. To use them effectively, secure the stencil to your mug with tape to prevent it from shifting. Use a sponge or brush to apply paint, and be sure to remove the stencil carefully to avoid smudging. This technique is perfect for those who want precise designs without the pressure of freehand painting.
The final steps are crucial for durability and aesthetics. Sealing your artwork is essential to ensure that your designs last through countless washes. There are various sealing options available, from spray sealants to brush-on finishes. Choose one that best suits your needs and follow the manufacturer's instructions for the best results.
Sealing your painted mugs ensures that your designs last. Explore different sealing options and techniques to protect your handiwork. A good sealant will prevent chipping and fading, allowing your creations to shine for years to come.
Consider incorporating personal touches, such as initials or quotes, to make your mugs truly one-of-a-kind. You can use a fine brush to add these details or even create small designs around them. This is where your creativity can really shine!
Proper care will prolong the life of your hand-painted mugs. Learn how to clean and maintain them to keep your designs vibrant and intact. When washing your mugs, always opt for hand washing with a gentle sponge instead of a dishwasher, as the harsh conditions can wear down your artwork.
Cleaning painted mugs requires special care. Use a soft sponge and mild soap, avoiding abrasive materials that could scratch the surface. Always let your mugs air dry to maintain their beauty.
Storing your mugs properly can prevent damage. Consider using a dedicated shelf or cabinet to keep them safe from accidental knocks. You might also want to wrap them in soft cloths if you're stacking them to avoid scratches.
Q: Can I use regular paint for my mugs?
A: While you can use regular paint, it's best to opt for ceramic or porcelain paints designed for durability.
Q: How do I seal my painted mugs?
A: You can seal your mugs with a spray sealant or brush-on finish, following the manufacturer's instructions for best results.
Q: Are hand-painted mugs safe to use for food and drink?
A: Yes, as long as you use food-safe paints and sealants, your hand-painted mugs are safe for everyday use.

Choosing the Right Materials
When it comes to creating your very own hand-painted mugs, selecting the right materials is absolutely crucial. Imagine embarking on a creative journey where the quality of your paints and brushes can make or break your masterpiece. So, let’s dive into the essentials that will set you up for success!
First off, the type of paint you choose can significantly affect the outcome of your project. There are several options available, but ceramic paint and acrylic paint are among the most popular for mug painting. Ceramic paints are specifically designed for use on ceramics and provide a durable finish that can withstand washing. On the other hand, acrylic paints are versatile and easy to find, but they may require a sealing process to ensure longevity. Here’s a quick comparison:
| Type of Paint | Durability | Ease of Use | Sealing Required |
|---|---|---|---|
| Ceramic Paint | High | Moderate | No |
| Acrylic Paint | Moderate | Easy | Yes |
Next up, let’s talk about brushes. The right brushes can make all the difference in achieving those intricate details or smooth strokes. A variety of brush types is available, including round brushes for fine lines and flat brushes for broader strokes. It’s often a good idea to have a few different sizes on hand to give you flexibility in your designs. Remember, a well-maintained brush will serve you better, so invest in some quality options!
Now, let’s not forget about the mugs themselves. The type of mug you select can impact not just your painting experience but also the final aesthetic of your work. Porcelain and stoneware are excellent choices because they provide a smooth surface that holds paint well. You can find mugs in various shapes and sizes, so consider what fits your style. For instance, a classic white mug offers a blank canvas, while a colored mug can add depth to your design.
As you gather your materials, keep in mind the importance of organizing everything in your workspace. Having your supplies within reach will allow your creative juices to flow without interruption. Consider creating a checklist of the materials you need, so you don’t miss anything crucial. Here’s a quick list of must-have items:
- Ceramic or acrylic paint
- Assorted paintbrushes
- Plain mugs (ceramic or porcelain)
- Palette for mixing colors
- Stencils (if desired)
- Sealer (if using acrylic paint)
In summary, choosing the right materials is the foundation of your hand-painted mug project. By carefully selecting your paints, brushes, and mugs, you’ll set yourself up for a delightful and rewarding crafting experience. So, gather your supplies, and let your creativity shine!

Preparing Your Workspace
Creating a cozy and efficient workspace is a crucial step in the DIY hand-painted mug journey. Imagine walking into a room where everything is in its place, inspiring creativity at every turn. A well-organized area not only boosts your mood but also enhances your productivity. Before you dive into painting, take a moment to set the stage for your masterpiece. Start by choosing a flat, sturdy surface, like a table or a countertop, where you can comfortably work without distractions. Make sure this space is well-lit; natural light is ideal, but a good lamp can also work wonders.
Next, let’s talk about cleanliness. You want to protect your surrounding area from paint spills and splatters. Lay down some old newspapers or a plastic drop cloth to catch any drips. This will save you the hassle of scrubbing paint off your favorite table later. Don't forget to gather all your supplies beforehand—having everything at your fingertips will keep your creative flow uninterrupted. Think of your workspace as your personal art studio, where every brush stroke can be a step toward making something beautiful.
Organizing your supplies can be a game changer. Use small containers or trays to categorize your paints, brushes, and stencils. For example, you might have one container for brushes, another for paints, and a third for stencils. This way, you won't waste time searching for that perfect brush when inspiration strikes. Here’s a simple table to help you visualize how to organize your workspace:
| Supplies | Suggested Storage |
|---|---|
| Paints | Small containers or caddies |
| Brushes | Brush holder or cup |
| Stencils | Folder or binder |
| Mugs | Tray or box |
Another essential aspect of preparing your workspace is to ensure you have all the necessary tools within reach. Think about what you’ll need: your paints, brushes, stencils, and of course, the mugs themselves. It's like setting up your own little command center, ready for action. You might even consider playing some music or a podcast in the background to keep the atmosphere lively and enjoyable. After all, this is your creative sanctuary!
Lastly, don’t forget to consider the ventilation of your workspace. If you're using paints that have strong odors, ensure that the area is well-ventilated. Open a window or use a fan to keep the air circulating. This not only makes for a more pleasant experience but also keeps you safe while you unleash your artistic flair. So, take a deep breath, gather your supplies, and let’s get painting!
Q: What type of paint is best for hand-painted mugs?
A: Ceramic paint is often recommended for its durability and finish, but acrylic paint can also work if sealed properly.
Q: Do I need to bake the mugs after painting?
A: Yes, baking can help set the paint and make it more durable, but be sure to follow the instructions specific to the paint you use.
Q: Can I use my hand-painted mugs for hot beverages?
A: Absolutely! Just make sure to use appropriate paint and sealant to ensure they are safe for hot liquids.
Q: How do I clean my painted mugs?
A: Hand wash your mugs gently with mild soap and avoid abrasive sponges to protect the artwork.
Gathering Your Supplies
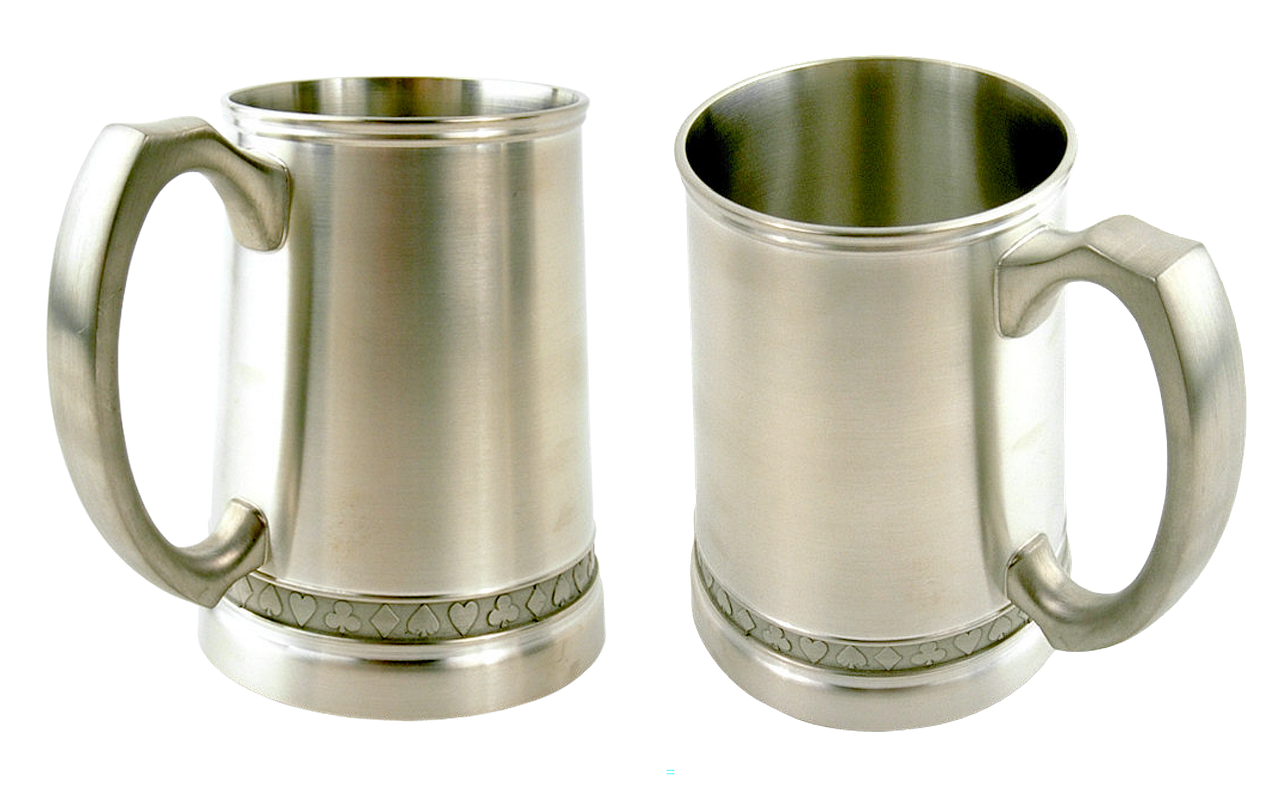
Before diving into the delightful world of hand-painted mugs, it's essential to gather all the necessary supplies to ensure a smooth crafting experience. Imagine embarking on a road trip without a map; it could lead to some unexpected detours! Similarly, having your supplies organized and ready will help you stay focused on your creative journey. So, what do you need?
First and foremost, you'll need to select the right type of paint. For ceramic mugs, ceramic paint is often the best choice as it is designed specifically for this material. However, if you're feeling adventurous, acrylic paint can also work, provided you seal it properly afterward. Here’s a quick comparison of the two:
| Type of Paint | Pros | Cons |
|---|---|---|
| Ceramic Paint | Durable, dishwasher safe, vibrant colors | Requires baking to set |
| Acrylic Paint | Easy to find, versatile, wide color range | Less durable, may require sealing |
Next, you’ll need brushes. A variety of brush sizes can help you achieve different effects, from fine details to broad strokes. It’s like having a toolbox filled with the right instruments for each job. Don’t forget to pick up some sponges as well; they can create beautiful textures and patterns that will make your mugs stand out.
When it comes to the mugs themselves, the type you choose can greatly influence your painting experience. Look for plain, unglazed ceramic mugs, as these provide an ideal surface for painting. You can often find these at craft stores or online. If you want to get creative, consider experimenting with different shapes and sizes to see what inspires you!
Lastly, gather some additional supplies like stencils, painter’s tape, and even a palette for mixing colors. Stencils can help you achieve that perfect design without the stress of freehand painting. Think of them as your guiding star, leading you to a beautifully crafted mug. Painter’s tape can be particularly useful for creating clean lines, especially if you want to add geometric designs or stripes.
In summary, gathering your supplies is a crucial step in the DIY mug painting process. By ensuring you have all the right materials at hand, you can unleash your creativity without interruption. So, take a moment to collect everything you need, and let your imagination run wild!
- Can I use regular paint on ceramic mugs? - Regular paint is not recommended as it may not adhere well and can wash off easily. Always opt for ceramic paint or acrylic paint with a proper sealant.
- How do I seal my painted mugs? - You can seal your painted mugs by applying a clear ceramic sealer or baking them in the oven according to the paint's instructions.
- Are hand-painted mugs dishwasher safe? - If you use the right ceramic paint and seal them properly, your mugs can be dishwasher safe. Always check the paint instructions for specifics.
Types of Paints
When it comes to hand painting mugs, the type of paint you choose can make all the difference in the world. It's not just about slapping some color on a ceramic surface; it's about selecting the right medium that will bring your artistic vision to life while ensuring durability. So, let's dive into the world of paints and discover which ones are best suited for your DIY mug project.
First off, we have ceramic paint, which is often the go-to choice for many DIY enthusiasts. This paint is specifically designed for use on ceramic surfaces and is known for its vibrant colors and durability. Once cured, ceramic paint is dishwasher safe and can withstand the heat of a microwave, making it a practical option for everyday use. However, it does require baking in the oven to set the paint properly, which means you’ll need to plan your painting session accordingly.
Next up is acrylic paint. This versatile option is easily accessible and can be used on a variety of surfaces, including ceramics. While it’s great for creating intricate designs and offers a wide range of colors, it’s important to note that acrylic paint may not be as durable as ceramic paint. To ensure your artwork lasts, you’ll want to seal it with a clear acrylic sealer after it dries. This extra step will help protect your design from chipping and fading over time.
Additionally, there are porcelain paints, which are similar to ceramic paints but are specifically formulated for porcelain surfaces. These paints offer a glossy finish and are also dishwasher safe once baked. They can be a bit more challenging to find, but if you’re looking for a sleek and shiny look, they’re worth considering.
To help you better understand the differences, let’s take a look at a comparison table:
| Type of Paint | Durability | Dishwasher Safe | Baking Required |
|---|---|---|---|
| Ceramic Paint | High | Yes | Yes |
| Acrylic Paint | Medium | No | No |
| Porcelain Paint | High | Yes | Yes |
Lastly, it's worth mentioning glass paint, which can also be used on ceramic mugs if you’re aiming for a unique look. Glass paint provides a transparent finish that can give your mugs a beautiful, stained-glass effect. However, similar to acrylic paint, it typically requires sealing to enhance durability.
In summary, the choice of paint can significantly affect the outcome of your hand-painted mugs. Whether you opt for ceramic, acrylic, porcelain, or glass paint, each has its own unique qualities that can elevate your designs. Just remember to consider the final use of your mugs—whether for decoration or daily use—when making your selection. With the right paint in hand, you’re well on your way to creating stunning, personalized mugs that reflect your creativity!
Choosing the Right Mug
When it comes to hand painting mugs, the type of mug you choose can significantly impact your overall experience and the final outcome of your artwork. Not all mugs are created equal, and selecting the right one is akin to choosing the perfect canvas for a masterpiece. Think of it this way: you wouldn’t paint on a crumpled piece of paper, right? Similarly, your mug should be a suitable surface that enhances your creativity.
First off, consider the material of the mug. Ceramic mugs are the most popular choice for hand painting due to their smooth surface and durability. They can withstand the heat of the kiln if you decide to bake your designs for longevity. On the other hand, glass mugs offer a sleek and modern look, allowing for vibrant colors to shine through. However, they require special paint that adheres well to glass surfaces. If you’re feeling adventurous, you might even explore porcelain or metal mugs, each offering unique textures and finishes that can enhance your designs.
Next, think about the shape and size of the mug. A classic coffee cup shape is always a safe bet, but don’t shy away from experimenting with different styles. For instance, a tall latte mug offers a narrow canvas that can be perfect for intricate designs, while a wide bowl-like mug allows for more expansive artwork. Choosing a larger surface area could be beneficial if you plan on creating detailed patterns or illustrations. Remember, the size of the mug can also affect the way your design is perceived; a larger mug can make a bold statement, while a smaller one can be charming and delicate.
It's also important to consider the color of the mug. A white or light-colored mug serves as a blank slate, allowing your colors to pop brilliantly. However, darker mugs can create a striking contrast with lighter paint, making your designs stand out in a different way. If you’re feeling particularly creative, you might even opt for a colored mug and use a contrasting paint to create a unique visual effect.
Finally, before you start painting, check the quality of the mug. Ensure that it is free from any chips or imperfections that could affect your design. A smooth, even surface is essential for achieving clean lines and vibrant colors. After all, your mug should not only be a canvas for your creativity but also a functional piece that you’ll enjoy using every day.
In summary, choosing the right mug is a crucial step in your DIY hand-painted mug project. By carefully selecting the material, shape, size, color, and quality, you can set yourself up for a successful and enjoyable painting experience. So go ahead, find that perfect mug, and let your creativity flow!

Design Inspiration
Finding the right design inspiration is like searching for the perfect seasoning to elevate a dish—it's essential! When it comes to crafting your hand-painted mugs, the options are virtually limitless, and the key is to let your imagination run wild. Are you a fan of nature? Perhaps floral patterns or animal motifs will tickle your fancy. If you lean towards the modern aesthetic, geometric shapes or abstract art could be your go-to. The beauty of DIY projects is that they reflect your personality, so don’t be afraid to explore different styles!
One effective way to gather inspiration is by browsing platforms like Pinterest or Instagram. These sites are treasure troves of creative ideas, where you can find everything from minimalist designs to vibrant, colorful patterns. You might even stumble upon a design that sparks your creativity and leads you to create something entirely unique. Consider creating a mood board—whether digital or physical—where you can pin or paste your favorite designs, colors, and themes. This will serve as a handy reference as you embark on your mug-painting journey.
Additionally, think about themes that resonate with you or your loved ones. For example, if you’re painting a mug for a friend who loves coffee, why not incorporate coffee beans or cute coffee quotes? Or, if you’re crafting for a family member who adores travel, designs featuring maps or famous landmarks could be a hit. Personalizing your mugs not only makes them special but also adds a touch of heartfelt sentiment.
Here’s a quick table to help you brainstorm some themes for your designs:
| Theme | Design Ideas |
|---|---|
| Nature | Flowers, leaves, trees, animals |
| Quotes | Inspirational sayings, funny quotes, personalized messages |
| Geometric | Shapes, patterns, lines, abstract designs |
| Seasonal | Holidays, seasonal themes (winter, spring, summer, fall) |
| Food & Drink | Coffee beans, cupcakes, fruits, cocktails |
Lastly, don’t underestimate the power of collaboration! Invite friends or family members to join you in this creative endeavor. Sharing ideas and techniques can lead to unexpected inspiration and create a fun, social atmosphere. You might even end up with a few design ideas that you never would have thought of on your own!
Q: What materials do I need for hand-painted mugs?
A: You'll need ceramic or porcelain mugs, paint (ceramic paint is recommended), brushes, stencils (if desired), and a sealant to protect your artwork.
Q: Can I use regular paint for my mugs?
A: It's best to use paint specifically designed for ceramics to ensure durability and longevity. Regular acrylic paint may not hold up well after washing.
Q: How do I clean my painted mugs?
A: Hand wash your mugs with a gentle sponge and mild soap. Avoid harsh scrubbing and dishwasher use to preserve your designs.
Q: How can I add personal touches to my mugs?
A: Consider adding initials, favorite quotes, or symbols that represent the recipient's interests. These small details make your mugs truly unique!
Painting Techniques
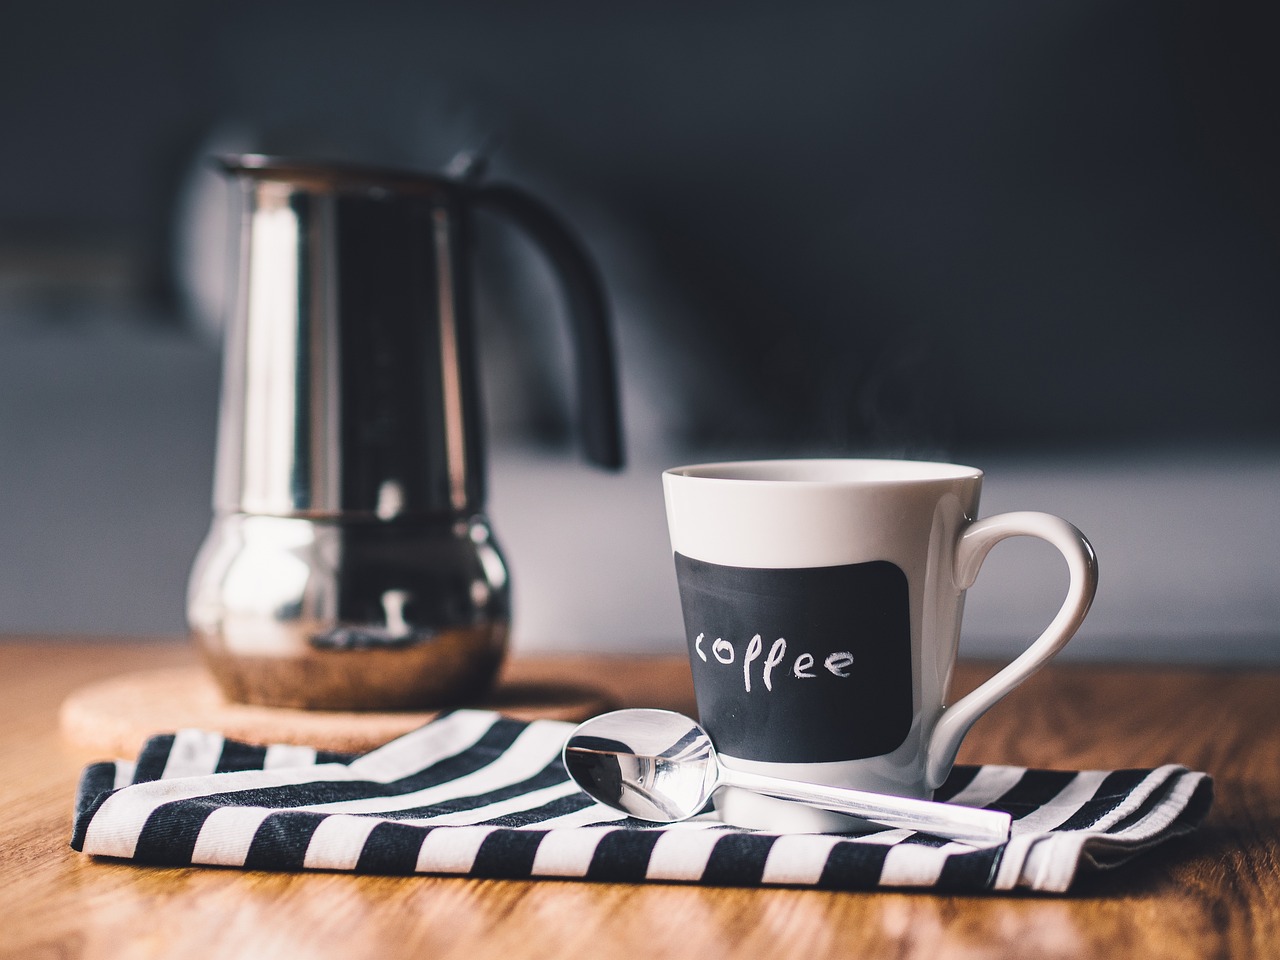
When it comes to creating stunning hand-painted mugs, mastering various can truly elevate your designs. Whether you’re a seasoned artist or a beginner just dipping your toes into the world of DIY crafts, understanding different methods will help you express your creativity more effectively. Let's explore some of the most popular techniques that can transform your plain mugs into personalized masterpieces.
One of the most liberating methods is freehand painting. This technique allows you to unleash your creativity without the constraints of stencils or guides. It’s all about letting your brush dance across the surface of the mug, creating unique patterns and designs. To get started with freehand painting, consider these tips:
- Brush Control: Practice makes perfect! Spend some time familiarizing yourself with the brush and how it interacts with the paint.
- Color Blending: Experiment with blending colors directly on the mug. This can create beautiful gradients and depth in your artwork.
- Layering: Don’t be afraid to layer your designs. Let the first layer dry before adding additional colors or details for a more dynamic look.
If you’re looking for precision and clean lines, using stencils is the way to go. Stencils can help you achieve intricate designs that might be challenging to paint freehand. To use stencils effectively, follow these steps:
- Choose the Right Stencil: Select a design that complements the shape of your mug. There are countless options available, from geometric patterns to floral designs.
- Secure the Stencil: Use painter's tape to hold the stencil in place. This will prevent it from shifting while you paint.
- Apply Paint Carefully: Use a sponge or a brush to dab paint onto the stencil. Avoid overloading your brush to prevent paint from seeping underneath.
Another exciting technique is sponging, which involves using a sponge to apply paint in a stippling motion. This method is perfect for creating textured backgrounds or adding dimension to your designs. You can even mix multiple colors on the sponge for a more vibrant effect. Just remember to use a clean sponge for each color to maintain clarity in your design.
For those who love a bit of sparkle, consider using metallic paints or glitters to add a touch of glamour to your mugs. These can be applied over your base design or used as accents to highlight certain features. Just be sure to seal your mugs properly after painting to keep that shine intact!
Finally, don't overlook the power of decoupage. This technique involves gluing decorative paper or fabric onto your mug to create a unique design. It’s a fun way to incorporate patterns or images that might be difficult to paint. Simply cut out your desired shapes, apply a layer of decoupage glue, and seal it with a top coat for durability.
In summary, the world of painting techniques for DIY hand-painted mugs is rich and varied. From freehand painting to stenciling, sponging, and decoupage, each method offers its own unique flair. So grab your brushes, unleash your imagination, and get ready to create some truly spectacular mugs!
Q: Can I use regular acrylic paint on mugs?
A: While you can use regular acrylic paint, it’s best to use paint specifically designed for ceramics for durability and washability.
Q: How do I seal my painted mugs?
A: You can seal your painted mugs with a clear ceramic sealer or a food-safe acrylic spray. Make sure to follow the manufacturer's instructions for the best results.
Q: Are hand-painted mugs dishwasher safe?
A: Hand-painted mugs are generally not dishwasher safe unless you use special paint and sealers designed to withstand high temperatures. Hand washing is recommended to preserve your designs.
Q: How can I remove paint mistakes?
A: If you make a mistake, you can often wipe off wet paint with a damp cloth. For dried paint, you may need to sand it down gently before repainting.

Freehand Painting Tips
Freehand painting on your mugs can be one of the most exhilarating experiences in your DIY journey. It’s like dancing with a brush, where every stroke is an expression of your creativity. However, to truly make your designs pop, there are a few essential tips to keep in mind. First off, choose the right brush. The type of brush you use can greatly affect your painting style. A flat brush is fantastic for bold strokes, while a fine-tipped brush is perfect for intricate details.
Next, consider your color palette. When selecting colors, think about how they will complement each other on your mug. You might want to create a harmonious look with shades that blend well or go for a vibrant contrast that catches the eye. Remember, less is often more; a few well-placed colors can have a more significant impact than a chaotic mix. If you're unsure where to start, try using a color wheel to find complementary colors.
Another vital aspect of freehand painting is brush control. Practice makes perfect! Before you dive into your mug, consider practicing on a piece of paper or a scrap ceramic tile. This way, you can familiarize yourself with how much pressure to apply and how to create different effects. For instance, light pressure can give a soft, feathered look, while firm pressure produces bold, defined lines. Take your time and don’t rush; the beauty of freehand painting is in the process.
Furthermore, plan your design before you start painting. Sketching your ideas lightly with a pencil on the mug can help you visualize the final product. It’s like creating a roadmap for your artistic journey. If you’re feeling adventurous, try using a water-soluble pencil that will wash away with water, allowing you to erase any mistakes easily. This way, you can feel free to experiment without the fear of making permanent errors.
Lastly, don’t forget about layering. If you want to create depth in your designs, consider painting in layers. Start with a base color and allow it to dry before adding details or additional colors. This technique not only enhances the richness of your artwork but also helps prevent colors from blending unintentionally. Remember, patience is key!
In summary, freehand painting is all about embracing your creativity and allowing your personality to shine through. With the right tools, a thoughtful approach, and a sprinkle of patience, you can create stunning, one-of-a-kind mugs that reflect your unique style. So grab your brushes, unleash your imagination, and let your creativity flow!
- Can I use regular paints for my mugs? No, it is best to use paints specifically designed for ceramics to ensure durability and safety.
- How do I seal my painted mugs? You can use a clear ceramic sealant or spray sealant after your paint has dried completely.
- Are hand-painted mugs dishwasher safe? Generally, hand-painted mugs are not dishwasher safe unless specified by the paint manufacturer. Hand wash is recommended.
- How long does the paint take to dry? Drying times can vary, but most ceramic paints will be dry to the touch within a few hours. However, it's best to wait 24 hours before using the mug.

Using Stencils Effectively
Stencils can be a game-changer when it comes to creating stunning designs on your hand-painted mugs. They offer a way to achieve clean lines and intricate patterns that might be challenging to accomplish with freehand painting alone. So, how do you use stencils effectively? First, it's essential to choose the right stencil for your design. You can find a variety of stencils, from simple shapes to complex patterns, at craft stores or even online. When selecting a stencil, consider the size and detail of your design; a larger stencil may work better for bold designs, while smaller ones are perfect for intricate artwork.
Once you've chosen your stencil, the next step is to prepare your mug. Make sure it is clean and dry, as any dust or moisture can interfere with the paint adherence. Position your stencil carefully on the mug, securing it with painter's tape if necessary. This will prevent it from shifting while you work, ensuring that your design remains crisp and precise. If you're using a multi-layer stencil, start with the background color first, allowing it to dry before applying the next layer.
When it comes to applying paint through the stencil, less is often more. Use a sponge or a flat brush to dab the paint onto the stencil, rather than brushing it on. This technique helps to minimize paint bleed, which can ruin the sharpness of your design. Make sure to lift the stencil straight up after painting to avoid smudging. If you find that some areas need touch-ups, don’t worry! A fine brush can help you refine those edges after the stencil is removed.
After you've completed your design, it's time to let the paint dry completely before handling your mug. Depending on the type of paint you used, drying times may vary, so always refer to the manufacturer's instructions. Once dry, consider sealing your artwork to protect it from wear and tear, especially if you plan to use the mug regularly.
Incorporating stencils into your mug painting process not only enhances the aesthetic appeal of your creations but also boosts your confidence as a DIY artist. With a little practice, you'll find that stencils can help you create professional-looking mugs that reflect your unique style. So, gather your supplies, unleash your creativity, and let those stencils do the talking!
- Can I use any type of paint with stencils? While you can use various paints, it's best to choose those specifically designed for ceramics to ensure durability.
- How do I clean my stencils after use? Gently wash them with warm soapy water and a soft sponge to remove any paint residue.
- Are stencils reusable? Yes! As long as you clean them properly, you can use stencils multiple times for different projects.
- Can I use stencils on other surfaces? Absolutely! Stencils can be used on various surfaces, including canvas, wood, and fabric.
Finishing Touches
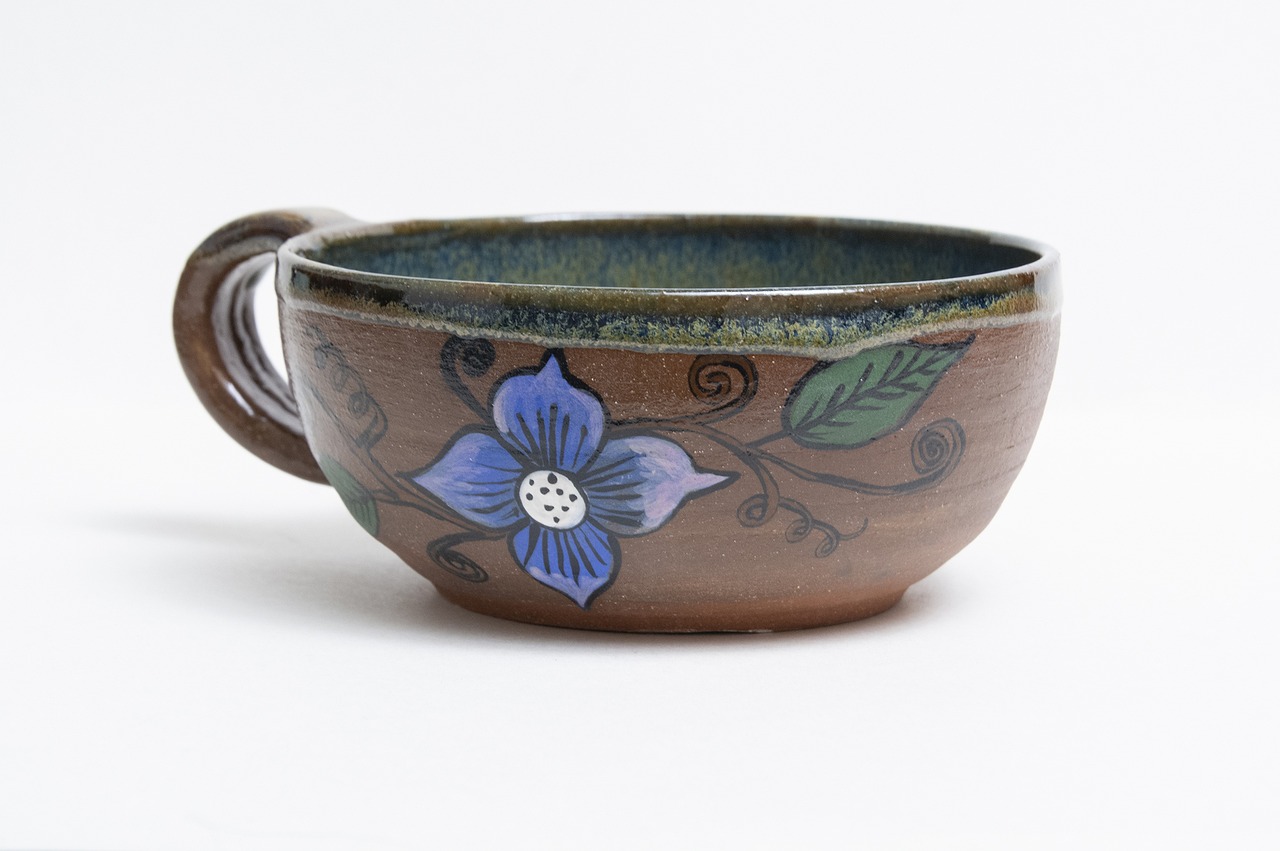
When it comes to crafting your very own hand-painted mugs, the are what truly bring your artwork to life. These final steps are not just about aesthetics; they play a crucial role in ensuring that your designs remain vibrant and intact for years to come. After all, what good is a beautiful mug if the paint chips away after a few washes? So, let’s dive into the essential processes that will enhance the durability and appeal of your creations.
First and foremost, sealing your artwork is paramount. This step protects your painted designs from wear and tear, making them dishwasher-safe and suitable for everyday use. There are various sealing options available, each with its own benefits. For instance, you can choose between spray sealants, which provide a smooth, even coat, or brush-on sealers that allow for more control over the application. Regardless of the method you choose, make sure to follow the manufacturer’s instructions for the best results. Here’s a quick overview of popular sealing options:
| Sealing Option | Pros | Cons |
|---|---|---|
| Spray Sealant | Even coverage, quick drying | Can overspray, requires ventilation |
| Brush-On Sealer | Control over application, good for details | Can leave brush strokes if not applied carefully |
| Heat-Setting | Durable finish, often dishwasher safe | Requires an oven, not suitable for all paints |
After sealing, consider adding personal touches that make your mugs uniquely yours. This could be anything from hand-painted initials, a favorite quote, or even a meaningful symbol. These little details not only add character but also transform a standard mug into a cherished keepsake. Think of your mug as a canvas; the more personal elements you add, the more it tells your story.
Don’t forget about embellishments! Adding a few decorative elements can elevate your mug’s appearance significantly. For example, you might want to incorporate some metallic paint accents or even small decals to enhance the visual appeal. Just be sure that any additional elements you add are compatible with the paint and sealant you’ve used. A well-placed embellishment can turn a simple design into a stunning piece of art!
Finally, take a moment to admire your handiwork! The finishing touches are not just practical; they're a celebration of your creativity and effort. Once you’ve sealed and personalized your mugs, they’re ready to be used or gifted. Imagine sipping your morning coffee from a mug that not only serves a purpose but also reflects your personality and style. It’s these finishing touches that make your DIY project truly special.
Q: How long should I wait before sealing my painted mug?
A: It's best to let your paint dry completely, which usually takes about 24 hours. Make sure to follow the manufacturer's recommendations for specific drying times.
Q: Can I use my hand-painted mug in the microwave?
A: It depends on the type of paint you used. Always check the paint’s label for microwave safety. If unsure, it’s best to avoid using it in the microwave.
Q: How do I clean my painted mug?
A: Hand wash your mug with mild soap and a soft sponge. Avoid abrasive materials that could scratch your design.
Q: Can I paint over mistakes?
A: Absolutely! If you make a mistake, let the paint dry, then gently sand the area and repaint it. Just be sure to seal it again afterward.
Sealing Your Artwork
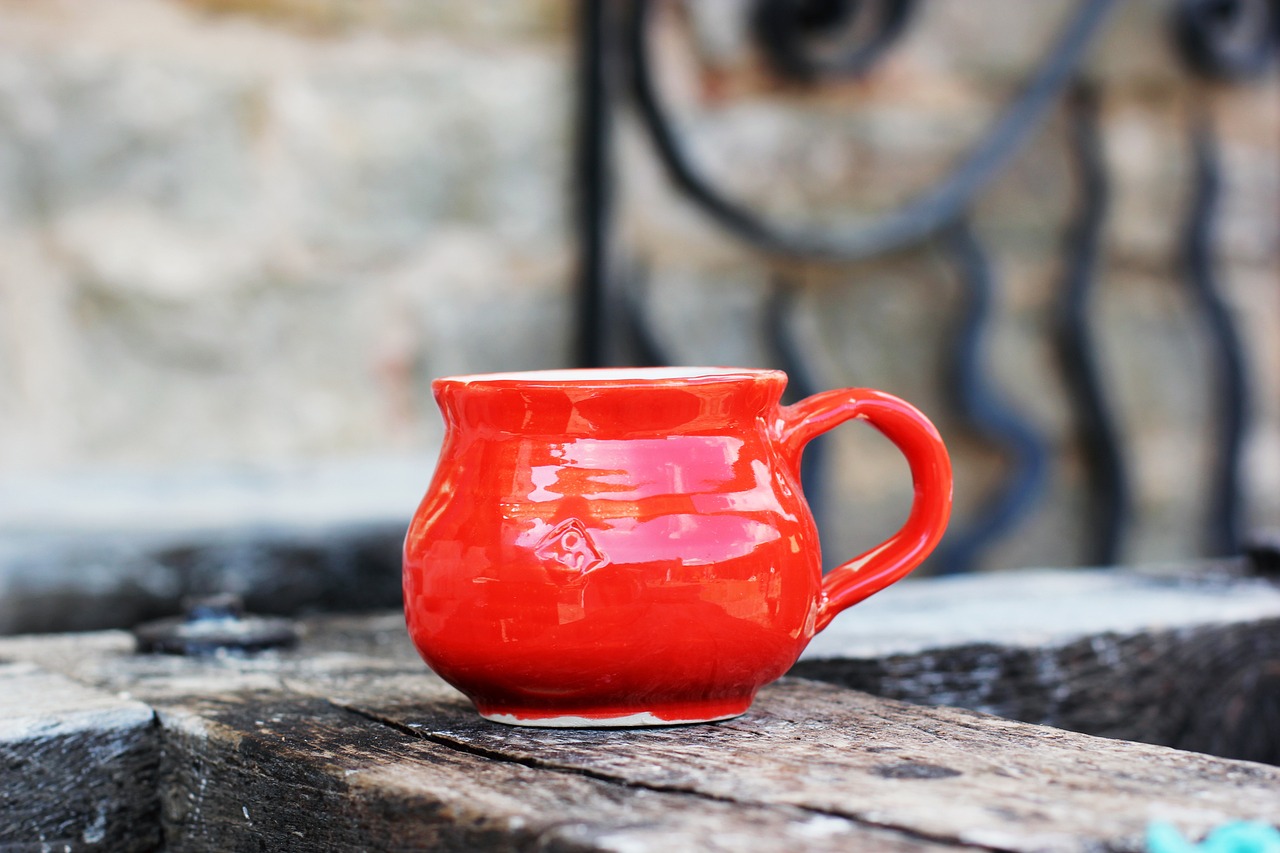
Once you've completed your stunning hand-painted mug, the next critical step is . This process not only enhances the visual appeal of your designs but also ensures that your hard work stands the test of time. Imagine pouring your favorite hot beverage into a mug that looks as vibrant as the day you painted it—sealing is the key to achieving that!
There are several sealing options available, and the choice largely depends on the type of paint you used and how you intend to use your mug. Here are some popular sealing methods:
- Clear Acrylic Spray Sealant: This is a favorite among DIY enthusiasts due to its ease of use. Simply spray an even coat over your mug, allowing it to dry completely. This method is excellent for protecting your artwork from scratches and fading.
- Dishwasher-Safe Mod Podge: If you want a sealant that can withstand the rigors of daily use, consider using dishwasher-safe Mod Podge. Apply it with a brush to your painted areas, and after allowing it to cure for a few days, your mug will be ready for the dishwasher!
- Heat Setting: For those using ceramic paints, heat setting can be an effective way to seal your designs. After painting, place your mug in a cold oven, set the temperature to 350°F (175°C), and bake for about 30 minutes. This method helps the paint bond with the ceramic surface.
Regardless of the method you choose, it's essential to follow the manufacturer’s instructions for the best results. Additionally, always allow your painted mug to cure fully before using it to ensure the sealant adheres properly and your artwork stays intact.
Lastly, while sealing your artwork is crucial, it’s equally important to consider the long-term care of your mug. Avoid soaking it in water for extended periods, and hand wash it gently to maintain the integrity of your sealant. With the right care, your hand-painted mug can become a cherished item in your kitchen for years to come!
Here are some common questions about sealing hand-painted mugs:
- Can I use any sealant for my painted mug? Not all sealants are suitable for every type of paint. Always check compatibility before applying.
- Will the sealant make my mug safe for food and beverages? Yes, if you use food-safe sealants, your mug will be safe for use. Always verify the product specifications.
- How long should I wait before using my sealed mug? It's best to wait at least 72 hours after sealing to ensure everything has cured properly.

Adding Personal Touches
When it comes to hand-painted mugs, adding personal touches can truly transform them from simple kitchenware into cherished keepsakes. Imagine sipping your morning coffee from a mug that not only reflects your personality but also tells a story. Whether it’s your favorite quote, a special date, or a whimsical design that resonates with you, these unique elements can make your mugs feel like they were crafted just for you.
One fantastic way to personalize your mugs is by incorporating your initials or a meaningful symbol. For instance, if you love nature, consider painting a small leaf or flower next to your name. This not only adds a personal flair but also connects your mug to your interests. You could also include a quote that inspires you each day. Imagine starting your morning with a mug that says, "Believe in yourself," or "Every day is a new beginning." These affirmations can set a positive tone for your day.
Another creative idea is to use a theme that resonates with your life. If you love traveling, why not paint a small globe or landmarks from your favorite destinations? Or if you’re an avid reader, consider designing a stack of books with your favorite titles. This thematic approach not only showcases your interests but also sparks conversations with guests who admire your handiwork.
Moreover, you can experiment with colors that represent your personality. For instance, if you’re vibrant and energetic, bold colors like reds and yellows can reflect that spirit. On the other hand, if you prefer a calm and serene vibe, soft blues and greens might be more your style. The color palette you choose can significantly impact the overall feel of your mug, making it a true reflection of who you are.
Finally, don’t forget about the placement of your designs. Think about where you want your artwork to be visible. A design that wraps around the mug can create a stunning effect, while a small emblem on one side can be a subtle yet classy touch. The key is to balance creativity with functionality, ensuring your personalized mug is as practical as it is beautiful.
By adding these personal touches to your hand-painted mugs, you're not just creating art; you're crafting a piece of yourself. So gather your paints and brushes, let your imagination run wild, and create mugs that are as unique as you are!
- Can I use regular acrylic paint for my mugs? - While you can use regular acrylic paint, it's best to opt for ceramic paint specifically designed for pottery to ensure durability.
- How do I seal my painted mug? - You can use a food-safe sealant or spray to protect your designs. Make sure to follow the manufacturer's instructions for the best results.
- Are hand-painted mugs dishwasher safe? - It's generally recommended to hand wash your painted mugs to preserve the artwork, as dishwashers can be harsh on the paint.

Care and Maintenance
Taking care of your hand-painted mugs is essential if you want to keep them looking vibrant and fresh over time. Just like a well-tended garden, your mugs need a bit of nurturing to flourish. Proper care and maintenance not only preserve the beauty of your artwork but also ensure that your favorite beverage can be enjoyed in a mug that feels personal and special. So, how do you keep those beautiful creations in tip-top shape? Let's dive into some essential tips!
First and foremost, when it comes to cleaning your painted mugs, it's crucial to treat them with care. Unlike standard ceramic mugs, hand-painted designs can be a bit more delicate, especially if you used acrylic paints. Here’s a quick guide to cleaning:
- Hand Wash Only: Avoid the dishwasher! Hand washing is the safest option to protect your artwork. Use warm, soapy water and a soft sponge to gently clean the surface.
- Gentle Scrubbing: If there are stubborn stains, opt for a soft-bristled brush instead of abrasive sponges, which can scratch your design.
- Dry with Care: After washing, pat your mug dry with a soft cloth rather than rubbing it, which can lead to wear on the painted surface.
Now that we’ve covered cleaning, let’s talk about storage. How you store your hand-painted mugs can make a significant difference in their longevity. Stacking mugs can lead to scratches and chips, so consider these storage tips:
- Use Mug Hooks: Installing hooks in your kitchen can be a stylish way to display your mugs while keeping them safe from damage.
- Keep Them Separate: If you must stack, place a soft cloth between each mug to prevent scratching and chipping.
- Temperature Awareness: Avoid storing your mugs in extreme temperatures, as this can cause cracking or fading of the paint.
Lastly, let's not forget about the sealing process! Sealing your painted mugs is a critical step that protects your artwork from wear and tear. There are several sealing options available, such as spray sealants or brush-on finishes. Make sure to follow the manufacturer's instructions carefully to ensure the best results. Remember, a good seal not only enhances the durability of your design but can also add a lovely sheen that makes your artwork pop!
Incorporating personal touches, such as your initials or a favorite quote, can also make your mugs truly unique. This is where creativity meets functionality, allowing you to express yourself while enjoying your favorite drinks. Whether it's a morning coffee or an evening tea, your hand-painted mug can be a source of joy and inspiration every time you use it.
Q: Can I use my hand-painted mugs for hot beverages?
A: Yes, as long as you use heat-resistant paints and sealants, your mugs should be fine for hot drinks. Just remember to avoid extreme temperature changes.
Q: How do I know if my paint is food-safe?
A: Always check the label on your paint. If it’s not labeled as food-safe, it’s best to use your painted mugs for decorative purposes only.
Q: What should I do if my design starts to fade?
A: If your design begins to fade, consider re-sealing or re-painting the affected area. Keeping your mugs out of direct sunlight can also help preserve the colors.
Q: Is it safe to put my painted mug in the microwave?
A: This depends on the type of paint used. If you used non-toxic, heat-resistant paint, it should be safe. However, always check the manufacturer's guidelines.
Cleaning Techniques
When it comes to keeping your hand-painted mugs looking as vibrant as the day you created them, play a pivotal role. You might be wondering, "Can I just toss them in the dishwasher?" While that sounds convenient, the answer is a resounding no! Hand-painted mugs require a bit more love and care to ensure that your artistic creations remain intact and stunning.
First and foremost, always opt for gentle hand washing instead of using a dishwasher. The high temperatures and harsh detergents can fade your beautiful designs and even cause them to chip. Instead, fill your sink with warm water and add a splash of mild dish soap. Use a soft sponge or cloth to gently scrub the surface of your mugs, paying special attention to the painted areas. Avoid using abrasive sponges, as they can scratch the paint and ruin your masterpiece.
After washing, rinse your mugs thoroughly under warm water to remove any soap residue. Here’s a tip: let your mugs air dry instead of using a towel. This helps prevent any potential scratches that could occur from drying with fabric. If you want to go the extra mile, consider placing your mugs upside down on a drying rack to allow any excess water to drip off.
For those stubborn stains or marks that just won’t budge, you can create a gentle cleaning paste using baking soda and water. Mix a tablespoon of baking soda with a few drops of water until it forms a paste. Apply this paste to the stained area and gently scrub with a soft cloth. Rinse well and watch as your mug returns to its original glory!
Additionally, if your mugs are adorned with intricate designs, you might want to consider hand washing them more frequently to prevent any buildup of grime that could dull your artwork. Remember, a little bit of care goes a long way in preserving the beauty of your hand-painted creations.
Lastly, avoid soaking your mugs in water for extended periods, as this can weaken the paint and lead to peeling. Instead, keep your cleaning routine quick and efficient. By following these simple cleaning techniques, you can enjoy your hand-painted mugs for years to come, keeping the joy of your creativity alive in every sip!
Here are some common questions you might have regarding the cleaning and maintenance of your hand-painted mugs:
- Can I use a dishwasher for my hand-painted mugs?
No, it's best to hand wash them to preserve the paint. - What should I use to clean stubborn stains?
A baking soda paste works wonders for tough stains. - Is it safe to soak my mugs in water?
No, soaking can weaken the paint. Quick washes are recommended. - How can I make my painted designs last longer?
Regular gentle cleaning and proper storage will help maintain their appearance.
Storage Tips
When it comes to storing your beautifully hand-painted mugs, a little bit of thought goes a long way. You want to ensure that your creations remain as stunning as the day you painted them. First and foremost, consider the location of your mugs. A cool, dry place away from direct sunlight will help prevent fading and deterioration of the paint. Think of your mugs as delicate treasures; they deserve a home that protects them.
Next, think about how you stack or arrange your mugs. If you have multiple painted mugs, avoid stacking them directly on top of each other unless you have soft padding, like a cloth or paper towel, between them. This will prevent any scratches or chips on your artwork. Instead, try displaying them on a dedicated shelf or in a cabinet where they can be showcased as art pieces. This not only protects them but also adds a personal touch to your kitchen decor.
For those who love to keep things organized, consider using mug racks or hooks. These options not only save space but also allow you to easily access your favorite mugs without the risk of damage. If you’re feeling crafty, you can even create a DIY mug rack that complements your kitchen's aesthetic. Just imagine hanging your favorite designs on the wall, turning your mugs into a charming display!
Lastly, if you have seasonal mugs or special occasion pieces that you don’t use every day, think about investing in a storage box or container specifically designed for fragile items. Make sure to wrap each mug in bubble wrap or soft cloth to provide extra cushioning. Not only does this keep them safe, but it also makes it easier to pull them out when the time comes to celebrate or change up your decor.
By following these storage tips, you can keep your hand-painted mugs looking fabulous for years to come. Remember, it’s all about creating a safe and loving environment for your artistic expressions!
- How can I clean my hand-painted mugs without damaging the paint?
Use a gentle dish soap and a soft sponge. Avoid abrasive cleaners that can scratch the surface. - Can I put my painted mugs in the dishwasher?
It's best to hand wash them to preserve the paint. If you must use a dishwasher, place them on the top rack and use a gentle cycle. - What type of paint is best for hand-painted mugs?
Ceramic paint is highly recommended as it is designed for use on pottery and can withstand washing. - How long do the painted designs last?
With proper care and sealing, your designs can last for years, even with regular use!
Frequently Asked Questions
- What type of paint should I use for hand-painted mugs?
For hand-painted mugs, it's best to use ceramic paint or specialized porcelain paint. These types of paints are designed to adhere to the surface of the mug and withstand washing. Acrylic paints can also be used, but make sure to seal them properly to ensure durability.
- Can I use regular brushes for painting my mugs?
While you can use regular brushes, it's recommended to use brushes specifically designed for ceramics. These brushes often have softer bristles that allow for smoother application and better control, making it easier to achieve the desired effect.
- How do I prepare my workspace for painting?
To prepare your workspace, start by choosing a clean, flat surface that's well-lit. Lay down newspaper or a plastic sheet to protect the area from paint spills. Organize all your supplies, including paints, brushes, and mugs, within easy reach to streamline your crafting process.
- What are some good design ideas for my mugs?
Finding inspiration can be as simple as browsing online platforms like Pinterest or Instagram. You can also look at nature, patterns, or even your favorite quotes for ideas. Don't be afraid to mix and match styles or create your own unique designs!
- How do I seal my painted mugs?
To seal your painted mugs, you can use a clear ceramic sealer or a food-safe acrylic spray. Make sure the paint is completely dry before applying the sealer. Follow the instructions on the product for the best results, and allow it to cure for the recommended time.
- Can I put my hand-painted mugs in the dishwasher?
It's best to hand wash your hand-painted mugs to preserve the artwork. If you've used food-safe paint and sealing techniques, you may be able to put them in the dishwasher, but it's safer to wash them gently by hand to avoid potential damage.
- What should I do if the paint chips or fades?
If your paint chips or fades, you can touch it up with the same paint you used initially. Just clean the area, let it dry, and apply a new coat. Afterward, make sure to reseal to protect your artwork from further wear.
- How should I store my hand-painted mugs?
Store your hand-painted mugs in a safe place where they won't be knocked over or scratched. Consider using a mug tree or a dedicated shelf with enough space between each mug to prevent them from touching. Always place them upright to avoid any potential damage.


