
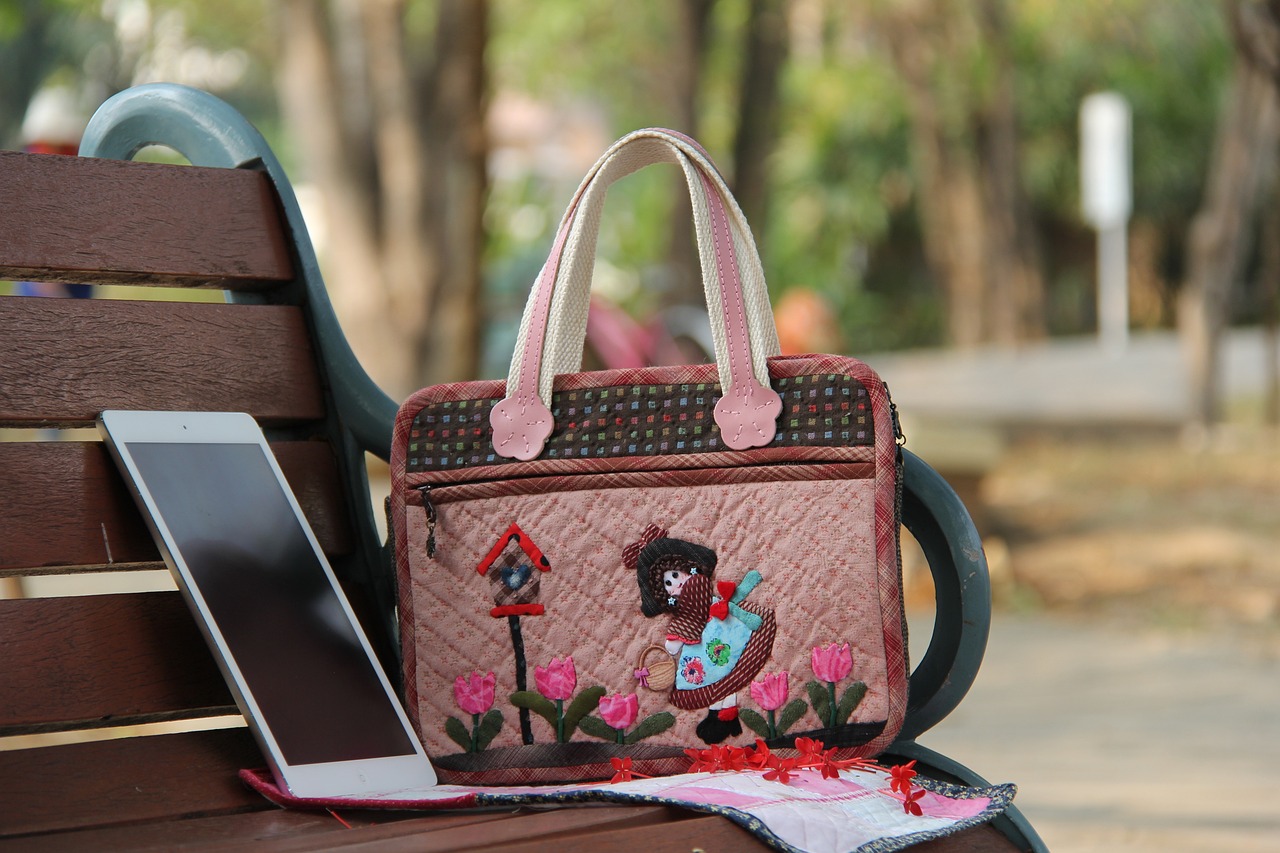
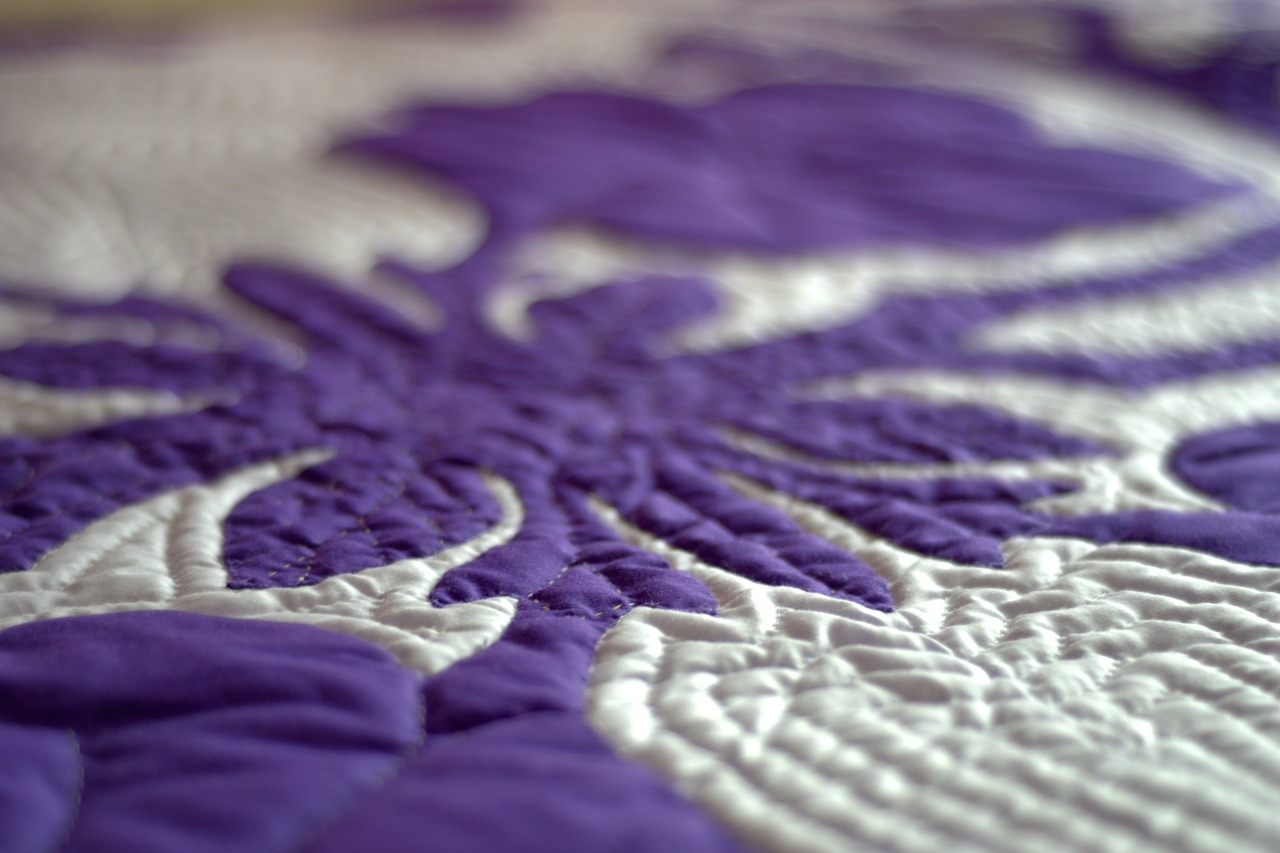
Ten Time-Saving Quilting Tips and Tricks
This article provides essential tips and tricks to help quilters save time while maintaining quality. Discover efficient techniques to streamline your quilting process and enhance your overall quilting experience. Quilting is a delightful craft, but it can also be time-consuming if you're not equipped with the right strategies. Whether you're a seasoned quilter or just starting, these tips will help you reclaim hours of your life while creating beautiful quilts that you'll be proud to showcase. So, let’s dive into the art of quilting smarter, not harder!
A clutter-free workspace can significantly improve your efficiency. Imagine trying to sew a beautiful quilt while constantly searching for your scissors or thread; it’s not just frustrating, it’s a major time-waster! Organizing your quilting tools and materials is key to a productive session. Start by designating specific areas for different tools—your fabric, threads, and cutting tools should all have their own spaces. Consider using clear storage bins and labels to make everything easily accessible. A well-organized space not only enhances your workflow but also inspires creativity, allowing you to focus on what you love most: quilting.
Pre-cutting fabric can save valuable time during the quilting process. Think of it as laying the groundwork before building a house; having everything ready makes the actual construction much smoother. Preparing your fabric ahead of time means you can dive right into sewing when the mood strikes. Here are a few tips on cutting techniques and storage solutions:
- Use a rotary cutter for precise cuts.
- Store pre-cut pieces in labeled bags to avoid confusion later.
- Cut multiple layers of fabric at once to save time.
By investing a bit of time upfront, you’ll find that your quilting sessions become more enjoyable and less stressful.
A rotary cutter can speed up the cutting process significantly. It’s like having a magic wand that transforms fabric into perfect shapes with minimal effort. To use this tool effectively and safely, always ensure your blade is sharp and your cutting mat is clean. A dull blade can lead to ragged edges and frustration, so make it a habit to check your cutter before starting a project. Remember, safety first—always cut away from your body and keep your fingers clear of the blade.
Selecting the appropriate cutting mat is crucial for efficiency. Different types of mats cater to various needs, so consider your quilting style before making a choice. Here’s a quick comparison:
| Mat Type | Best For |
|---|---|
| Self-Healing Mat | Frequent cutting without wear |
| Grid Mat | Precise measurements |
| Double-Sided Mat | Versatility and space-saving |
Choosing the right mat will not only enhance your cutting experience but also prolong the life of your rotary cutter.
Regular maintenance of your rotary cutter ensures optimal performance. Just like a car needs regular oil changes, your quilting tools require care to function at their best. Keep your cutter sharp by replacing blades as needed, and clean it regularly to avoid fabric buildup. A well-maintained rotary cutter can make all the difference in achieving clean, precise cuts.
Batch processing allows you to complete similar tasks at once. This method is akin to cooking a meal; when you chop all your vegetables before you start cooking, the process flows much smoother. By grouping similar tasks—like cutting all your fabric pieces or sewing all your blocks—you can maximize your efficiency and minimize interruptions. This approach not only saves time but also helps maintain focus, making your quilting projects more enjoyable.
Using efficient piecing methods can speed up your quilting process. Think of piecing as assembling a puzzle; the quicker you can fit the pieces together, the sooner you’ll see the full picture. Techniques like chain piecing and strip piecing are game-changers. Chain piecing involves sewing multiple pieces together in one continuous process, which can drastically reduce your sewing time. Strip piecing, on the other hand, allows you to sew long strips of fabric together before cutting them into smaller pieces, simplifying the entire piecing process.
Chain piecing is a time-saving technique that allows you to sew multiple pieces together in one continuous process. This method not only speeds up your sewing but also reduces thread waste, making it a win-win situation. To implement this in your quilting projects, simply feed your fabric pieces through the machine without cutting the thread between them.
Strip piecing involves sewing long strips of fabric together before cutting them into smaller pieces. This method can simplify your piecing process and save time, much like laying down a foundation before building a house. By preparing strips ahead of time, you can quickly assemble your quilt blocks without the hassle of cutting and measuring each piece individually.
Implementing streamlined quilting techniques can enhance your overall efficiency. It’s about working smarter, not harder. Techniques like machine quilting can significantly reduce the time spent on finishing a quilt. By mastering machine quilting, you’ll not only speed up the process but also achieve professional results that will impress anyone who sees your work.
Machine quilting can significantly reduce the time spent on finishing a quilt. To improve your machine quilting skills, practice regularly and experiment with different stitch patterns. Don’t forget to adjust your machine’s tension settings for optimal results. A well-tuned machine can make all the difference in achieving that perfect finish.
Quilting in sections allows for better control and efficiency. By breaking down your quilting projects into manageable sections, you can create a smoother workflow. This technique not only makes large projects less daunting but also allows you to focus on perfecting each section before moving on to the next.
Investing in quality quilting tools can save you time and frustration. Just like a chef needs the right knives to prepare a meal, a quilter needs reliable tools to create beautiful quilts. Essential tools that enhance your quilting experience include a good sewing machine, sharp scissors, and high-quality threads. These tools can make the difference between a frustrating session and a joyful experience.
A reliable sewing machine can make a significant difference in your quilting speed. When selecting a machine, look for features such as a wide throat space for larger quilts, adjustable speed settings, and a variety of stitch options. Investing in a good machine is a step toward elevating your quilting game.
Certain accessories can enhance your quilting efficiency. Must-have tools like a walking foot, quilting clips, and a seam ripper can simplify various quilting tasks and improve your overall workflow. These small investments can lead to big savings in time and effort, allowing you to enjoy your quilting projects even more.
Q: How can I improve my quilting speed?
A: Focus on organizing your workspace, using efficient cutting and piecing techniques, and investing in quality tools. These strategies will help you quilt faster without sacrificing quality.
Q: What is chain piecing?
A: Chain piecing is a technique where you sew multiple pieces of fabric together in one continuous chain, saving time and reducing thread waste.
Q: Why is it important to maintain my rotary cutter?
A: Regular maintenance ensures your rotary cutter performs optimally, providing clean cuts and reducing fabric waste.

Organizing Your Workspace
When it comes to quilting, the environment in which you work can make all the difference. Imagine trying to create a masterpiece in a chaotic, cluttered space—it can feel overwhelming, right? By organizing your workspace, you can transform your quilting experience from frustrating to fulfilling. A well-structured area not only enhances your efficiency but also sparks creativity. So, how do you go about creating this ideal quilting haven?
First, consider the layout of your workspace. Ensure that your sewing machine is placed on a sturdy table at a comfortable height, allowing you to sew without straining your back. Surround your machine with essential tools such as scissors, threads, and pins. This way, everything you need is within arm's reach, reducing the time spent searching for items. Think of your workspace as a well-oiled machine—every part needs to work together smoothly!
Next, let's talk about storage solutions. Utilize bins, baskets, and shelves to categorize your materials. For instance, you could have a designated bin for fabric scraps, another for threads, and yet another for tools. Labeling these containers can further streamline your process. Imagine opening a bin and instantly knowing where everything is—no more digging through piles of fabric! Here are some tips to keep in mind:
- Clear Surfaces: Keep your cutting table and sewing area free of unnecessary items.
- Vertical Space: Use wall-mounted shelves or pegboards to maximize storage without taking up valuable floor space.
- Regular Decluttering: Make it a habit to regularly sort through your materials and eliminate what you no longer need.
Another important aspect of organizing your workspace is creating a comfortable atmosphere. Good lighting is essential; consider adding a bright lamp to illuminate your sewing area. Natural light is also beneficial, so if possible, position your workspace near a window. A well-lit space not only helps you see your fabrics clearly but also makes your quilting sessions more enjoyable.
Finally, don't underestimate the power of personal touches. Incorporate elements that inspire you—whether it's a quilt you’ve completed, a vision board of your dream projects, or even a cozy chair for breaks. These small additions can boost your motivation and make your workspace feel uniquely yours.
In conclusion, organizing your quilting workspace is about more than just tidiness; it's about creating an environment that fosters creativity and efficiency. By investing time in setting up your space thoughtfully, you're setting yourself up for quilting success. So, roll up your sleeves, declutter, and watch how your productivity soars!
Pre-Cutting Fabric
When it comes to quilting, time is often of the essence, and one of the best ways to save precious minutes is through . Imagine walking into your quilting space, ready to dive into your project without the tedious task of cutting fabric first. Sounds delightful, right? By preparing your fabric ahead of time, you can streamline your quilting process significantly. Not only does pre-cutting save time, but it also allows you to focus on the fun parts of quilting, like piecing and quilting itself.
So, what are the benefits of pre-cutting fabric? For starters, it helps you avoid the frustration that comes with cutting fabric during your quilting session. You can easily grab the pieces you need without having to stop and measure, cut, and organize. This method also enables you to work more efficiently, as you can cut multiple pieces at once, which is particularly useful for larger projects. Plus, when you have everything pre-cut and organized, you can easily switch between projects without losing momentum.
To effectively pre-cut your fabric, consider the following techniques:
- Use a rotary cutter: This handy tool can make quick and precise cuts, ensuring that your pieces are uniform and ready for piecing.
- Plan your cuts: Before you start cutting, take a moment to plan out your pieces based on your quilt pattern. This will help you maximize fabric usage and minimize waste.
- Storage solutions: After cutting, store your fabric pieces in labeled bags or containers. This organization will save you time when you return to your project later.
Additionally, consider creating a cutting chart to help you keep track of the sizes and quantities of each piece you need. Here's a simple example:
| Fabric Color | Piece Size | Quantity |
|---|---|---|
| Red | 5" squares | 20 |
| Blue | 2.5" strips | 15 |
| Yellow | 10" squares | 10 |
By keeping a detailed record of your fabric cutting, you can ensure that you have everything you need at your fingertips, allowing you to dive straight into the sewing process. In essence, pre-cutting fabric not only saves time but also enhances your quilting experience by reducing stress and increasing your productivity. So, next time you embark on a quilting project, consider taking that extra step to pre-cut your fabric. You'll be amazed at how much smoother and more enjoyable your quilting journey can be!
Using a Rotary Cutter
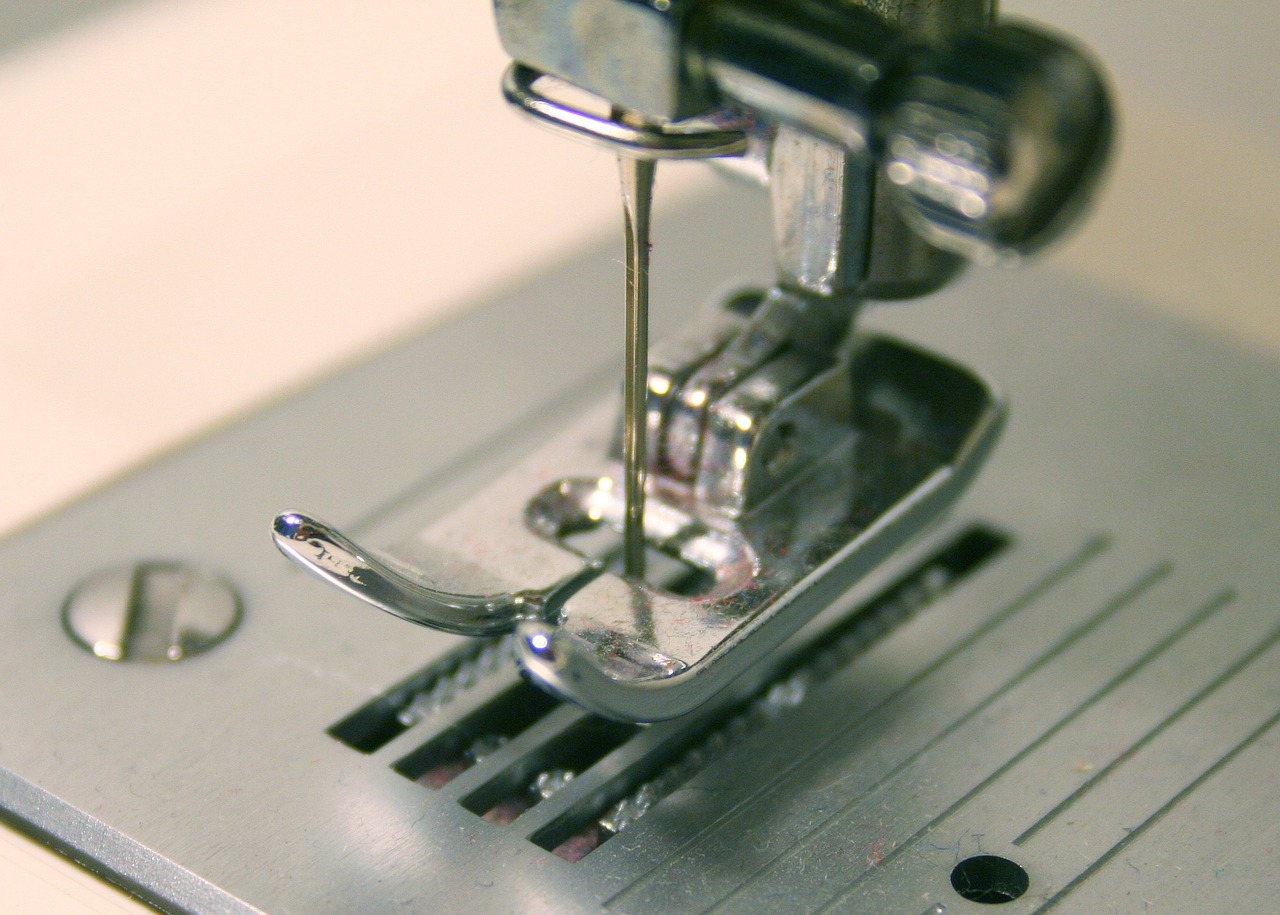
When it comes to quilting, efficiency is key, and one of the best tools to help you achieve that is the rotary cutter. This nifty little device can transform your cutting process, allowing you to make precise cuts quickly and easily. Unlike traditional scissors, a rotary cutter glides through multiple layers of fabric with ease, which means you can cut out quilt pieces in a fraction of the time. Imagine trying to slice through a stack of fabrics with scissors; it’s like trying to cut a cake with a butter knife—frustrating and inefficient!
To get the most out of your rotary cutter, it’s essential to use it correctly. Here are some tips to ensure you're cutting like a pro:
- Keep Your Blade Sharp: A dull blade can lead to jagged edges and uneven cuts, which can affect the overall look of your quilt. Regularly replace or sharpen your rotary cutter blades to maintain precision.
- Use a Cutting Mat: Always cut on a self-healing cutting mat. This not only protects your surfaces but also helps prolong the life of your blades.
- Employ Proper Cutting Techniques: Hold the cutter at a comfortable angle and apply even pressure as you cut. A steady hand will yield better results.
Another great aspect of the rotary cutter is its versatility. You can use it for various quilting techniques, from cutting straight lines to intricate shapes. If you’re working on a project that requires multiple pieces of the same size, you can stack your fabric layers and cut through them all at once. This method not only saves time but also ensures that all your pieces are uniform, which is crucial for piecing together a quilt.
However, safety should always be a priority when using a rotary cutter. Make sure to keep the blade covered when not in use, and always cut away from your body. It’s easy to get lost in the rhythm of cutting, but a moment of distraction can lead to accidents. Think of it like driving a car; you need to stay focused on the road to avoid any mishaps!
Finally, remember that practice makes perfect. If you're new to using a rotary cutter, take some time to practice on scrap fabric. This will help you get comfortable with the tool and develop your cutting skills without the pressure of working on an actual quilt. With a little bit of practice, you’ll be able to wield your rotary cutter with confidence, making your quilting experience not only faster but also more enjoyable.
Q: Can I use a rotary cutter on all types of fabric?
A: Yes, rotary cutters work well on most fabric types, but be cautious with delicate fabrics, as they may require more care.
Q: How often should I change my rotary cutter blade?
A: It’s best to change your blade when you notice it’s not cutting as smoothly as it used to, typically after several projects.
Q: What size rotary cutter is best for quilting?
A: A 45mm rotary cutter is the most common size used for quilting, as it strikes a good balance between versatility and ease of use.
Choosing the Right Mat
When it comes to quilting, selecting the right cutting mat can make a world of difference in your efficiency and overall experience. A cutting mat serves as your workspace's foundation, protecting your surfaces and providing a reliable area for cutting fabric. But with so many options out there, how do you choose the best one for your quilting needs? Let's dive into some key considerations!
First and foremost, you should consider the size of the cutting mat. A larger mat allows for more extensive projects and reduces the need to constantly reposition your fabric. However, if you’re working in a smaller space, a compact mat might be more practical. The size you choose should reflect your workspace and the types of projects you typically tackle.
Next, think about the thickness of the mat. Thicker mats tend to last longer and provide more cushioning, which can help protect your rotary cutter's blade. A standard thickness is around 3mm to 5mm, but if you’re looking for durability, consider mats that are 5mm or thicker. This thickness can also help with cutting precision, as it reduces the chance of the fabric slipping during the cutting process.
Another crucial factor is the material of the cutting mat. Most mats are made from either PVC or self-healing materials. Self-healing mats are particularly beneficial as they close up after cuts, extending their lifespan and maintaining a smooth surface. This is especially important for quilters who frequently cut fabric, as it helps to keep your mat looking new for longer.
Additionally, pay attention to the grid lines on the mat. Clear, easy-to-read grid lines can significantly enhance your cutting accuracy. Look for mats that have both metric and imperial measurements, as this versatility can be helpful depending on your project needs. Some mats even come with angled lines for cutting at specific degrees, which can be a game-changer for certain quilt designs.
Lastly, consider the color of the mat. While this might seem trivial, a darker mat can help you see lighter fabrics more clearly, making it easier to align and cut accurately. Conversely, a lighter mat may be more visually appealing in your workspace. Ultimately, choose a color that you find aesthetically pleasing while also being functional.
To summarize, here are the key factors to consider when choosing a cutting mat:
- Size: Choose a size that fits your workspace and project needs.
- Thickness: Opt for a thicker mat for durability and cutting precision.
- Material: Self-healing mats are preferable for longevity.
- Grid Lines: Look for clear, versatile measurements.
- Color: Select a color that enhances visibility and fits your style.
By taking the time to select the right cutting mat, you'll not only enhance your quilting experience but also save time and effort in the long run. Remember, a well-chosen mat can be a quilter's best friend!
Q: How often should I replace my cutting mat?
A: It depends on usage, but if you notice deep cuts or warping, it’s time for a replacement.
Q: Can I use my cutting mat for other crafts?
A: Absolutely! Cutting mats are versatile and can be used for various crafts, not just quilting.
Q: Do I need to clean my cutting mat?
A: Yes, regular cleaning helps maintain its surface and prolong its life. Use a damp cloth and mild soap for cleaning.
Q: Are there specific mats for rotary cutters?
A: Most cutting mats are suitable for rotary cutters, but always check the manufacturer's recommendations.

Maintaining Your Rotary Cutter
When it comes to quilting, your rotary cutter is your best friend. It's the tool that helps you achieve those precise cuts and keeps your projects moving smoothly. However, just like any tool, it requires proper care and maintenance to ensure it performs at its best. Neglecting your rotary cutter can lead to frustration and wasted fabric. So, how do you keep this essential tool in top shape?
First and foremost, always keep your rotary cutter sharp. A dull blade not only makes cutting more difficult but can also increase the risk of accidents as you apply more pressure to make cuts. It's recommended to replace the blade regularly, especially if you notice any tearing or fraying of the fabric edges. Most quilters find that changing the blade every few projects is a good rule of thumb.
Another crucial aspect of maintenance is keeping your rotary cutter clean. Dust and fabric lint can accumulate in the blade housing, affecting its performance. To clean it, simply disassemble the cutter according to the manufacturer's instructions and use a soft brush or cloth to remove any debris. Regular cleaning will not only prolong the life of your cutter but also ensure smooth operation.
Storage is equally important. Always store your rotary cutter in a safe place, preferably with a blade guard or cover to prevent accidental cuts. Avoid leaving it on your workspace where it can be knocked over or misplaced. Consider using a dedicated container or a drawer to keep it secure and organized.
Lastly, be mindful of how you use your rotary cutter. Always cut on a self-healing cutting mat to protect both your blade and your work surface. This will help maintain the sharpness of the blade longer and provide a smoother cutting experience. Additionally, using the right cutting technique—like applying even pressure and moving in a straight line—will help prevent unnecessary wear and tear on your tool.
By following these simple maintenance tips, you can ensure your rotary cutter remains a reliable companion in your quilting journey. Remember, a well-maintained tool not only saves you time but also enhances the quality of your work.
- How often should I replace the blade on my rotary cutter?
It's best to replace the blade every few projects or whenever you notice it becoming dull. - Can I clean my rotary cutter with water?
It's recommended to avoid water; instead, use a soft cloth or brush to clean the blade and housing. - What should I do if my rotary cutter gets stuck while cutting?
Stop cutting immediately, check for fabric caught in the blade, and ensure the blade is sharp before continuing.
Batch Processing Techniques
Batch processing techniques are an absolute game-changer when it comes to quilting. Imagine you’re in a bustling bakery, where the chef bakes dozens of cookies at once instead of making one batch at a time. This approach not only speeds up the process but also ensures consistency in the final product. In quilting, applying a similar methodology can save you heaps of time and energy, allowing you to focus on the creative aspects rather than getting bogged down with repetitive tasks.
So, how does batch processing work in the world of quilting? It’s all about grouping similar tasks together. For instance, instead of cutting fabric pieces for one block at a time, you can cut all the pieces for several blocks in one go. This minimizes the time spent switching between different tasks and tools, making your quilting sessions much more efficient. You might find it helpful to follow these steps:
- Plan Your Project: Before diving in, outline your project. Determine how many blocks you’ll need and what sizes they will be.
- Gather Your Materials: Collect all your fabrics, threads, and tools. Having everything at hand reduces interruptions.
- Cut in Batches: Cut all the pieces for each block at once. This way, you can keep your cutting mat out and avoid the hassle of setting it up multiple times.
- Sew in Batches: Once your pieces are cut, sew them together in batches. You can chain piece them, which not only saves time but also helps maintain consistent seam allowances.
By implementing these batch processing techniques, you’ll find that your quilting projects progress at a much faster pace. Additionally, this method reduces the mental load of switching gears constantly, allowing you to immerse yourself in the joy of quilting. Plus, with everything organized, you can easily track your progress, giving you that satisfying sense of accomplishment as you check off each completed block.
As you get comfortable with batch processing, you may also discover additional time-saving strategies. For example, consider keeping a dedicated space for your quilting projects where you can leave everything set up. This way, you can jump right back in whenever you have a spare moment, making it easier to maintain momentum. Remember, the key to effective batch processing is not just speed, but also finding a flow that works for you.
What is batch processing in quilting?
Batch processing in quilting refers to the technique of grouping similar tasks together to enhance efficiency. For example, cutting all fabric pieces for multiple blocks at once instead of one at a time.
How can I implement batch processing?
You can implement batch processing by planning your project ahead, gathering all materials, and then cutting and sewing in batches. This reduces time spent on switching tasks and tools.
Does batch processing affect the quality of my quilting?
No, in fact, batch processing can improve the quality of your quilting by allowing you to focus on consistency and precision in each step without interruptions.
Can batch processing be used for other quilting techniques?
Absolutely! Batch processing can be applied to various quilting techniques, including piecing, quilting, and even binding, making it a versatile approach to enhance your quilting experience.
Efficient Piecing Methods
When it comes to quilting, the piecing process can often feel like the most daunting part of the project. However, with the right techniques, you can transform this task from a time-consuming chore into a smooth and enjoyable experience. are key to ensuring that you spend less time sewing and more time enjoying your beautiful creations. So, how can you speed up this process without sacrificing quality? Let’s dive into some effective strategies that will help you piece blocks quickly and accurately.
One of the most effective methods to enhance your piecing efficiency is to adopt chain piecing. This technique allows you to sew multiple pieces together in a continuous chain, drastically reducing the time spent on starting and stopping your sewing machine. Imagine this: instead of sewing one block at a time, you can sew several blocks in one go, which not only saves time but also keeps your sewing rhythm intact. To implement chain piecing, simply feed your fabric pieces through the machine consecutively without cutting the thread in between. It’s like a well-oiled assembly line, and the results are both quick and satisfying.
Another method worth considering is strip piecing. This technique involves sewing long strips of fabric together before cutting them into smaller pieces. Think of it as preparing a large pizza before slicing it into individual pieces. By piecing long strips, you can significantly reduce the number of seams you have to sew, making the entire process much more efficient. Once you have your strips sewn together, simply cut them into the desired sizes, and you’ll have perfectly matched pieces ready for assembly. Not only does this method save time, but it also minimizes fabric waste, which is a win-win for any quilter.
To further streamline your piecing process, consider organizing your fabric and tools before you start sewing. Having everything within arm's reach can eliminate unnecessary interruptions. Set up your workspace so that your fabric, rotary cutter, and sewing machine are all easily accessible. You might even want to create a piecing station where all your essentials are located, making it easy to grab what you need as you work. This simple act of organization can drastically improve your workflow and allow you to focus on the creative aspect of quilting.
Lastly, don't underestimate the importance of quality tools in your piecing process. Investing in a reliable sewing machine that offers a consistent stitch and good speed can make a significant difference in your quilting experience. Additionally, using high-quality thread and sharp needles will ensure that your seams are strong and your fabric pieces fit together perfectly. Remember, a smooth ride requires a well-tuned vehicle, and the same goes for your quilting tools!
- What is chain piecing and how does it work?
Chain piecing is a technique where you sew multiple pieces of fabric together in a continuous chain without cutting the thread in between. This method speeds up the sewing process and maintains your rhythm. - How can I organize my quilting workspace?
To organize your workspace, keep all your tools and materials within reach. Consider creating a designated piecing station where everything you need is easily accessible. - What tools are essential for efficient piecing?
Essential tools include a reliable sewing machine, sharp needles, quality thread, and a rotary cutter. Investing in these tools can significantly enhance your piecing efficiency.
Chain Piecing
Chain piecing is a revolutionary technique that can transform your quilting experience, making it not only faster but also more enjoyable. Imagine sitting down at your sewing machine and sewing multiple pieces of fabric together in one continuous motion, like a well-oiled machine! This method allows you to sew several units at once without stopping to cut threads after each piece. It's like creating a beautiful assembly line right in your own sewing room.
So, how does chain piecing work? The concept is quite simple: you start by sewing two pieces of fabric together, and instead of cutting the thread, you simply feed the next pair of pieces into the machine. This way, you create a "chain" of sewn pieces, which can be cut apart later. Not only does this save time, but it also reduces thread waste and keeps your workflow smooth. You’ll find that you can piece blocks together in record time!
Here are some additional benefits of chain piecing:
- Efficiency: By sewing multiple pieces at once, you cut down on the time spent stopping and starting, which can be a major time sink in traditional piecing methods.
- Consistency: Chain piecing allows for a more uniform stitch length and tension, leading to better quality seams.
- Less Fabric Waste: Since you’re not cutting the thread between each piece, you’ll find you have less thread to trim away later.
To get started with chain piecing, you’ll want to make sure you have your pieces organized. Lay out your fabric pieces in the order you plan to sew them. This organization will help you maintain your workflow and keep you from getting lost in the process. It’s also helpful to use a leader and ender fabric (scraps of fabric) to start and finish your chain. This practice can help you avoid thread nests and keep your stitches neat.
As you get into the rhythm of chain piecing, you might be surprised by how quickly you can complete a quilt top. It’s almost like magic! Plus, once you master this technique, you’ll find yourself looking for more opportunities to use it in your quilting projects. So grab your fabric, set up your machine, and let the chain piecing begin!
Q: What types of projects are best suited for chain piecing?
A: Chain piecing is ideal for projects that require multiple blocks or units, such as quilts, table runners, or any project that involves repetitive sewing patterns.
Q: Do I need any special equipment for chain piecing?
A: No special equipment is required! Just your sewing machine, fabric, and a pair of scissors for cutting the threads after you finish the chain.
Q: Can I chain piece with different types of fabrics?
A: Absolutely! Chain piecing works with various fabric types, but make sure they have similar weights and textures for the best results.

Using Strip Piecing
Strip piecing is a fantastic technique that can revolutionize your quilting process. Imagine being able to sew long strips of fabric together before cutting them into smaller pieces. This method not only speeds up your piecing but also enhances the accuracy of your blocks. By piecing strips, you reduce the number of seams and the time spent on each individual piece, allowing you to focus more on creativity rather than the tedious aspects of quilting.
To get started with strip piecing, you'll want to select your fabrics. Choose colors and patterns that complement each other, as this will create a cohesive look in your finished quilt. Once you have your fabrics, cut them into strips of equal width, generally ranging from 1.5 to 3 inches. The beauty of strip piecing is that you can mix and match different fabrics to create stunning designs. For example, you could use a combination of solids and prints to add depth and interest to your quilt.
After you have your strips ready, lay them out in the desired order. This is where you can get creative! Think about the overall design and how the colors will interact. Once you're satisfied with the arrangement, start sewing the strips together. Remember to use a consistent seam allowance—typically 1/4 inch—to ensure that your pieces fit together perfectly when you cut them down later.
Once you’ve sewn your strips, press the seams open or to one side, depending on your preference and the design requirements. This step is crucial, as it helps to eliminate bulk and ensures that your quilt lays flat. After pressing, you can cut your long strip into smaller segments, which will become the blocks for your quilt. The result is a series of perfectly sized pieces that are ready to be assembled into your quilt top.
One of the greatest advantages of strip piecing is the ability to create a variety of block styles without the hassle of cutting each piece individually. You can create a myriad of designs, from simple squares to intricate patterns, all while saving time. Just consider how you can adapt this technique to your favorite quilt patterns!
Incorporating strip piecing into your quilting repertoire not only saves time but also enhances your overall quilting experience. It allows you to produce beautiful quilts with less effort, freeing you up to enjoy the creative process. So the next time you're preparing for a quilting project, think about how strip piecing could streamline your workflow and bring your visions to life!
- What is strip piecing? Strip piecing is a quilting technique where long strips of fabric are sewn together before being cut into smaller pieces, allowing for quicker and more accurate piecing.
- How do I choose the right fabric for strip piecing? Select fabrics that complement each other in color and pattern. Consider mixing solids with prints for a dynamic look.
- What seam allowance should I use for strip piecing? A consistent seam allowance of 1/4 inch is recommended to ensure that your pieces fit together well.
- Can I use strip piecing for any quilt pattern? Yes! Strip piecing can be adapted for a variety of quilt patterns, making it a versatile technique.

Streamlining Quilting Techniques
When it comes to quilting, efficiency is key. Streamlining your quilting techniques can not only save you precious time but also enhance the quality of your finished projects. Imagine being able to complete a quilt in a fraction of the time it usually takes! By adopting a few smart strategies, you can transform your quilting experience from a time-consuming task into a delightful hobby that you look forward to every day.
One of the most effective ways to streamline your quilting process is by machine quilting. This technique can significantly reduce the amount of time spent on finishing a quilt. Unlike hand quilting, which can take hours or even days, machine quilting allows for faster stitching and more consistent results. To get the most out of this method, consider these essential tips:
- Choose the Right Thread: Using a high-quality thread can make a world of difference. It not only glides smoothly through your machine but also reduces the chances of thread breakage.
- Practice Your Stitching: Spend some time getting comfortable with your machine. The more you practice, the more confident and efficient you'll become.
- Adjust Your Machine Settings: Familiarize yourself with your sewing machine's settings. Adjusting the tension and stitch length can help you achieve the best results.
Another effective technique for streamlining your quilting process is quilting in sections. This method allows you to break down your quilting projects into manageable parts, making it easier to focus on each section without feeling overwhelmed. For instance, instead of trying to quilt an entire quilt top at once, consider dividing it into smaller sections. This approach not only helps maintain control over your work but also provides a sense of accomplishment as you complete each segment.
Additionally, consider using a walking foot when machine quilting. This specialized foot helps to evenly feed the fabric through the machine, preventing shifting and ensuring consistent stitching. It’s especially useful for quilting layers together, as it allows for greater control and precision.
Finally, don’t underestimate the power of planning your quilting design in advance. Before you even pick up your sewing machine, take a moment to sketch out your quilting pattern. This can save you time and frustration later on, as you won’t have to make decisions on the fly. Knowing your design ahead of time allows you to stitch more confidently and efficiently, ultimately leading to a more polished final product.
Q: What is the best way to prepare my fabric before quilting?
A: Pre-washing and pressing your fabric can help prevent shrinkage and ensure that your pieces lie flat, making the quilting process smoother.
Q: How can I improve my machine quilting skills?
A: Practice is key! Try different stitches and techniques on scrap fabric to build your confidence and improve your skills.
Q: What tools can help streamline my quilting process?
A: Essential tools include a rotary cutter, cutting mat, walking foot, and quality thread. Investing in these items can greatly enhance your efficiency.
By implementing these streamlined quilting techniques, you can create beautiful quilts in less time while enjoying the process even more. Happy quilting!
Machine Quilting Tips
Machine quilting can be a game-changer for those looking to reduce the time spent on finishing a quilt. Imagine transforming a pile of fabric into a beautifully quilted masterpiece in a fraction of the time it would take by hand! To help you achieve that, here are some essential tips that will not only enhance your skills but also ensure professional-looking results.
First and foremost, it's crucial to choose the right thread. The type of thread you use can significantly impact the overall appearance of your quilting. Opt for a high-quality thread that complements your fabric choices. Additionally, consider using a thread that matches your fabric color; this will help hide any imperfections in your quilting. Don't forget to test your thread tension on a scrap piece of fabric to ensure that your stitches are even and secure.
Next, maintain a consistent speed while sewing. It might be tempting to speed through your quilting, especially when you're excited about finishing your project, but maintaining a steady pace is essential for achieving even stitches. Think of it like riding a bike; if you pedal too fast, you'll lose control. A consistent speed allows you to have better control over your machine and ensures that your stitches are uniform.
Another important aspect of machine quilting is using a walking foot. This handy attachment helps to keep multiple layers of fabric aligned as you sew, preventing any shifting that could lead to uneven quilting. If you haven’t used one before, it’s like having a trusty sidekick that keeps everything in check! You’ll be amazed at how much smoother your quilting process becomes with this tool in your arsenal.
When it comes to the actual quilting patterns, start simple. If you’re new to machine quilting, stick to easy designs like straight lines or simple curves until you feel more confident. As you gain experience, you can gradually incorporate more complex patterns. Just remember, every quilting expert was once a beginner!
Lastly, don’t underestimate the power of practicing on scrap fabric. Before diving into your main project, take some time to practice your quilting techniques on leftover fabric. This will not only help you get comfortable with your machine but also give you the opportunity to experiment with different patterns and settings. Think of it as a warm-up before the big game; it prepares you for success!
In summary, machine quilting can elevate your quilting game to new heights. By choosing the right thread, maintaining a consistent speed, using a walking foot, starting with simple patterns, and practicing on scrap fabric, you’ll be well on your way to achieving stunning results in less time. So, grab your machine, put these tips into action, and watch your quilting projects transform!
- What type of thread is best for machine quilting? High-quality cotton or polyester thread is recommended as it provides durability and a smooth finish.
- How can I prevent my fabric from shifting while quilting? Using a walking foot can help keep multiple layers of fabric aligned and prevent shifting.
- Is it necessary to practice on scrap fabric? Yes, practicing on scrap fabric allows you to perfect your techniques and experiment without the pressure of ruining your main project.
- What should I do if my stitches are uneven? Check your thread tension and ensure you're maintaining a consistent sewing speed. Adjust as necessary and test on scrap fabric.
Quilting in Sections
When it comes to quilting, one of the most effective strategies to enhance both efficiency and quality is . This method allows you to break down a large project into smaller, more manageable parts, making the entire process less overwhelming and far more enjoyable. Imagine trying to eat a whole cake in one bite—it's not only impractical but also a bit messy, right? Just like slicing that cake into pieces makes it easier to enjoy, dividing your quilt into sections streamlines your workflow.
By focusing on one section at a time, you can maintain better control over your stitching and ensure that each part of your quilt receives the attention it deserves. This approach also allows for easier adjustments and corrections, should any issues arise during the quilting process. For instance, if you notice that a particular section doesn't align perfectly, it's much simpler to fix it when you're only dealing with a small area instead of the entire quilt.
Here are some key benefits of quilting in sections:
- Improved Focus: Concentrating on one section helps you stay focused and reduces the risk of mistakes.
- Better Quality Control: You can inspect each section thoroughly before moving on to the next, ensuring consistent quality throughout your quilt.
- Time Management: Breaking the quilt into sections allows you to set achievable goals, making it easier to manage your time effectively.
- Enhanced Creativity: Working in smaller sections can inspire creative ideas as you see how each part contributes to the overall design.
To implement this technique, start by planning your quilt layout. Sketch it out or use quilting software to visualize how the sections will come together. You might consider dividing your quilt into rows or blocks, depending on the design. Once you have a clear plan, you can begin working on each section individually, ensuring that you complete one before moving on to the next. This method not only keeps you organized but also provides a sense of accomplishment as you complete each part.
Additionally, consider using a design wall to help visualize how your sections will fit together. By placing your completed sections on a wall, you can step back and see the full picture, making it easier to identify any adjustments that need to be made before you sew everything together. This method can be particularly beneficial for complex designs where color and pattern placement are crucial.
In summary, quilting in sections is a fantastic way to enhance your quilting experience. By breaking down your project, you can improve focus, quality, and creativity while managing your time effectively. So, grab your fabric, plan your sections, and watch your quilting projects transform into beautiful, cohesive works of art!
Here are some common questions quilters have about the process of quilting in sections:
- What is the best way to divide my quilt into sections?
Consider the overall design of your quilt. You can divide it into rows, blocks, or even themed sections based on color or pattern. - How do I keep track of my sections?
Using a design wall or keeping a project journal can help you visualize your progress and ensure that each section fits together as planned. - Can I quilt in sections with any quilt pattern?
Absolutely! Most quilt patterns can be adapted to a sectional approach, making it a versatile technique for quilters of all skill levels.

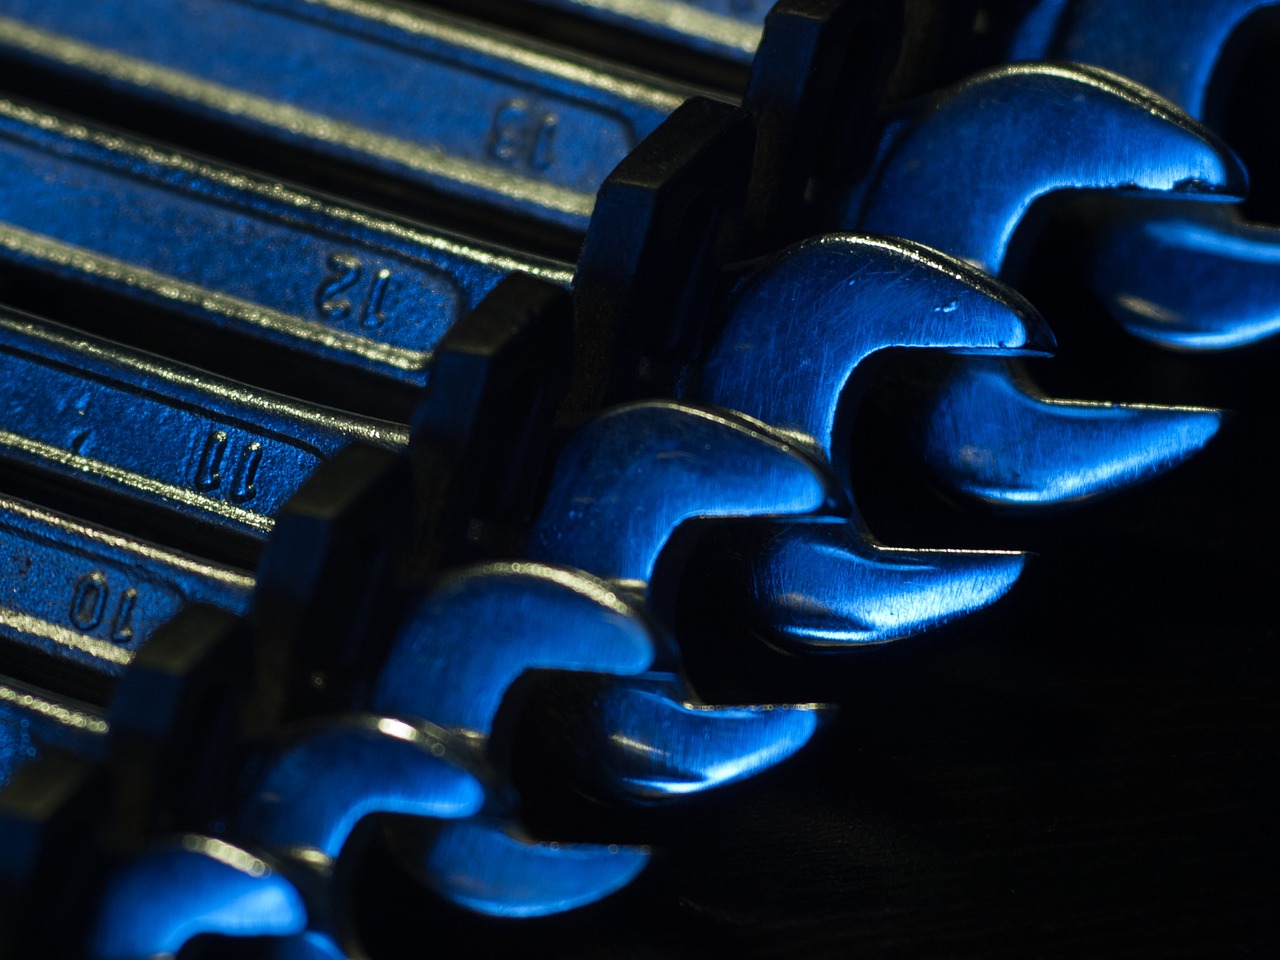
Using Quality Tools
When it comes to quilting, investing in quality tools can make a world of difference in your crafting experience. Imagine trying to bake a cake with a dull knife; it’s frustrating and often leads to a less-than-perfect result. The same principle applies to quilting. Using high-quality tools not only enhances your efficiency but also elevates the quality of your finished projects. So, what should you be looking for? Let's dive into some essential tools that can transform your quilting journey.
First up, your sewing machine is the heart of your quilting process. A reliable sewing machine can drastically improve your speed and accuracy. When choosing a machine, consider features like a walking foot for even fabric feeding, adjustable stitch lengths, and a drop-in bobbin system for easy threading. You want a machine that feels like an extension of your creativity, not a hindrance. Think of it as your trusty steed; the better it is, the smoother your ride will be!
In addition to a good sewing machine, having the right accessories can make your quilting tasks easier and more enjoyable. Here are some must-have tools:
- Rotary Cutter: This tool is a game changer for cutting fabric accurately and swiftly. It’s like using a hot knife through butter!
- Cutting Mat: A self-healing cutting mat protects your surfaces and keeps your rotary cutter in top condition.
- Quilting Ruler: A clear quilting ruler helps you measure and cut with precision, ensuring your pieces fit together seamlessly.
- Seam Ripper: Mistakes happen, and having a quality seam ripper on hand makes correcting them a breeze.
Now, let’s not forget about the importance of maintaining your tools. Just like any well-loved item, your quilting tools require care. Regularly clean your sewing machine and keep your rotary cutter blades sharp. Dull blades can lead to fabric fraying and uneven cuts, which can be a nightmare when piecing your quilt together. Think of it this way: a well-maintained tool is like a well-tuned instrument; it plays beautifully and helps you create masterpieces!
In conclusion, investing in quality tools is not just about spending more money; it’s about enhancing your quilting experience. The right tools can save you time, reduce frustration, and ultimately lead to stunning quilts that you’ll be proud to show off. So, take a moment to evaluate what you currently have and consider upgrading where necessary. Your future quilting projects will thank you!
Q: What is the most important tool for quilting?
A: While many tools are essential, a reliable sewing machine is often considered the most important tool for quilting. It can significantly affect your speed and accuracy.
Q: How often should I replace my rotary cutter blades?
A: It’s recommended to replace your rotary cutter blades every 10-20 hours of cutting, or whenever you notice they are no longer cutting cleanly.
Q: Can I use regular scissors for cutting fabric?
A: While you can use regular scissors, a rotary cutter and mat will provide more precise and quicker cuts, making them more suitable for quilting.
Q: What accessories should I have as a beginner quilter?
A: As a beginner, you should invest in a rotary cutter, cutting mat, quilting ruler, and a seam ripper. These tools will make your quilting experience much smoother.
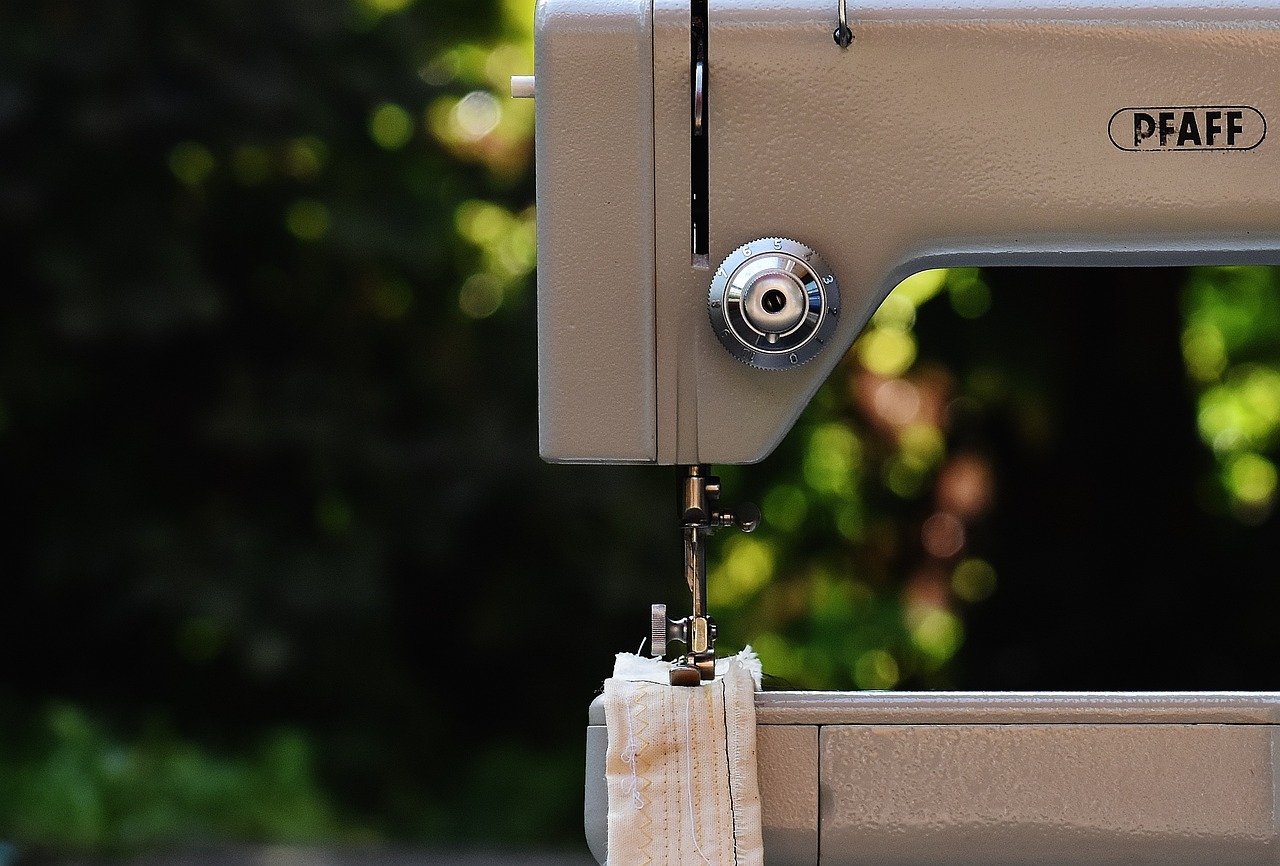
Choosing the Right Sewing Machine
When it comes to quilting, having the right sewing machine can make a world of difference. Imagine trying to bake a cake without the right oven; it’s a similar concept with quilting. A reliable sewing machine not only speeds up your quilting process but also enhances the quality of your work. So, what should you look for when selecting the perfect machine for your quilting needs?
First and foremost, consider the stitch quality. You want a machine that delivers consistent and clean stitches. Look for machines that offer a variety of stitch options, including straight, zigzag, and decorative stitches. This flexibility allows you to express your creativity without limits. Additionally, pay attention to the throat space—the area to the right of the needle. A larger throat space is essential for handling bigger quilting projects, making it easier to maneuver your fabric without any hassle.
Another crucial feature is the feed system. A machine with a good feed system helps to keep the fabric moving smoothly through the machine. This means less frustration and more time spent quilting. You might also want to check if the machine has a walking foot, which is particularly useful for quilting as it helps to evenly feed multiple layers of fabric through the machine.
Don't forget to consider the machine's weight and portability. If you plan to take your sewing machine to quilting classes or workshops, a lightweight model will be your best friend. However, ensure that it is sturdy enough to handle regular use without compromising on performance.
Lastly, think about the budget. While it’s tempting to go for the most expensive model with all the bells and whistles, there are many mid-range machines that offer excellent features for quilting. It’s all about finding a balance between quality and affordability. Here’s a quick comparison table to help you decide:
| Feature | Entry-Level Machine | Mid-Range Machine | High-End Machine |
|---|---|---|---|
| Stitch Options | Basic stitches | Variety of stitches | Extensive stitch library |
| Throat Space | Small | Medium | Large |
| Portability | Lightweight | Moderate weight | Heavier |
| Price Range | Under $300 | $300 - $800 | Above $800 |
In conclusion, choosing the right sewing machine is a pivotal step in your quilting journey. By considering factors such as stitch quality, throat space, feed system, portability, and budget, you can find a machine that meets your specific needs. Remember, the right tool can transform your quilting experience from a chore into a joy!
Q: What is the best sewing machine for beginners?
A: For beginners, a machine with basic stitches and user-friendly features is ideal. Look for brands known for reliability, such as Brother or Singer, which offer models under $300.
Q: How much should I spend on a quilting machine?
A: It depends on your quilting needs and how often you plan to quilt. A good mid-range machine typically costs between $300 and $800, offering a balance of features and quality.
Q: Do I really need a walking foot for quilting?
A: While not mandatory, a walking foot is highly recommended for quilting. It helps to evenly feed multiple layers of fabric, reducing the chances of puckering and ensuring a smooth finish.
Essential Quilting Accessories
When it comes to quilting, having the right tools can make all the difference between a frustrating experience and a joyful one. Investing in quality quilting accessories not only enhances your efficiency but also contributes to the overall quality of your projects. So, what are these essential accessories that every quilter should have in their toolkit? Let's dive in!
First and foremost, a sewing machine is your best friend in the quilting world. But not just any sewing machine will do. You’ll want one that is specifically designed for quilting, ideally with features like a larger throat space to accommodate bulky quilts, adjustable speed settings, and a walking foot to help manage multiple layers of fabric. Choosing the right sewing machine can significantly speed up your quilting process and ensure that your stitches are even and consistent.
Another must-have accessory is a cutting mat. This isn’t just a surface to cut on; it’s a crucial tool that protects your work area and helps you achieve precise cuts. Look for a self-healing mat that can withstand numerous cuts and still provide a smooth surface. Pair your cutting mat with a rotary cutter for the best results. The rotary cutter allows for quick and clean cuts, making it a favorite among quilters. Just remember to keep your blade sharp for optimal performance!
Don't overlook the importance of pins and clips. While pins have been a staple in quilting for ages, many quilters are now turning to fabric clips for bulky layers, as they can hold multiple layers together without distortion. Using the right type of fastening tools can save you time when piecing your blocks together, allowing for a smoother sewing experience.
Additionally, consider investing in a quilt ruler. A clear, gridded ruler helps you measure and cut accurately, ensuring that your fabric pieces are the correct size. This is particularly useful when working on intricate designs or when you need to cut multiple pieces of fabric to the same dimensions. The right ruler can make your cutting process much more efficient, reducing the likelihood of errors that could set you back.
Lastly, don’t forget about pressing tools. A good iron, preferably one with a steam function, is essential for achieving crisp seams and a professional finish. You might also want to invest in a pressing mat, which can help distribute heat evenly and protect your fabric from scorching. Having these pressing tools on hand will ensure that your quilt pieces lie flat and align perfectly.
In summary, equipping yourself with the right quilting accessories can drastically improve your quilting experience. Whether it's a reliable sewing machine, a sharp rotary cutter, or handy pressing tools, each accessory plays a vital role in streamlining your process and enhancing your final product. So, as you embark on your next quilting adventure, remember that the right tools are just as important as your creativity!
- What is the most important accessory for quilting? While many tools are essential, a good sewing machine designed for quilting is often considered the most important accessory.
- Can I use regular fabric scissors instead of a rotary cutter? While you can use fabric scissors, a rotary cutter provides more precision and speed, especially for straight cuts.
- How often should I replace my rotary cutter blade? It's best to replace your rotary cutter blade whenever you notice it becoming dull, as a sharp blade will save you time and frustration.
- Are fabric clips better than pins? It depends on personal preference and the type of project. Fabric clips are great for bulky layers, while pins are excellent for precision.
Frequently Asked Questions
- What are the best ways to organize my quilting workspace?
To create an efficient quilting workspace, start by decluttering your area. Use clear storage bins for fabrics and tools, and label everything for easy access. Consider creating designated zones for cutting, sewing, and pressing to streamline your workflow.
- How does pre-cutting fabric save time in quilting?
Pre-cutting fabric allows you to prepare all your pieces ahead of time, which means you can jump straight into sewing when you're ready. This method reduces the time spent during the actual quilting process, making it easier to focus on piecing and finishing your quilt.
- What is chain piecing and how can it help me?
Chain piecing is a technique where you sew multiple pieces of fabric together in a continuous chain without cutting the thread in between. This method saves time and thread, allowing you to complete blocks faster and more efficiently.
- What type of cutting mat should I use for quilting?
Choosing the right cutting mat is crucial. Look for a self-healing mat that is large enough to accommodate your fabric pieces. A mat with grid lines can also help ensure accurate cuts and measurements, making your cutting process much smoother.
- How can I maintain my rotary cutter for best performance?
To keep your rotary cutter in top condition, regularly replace the blade when it becomes dull. Clean the cutter and the mat to prevent fabric debris from affecting performance. Also, store your cutter safely to avoid accidental damage.
- What are some essential tools for efficient quilting?
Investing in quality tools can significantly enhance your quilting experience. Essential tools include a reliable sewing machine, a rotary cutter, a cutting mat, and various quilting rulers. These tools not only save time but also improve the quality of your work.
- What are the benefits of quilting in sections?
Quilting in sections allows you to manage large projects more effectively. By breaking down your quilt into smaller, more manageable parts, you can focus on each section without feeling overwhelmed, leading to a smoother workflow and better results.
- How can I improve my machine quilting skills?
To enhance your machine quilting skills, practice free-motion quilting regularly. Start with simple designs and gradually work your way up to more complex patterns. Additionally, ensure your machine is properly set up and that you have the right foot and needle for the job.
- What accessories should I consider for better quilting efficiency?
Must-have accessories that can simplify your quilting tasks include a walking foot for even fabric feeding, a quilting guide for accurate stitching, and fabric clips to hold layers together. These tools can save you time and frustration during your projects.


