Enhancing Your Quilting Techniques: Advanced Tutorial
Welcome to the world of quilting, where creativity meets craftsmanship! If you’re looking to take your quilting skills to the next level, you’ve landed in the right spot. This article is packed with advanced techniques, tips, and tools that will not only elevate your projects but also help you achieve that professional-quality finish you’ve always dreamed of. Think of quilting as a dance; the more you practice the steps, the more fluid and beautiful your performance becomes. So, grab your fabric and let’s dive into the intricate art of quilting!
Choosing the right fabric is crucial for successful quilting. Just like a painter selects the perfect canvas, a quilter must understand the materials they’re working with. Different fabrics have unique properties that affect how they behave during the quilting process. For example:
- Cotton: This is the most popular fabric choice for quilting due to its durability and ease of handling.
- Flannel: Soft and cozy, flannel is perfect for warm quilts but can be a bit tricky to sew if you're not careful.
- Batiks: Known for their vibrant colors and intricate patterns, batiks can add a unique flair to your quilts.
Understanding these properties will help you select the right fabric for your project, ensuring that your quilt not only looks great but also stands the test of time. Remember, the fabric is the foundation of your quilt, so choose wisely!
Now that you've got your fabric sorted, let's talk about stitching techniques that can truly transform your quilts. Advanced stitching methods add texture and depth, creating visual interest that will make your quilts stand out. Techniques like free-motion quilting and echo quilting are game-changers in the quilting world.
Free-motion quilting allows for creative expression and is a fantastic way to personalize your quilts. Imagine being able to draw with your sewing machine! To get started, you’ll need to set up your machine properly. Make sure to lower the feed dogs and use a free-motion foot. It's like letting your imagination run wild on a blank canvas!
Selecting the appropriate foot for free-motion quilting is essential. There are various options available, such as:
- Open-Toe Foot: Offers better visibility for intricate designs.
- Closed-Toe Foot: Provides more stability for straight lines.
Each foot impacts your quilting experience and the outcome of your project, so choose one that aligns with your quilting style.
Practice makes perfect! Here, we’ll outline beginner-friendly patterns that can help you gain confidence in free-motion quilting. Start with simple shapes like loops and swirls, gradually progressing to more complex designs. Remember, every expert was once a beginner!
Echo quilting creates beautiful, layered designs that can add depth to your quilts. The key to mastering this technique lies in achieving perfect echoes. Start by marking your initial line and work your way outwards, maintaining consistent spacing. It's like creating ripples in a pond—each echo should flow seamlessly from the last!
The right tools can make a significant difference in your quilting experience. Think of them as your trusty sidekicks on your quilting journey. Essential gadgets like rotary cutters, quilting rulers, and cutting mats can enhance precision and efficiency in your projects.
Using rotary cutters and mats can streamline your cutting process, allowing for clean, accurate cuts. Always ensure your blades are sharp and your mats are in good condition. A dull blade is like trying to paint with a dry brush—it just won’t give you the results you want!
Quilting rulers are vital for precise measurements. Different types of rulers serve various purposes, from straight edges to specialty shapes. Understanding how to use them effectively can make a world of difference in your quilting projects. It’s all about getting those measurements just right!
Modern quilting techniques can add a contemporary flair to your projects. Embrace innovative methods that blend traditional quilting with modern aesthetics for unique results. Techniques like improv quilting encourage creativity and spontaneity, allowing you to break free from rigid patterns and create one-of-a-kind quilts that reflect your personal style.
Digital tools can enhance your quilting process. From software that helps you design quilts to apps that manage your fabric inventory, technology can be a quilter's best friend. Imagine being able to visualize your project before you even cut your fabric—how cool is that?
Finishing touches can elevate your quilt's appearance. Techniques like binding and labeling ensure your quilt looks polished and professional. Binding is the final step in quilt finishing, and learning various techniques, such as straight, bias, and machine binding, can help you achieve a clean, durable edge.
Labeling adds a personal touch to your quilt. Discover creative ways to incorporate labels, including fabric labels and embroidered options. It’s a great way to commemorate your work and share your quilting journey with others!
Q: What is the best fabric for beginners?
A: Cotton is often recommended for beginners due to its ease of handling and availability.
Q: How do I improve my free-motion quilting skills?
A: Practice regularly with simple patterns, and don’t be afraid to experiment!
Q: What tools are essential for quilting?
A: A rotary cutter, cutting mat, quilting rulers, and a good sewing machine are fundamental tools for any quilter.
Understanding Fabric Types
When it comes to quilting, the fabric you choose can make or break your project. Understanding the different types of fabrics available is crucial for achieving the best results. Each fabric type has its own unique properties that can affect the drape, durability, and overall appearance of your quilt. For instance, cotton is the most popular choice among quilters due to its versatility and ease of use. It’s breathable, easy to sew, and comes in a vast array of colors and patterns, making it perfect for both traditional and modern quilts.
On the other hand, fabrics like flannel offer a cozy, soft touch, ideal for warmer quilts, while silk can add a luxurious feel but requires a bit more skill to work with. Understanding these fabric types not only helps you select the right material but also influences your quilting techniques. Here’s a quick overview of some common fabric types you might consider:
| Fabric Type | Properties | Best Uses |
|---|---|---|
| Cotton | Soft, breathable, easy to sew | General quilting, piecing |
| Flannel | Warm, soft, and cozy | Warm quilts, children’s blankets |
| Silk | Lustrous, delicate, requires special care | Luxury quilts, special occasions |
| Batiks | Colorful, durable, unique patterns | Art quilts, modern designs |
| Linen | Textured, breathable, wrinkles easily | Unique quilts, home decor |
When selecting fabric, consider how it will interact with the other materials in your quilt. For example, pairing a heavier fabric with a lighter one can create interesting textures, while using similar weights can ensure a smoother finish. Additionally, pay attention to the fabric's print and color, as these elements can significantly impact the overall aesthetic of your quilt.
In conclusion, understanding fabric types is not just about choosing what looks good; it’s about knowing how each type will perform in your quilting project. Whether you’re aiming for a traditional quilt or something more contemporary, the right fabric will help you achieve stunning results that you can be proud of.
- What is the best fabric for beginners? Cotton is recommended for beginners due to its ease of handling and availability.
- Can I mix different fabric types in one quilt? Yes, mixing fabric types can create unique textures, but be mindful of their weights and care requirements.
- How do I care for my quilted items? Always check the fabric care labels, but generally, machine washing on a gentle cycle and air drying is best.
Mastering Advanced Stitching Techniques
When it comes to quilting, the magic often lies in the details, and mastering advanced stitching techniques can transform your quilts from simple to stunning. If you've ever marveled at the intricate designs in a quilt, chances are those effects were achieved through advanced stitching methods. These techniques not only add texture and depth but also allow for creative expression, making your quilts truly one-of-a-kind. In this section, we'll dive into some of the most popular advanced stitching techniques, including free-motion quilting and echo quilting, and how you can incorporate them into your projects.
Free-motion quilting is like dancing on fabric; it gives you the freedom to create beautiful designs without being confined to a grid. This technique allows you to move the quilt sandwich freely under the needle, enabling you to create intricate patterns and designs that reflect your personality and style. To get started, you'll need to set up your sewing machine properly. This involves lowering the feed dogs and using a special free-motion foot. Don't worry if it sounds daunting! With practice, you'll find your rhythm and be able to stitch out stunning designs.
Choosing the appropriate foot for free-motion quilting is crucial for achieving the best results. There are several options available, including:
- Open-Toe Foot: This foot provides better visibility as you quilt, allowing you to see your stitching clearly.
- Closed-Toe Foot: Offers more stability, which can be beneficial for beginners as it keeps the fabric from slipping.
- Spring Loaded Foot: This type of foot allows for easier movement over the fabric, perfect for those intricate designs.
Experiment with different feet to find the one that feels most comfortable for you. Each foot can impact your quilting experience and the final outcome, so don't hesitate to try them all!
As with any skill, practice makes perfect! Before diving into complex designs, it's wise to start with some beginner-friendly patterns that will help you build your confidence. Here are a few patterns to consider:
- Loops: Simple and forgiving, loops can be varied in size and spacing to create a playful look.
- Waves: These can add a sense of movement and flow to your quilt.
- Meandering: A classic pattern that’s easy to learn and works well in many quilt styles.
By mastering these basic patterns, you'll be well on your way to tackling more intricate designs in no time!
Another fantastic technique to explore is echo quilting, which involves stitching parallel lines around a motif, creating a beautiful layered effect. This technique can add dimension and visual interest to your quilts, making them stand out. The key to successful echo quilting is maintaining consistent spacing between your lines. A good tip is to use a quilting ruler or a guide to help keep your lines evenly spaced. You can also experiment with different distances between echoes to create unique effects.
Echo quilting can be used on various designs, from simple shapes to intricate patterns. The best part? It’s a technique that can be adapted to any skill level. So whether you’re a seasoned quilter or a beginner, you can find ways to incorporate echo quilting into your projects.
Q: What is the best fabric for free-motion quilting?
A: Generally, a medium-weight cotton fabric works best as it provides a good balance of stability and flexibility. Avoid stretchy or slippery fabrics as they can complicate the quilting process.
Q: Do I need a special machine for advanced quilting techniques?
A: While a sewing machine with a free-motion capability is ideal, many standard machines can be adapted for advanced techniques with the right foot and settings.
Q: How can I improve my free-motion quilting skills?
A: Consistent practice is key! Start with simple patterns and gradually increase the complexity as you become more comfortable. Consider taking a class or watching online tutorials for additional guidance.
Free-Motion Quilting
Free-motion quilting is like dancing with your sewing machine; it offers a wonderful opportunity for creative expression that can transform a simple quilt into a stunning work of art. Unlike traditional quilting, where the machine feeds the fabric in a straight line, free-motion quilting allows you to move the fabric in any direction you desire. This technique opens up a world of possibilities, enabling you to create intricate patterns and designs that reflect your personal style. But before you dive in, it’s important to understand a few key elements that will help you master this technique.
First and foremost, setting up your sewing machine properly is crucial. You’ll want to lower the feed dogs, which are the small metal teeth that move the fabric through the machine. This adjustment allows you to control the fabric movement manually. Additionally, using a free-motion quilting foot is essential. This special foot holds the fabric in place while giving you the freedom to move it around without obstruction. Choosing the right foot can make a significant difference in your quilting experience, so let's take a closer look at some options.
When it comes to free-motion quilting, not all feet are created equal. Here are a few popular options:
- Open-Toe Foot: This foot provides excellent visibility, allowing you to see your stitching clearly as you work.
- Darning Foot: Ideal for free-motion quilting, this foot allows you to move the fabric freely while providing stability.
- Walking Foot: While primarily used for straight-line quilting, some quilters prefer it for free-motion work as well.
Once you’ve selected the right foot, it’s time to practice some basic patterns. Just like any new skill, practice makes perfect. Start with simple shapes like loops, swirls, and meanders. As you gain confidence, you can challenge yourself with more complex designs. Remember, the key to mastering free-motion quilting is to maintain a steady speed and even pressure on the fabric. Think of it as a rhythm; find your groove, and let the needle dance across the quilt!
To help you get started, here are a few beginner-friendly patterns to try:
- Basic Loops: These are simple, continuous curves that can fill spaces beautifully.
- Waves: Create a flowing pattern by stitching wavy lines that mimic the motion of water.
- Flowers: Add a touch of whimsy by stitching flower shapes that can enhance the overall design of your quilt.
As you practice these patterns, don’t be afraid to experiment! Free-motion quilting is all about finding your unique style. Consider using different thread colors or weights to add depth and interest to your designs. The beauty of this technique is that there are no strict rules—only guidelines to help you unleash your creativity.
In conclusion, free-motion quilting is a thrilling way to elevate your quilting projects. With the right setup, practice, and a willingness to explore, you’ll soon be creating quilts that not only showcase your skills but also tell a story. So grab your machine, put on your favorite music, and let your imagination take flight!
Choosing the Right Foot
When it comes to free-motion quilting, selecting the right foot for your sewing machine is crucial. The foot you choose can dramatically affect your quilting experience and the quality of your finished project. There are several types of quilting feet available, and understanding their functions will help you make an informed decision. The most common options include:
- Free-Motion Quilting Foot: This foot allows for unrestricted movement of the fabric under the needle, enabling you to create intricate designs and patterns. It's essential for achieving that fluid, artistic look.
- Walking Foot: Ideal for quilting multiple layers, this foot helps feed the fabric evenly, preventing puckering and shifting. It's perfect for straight-line quilting and works well with thicker materials.
- Open-Toe Foot: This foot provides a clear view of your stitching area, making it easier to see your designs as you work. It's great for detailed free-motion work where precision is key.
Each foot has its unique advantages, so it's worth experimenting to see which one feels best for your style. For instance, if you're just starting with free-motion quilting, the free-motion foot is your best bet. It allows you to practice various patterns without the constraints of a walking foot. However, if you find yourself working with thicker quilts or multiple layers, a walking foot might be the way to go.
Additionally, consider the compatibility of the foot with your sewing machine model. Some machines come with specific feet that may not fit others, so always check your manual or consult with your local sewing machine dealer. Investing in quality feet can significantly enhance your quilting capabilities and lead to more professional-looking results.
In summary, choosing the right foot is not just about functionality; it's about finding the tool that best suits your quilting style and needs. Don't hesitate to try different options, as this experimentation will help you discover what works best for you. After all, the journey of quilting is as much about the process as it is about the final product!
Q: Can I use any foot for free-motion quilting?
A: While you can technically use a standard foot, it's highly recommended to use a dedicated free-motion quilting foot for the best results. This foot allows for greater control and creativity.
Q: How do I know if my foot is compatible with my sewing machine?
A: Check your sewing machine's manual or consult with a dealer to ensure compatibility. Many brands offer specific feet designed for their machines.
Q: Is it necessary to have both a walking foot and a free-motion foot?
A: While it's not necessary, having both can provide you with more versatility in your quilting projects. Each foot serves a different purpose and can enhance your quilting experience.

Practice Patterns
When it comes to free-motion quilting, the adage "practice makes perfect" couldn't be more accurate. Starting with beginner-friendly practice patterns can significantly boost your confidence and skill level. These patterns are designed to help you familiarize yourself with your machine's movements and the rhythm of free-motion quilting. Think of it as learning to ride a bike; at first, you may wobble and feel unsure, but with practice, you’ll find your balance and speed.
One of the most effective ways to practice is by using simple designs that gradually increase in complexity. Here are a few patterns you might want to try:
- Loops: Start with basic loops. They are forgiving and can be varied in size and spacing, allowing you to get comfortable with the motion.
- Waves: Once you’ve mastered loops, try creating wave patterns. This will help you learn how to pivot and maintain consistent spacing.
- Swirls: Swirls add a bit of flair to your quilting. They can be challenging but are excellent for improving your control and flow.
- Meandering: This is a popular free-motion technique that looks complex but is actually quite simple. It involves moving in various directions without a set pattern, which can be very freeing.
To make your practice even more effective, consider using a practice quilt sandwich. This is simply a piece of fabric layered with batting and backing. It simulates the feel of quilting a real project without the pressure of perfection. You can use scrap fabric for this purpose, which not only saves money but also allows you to experiment with different fabrics and batting types.
Another tip is to set a timer for your practice sessions. Even just 15-30 minutes a day can lead to significant improvement over time. Focus on one pattern at a time, and don’t rush the process. As you become more comfortable, gradually introduce more complex designs. Remember, each stitch is a step towards mastering the art of free-motion quilting!
Lastly, don’t forget to enjoy the process! Quilting is not just about the end product; it’s about the journey and the creativity that flows through your hands. Celebrate your progress, no matter how small, and soon you’ll be amazed at how far you’ve come!

Echo Quilting Techniques
Echo quilting is a captivating technique that adds a stunning depth and dimension to your quilts, transforming them from ordinary to extraordinary. Imagine the way sound waves ripple outward; echo quilting mimics this concept by creating concentric designs that radiate from a central point. It’s not just about aesthetics; it’s about creating a visual rhythm that draws the eye and invites touch. To achieve this effect, you’ll need to master the art of spacing and consistency, ensuring that each echo is evenly distanced from the last.
To get started with echo quilting, you'll first want to choose a design that lends itself well to this technique. Popular motifs include circles, flowers, and geometric shapes. Once you have your design, the key is to establish a clear starting point. This could be the center of a flower or the apex of a triangle. From there, you will stitch your first echo line, then measure the distance for the next echo. A good rule of thumb is to keep the spacing between echoes uniform, which creates a more polished and professional look.
Here are some essential tips to help you achieve perfect echoes:
- Use a quilting ruler: This tool can help you maintain consistent spacing as you stitch your echoes. Place it alongside your previous line to guide your next one.
- Practice on scrap fabric: Before diving into your main project, take some time to practice on scraps. This will help you get a feel for the spacing and rhythm of your stitching.
- Adjust your machine settings: Depending on your machine, you might want to adjust the tension or stitch length to get the best results for your echoes.
As you gain confidence, consider experimenting with different echo distances. For instance, closely spaced echoes create a more intricate look, while wider spacing can produce a more open and airy design. Additionally, varying the width of your echo lines can add another layer of interest to your quilt. By playing with these elements, you can develop a style that is uniquely yours.
One of the most rewarding aspects of echo quilting is the way it allows for creativity. You can combine echo quilting with other techniques, such as free-motion quilting or appliqué, to create stunning, layered effects. Imagine a quilt where echo quilting frames a beautifully appliquéd flower; the contrast of textures and techniques can elevate your work to a new level.
Finally, don’t forget the importance of practice. Echo quilting, like all quilting techniques, requires time and patience to master. So, gather your materials, set up your sewing machine, and dive into this beautiful technique. With each stitch, you’ll find yourself improving, and soon enough, you’ll be creating quilts that not only tell a story but also showcase your advanced quilting skills.
Q: What is echo quilting?
A: Echo quilting is a technique that involves stitching lines that radiate outward from a central design, creating a layered, textured effect.
Q: Do I need special tools for echo quilting?
A: While you can use basic quilting tools, having a quilting ruler and a free-motion foot can significantly enhance your precision and ease of creating echo designs.
Q: How can I ensure my echoes are evenly spaced?
A: Using a ruler as a guide and practicing on scrap fabric can help you maintain consistent spacing between your echo lines.
Utilizing Quilting Tools and Gadgets
When it comes to quilting, having the right tools and gadgets can be a game changer. Imagine trying to paint a masterpiece without the right brushes or colors; it just wouldn’t work, right? Similarly, the tools you use can greatly influence the precision, efficiency, and enjoyment of your quilting projects. So, let’s dive into some essential quilting tools that can elevate your craft to new heights!
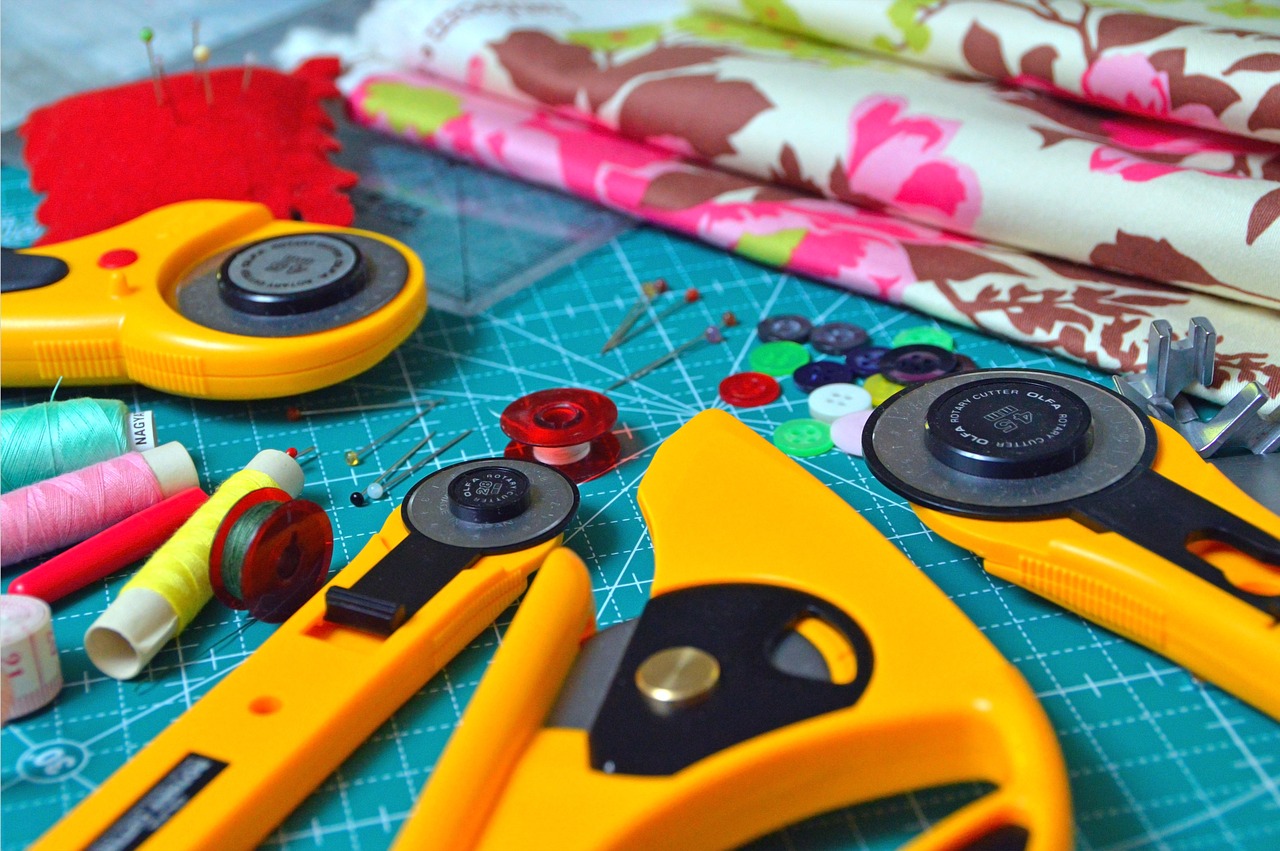
First up, we have rotary cutters and cutting mats. These are the dynamic duo of the quilting world! A rotary cutter allows you to slice through multiple layers of fabric with ease, making your cutting process fast and efficient. Pair it with a self-healing cutting mat, and you’ll have a surface that protects your table while ensuring your blades stay sharp for longer. Remember, maintaining your rotary cutter is crucial. Regularly replace the blade when it starts to dull, and clean the mat to keep it in top condition. This will ensure you achieve those clean, accurate cuts that are essential for a well-made quilt.
Next, let’s talk about quilting rulers. These nifty tools are vital for precise measurements and cutting. They come in various shapes and sizes, each designed for different tasks. For instance, a long ruler is perfect for cutting straight lines, while a square ruler is great for squaring up blocks. When using quilting rulers, it’s important to position them correctly on your fabric and use a rotary cutter for the best results. This combination will help you achieve the accuracy that is essential in quilting.
In addition to these staples, there are also a variety of gadgets that can enhance your quilting experience. For example, consider investing in a walking foot if you haven’t already. This foot helps to evenly feed multiple layers of fabric through your sewing machine, preventing puckering and ensuring that your quilt layers stay aligned. Another fantastic tool is the seam ripper. While it may not sound glamorous, this little gadget is a quilter's best friend when mistakes happen. It allows you to easily remove stitches and correct errors without damaging your fabric.
Moreover, technology has also made its way into quilting. There are numerous digital tools and apps designed to assist quilters in various aspects of their craft. From fabric inventory management to quilt design software, these modern innovations can streamline your quilting process. Imagine being able to visualize your quilt layout on your tablet before you even cut your fabric! This kind of planning can save you time and fabric, making your quilting journey more enjoyable.
To wrap it up, utilizing the right tools and gadgets can significantly enhance your quilting projects. By investing in quality tools like rotary cutters, cutting mats, quilting rulers, and various quilting gadgets, you’ll find that your quilting experience becomes more efficient and enjoyable. So, don’t hesitate to explore the tools available to you; they might just be the key to unlocking your quilting potential!
- What is the best rotary cutter for beginners? A 45mm rotary cutter is generally recommended for beginners as it is versatile and easy to handle.
- How do I maintain my cutting mat? Clean your cutting mat regularly with a damp cloth and avoid using it in direct sunlight to prolong its lifespan.
- Can I use regular scissors instead of a rotary cutter? While you can use scissors, a rotary cutter provides more precision and is much faster for cutting multiple layers.
Rotary Cutters and Mats
Using rotary cutters and mats can significantly streamline your quilting process, making it easier to achieve precise cuts for your quilt pieces. These tools are essential for any quilter looking to enhance their efficiency and accuracy. Rotary cutters come in various sizes, typically ranging from 28mm to 60mm, allowing you to choose the perfect one for your specific project. The larger the cutter, the more layers of fabric you can cut at once, which is a huge time-saver!
When it comes to rotary mats, they are designed to provide a safe cutting surface that protects your table and ensures that your blades stay sharp longer. A good quality rotary mat is double-sided, with one side often marked in inches and the other in centimeters, which adds versatility to your quilting toolkit. Make sure to select a mat that is large enough to accommodate your largest pieces of fabric, as this will help prevent any awkward repositioning during the cutting process.
Proper maintenance of your rotary cutter and mat is crucial for achieving the best results. Here are some tips to keep your tools in top shape:
- Keep your blades sharp: Dull blades can cause jagged cuts and require more pressure, which can lead to accidents. Regularly replace the blades to maintain clean edges.
- Clean your mat: Dust and fabric fibers can accumulate on your cutting mat. Wipe it down regularly with a damp cloth to keep it in good condition.
- Store properly: Always store your rotary cutter with the blade cover on to prevent accidental cuts, and keep your mat flat to avoid warping.
Additionally, consider investing in a self-healing mat. These mats are designed to 'heal' themselves after cuts, which prolongs their lifespan and keeps them looking new. The self-healing feature is particularly beneficial for quilters who frequently cut fabric, as it helps maintain a smooth cutting surface.
In summary, incorporating rotary cutters and mats into your quilting routine can elevate your crafting experience. They not only save time but also enhance the precision of your cuts, leading to a more professional-looking quilt. So, whether you're a seasoned pro or just starting, these tools are a must-have in your quilting arsenal!
Q: How often should I replace my rotary cutter blade?
A: It's best to replace your rotary cutter blade whenever you notice it becoming dull or when it starts to tear the fabric instead of cutting it cleanly. Regularly changing the blade will ensure you get the best results.
Q: Can I use a rotary cutter on any type of fabric?
A: Yes, rotary cutters can be used on various types of fabric, but it's essential to choose the right blade size and mat thickness based on the material you're cutting. For thicker fabrics, a larger blade may be more effective.
Q: What size rotary cutter is best for beginners?
A: A 45mm rotary cutter is typically recommended for beginners as it is versatile enough for most quilting projects and can handle multiple layers of fabric effectively.
Quilting Rulers
Quilting rulers are essential tools that can significantly enhance your quilting precision and efficiency. Whether you're a beginner or a seasoned quilter, having the right rulers at your disposal can make all the difference in achieving clean, accurate cuts and measurements. These rulers come in various shapes and sizes, allowing you to tackle a wide range of quilting techniques with confidence. When selecting a ruler, consider factors such as the type of quilting you'll be doing, the size of your fabric pieces, and your personal preference for handling the tools.
One of the most popular types of quilting rulers is the acrylic ruler, which is transparent and often marked with grid lines and measurements. This transparency allows you to see your fabric underneath, ensuring that you can align your cuts perfectly. Additionally, many acrylic rulers feature non-slip backing, which keeps the ruler in place while you cut, reducing the risk of mistakes. Here are some common types of quilting rulers you might find useful:
- Square Rulers: Ideal for cutting squares and ensuring that your blocks are perfectly aligned.
- Long Rulers: Great for cutting long strips of fabric, making them perfect for borders and sashing.
- Specialty Rulers: These can include templates for specific shapes, such as triangles or curves, helping you create unique designs.
Using quilting rulers effectively involves understanding how to read the measurements accurately. Most rulers have markings that indicate both inches and centimeters, which can be particularly helpful when working with patterns that require precise dimensions. To use a quilting ruler, simply place it on your fabric, ensuring it's aligned with the desired cut line, and then use a rotary cutter to slice through the fabric. It's as simple as that! However, always remember to keep your fingers clear of the cutting path to avoid accidents.
Additionally, maintaining your quilting rulers is crucial for longevity and accuracy. Regularly clean them with a soft cloth to remove any fabric dust or residue, and store them flat to prevent warping. Some quilters even prefer to mark their rulers with washi tape to denote specific measurements, making it easier to grab the right size quickly. Investing in a variety of quilting rulers can open up a world of possibilities in your quilting projects, allowing you to experiment with different shapes and designs.
In conclusion, quilting rulers are not just tools; they are your partners in creating beautiful quilts. By incorporating different types of rulers into your quilting toolkit, you can enhance your skills and ensure that each project turns out just as you envisioned. So, don’t hesitate to explore various options and find the rulers that resonate with your quilting style!
Q: What is the best type of ruler for beginners?
A: For beginners, a basic acrylic square ruler is highly recommended. It provides versatility for cutting squares and rectangles, which are foundational shapes in quilting.
Q: How do I choose the right size ruler?
A: The right size ruler depends on the size of your fabric pieces and the type of projects you typically work on. A standard 6” x 24” ruler is a great all-purpose choice for most quilting tasks.
Q: Can I use a regular ruler for quilting?
A: While you can use a regular ruler, quilting rulers are specifically designed to provide better accuracy and stability, making them a superior choice for quilting projects.

Incorporating Modern Techniques
Modern quilting techniques are revolutionizing the way we approach this age-old craft. They blend traditional methods with contemporary aesthetics, allowing quilters to express their creativity in exciting new ways. Have you ever felt limited by conventional patterns? Well, incorporating modern techniques can free you from those constraints, enabling you to create quilts that truly reflect your personal style.
One of the most exhilarating modern techniques is improv quilting. This method encourages you to embrace spontaneity and creativity. Instead of following a strict pattern, you can let your imagination run wild! Think of it as jazz music—there are no wrong notes, just a beautiful melody that evolves as you go. To get started with improv quilting, gather a variety of fabric scraps and simply start sewing them together without a predetermined plan. You might be surprised by the stunning results!
Another exciting aspect of modern quilting is the use of digital tools. In today’s tech-savvy world, there are numerous software programs and apps designed specifically for quilters. These tools can assist you in various ways, from designing intricate quilt patterns to managing your fabric inventory. Imagine being able to visualize your quilt before you even cut the first piece of fabric! Some popular digital tools include:
- EQ8 (Electric Quilt 8): A powerful design software that allows you to create and visualize quilt patterns.
- Canva: While not specifically for quilting, this design tool can help you create mood boards and plan your color schemes.
- Stash2Go: An app designed to help you manage your fabric inventory and keep track of your projects.
By leveraging these digital tools, you can enhance your quilting process, making it more efficient and enjoyable. Plus, they can help you stay organized, allowing you to focus more on the creative aspects of quilting rather than getting bogged down by logistics.
As you explore modern techniques, remember that the goal is to have fun and express yourself. Don't be afraid to experiment with color, texture, and design. The beauty of quilting lies in its versatility, and modern techniques open up a world of possibilities. So, grab your sewing machine, some fabric, and let your creativity soar!
- What is improv quilting?
Improv quilting is a technique that encourages spontaneity and creativity, allowing quilters to create without following strict patterns. - How can digital tools help in quilting?
Digital tools can assist in designing quilts, managing fabric inventory, and visualizing projects, making the quilting process more efficient. - Do I need to be an expert to try modern techniques?
No! Modern techniques are accessible to all skill levels. The key is to be open to experimentation and creativity.
Improv Quilting
Improv quilting is all about breaking free from the constraints of traditional patterns and embracing the unexpected. Imagine stepping into a world where rules are bent, and creativity flows like a river! This technique encourages you to let go of rigid guidelines, allowing your imagination to take the lead. Whether you're a seasoned quilter or just starting out, improv quilting is a fantastic way to explore your artistic side and create quilts that truly reflect your personal style.
At its core, improv quilting is about spontaneity. Instead of meticulously planning each block and color, you can dive right in and start sewing pieces together in a way that feels right to you. It’s like jazz music—each note is played in the moment, creating a unique melody that can never be replicated. This approach not only makes quilting more enjoyable but also results in quilts that are vibrant and full of character.
So, how do you get started with improv quilting? Here are a few tips to help you embrace this exciting technique:
- Start with What You Have: Gather your fabric scraps and leftover pieces. This is a wonderful way to use up materials you already own and reduce waste.
- Choose a Color Palette: While improv is about freedom, having a cohesive color scheme can help your quilt feel more harmonious. Pick a few colors that speak to you and let those guide your choices.
- Let Your Instincts Lead: Trust your gut! If a piece feels right, go for it. The beauty of improv quilting is that there are no mistakes—only happy accidents.
As you sew, you might find yourself creating unexpected shapes and patterns. This is where the magic happens! You can layer fabrics, mix textures, and even incorporate different techniques like appliqué or patchwork. The key is to enjoy the process and not worry too much about the final outcome. Remember, the journey is just as important as the destination.
One of the most exciting aspects of improv quilting is that it encourages collaboration. Consider hosting an improv quilting party with friends! This can be a fantastic way to share ideas, inspire one another, and create something truly special together. You might even find that working alongside others sparks new ideas and techniques you hadn’t considered before.
In conclusion, improv quilting is a liberating and exhilarating way to express your creativity. By stepping outside the boundaries of traditional quilting, you open yourself up to a world of possibilities. So grab your fabric, let your imagination run wild, and start creating quilts that tell your unique story!
Q: Do I need to have experience to try improv quilting?
A: Absolutely not! Improv quilting is perfect for quilters of all skill levels. Just dive in and have fun!
Q: What if I don’t like my improv quilt?
A: Remember, there are no mistakes in improv quilting. If you don’t love a piece, you can always cut it up and incorporate it into another project.
Q: Can I use patterns in improv quilting?
A: While improv quilting encourages spontaneity, you can certainly use patterns as inspiration. Just feel free to adapt and modify them as you go!
Using Digital Tools
In today's fast-paced world, the quilting landscape has undergone a significant transformation, thanks to the advent of digital tools. These tools not only streamline the quilting process but also open up a realm of creative possibilities that can elevate your quilting projects to new heights. Imagine being able to visualize your quilt design on a screen before even picking up a needle! That's the power of technology in quilting.
One of the most exciting aspects of using digital tools is the ability to design quilts with precision. Software programs like EQ8 or Adobe Illustrator allow quilters to experiment with different patterns, colors, and layouts. With just a few clicks, you can create a virtual quilt that gives you a clear picture of the final product. This not only saves time but also reduces the chances of fabric waste, as you can make adjustments before cutting into your precious materials.
Moreover, there are various apps available that help you manage your fabric inventory. Imagine having a digital catalog of all your fabrics at your fingertips! Apps like Stashbot or Fabric Stash allow you to keep track of your fabric stash, making it easier to plan your projects without the fear of running out of materials. You can categorize your fabrics by color, type, or even project, ensuring that you always know what you have on hand.
For those who love to share their work or seek inspiration, social media platforms like Instagram and Pinterest play a vital role in the quilting community. You can connect with fellow quilters, share your projects, and even find tutorials or patterns that inspire you. The digital age has made it possible to learn from the best, no matter where they are in the world.
Another fantastic feature of digital tools is the ability to visualize your projects in different settings. Some software even allows you to see how your quilt will look in a room, helping you make decisions about color schemes and fabric choices. This can be particularly useful when you're creating quilts as gifts or for specific themes.
In summary, incorporating digital tools into your quilting routine can significantly enhance your experience and results. The blend of traditional quilting techniques with modern technology not only fosters creativity but also helps you achieve a level of precision that was once hard to attain. So, if you haven't yet explored the digital side of quilting, now is the perfect time to dive in!
- What are some popular digital tools for quilting?
Some popular digital tools include EQ8 for design, Stashbot for inventory management, and various social media platforms for community engagement.
- Can digital tools help reduce fabric waste?
Yes, by allowing you to visualize your designs before cutting, digital tools can help minimize mistakes and fabric waste.
- Are there free digital tools available for quilters?
Yes, there are several free apps and software options available that can assist in quilt design, fabric management, and more.
Finishing Techniques for a Professional Look
When it comes to quilting, the finishing touches are what truly elevate your work from good to **great**. A well-finished quilt not only showcases your hard work but also adds a level of professionalism that can impress anyone who lays eyes on it. Think of finishing techniques as the cherry on top of your quilting sundae; without it, the entire creation feels incomplete. In this section, we will explore essential finishing techniques that can help you achieve that polished look you desire.
One of the most critical aspects of finishing a quilt is the binding. Binding is the final step that frames your quilt and protects the edges, ensuring durability. There are several methods for binding your quilt, each offering a unique aesthetic and functionality:
- Straight Binding: This is the most common method, where you cut your binding strips straight along the fabric grain. It’s simple and effective, providing a clean edge.
- Bias Binding: Cut on the bias, this method allows for more stretch and flexibility, making it ideal for curves or intricate designs.
- Machine Binding: If you’re short on time, machine binding can be a quick solution, giving you a neat finish without the hand-sewing effort.
After binding, it’s essential to consider labeling your quilt. A label adds a personal touch, helping to commemorate your hard work and creativity. Whether you opt for a simple fabric label or a more intricate embroidered option, labels can also serve as a way to share the quilt's story. You might include:
- Your name or initials
- The date of completion
- A special message or the quilt's purpose
Additionally, don’t underestimate the power of a good press! After binding and labeling, give your quilt a final press with an iron. This step helps to smooth out any wrinkles and ensures that your quilt lays flat and looks its best. Just be cautious with the heat settings, especially if your quilt includes synthetic fabrics or delicate embellishments.
Lastly, consider how you will display or store your quilt. A beautifully finished quilt deserves to be seen, so think about hanging it on a wall or showcasing it on a bed. If you plan to store it, ensure that it is folded neatly and placed in a breathable storage container to prevent any damage over time.
In summary, the finishing techniques you choose can significantly impact the overall look and longevity of your quilt. From binding to labeling and pressing, each step plays a vital role in achieving that professional appearance. Remember, the little details make a big difference, so take the time to perfect these finishing touches. Your quilts will not only look stunning but will also carry a sense of pride in the craftsmanship you’ve put into them.
Q1: What is the best fabric for quilt binding?
A1: Cotton fabric is often recommended for quilt binding due to its durability and ease of handling. It holds its shape well and comes in a variety of colors and patterns to complement your quilt.
Q2: How do I ensure my quilt label stays intact?
A2: To keep your quilt label secure, consider sewing it into the quilt's binding or using a strong adhesive fabric glue. Additionally, make sure to wash your quilt gently to avoid damaging the label.
Q3: Can I machine sew my binding on both sides?
A3: Yes, you can machine sew your binding on both sides for a quick finish. Just ensure that you sew it securely to avoid any fraying or detachment over time.
Binding Your Quilt
Binding your quilt is not just a finishing touch; it's the final stroke of artistry that brings your entire project together. Think of it as the frame around a beautiful painting—it enhances the overall look and provides a polished edge. When it comes to binding, there are several techniques you can choose from, each with its unique flair and functionality. Understanding these methods will not only elevate the appearance of your quilt but also ensure its durability for years to come.
One of the most common techniques is straight binding, where you cut your binding strips straight along the fabric grain. This method is straightforward and works well for most quilts. In contrast, bias binding involves cutting your fabric on the diagonal, allowing it to stretch and curve around corners more easily. This technique is particularly useful for quilts with rounded edges or intricate designs. Finally, there’s machine binding, which is perfect for those looking to save time. This method involves sewing the binding to the front of the quilt by machine and then folding it over to the back, securing it with a topstitch.
To help you decide which binding method suits your project best, here’s a quick comparison table:
| Binding Technique | Pros | Cons |
|---|---|---|
| Straight Binding | Simple and quick to execute | Less flexible around curves |
| Bias Binding | Great for curves and corners | More complex to cut and sew |
| Machine Binding | Fast and efficient | May lack the hand-stitched finish |
Once you've chosen your binding technique, the next step is to cut your binding strips. A common width for binding is 2.5 inches, but feel free to adjust based on your personal preference. After cutting, you’ll want to join the strips together to create a continuous length. This can be done by placing the ends of two strips at a right angle and sewing diagonally from corner to corner. When you open it up, you'll have a seamless connection that will lay flat against your quilt.
As you prepare to attach the binding, it’s essential to start from the middle of one side of the quilt. This allows for even distribution of the binding around the quilt. Use clips or pins to secure the binding in place, making sure to keep it taut but not overly stretched. When you reach a corner, fold the binding at a 45-degree angle to create a neat mitered corner, then continue sewing along the next side.
Finally, once you've attached the binding, it’s time to secure it on the back. You can either hand-stitch it for a more traditional look or use a topstitch to finish it off quickly. Whichever method you choose, take a moment to admire your work. That clean, finished edge is a testament to your hard work and creativity.
- What is the best fabric for binding? Cotton fabric is widely recommended due to its durability and ease of handling.
- How do I choose the right color for my binding? Select a color that complements the quilt top; consider using a solid color to create contrast or a print that ties in with the overall design.
- Can I use leftover fabric for binding? Absolutely! Using scraps can add a unique touch to your quilt and is a great way to reduce waste.
Labeling Your Quilt
Labeling your quilt is not just a final touch; it’s a way to tell a story, commemorate a moment, or simply add a personal flair to your creation. Think of your quilt like a book; while the fabric and stitching tell the tale, the label is the title that gives it context. When you take the time to label your quilt, you're not only marking your achievement but also creating a legacy that can be cherished by future generations.
There are various ways to label your quilts, each offering a unique way to express your creativity. You might choose to go the traditional route with a simple fabric label, or you could opt for something more elaborate like an embroidered option. The beauty of quilting lies in its flexibility, and labeling is no different. Here are a few ideas to consider:
- Fabric Labels: These are often printed with the quilt maker’s name, the date of completion, and perhaps a special message. You can create these using fabric markers or printable fabric sheets.
- Embroidered Labels: For those who enjoy embroidery, creating a personalized label can add a touch of elegance. This option allows for intricate designs and can include your name, the quilt’s name, and even a small motif that relates to the quilt's theme.
- Photo Labels: In a modern twist, consider incorporating a small photo of you working on the quilt or a significant moment in its creation. This can be printed on fabric and sewn into the quilt.
When it comes to placement, think about where the label will look best. Common locations include the bottom corner of the back or the inside of the quilt. Make sure it’s securely attached, so it won’t come loose after washing. You can sew it on by hand or use a sewing machine, depending on your preference. The key is to ensure that it complements the quilt without detracting from its beauty.
Lastly, don’t forget to include the story behind the quilt. A label can serve as a wonderful conversation starter, especially if you share the inspiration or the journey that led to its creation. This adds a layer of depth that can make your quilt even more special. So, take the time to label your quilts; it’s a small step that makes a big difference in how your work is remembered and appreciated.
Q: What should I include on my quilt label?
A: Typically, you should include your name, the date of completion, and any special messages or the quilt's name. Some people also include the occasion for which the quilt was made.
Q: How do I attach a label to my quilt?
A: You can sew the label onto the quilt by hand or machine. Just make sure it is securely attached, preferably in a spot that won't see much wear and tear.
Q: Can I use a photo on my quilt label?
A: Absolutely! You can print a photo on fabric and sew it into your quilt as a label. This adds a unique personal touch.
Q: What materials are best for making quilt labels?
A: Fabric markers, printable fabric sheets, and embroidery thread are all great options for creating quilt labels. Choose materials that will withstand washing and wear.
Frequently Asked Questions
- What types of fabric are best for quilting?
Choosing the right fabric is essential for quilting success. Generally, cotton fabrics are preferred due to their durability and ease of handling. However, you can also experiment with blends and specialty fabrics like batiks or flannels for different textures and effects.
- How do I start with free-motion quilting?
To begin free-motion quilting, first, ensure your sewing machine is equipped with a free-motion foot. Practice on a scrap piece of fabric to get comfortable moving the fabric while controlling the stitch length. Start with simple patterns like loops or spirals to build your confidence before advancing to more complex designs.
- What tools do I need for efficient quilting?
Essential tools for quilting include rotary cutters, cutting mats, quilting rulers, and high-quality thread. These tools will help you achieve precise cuts and measurements, making your quilting process smoother and more enjoyable.
- What is improv quilting?
Improv quilting is a modern technique that encourages creativity and spontaneity. Instead of following strict patterns, you can cut and sew fabric pieces in a freeform manner, allowing your artistic instincts to guide you. This method results in unique quilts that showcase your personal style.
- How do I properly bind my quilt?
Binding your quilt can be done in a few ways: straight binding, bias binding, or machine binding. Choose a method that suits your quilt's design and your sewing comfort level. Make sure to fold the binding over the raw edges and stitch it down neatly for a polished finish.
- Why should I label my quilt?
Labeling your quilt adds a personal touch and serves as a way to commemorate your hard work. It can include your name, the date of completion, or even a special message. This not only enhances the sentimental value but also provides information for future generations.


