
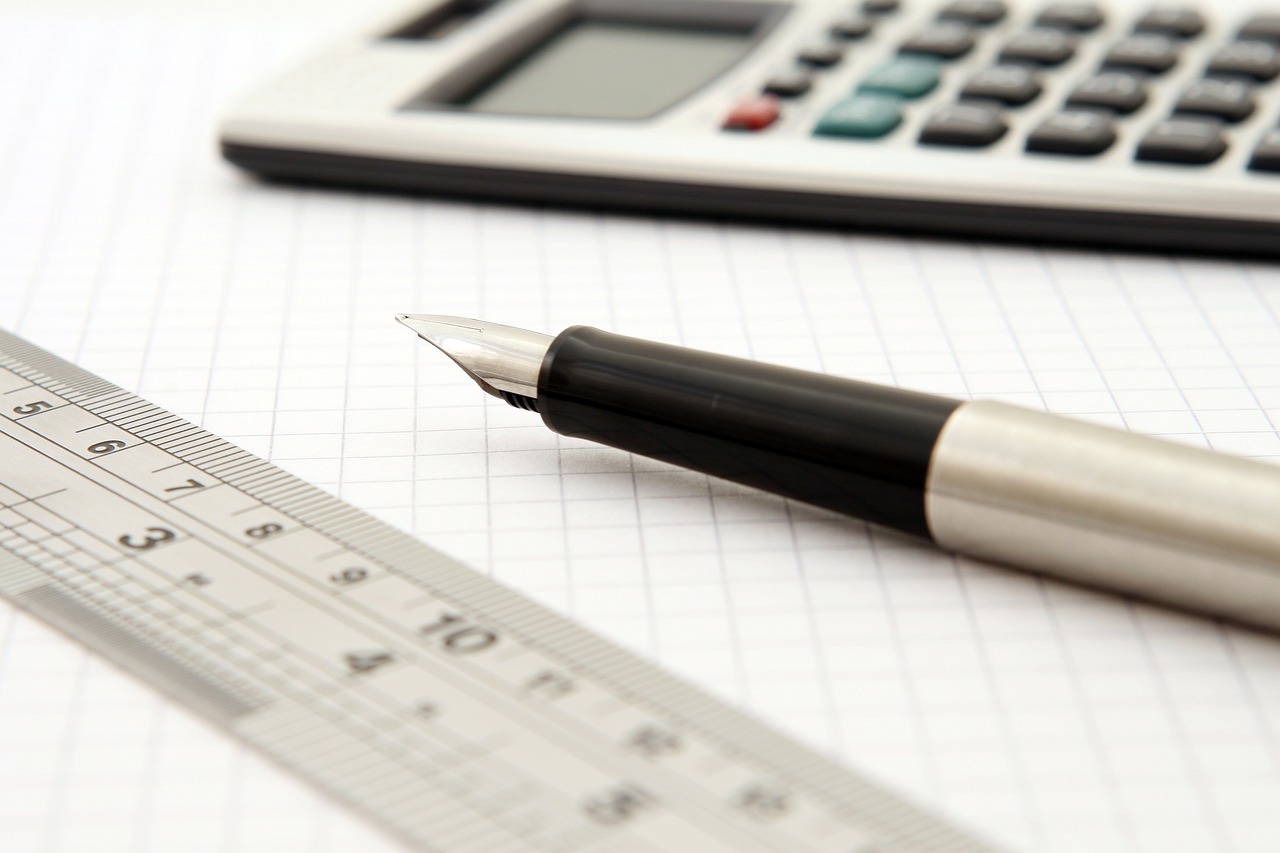
How to Use a Quilting Ruler Correctly
Welcome to the wonderful world of quilting! If you're diving into this creative hobby, one of the most essential tools you'll encounter is the quilting ruler. Using a quilting ruler correctly can make a significant difference in your sewing projects, ensuring that each cut is precise and accurate. But how do you master this tool? In this article, we will explore various tips and techniques that will not only enhance your quilting experience but also boost your confidence in using this indispensable tool.
First and foremost, it’s important to understand that quilting rulers come in various shapes and sizes, each designed for specific tasks. Whether you're cutting straight lines, angles, or intricate shapes, knowing how to use your ruler effectively can help you achieve professional-looking results. Imagine trying to build a house without a level—your quilting projects can feel just as chaotic without the right ruler techniques!
As we navigate through this guide, you'll discover the different types of quilting rulers available, how to choose the right one for your projects, and the proper techniques for maximizing your cutting accuracy. So, grab your fabric and let’s get started on this quilting journey together!
Quilting rulers are specialized tools designed to assist in measuring and cutting fabric accurately. They come in various styles, including rectangular, square, and even circular shapes. Each type of ruler has unique features, such as grid lines, angle markings, and non-slip surfaces, which can dramatically impact your quilting accuracy and efficiency.
For example, a rectangular ruler is perfect for cutting long strips, while a square ruler is great for squaring up blocks. Understanding these features will empower you to select the right ruler for each task, making your quilting process smoother and more enjoyable.
When it comes to selecting a quilting ruler, there are several factors to consider. The size, shape, and markings of the ruler can all influence your quilting success. Here are some key points to keep in mind:
- Size: Consider the size of the projects you typically work on. Larger rulers are better for big pieces of fabric, while smaller rulers excel at detailed cuts.
- Shape: Different shapes serve different purposes. A square ruler is ideal for squaring up blocks, while a long rectangular ruler is perfect for cutting strips.
- Markings: Look for clear, easy-to-read markings. Some rulers have additional features like 45-degree angle lines, which can be helpful for cutting triangles.
Understanding the various sizes of quilting rulers and their specific applications is crucial for any quilter. Here’s a quick overview:
| Ruler Size | Best Used For |
|---|---|
| 6" x 12" | Cutting strips and small pieces |
| 12" x 12" | Squaring up blocks |
| 24" x 6" | Long cuts on larger fabrics |
Small quilting rulers, typically measuring around 6" x 6" or 6" x 12", are perfect for intricate cuts and detailed work. They allow you to make precise cuts without overwhelming your workspace. When using a small ruler, always ensure that it’s positioned correctly on your fabric, and use a steady hand to maintain accuracy. These rulers are fantastic for projects like patchwork quilts or small fabric pieces that require a delicate touch.
On the flip side, large rulers, such as those measuring 24" x 6", are invaluable when working with bigger pieces of fabric. They provide the stability needed to cut through multiple layers, ensuring that your cuts are straight and even. When using a large ruler, make sure to have enough space on your cutting mat, and don’t hesitate to use weights or clips to hold your fabric in place.
Quilting rulers come equipped with various markings to aid in accurate measurements. Familiarize yourself with these markings to optimize your cutting. For instance, many rulers feature 1-inch grid lines, which help ensure that your fabric is aligned correctly. Additionally, some rulers have diagonal lines that assist in cutting triangles. Always take a moment to double-check your measurements before making any cuts—it's a small step that can save you a lot of time and fabric!
Mastering the techniques of using a quilting ruler can significantly improve your cutting accuracy. Here are some essential tips:
Properly stabilizing your fabric is essential for accurate cuts. Use a rotary cutter and ensure that your fabric is flat and secured. You can use quilt weights or pins to hold your fabric in place, preventing slips and errors. This simple step can make a world of difference in the quality of your cuts.
There are various cutting techniques that you can employ with a quilting ruler. The most common methods include:
- Rotary Cutting: This technique involves using a rotary cutter along the edge of the ruler for clean, precise edges.
- Straight Cutting: For simpler cuts, a straight edge can be used with scissors, but it’s less accurate than rotary cutting.
By mastering these techniques, you’ll find that your quilting projects will not only look better but will also be more enjoyable to create!
Q: How do I clean my quilting ruler?
A: To clean your quilting ruler, use a soft cloth and mild soap. Avoid abrasive cleaners that can scratch the surface.
Q: Can I use a quilting ruler for other crafts?
A: Absolutely! Quilting rulers are versatile and can be used for various crafts, including sewing, scrapbooking, and more.
Q: What is the best way to store my quilting rulers?
A: Store your rulers flat or hang them on a wall to prevent warping and ensure they remain accurate.

Understanding Quilting Rulers
When it comes to quilting, having the right tools can make all the difference, and quilting rulers are among the most essential. These rulers not only help you achieve precise cuts but also enhance your overall quilting experience. With various types of quilting rulers available, each designed for specific tasks, understanding their features is crucial. Whether you're a beginner or a seasoned quilter, knowing your tools is the first step to successful quilting.
Quilting rulers are typically made from clear acrylic, allowing you to see your fabric underneath while measuring and cutting. This transparency is a game-changer, as it helps you align your cuts accurately, ensuring that every piece fits perfectly together. But, did you know that not all quilting rulers are created equal? They come in different shapes, sizes, and with various markings, each serving a unique purpose in the quilting process.
For instance, some rulers are designed specifically for straight cuts, while others may feature angles or curves for more intricate designs. Additionally, many quilting rulers have grid lines and measurements marked on them, which are invaluable for ensuring that your cuts are not only precise but also consistent throughout your project. The right ruler can help you save time and reduce fabric waste, allowing you to focus on the creative aspects of quilting rather than the technical details.
To give you a clearer picture, here's a quick overview of the different types of quilting rulers:
| Type of Ruler | Features | Best For |
|---|---|---|
| Square Rulers | Perfect for squaring up blocks, often marked with grid lines | Block construction |
| Rectangular Rulers | Great for cutting strips and larger pieces | Strip piecing |
| Angle Rulers | Marked with angles for cutting triangles and other shapes | Creating complex shapes |
| Specialty Rulers | Designed for specific tasks, like curves or templates | Unique quilting designs |
Understanding the different types of rulers and their specific features can significantly impact your quilting accuracy and efficiency. By selecting the right ruler for your project, you can streamline your process and achieve stunning results. So, the next time you're preparing for a quilting project, take a moment to assess your ruler options and choose wisely!
Choosing the Right Ruler
When it comes to quilting, selecting the right ruler is not just a matter of preference; it's a crucial decision that can make or break your project. Imagine trying to navigate a vast ocean without a compass—choosing the wrong ruler can lead you astray, resulting in uneven cuts and frustrating sewing experiences. So, what should you consider when choosing your quilting ruler? Let's dive into the essential factors that will help you make an informed choice.
First and foremost, size plays a pivotal role in your selection process. Rulers come in various dimensions, and each size serves a specific purpose. For instance, if you're working on intricate designs or small patchwork pieces, a smaller ruler will give you the precision you need. On the other hand, larger rulers are better suited for cutting wide strips of fabric or managing large quilts. It’s like having the right tool for the job—each ruler has its own unique strengths.
Next up is the shape of the ruler. While most quilting rulers are rectangular, some come in specialty shapes that can aid in specific tasks. For example, triangular or circular rulers can be particularly useful for creating angles or curves. Consider the types of cuts you frequently make and choose a ruler shape that will complement your quilting style. Think of it as choosing the right brush for painting; the shape can influence your final masterpiece.
Another vital aspect to consider is the markings on the ruler. These markings can vary significantly from one ruler to another, and they are designed to help you measure and cut accurately. Look for rulers that feature clear, easy-to-read lines and numbers. Many rulers also have grid lines that assist with alignment, making it easier to cut straight and even pieces. A ruler with good markings is like having a map—it guides you to your destination without unnecessary detours.
Lastly, consider the material of the ruler. Most quilting rulers are made from acrylic, which is lightweight and easy to handle. However, some rulers are made from heavier materials that provide stability during cutting. If you tend to cut multiple layers of fabric, a sturdier ruler might be beneficial. It’s essential to find a balance between weight and ease of use, ensuring that your ruler feels comfortable in your hands.
In summary, when choosing the right quilting ruler, keep the following factors in mind:
- Size: Match the ruler size to your project needs.
- Shape: Consider specialty shapes for unique cuts.
- Markings: Look for clear, easy-to-read measurements.
- Material: Choose a ruler that balances weight and usability.
By paying attention to these details, you'll be well on your way to selecting a ruler that enhances your quilting experience. Remember, the right ruler is not just a tool; it's an extension of your creative expression. So take your time, explore your options, and choose wisely!
Q: How do I know what size ruler to choose for my projects?
A: The size of the ruler you choose should correspond to the size of the fabric pieces you'll be cutting. Smaller rulers are perfect for intricate pieces, while larger rulers are ideal for big projects.
Q: Can I use a regular ruler for quilting?
A: While you can use a regular ruler, quilting rulers are specifically designed with markings and features that aid in cutting fabric accurately, making them a better choice for quilting projects.
Q: What is the best material for quilting rulers?
A: Acrylic is the most common material for quilting rulers due to its lightweight nature and transparency, allowing you to see your fabric beneath. However, heavier options are available for added stability.

Ruler Sizes and Their Uses
When it comes to quilting, the size of your ruler can make a world of difference in the precision and efficiency of your cuts. Just like a chef chooses the right knife for each ingredient, a quilter must select the appropriate ruler to achieve the best results. Understanding the different sizes of quilting rulers and their specific applications is essential for any quilting enthusiast. Let's dive into how ruler sizes can impact your quilting journey.
Generally, quilting rulers come in a variety of sizes, each tailored for specific tasks. For instance, a 6” x 24” ruler is a staple in many quilters' toolkits. This size is perfect for cutting long strips of fabric, making it a great choice for projects like quilts and bags. The length allows for a steady hand and a clean cut, reducing the risk of fabric slipping during the process.
On the other hand, 3” x 18” rulers are perfect for smaller, more intricate pieces. These rulers are ideal for cutting smaller patches or for trimming blocks where precision is key. They allow for detailed work without overwhelming the user with too much surface area, making them a favorite for those delicate projects.
Additionally, there are specialty rulers available that cater to specific quilting needs. For example, triangular rulers can help you create perfect triangles for your quilt blocks, while square rulers are excellent for squaring up blocks after they have been pieced together. Using the right specialty ruler can save you time and improve your overall accuracy.
Here's a quick overview of common quilting ruler sizes and their typical uses:
| Ruler Size | Common Uses |
|---|---|
| 6” x 24” | Cutting long strips, general cutting |
| 3” x 18” | Small patches, trimming blocks |
| 12” x 12” square | Squaring up blocks, cutting larger squares |
| Triangle rulers | Cutting triangles for blocks |
Ultimately, the right ruler size can enhance your quilting experience significantly. It’s about finding the balance between the size of your project and the precision required. Remember, investing in a variety of ruler sizes can provide you with the flexibility to tackle any quilting project that comes your way. So, whether you’re cutting strips for a cozy quilt or intricate shapes for a stunning wall hanging, having the right ruler in hand will make all the difference!
- What is the best size ruler for beginners? - A 6” x 24” ruler is highly recommended for beginners as it is versatile and can handle most cutting tasks.
- Can I use a regular ruler for quilting? - While you can use a regular ruler, quilting rulers are designed with specific markings and thickness to ensure accuracy and safety while cutting.
- How do I clean my quilting ruler? - Use a soft cloth and mild soap to clean your ruler, avoiding harsh chemicals that may damage the surface.
Small Rulers for Precision Cuts
When it comes to quilting, precision is everything. Small rulers play a crucial role in achieving those **intricate cuts** that can make or break your project. These handy tools are designed specifically for detailed work, allowing you to cut fabric with utmost accuracy. Imagine trying to sew a beautiful quilt only to realize your fabric pieces are misaligned; it can be frustrating, right? That's where small rulers come into play, ensuring that every cut is just right.
Small quilting rulers typically range from 6 inches to 12 inches in length. Their compact size makes them perfect for navigating around curves and corners, which are often found in more complex quilting designs. With their clear markings and grids, they help you measure and cut your fabric pieces accurately, reducing the chances of errors. You might wonder, how do I choose the right small ruler for my needs? Well, consider the following features:
- Material: Look for rulers made from durable acrylic. They should be sturdy yet lightweight, ensuring they won’t warp over time.
- Grid Lines: Opt for rulers with clear, easy-to-read grid lines. This will help you align your fabric correctly and make precise cuts.
- Non-Slip Backing: A non-slip backing is essential for keeping the ruler in place while you cut. This feature prevents any accidental slips that could ruin your fabric.
Using a small ruler effectively involves more than just placing it on your fabric and cutting. It's about having a technique that ensures accuracy. Start by laying your fabric flat on a cutting mat. Position the small ruler over the area you wish to cut, ensuring that the grid lines align with the edges of your fabric. Use a rotary cutter for the best results, as it glides smoothly along the edge of the ruler, providing a clean cut. Remember to apply consistent pressure to avoid any jagged edges.
Another tip is to always cut away from your body. This not only enhances safety but also allows you to maintain better control over your cutting motion. When working on intricate designs, take your time. Rushing can lead to mistakes, and we all know that unpicking stitches is not a fun part of quilting!
In conclusion, small rulers are invaluable tools in the quilting world. They offer precision, control, and ease of use, making them essential for anyone serious about their quilting projects. Whether you're cutting small squares for a patchwork quilt or trimming edges for a more detailed design, these rulers will help you achieve the **perfect cut** every time.
Q: What is the best size for a small quilting ruler?
A: The best size typically ranges between 6 to 12 inches, depending on your project. Smaller rulers are great for detailed cuts, while slightly larger ones can handle more versatile applications.
Q: Can I use a small ruler for larger projects?
A: While small rulers are designed for precision, they can also be used in larger projects for specific tasks, such as cutting small pieces or trimming edges. However, for larger cuts, consider using a larger ruler for efficiency.
Q: How do I maintain my small quilting ruler?
A: Keep your ruler clean by wiping it with a soft cloth after each use. Avoid using harsh chemicals that can damage the surface. Store it flat to prevent warping.
Large Rulers for Bigger Projects
When it comes to tackling larger quilting projects, having the right tools can make all the difference. Large quilting rulers are specifically designed to handle big pieces of fabric, making them essential for quilts, bedspreads, and other expansive sewing endeavors. These rulers not only provide the necessary length to cut wide swathes of fabric but also ensure that your cuts remain straight and precise. Imagine trying to cut a large quilt top using a small ruler; it would be like trying to paint a mural with a toothbrush—frustrating and inefficient!
One of the primary advantages of using large rulers is their ability to span across the full width of your fabric, allowing you to measure and cut in one smooth motion. This not only saves time but also reduces the likelihood of mistakes that can occur when repositioning smaller rulers. Additionally, many large rulers come with grip strips or non-slip surfaces that help keep the ruler in place, ensuring your fabric doesn’t shift while you’re cutting. This stability is crucial, especially when working with fabrics that tend to slide, such as silks or satins.
When selecting a large quilting ruler, consider the following features to enhance your cutting experience:
- Length: Look for rulers that are at least 24 inches long to accommodate most fabric widths.
- Grid Lines: Rulers with clear grid lines help in aligning your fabric accurately, which is essential for achieving the desired dimensions.
- Angle Markings: Some large rulers include angle markings, allowing you to create bias cuts or other angled shapes without needing additional tools.
To maximize the effectiveness of your large ruler, ensure you’re using it on a stable cutting mat. This not only protects your cutting surface but also helps in achieving cleaner cuts. When cutting, always use a sharp rotary cutter and apply even pressure as you glide the cutter along the edge of the ruler. This technique minimizes the risk of the fabric shifting and guarantees a clean edge.
In summary, large rulers are indispensable tools for quilters looking to take on bigger projects. They provide the necessary length and stability to ensure precision in your cuts, making your quilting experience smoother and more enjoyable. So, whether you’re piecing together a king-sized quilt or crafting a large wall hanging, investing in a quality large quilting ruler will pay off in the form of accuracy and efficiency.
Q: What size should I look for in a large quilting ruler?
A: It's best to choose a ruler that is at least 24 inches long to accommodate wider fabrics. Some may prefer even larger rulers, depending on their project needs.
Q: Can I use a large ruler for small projects?
A: Absolutely! While large rulers are designed for bigger projects, they can also be used for smaller cuts. Just be mindful of the excess ruler length that might be cumbersome.
Q: How do I maintain my large quilting ruler?
A: Keep your ruler clean and free of fabric debris. Store it flat to avoid warping, and avoid exposing it to extreme temperatures.

Markings and Measurements
When it comes to quilting, understanding the on your quilting ruler is absolutely crucial. These markings are not just decorative; they are designed to enhance your accuracy and efficiency, making your quilting experience smoother and more enjoyable. Most quilting rulers feature a grid pattern along with various measurement lines, which can be a little overwhelming at first glance. However, once you familiarize yourself with these features, you'll find that they can drastically improve your cutting precision.
Typically, quilting rulers are marked in both inches and centimeters, allowing you to choose the measurement system that best suits your preferences. The bold lines usually represent whole numbers, while the smaller lines indicate fractions. For instance, if you see a line that is halfway between the 3 and 4-inch mark, that line represents 3.5 inches. Understanding these increments is essential for making accurate cuts, especially when working on intricate patterns or smaller pieces of fabric.
Another important aspect to consider is the angle markings found on many quilting rulers. These markings allow you to cut at various angles, which is particularly useful for creating triangles or other geometric shapes. If you’re aiming to make precise cuts at a 45-degree angle, look for the diagonal lines that often run across the ruler. Aligning your fabric edge with these lines will help ensure that your cuts are straight and accurate, leading to better-fitting pieces in your quilt.
To help you better understand the various markings and their uses, here’s a quick breakdown:
| Marking Type | Description |
|---|---|
| Whole Numbers | Bold lines indicating full inches. |
| Fractional Marks | Smaller lines representing fractions of an inch (e.g., 1/4", 1/2"). |
| Angle Lines | Diagonal lines for cutting at specific angles (e.g., 30°, 45°). |
| Grid Pattern | A background grid that helps with aligning fabric pieces. |
When using a quilting ruler, it's essential to position your fabric correctly in relation to these markings. Always double-check that the edges of your fabric align with the appropriate measurement lines before making any cuts. This practice can help prevent mistakes that could lead to wasted fabric or uneven quilt pieces. Remember, the more comfortable you become with reading these markings, the more confident you'll feel in your quilting skills.
In summary, the markings and measurements on your quilting ruler are invaluable tools that can elevate your quilting projects. By taking the time to understand and utilize these features effectively, you'll be on your way to creating beautiful, well-crafted quilts that showcase your unique style and skill. So, grab your ruler, take a moment to study those markings, and get ready to cut with confidence!
- What is the best way to clean my quilting ruler? It's best to use a soft, damp cloth to wipe down your ruler. Avoid harsh chemicals that could damage the surface.
- Can I use a quilting ruler for other types of sewing projects? Absolutely! A quilting ruler can be an excellent tool for various sewing tasks, including garment making and home decor projects.
- How do I know which ruler to buy? Consider the size of your projects, the types of cuts you need to make, and whether you prefer metric or imperial measurements.
Proper Techniques for Using a Ruler
Mastering the techniques of using a quilting ruler can significantly enhance your cutting accuracy, making your quilting projects not only easier but also more enjoyable. Imagine standing in front of your fabric, ready to create something beautiful, but feeling uncertain about how to make that perfect cut. With the right techniques, you can transform that uncertainty into confidence. Here are some essential tips that will help you become a pro at using your quilting ruler.
First and foremost, stabilizing your fabric is crucial for achieving precise cuts. If your fabric shifts or slips while you're cutting, it can lead to uneven edges and frustrating mistakes. To prevent this, consider using a few simple techniques:
- Use a cutting mat: A self-healing cutting mat provides a non-slip surface that helps keep your fabric in place while you work.
- Pin your fabric: If you're working with multiple layers, use quilting pins to secure the fabric together, ensuring it stays stable during cutting.
- Press your fabric: Ironing your fabric before cutting can help flatten any wrinkles, making it easier to achieve clean cuts.
Once your fabric is stabilized, it’s time to focus on the cutting techniques you’ll employ with your ruler. There are several methods you can use, each suited for different types of cuts:
- Rotary cutting: This technique involves using a rotary cutter along with your ruler. Place the ruler firmly on the fabric, aligning it with your desired measurement, and then run the rotary cutter along the edge of the ruler. This method is fantastic for straight cuts and allows for smooth, clean edges.
- Straight cutting: If you prefer using scissors, hold the ruler steady and cut alongside it with your scissors. While this method may not be as fast as rotary cutting, it can be more comfortable for those who are used to traditional cutting methods.
Another important aspect to consider is the angle at which you hold your ruler. When cutting, always ensure that the ruler is placed at a 90-degree angle to your cutting line. This angle helps maintain accuracy and prevents any accidental slips that could result in uneven cuts. It's like holding a compass steady while navigating through uncharted waters; a slight tilt can lead you off course!
Finally, practice makes perfect. Don’t be discouraged if your first few cuts aren’t flawless. The more you work with your quilting ruler, the more comfortable you’ll become. Try practicing on scrap fabric before diving into your main project. This will give you the opportunity to refine your technique without the pressure of ruining your precious fabric.
Q: How do I know if my ruler is aligned correctly?
A: To ensure proper alignment, check that the measurement markings on your ruler correspond with the edges of your fabric. A good rule of thumb is to have the edge of the ruler flush against the fabric edge, providing a clear line for cutting.
Q: Can I use any ruler for quilting?
A: While you can use a standard ruler, it’s best to use a quilting ruler, as they are specifically designed with markings and features that cater to quilting needs, enhancing accuracy and ease of use.
Q: What should I do if my ruler slips while cutting?
A: If your ruler slips, stop cutting immediately. Realign the ruler, ensuring it’s stable and secure before continuing. Consider using non-slip grips or fabric weights to help keep the ruler in place.
Stabilizing Your Fabric
When it comes to quilting, one of the most crucial steps for achieving precision is ensuring that your fabric is properly stabilized. Think of your fabric as a canvas; if it isn’t secure, your masterpiece could end up looking more like a Picasso than a Van Gogh! So, how do you keep your fabric from slipping and sliding while you cut? Here are some effective techniques to consider:
First and foremost, always start with a clean, flat surface. A cutting mat is your best friend here, as it provides a stable foundation and helps prevent your fabric from moving around. If you’re working with larger pieces, consider using a grippy mat or placing a non-slip material underneath your fabric to add extra stability. This simple step can make a world of difference!
Another effective method is to utilize weights or clips to hold your fabric in place. This is particularly useful when you’re working with multiple layers or larger pieces. You can use quilting clips, binder clips, or even small weights specifically designed for this purpose. Just be sure to position them in a way that doesn’t interfere with your cutting lines. A little bit of weight can go a long way in keeping everything in check!
Additionally, consider using fabric adhesive sprays or temporary fabric adhesives. These products can provide a light hold to keep your layers from shifting. However, be cautious with the amount you apply; you don’t want to end up with a sticky mess that complicates your project. A light mist is usually sufficient to keep your fabric stable without making it difficult to cut.
For those who prefer a more traditional approach, pinning your fabric can also be an effective method. Just remember to remove the pins as you cut to avoid any accidents. If you’re working with intricate designs or small pieces, this technique can help ensure that everything stays aligned and secure.
Lastly, always remember to check your fabric grain before cutting. Cutting against the grain can lead to distortion and uneven edges, which can throw off your entire project. Align your ruler with the grain of your fabric for the best results. When you take the time to stabilize your fabric properly, you’ll find that your cutting becomes much more accurate and enjoyable.
- What is the best way to stabilize fabric for quilting? Using a combination of a cutting mat, weights, and adhesive sprays can significantly improve stability.
- Can I use regular pins to hold my fabric? Yes, but be sure to remove them before cutting to avoid any accidents.
- How do I know if my fabric is cut correctly? Always align your ruler with the fabric grain and double-check your measurements before cutting.

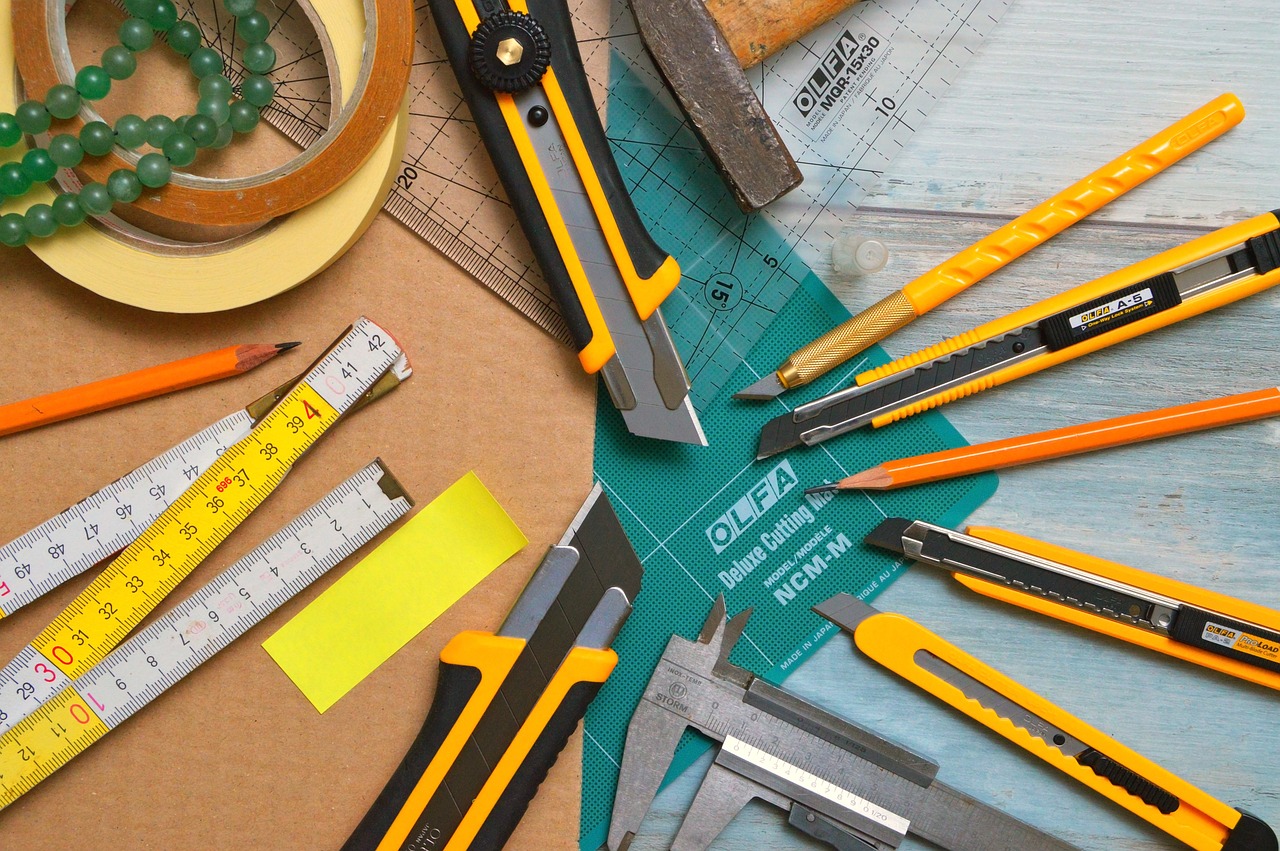
Cutting Techniques with a Ruler
When it comes to quilting, mastering the right cutting techniques with a ruler can make all the difference in achieving clean, precise edges. A quilting ruler is more than just a tool; it's your best friend in the world of fabric. Understanding how to effectively utilize it can elevate your projects from ordinary to extraordinary. So, let’s dive into some essential cutting techniques that will help you harness the full potential of your quilting ruler!
One of the most popular methods is rotary cutting. This technique involves using a rotary cutter along with your ruler to slice through multiple layers of fabric effortlessly. To get started, place your fabric on a cutting mat, ensuring it’s flat and free of wrinkles. Next, align your ruler with the desired cutting line, making sure it’s securely positioned. The key here is to apply even pressure while rolling the rotary cutter along the edge of the ruler. This method not only speeds up the cutting process but also ensures that your edges are straight and uniform.
Another technique to master is the straight cutting method. This is particularly useful for cutting single layers of fabric or when precision is paramount. Start by laying your fabric on a flat surface, then position your ruler over the fabric, ensuring it’s aligned with your cutting line. Unlike rotary cutting, where you use a rolling motion, straight cutting involves using scissors. Make sure your scissors are sharp and cut along the edge of the ruler for the best results. This technique is ideal for intricate shapes or when you need to make small adjustments to your fabric pieces.
It’s also important to consider the direction of your cuts. Always cut away from your body and keep your hands clear of the blade. This not only ensures your safety but also allows for a more controlled cut. Additionally, when working with thicker fabrics or multiple layers, don’t hesitate to make multiple passes with your rotary cutter. This will help you achieve a cleaner cut without straining your wrist or the blade.
To further enhance your cutting experience, you might want to explore using a cutting guide. This can be a simple piece of cardboard or a specialized cutting mat with measurements marked on it. By placing your ruler against the guide, you can ensure that your cuts are consistently straight and at the desired width. This is especially helpful for beginners who are still getting the hang of aligning their ruler correctly.
In conclusion, the right cutting techniques with a quilting ruler can transform your quilting experience. By incorporating rotary cutting, straight cutting, and mindful cutting directions into your practice, you'll find that your projects not only look better but also come together more smoothly. Remember, practice makes perfect! The more you familiarize yourself with your ruler and these techniques, the more confident you’ll become in your quilting journey.
- What is the best ruler size for beginners? For beginners, a 6” x 24” ruler is often recommended as it’s versatile and easy to handle.
- Can I use a quilting ruler for other crafts? Absolutely! Quilting rulers can be used for various crafts, including sewing and paper crafting.
- How do I maintain my quilting ruler? Keep your ruler clean and store it flat to prevent warping. Avoid exposing it to extreme temperatures.
- Is a rotary cutter necessary? While not mandatory, a rotary cutter paired with a quilting ruler makes cutting much easier and more efficient.
Frequently Asked Questions
- What is a quilting ruler and why is it important?
A quilting ruler is a specialized tool designed to help you measure and cut fabric accurately. It’s important because precise measurements are crucial in quilting, ensuring that your pieces fit together perfectly, which ultimately enhances the quality of your finished project.
- How do I choose the right quilting ruler for my project?
Choosing the right quilting ruler depends on several factors such as the size of your project, the type of cuts you need to make, and the markings on the ruler. For smaller, intricate projects, a small ruler is ideal, while larger projects benefit from bigger rulers that can accommodate wider fabric pieces.
- What are the different sizes of quilting rulers and their uses?
Quilting rulers come in various sizes, each serving different purposes. Small rulers are perfect for detailed cuts, while larger rulers are great for cutting bigger pieces of fabric quickly and accurately. Understanding the sizes can help you select the right one for your specific quilting tasks.
- How do I read the markings on a quilting ruler?
Reading the markings on a quilting ruler involves understanding the measurement increments, typically in inches or centimeters. Most rulers have grid lines and angles that help you align your fabric correctly. Familiarizing yourself with these markings will improve your cutting accuracy significantly.
- What techniques can I use to stabilize my fabric while cutting?
To stabilize your fabric, you can use a few techniques such as pinning it down, using weights, or employing a non-slip mat. Ensuring your fabric is secure will prevent any slips during cutting, which can lead to inaccurate measurements and wasted fabric.
- What cutting techniques should I use with a quilting ruler?
There are several cutting techniques you can employ with a quilting ruler, including rotary cutting and straight cutting. Rotary cutting is often preferred for its speed and precision, while straight cutting is useful for beginners learning to control their cuts.


