DIY Friendship Bracelets: A Fun Craft for Kids
Welcome to the enchanting world of DIY friendship bracelets, where creativity meets connection! Crafting these colorful accessories is not just a fun activity; it’s a fantastic way for kids to express their feelings and strengthen friendships. Imagine your child sitting at a table, surrounded by vibrant threads, laughter echoing in the air, and the joy of creating something special for their best friend. Isn't that a delightful picture?
In this article, we’ll dive into the step-by-step process of making these charming bracelets, explore various creative ideas to personalize them, and share tips to make the crafting experience enjoyable for everyone involved. Whether your child is a beginner or has some experience, there’s something here for everyone. So, let’s get started on this colorful journey!
Before embarking on this crafting adventure, it’s essential to gather the right materials. Having everything ready can make the process smoother and more enjoyable. Here’s a quick rundown of what you’ll need:
| Item | Description |
|---|---|
| Embroidery Threads | Colorful threads that are easy to work with and available in various shades. |
| Scissors | A pair of scissors for cutting the threads to the desired length. |
| Tape or Clip Board | To secure the bracelet while your child works on it. |
| Charms (optional) | Fun additions to personalize the bracelets further. |
Gathering these materials is like setting the stage for a fantastic performance. Each item plays a crucial role in bringing your child's creative vision to life!
Now that we have our materials, it’s time to learn some basic techniques. Understanding the fundamental skills of bracelet-making is crucial for beginners. This section will outline simple knotting methods and patterns that kids can easily grasp. Think of it as learning the ABCs of bracelet-making!
The single knot technique is a foundational skill in bracelet-making. This technique is not only simple but also serves as the building block for more complex designs. Let’s break down the process step-by-step:
To execute the single knot technique, follow these steps:
- Cut two pieces of thread, each about 24 inches long.
- Align the threads side by side and tie a knot at one end, leaving about an inch of space.
- Hold the knotted end securely, and take the left thread over the right thread.
- Wrap the left thread around the right thread and pull it through the loop created.
- Pull both threads tight to secure the knot.
With practice, kids will master this technique and be ready to explore more intricate designs!
As with any new skill, mistakes can happen. Here are some common pitfalls to watch out for:
- Uneven Tension: If the knots are too loose or too tight, the bracelet may not look uniform.
- Wrong Thread Order: Ensure that the threads are crossed in the correct order to avoid tangled knots.
By being aware of these common mistakes, children can improve their crafting experience and enjoy the process even more!
Once the basics are mastered, kids can unleash their creativity by exploring advanced patterns. This section introduces more complex designs that will challenge their skills and imagination. From chevrons to zigzags, the possibilities are endless!
Personalizing friendship bracelets adds a special touch that makes them truly unique. Kids can choose colors, add charms, or even incorporate initials to create designs that reflect their friendships. The beauty of crafting is that each bracelet tells a story!
Choosing the right color combinations can elevate a bracelet's appeal. Encourage kids to select colors that resonate with their friends’ personalities or shared memories. For example, a combination of blue and green might remind them of a fun day at the beach!
Adding charms is a fun way to personalize bracelets. Charms can represent hobbies, interests, or special memories, making each bracelet a cherished keepsake. Discuss different types of charms and how to incorporate them into designs for added flair!
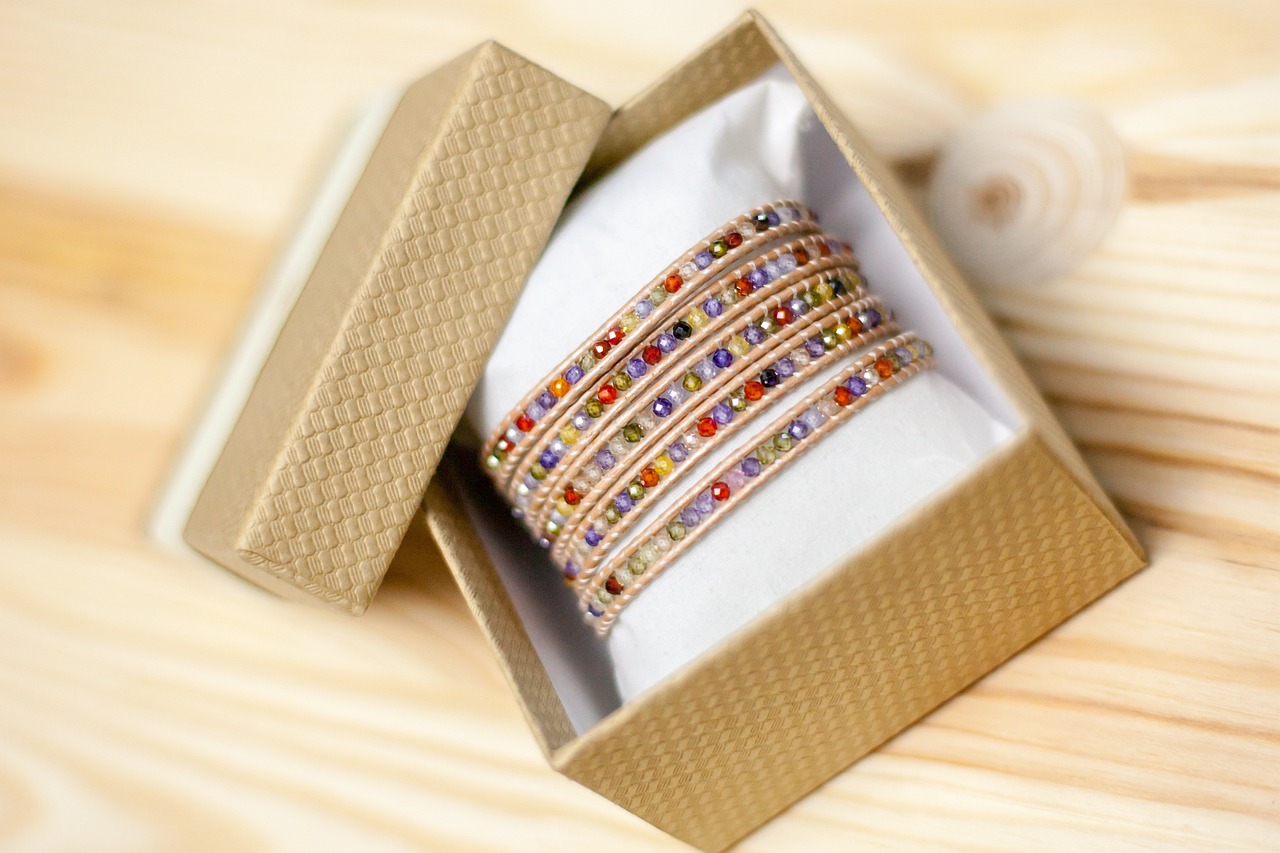
Presenting friendship bracelets as gifts can enhance their sentimental value. Consider wrapping them in colorful paper or placing them in a small gift box. Adding a handwritten note expressing the meaning behind the bracelet can make it even more special!
Crafting with children can be a joyful experience filled with laughter and creativity. Here are some practical tips for parents and guardians to ensure a fun, engaging, and productive crafting session:
Establishing a dedicated crafting space can enhance the experience. Set up an inviting and organized area where kids can unleash their creativity without distractions. Think of it as their personal art studio!
Fostering creativity is essential in crafting. Encourage children to experiment with their designs and explore different techniques. The more they play with colors and patterns, the more original their friendship bracelets will be!
Q: What age is appropriate for kids to start making friendship bracelets?
A: Generally, children aged 6 and up can start making simple friendship bracelets with supervision. As they develop their skills, they can tackle more complex designs.
Q: How long does it take to make a friendship bracelet?
A: The time it takes to make a bracelet varies depending on the complexity of the design. Simple bracelets can take around 30 minutes, while more intricate patterns may take a few hours.
Q: Can friendship bracelets be made with other materials?
A: Absolutely! While embroidery threads are popular, you can also use yarn, leather, or beads to create unique styles.
So, gather your materials, unleash your creativity, and dive into the wonderful world of DIY friendship bracelets. Happy crafting!
Materials Needed
When diving into the wonderful world of DIY friendship bracelets, having the right materials at your fingertips is crucial. Imagine walking into a candy store filled with vibrant colors and delightful textures; that’s exactly how gathering your supplies should feel! The joy of crafting begins with the right tools and materials, which not only make the process smoother but also spark creativity in kids. Here’s a comprehensive overview of what you’ll need:
First and foremost, you’ll require a variety of threads. Cotton embroidery floss is a popular choice due to its softness and availability in countless colors. You can also opt for nylon cord for a more durable bracelet, especially if you want something that can withstand the rigors of everyday wear. Each type of thread brings its own charm to the bracelets, allowing kids to choose according to their preferences.
In addition to threads, don’t forget about scissors for cutting lengths of thread and a tape measure or ruler to ensure you have the right length. Typically, 24 inches of thread per color is a safe bet for most bracelet designs. A clipboard or a sturdy surface will help keep the bracelet in place while kids work their magic. If you’re feeling extra creative, consider adding beads and charms to spice things up! These little embellishments can transform a simple bracelet into a unique piece of art.
Lastly, you might want to have a crafting tray to organize all your materials. This not only keeps everything tidy but also makes it easier for kids to find what they need without the frustration of searching through a messy pile. Here’s a quick summary of the essential materials:
| Material | Purpose |
|---|---|
| Cotton embroidery floss | Soft and colorful thread for bracelet making |
| Nylon cord | Durable option for long-lasting bracelets |
| Scissors | For cutting the thread to desired lengths |
| Tape measure or ruler | To measure thread lengths accurately |
| Clipboard or sturdy surface | To hold the bracelet in place while crafting |
| Beads and charms | To personalize and embellish the bracelets |
| Crafting tray | To organize materials and keep the workspace tidy |
With these materials in hand, you’re well on your way to creating beautiful friendship bracelets that are sure to bring smiles and joy. Whether it’s a rainy day activity or a fun weekend project, crafting these bracelets not only fosters creativity but also strengthens the bonds of friendship. So, gather your supplies, roll up your sleeves, and let the crafting adventure begin!
Basic Techniques
When it comes to creating stunning friendship bracelets, understanding the is essential. Think of these techniques as the building blocks of your bracelet-making journey. They will not only empower kids to express their creativity but also help them gain confidence as they see their designs come to life. The beauty of crafting lies in its simplicity; with just a few fundamental skills, children can create beautiful bracelets that tell a story or celebrate a friendship.
One of the most important skills to master is the knotting method. It might sound simple, but the right knot can significantly impact the bracelet's durability and appearance. The two most common techniques are the single knot and the double knot. While the single knot is great for beginners, the double knot offers a bit more security, making it ideal for more intricate designs. Let’s dive deeper into these techniques, starting with the single knot.
The single knot technique is like the first step in a dance; it sets the rhythm for everything that follows. This technique is straightforward and can be learned quickly by kids, allowing them to focus on creativity rather than getting bogged down by complex steps. Here’s a simple breakdown of how to execute this technique:
To perform the single knot, follow these steps:
- Start by cutting two strands of thread, about 24 inches long each.
- Align the two strands together and tie a simple knot at one end, leaving a small loop.
- Hold the loop with one hand and use the other hand to wrap the left strand over the right strand.
- Now, take the left strand under the right strand and pull it through the loop you created.
- Tighten the knot gently, making sure it’s secure but not too tight that it distorts the shape.
With practice, kids will find this technique easy and enjoyable, allowing them to create beautiful designs in no time!
Just like in any craft, making mistakes is part of the learning process. Here are a few common pitfalls kids might encounter while mastering the single knot technique:
- Over-tightening: If the knot is pulled too tightly, it can become difficult to adjust or may break the thread.
- Uneven Strands: Using strands of different lengths can lead to an uneven bracelet. Always measure and cut your threads carefully.
- Skipping Steps: Rushing through the process can lead to errors. Encourage kids to take their time and enjoy each step.
By being aware of these common mistakes, children can learn how to troubleshoot their work, making the crafting experience much more enjoyable and rewarding.
Once the basics are mastered, kids can unleash their creativity with advanced patterns. This is where the fun really begins! By combining different knotting techniques and colors, they can create intricate designs that reflect their personality or the essence of their friendship.
In summary, mastering basic techniques like the single knot is crucial for any budding bracelet-maker. With a little patience and practice, children can transform simple threads into beautiful tokens of friendship. So, gather your materials and let the crafting adventure begin!
Single Knot Technique
The is the cornerstone of friendship bracelet making. It's like the first step in a dance; once you master it, you can twirl into more complex patterns with ease. This technique is not only simple but also incredibly satisfying, as it allows young crafters to see their progress quickly. Imagine the joy on a child's face as they tie their first knot and watch their bracelet take shape! To get started, you'll need a few basic materials: colorful threads, scissors, and a comfortable workspace. The best part? You can create a bracelet in just a few minutes!
Here’s a quick breakdown of the steps involved in the Single Knot Technique:
- Choose Your Threads: Pick a few vibrant colors that your child loves. This adds a personal touch and makes the bracelet even more special!
- Cut to Length: Cut the threads to about 24 inches long. This length is perfect for most wrist sizes.
- Secure the Threads: Tie a simple knot at one end and secure it to a table or your child's lap using tape. This will prevent the threads from slipping as they work.
Now, let’s dive into the actual knotting process! Start by taking the left thread and placing it over the middle thread, forming a '4' shape. Next, take the right thread and loop it under the middle thread and through the top of the '4'. Pull both ends to tighten the knot. Voila! You've just made your first knot! Repeat this process, alternating the left and right threads, until the bracelet reaches the desired length. It’s like a rhythmic dance of colors coming together, and before you know it, you’ll have a beautiful piece of art on your wrist!
However, like any new skill, it’s common for beginners to make a few mistakes along the way. Here are some common pitfalls to watch out for:
- Uneven Tension: If the knots are too loose or too tight, the bracelet can look uneven. Encourage kids to maintain a consistent tension for a polished look.
- Mixing Up Threads: It’s easy to lose track of which thread goes where. A little focus can go a long way in keeping the pattern intact.
- Forgetting to Secure the End: Before they finish, remind them to tie off the end securely to prevent the bracelet from unraveling.
By mastering the Single Knot Technique, kids will not only gain confidence in their crafting abilities but also create beautiful, meaningful gifts for their friends. As they practice, they’ll discover their unique style, and before long, they’ll be ready to tackle more advanced patterns. So, gather those threads, get comfy, and let the fun begin!
Step-by-Step Guide
Creating your very own friendship bracelet is not just a craft; it's a journey of creativity and connection! Let’s dive into a step-by-step guide that will make this process not only easy but also incredibly enjoyable for kids. First, you'll want to gather your materials. This includes colorful embroidery threads, scissors, and a clipboard or tape to hold your work in place. Once you have everything ready, you can begin the exciting adventure of bracelet-making!
Start by cutting your threads. A good length is about 24 inches for each color, which allows enough room for knotting and adjustments. If you're using multiple colors, cut equal lengths for each color. Next, tie all the threads together in a secure knot about an inch from one end. This knot will serve as the anchor for your bracelet. Now, you’re ready to attach your threads to a sturdy surface. You can use a clipboard or simply tape the knot down to a table. This will keep your bracelet steady while you work.
Now comes the fun part: the knotting! The single knot technique we discussed earlier is perfect for beginners. To start, take the left thread and place it over the center threads, creating a loop. Next, take the right thread, bring it under the center threads, and pull it through the loop you just created. Pull both ends to tighten the knot. This simple movement is the foundation of your bracelet. Repeat this knotting process, alternating the left and right threads, until your bracelet reaches the desired length. The more knots you make, the more beautiful your bracelet will become!
As you work, encourage kids to be mindful of their tension. If the knots are too tight, the bracelet may become stiff; if they're too loose, it may unravel. A good rule of thumb is to keep a consistent tension that allows the bracelet to be flexible yet secure. If kids make a mistake, remind them that crafting is all about learning! They can easily undo a knot by gently pulling the threads apart and starting that section over.
Once the bracelet is long enough to fit around the wrist, it’s time to finish it off. Gather the threads at the end and tie a secure knot, just like you did at the beginning. This knot is crucial as it keeps everything in place. For an extra touch, you can add a charm or bead before the final knot, making the bracelet even more special. Finally, trim any excess thread, leaving a little length for tying the bracelet onto the wrist.
And there you have it! A beautifully crafted friendship bracelet that kids can wear or gift to a friend. This step-by-step guide not only helps in creating a lovely piece of jewelry but also fosters a sense of accomplishment and creativity in young crafters. So, gather around the crafting table and let the fun begin!
Q: What materials do I need to make friendship bracelets?
A: You'll need embroidery threads in various colors, scissors, and a clipboard or tape to hold your work in place.
Q: How long should the threads be?
A: A good length for each thread is about 24 inches, which provides enough material for knotting and adjustments.
Q: What if I make a mistake while knotting?
A: If you make a mistake, simply pull the threads apart gently to undo the knot and start that section over. Crafting is all about learning and having fun!
Q: Can I add charms to my bracelet?
A: Absolutely! Adding charms or beads is a fantastic way to personalize your bracelet and make it unique.

Common Mistakes
When diving into the world of DIY friendship bracelets, even the most enthusiastic young crafters can stumble upon a few common pitfalls. It’s all part of the learning process, but being aware of these mistakes can save a lot of time and frustration. One of the biggest blunders is not measuring the threads properly before starting. Imagine setting off on a road trip without checking your fuel gauge; it can lead to unexpected detours! When kids cut their threads too short, they may find themselves having to start over, which can be disheartening.
Another frequent issue occurs during the knotting process. Kids might rush through the knots, resulting in loose or uneven tension. This can make the bracelet look sloppy and may even cause it to fall apart. Encourage your little ones to take their time and ensure each knot is secure. A good knot is like a strong foundation for a house; without it, everything else can come crashing down!
Additionally, many young crafters forget to check the order of their colors while working on patterns. This can lead to unexpected and often undesirable results. To avoid this, it's helpful to lay out the colors before starting. Think of it like planning a meal; you wouldn’t want to mix up the ingredients and end up with a dish that doesn’t taste good!
Finally, one of the most overlooked aspects is the finishing touches. Kids often neglect to secure the ends of their bracelets properly, which can lead to unraveling. A simple solution is to tie off the ends with an extra knot and trim any excess thread. This ensures that all their hard work stays intact. By keeping these common mistakes in mind, children can improve their skills and enjoy the bracelet-making process even more!
Q1: What materials do I need to start making friendship bracelets?
A1: You will need embroidery threads, scissors, tape or a clipboard, and optionally, beads or charms for decoration. Having a comfortable workspace is also important!
Q2: How long should I cut the threads for a bracelet?
A2: A good rule of thumb is to cut each thread about 24 to 30 inches long. This length gives enough material to create a comfortable bracelet for most kids.
Q3: Can I use other types of string or thread?
A3: Absolutely! While embroidery floss is popular, you can also use yarn, leather cord, or even ribbon, depending on the style you want to achieve.
Q4: How can I make my bracelet unique?
A4: Personalize your bracelet by choosing colors that represent your friend’s personality, adding charms that hold special meaning, or incorporating initials into the design.
Q5: What’s the best way to present a friendship bracelet as a gift?
A5: Consider wrapping the bracelet in decorative paper or placing it in a small gift box. Adding a handwritten note can also make the gift feel extra special!

Advanced Patterns
Once your little ones have mastered the basics of friendship bracelet making, it's time to dive into the exciting realm of . These patterns not only challenge their skills but also allow them to express their creativity in vibrant and intricate ways. Think of it like moving from simple doodles to creating a masterpiece! Advanced patterns can include braids, chevrons, and even unique shapes, transforming a simple strand of thread into a work of art.
One popular advanced pattern is the Chevron Design. This pattern creates a striking zigzag effect that can be customized with various colors to represent different moods or shared experiences. To create a chevron bracelet, kids will need to arrange their threads in a specific order and follow a series of knotting techniques that build upon their foundational skills. It’s like following a recipe where each step adds flavor to the final dish!
Another exciting pattern is the Twisted Bracelet. This design involves twisting two or more strands together, which not only adds texture but also creates a visually appealing look. It’s a fantastic way for kids to experiment with different thread types, such as incorporating shiny metallic threads or soft, plush yarns for a unique tactile experience. The twisted bracelet can be a great conversation starter, as kids can share the stories behind their color choices and materials.
For those who are feeling particularly adventurous, the Diamond Pattern offers a delightful challenge. This intricate design requires a bit more concentration and practice, as it involves forming diamond shapes within the bracelet. Kids can use a combination of colors to create a mesmerizing effect that draws the eye. It’s like painting a canvas, where each knot adds to the overall masterpiece.
To help visualize these advanced patterns, here’s a simple table summarizing the key features of each design:
| Pattern Name | Description | Skill Level |
|---|---|---|
| Chevron Design | Zigzag pattern that can be customized with colors. | Intermediate |
| Twisted Bracelet | Involves twisting strands together for texture. | Intermediate |
| Diamond Pattern | Intricate diamond shapes formed within the bracelet. | Advanced |
As children embark on these advanced projects, it's essential to remind them that mistakes are part of the learning process. Just like in life, not every attempt will be perfect, but each one will teach them something valuable. Encourage them to embrace their creativity, mix and match colors, and even invent their own patterns. Who knows? They might just come up with the next big trend in friendship bracelets!
In conclusion, advanced patterns in friendship bracelet making are not just about creating beautiful accessories; they're about fostering creativity, patience, and a sense of accomplishment in children. So, gather those threads, unleash the imagination, and let the crafting adventure continue!
Q: What age is appropriate for kids to start making friendship bracelets?
A: Generally, children aged 6 and up can start making simple friendship bracelets with supervision. As they grow older, they can tackle more complex patterns.
Q: What materials are best for beginners?
A: For beginners, it’s best to use embroidery floss or yarn, as they are easy to work with and come in a variety of colors.
Q: How can I make my bracelets last longer?
A: To ensure longevity, avoid exposing the bracelets to water, and store them in a cool, dry place when not in use.
Q: Can friendship bracelets be made for special occasions?
A: Absolutely! They make great gifts for birthdays, holidays, or even as a token of friendship during special events.

Personalization Ideas
When it comes to crafting friendship bracelets, personalization is the key to making each piece truly special. After all, these bracelets are not just accessories; they are tokens of friendship that carry memories and emotions. One of the simplest yet most impactful ways to personalize a bracelet is through color choices. Think about the personality of the friend receiving the bracelet. Do they love vibrant colors that pop, or do they prefer subtle, muted tones? By selecting colors that resonate with their personality or reflect shared memories, you can create a gift that speaks volumes.
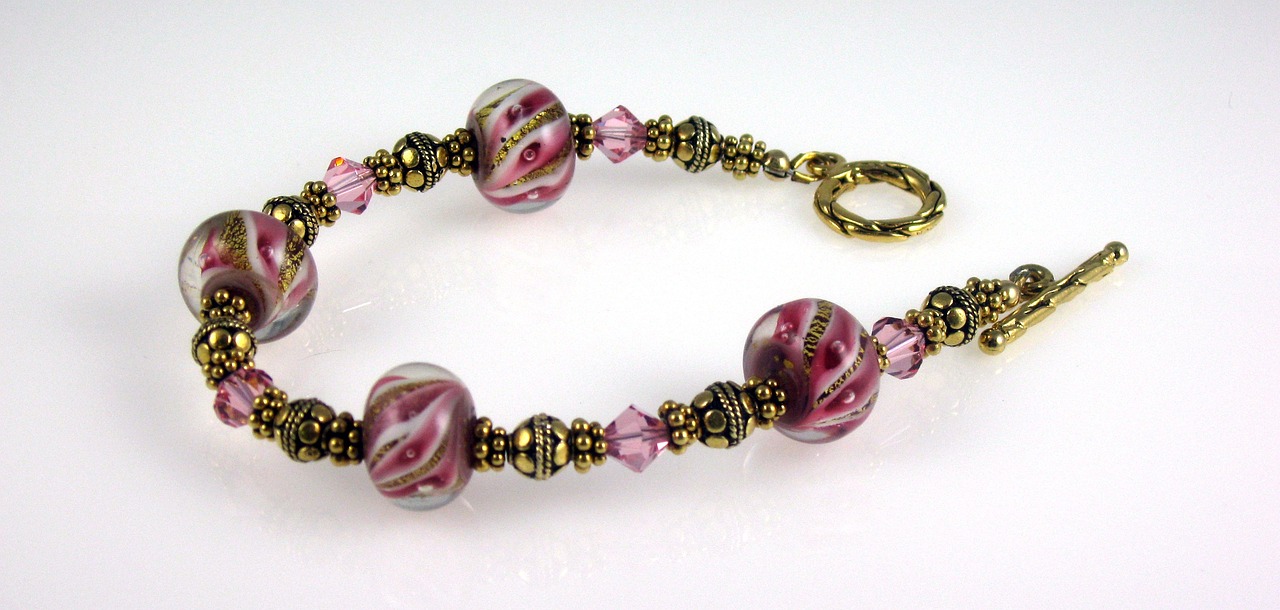
Another exciting way to add a personal touch is by incorporating charms. Charms can be anything from initials to symbols that represent hobbies or interests. Imagine a bracelet adorned with a tiny guitar for a music lover or a heart for someone dear to you. This not only enhances the bracelet's visual appeal but also makes it a meaningful keepsake. Here are some popular charm ideas:
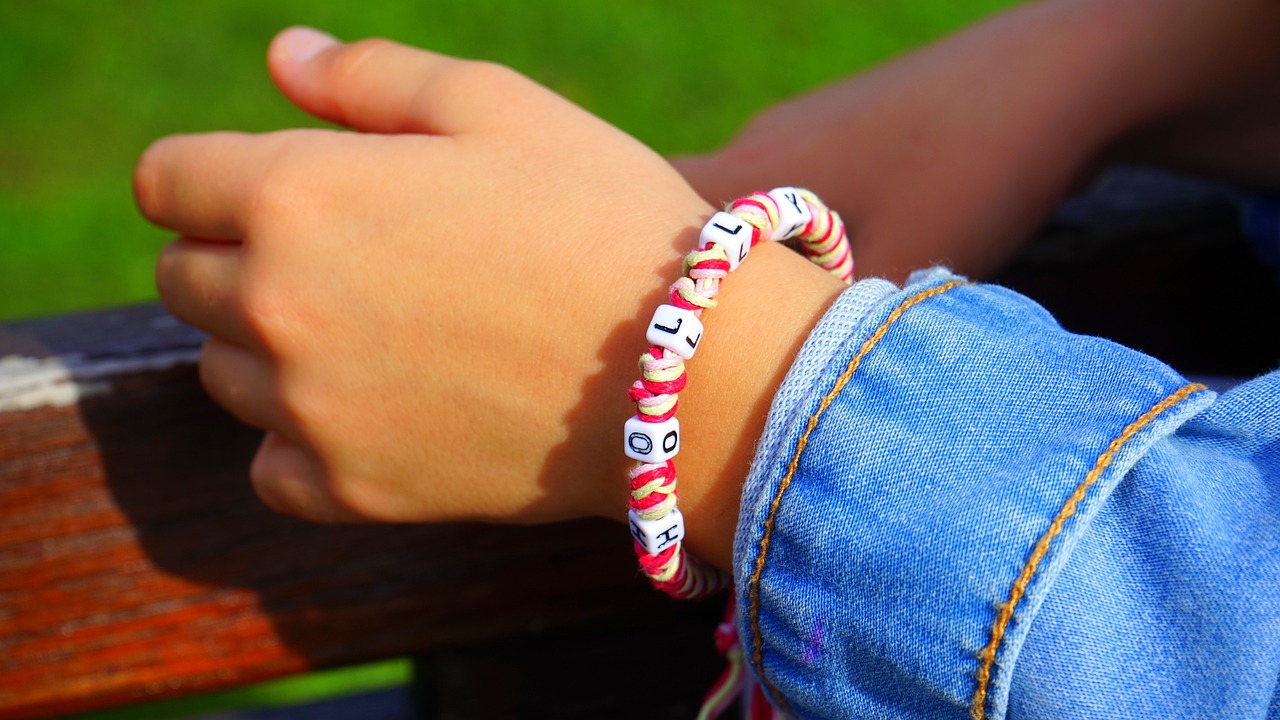
- Initial Charms: Personalize each bracelet with the initials of the friends involved.
- Hobby Charms: Choose charms that reflect the recipient's favorite activities, like sports, music, or art.
- Symbolic Charms: Incorporate symbols like stars, hearts, or animals that hold significance in your friendship.
Furthermore, consider adding beads that tell a story. Each bead can represent a shared experience or a memorable moment in your friendship. For instance, if you and your friend went on a memorable trip together, you could choose a bead that represents that location or a memento from the trip. This approach not only personalizes the bracelet but also makes it a conversation starter.
Don’t forget about patterns! Once you've mastered the basics, you can experiment with different knotting techniques and patterns. Mixing and matching various styles can create a unique design that stands out. For example, alternating between solid colors and patterned threads can give the bracelet a dynamic look that reflects both your creativity and your friend's style.
Lastly, the way you present the bracelet can also add to its personalized charm. Consider crafting a small card that explains the meaning behind the colors, charms, or beads you've used. This thoughtful touch will show your friend how much you care and make the gift even more special.
Q: How can I choose the right colors for my friend's bracelet?
A: Think about your friend's favorite colors or colors that symbolize shared memories. You can also create a mood board to visualize different combinations!
Q: What types of charms should I use?
A: Choose charms that reflect your friend's interests, hobbies, or initials. You can find a variety of charms online or at craft stores.
Q: Can I mix different materials in one bracelet?
A: Absolutely! Mixing materials like threads, beads, and charms can create a unique and textured look that adds depth to your bracelet.
Q: How can I ensure the bracelet is durable?
A: Use high-quality threads and secure knots to ensure longevity. You might also consider applying a bit of clear nail polish to the knots for extra strength.
Color Combinations
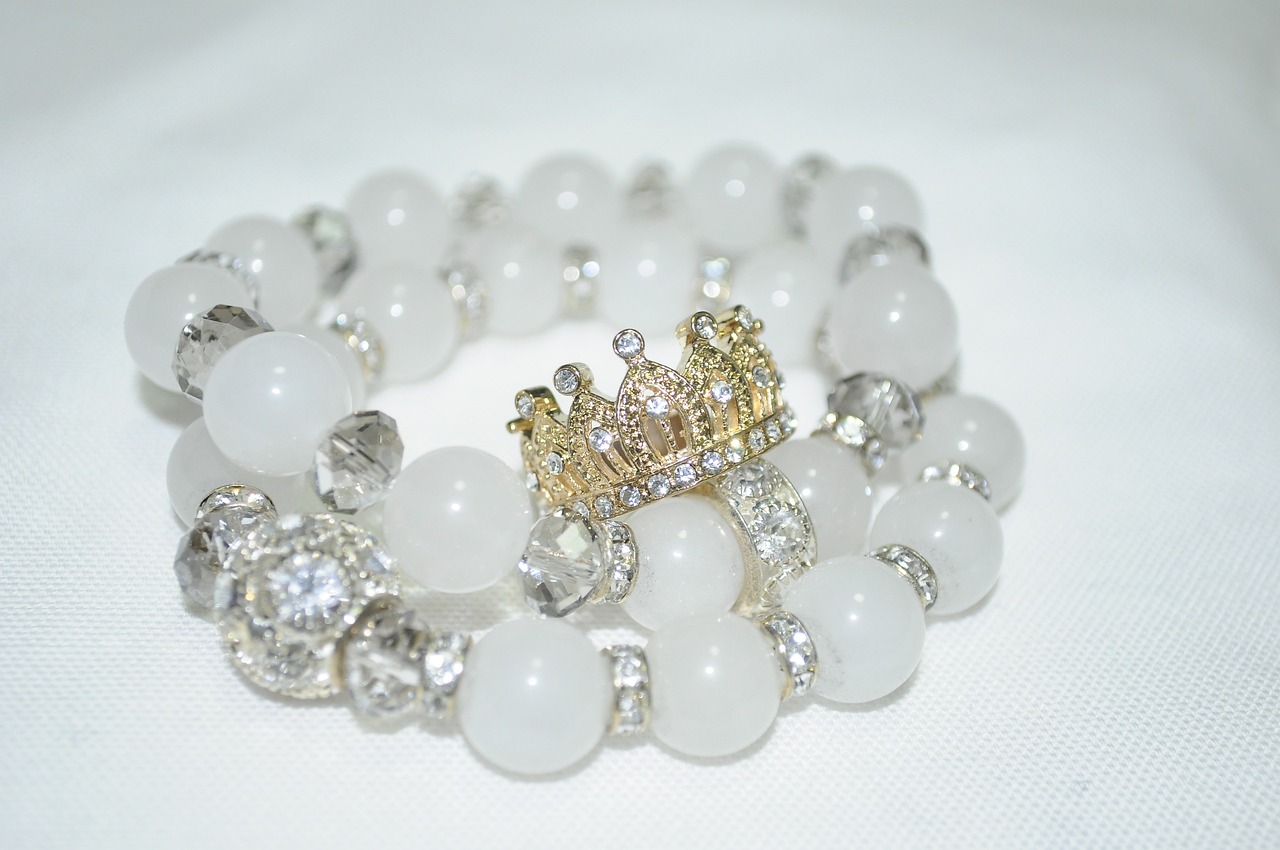
When it comes to creating stunning friendship bracelets, play a pivotal role in expressing individuality and sentiment. Just like a painter chooses their palette, kids can mix and match threads to create designs that resonate with their friends' personalities or shared memories. Imagine the delight on a friend's face when they receive a bracelet that perfectly reflects their favorite colors or hobbies!
To make the process easier, consider the following tips when selecting colors:
- Consider Personality: Think about your friend's character. Are they vibrant and outgoing? Warm colors like red, orange, and yellow might suit them perfectly. For a more calm and collected friend, cool colors like blue, green, and purple could be more fitting.
- Shared Memories: Use colors that remind you of special moments together. For example, if you both love the beach, shades of turquoise and sandy beige can evoke those cherished memories.
- Seasonal Themes: Incorporating seasonal colors can also be a fun idea. Bright pastels for spring, warm tones for autumn, and even icy blues for winter can add a unique touch to your creations.
Another great way to explore color combinations is through the use of color wheels. A color wheel can help you understand which colors complement each other. For instance, pairing complementary colors, such as blue and orange or purple and yellow, can create a vibrant contrast that makes the bracelet pop!
Here’s a simple table to illustrate some popular color combinations and their meanings:
| Color Combination | Meaning |
|---|---|
| Red & Gold | Friendship and Celebration |
| Blue & White | Peace and Trust |
| Green & Brown | Nature and Growth |
| Purple & Pink | Creativity and Fun |
Ultimately, the beauty of crafting friendship bracelets lies in the personal touch each child brings to their design. Encourage them to experiment with different combinations, perhaps even creating their own unique palettes that reflect their style. This not only enhances their creativity but also makes the bracelet a true representation of their friendship.
So, gather those colorful threads and let your imagination run wild! The right color combinations can transform a simple bracelet into a cherished keepsake, symbolizing the bond of friendship.
Q: What if I don't have the exact colors I want?
A: No problem! Mixing and blending colors can create beautiful new shades. Encourage kids to get creative with what they have!
Q: How do I choose colors for a friend who has different tastes?
A: Consider using neutral colors as a base and adding pops of their favorite colors. This way, the bracelet remains stylish while still reflecting their preferences.
Q: Can I use beads or other embellishments with my color combinations?
A: Absolutely! Beads and charms can add an extra layer of personalization and style to the bracelet. Just make sure they complement the colors you’ve chosen.
Incorporating Charms
Adding charms to friendship bracelets is a fantastic way to personalize them, making each bracelet not just a piece of jewelry, but a treasured keepsake. Charms can represent shared memories, interests, or even inside jokes between friends. Imagine creating a bracelet adorned with a tiny guitar charm for your music-loving buddy or a star charm for your friend who dreams big! The possibilities are endless, and the best part is that kids can let their imaginations run wild while selecting charms that resonate with their friendships.
When it comes to incorporating charms into your bracelets, there are a few techniques to consider. You can string the charms directly onto the thread or use them as focal points in your design. For instance, if you're using a charm that has a hole in the center, you can weave the thread through it, allowing it to dangle beautifully as part of the bracelet. Alternatively, you can create sections of the bracelet that alternate between knots and charms, adding a fun rhythm to the design.
To make the charm selection process easier, here are some popular types of charms that kids might enjoy:
- Symbolic Charms: These can include hearts, stars, or initials that hold special meaning.
- Theme Charms: Choose charms that reflect hobbies or interests such as animals, sports, or music.
- Seasonal Charms: Incorporate charms that represent different seasons or holidays for a festive touch.
To help kids visualize how to incorporate charms into their designs, consider creating a sample bracelet chart that illustrates different charm placements. This can be a fun activity where children can sketch their ideas before starting to craft. Here’s a simple example of what that chart might look like:
| Charm Position | Description |
|---|---|
| 1 | Start with a knot, followed by a heart charm for a personal touch. |
| 2 | Add two colored threads, then place a star charm in the center. |
| 3 | Finish with a charm that represents a shared memory, like a tiny book for book lovers. |
Incorporating charms not only enhances the visual appeal of friendship bracelets but also deepens the emotional connection between friends. Each charm tells a story, making the bracelet a unique reflection of the bond shared. So, gather some charms, let the kids explore their creativity, and watch as they craft beautiful, meaningful gifts that will surely bring smiles to their friends' faces!
Q: What types of charms are best for kids' friendship bracelets?
A: Kids can choose from a variety of charms, including symbolic charms (like hearts or initials), theme charms (reflecting hobbies), and seasonal charms (for holidays). The key is to select charms that resonate with their friendships!
Q: How can I help my child incorporate charms into their bracelet designs?
A: Encourage your child to sketch their ideas first. You can also create a sample bracelet chart to visualize different charm placements. This way, they can plan their designs before starting to craft.
Q: Are there any special techniques for attaching charms to the bracelets?
A: Yes! Charms can be strung directly onto the thread or woven through the bracelet design. Experimenting with placement and spacing can create unique looks!
Gift Presentation
When it comes to gifting friendship bracelets, the presentation can make all the difference in how the gift is received. After all, a beautifully presented bracelet not only enhances its sentimental value but also adds an element of surprise and excitement for the recipient. So, how can you elevate the gifting experience? Let’s dive into some creative ideas that will turn your handmade bracelet into a memorable gift!
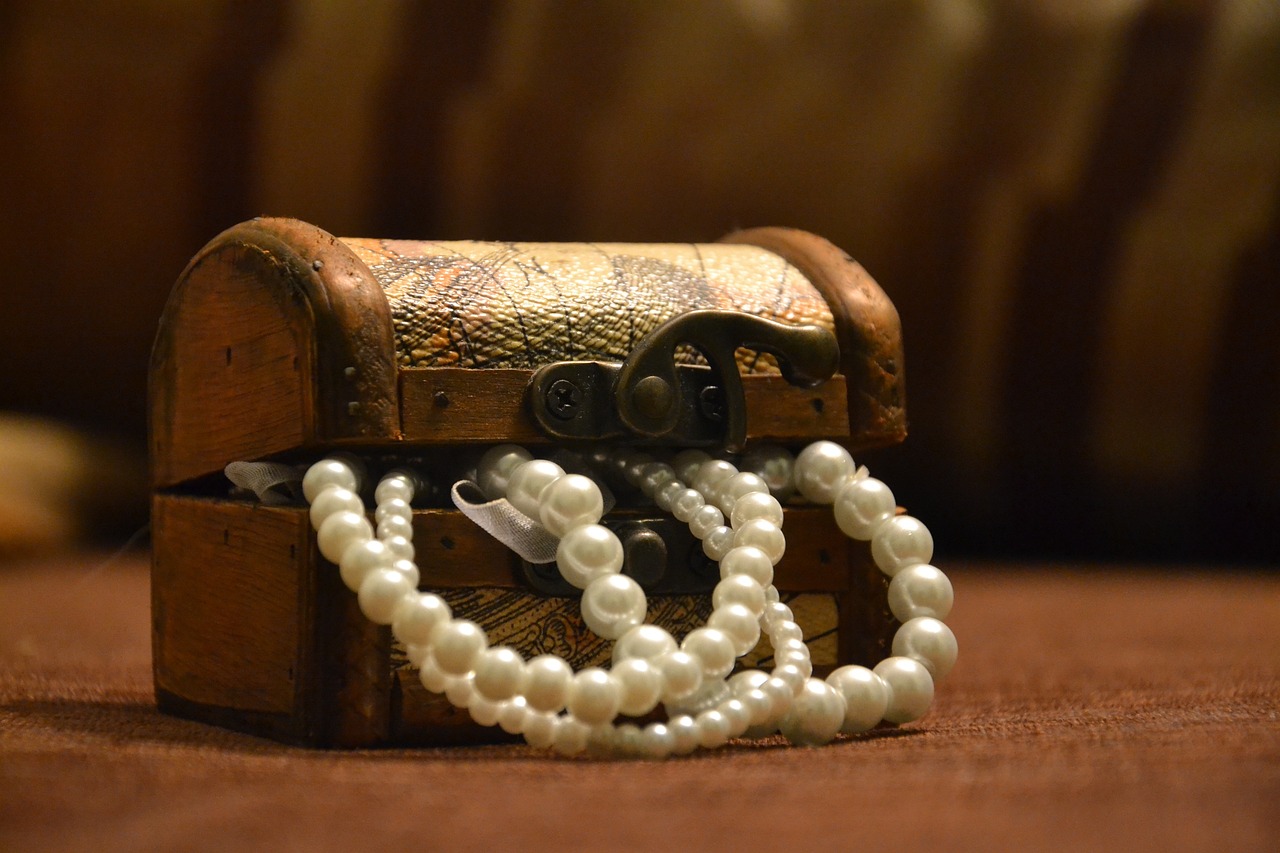
First, consider the packaging. Instead of simply handing over the bracelet, you could use a small, decorative box or a vibrant gift bag. Adding a personal touch, such as a handwritten note or a card explaining the significance of the colors and patterns used in the bracelet, can make the gift even more special. Kids can get involved in this process, making it a fun activity that enhances their excitement about giving. Here are a few ideas for packaging:
- Decorative Boxes: Use small boxes covered in colorful paper or decorated with stickers that resonate with the recipient’s interests.
- Gift Bags: Choose bags with fun designs or patterns; you can even let the kids decorate plain bags with markers and stickers.
- Fabric Pouches: Sew or buy small pouches made from colorful fabric to hold the bracelets, adding a tactile element to the gift.
Next, think about the presentation moment. Creating a special moment for the gift-giving can amplify the joy of receiving. For instance, you could organize a small gathering with friends where everyone exchanges their handmade gifts, or simply plan a surprise reveal during a playdate. The excitement of anticipation can turn an ordinary day into something extraordinary. Imagine the delight on your friend’s face when they unwrap a beautifully packaged bracelet, knowing it was made just for them!
Additionally, you might want to consider adding a theme to your gift presentation. For example, if the bracelet features bright summer colors, you could pair it with a summer-themed card and some homemade cookies for a delightful treat. This thematic approach not only enhances the overall aesthetic but also creates a cohesive experience that your friends will remember.
Finally, don’t forget to capture the moment! Encourage kids to take photos or videos during the gift presentation. These memories can be cherished for years to come and serve as a reminder of the special bond shared through these handmade creations. By turning the act of giving into a memorable event, you’re not just gifting a bracelet; you’re creating a lasting memory.
Q: How can I make my gift presentation more personal?
A: Personalize your gift by adding a handwritten note that explains the meaning behind the bracelet's colors or patterns. You can also decorate the packaging together with your child for a special touch.
Q: What are some creative ways to present friendship bracelets?
A: Consider using decorative boxes, vibrant gift bags, or fabric pouches. You could also create a themed presentation based on the bracelet's colors or the recipient's interests.
Q: Should I include anything else with the bracelet?
A: Including a small treat, like homemade cookies, or a themed card can enhance the gift experience. It shows thoughtfulness and adds an extra layer of joy to the presentation.

Tips for Crafting with Kids
Crafting with kids can be one of the most rewarding experiences for both parents and children. It’s not just about making something beautiful; it’s about creating memories, fostering creativity, and spending quality time together. To ensure that your crafting session is enjoyable and productive, here are some practical tips that will help you navigate the colorful world of DIY friendship bracelets.
First and foremost, setting the right atmosphere is crucial. Establish a dedicated crafting space where kids can freely express their creativity without the fear of making a mess. This could be a corner of the dining room table or a designated craft table in the playroom. Make sure to cover the surface with a protective layer, like an old tablecloth or newspapers, to catch any stray bits of thread or glue. This way, kids can focus on their projects without worrying about cleanup. A well-organized space with all materials within reach can also spark excitement and make the crafting process smoother.
Next, encouragement is key. Kids thrive on positive reinforcement, so be sure to celebrate their efforts, no matter how small. If they make a mistake, turn it into a learning opportunity. For instance, if a knot isn’t tight enough, gently guide them on how to fix it rather than expressing frustration. This not only builds their confidence but also teaches them resilience. Remember, crafting is about the journey, not just the final product!
Another important aspect is to allow for creativity and experimentation. While it’s great to have a plan, give children the freedom to explore their ideas. Perhaps they want to mix colors that you wouldn’t normally consider, or they might come up with a unique pattern. Embrace their creativity! You might be surprised by the innovative designs they come up with. Encourage them to try different techniques, even if it means stepping outside the traditional methods. This exploration is what makes crafting so exciting!
Additionally, involve them in the planning process. Before diving into the project, discuss what kind of bracelet they want to make. Ask them questions like, “What colors do you love?” or “Do you want to add any special charms?” This not only helps them feel more invested in the project but also develops their decision-making skills. You can even create a mood board together using cut-out images from magazines or printed designs to inspire their bracelet creation.
Finally, remember to take breaks. Crafting can be intense, especially for younger children who may have shorter attention spans. If you notice their focus waning, suggest a quick snack or a little dance break to recharge. This will keep the energy high and make the experience more enjoyable for everyone involved.
Q: What age is appropriate for kids to start crafting friendship bracelets?
A: Generally, children aged 6 and up can start crafting friendship bracelets with some guidance. Younger kids might need more assistance, especially with knotting techniques.
Q: How can I make crafting sessions more engaging?
A: Incorporate themes or challenges, such as making bracelets for specific occasions or using a limited color palette. This can spark creativity and make the crafting experience more fun.
Q: What if my child loses interest halfway through?
A: It’s perfectly normal for kids to lose interest. Encourage them to take a break and come back to it later, or suggest switching to a different craft if they seem particularly disengaged.
Q: Are there any safety concerns I should be aware of?
A: Always supervise young children when using scissors or other tools. Ensure that materials are non-toxic and age-appropriate to avoid any hazards.

Creating a Crafting Space
When it comes to crafting, especially with kids, having the right environment can make all the difference. Imagine stepping into a space that feels like a creative haven, where every corner inspires imagination and every tool is at your fingertips. To create this magical crafting space, start by choosing a dedicated area in your home. It could be a corner of the living room, a spare room, or even a cozy nook in the kitchen. The key is to ensure it's a place where kids can feel free to express themselves without the worry of making a mess.
Next, consider the essentials that will make crafting enjoyable. A sturdy table or desk is crucial; it should be large enough to accommodate multiple projects at once. You might want to cover the surface with a protective mat or an old tablecloth to make cleanup easier. Organizing supplies is equally important. Use bins, baskets, or even repurposed jars to store materials like threads, beads, and scissors. Labeling these containers can help kids find what they need quickly, fostering independence and encouraging them to take ownership of their crafting space.
Lighting also plays a vital role in a crafting area. Natural light is ideal, so if possible, set up near a window. If that’s not an option, invest in good quality craft lamps that provide ample light without straining young eyes. Additionally, consider adding some fun decor—think colorful posters, inspirational quotes, or even a bulletin board for displaying completed projects. These elements not only brighten the space but also motivate kids to dive into their creative endeavors.
Moreover, safety should always be a priority. Ensure that all tools are age-appropriate and that sharp objects are stored out of reach when not in use. Establishing clear rules about the crafting area can help maintain a safe and enjoyable environment. For instance, teaching kids to clean up after each session not only keeps the space tidy but also instills a sense of responsibility.
Finally, make the crafting area a place for collaboration. Encourage siblings or friends to join in on the fun. Having a communal space can lead to shared ideas and inspire teamwork. You might even consider scheduling regular crafting days where everyone comes together to create and share their projects. This not only strengthens friendships but also builds lasting memories around the joy of crafting.
Encouraging Creativity
When it comes to crafting, especially with kids, encouraging creativity is like adding sprinkles to a cupcake—it makes everything better! Kids have a natural flair for imagination, and as parents or guardians, our role is to nurture that spark. One of the best ways to do this is by providing them with the freedom to experiment. Allow them to mix colors, try out different patterns, and even come up with their own unique designs. Who knows? They might create the next big trend in friendship bracelets!
To foster this sense of creativity, consider setting up a crafting environment that inspires. Think about incorporating various materials such as beads, ribbons, and even fabric scraps. Having a variety of supplies readily available can ignite their imagination and encourage them to think outside the box. You might be surprised at how a simple piece of string can transform into a vibrant bracelet with just a little creativity!
Another fantastic way to encourage kids is through collaboration. Invite their friends over for a crafting day, where they can share ideas and inspire one another. Kids often come up with the most innovative designs when they bounce ideas off each other. Plus, it’s a great opportunity for them to learn the value of teamwork and sharing, which are essential skills in life.
Don't forget to celebrate their creations! Whether it’s a simple compliment or a small showcase of their finished bracelets, acknowledging their hard work boosts their confidence and motivates them to keep creating. You might even consider setting up a mini-exhibition at home, where they can display their favorite pieces. This not only highlights their accomplishments but also makes them feel proud of their artistic journey.
Lastly, remember that mistakes are part of the creative process. If a bracelet doesn’t turn out as expected, encourage them to see it as a learning opportunity rather than a failure. Perhaps they can transform the “mistake” into something new and exciting! This mindset not only fosters resilience but also teaches them that creativity knows no bounds.
- What materials do I need to make friendship bracelets? You’ll need threads, scissors, tape or a clipboard, and optional beads or charms for decoration.
- Can younger children participate in making friendship bracelets? Absolutely! Just ensure that they have supervision and use child-friendly materials.
- How can I help my child if they get frustrated while crafting? Offer encouragement, suggest they take a break, or help them troubleshoot the problem together.
- Are there any online resources for bracelet-making tutorials? Yes! YouTube has a plethora of tutorials that can guide you and your child through various techniques.
Frequently Asked Questions
- What materials do I need to make friendship bracelets?
To get started with making friendship bracelets, you'll need some basic materials. Gather embroidery floss or yarn in various colors, scissors, and tape or a clipboard to hold your work in place. If you want to add some flair, consider picking up some charms or beads too!
- Are friendship bracelets difficult to make?
Not at all! Friendship bracelets can be as simple or complex as you want them to be. Beginners can start with basic knotting techniques like the single knot, which is easy to learn. With practice, you can progress to more advanced patterns that will challenge your creativity!
- How can I personalize my friendship bracelet?
Personalizing your friendship bracelet is a great way to make it special! You can choose colors that represent your friend's personality or even include their initials. Adding charms that signify shared memories or interests also adds a unique touch!
- What are some common mistakes when making friendship bracelets?
Common mistakes include using the wrong tension when knotting, which can lead to uneven bracelets. Another issue is not securing the threads properly, causing them to unravel. Don't worry! With a little practice and patience, you can easily avoid these pitfalls.
- How can I create a great crafting space for kids?
To create a fun crafting space, set up a dedicated area with plenty of light and comfortable seating. Organize your materials in bins or baskets for easy access. Having a clean, inviting workspace can spark creativity and make crafting sessions enjoyable!
- What tips do you have for encouraging kids' creativity while crafting?
Encouraging creativity is all about freedom and exploration! Let kids experiment with different colors, patterns, and techniques. Avoid strict guidelines and instead, celebrate their unique designs. This will help them express themselves and enjoy the crafting process!


