
Making DIY Wire Crafts for Your Home
Have you ever looked around your home and thought, "I could really use something unique to brighten up this space?" Well, you're in luck! DIY wire crafts are a fantastic way to unleash your creativity while adding a personal touch to your decor. Whether you're a seasoned crafter or just starting out, the beauty of working with wire lies in its versatility and the endless possibilities it offers. From stunning wall art to functional household items, wire crafting allows you to express your style and make something truly special.
Imagine transforming a simple piece of wire into a beautiful sculpture or a practical item that enhances your daily life. It’s like taking a blank canvas and painting it with your imagination! In this article, we'll dive into the world of wire crafting, exploring essential techniques, tools, and inspiring project ideas that will motivate you to get started. So, grab your wire and tools, and let’s create something amazing together!
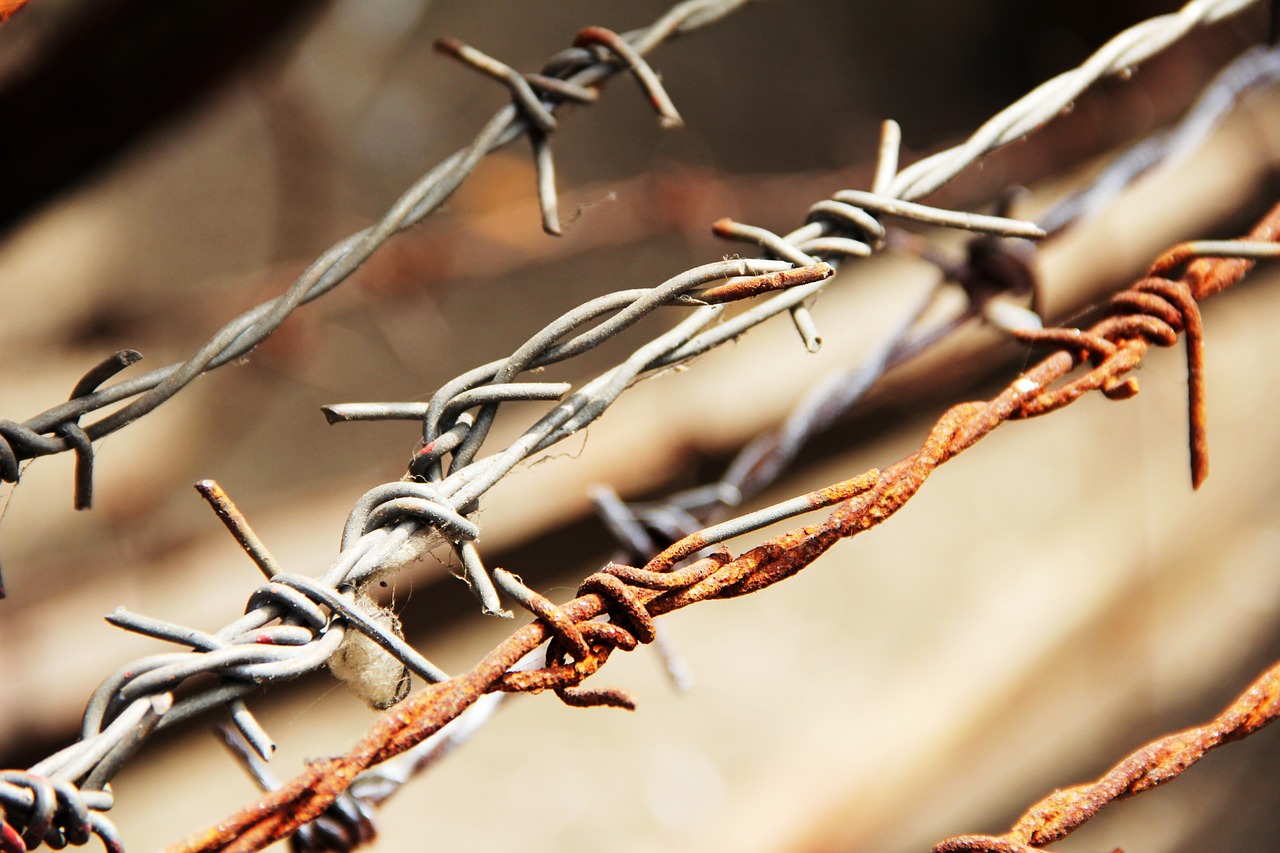
Selecting the appropriate wire is crucial for successful DIY wire crafts. With so many options available, it can be overwhelming to choose the right one. Here’s a quick breakdown of some common types of wire:
| Type of Wire | Uses | Best For |
|---|---|---|
| Aluminum Wire | Lightweight crafts, jewelry | Beginners, intricate designs |
| Copper Wire | Jewelry making, home decor | Durability, flexibility |
| Steel Wire | Structural projects, garden art | Strength, outdoor use |
When choosing wire, consider the gauge, which indicates the thickness. A lower gauge means thicker wire, which is ideal for structural projects, while a higher gauge is better for delicate work. Always keep your project in mind—what you create will dictate the type of wire you need!
Having the right tools can make a significant difference in your crafting experience. Here’s a rundown of the essential tools you’ll need:
- Wire Cutters: For clean cuts and precision.
- Pliers: Different types for bending, twisting, and shaping.
- Ruler or Measuring Tape: To ensure accuracy in your projects.
- Beading Mat: To keep your workspace organized and prevent rolling.
Investing in quality tools will pay off in the long run, making your crafting process smoother and more enjoyable.
Wire cutters are fundamental tools in wire crafting. When selecting wire cutters, look for ones that feel comfortable in your hand and are sharp enough to handle the gauge of wire you plan to use. A good pair will cut through wire cleanly without crushing it, which is essential for maintaining the integrity of your designs. Remember, the right tool can make all the difference!
Different types of pliers serve various purposes in wire crafting. You’ll want to have a few key types on hand:
- Round Nose Pliers: Perfect for creating loops and curves.
- Chain Nose Pliers: Great for gripping and bending wire.
- Cutter Pliers: For cutting wire cleanly.
Using the correct pliers for each task will help you achieve the best results and make your crafting experience much more enjoyable.
Understanding fundamental wire crafting techniques is key to creating beautiful items. Start with the basics: bending, twisting, and coiling wire. These skills will open up a world of possibilities for your projects.
Bending wire is a foundational skill in crafting. To bend wire effectively, follow these steps:
- Measure and cut your wire to the desired length.
- Use your pliers to create a gentle bend at the desired point.
- Continue bending until you achieve the shape you want.
Practice makes perfect, so don’t hesitate to experiment with different shapes and designs!
Coiling and twisting wire adds texture and dimension to your crafts. To coil wire, simply wrap it around a mandrel or a round object, creating loops that can be used in various projects. Twisting wire can create beautiful patterns and is often used to add strength to your pieces. With a little practice, you’ll be able to achieve stunning effects that will elevate your crafts to the next level!
Now that you have a grasp on the basics, let’s explore some inspiring project ideas that utilize wire crafting techniques. From decorative pieces to functional items, you’ll find something for every taste and skill level.
Creating wire wall art is a fantastic way to personalize your space. You can make anything from simple shapes to intricate designs that reflect your style. Consider incorporating elements like flowers, animals, or abstract patterns. The sky's the limit!
Functional wire crafts combine artistry with practicality. Explore various projects that serve a purpose, such as:
- Wire organizers for your desk.
- Plant holders that add a touch of greenery.
- Unique kitchen accessories that spark joy.
By creating functional items, you not only beautify your home but also make your life a little easier!
Q: What type of wire is best for beginners?
A: Aluminum wire is often recommended for beginners due to its lightweight and malleability.
Q: Can I use regular household tools for wire crafting?
A: While you can use some household tools, investing in quality wire-specific tools will yield better results.
Q: How do I store my wire and tools?
A: Use a toolbox or a dedicated craft organizer to keep your wire and tools organized and easily accessible.
Choosing the Right Wire
When it comes to DIY wire crafts, is absolutely essential. The wire you select can make or break your project, influencing both its durability and aesthetic appeal. With a plethora of options available, it can be overwhelming to decide which wire suits your needs best. So, let’s break it down and explore the different types of wire, their unique properties, and how to select the ideal one for your crafting endeavors.
First off, you’ll encounter various types of wire, each designed for specific uses. Here are some common wire types you might consider:
- Aluminum Wire: Lightweight and easy to manipulate, aluminum wire is perfect for beginners. It comes in various colors and gauges, making it a versatile choice for decorative projects.
- Copper Wire: Known for its excellent conductivity, copper wire is often used in jewelry making and electronic projects. Its malleability allows for intricate designs, but it can tarnish over time.
- Steel Wire: If you're looking for strength and durability, steel wire is your go-to. It's commonly used for functional items like wire racks and supports, but it’s less flexible than aluminum or copper.
- Craft Wire: This is a coated wire that is often used in jewelry making. It’s available in various colors and thicknesses, making it easy to find the right match for your project.
When selecting wire, consider the following factors:
| Factor | Considerations |
|---|---|
| Gauge | The gauge of the wire determines its thickness. A lower gauge means thicker wire, while a higher gauge indicates thinner wire. Choose the gauge based on the project’s requirements; thicker wire is better for structural integrity, while thinner wire is ideal for delicate designs. |
| Material | Decide on the material based on the project’s purpose. For decorative items, you might prefer aluminum for its ease of use, whereas for functional items, steel may be more suitable. |
| Finish | The finish of the wire can affect its appearance and durability. Coated wires can be colorful and prevent tarnishing, while uncoated wires may develop a patina over time, adding character to your pieces. |
Ultimately, the wire you choose should resonate with your creative vision and the functionality of your project. Don’t be afraid to experiment with different types and gauges to see what works best for you. Remember, crafting is all about exploration and finding joy in the process!
Q: What is the best wire for beginners?
A: Aluminum wire is often recommended for beginners due to its lightweight nature and ease of manipulation.
Q: How do I know which gauge wire to use?
A: Consider the project's requirements; thicker wire (lower gauge) is better for structural items, while thinner wire (higher gauge) is suitable for intricate designs.
Q: Can I paint or color my wire?
A: Yes! You can use spray paint or specialty coatings to customize the color of your wire for your projects.
Essential Tools for Wire Crafting
When diving into the world of wire crafting, having the right tools is like having a well-stocked toolbox for any DIY project. It can truly make or break your crafting experience. Imagine trying to bake a cake without the right utensils—frustrating, right? Similarly, in wire crafting, the right tools not only enhance your creativity but also ensure that your projects turn out as envisioned. So, what are these essential tools that every wire crafter should have at their disposal?
First and foremost, you'll need wire cutters. These handy tools are fundamental for any wire crafting project, allowing you to snip wire to your desired lengths with precision. A good pair of wire cutters will make your life infinitely easier, especially when working with thicker wires. Look for cutters that offer a clean cut without fraying the ends of the wire, which can be a common pitfall for beginners.
Next up, pliers are indispensable in the wire crafting toolkit. Different types of pliers serve various purposes, and having a few different kinds can significantly enhance your crafting capabilities. For instance, needle-nose pliers are excellent for reaching into tight spaces and making intricate bends, while round-nose pliers allow you to create beautiful loops and curves. You'll find that having a variety of pliers at your fingertips opens up a world of possibilities for bending, twisting, and shaping wire.
But wait, there's more! A wire jig can be a game-changer for more complex designs. This tool allows you to create consistent shapes and patterns by providing a template to work from. Think of it as a blueprint for your wire creations, making it easier to replicate designs or create symmetrical pieces. If you’re looking to step up your game, investing in a wire jig can be well worth it.
Let’s not forget about a work surface. A sturdy, flat surface will be your best friend while crafting. It provides space to spread out your materials and gives you the freedom to work without worrying about damaging your table. You might even consider using a self-healing cutting mat to protect your work area, especially when using sharp tools.
To wrap it all up, here’s a quick overview of the essential tools you’ll want to gather:
- Wire Cutters: For precise cuts.
- Pliers: Various types for bending and shaping.
- Wire Jig: For creating consistent designs.
- Work Surface: To provide a safe crafting area.
With these essential tools in your crafting arsenal, you'll be well-prepared to tackle any wire project that comes your way. Remember, the right tools can make the process smoother, more enjoyable, and ultimately, more rewarding. So, gather your supplies, and get ready to unleash your creativity!
Q: What type of wire should I use for my projects?
A: The type of wire you choose depends on your project. For beginners, aluminum wire is a great option as it is lightweight and easy to work with. For more durable items, consider using copper or brass wire.
Q: Can I use regular pliers for wire crafting?
A: While you can use regular pliers, investing in specific wire crafting pliers will make your work easier and yield better results. They are designed for the intricacies of wire work.
Q: How do I know if my wire cutters are good quality?
A: Look for wire cutters that have a sharp, clean cutting edge and feel sturdy in your hand. Test them on a piece of wire to ensure they cut smoothly without crushing it.
Q: Is it necessary to have a wire jig?
A: A wire jig is not necessary for all projects, but it can be very helpful for creating complex shapes and designs consistently. If you plan to make intricate items, consider adding one to your toolkit.
Wire Cutters
When it comes to crafting with wire, having the right tools is like having the right brush for painting a masterpiece. Among these tools, hold a special place. They are not just any pair of scissors; they are your trusted companions in achieving clean, precise cuts that make all the difference in your projects. Choosing quality wire cutters can significantly impact your crafting experience, ensuring that you can work efficiently without the frustration of jagged edges or uneven lengths.
So, what should you look for when selecting wire cutters? First off, consider the material of the cutters. High-carbon steel is a popular choice because it offers durability and strength, allowing you to cut through various wire types with ease. Additionally, the cutting edge should be sharp and designed for the specific gauge of wire you plan to use. For instance, if you're working with thicker wire, you’ll need cutters that can handle that thickness without bending or breaking.
Another essential factor is the handle comfort. You might find yourself cutting wire for extended periods, so ergonomically designed handles can prevent hand fatigue. Look for wire cutters with rubber grips or cushioned handles for added comfort. Furthermore, consider the size of the cutters; smaller cutters are great for intricate work, while larger ones are better for heavy-duty tasks. Ultimately, the right wire cutters will not only enhance your crafting experience but also ensure that your finished products look polished and professional.
To help you navigate the world of wire cutters, here’s a quick comparison table of different types:
| Type of Wire Cutters | Best For | Features |
|---|---|---|
| Diagonal Cutters | Soft and medium gauge wire | Sharp angled jaws for precise cuts |
| Flush Cutters | Fine and delicate wire | Provides a flush cut, ideal for jewelry making |
| Heavy-Duty Cutters | Thick wire and metal | Robust design for cutting tougher materials |
In summary, investing in a good pair of wire cutters is essential for anyone serious about wire crafting. They are your gateway to transforming raw wire into beautiful creations. So, before you dive into your next project, take a moment to evaluate your tools and ensure you have the best wire cutters for the job. After all, a well-cut wire is the first step toward creating something truly spectacular!
Q: How do I maintain my wire cutters?
A: To keep your wire cutters in top condition, regularly clean them after use to remove any debris. Occasionally, you can apply a drop of oil to the pivot point to ensure smooth operation.
Q: Can I use wire cutters on other materials?
A: While wire cutters are designed for cutting wire, they can sometimes cut soft materials like plastic or thin rubber. However, avoid using them on hard materials like nails or screws, as this can damage the cutting edge.
Q: What gauge of wire can I cut with my wire cutters?
A: The gauge of wire you can cut depends on the type of wire cutters you have. Always check the manufacturer's specifications to ensure you are using them within their recommended limits.

Pliers and Their Uses
When it comes to wire crafting, having the right pliers in your toolkit is akin to a painter having the right brushes. Each type of plier serves a unique purpose, making it essential to understand their functions to enhance your crafting experience. Imagine trying to shape a delicate piece of wire with a tool that’s too bulky; it’s like trying to paint a fine detail with a broad brush—it just won’t work! So, let’s dive into the world of pliers and explore how they can transform your wire crafting projects.
First off, round-nose pliers are your best friends when it comes to creating loops and curves. Their conical shape allows you to make perfect round bends in the wire, which is crucial for creating intricate designs. Whether you're making earrings or crafting a delicate pendant, these pliers will help you achieve that professional look. On the other hand, flat-nose pliers are fantastic for gripping and holding wire firmly in place. They’re perfect for flattening wire or making sharp bends, which is especially useful when you want to create geometric shapes in your designs.
Another essential tool is the chain-nose pliers. These pliers have a tapered tip, making them ideal for reaching into tight spaces where other pliers might not fit. They are perfect for opening and closing jump rings, which are often used in jewelry making. Moreover, cutting pliers are indispensable for trimming excess wire. You’ll want to invest in a pair that can handle the thickness of the wire you’re using to ensure clean cuts without fraying the ends.
To give you a clearer picture of how these tools can work together, here’s a simple table summarizing the different types of pliers and their primary uses:
| Type of Pliers | Primary Use |
|---|---|
| Round-Nose Pliers | Making loops and curves |
| Flat-Nose Pliers | Gripping and flattening wire |
| Chain-Nose Pliers | Opening and closing jump rings |
| Cutter Pliers | Trimming excess wire |
Using these pliers effectively can make your crafting process not only easier but also more enjoyable. Imagine the satisfaction of crafting a beautiful piece of art with the right tools at your disposal! Remember, each type of plier complements the others, so consider having a complete set to tackle various projects. As you become more familiar with these tools, you’ll find that your creativity knows no bounds. So, grab your pliers, and let’s get crafting!
Q: What is the best type of pliers for beginners?
A: For beginners, a set that includes round-nose, flat-nose, and cutting pliers is ideal. These will cover most basic wire crafting needs.
Q: Can I use regular pliers for wire crafting?
A: While you can use regular pliers, they may not provide the precision and ease that specialized wire crafting pliers offer. Investing in the right tools can significantly enhance your crafting experience.
Q: How do I maintain my pliers?
A: To maintain your pliers, keep them clean and free from rust. Wipe them down after use and store them in a dry place to prolong their lifespan.
Basic Techniques for Wire Crafting
Understanding fundamental wire crafting techniques is key to creating beautiful items. Whether you're a beginner or someone looking to refine your skills, mastering these basic techniques will open up a world of creative possibilities. Let's dive into some essential skills like bending, twisting, and coiling wire, which are vital for forming intricate designs that can elevate your DIY projects to the next level.
Bending wire is a foundational skill in crafting that can seem daunting at first. However, with a little practice, you can achieve stunning results. To bend wire effectively, start by selecting the right gauge for your project; thinner wire is easier to bend but may not hold its shape as well as thicker wire. A good rule of thumb is to use a wire gauge of 18-20 for most decorative projects.
To begin bending, hold the wire firmly with one hand while using your pliers to create your desired bend. For sharper angles, you might want to use a mandrel or a cylindrical object to wrap the wire around. This technique not only ensures precision but also adds a professional touch to your work. Remember, patience is key—take your time to achieve the perfect angle!
Coiling and twisting wire adds texture and dimension to your crafts, transforming simple designs into eye-catching pieces. Coiling involves wrapping the wire around a form, such as a dowel or a pen, to create loops. This technique can be used to make everything from decorative spirals to functional elements like hooks or hangers. To coil effectively, make sure to maintain consistent tension on the wire as you wrap it around your form. This will help create even coils that look polished and professional.
Twisting, on the other hand, involves taking two or more strands of wire and intertwining them. This technique can add strength to your projects, as well as a unique aesthetic. A simple way to twist wire is to hold the ends of two strands firmly and then twist the middle section together using your hands or pliers. The beauty of twisting lies in its versatility—you can create different effects by adjusting the tightness and spacing of your twists.
As you practice these techniques, don't hesitate to experiment! Try combining bending, coiling, and twisting to create complex designs that reflect your personal style. The more you play with these techniques, the more creative freedom you'll discover. Remember, wire crafting is not just about following instructions; it’s about expressing yourself and enjoying the process.
Q: What type of wire is best for beginners?
A: For beginners, aluminum wire is a great choice due to its softness and ease of manipulation. It comes in various colors and is perfect for crafting decorative items.
Q: Can I use regular household tools for wire crafting?
A: While specialized tools like wire cutters and pliers work best, you can use household tools in a pinch. Just ensure they are safe and appropriate for the wire gauge you're working with.
Q: How do I keep my wire crafts from falling apart?
A: To ensure your wire crafts are durable, make sure to use the right gauge for your project, and consider using glue or soldering for added strength in joints or connections.

Bending Techniques
Bending wire is one of the most fundamental skills in the world of wire crafting, and mastering this technique can truly elevate your projects. Whether you're creating intricate designs or simple shapes, the way you bend the wire can significantly affect the final outcome. To start, it’s essential to choose the right type of wire. For beginners, soft copper wire is highly recommended due to its malleability, making it easier to bend and shape. As you gain confidence, you can experiment with aluminum or even stainless steel wire, which offers different aesthetic qualities.
So, how do you bend wire effectively? First, you’ll want to gather your materials and tools. Apart from your wire, having a pair of pliers handy is crucial. Here’s a simple step-by-step guide to help you get started:
- Measure and Cut: Determine the length of wire you need for your project. Use wire cutters to cut the wire, ensuring you leave a little extra length for adjustments.
- Secure the Wire: Hold one end of the wire with your pliers to stabilize it. This will give you better control as you bend the other end.
- Begin Bending: Gently pull or push the wire with your fingers or pliers. Start with small bends to avoid kinking the wire.
- Check for Precision: After each bend, step back and assess your work. Adjust as necessary to ensure your design remains symmetrical and visually appealing.
One of the most exciting aspects of bending wire is the variety of shapes you can create. From simple curves to complex spirals, the possibilities are endless! For instance, if you’re making a wire heart, you would start by bending the wire into two arcs at the top, then bring the ends together at a point below. This technique not only creates a pleasing shape but also reinforces the wire’s structure.
Another tip is to use a mandrel or any cylindrical object (like a pen or a bottle) to help form consistent curves. Wrap the wire around the object to achieve smooth, uniform bends. This is particularly useful for crafting items like earrings or pendants where symmetry is key.
Remember, practice makes perfect! Don’t be discouraged if your first few attempts aren’t flawless. Each bend is a step towards mastering the craft, and with time, you’ll develop a feel for the wire and how it responds to your manipulations. So grab your tools and start bending your way to beautiful creations!
- What type of wire is best for beginners? Soft copper wire is ideal for beginners due to its ease of manipulation.
- Can I use regular pliers for wire bending? While you can use regular pliers, it’s recommended to use jewelry or needle-nose pliers for better control and precision.
- How do I prevent kinking in the wire? Always bend the wire gently and use the appropriate tools to maintain control.
- What projects can I create with bent wire? You can create a variety of projects, including jewelry, wall art, and functional items like plant holders.

Coiling and Twisting
Coiling and twisting wire is not just a technique; it's an art form that can bring your DIY projects to life in vibrant and exciting ways. Imagine transforming a simple piece of wire into an intricate design that captures attention and adds flair to your home decor. Whether you're looking to create beautiful jewelry or stunning wall hangings, mastering the coiling and twisting techniques will open up a world of creative possibilities.
To get started, it's essential to understand the basic principles of coiling. Coiling involves wrapping the wire around a cylindrical object or your fingers to create loops. This technique can be used to form spirals, beads, or even complex shapes. The beauty of coiling lies in its versatility; you can adjust the tightness of the coils to achieve different looks. For instance, tighter coils can create a more compact design, while looser coils provide a flowing, organic feel.
Twisting, on the other hand, adds another layer of dimension to your wire crafts. By twisting two or more strands of wire together, you can create a textured effect that enhances the visual appeal of your projects. This technique is particularly useful when working with thicker wires, as it can help to stabilize your design while adding a touch of elegance. It's like braiding hair; the more you twist, the more intricate and beautiful the result becomes.
Here are some tips to keep in mind while coiling and twisting:
- Choose the Right Wire: Different gauges of wire will behave differently when coiled or twisted. Thicker wires are more rigid, while thinner wires are easier to manipulate.
- Use a Mandrel: A mandrel can help you achieve uniform coils. You can use anything cylindrical, like a pen or dowel, to wrap your wire around.
- Practice Patience: Coiling and twisting require a steady hand. Take your time to ensure each coil is even and each twist is tight.
As you practice these techniques, don't hesitate to experiment. Try combining coiling and twisting to create unique designs. For example, you might coil a piece of wire into a flower shape and then twist the stem to give it a more dynamic look. The possibilities are endless, and the only limit is your imagination.
In conclusion, coiling and twisting are fundamental techniques in wire crafting that can dramatically elevate your projects. By incorporating these skills, you can create stunning pieces that showcase your creativity and style. So grab your wire and tools, and let your imagination run wild!
Q: What type of wire is best for coiling and twisting?
A: For beginners, a medium gauge aluminum or copper wire is recommended. These materials are flexible and easy to manipulate, making them perfect for coiling and twisting.
Q: How do I avoid kinks in my wire while coiling?
A: To prevent kinks, always handle your wire gently and avoid bending it sharply. If you do encounter a kink, you can use pliers to carefully straighten it out.
Q: Can I use these techniques for jewelry making?
A: Absolutely! Coiling and twisting are commonly used in jewelry making to create beautiful pendants, earrings, and bracelets. Just remember to use finer gauge wire for jewelry to ensure comfort and wearability.

Creative Project Ideas
When it comes to DIY wire crafts, the possibilities are as endless as your imagination! Whether you're looking to add a touch of personal flair to your home decor or create functional items that serve a purpose, wire crafting opens up a world of creativity. From elegant wall art that catches the eye to practical organizers that declutter your space, there’s a project for everyone. Let’s dive into some inspiring ideas that will ignite your passion for wire crafting!
One of the most captivating projects you can undertake is wire wall art. Imagine transforming a simple wall into a stunning focal point with your own hands! You can create intricate designs that reflect your personality—think abstract shapes, floral patterns, or even meaningful quotes. To get started, gather some sturdy wire, a pair of pliers, and your favorite tools. Start with a basic sketch of your design on paper, then slowly shape the wire to match your vision. The beauty of wire art is its versatility; you can paint it, wrap it in colorful threads, or even incorporate beads for added flair!
Another fantastic avenue to explore is functional wire crafts. These projects not only showcase your artistic skills but also serve practical purposes in your daily life. For example, you could create a stylish wire organizer for your desk. Picture this: a chic wire basket to hold your pens, papers, and miscellaneous items, all while adding a modern touch to your workspace. Or how about crafting a unique plant holder that elevates your greenery? A wire plant holder can be designed to hang from the ceiling or stand on a table, enhancing your plants' beauty while saving space. The options are truly limitless!
To give you a clearer picture, here’s a quick overview of some creative project ideas you might consider:
| Project Idea | Description |
|---|---|
| Wire Wall Art | Create stunning designs that can be hung on walls, adding a personal touch to your decor. |
| Wire Organizers | Functional pieces that help organize your workspace or home, combining style with utility. |
| Plant Holders | Design unique holders that enhance the presentation of your plants while saving space. |
| Jewelry Making | Craft beautiful wire jewelry, such as bracelets or earrings, showcasing your unique style. |
Lastly, don't overlook the joy of making wire jewelry. This is a fantastic way to express your creativity while crafting unique accessories. With just a few tools and some wire, you can create stunning earrings, bracelets, or necklaces that you won't find in any store. The best part? You can customize them to match your outfits perfectly!
So, grab your wire, gather your tools, and let your creativity flow! The world of DIY wire crafts is waiting for you to explore. Remember, the only limit is your imagination, and every piece you create is a reflection of your personal style. Happy crafting!
Q: What type of wire is best for beginners?
A: For beginners, it's recommended to start with soft aluminum wire or copper wire. These materials are easy to manipulate and come in various thicknesses, making them perfect for a range of projects.
Q: Do I need special tools for wire crafting?
A: While you can start with basic tools like pliers and wire cutters, investing in specific tools such as round-nose pliers and flat-nose pliers can enhance your crafting experience and allow for more intricate designs.
Q: Can I paint or decorate my wire crafts?
A: Absolutely! You can paint your wire creations or wrap them with colorful threads, ribbons, or even beads to add a personal touch and make your crafts truly unique.

Wire Wall Art
Creating is not just a fun project; it's a fantastic way to personalize your space and showcase your creativity. Imagine walking into a room and being greeted by a stunning piece of art that you crafted yourself! The beauty of wire wall art lies in its versatility; you can create anything from simple geometric shapes to intricate designs that tell a story. The best part? You don't need to be an expert artist to make something beautiful. With a little guidance and a splash of inspiration, you can transform your walls into a canvas of creativity.
To get started, consider the theme or style you want to achieve. Are you drawn to modern minimalism, or do you prefer bohemian flair? Your style will guide your design choices. For instance, if you love nature, you might want to create a wire sculpture of a tree or a delicate flower. On the other hand, if you're into abstract art, swirling lines and curves can create a mesmerizing effect. The possibilities are truly endless!
Here are some techniques to consider when crafting your wire wall art:
- Bending: Use bending techniques to create shapes and outlines. This is where your imagination can run wild!
- Coiling: Adding coils can give your piece depth and texture. Think of it as adding layers to your artwork.
- Layering: Combine different wire thicknesses to create contrast and interest. This can elevate your design from simple to stunning!
Once you have your design in mind, gather your materials. You’ll need various gauges of wire, which can be found at most craft stores, as well as your essential tools like wire cutters and pliers. When working with wire, remember to start with a sturdy base; this will support your design and ensure it holds up on your wall. You can use a wooden board, a canvas, or even directly on the wall if you're feeling adventurous!
After assembling your piece, consider how you want to display it. You can hang it directly on the wall using nails or hooks, or you can create a shadow box effect by framing it. A well-framed piece can add a touch of elegance to your wire art, making it look like a professional installation. Don't forget to step back and admire your work once it's up. It’s not just art; it’s a reflection of your creativity and personality!
As you embark on your wire wall art journey, don't hesitate to experiment. Mistakes can lead to unexpected beauty, and sometimes the most unique designs come from a little trial and error. So grab your wire and tools, and let your imagination soar!
Q: What type of wire should I use for wall art?
A: It's best to use aluminum or copper wire, as they are both flexible and sturdy. Aluminum wire is lightweight and easy to shape, while copper wire offers a more rustic look.
Q: How do I hang my wire wall art?
A: You can use nails, hooks, or adhesive wall mounts, depending on the weight of your piece. Make sure to secure it well to avoid any accidents!
Q: Can I paint my wire wall art?
A: Absolutely! You can use spray paint or acrylic paint to add color to your wire art. Just make sure the paint is suitable for metal surfaces.
Q: What tools do I need to start?
A: Essential tools include wire cutters, round-nose pliers, and flat-nose pliers. These will help you shape, cut, and manipulate the wire effectively.
Functional Wire Crafts
When it comes to wire crafting, the beauty of creativity lies in its ability to blend art with functionality. Imagine transforming simple wire into practical items that not only serve a purpose but also add a touch of elegance to your home. Functional wire crafts range from organizers to plant holders, each project offering a unique way to infuse your style into everyday items. Let’s dive into some exciting ideas that will inspire you to create!
One of the most popular functional wire crafts is the **wire organizer**. These handy creations can help declutter your workspace and bring some order to the chaos. You can make a simple desk organizer by bending wire into a series of compartments to hold pens, notepads, or even your phone. Not only does this project keep your essentials within reach, but it also adds a modern flair to your desk. You can customize the size and shape to fit your needs, making it a versatile addition to any home office.
Another fantastic project is a **wire plant holder**. If you’re a plant lover, you know how important it is to display your greenery beautifully. A wire plant holder can elevate your pots and create a stunning visual effect. You can create a hanging wire basket or a geometric stand that showcases your plants in style. The beauty of this project is that you can tailor it to fit any plant size or type, making it a perfect fit for your home decor.
For those who enjoy cooking, consider crafting **unique kitchen accessories**. A wire fruit basket is not only a great way to store your fruits and vegetables but also a charming decoration for your kitchen counter. You can weave wire into a beautiful, open design that allows air circulation, keeping your produce fresh. Additionally, think about making **wire spice racks** or **utensil holders**. These projects are not only practical but also add a rustic touch to your culinary space.
Here’s a quick look at some functional wire crafts you might want to consider:
- Wire organizers for office supplies
- Hanging wire plant holders for indoor gardening
- Wire fruit and vegetable baskets
- Custom spice racks for your kitchen
- Unique wire candle holders for ambiance
The possibilities are endless when it comes to functional wire crafts. Each project allows you to express your creativity while creating items that enhance your living space. Don't hesitate to experiment with different wire types and techniques to find what works best for you. Remember, the key is to have fun and let your imagination run wild!
Q: What type of wire should I use for functional crafts?
A: The best wire to use often depends on your project. For most crafts, aluminum wire is lightweight and easy to manipulate, while copper wire offers durability and a beautiful finish.
Q: Do I need special tools to work with wire?
A: While basic wire cutters and pliers are essential, you can create many functional crafts with just these tools. As you advance, you may want to invest in more specialized tools for intricate designs.
Q: Can I paint or finish wire crafts?
A: Absolutely! You can use spray paint or acrylic paint to add color to your wire crafts. Just ensure the paint is suitable for metal surfaces for the best results.
Q: Is wire crafting safe for beginners?
A: Yes, wire crafting is generally safe for beginners. Just be cautious while using tools, and always wear safety glasses if you're cutting wire to protect your eyes.
Frequently Asked Questions
- What type of wire is best for DIY crafts?
Choosing the right wire depends on your project. For general crafting, soft aluminum wire is great because it’s easy to bend and shape. If you need something sturdier, consider using copper wire, which is more durable and holds its shape well.
- Do I need special tools for wire crafting?
While you can get started with basic tools, having the right ones can make a huge difference. Essential tools include wire cutters, needle-nose pliers, and round-nose pliers. These will help you cut, bend, and twist wire effectively, ensuring clean and precise results.
- How do I bend wire properly?
Bending wire is a fundamental skill. Start by securing the wire in a vice or with pliers, then gently apply pressure at the desired angle. Practice makes perfect, so don’t hesitate to experiment with different shapes and designs!
- Can I use any type of wire for wall art?
Yes, you can use various types of wire for wall art! However, stainless steel or copper wire are popular choices due to their strength and aesthetic appeal. Just make sure the wire is manageable and easy to work with for your specific design.
- What are some functional wire craft ideas?
Functional wire crafts are both practical and artistic! You can create items like wire organizers, plant hangers, or even unique kitchen accessories. The possibilities are endless, and they add a personal touch to your home!
- Is wire crafting safe for children?
Wire crafting can be safe for children, but adult supervision is essential. Ensure they use child-safe tools and avoid sharp edges. It’s a great way to encourage creativity while teaching them about crafting!
- Where can I find inspiration for wire crafts?
Inspiration can be found everywhere! Check out crafting blogs, social media platforms like Pinterest and Instagram, or even local craft fairs. Joining crafting communities can also provide fresh ideas and support!


