How to Build a DIY Planter Box for Your Garden
Are you ready to take your gardening game to the next level? Building a DIY planter box is a fantastic way to not only enhance your garden's aesthetic but also to create a nurturing environment for your plants. Imagine stepping into your backyard and being greeted by a beautiful array of flowers or fresh herbs, all neatly contained in a charming wooden box that you crafted with your own hands. In this article, we'll walk you through everything you need to know to create your very own planter box, from choosing the right materials to planting and maintaining your new garden addition.
The first step in your DIY planter box adventure is selecting the right materials. This decision is crucial, as it affects both the durability and aesthetic appeal of your planter. When it comes to wood, you have several options:
- Cedar: Naturally resistant to rot and insects, cedar is a popular choice for outdoor projects.
- Redwood: Similar to cedar, redwood is durable and has a beautiful finish, making it an excellent choice for a planter box.
- Pine: A more affordable option, pine can be treated for outdoor use but may require more maintenance over time.
- Composite Materials: If you’re looking for an eco-friendly option, consider composite materials made from recycled plastics and wood fibers.
When selecting wood, keep in mind the environmental impact. Opt for sustainably sourced materials whenever possible to ensure your gardening project is as green as it is beautiful.
No DIY project is complete without the right tools! To construct your planter box efficiently and safely, gather the following essentials:
- Measuring Tape: For accurate measurements.
- Miter Saw: Ideal for making precise cuts.
- Drill: To create holes for screws and drainage.
- Screwdriver: For assembling the pieces.
- Sandpaper: To smooth out rough edges.
Having these tools at your disposal will make the process smoother and more enjoyable, ensuring that you can focus on creating rather than searching for what you need.
Accurate measurements and cuts are vital for a well-constructed planter box. Start by determining the dimensions of your planter box based on the space available in your garden and the plants you wish to grow. A standard size might be 4 feet long, 2 feet wide, and 1 foot deep, but feel free to customize it to fit your needs.
Once you have your measurements, use your measuring tape to mark the wood. A good tip is to double-check your measurements before cutting—after all, it's better to measure twice and cut once! For cutting, you can use a miter saw for straight cuts or a hand saw if you prefer traditional tools.
A miter saw is perfect for making angled cuts, which can add a professional touch to your planter box. To use it effectively, ensure that the wood is securely clamped in place. Align the blade with your marked line, and with a firm grip, pull the saw down smoothly. Safety first! Always wear goggles to protect your eyes from wood shavings.
If you prefer manual tools, using a hand saw can be just as effective. Position the wood on a stable surface and use a sawhorse if available. Start with long, even strokes, allowing the saw to do the work. This technique not only gives you a good workout but also allows for greater control over your cuts.
With your materials prepped and cuts made, it’s time to assemble your planter box. Begin by laying out the pieces in the desired configuration. Start with the bottom piece and attach the sides using screws. Make sure to pre-drill holes to prevent the wood from splitting. Once the sides are secure, attach the front and back panels.
For added stability, consider reinforcing the corners with brackets. This will help your planter box withstand the weight of the soil and plants, as well as the elements. Once everything is assembled, give it a good sand to smooth out any rough edges.
Now that your planter box is constructed, it’s time for the finishing touches! Adding paint or stain can not only enhance its appearance but also protect it from the elements. Choose a color that complements your garden or home, and apply it evenly with a brush.
When selecting paint or stain, look for products specifically designed for outdoor use. These options are formulated to withstand UV rays and moisture, ensuring your planter box remains vibrant for years to come.
To protect your planter box from the harsh elements, consider sealing it with a waterproof sealant. This will help prevent rot and extend the life of your planter. Apply the sealant according to the manufacturer's instructions, and allow it to dry completely before adding soil and plants.
After constructing your planter box, it’s crucial to know how to plant and maintain it. Begin by selecting high-quality soil that provides good drainage and nutrients for your plants. A mix of potting soil and compost works wonders!
Proper soil and drainage are key to healthy plants. Ensure your planter box has drainage holes at the bottom to prevent water accumulation. You can add a layer of gravel or small stones at the bottom before filling it with soil to enhance drainage.
Regular maintenance ensures your plants thrive. Keep an eye on the soil moisture level, and water your plants as needed. Additionally, remove any dead or yellowing leaves to promote healthy growth. With a little love and care, your DIY planter box will be the pride of your garden!
Q: How long will my planter box last?
A: With proper materials and maintenance, your planter box can last for several years, especially if you use rot-resistant wood and seal it regularly.
Q: Can I grow vegetables in my planter box?
A: Absolutely! Just ensure that the depth of the box is sufficient for the root systems of the vegetables you choose to plant.
Q: Do I need to line the inside of my planter box?
A: Lining the inside with landscape fabric can help retain soil and prevent it from washing out through the drainage holes.

Choosing the Right Materials
When embarking on your DIY planter box adventure, selecting the right materials is crucial—not just for durability, but also for the overall aesthetic appeal of your garden. Think of your planter box as the frame of a beautiful painting; the right materials can enhance the beauty of the plants you choose to display. Generally, wood is the go-to option for many DIYers, but not all wood is created equal. Let’s break down some of the best wood types you can use:
| Wood Type | Durability | Cost | Environmental Impact |
|---|---|---|---|
| Cedar | Highly durable; resistant to rot | Moderate to high | Eco-friendly; sustainably sourced |
| Redwood | Very durable; natural resistance to insects | High | Requires careful sourcing to be sustainable |
| Pine | Less durable; prone to rot unless treated | Low | Widely available; consider treated options |
| Composite Wood | Highly resistant to rot and insects | Moderate to high | Recycled materials; eco-friendly |
As you can see from the table, cedar and redwood are excellent choices for their durability and natural resistance to the elements. On the other hand, pine is budget-friendly but may require additional treatments to ensure longevity. If you’re looking for a more sustainable option, consider using composite wood, which is made from recycled materials and offers great durability.
Beyond wood, you might also want to consider alternatives like metal or plastic. Metal planter boxes can add a modern touch to your garden and are incredibly durable, while plastic options are lightweight and often come in various colors and designs. However, keep in mind the environmental impact of these materials. Opt for recycled or sustainably sourced products whenever possible.
When choosing materials, it’s also essential to consider the environmental impact. Look for woods that are certified by organizations like the Forest Stewardship Council (FSC), which ensures that the wood is sourced sustainably. Additionally, think about the treatment options for your wood; many treatments can be harmful to the environment, so always look for eco-friendly alternatives.
In summary, the right materials for your DIY planter box can make all the difference in both functionality and visual appeal. Whether you choose traditional wood, metal, or plastic, always keep durability, cost, and environmental impact in mind. Your garden will not only flourish but also look stunning with the right planter box!
Essential Tools for the Project
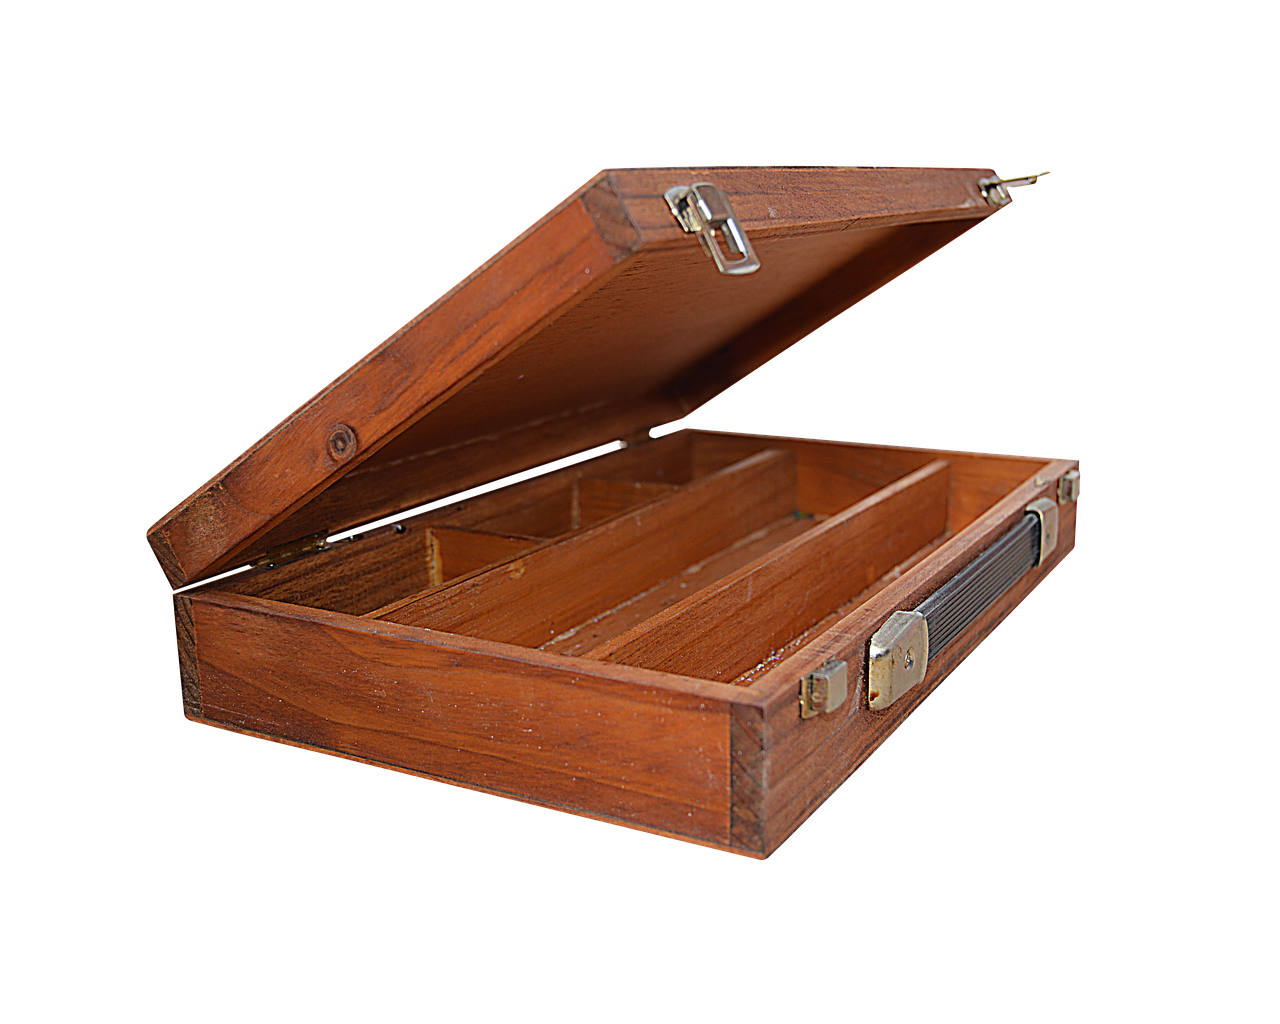
When it comes to building your very own DIY planter box, having the right tools is not just a luxury—it's a necessity! Think of it like cooking; you wouldn't want to whip up a gourmet meal without the right kitchen gadgets, right? The same goes for woodworking. With the right tools, you can transform a simple pile of wood into a beautiful and functional planter box that can elevate your garden. So, let’s dive into the essential tools you’ll need for this project.
First and foremost, you'll need a good quality measuring tape. Accurate measurements are the backbone of any successful DIY project. A measuring tape allows you to take precise measurements of your wood pieces, ensuring that everything fits together perfectly. Alongside this, a square is crucial for checking your angles and ensuring that your cuts are straight. Without a square, you might find yourself in a bit of a pickle with uneven edges!
Next up is your cutting tool. You have a couple of options here: a miter saw or a hand saw. A miter saw is fantastic for making angled cuts and will save you a lot of time and effort. If you're more of a traditionalist or enjoy the hands-on approach, a hand saw can also do the trick. Just remember, whichever tool you choose, practice safety first! Always wear protective eyewear and gloves to keep yourself safe while cutting.
Once your pieces are cut, it’s time for assembly. For this, you’ll need a drill with appropriate drill bits and screws. The drill will help you create holes for your screws, which will hold your planter box together securely. If you’re feeling a bit fancy, you might also want to consider a screwdriver set for any manual adjustments. And let’s not forget about wood glue; it’s an excellent addition that can reinforce your joints and add extra stability.
Finally, you might want to grab some sandpaper or a sanding block. This is essential for smoothing out any rough edges, making your planter box safe to handle and visually appealing. After all, who wants splinters while they’re trying to admire their handiwork?
To summarize, here’s a quick table of the essential tools you’ll need:
| Tool | Purpose |
|---|---|
| Measuring Tape | For accurate measurements |
| Square | To ensure straight and even cuts |
| Miter Saw / Hand Saw | For cutting wood pieces |
| Drill | To create holes for screws |
| Screwdriver Set | For manual adjustments |
| Wood Glue | To reinforce joints |
| Sandpaper / Sanding Block | To smooth out rough edges |
With these tools in hand, you're well on your way to building a stunning planter box that will not only enhance your garden but also give you a sense of accomplishment. So, gather your materials, gear up with the right tools, and get ready to unleash your inner gardener!
As you embark on your DIY planter box journey, you might have some questions. Here are a few frequently asked questions that can help guide you through the process:
- What type of wood should I use? Cedar and redwood are great choices due to their natural resistance to rot.
- How deep should my planter box be? A depth of 12 to 18 inches is usually ideal for most plants.
- Can I use treated wood? Treated wood can be used, but make sure to line the inside of the box to prevent chemicals from leaching into the soil.
- Do I need drainage holes? Yes, drainage holes are essential to prevent waterlogging and root rot.
Measuring and Cutting
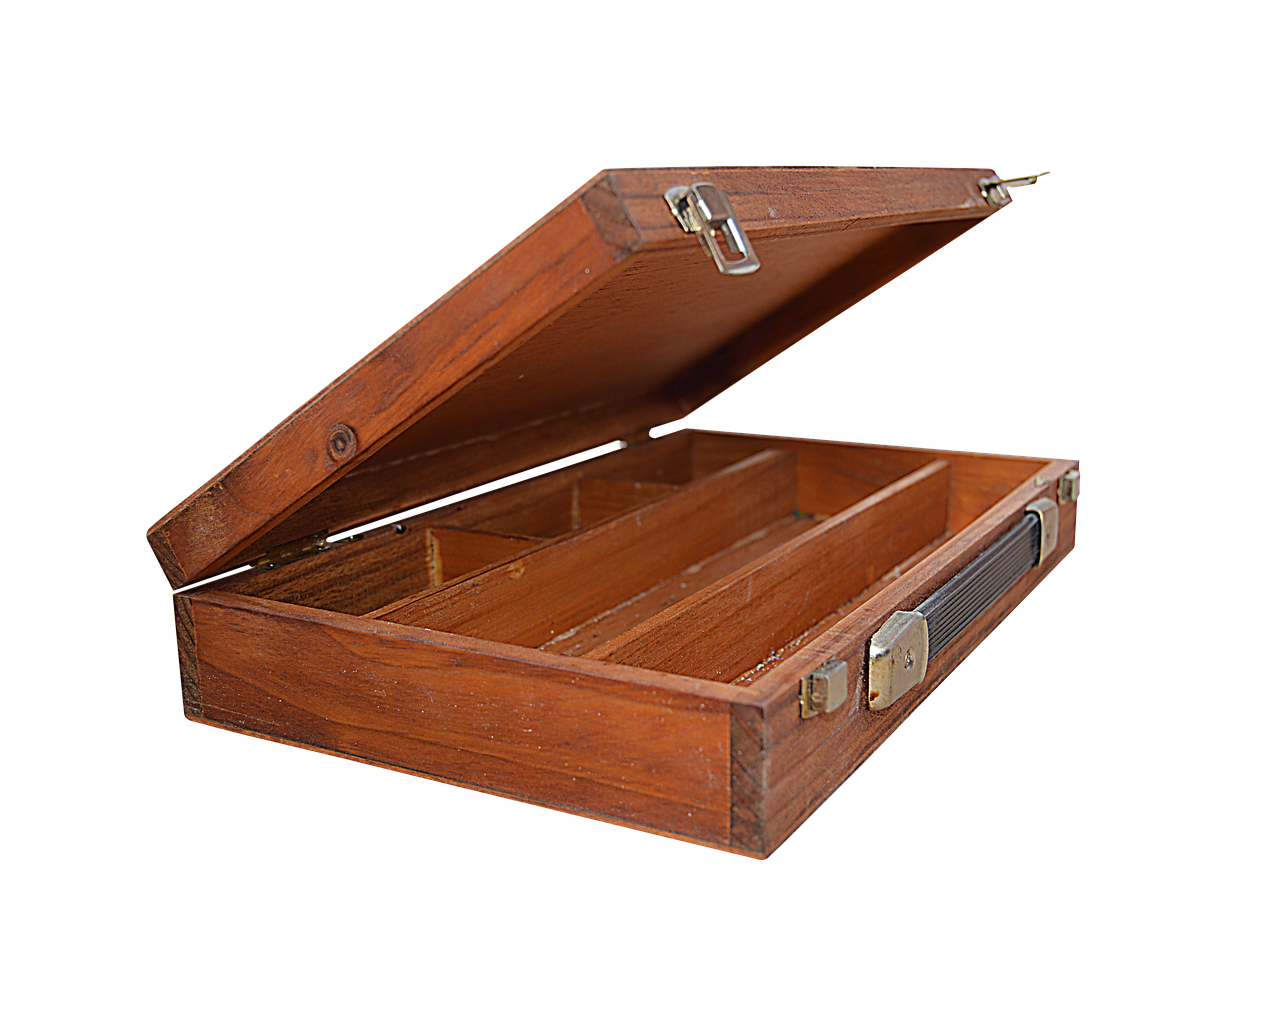
When it comes to building a DIY planter box, your materials accurately is crucial. Think of it as laying the foundation of a house; if the base isn’t right, everything built on top can crumble. So, before you grab that saw, let’s talk about how to measure and cut your wood like a pro!
First things first, grab a reliable measuring tape and a pencil. You’ll want to measure each piece of wood carefully, marking where you need to cut. A good rule of thumb is to measure twice and cut once. This simple mantra will save you from making mistakes that could lead to wasted materials and time. When marking, make sure your lines are clear and straight. Using a square can help ensure that your lines are perfectly perpendicular, which is especially important for corners.
Next, let’s talk about the actual cutting process. Depending on your preference and the tools you have at hand, you can either use a miter saw or a hand saw. Each method has its pros and cons, and understanding these can help you choose the right one for your project.
A miter saw is a fantastic tool for making precise angled cuts, which can be particularly useful for the corners of your planter box. To use it effectively, make sure to set the blade to the desired angle before you start cutting. Position your wood securely against the fence of the saw and hold it in place while cutting. This will ensure that your cuts are not only accurate but also clean. If you’re new to using a miter saw, don’t hesitate to practice on some scrap wood first!
If you prefer the traditional route, a hand saw can also do the job beautifully. Start by securing your wood in a vice or with clamps to prevent it from moving while you cut. When using a hand saw, it’s important to keep a steady rhythm. Start with light pressure to create a groove, then gradually increase your force as you saw through the wood. This technique will help you achieve a clean cut without splintering the edges. Remember, patience is key here!
Once you’ve made all your cuts, take a moment to inspect each piece. Make sure the edges are smooth and free of splinters to ensure safety and aesthetics. If you notice any rough edges, a quick pass with sandpaper can do wonders. This attention to detail will not only improve the look of your planter box but also make it safer to handle.
In summary, measuring and cutting your materials accurately is a fundamental step in building a DIY planter box. By using the right tools and techniques, you’ll set yourself up for success and create a sturdy, beautiful addition to your garden. So take your time, be precise, and soon you’ll be ready to move on to the next exciting phase of your planter box project!
Q: What tools do I need for measuring and cutting?
A: You’ll need a measuring tape, a pencil, a square, and either a miter saw or a hand saw, depending on your preference.
Q: How can I ensure my cuts are straight?
A: Use a square to mark your lines, and secure your wood properly before cutting. Practice on scrap wood if you're unsure.
Q: What should I do if I make a mistake while cutting?
A: Don’t panic! You can either adjust your measurements for a smaller piece or use wood filler to fix minor mistakes.
Using a Miter Saw
When it comes to cutting wood for your DIY planter box, a miter saw is an indispensable tool that can make your project not only easier but also more precise. Imagine standing in your workshop, the smell of fresh wood filling the air, and the sound of the saw humming as it effortlessly slices through timber. This tool is designed to make angled cuts, which is particularly useful when you want to create a professional-looking finish on your planter box. But before you dive in, let’s break down how to use a miter saw effectively.
First, it’s important to understand the different parts of a miter saw. The base, blade, and the miter gauge are your main players here. The base provides stability, while the blade does the cutting. The miter gauge allows you to set the angle for your cuts. Getting familiar with these components will help you operate the saw with confidence.
Before you start cutting, ensure that you have your materials measured and marked accurately. Use a tape measure to determine the lengths you need, and mark them clearly on the wood. Remember, “measure twice, cut once” is a golden rule in woodworking. Once your wood is marked, place it on the saw’s base, aligning it with the blade. Always make sure your hands are clear of the cutting path to avoid accidents.
When you’re ready to cut, pull the blade down to meet the wood and press the trigger to start the motor. Allow the blade to reach full speed before making your cut. This is crucial for achieving clean, straight cuts. As you lower the blade, apply steady pressure but let the saw do the work; forcing it can lead to uneven cuts or even damage the blade.
After making your cuts, take a moment to inspect them. You want clean edges that fit together snugly when you assemble your planter box. If you notice any rough edges, you can smooth them out with sandpaper. This not only improves the appearance but also prevents splinters, making your planter box safer to handle.
Here’s a quick recap of the essential steps for using a miter saw:
- Familiarize yourself with the saw parts.
- Measure and mark your wood accurately.
- Align the wood with the blade on the base.
- Start the saw and make your cut with steady pressure.
- Inspect and smooth out any rough edges.
Using a miter saw can greatly enhance your woodworking experience, providing you with the precision needed to create a beautiful planter box that you can be proud of. So, gear up, stay safe, and let that saw do the magic!
Q: What safety precautions should I take when using a miter saw?
A: Always wear safety goggles to protect your eyes from sawdust and debris. Keep your hands away from the blade and ensure the workspace is clear of any obstacles.
Q: Can I use a miter saw for other projects?
A: Absolutely! A miter saw is versatile and can be used for various woodworking projects, including furniture making and framing.
Q: What wood types are best for planter boxes?
A: Cedar and redwood are great choices due to their natural resistance to rot. However, treated pine can also be a budget-friendly option.
Hand Saw Techniques
When it comes to crafting your DIY planter box, using a hand saw can be both a rewarding and satisfying experience. Many people shy away from hand saws, thinking they are less efficient than power tools, but let me tell you, there’s something incredibly fulfilling about mastering the art of manual cutting. Not only do hand saws allow for greater control, but they also connect you to the process in a way that power tools simply can’t match. Plus, they’re often more affordable and easier to store!
Before you dive in, it’s essential to understand the different types of hand saws available and their specific uses. For instance, a crosscut saw is perfect for cutting across the grain of the wood, while a rip saw is designed for cutting along the grain. If you’re planning to make precise cuts for your planter box, you might also consider a back saw, which is ideal for making clean, straight cuts. Here’s a quick overview of some common hand saws:
| Type of Saw | Best For |
|---|---|
| Crosscut Saw | Cutting across the grain |
| Rip Saw | Cutting along the grain |
| Back Saw | Precise cuts, often used with a miter box |
Now that you have an idea of the tools you'll be using, let’s talk about some effective techniques for using a hand saw. First and foremost, always ensure your wood is securely clamped down or held firmly in place. This helps prevent any slipping that could lead to inaccurate cuts or, worse, accidents. Next, it’s important to start your cut slowly. Many beginners make the mistake of sawing too quickly, which can lead to jagged edges. Instead, take your time and use long, smooth strokes to create a clean line. Remember, patience is key!
Another tip is to keep your saw at a slight angle, typically around 45 degrees for most cuts. This angle allows for better control and helps reduce the amount of effort needed. As you saw, use your body weight to push down on the saw instead of relying solely on your arms. This technique not only makes the process easier but also helps you maintain a steady rhythm, which is crucial for achieving a straight cut.
Lastly, practice makes perfect! If you have some scrap wood lying around, take the time to practice your cuts. Experiment with different saws and techniques to find what feels most comfortable for you. The more you practice, the more confident you’ll become, and soon enough, you’ll be cutting like a pro!
Q: What type of hand saw should I use for my planter box?
A: A crosscut saw is ideal for cutting across the grain, while a rip saw is best for cutting along the grain. For precise cuts, consider using a back saw.
Q: How can I ensure my cuts are straight?
A: Use a straight edge or a square to mark your cutting line clearly. Clamp your wood securely and take your time with long, smooth strokes.
Q: Is it better to use a hand saw or a power saw?
A: It depends on your comfort level and the project. Hand saws offer more control and are quieter, while power saws can be faster. Choose what works best for you!
Assembly Instructions
Assembling your DIY planter box is where the magic happens! After you've meticulously measured and cut your materials, it's time to bring everything together. The key to a sturdy planter box lies in the assembly process, so let’s dive into the steps that will transform your wood pieces into a beautiful, functional garden feature.
First, start by laying out all the pieces of your planter box. Visualizing the final product can help you understand how everything fits together. Typically, you’ll have four sides and a bottom. Before you begin attaching anything, it’s a good idea to **dry fit** the pieces. This means placing them together without any fasteners to ensure they align perfectly. If something seems off, now is the time to make adjustments!
Next, it’s time to attach the sides. Begin with the two longer sides of the planter. Position them parallel to each other on a flat surface. Then, take the two shorter sides and position them between the longer sides, forming a rectangle. Use wood screws to secure the corners. For added stability, you might want to consider using corner brackets, which can provide extra support and prevent any wobbling over time. Make sure to drill pilot holes first to avoid splitting the wood.
Once the sides are secure, it’s time to add the bottom. You’ll want to ensure that the bottom is well-supported to hold the weight of the soil and plants. Lay the bottom piece inside the frame you've created and use screws to attach it to the sides. If you’re using slats for the bottom, leave small gaps between them to allow for proper drainage. Remember, **drainage is key** to healthy plants!
After securing the bottom, check all corners and edges to ensure everything is tight and secure. A level planter box is essential, so use a level tool to check that the structure is even. If you notice any discrepancies, adjust as necessary. Once you’re satisfied with the assembly, you can give the entire box a light sanding to smooth out any rough edges, which will not only make it safer to handle but also prepare it for finishing touches.
Finally, it’s time to personalize your planter box. Before you move on to painting or staining, consider applying a protective sealant on the inside to prolong the life of the wood. This step is especially important if you're using untreated wood, as it will help resist moisture damage. With your planter box assembled and ready for finishing, you’re one step closer to creating a vibrant garden space!
Q: What type of wood is best for a planter box?
A: Cedar and redwood are excellent choices due to their natural resistance to rot and insects. However, pressure-treated lumber can also be used if you're mindful of chemical exposure.
Q: How do I ensure proper drainage in my planter box?
A: Make sure to drill holes in the bottom of your planter box to allow excess water to escape. You can also add a layer of gravel at the bottom before adding soil to enhance drainage.
Q: Can I use recycled materials to build my planter box?
A: Absolutely! Recycled wood pallets or old furniture can be repurposed into beautiful planter boxes. Just ensure that the materials are safe for planting, especially if they were previously treated with chemicals.
Finishing Touches
Now that you've built your DIY planter box, it's time to elevate its look and durability with some . These final steps not only enhance the aesthetic appeal of your planter but also protect it from the elements, ensuring that it stands the test of time. Think of this as the cherry on top of your gardening masterpiece! So, what are some ways to add that extra flair to your creation?
First off, consider painting or staining your planter box. This is not just about color; it also serves a functional purpose. A good coat of paint or stain can protect the wood from moisture and UV rays, which can cause it to warp or fade over time. When choosing a paint or stain, think about the overall vibe you want to create in your garden. Do you want something that blends in with nature, or are you looking for a pop of color that draws the eye? Here are a few options to consider:
- Water-based stains: These are easy to apply and clean up, and they offer excellent protection without overwhelming the natural wood grain.
- Oil-based paints: While they take longer to dry, they provide a durable finish that can withstand harsh weather conditions.
- Eco-friendly options: If you're environmentally conscious, look for low-VOC (volatile organic compounds) paints and stains that are safer for you and the planet.
Once you've decided on a finish, it's time to seal your planter box. Sealing is crucial as it provides an additional layer of protection against moisture and pests. There are various sealing methods available, including clear sealants, which allow the beauty of the wood to shine through, and colored sealants, which can add a unique touch. Applying a sealant is relatively straightforward: just make sure the wood is clean and dry, and follow the manufacturer's instructions for the best results.
In addition to painting and sealing, consider adding some decorative elements to personalize your planter box. You could attach wooden or metal accents, such as handles or corner brackets, for a rustic touch. Or, if you're feeling creative, why not paint some fun designs or patterns? Stencils can be a great way to add intricate details without needing to be a professional artist.
Finally, don't forget about drainage! While this might seem like a practical detail rather than a finishing touch, ensuring that your planter has adequate drainage holes is essential for plant health. You can cover these holes with landscape fabric to prevent soil from escaping while allowing excess water to drain away. This small step can make a big difference in how well your plants thrive.
In summary, the finishing touches you apply to your DIY planter box can significantly enhance its beauty and longevity. By selecting the right paint or stain, sealing effectively, adding decorative elements, and ensuring proper drainage, you can create a stunning and functional piece that will be the envy of your gardening friends. So, get creative and make your planter box uniquely yours!
Q: How often should I repaint or restain my planter box?
A: It's generally a good idea to check your planter box annually for signs of wear. Depending on the climate and the type of finish you used, you may need to repaint or restain every 2-5 years.
Q: Can I use treated wood for my planter box?
A: Yes, but be cautious. Some treated woods contain chemicals that can leach into the soil. If you're growing edible plants, consider using untreated wood or lining the interior with a barrier to prevent contact with the soil.
Q: What type of plants are best suited for a planter box?
A: Almost any plant can thrive in a planter box, but herbs, flowers, and small vegetables are particularly well-suited. Just ensure that you choose plants with similar water and light requirements for the best results.

Choosing the Right Paint or Stain
When it comes to enhancing the beauty and longevity of your DIY planter box, selecting the right paint or stain is absolutely crucial. Not only does it add a splash of color, but it also provides much-needed protection against the elements. You want your planter box to withstand the test of time while looking fabulous in your garden. So, let’s dive into the world of paints and stains, and uncover what you need to know!
First off, you’ll need to decide between paint and stain. Each option has its pros and cons. Paint creates a solid barrier on the wood, offering vibrant colors and a glossy finish. However, it can peel over time if not applied correctly. On the other hand, stain penetrates the wood, enhancing its natural grain while providing a more rustic look. It won't peel, but it may require reapplication more frequently. So, which one should you choose? It really depends on your aesthetic preference and how much maintenance you’re willing to put in.
Next, consider the type of paint or stain. For outdoor projects like your planter box, it's essential to use products specifically formulated for outdoor use. These products are designed to resist fading, mildew, and moisture. Look for water-based paints or stains that are low in volatile organic compounds (VOCs) for a safer and more environmentally friendly option. If you’re leaning towards a stain, oil-based stains can provide a deeper color and longer-lasting protection, but they take longer to dry and require more cleanup.
Additionally, think about the color. Do you want your planter box to blend in with your garden, or do you want it to stand out as a focal point? Earthy tones like browns and greens can harmonize beautifully with plants, while brighter colors like red or blue can add a fun pop. To help you visualize, here’s a simple table comparing the effects of different color choices:
| Color | Effect |
|---|---|
| Natural Wood | Creates a rustic, organic look |
| Earthy Tones | Blends seamlessly with plants |
| Bright Colors | Acts as a cheerful focal point |
Lastly, don’t forget about the application process. Whether you choose paint or stain, preparation is key. Make sure to sand the surface of your planter box to ensure a smooth finish. Clean the wood thoroughly to remove any dust or debris, and apply a primer if you’re using paint. When applying your chosen product, use a high-quality brush or roller for an even application. For stains, a cloth or sponge can help you achieve a more natural look. Always follow the manufacturer’s instructions for the best results.
In conclusion, choosing the right paint or stain for your DIY planter box is about balancing aesthetics, protection, and personal preference. Take your time to explore different options, and don’t hesitate to experiment with colors and finishes. Your planter box will not only serve as a functional gardening tool but also as a beautiful addition to your outdoor space!
- What type of paint is best for outdoor use? Look for water-based, low-VOC paints that are specifically made for outdoor projects.
- How often should I repaint or restain my planter box? It depends on the product used, but generally, every 2-3 years is a good rule of thumb for maintenance.
- Can I use regular indoor paint on my planter box? It's not recommended, as indoor paints aren’t designed to withstand outdoor conditions.
Sealing for Longevity
When you’ve put in the effort to build your DIY planter box, it’s only natural to want it to last as long as possible. One of the most crucial steps in ensuring the longevity of your planter box is sealing it properly. Think of sealing as the armor for your wooden creation; it protects against moisture, pests, and the wear and tear of the elements. Without a good seal, your planter box can quickly succumb to rot, warping, and other forms of damage that can cut its lifespan drastically.
There are various sealing methods available, each with its own advantages. You can choose from options like waterproof sealants, oil-based finishes, or even natural oils if you prefer a more eco-friendly approach. Each of these options serves the same purpose: to create a barrier that prevents water from penetrating the wood. However, the choice largely depends on your specific needs and the type of wood you’ve used. For instance, if you’ve opted for untreated wood, a high-quality waterproof sealant is your best bet to fend off moisture and prolong the life of your planter box.
Here’s a quick comparison of some popular sealing options you might consider:
| Sealing Option | Pros | Cons |
|---|---|---|
| Waterproof Sealant | Durable, effective against moisture | Can be toxic; requires proper ventilation during application |
| Oil-Based Finish | Enhances wood grain, long-lasting | Long drying time, requires multiple coats |
| Natural Oils | Eco-friendly, easy to apply | Less durable, may require more frequent reapplication |
Before applying any sealant, make sure your planter box is clean and dry. If you’ve used any wood treatments or preservatives, allow them to cure fully before sealing. This ensures that the sealant adheres properly and provides maximum protection. Start by applying a thin coat of your chosen sealant with a brush or roller, making sure to cover all surfaces, including the bottom of the planter, as this area is often neglected but is equally important for preventing rot.
After the first coat has dried, inspect the box for any areas that might need a touch-up. Applying a second coat is often recommended for optimal protection, especially if you live in an area with harsh weather conditions. Remember, your goal is to create a protective barrier that will keep your planter box looking great and functioning well for years to come.
Finally, don’t forget to re-seal your planter box every couple of years, depending on the type of sealant you used and the weather conditions in your area. Regular maintenance will help keep your planter box in tip-top shape, allowing you to enjoy your gardening endeavors without worrying about the integrity of your planter.
- How often should I seal my planter box? It's recommended to re-seal your planter box every 1-3 years, depending on the weather conditions and the type of sealant used.
- Can I use regular paint as a sealant? While paint can provide some level of protection, it's best to use a dedicated sealant for optimal waterproofing and longevity.
- What should I do if my planter box starts to show signs of rot? If you notice rot, it's crucial to address it immediately. Remove any affected wood and apply a wood preservative before re-sealing.
Planting and Maintenance Tips
After you’ve successfully constructed your DIY planter box, the next exciting phase begins—planting! But hold on, it’s not just about throwing some seeds in the dirt and hoping for the best. To truly create a thriving garden, you need to pay attention to a few crucial factors. First up is soil selection. The right soil is like a solid foundation for your home; it supports everything that grows above it. A high-quality potting mix that retains moisture yet drains well is ideal. You might want to consider a mix that includes compost to enrich the soil with nutrients, giving your plants the best chance to flourish.
Now, let’s talk about drainage. Without proper drainage, you risk waterlogging your plants, which can lead to root rot. Make sure your planter box has adequate drainage holes at the bottom. If you’re worried about soil escaping through these holes, you can line the bottom with landscape fabric or a fine mesh screen. This will allow water to drain while keeping the soil intact. Remember, it’s all about balance—too much water can be just as harmful as too little!
When it comes to choosing plants, think about what you love to eat or see in your garden. Are you a fan of vibrant flowers or perhaps fresh herbs for your culinary adventures? Here are a few tips to guide your plant choices:
- Consider sunlight: Most plants require at least 6 hours of sunlight a day. Position your planter box accordingly.
- Companion planting: Some plants thrive better together. For example, basil and tomatoes make great companions.
- Height considerations: Plant taller plants at the back of the box and shorter ones in front to create a visually appealing arrangement.
Once your plants are in the ground, maintenance becomes key to keeping your garden vibrant. Regular watering is essential, but be mindful of the weather. On hot, sunny days, your plants may need more water, while cooler, rainy days require less. A good rule of thumb is to check the soil moisture about an inch down; if it feels dry, it’s time to water. Also, consider using a drip irrigation system or self-watering planters to simplify this process.
As seasons change, so do your plants’ needs. Seasonal maintenance is crucial for ensuring your planter box remains healthy throughout the year. In the spring, it’s a good idea to refresh the soil with compost and mulch to retain moisture and suppress weeds. During the summer, keep an eye out for pests—little invaders can wreak havoc on your garden. Hand-picking pests or using organic pest control methods can help keep your plants safe.
In the fall, as your plants start to die back, you can either leave them for winter interest or remove them to prepare for the next planting season. If you choose to leave them, consider adding some winter-hardy plants or even decorative elements like twigs or ornaments to keep your planter looking lively. And don’t forget about winterizing your planter box! If you live in a region with harsh winters, consider bringing your planter indoors or insulating it to protect the roots from freezing temperatures.
Q: How often should I water my planter box?
A: Watering frequency depends on the plants and weather conditions. Check the soil moisture regularly; if it feels dry an inch below the surface, it’s time to water.
Q: What are the best plants for a DIY planter box?
A: Consider herbs, vegetables, and flowering plants that suit your climate and sunlight conditions. Popular choices include basil, tomatoes, marigolds, and petunias.
Q: How do I prevent pests in my planter box?
A: Regularly inspect your plants for signs of pests and use organic pest control methods like neem oil or insecticidal soap if needed. Companion planting can also help deter pests.
Q: Can I use treated wood for my planter box?
A: It's best to avoid treated wood, as it may contain chemicals harmful to plants. Opt for untreated wood or alternative materials like composite or cedar.
With these planting and maintenance tips in hand, you’re well on your way to creating a flourishing garden that not only enhances your outdoor space but also brings joy and satisfaction. Happy gardening!
Soil and Drainage Considerations
When it comes to creating a thriving garden in your DIY planter box, soil and drainage are two critical factors that can make or break your gardening experience. Imagine planting your favorite flowers or vegetables, only to watch them wilt and die due to poor soil quality or waterlogged roots. That’s a heart-wrenching scenario no gardener wants to face! So, let's dive into what you need to know to ensure your plants flourish.
First off, the type of soil you choose is essential. You want a mix that promotes healthy root growth while retaining some moisture without becoming soggy. A great option is a potting mix, which typically includes organic materials like peat moss, compost, and perlite. These components provide the necessary nutrients and improve aeration. If you’re feeling adventurous, you can even create your own custom mix. Here’s a simple recipe:
| Component | Ratio |
|---|---|
| Peat Moss | 1 part |
| Compost | 1 part |
| Perlite or Vermiculite | 1 part |
Now, let’s talk about drainage. This is crucial because stagnant water can lead to root rot, a common issue that can devastate your plants. To prevent this, ensure that your planter box has adequate drainage holes at the bottom. If you’re building your box from scratch, it’s a good idea to drill several holes to allow excess water to escape. Think of these holes as little lifelines for your plants, preventing them from drowning.
Additionally, consider adding a layer of small stones or gravel at the bottom of your planter box before filling it with soil. This acts like a natural drainage system, allowing water to flow freely while keeping the soil in place. It’s like giving your plants a cozy bed to rest on, ensuring they have both support and comfort.
Another aspect to keep in mind is the location of your planter box. If it’s placed in a spot that receives too much sun without sufficient moisture, you may find yourself needing to water more frequently. Conversely, a shaded area might lead to slower growth. So, choose wisely! Monitor the sunlight and adjust your placement as necessary.
Lastly, don't forget about seasonal changes. Different seasons can affect soil moisture levels, so it’s essential to check your planter box regularly. During hot summer months, you might need to water more often, while in cooler months, your plants may require less. Keeping an eye on your plants and adjusting your watering schedule accordingly is key to maintaining a healthy garden.
In summary, the right soil and proper drainage are vital for the success of your DIY planter box. By selecting a quality potting mix, ensuring adequate drainage, and monitoring your plants' needs, you'll be well on your way to creating a flourishing garden that brings you joy and satisfaction. Remember, gardening is not just about planting; it's about nurturing and watching your creations thrive!
- What type of soil is best for a planter box? A potting mix that includes organic materials like peat moss, compost, and perlite is ideal.
- How many drainage holes should I have? At least 4-6 drainage holes at the bottom of your planter box are recommended to prevent water accumulation.
- Can I use regular garden soil in my planter box? It's best to avoid using regular garden soil as it can compact and hinder drainage. Stick to a good-quality potting mix instead.
- How often should I water my planter box? Watering frequency depends on the weather and the plants you choose, but always check the soil moisture before watering.
Seasonal Maintenance
Maintaining your DIY planter box is essential for ensuring that your plants thrive throughout the year. Just like any living thing, plants need care and attention to flourish, and seasonal maintenance is the key to achieving this. Think of your planter box as a mini-ecosystem; it requires regular check-ups and adjustments based on the changing seasons. As the seasons shift, so do the needs of your plants, and being proactive can save you from a garden disaster!
In the spring, it's time to wake up your planter box from its winter slumber. Start by inspecting the wood for any signs of rot or damage caused by the cold. If you notice any issues, now is the time to repair or replace those sections. Next, refresh the soil by removing any dead plants and adding a layer of compost or organic fertilizer. This not only enriches the soil but also prepares it for new plantings. Consider planting vibrant flowers or vegetables that thrive in the warmer months. Remember to water regularly, as spring can sometimes be dry.
As summer rolls in, your plants will be in full swing, and this is when they need the most attention. Make sure to check the moisture levels in the soil frequently. During hot spells, you might find yourself watering your planter box more than once a day. It's also crucial to monitor for pests that love the summer heat. A simple inspection can prevent a minor issue from turning into a major infestation. If you find any pests, try using natural remedies like neem oil or insecticidal soap to keep your plants safe.
When autumn arrives, it's time to prepare your planter box for the cooler months ahead. Start by trimming any dead or dying foliage and consider planting some hardy perennials that can withstand the chill. You might also want to add a protective layer of mulch to insulate the roots and retain moisture. This is especially important if you're in an area that experiences frost. If you have any annuals that won’t survive the winter, remove them and compost them if possible. This not only keeps your planter looking tidy but also enriches your compost pile.
Finally, winter is a time of rest for your plants, but that doesn't mean you can ignore your planter box entirely. If you live in a region where freezing temperatures are common, consider bringing your planter box indoors or covering it with protective materials. Check for any signs of damage from snow or ice, and ensure that the wood is still in good condition. During this time, you can also plan for next year's garden by researching new plants or design ideas.
In summary, seasonal maintenance is about more than just keeping your planter box looking good; it's about creating a healthy environment for your plants to thrive. By paying attention to their needs throughout the year, you can ensure that your garden remains a beautiful and productive space. Remember, a little care goes a long way, and the effort you put in will reward you with a flourishing garden!
- How often should I water my planter box?
Watering frequency depends on the season and the type of plants you have. Generally, check the soil moisture daily during hot months and adjust accordingly. - What should I do if my plants are wilting?
Wilting can be a sign of either overwatering or underwatering. Check the soil moisture and adjust your watering schedule as needed. - Can I leave my planter box outside during winter?
It depends on your climate. In colder regions, it’s best to bring the planter indoors or cover it to protect the plants and wood from freezing temperatures. - What kind of plants are best for a DIY planter box?
Choose plants that thrive in the conditions of your area. Herbs, flowers, and vegetables are all great options, but ensure they have similar light and water needs.
Frequently Asked Questions
- What materials are best for building a DIY planter box?
When it comes to materials, you can’t go wrong with cedar or redwood, as they’re naturally resistant to rot. If you’re looking for a more budget-friendly option, pressure-treated pine can work, but remember to line it with plastic to prevent chemicals from leaching into the soil.
- Do I need special tools to build a planter box?
Not really! While a miter saw can make angled cuts easier, a simple hand saw will do the trick too. Just make sure you have a measuring tape, a square, and some screws or nails to hold everything together.
- How do I ensure my planter box has proper drainage?
Great question! To ensure proper drainage, drill holes in the bottom of your planter box. You can also add a layer of gravel or small stones beneath the soil to help water flow out easily.
- What type of paint or stain should I use?
Look for non-toxic, water-based paints or stains that are designed for outdoor use. This will not only protect the wood but also keep your plants safe from harmful chemicals.
- How often should I maintain my planter box?
Seasonal maintenance is key! Check for any signs of wear and tear at the beginning of each season. You should also refresh the soil and ensure your plants are healthy, which might involve watering, weeding, and fertilizing.
- Can I plant anything in my DIY planter box?
Absolutely! Just make sure to choose plants that have similar water and sunlight needs. Herbs, flowers, and even small vegetables can thrive in a planter box.
- How can I protect my planter box from harsh weather?
Sealing your planter box with a weather-resistant sealant can help prolong its life. Additionally, consider placing it in a sheltered area during extreme weather conditions.


