DIY Soap Projects for Kids
Are you ready to dive into the colorful and creative world of soap-making with your little ones? DIY soap projects are not just a fun pastime; they are a fantastic way to unleash your child's imagination while teaching them valuable skills. Picture this: your kids, covered in colorful soap mixtures, giggling and learning about science all at once! Soap making is like a magical potion that combines art, chemistry, and a whole lot of fun. Plus, the best part? They get to take home their very own creations!
So, why is soap-making such a hit among kids? First off, it’s a hands-on activity that enhances creativity. Children can experiment with colors, shapes, and scents, allowing them to express themselves artistically. Moreover, soap making involves fine motor skills, which are essential for developing coordination and dexterity. Think of it as a fun workout for their fingers! And let’s not forget the sense of accomplishment they feel when they see their finished product—it's like crafting a trophy of their hard work.
But wait, there's more! While they’re having a blast, kids also get to learn about important concepts in science. They'll discover how different ingredients react with one another, which is a great introduction to basic chemistry. Plus, they’ll learn about safety procedures, which is invaluable for any young crafter. So, if you’re ready to embark on this exciting journey, gather your supplies and let’s get crafting!
Soap making is not just a fun activity; it’s a gateway to a plethora of benefits for children. Here are some of the key advantages:
- Enhances Creativity: Kids can design their soaps in countless ways, letting their imagination run wild.
- Improves Fine Motor Skills: The process of measuring, mixing, and pouring helps develop dexterity.
- Teaches Science: Understanding the chemical reactions involved makes learning fun!
- Encourages Safety Awareness: Learning to handle materials properly instills a sense of responsibility.
- Provides a Sense of Accomplishment: Seeing their creations boosts their confidence.
In summary, DIY soap projects for kids are a fantastic blend of fun, learning, and creativity. They not only produce beautiful and functional soaps but also create lasting memories between you and your little crafters. So, grab those supplies and get ready for an adventure in soap making!
Before you dive into the world of soap making, it’s crucial to gather the right materials. Having everything on hand ensures a smooth and enjoyable crafting experience. Here’s a quick overview of the essential supplies you’ll need:
| Supply | Description |
|---|---|
| Soap Base | A pre-made base that melts down easily, such as glycerin or shea butter. |
| Molds | Shapes to pour your soap into, which can be found in various designs. |
| Colors | Soap-safe colorants to make your creations pop! |
| Fragrances | Essential oils or fragrance oils to give your soap a delightful scent. |
With these supplies ready, your soap-making adventure can begin! Remember, the sky's the limit when it comes to creativity, so encourage your kids to think outside the box and make their soap truly unique.
Q: Is soap making safe for kids?
A: Yes, soap making can be safe for kids when done with adult supervision and using safe materials.
Q: What age is appropriate for kids to start making soap?
A: Children as young as 5 can participate in soap making with adult help, while older kids can handle more complex projects independently.
Q: Can we use any colors or fragrances?
A: It’s essential to use soap-safe colors and fragrances, as some products may not be suitable for skin contact.
Q: How long does homemade soap last?
A: Properly made and stored homemade soap can last for several months, but it's best to use it within a few weeks for optimal freshness.

Benefits of Soap Making for Kids
Soap making is not just a fun and engaging activity for kids; it also comes packed with a plethora of benefits that can enrich their development. When children dive into the world of crafting their own soap, they are not merely playing; they are enhancing their creativity and discovering new skills along the way. Imagine the joy on their faces as they mix colors and scents, transforming simple ingredients into a beautiful, fragrant bar of soap!
One of the most significant advantages of soap making is the improvement of fine motor skills. As kids measure, pour, and stir, they are developing hand-eye coordination and dexterity. These skills are essential not only for crafting but also for everyday tasks like writing and buttoning shirts. Think of it as a fun workout for their little hands!
Moreover, this hands-on activity provides a wonderful sense of accomplishment. After putting in the effort to create their soap, children can take pride in their finished product. It’s like watching a gardener bloom their first flower; the sense of achievement is truly rewarding. This feeling can boost their self-esteem and encourage them to take on more challenging projects in the future.
Soap making also introduces kids to basic principles of science and chemistry. They learn about the properties of different ingredients and how they interact with each other. For example, understanding why certain oils are used for moisturizing or how colors can blend to create new shades can spark an interest in further scientific exploration. It’s like a mini-laboratory right in their kitchen!
As with any activity involving crafting, safety is a crucial component. Children learn the importance of safety precautions when handling materials, such as avoiding burns from hot soap mixtures or being careful with sharp objects like molds. This awareness can foster a sense of responsibility and caution that will serve them well throughout life.
In summary, the benefits of soap making for kids extend far beyond the simple act of crafting. From enhancing creativity and fine motor skills to introducing scientific concepts and promoting safety awareness, soap making is a multifaceted activity that can provide children with invaluable experiences. So, why not grab some supplies and embark on this colorful, fragrant adventure together? Your little ones will thank you for it!

Essential Supplies for Soap Making
When diving into the exciting world of soap making, having the right supplies is crucial for a smooth and enjoyable crafting experience. It's like preparing for an adventure; you wouldn't want to head out without your gear, right? For kids, this means gathering materials that are not only fun to use but also safe and easy to handle. Here’s a rundown of the essential supplies that will set the stage for some bubbly creativity!
First on the list is the soap base. This is the foundation of your soap, and there are several types available, each with its unique properties. Popular options include glycerin, shea butter, and goat milk soap bases. Glycerin is transparent and great for beginners, while shea butter is rich and nourishing, perfect for sensitive skin. Goat milk soap offers a creamy texture that kids will love. Choosing the right base can make all the difference in the final product, so let your little ones explore their options!
Next, we have molds. These come in various shapes and sizes, allowing kids to unleash their creativity. From fun animal shapes to classic bars, the possibilities are endless! Silicone molds are particularly popular because they make it easy to pop the soaps out once they’ve set. Just imagine the joy on your child's face when they reveal their uniquely shaped creations!
Now, let’s talk about colors and fragrances. Adding vibrant colors can make the soap-making process even more exciting. Kids can choose from a range of colorants, including natural options like beet juice or turmeric for those who prefer an organic touch. As for fragrances, essential oils or fragrance oils can be used to add delightful scents. Lavender, citrus, and mint are just a few examples that can transform a simple soap into a sensory delight.
In addition to the basics, consider adding some fun additives to the mix. Items like glitter, dried flowers, or even small toys can be incorporated into the soap for an extra touch of fun. Just be sure to choose safe and non-toxic materials, especially if the soap will be used by younger children. The goal is to create a masterpiece that not only looks good but feels good too!
Here’s a quick reference table of essential supplies:
| Supply | Description |
|---|---|
| Soap Base | Glycerin, Shea Butter, Goat Milk |
| Molds | Silicone molds in various shapes |
| Colors | Natural colorants or soap dyes |
| Fragrances | Essential oils or fragrance oils |
| Additives | Glitter, dried flowers, small toys |
Lastly, don’t forget about the tools needed for the process. Items like a microwave-safe bowl for melting the soap, a stirring stick, and a spray bottle filled with rubbing alcohol (to help remove bubbles) are essential. With these supplies in hand, children will be well-equipped to embark on their soap-making journey!

Types of Soap Bases
When it comes to soap making, one of the most exciting aspects is choosing the right soap base. Each type of soap base has its own unique properties, making it suitable for different projects and skin types. For kids, it's essential to select bases that are not only fun to work with but also safe and easy to handle. Below, we’ll explore some of the most popular soap bases that are perfect for young crafters, ensuring they have a blast while learning the art of soap making.
One of the most commonly used soap bases is glycerin soap. This transparent soap base is especially appealing to kids because it allows them to see the fun ingredients they add, such as glitter or small toys. Glycerin is a natural humectant, which means it helps retain moisture, making it gentle on the skin. Since it melts easily and can be poured into molds without much hassle, glycerin soap is ideal for beginners. Kids can experiment with different colors and additives, creating unique bars that are both functional and visually appealing.
Next up is sheabutter soap base, which is known for its nourishing and moisturizing properties. This base is particularly beneficial for children with sensitive skin, as shea butter is rich in vitamins and fatty acids that help soothe and hydrate. When kids use shea butter soap, they not only enjoy the process of making it but also reap the rewards of using a product that is gentle and kind to their skin. Incorporating shea butter into their projects can teach kids about the importance of using natural ingredients and caring for their bodies.
Another fantastic option for soap making is goat milk soap base. Goat milk is renowned for its creamy texture and moisturizing benefits, making it a favorite among those with dry or sensitive skin. The natural fats in goat milk soap help to nourish and hydrate the skin, making it an excellent choice for children. Plus, this base is easy to work with and can be customized with various colors and scents, allowing kids to unleash their creativity. The creamy lather produced by goat milk soap is not only enjoyable to use but also creates a luxurious bathing experience.
In addition to these popular bases, kids can also explore other exciting options like olive oil soap base and coconut oil soap base. Olive oil soap is known for its moisturizing properties, while coconut oil soap offers a bubbly lather that kids will love. The beauty of soap making is that children can mix and match bases to create their own unique concoctions, allowing them to personalize their creations.
To summarize, here’s a quick comparison of the different soap bases:
| Soap Base | Properties | Best For |
|---|---|---|
| Glycerin | Transparent, easy to handle | Beginners, visual projects |
| Shea Butter | Nourishing, moisturizing | Sensitive skin |
| Goat Milk | Creamy, hydrating | Dry skin |
| Olive Oil | Moisturizing | Gentle use |
| Coconut Oil | Bubbly lather | Fun, bubbly projects |
By understanding the different types of soap bases available, kids can make informed choices about their soap-making projects. Each base offers unique benefits, allowing children to explore their creativity while also learning about the ingredients they use. So, gather your supplies, choose your favorite soap base, and get ready for an exciting adventure in soap making!
Q: Can kids make soap without adult supervision?
A: While many soap-making projects are safe, it’s always best for kids to have adult supervision, especially when using heat sources or sharp tools.
Q: What is the best soap base for beginners?
A: Glycerin soap base is highly recommended for beginners due to its ease of use and transparency, which allows for creative experimentation.
Q: Are there any allergens in soap bases?
A: Some soap bases may contain allergens. It's important to check the ingredients and choose bases that are suitable for sensitive skin, especially for children.
Q: How can I make my soap smell good?
A: You can add essential oils or fragrance oils to your soap mixture. Just a few drops can give your soap a delightful scent!
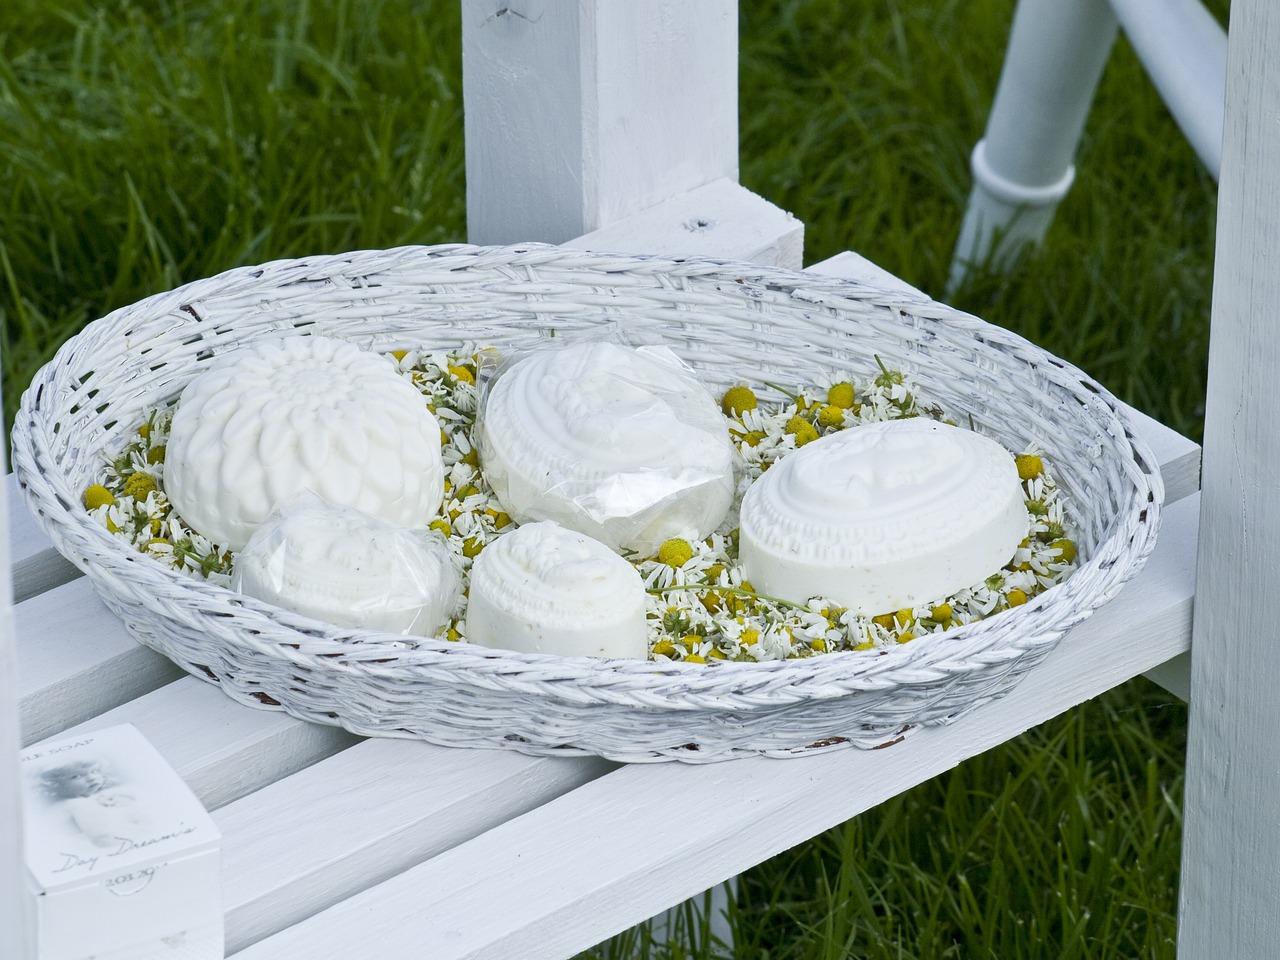
Glycerin Soap Base
When it comes to soap making, stands out as a fantastic choice, especially for kids who are just starting their crafting journey. This type of soap is not only transparent, allowing for stunning visual effects, but it’s also incredibly easy to work with. Children can see their creations come to life as they mix in colors and additives, making the experience both fun and educational.
One of the key benefits of glycerin soap is its gentleness on the skin. It’s a humectant, which means it attracts moisture, making it perfect for all skin types, including sensitive skin. This is particularly important for kids who may have allergies or skin sensitivities. By using glycerin soap, parents can feel confident that their children are crafting with a safe and skin-friendly product.
Moreover, glycerin soap is incredibly versatile. Kids can customize their soap by adding a variety of natural colorants, fragrances, and even fun additives like glitter or dried flowers. This opens the door to endless creativity! Imagine a rainbow-colored soap infused with the sweet scent of strawberries or a sparkly soap that twinkles like stars in the night sky. The possibilities are truly limitless.
For those new to soap making, glycerin soap bases are available in pre-cut blocks that can be easily melted in a microwave or double boiler. This process is straightforward and requires minimal equipment, making it an ideal starting point for young crafters. As they melt the soap, they can learn about temperature control and the science behind how heat affects materials. Once melted, they can pour the soap into molds, which can be themed or shaped like their favorite characters, adding an extra layer of excitement to the project.
In addition to being fun, glycerin soap making can also be a great opportunity for kids to learn about measuring and mixing ingredients, fostering their mathematical skills in a hands-on way. By measuring out their colorants and fragrances, children can practice their counting and estimation skills, all while creating something beautiful and functional.
To summarize, glycerin soap base is not just a crafting material; it’s a gateway to a world of creativity and learning. With its skin-friendly properties, ease of use, and endless customization options, it’s no wonder that glycerin soap making is a beloved activity for kids. So why not gather your supplies and dive into the colorful world of soap making? Your little ones will thank you for the fun and the valuable skills they'll gain along the way!
- Is glycerin soap safe for kids? Yes, glycerin soap is gentle and safe for all skin types, including sensitive skin.
- Can kids customize their glycerin soap? Absolutely! Kids can add colors, fragrances, and fun additives to personalize their soap.
- What equipment do we need for glycerin soap making? Basic equipment includes a microwave or double boiler, measuring cups, and soap molds.
- How long does it take for glycerin soap to set? Typically, it takes about 1-2 hours for glycerin soap to harden in the molds.
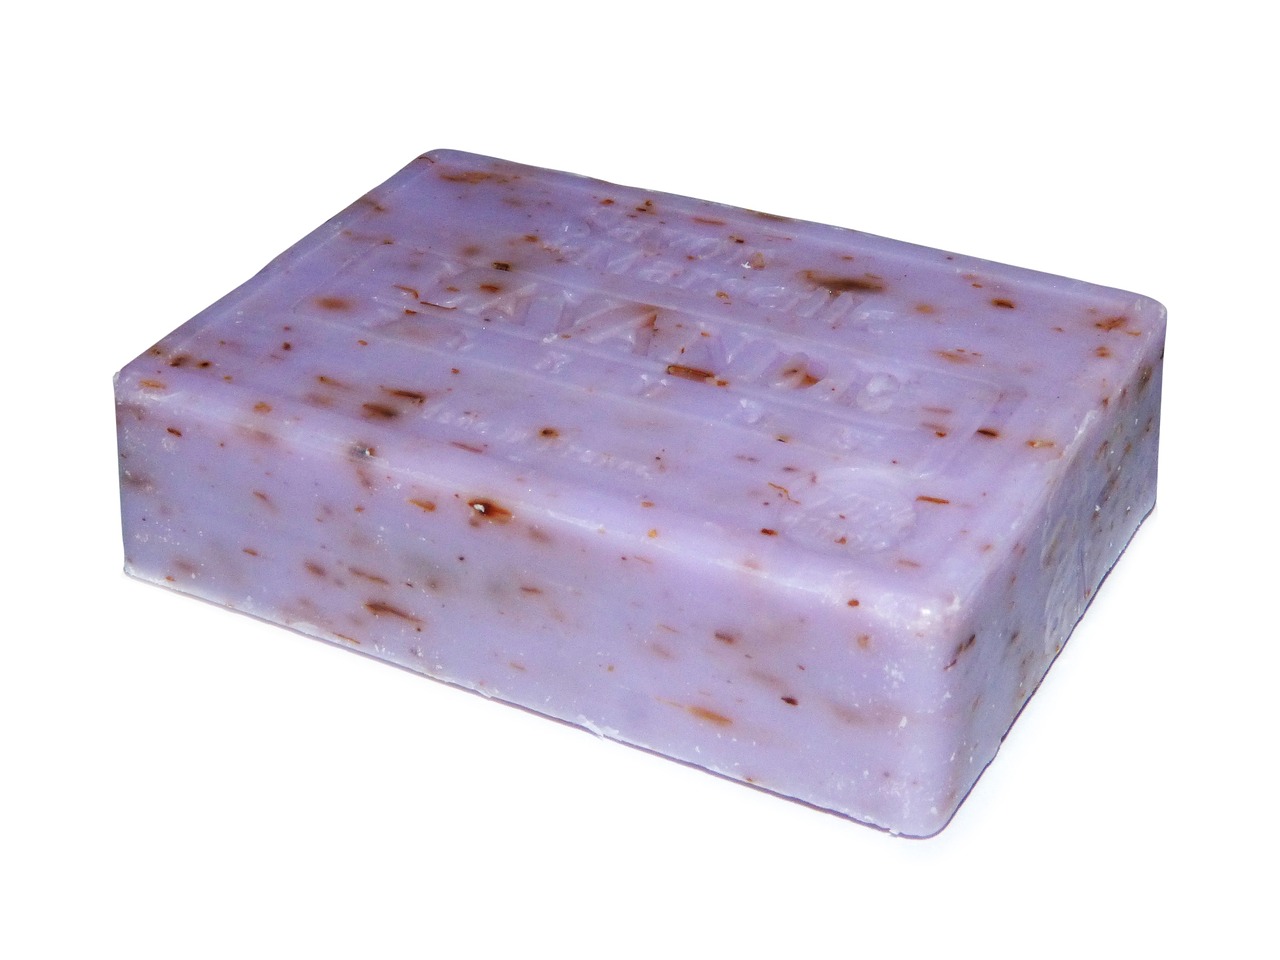
Shea Butter Soap Base
Shea butter soap is a fantastic option for kids who are diving into the world of soap making. This creamy, luxurious base is not just a treat for the senses; it also offers a multitude of benefits that make it ideal for young skin. Its moisturizing properties are particularly noteworthy, as shea butter is known to hydrate and nourish the skin, making it a great choice for those with sensitive or dry skin. Imagine how wonderful it feels to create something that not only looks good but is also kind to your skin!
One of the best things about using shea butter soap base is its ease of use. It melts quickly and can be mixed with various colors and fragrances, allowing kids to unleash their creativity. The smooth texture makes it easy to pour into molds, and the finished product is often a beautiful, creamy bar that can be personalized in countless ways. Whether your child wants to add a splash of color or a delightful scent, the shea butter base accommodates all kinds of fun experiments.
When working with shea butter soap, kids can learn about the importance of natural ingredients and how they can benefit our skin. This can lead to discussions about skincare and the significance of using products that are gentle and nourishing. Plus, the process itself is a wonderful way for kids to develop their fine motor skills as they measure, mix, and pour their ingredients.
Here are some key features of shea butter soap base:
| Feature | Description |
|---|---|
| Moisturizing | Rich in vitamins A and E, providing hydration to the skin. |
| Gentle | Safe for sensitive skin, making it suitable for all ages. |
| Versatile | Can be easily customized with colors and fragrances. |
| Easy to Use | Melts quickly and sets well, perfect for beginner soap makers. |
Incorporating shea butter into soap projects is not just about making something pretty; it’s about creating a product that kids can feel proud of and actually use. After all, what’s more rewarding than using a soap that you’ve made yourself? It’s a great way to teach children about the value of handmade products and the joy of crafting something from scratch. So, grab your shea butter soap base, and let the fun begin!

Fun Additives and Colors
When it comes to soap making, one of the most exciting aspects is the ability to customize your creations with fun additives and vibrant colors. Imagine the joy on a child's face as they pour in a splash of bright color or sprinkle in some glitter! These additions not only make the soap visually appealing but also allow kids to express their unique personalities. The world of soap crafting is a playground for creativity, and experimenting with different additives can turn an ordinary soap project into a magical experience.
There are countless options for enhancing soap, and it's important to consider both aesthetics and skin-friendly properties. For instance, natural colorants like beetroot powder or turmeric can add beautiful hues without introducing harsh chemicals. Kids can learn about the properties of these natural ingredients while having fun! Additionally, they can experiment with different textures and scents by adding ingredients like oatmeal or essential oils. This not only makes the soap smell amazing but also provides a sensory experience that is both educational and enjoyable.
Here’s a quick overview of some popular fun additives and colors:
| Additive | Benefits | Color |
|---|---|---|
| Beetroot Powder | Natural colorant, antioxidant | Pink to Red |
| Turmeric | Anti-inflammatory, natural colorant | Yellow |
| Glitter | Fun texture, visually appealing | Varies |
| Essential Oils | Fragrance, therapeutic properties | Varies |
| Oatmeal | Exfoliant, soothing for skin | Natural |
Incorporating these additives is as simple as melting the soap base and mixing in the desired ingredients before pouring into molds. Kids can unleash their creativity by layering different colors or adding glitter for a sparkling finish. The possibilities are endless! Encourage them to think outside the box and come up with their own unique combinations. Who knows, they might even invent the next big trend in soap making!
As they work with these fun additives, children also learn valuable lessons about science and art. They will see how different ingredients interact and change the properties of the soap, making it a perfect opportunity for hands-on learning. Plus, the sense of accomplishment they feel when they see their beautiful, customized soaps will boost their confidence and inspire them to try even more complex projects in the future.
Q: Can we use food coloring in soap making?
A: While food coloring can be used, it's important to choose ones that are safe for skin contact. Natural colorants are often a better choice for sensitive skin.
Q: Are there any additives that should be avoided?
A: Yes, additives like salt or sugar can affect the soap's lather and texture. It's best to stick with tried-and-true ingredients until you're more experienced.
Q: How can we ensure the colors stay vibrant?
A: Using high-quality colorants and ensuring the soap is stored properly can help maintain the vibrancy of the colors.
In conclusion, by incorporating fun additives and colors into their soap-making projects, children not only create visually stunning products but also engage in a rich learning experience that combines creativity, science, and a little bit of magic!
Simple Soap Recipes
Making soap can be an incredibly fun and rewarding experience for kids. Not only do they get to unleash their creativity, but they also get to enjoy the fruits of their labor in the form of beautifully crafted soaps. Below are some simple and exciting soap recipes that children can easily follow, each designed to spark their imagination and encourage personalization.
One delightful project is creating fruit-scented soap. This recipe is not only straightforward but also allows kids to explore different scents and colors. To make this soap, you’ll need:
| Ingredients | Amount |
|---|---|
| Glycerin soap base | 1 lb |
| Fruit fragrance oil (like strawberry or orange) | 1 tsp |
| Soap colorant (optional) | As desired |
| Soap mold | 1 |
To create the fruit-scented soap, follow these simple steps:
- Start by cutting the glycerin soap base into small cubes for easy melting.
- Place the cubes in a microwave-safe bowl and heat them in short bursts, stirring in between until completely melted.
- Add the fruit fragrance oil and any desired colorant, stirring well to combine.
- Pour the mixture into the soap mold and let it cool for a few hours until solid.
- Once set, pop the soap out of the mold and enjoy your fruity creation!
Another exciting project is making layered soap bars. This visually appealing soap not only teaches kids about layering but also allows them to experiment with colors. Here’s how to make them:
For layered soap bars, you will need:
| Ingredients | Amount |
|---|---|
| Glycerin soap base | 1 lb |
| Soap colorant | Multiple colors |
| Soap mold | 1 |
Here’s how to create stunning layered soap bars:
- Again, start by melting the glycerin soap base as mentioned previously.
- Divide the melted soap into different bowls, adding various colorants to each bowl.
- Pour the first color into the mold and allow it to set for about 10-15 minutes.
- Once the first layer has hardened, repeat the process with the next color, pouring it gently on top of the first layer.
- Continue this process until you’ve created as many layers as you desire, then let the entire soap cool completely.
These simple soap recipes not only make for great crafting projects but also provide an opportunity for kids to learn about science and creativity in a hands-on way. Plus, they get to take home a personalized soap that they can use or gift to someone special!
Q: Is soap making safe for kids?
A: Yes, soap making can be safe for kids when proper safety precautions are taken, such as using adult supervision and handling materials carefully.
Q: What age is appropriate for kids to start soap making?
A: Generally, children aged 6 and up can participate in soap making with adult supervision. Younger children can help with simpler tasks.
Q: Can we use essential oils in soap making?
A: Yes, essential oils can be used for fragrance, but it’s important to ensure they are skin-safe and used in appropriate amounts.
Q: How long do homemade soaps last?
A: Homemade soaps can last several months if stored in a cool, dry place away from direct sunlight.

Fruit Scented Soap
Creating fruit-scented soap is not just a delightful project; it’s an aromatic adventure that kids will absolutely adore! Imagine the joy on their faces as they craft colorful bars that smell like their favorite fruits. This project is perfect for young crafters, as it combines creativity with sensory exploration. Plus, it’s incredibly easy to follow, making it an ideal introduction to the world of soap making.
To get started, you’ll need some basic materials. Here’s a quick rundown of what you’ll require:
- Glycerin soap base
- Fruit fragrance oils (like strawberry, lemon, or orange)
- Soap colorants (in vibrant shades)
- Soap molds (silicone molds work best)
- Microwave-safe container
- Stirring stick
Once you have your supplies ready, the fun begins! First, you’ll want to cut the glycerin soap base into small cubes. This makes it easier to melt. Place the cubes in a microwave-safe container and heat them in the microwave in short bursts—about 30 seconds at a time—to avoid overheating. Stir well after each burst until the soap is completely melted and smooth.
Next, it’s time to add some fragrance and color! For a fruity twist, add a few drops of your chosen fruit fragrance oil. The more you add, the stronger the scent will be, but remember to start with just a few drops and adjust as needed. Now, for the color! You can use soap colorants to create vibrant, eye-catching hues. Just a drop or two can transform your soap into a work of art. Mix well until the color is evenly distributed.
Now comes the exciting part: pouring the mixture into the molds! Carefully pour the melted soap into your molds, filling them to the top. If you want to get creative, you can layer different colors or even add small pieces of dried fruit for a fun touch. Once you’ve poured the soap, let it sit at room temperature for about 30 minutes, or until it hardens completely.
After the soap has hardened, gently remove it from the molds. Voila! You now have beautiful, fruit-scented soap bars ready to use or give as gifts. Not only will your kids learn the art of soap making, but they’ll also enjoy the sweet rewards of their labor. And the best part? They can experiment with different scents and colors every time they make a new batch.
In conclusion, making fruit-scented soap is a fantastic way for kids to express their creativity while learning about the science of soap making. It’s a project that not only smells amazing but also provides a sense of accomplishment. So, gather your supplies, unleash your imagination, and let the fruity fun begin!
Here are some common questions about making fruit-scented soap:
- Can I use regular food coloring instead of soap colorants? It’s best to use soap colorants as they are specifically designed for soap making and won’t alter the soap's properties.
- How long does the soap last? Homemade soap can last for several months if stored properly in a cool, dry place.
- Is it safe for sensitive skin? Yes, glycerin soap is generally safe for sensitive skin, but always check for allergies to specific fragrance oils.
Layered Soap Bars
Creating is not just a fun project; it's a fantastic way for kids to express their creativity and artistic flair while learning about the science behind soap making. Imagine a colorful rainbow trapped in a bar of soap! The vibrant layers can be customized with different colors and scents, making each bar unique and personal. This project is perfect for those who love to mix and match and want to see their ideas come to life in a tangible form.
To get started, you'll need to gather some essential supplies, which include:
- Soap base (like glycerin or shea butter)
- Soap molds (silicone molds work great)
- Colorants (soap dyes or natural colorants)
- Fragrances (essential oils or fragrance oils)
- Microwave-safe containers for melting soap
- A stirring stick for mixing
Once you have your supplies ready, the magic begins! The process of making layered soap bars involves melting the soap base, adding color and fragrance, pouring it into molds, and then repeating the process for each layer. Here’s a simple step-by-step guide to help you create your own stunning layered soap bars:
- Prepare the Soap Base: Cut the soap base into small chunks and place them in a microwave-safe container. Heat in the microwave in 30-second intervals until fully melted.
- Add Color and Fragrance: Once melted, stir in your chosen colorant and fragrance. This is where the fun begins! You can mix different colors to create unique shades.
- Pour the First Layer: Pour the melted soap into your mold, filling it about one-third full. Allow it to cool and harden for about 15-20 minutes.
- Repeat for Additional Layers: After the first layer is set, repeat the melting, coloring, and pouring process for the next layer. You can choose to pour contrasting colors or stick to a theme.
- Let it Set: Once all layers are poured, let the soap cool completely. This could take a few hours, so patience is key!
- Unmold and Enjoy: Once fully set, carefully remove the soap from the mold. Your beautiful layered soap bars are ready to be used or gifted!
Layered soap bars not only look fantastic but also make wonderful gifts for friends and family. Kids can personalize their creations with different scents and colors, making each bar a thoughtful and unique present. Plus, they’ll learn about the properties of the ingredients they use, enhancing their understanding of chemistry in a fun and engaging way.
So, grab your supplies and let the creativity flow! Layered soap bars are a delightful way to spend an afternoon, and who knows? You might just spark a lifelong passion for crafting in your little ones.
Q: Can I use any type of soap base for layered soap bars?
A: While you can experiment with different soap bases, glycerin and shea butter are the most popular choices for beginners due to their ease of use and skin-friendly properties.
Q: How long does it take for the soap to harden?
A: The hardening time can vary based on the thickness of the layers and the soap base used. Generally, it takes about 15-20 minutes for each layer to set, and a few hours for the entire bar to harden completely.
Q: Can I add my own scents to the soap?
A: Absolutely! You can use essential oils or fragrance oils to customize the scent of your soap. Just be sure to use skin-safe options and follow recommended usage rates.
Safety Tips for Kids
When it comes to crafting, especially with something as fun as soap making, safety should always be the top priority. Kids are naturally curious and excited to explore, but they also need guidance to ensure they have a safe and enjoyable experience. Here are some essential safety tips to keep in mind while diving into the world of soap making:
First and foremost, adult supervision is crucial. Even though soap making can be a simple and enjoyable project, having an adult around ensures that kids have someone to help them with any questions or challenges that arise. It's like having a trusty sidekick in a superhero movie—having that extra support can make all the difference!
Next, when working with materials, it’s important to handle all ingredients carefully. Some soap bases and additives may have specific instructions or precautions. Make sure to read the labels together with your child, explaining what each ingredient does and why it’s important to follow the guidelines. Just like following a treasure map, the instructions lead to the best results!
Additionally, make sure to create a clean workspace. Setting up a designated crafting area can help prevent messes and accidents. Use old newspapers or a plastic tablecloth to protect surfaces, and keep all supplies organized. Think of it as setting the stage for a fantastic performance—the cleaner the stage, the better the show!
Another important aspect is to wear protective gear. While soap making is generally safe, wearing gloves can protect little hands from any potential irritation, especially when using fragrances or colorants. It’s like wearing a superhero costume—protection makes the adventure even more exciting!
Finally, always store materials safely after the project is complete. Keep all soap-making supplies out of reach of younger siblings or pets. This ensures that no one accidentally gets into the crafting materials when it’s not crafting time. Think of it as putting the treasure back in the chest—safeguarding your precious supplies for the next adventure!
By following these simple safety tips, kids can enjoy their soap-making journey while learning valuable lessons about responsibility and care. Remember, crafting is not just about making something beautiful; it’s also about having fun and staying safe while doing it!
Here are some common questions parents might have regarding soap making with kids:
- Is soap making safe for kids? Yes, as long as proper safety precautions are taken, such as adult supervision and careful handling of materials.
- What age is appropriate for kids to start soap making? Generally, children aged 6 and older can participate in soap making, especially with adult guidance.
- Can kids use essential oils in their soap? Yes, but it’s essential to use kid-friendly essential oils and to check for any allergies beforehand.
- How can I personalize the soap? Kids can personalize their soap by adding colors, scents, and fun shapes using different molds.
Frequently Asked Questions
- What age is appropriate for kids to start making soap?
Kids as young as 5 years old can start making soap with adult supervision. It’s a fun way to introduce them to crafting while ensuring safety. Older children can take on more complex projects as they develop their skills.
- Are there any safety concerns when making soap with kids?
Absolutely! Always supervise children during the soap-making process. Ensure they wear gloves and goggles if necessary, especially when handling fragrances or colorants. Using pre-made soap bases like glycerin minimizes risks, making it safer for young crafters.
- What supplies do I need for a basic soap-making project?
For a simple soap-making project, you will need a soap base (like glycerin), molds, colors, fragrances, and a microwave-safe container. You might also want to have a stirring utensil and a cutting tool handy for shaping your soap.
- Can kids customize their soap creations?
Definitely! Kids can personalize their soaps by adding colors, scents, and fun additives like glitter or dried flowers. This not only makes the process more exciting but also encourages creativity and self-expression.
- How long does it take for the soap to set?
The setting time can vary depending on the soap base used. Typically, glycerin soap takes about 1-2 hours to harden at room temperature. However, placing it in the fridge can speed up the process!
- Are there any allergies to consider when making soap?
Yes, always check for potential allergies, especially with fragrances and essential oils. It's a good idea to do a patch test on a small area of skin before using any new ingredients, ensuring a fun and safe experience for everyone.
- What are some fun themes for soap-making projects?
There are endless themes you can explore! Consider seasonal themes like summer fruits, holiday scents, or even animal shapes. Kids can create themed soaps for gifts or parties, making it a delightful experience.


