Crafting an Indoor Snow Day: Winter Crafts for Kids
When the winter chill sets in and snowflakes start to fall, it's the perfect opportunity to bring the magic of a snow day indoors. Instead of letting the cold keep your kids cooped up, why not transform a dreary day into a vibrant explosion of creativity? With just a few materials and a sprinkle of imagination, you can embark on a delightful journey filled with fun winter crafts that will keep little hands busy and minds engaged. These activities not only spark creativity but also provide a wonderful chance for families to bond while crafting together. So, grab your scissors, glue, and a dash of glitter, and let’s dive into the world of winter crafts that will turn your living room into a cozy winter wonderland!
Creating beautiful snowflake designs is a fantastic way for kids to explore symmetry and creativity. Picture this: a flurry of paper snowflakes drifting down from the ceiling, each one unique and sparkling with glitter. Using just paper, scissors, and a bit of imagination, children can craft intricate snowflakes that are not only fun to make but also serve as stunning decorations. This activity encourages kids to think critically about shapes and patterns while giving them the freedom to express themselves artistically. As they cut and fold, they’ll discover that no two snowflakes are alike, just like in nature!
Building a winter wonderland diorama allows children to express their artistic vision in a three-dimensional format. Imagine a cozy shoebox transformed into a snowy village, complete with tiny houses, snowmen, and even little animals peeking out from behind trees. Kids can use materials like cotton balls for snow, cardboard for structures, and figurines to create a scene that tells a story. This project not only enhances their creativity but also teaches them about spatial awareness and storytelling. The best part? They can choose their own theme, turning each diorama into a personal masterpiece!
Gathering the right materials is essential for a successful diorama. Common items include:
- Shoeboxes
- Construction paper
- Cotton balls
- Miniature figurines
- Glue and scissors
- Markers and crayons for decoration
These materials can mimic a winter landscape, making the diorama come alive with creativity and imagination.
Selecting a theme for the diorama can enhance creativity. Kids can choose from themes like:
- A snowy forest
- A cozy cabin
- A bustling winter village
By deciding on a theme, children can focus their ideas and create a cohesive scene that reflects their vision.
Details like miniature trees, snowmen, and animals can bring the diorama to life. Encouraging children to add personal touches, such as their favorite winter activities or family traditions, will make their project even more special. It’s these little details that can spark joy and pride in their work!
Providing clear, step-by-step instructions can help kids navigate the diorama-making process. Here’s a simple guide:
- Choose your shoebox and decide on a theme.
- Sketch out your design on paper.
- Gather all your materials.
- Start building your scene from the base up.
- Add details and decorations to bring it all together.
This guidance will empower them to take ownership of their creations, making the experience even more rewarding!
Making snow globes is a delightful craft that combines art and science. Kids can create their own magical scenes encapsulated in glass, perfect for holiday gifts or home decor. The thrill of shaking the globe and watching the “snow” swirl around is an experience that never gets old. Plus, it’s a great way to teach kids about the principles of water and gravity while having fun!
Deciding on a scene for the snow globe is the first step. Children can choose anything from winter animals to festive holiday themes, allowing for personal expression. This creative choice sets the stage for a unique keepsake that reflects their interests and imagination.
Assembling the globe involves careful steps, including sealing the contents and ensuring a watertight fit. This process teaches kids about craftsmanship and patience. They’ll learn that sometimes, the best creations take a little time and effort to perfect. Plus, they'll have a beautiful snow globe to show off once they’re done!
Q: What age group are these crafts suitable for?
A: These crafts are ideal for children aged 5 and up, with adult supervision for younger kids, especially when using scissors and glue.
Q: How long do these activities typically take?
A: Depending on the complexity, each activity can take anywhere from 30 minutes to a couple of hours. It's a great way to spend a cozy afternoon indoors!
Q: Can these crafts be adapted for different skill levels?
A: Absolutely! You can simplify or elaborate on each craft based on the child's age and skill level. The key is to encourage creativity and have fun!
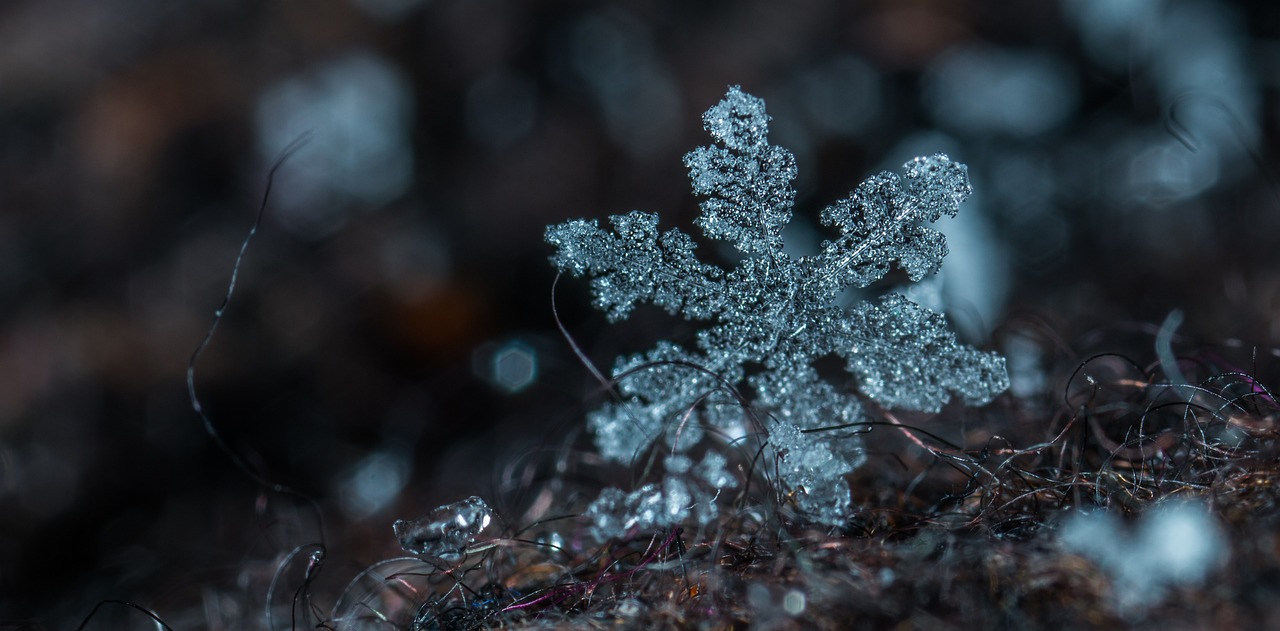
Snowflake Art
Creating beautiful snowflake designs is a fantastic way for kids to explore symmetry and unleash their creativity. Imagine a world where each flake is unique, just like a fingerprint! With just a few simple materials, kids can turn a chilly day indoors into a winter wonderland of their own making. All they need are some sheets of paper, scissors, and a sprinkle of glitter to transform their creations into shimmering decorations that brighten up any room.
Start by folding a piece of paper into a triangle. This step is crucial because it sets the stage for the magic of snowflakes. When the paper is unfolded, the kids will be amazed at the intricate patterns they've created. They can cut out shapes along the edges—think circles, triangles, and even hearts—to form the delicate designs that mimic real snowflakes. Each cut is like a tiny adventure, leading to a surprise reveal when they open the paper!
To add that extra touch of winter sparkle, sprinkle some glitter on the finished snowflakes. This will make them glisten like freshly fallen snow under the sunlight. Kids can hang their creations in windows or on walls, turning their homes into a cozy, festive space. Plus, this activity is not just about crafting; it also teaches children about the beauty of nature and the importance of individuality—every snowflake is different, just like every child!
For a fun twist, why not have a snowflake contest? Kids can showcase their masterpieces and vote for their favorites. This not only encourages creativity but also fosters a sense of community and teamwork. They can even create a gallery wall at home to display their work, making it feel like a real art exhibit!
So grab those scissors and let the snowflake fun begin! Who knew that a simple piece of paper could lead to such a delightful winter experience? The joy of crafting snowflakes is just the beginning of a day filled with creativity and imagination.
Winter Wonderland Diorama
Discover fun and engaging winter crafts that can transform a chilly day indoors into a creative snow day experience for kids. These activities are perfect for sparking imagination and keeping little hands busy.
Creating beautiful snowflake designs is a fantastic way for kids to explore symmetry and creativity. Using paper, scissors, and glitter, they can make unique decorations to brighten up any room.
Building a winter wonderland diorama allows children to express their artistic vision. Imagine a small world where snow blankets the ground, and tiny figures come to life. This project is not only a fun craft but also an opportunity for kids to delve into storytelling through art. By using materials like cotton balls, cardboard, and figurines, they can create a snowy scene that reflects their imagination.
Gathering the right materials is essential for a successful diorama. Here’s a quick list of common items you might want to collect:
- Shoeboxes
- Construction paper
- Cotton balls
- Miniature figurines
- Glue and scissors
- Markers and crayons
These items will help mimic a winter landscape, setting the stage for a magical scene that kids can be proud of.
Selecting a theme for the diorama can enhance creativity. Kids can choose from themes like a snowy forest, a cozy cabin, or a bustling winter village. For instance, a snowy forest might include tiny animals peeking out from behind trees, while a cozy cabin can have a warm glow from the windows made with yellow paper. The possibilities are endless, and the theme can significantly influence how they express their creativity.
Details like miniature trees, snowmen, and animals can bring the diorama to life. Encourage children to add personal touches, such as their favorite characters or elements from their own winter experiences. This could be anything from a snowball fight to a family sledding day. The more details they add, the more unique their creation will become, making it a special piece that tells their story.
Providing clear, step-by-step instructions can help kids navigate the diorama-making process. Here’s a simple approach to guide them:
- Start by selecting a theme and gathering materials.
- Use the shoebox as the base for the diorama.
- Cover the base with cotton balls to represent snow.
- Arrange the figurines and other elements according to the chosen theme.
- Glue everything down and add any final touches, like drawing a snowy sky on the lid.
This guidance will empower them to take ownership of their creations, fostering a sense of accomplishment and pride in their work.
Making snow globes is a delightful craft that combines art and science. Kids can create their own magical scenes encapsulated in glass, perfect for holiday gifts or home decor.
Deciding on a scene for the snow globe is the first step. Children can choose anything from winter animals to festive holiday themes, allowing for personal expression. Whether it’s a playful penguin or a serene winter cabin, the scene they choose will reflect their personality and creativity.
Assembling the globe involves careful steps, including sealing the contents and ensuring a watertight fit. This process teaches kids about craftsmanship and patience. It’s not just about creating something pretty; it’s about learning how to make it functional, too!
Q: What age group is suitable for these crafts?
A: These crafts are ideal for children aged 5 and up, but younger kids can also participate with adult supervision.
Q: How long do these activities take?
A: Most crafts can be completed in 1-2 hours, depending on the complexity and the child’s attention span.
Q: Can these crafts be adapted for different seasons?
A: Absolutely! While these crafts focus on winter, the concepts can be adapted for any season by changing the materials and themes.
Materials Needed
Discover fun and engaging winter crafts that can transform a chilly day indoors into a creative snow day experience for kids. These activities are perfect for sparking imagination and keeping little hands busy.
Creating beautiful snowflake designs is a fantastic way for kids to explore symmetry and creativity. Using paper, scissors, and glitter, they can make unique decorations to brighten up any room.
Building a winter wonderland diorama allows children to express their artistic vision. They can use materials like cotton balls, cardboard, and figurines to create a snowy scene that tells a story.
Gathering the right materials is essential for a successful diorama. Think of this as collecting the ingredients for a delicious recipe—each item plays a crucial role in bringing your winter scene to life. Common items include:
- Shoeboxes: These will serve as the base for your diorama, providing a perfect canvas for your snowy landscape.
- Construction Paper: Use this to create the backdrop and ground cover, giving your diorama depth and color.
- Cotton Balls: These can mimic snow, adding that fluffy, wintery touch that makes everything feel cozy.
- Figurines: Small toys or figurines can represent animals, people, or even holiday characters, making your scene come alive.
- Glue and Scissors: Essential tools for assembling your masterpiece!
Additionally, you might want to include some decorative items like glitter, sequins, or even small twigs to enhance the wintery feel. It’s like adding sprinkles to a cupcake—just a little can go a long way!
Selecting a theme for the diorama can enhance creativity. Kids can choose from themes like a snowy forest, a cozy cabin, or a bustling winter village. This choice not only makes the project more personal but also allows kids to explore different narratives and settings, like crafting a storybook with their hands.
Details like miniature trees, snowmen, and animals can bring the diorama to life. Encouraging children to add personal touches will make their project even more special. It’s these little elements that transform a simple scene into a vivid story, capturing the essence of winter magic.
Providing clear, step-by-step instructions can help kids navigate the diorama-making process. This guidance will empower them to take ownership of their creations.
Making snow globes is a delightful craft that combines art and science. Kids can create their own magical scenes encapsulated in glass, perfect for holiday gifts or home decor.
Deciding on a scene for the snow globe is the first step. Children can choose anything from winter animals to festive holiday themes, allowing for personal expression.
Assembling the globe involves careful steps, including sealing the contents and ensuring a watertight fit. This process teaches kids about craftsmanship and patience.
Q: What age group is suitable for these crafts?
A: These crafts are perfect for kids aged 5 and up, with adult supervision for younger children, especially when using scissors or glue.
Q: How long do these projects take?
A: Depending on the complexity, each craft can take anywhere from 1 to 3 hours, making them a great way to spend an afternoon indoors.
Q: Can we use recycled materials?
A: Absolutely! Using recycled materials not only saves money but also encourages creativity and environmental awareness.
Q: Are these crafts safe for young children?
A: Yes, as long as they are supervised, and age-appropriate materials are used. Always check for small parts that could pose a choking hazard.
Choosing a Theme
When it comes to creating a winter wonderland diorama, choosing the right theme can be the magic touch that sparks creativity and excitement in your kids. A well-thought-out theme not only provides a direction for the project but also allows children to express their unique personalities and interests. Imagine the joy on their faces as they dive into a world of imagination, transforming ordinary materials into a breathtaking winter scene!
Here are some popular themes that can inspire your little artists:
- Snowy Forest: Picture tall, majestic trees blanketed in snow, with woodland creatures peeking through the branches. This theme offers endless opportunities for creativity, from crafting tiny animals to creating a forest floor covered in fluffy cotton.
- Cozy Cabin: A warm, inviting cabin nestled in the snow can evoke feelings of comfort and nostalgia. Kids can make miniature cabins out of cardboard, complete with smoke curling from the chimney, and add details like a glowing window or a path lined with snow.
- Bustling Winter Village: This theme allows children to create a lively scene filled with activity. They can design shops, houses, and even a town square where snowmen gather. The possibilities are as vast as their imagination!
Encouraging your kids to brainstorm and choose a theme that resonates with them will make the diorama-building process even more enjoyable. Ask them questions like, “What’s your favorite winter activity?” or “Do you have a favorite winter story?” This can lead them to a theme that not only excites them but also tells a story they want to share.
Remember, the theme sets the stage for the entire project, so it's worth spending some time discussing and deciding on it together. By allowing your children to take the lead in choosing a theme, you’re not only fostering their creativity but also giving them a sense of ownership over their work. This collaborative process can be a wonderful bonding experience, turning a simple craft into a cherished memory.

Adding Details
When it comes to creating a winter wonderland diorama, the magic truly lies in the details. Think of your diorama as a storybook waiting to be filled with vibrant characters and enchanting settings. Each little addition can spark imagination and take the scene from ordinary to extraordinary. For instance, you might want to include miniature trees made from green construction paper or even real twigs, giving your landscape that authentic touch of nature. Adding snowmen crafted from cotton balls or marshmallows can bring a playful element to your snowy scene, while animals like penguins, bears, or rabbits can add a whimsical charm.
Don't forget about the backdrop! A simple piece of blue or gray construction paper can serve as a stunning sky, while white paper can mimic fluffy clouds. You can even sprinkle a little glitter on top to add a magical sparkle reminiscent of a snowy day. Encourage the children to think outside the box; perhaps they want to create a cozy cabin nestled in the woods. They can use small cardboard pieces to build it or even repurpose an old matchbox. The possibilities are endless!
To take it a step further, consider incorporating interactive elements. For example, if your child is making a bustling winter village, they might want to add small figures that can be moved around. This not only makes the diorama more engaging but also allows for storytelling during playtime. Encourage them to personalize their creations by adding family photos or drawings that represent their own winter memories. This personal touch will make the diorama not just a craft project, but a cherished keepsake.
In summary, the details in a winter wonderland diorama are what truly bring it to life. By incorporating various materials and encouraging creativity, you can help children create a masterpiece that reflects their imagination and personality. So, gather those supplies, unleash your creativity, and watch as your little ones transform their diorama into a breathtaking winter scene!
Here are some common questions parents might have when engaging in winter crafts with their kids:
- What age group is suitable for these crafts? Most of these activities are great for children aged 5 and up, but younger kids can also participate with adult supervision.
- How long do these crafts typically take? Depending on the complexity, each craft can take anywhere from 30 minutes to a couple of hours.
- Do I need special supplies? Most materials can be found around the house or at a local craft store, making these projects both fun and affordable!
- Can these crafts be done alone? While kids can work independently, it's often more enjoyable to craft together as a family!
Step-by-Step Instructions
Creating a winter wonderland diorama is not only a fun activity but also a fantastic way for kids to learn about planning and creativity. To make the process as smooth as possible, let's break it down into manageable steps. First, gather all the necessary materials. You’ll need a shoebox, construction paper, scissors, glue, and any decorative items you want to include, such as cotton balls for snow, miniature figurines, and glitter for that extra sparkle.
Once you have everything ready, start by choosing a theme for your diorama. This could be a snowy forest, a cozy cabin, or even a bustling winter village. Encourage the kids to think about what they want to depict and how they can tell a story with their scene. For example, if they choose a snowy forest, they might want to include trees, animals, and perhaps a little snowman peeking out from behind a tree.
Next, it’s time to create the base of the diorama. Take the shoebox and turn it upside down. This will serve as your landscape. You can cover the inside with blue or green construction paper to represent the ground or sky. If you’re going for a snowy scene, white paper or cotton balls can mimic the snow beautifully. Once the base is set, start placing your elements inside the box. This is where the fun really begins!
As you arrange the elements, remind the kids to think about depth and layering. For instance, placing larger items at the back and smaller ones in the front creates a more realistic scene. They can use glue to secure everything in place. To add even more detail, consider using small twigs for trees or making little snowmen out of marshmallows. The more personal touches they add, the more unique their diorama will be.
After the main elements are in place, it’s time to add finishing touches. This might include sprinkling glitter to simulate falling snow or adding a tiny signpost that says “Welcome to Winter Wonderland.” Encourage the kids to step back and take a look at their creation. This is a great moment for them to evaluate their work and make any adjustments they feel are necessary.
Finally, once everything is dry and secured, find a special spot to display the diorama. You might even want to hold a mini-exhibition at home where everyone can admire the creations. This project not only fosters creativity but also gives children a sense of accomplishment and pride in their work.
Q: What age group is this craft suitable for?
A: This diorama craft is perfect for children aged 5 and up. Younger kids may need assistance with cutting and gluing, while older kids can take the lead on their projects.
Q: Can we use recycled materials for the diorama?
A: Absolutely! Recycled materials like old cardboard, bottle caps, and even fabric scraps can add unique elements to the diorama and make it even more special.
Q: How long does this project usually take?
A: Depending on the complexity of the diorama, it can take anywhere from 1 to 3 hours. It’s a great way to spend an afternoon indoors!
Q: What if my child wants to create a different season instead?
A: Feel free to adapt the project! The same materials and techniques can be used to create dioramas for spring, summer, or fall. Just change the theme and colors to match the desired season.
DIY Snow Globes
Making snow globes is not just a fun craft; it’s a delightful blend of art and science that can captivate children’s imaginations. Imagine shaking a globe and watching the magical snow swirl around a charming scene! This activity is perfect for those chilly winter days when the snow is falling outside, but the warmth of creativity is blossoming indoors. Kids will love the chance to create their own little worlds, and the best part? They can personalize them to reflect their unique styles and interests.
The first step in crafting a snow globe is choosing your scene. This is where the fun really begins! Children can let their imaginations run wild. Do they want a serene winter landscape with a snowman? Or perhaps a bustling holiday market? The options are endless! Here are some ideas to spark their creativity:
- A cozy cabin surrounded by trees
- Winter animals like penguins or polar bears
- A festive holiday scene with Santa and his sleigh
Once the scene is selected, it’s time to gather the materials. Here’s a basic list of what you’ll need:
| Materials | Description |
|---|---|
| Glass jar | A clear jar with a lid, such as a mason jar. |
| Figurines | Small toys or decorations that fit the chosen theme. |
| Water | To fill the jar and create the snow globe effect. |
| Glitter or fake snow | To mimic the snow falling inside the globe. |
| Glue | To secure the figurines to the jar lid. |
With all the materials gathered, it's time to assemble the globe! Start by gluing the chosen figurines to the inside of the jar lid. Once the glue is dry, fill the jar with water, leaving a little space at the top. Add a generous sprinkle of glitter or fake snow, and then carefully screw the lid back on. Make sure it’s tight to avoid any leaks! This step is crucial, as it teaches kids about craftsmanship and the importance of patience. They’ll learn that good things take time and careful effort.
Finally, let the kids give their snow globes a good shake, and watch as the snow dances around their miniature world. This craft isn’t just about creating something beautiful; it’s about the joy of making and the stories behind each creation. Each snow globe will hold a special memory, making them perfect gifts for family and friends during the holiday season.
As a bonus, encourage the kids to write a little story or description about their snow globe. What’s happening in their scene? Who are the characters? This not only enhances their creativity but also boosts their writing skills. Plus, it gives them a chance to share their imaginative worlds with others!
Q: What if I don’t have a glass jar?
A: You can use any clear container with a lid, such as a plastic jar or even a small bowl covered with plastic wrap.
Q: Can I use real water instead of fake snow?
A: Yes, but be cautious! Real water can leak if the jar isn’t sealed properly, and it may not create the same magical effect as glitter or fake snow.
Q: How do I clean up if there’s a mess?
A: Glitter can be tricky to clean, so it’s best to work on a large tray or newspaper. Use a damp cloth to gather any stray pieces.
Choosing Your Scene
Discover fun and engaging winter crafts that can transform a chilly day indoors into a creative snow day experience for kids. These activities are perfect for sparking imagination and keeping little hands busy.
Creating beautiful snowflake designs is a fantastic way for kids to explore symmetry and creativity. Using paper, scissors, and glitter, they can make unique decorations to brighten up any room.
Building a winter wonderland diorama allows children to express their artistic vision. They can use materials like cotton balls, cardboard, and figurines to create a snowy scene that tells a story.
Gathering the right materials is essential for a successful diorama. Common items include shoeboxes, construction paper, and various craft supplies that can mimic a winter landscape.
Selecting a theme for the diorama can enhance creativity. Kids can choose from themes like a snowy forest, a cozy cabin, or a bustling winter village.
Details like miniature trees, snowmen, and animals can bring the diorama to life. Encouraging children to add personal touches will make their project even more special.
Providing clear, step-by-step instructions can help kids navigate the diorama-making process. This guidance will empower them to take ownership of their creations.
Making snow globes is a delightful craft that combines art and science. Kids can create their own magical scenes encapsulated in glass, perfect for holiday gifts or home decor.
Deciding on a scene for the snow globe is the first step in this enchanting craft. Children have the freedom to choose from a wide range of themes, allowing for personal expression and creativity. For instance, they might opt for a tranquil winter landscape featuring adorable animals, or perhaps a festive holiday scene with a jolly snowman and twinkling lights. The possibilities are endless!
Encouraging kids to think about their favorite winter memories can help spark ideas. They could recreate a scene from a beloved winter story or even a moment from their own lives, like a family trip to the snow. Here are some captivating scene ideas that might inspire them:
- A bustling winter village with tiny houses and people.
- A serene forest with deer and snow-covered trees.
- A cozy cabin with smoke curling from the chimney.
By allowing children to choose their scenes, we not only foster their creativity but also give them a chance to tell a story through their art. Each snow globe can become a unique masterpiece that reflects their personality and interests. Plus, it’s a wonderful opportunity for them to practice storytelling as they explain their scene to family and friends!
Assembling the globe involves careful steps, including sealing the contents and ensuring a watertight fit. This process teaches kids about craftsmanship and patience.
Q: What materials do I need for making snow globes?
A: You'll need a jar with a lid, water, glitter, and small figurines or decorations. Optional materials include glycerin for a more magical effect and glue to secure the decorations.
Q: Can I use any type of jar for the snow globe?
A: Yes, any jar with a tight-sealing lid will work! Just make sure it's clean and dry before you start assembling your snow globe.
Q: How can I make my diorama more realistic?
A: Adding details like miniature animals, trees, and even fairy lights can enhance the realism of your diorama. Encourage kids to think about textures and colors that represent winter.
Q: Is it safe for young children to use scissors and glue?
A: Always supervise young children during craft activities, especially when using scissors or glue. Consider using safety scissors and child-friendly glue for added safety.

Assembling the Globe
Assembling your DIY snow globe is where the magic truly happens! This process is not just about putting pieces together; it's about creating a tiny world that captures the imagination. First, gather all the materials you'll need: a clean glass jar with a lid, distilled water, glycerin (to help the "snow" fall slowly), glitter or artificial snow, and your chosen figurines. The combination of these elements is what makes your snow globe a delightful piece of art.
Start by placing your figurine at the bottom of the jar. You can use glue to secure it, ensuring it stays in place when you shake your globe later. Once the figurine is set, it's time to add the glitter or artificial snow. This is where your creativity can really shine! You can mix different colors of glitter to create a magical effect. Just remember, a little goes a long way, so sprinkle sparingly.
Next, fill the jar with distilled water, leaving about half an inch of space at the top. This is crucial because it prevents overflow when you screw on the lid. Adding a few drops of glycerin will give your snow a beautiful, slow-falling effect, mimicking the look of real snowflakes drifting through the air. It’s like giving your snow globe a wintery personality!
Once you’ve added the water and glycerin, it’s time to seal the deal. Carefully screw the lid onto the jar, making sure it’s tight. If you want to ensure it’s waterproof, you can apply a bit of glue around the edge of the lid before sealing it. This will help prevent any leaks and keep your creation intact for years to come.
Finally, give it a good shake! Watch as the glitter swirls around, creating a mesmerizing winter scene. This moment is not just about seeing the result; it’s about experiencing the joy of creation. Each time you shake it, you’ll be reminded of the fun you had assembling it. And remember, the best part of making snow globes is that no two are ever the same. Each child’s creation will be uniquely theirs, filled with their personality and imagination.
- Can I use tap water instead of distilled water? While tap water can work, distilled water is recommended as it helps prevent cloudiness over time.
- What type of glue should I use for the figurines? A strong adhesive like hot glue or epoxy is best, as it will hold the figurines securely in place.
- How can I make the snow fall more slowly? Adding glycerin to the water will slow down the descent of the glitter or artificial snow, creating a more magical effect.
- Can I use real snow or ice in my snow globe? It’s best to stick with artificial snow or glitter, as real snow or ice will melt and create a mess.
Frequently Asked Questions
- What materials do I need for snowflake art?
For snowflake art, you’ll need some basic supplies like paper, scissors, and glitter. You can also use colored pencils or markers to add some extra flair to your creations. The beauty of this craft is that you can let your imagination run wild!
- How do I create a winter wonderland diorama?
To create a winter wonderland diorama, start by gathering materials such as a shoebox, construction paper, and cotton balls. Choose a theme, like a snowy forest or a cozy cabin, and then begin assembling your scene. Don’t forget to add details like miniature trees and snowmen to make it come alive!
- What’s the best way to choose a scene for a DIY snow globe?
When choosing a scene for your DIY snow globe, think about what makes you happy! You can pick anything from cute winter animals to festive holiday themes. The goal is to create something that reflects your personality and brings a smile to your face!
- Are there any safety tips I should keep in mind while crafting?
Absolutely! Always supervise younger children when using scissors or other sharp tools. Make sure to use non-toxic materials, especially for crafts like snow globes where kids might be handling glue and water. Safety first makes crafting fun and worry-free!
- Can these crafts be adapted for different age groups?
Definitely! Many of these crafts can be simplified or made more complex depending on the age of the children involved. For younger kids, you can pre-cut materials, while older kids can handle more intricate designs. It’s all about finding the right balance!


