Making a Wooden Serving Tray: A DIY Guide
Crafting your own wooden serving tray is not just a fun weekend project; it's an opportunity to create something that reflects your personal style while also being functional. Whether you're a beginner dipping your toes into the world of DIY or a seasoned enthusiast looking for a new challenge, this guide will walk you through every step of the process. From selecting the right materials to the finishing touches that will make your tray stand out, you’ll find everything you need to know right here. So, grab your tools, and let’s dive into the beautiful world of woodworking!
When it comes to making a wooden serving tray, the type of wood you choose is crucial. Not only does it affect the durability of your tray, but it also plays a significant role in its aesthetic appeal. Hardwoods like oak, maple, and cherry are popular choices due to their strength and beautiful grain patterns. On the other hand, softwoods such as pine or cedar can be easier to work with, especially for beginners, but may not hold up as well over time. Consider the following factors when selecting your wood:
- Durability: Hardwoods are generally more durable than softwoods.
- Grain Pattern: Choose a wood type that complements your style.
- Weight: Consider how heavy you want your tray to be.
Ultimately, the right wood for your tray will depend on your personal preferences and the intended use of the tray. Make sure to visit your local lumberyard or home improvement store to see the options available. You might be surprised by how much variety there is!
Before you start your woodworking adventure, it’s essential to gather the right tools. Having the proper equipment not only makes your job easier but also ensures that the final product is of high quality. Here’s a list of the essential tools you’ll need for crafting your wooden serving tray:
- Saw: A circular saw or a jigsaw will help you make precise cuts.
- Drill: Useful for making pilot holes and adding screws.
- Sandpaper: To smooth out any rough edges and prepare for finishing.
- Clamps: Essential for holding pieces together while the glue dries.
- Safety Gear: Always wear safety goggles and a dust mask to protect yourself.
These tools will set you up for success, whether you’re cutting, drilling, or sanding. While it may seem like a lot at first, investing in quality tools will pay off in the long run, making your projects easier and more enjoyable.
When embarking on a DIY project, you’ll often find yourself choosing between hand tools and power tools. Each has its own set of advantages and disadvantages, and understanding these can help you make the best choice for your wooden serving tray.
Hand tools are often praised for their precision and control. They allow for intricate work and finer details, which can be particularly beneficial when crafting a serving tray with unique designs. Additionally, hand tools tend to be more affordable and portable, making them a great option for those just starting out. Imagine the satisfaction of creating something beautiful with just your hands and a few simple tools!
On the flip side, power tools can significantly speed up the crafting process. If you're working on larger cuts or more labor-intensive tasks, power tools like circular saws and drills can save you a lot of time and effort. They can also provide more consistent results, which is essential for ensuring that your tray looks professional. Think of it this way: if you're baking a cake, using a mixer is much faster than whisking by hand!
Safety should always be your top priority when working with tools. Here are some vital safety tips to ensure a secure and enjoyable woodworking experience:
- Always wear protective eyewear to shield your eyes from sawdust and debris.
- Use ear protection if you’re working with loud power tools.
- Keep your workspace tidy to avoid accidents.
- Make sure to read the instructions for each tool before use.
By following these safety precautions, you can focus on your project without worrying about potential hazards. Remember, a safe workspace is a happy workspace!
Q: What type of wood is best for a serving tray?
A: Hardwoods like oak, maple, and cherry are ideal for durability and aesthetics, but softwoods like pine can work as well for lighter projects.
Q: Do I need power tools to make a serving tray?
A: No, you can use hand tools, but power tools can make the process quicker and more efficient.
Q: How can I personalize my serving tray?
A: You can add engravings, choose unique colors, or apply different finishes to make your tray truly yours.
Q: How do I maintain my wooden serving tray?
A: Regular cleaning with a damp cloth and occasional oiling will help maintain its appearance and longevity.

Choosing the Right Wood
When it comes to crafting a wooden serving tray, is not just a matter of aesthetics; it’s also about durability and functionality. The type of wood you select will influence the overall look, feel, and longevity of your tray. So, how do you sift through the myriad of options available? Let's break it down!
First off, you have to consider the characteristics of different woods. Hardwoods like oak, maple, and cherry are popular choices for serving trays due to their strength and resistance to wear. They can withstand the rigors of daily use while maintaining their beauty. On the other hand, softwoods like pine and cedar offer a more rustic charm but may not stand up as well to heavy usage. If you’re aiming for a tray that will see a lot of action, hardwoods are generally your best bet.
Next, think about the finish you desire. Different woods take stains and finishes differently. For instance, oak has a pronounced grain that looks stunning with a dark stain, while maple is more subtle and may require a lighter finish to enhance its natural beauty. If you’re uncertain, consider testing a small piece of wood with the stain you plan to use to see how it reacts.
Also, don’t forget about sustainability! Opting for reclaimed or sustainably sourced wood not only helps the environment but also adds a unique story to your tray. Imagine serving snacks on a tray made from reclaimed barn wood; it’s a conversation starter in itself!
To help you make an informed decision, here’s a quick comparison table of some popular wood types for serving trays:
| Wood Type | Durability | Grain Pattern | Best Finish |
|---|---|---|---|
| Oak | High | Prominent | Dark Stain |
| Maple | High | Subtle | Light Stain |
| Cherry | Medium | Fine | Clear Coat |
| Pine | Low | Distinct | Natural Finish |
| Cedar | Medium | Wavy | Natural Finish |
Ultimately, the best wood for your serving tray will depend on your personal style, how you plan to use the tray, and the finish you envision. So take your time, explore your options, and choose a wood that resonates with you. After all, crafting a beautiful wooden serving tray is not just about the end product; it’s about the joy of creating something uniquely yours!
- What is the best wood for a serving tray? Hardwoods like oak and maple are excellent choices for durability and aesthetics.
- Can I use softwood for a serving tray? Yes, but softwoods like pine may not be as durable for everyday use.
- How do I choose a finish for my wooden tray? It depends on the wood type; always test a small area first!
- Is reclaimed wood a good option? Absolutely! It’s sustainable and adds character to your project.
Essential Tools for the Project
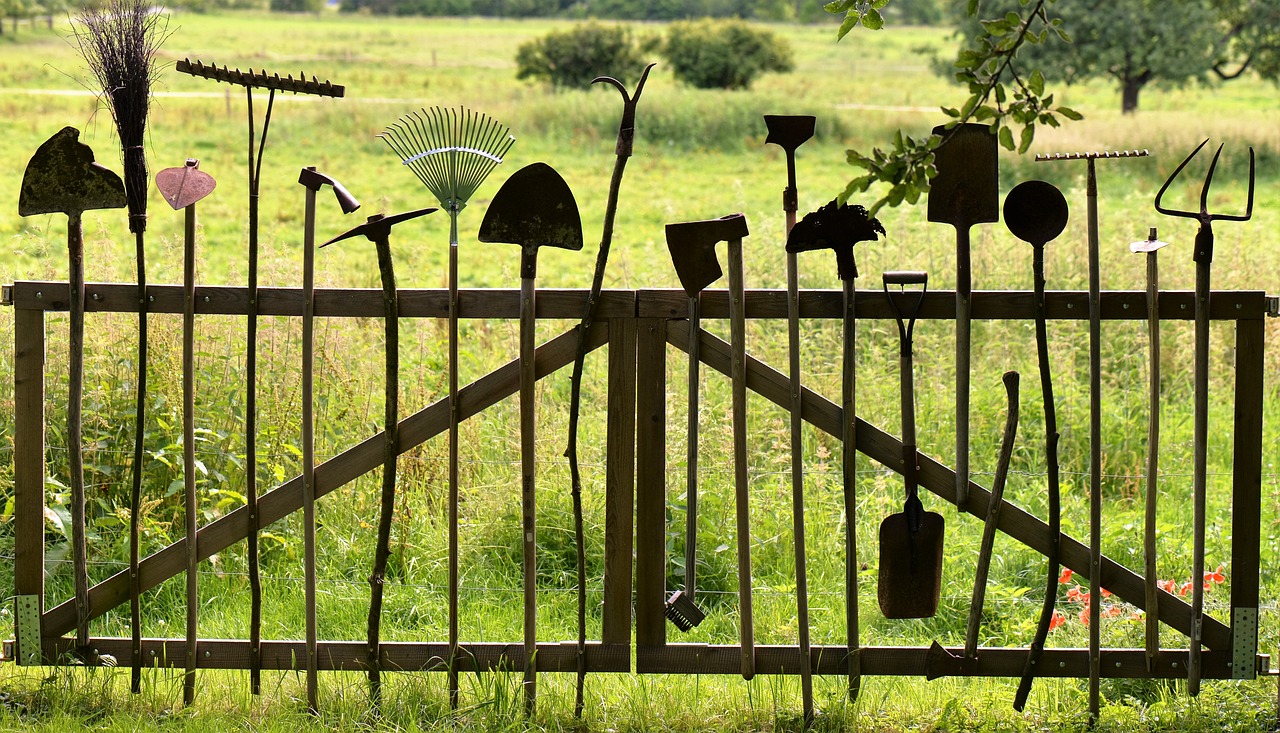
When it comes to crafting your very own wooden serving tray, having the right tools is like having a trusty map on a treasure hunt—it guides you to your destination with ease and precision. Whether you’re a seasoned DIY enthusiast or just dipping your toes into the world of woodworking, understanding the essential tools for this project will set you up for success. Let’s dive into the must-have tools that will make your crafting experience smooth and enjoyable!
First and foremost, you’ll need a measuring tape and a square. These tools are critical for ensuring that your cuts are accurate and that your tray has the right dimensions. Imagine trying to bake a cake without measuring the ingredients—chaos, right? The same principle applies here. A measuring tape helps you mark out your wood precisely, while a square ensures that your corners are perfectly aligned, resulting in a professional-looking tray.
Next on the list is a saw. Depending on your comfort level and the tools you have access to, you can choose between a hand saw or a power saw. A hand saw offers a more traditional approach, giving you control over each cut, while a power saw can make quick work of larger pieces of wood. If you’re leaning towards the latter, consider using a circular saw for straight cuts or a jigsaw for more intricate shapes. Just remember, with great power comes great responsibility—always prioritize safety!
Now, let’s talk about drills. A drill is essential for creating holes for screws or dowels, providing the necessary strength to hold your tray together. If you want to take it a step further, a drill/driver combo will allow you to both drill and drive screws, making your assembly process seamless. For those who prefer an even more straightforward approach, a wood glue can be a great alternative for joining pieces, although it’s always wise to use it in conjunction with screws for added durability.
Safety should never take a backseat, so don’t forget to equip yourself with personal protective equipment (PPE). Safety glasses, dust masks, and hearing protection are essential when operating power tools. Think of it as your superhero gear—without it, you’re vulnerable to potential hazards. Always prioritize your safety to ensure a fun and productive woodworking session!
Now, let’s summarize the essential tools you’ll need for your wooden serving tray project:
| Tool | Purpose |
|---|---|
| Measuring Tape | For accurate measurements and markings |
| Square | To ensure corners are perfectly aligned |
| Saw (Hand or Power) | For cutting wood to size |
| Drill | For creating holes for screws or dowels |
| Wood Glue | For joining pieces together |
| Personal Protective Equipment (PPE) | To ensure safety while working |
With these tools in your arsenal, you’re ready to embark on your woodworking adventure. Remember, the journey of crafting your wooden serving tray is just as rewarding as the final product itself. So, gather your tools, put on your safety gear, and let your creativity flow!
Q: Do I need expensive tools to make a wooden serving tray?
A: Not necessarily! While high-quality tools can make the job easier, many projects can be completed with basic hand tools. Start with what you have and upgrade as you gain experience.
Q: How long will it take to make a wooden serving tray?
A: The time it takes can vary based on your skill level and the complexity of your design. Generally, you can expect to spend a few hours to a full day on the project.
Q: Can I customize my wooden serving tray?
A: Absolutely! Personal touches like engravings, colors, and unique finishes can make your tray one-of-a-kind. Get creative!

Hand Tools vs. Power Tools
When it comes to crafting your wooden serving tray, a key decision you'll face is whether to use hand tools or power tools. Each type of tool has its own unique set of advantages and disadvantages, which can significantly impact your project. Let’s break it down!
Hand tools are the traditional choice for many woodworkers. They offer a level of precision and control that can be hard to replicate with power tools. With hand tools, you can feel the wood and make minute adjustments as you work, which is especially beneficial for intricate designs. For example, using a hand saw allows you to follow the grain of the wood closely, resulting in cleaner cuts. Additionally, hand tools are generally more affordable and require less maintenance. However, they do demand a bit more physical effort and time, which can be a drawback if you're on a tight schedule.
On the other hand, power tools can be a game changer, particularly for larger projects or when you need to make repetitive cuts. Tools like circular saws and routers can speed up the process dramatically, allowing you to complete your tray in a fraction of the time it would take with hand tools. They also reduce the physical strain on your body, making them a popular choice for many DIY enthusiasts. However, the downside is that power tools can sometimes be less forgiving, requiring a bit of practice to master. Plus, they tend to be more expensive and require careful handling to ensure safety.
To help you decide, here’s a quick comparison:
| Feature | Hand Tools | Power Tools |
|---|---|---|
| Cost | Generally lower | Higher initial investment |
| Precision | High | Variable |
| Speed | Slower | Faster |
| Physical Effort | More required | Less required |
| Maintenance | Less maintenance | Regular maintenance needed |
Ultimately, the choice between hand tools and power tools comes down to your personal preferences and the specific requirements of your project. If you enjoy the artistry of woodworking and have the time to dedicate, hand tools could be your best friend. However, if you’re looking to save time and effort, power tools might be the way to go. Whichever you choose, make sure to prioritize safety and practice your skills to achieve the best results!
Q: Can I use both hand and power tools for my project?
A: Absolutely! Many woodworkers find that a combination of both types of tools allows them to achieve the best results, leveraging the strengths of each.
Q: Are hand tools more suitable for beginners?
A: While hand tools can be easier to control for beginners, power tools can also be user-friendly with the right guidance. It really depends on your comfort level and the complexity of the project.
Q: What safety precautions should I take when using power tools?
A: Always wear safety goggles, use ear protection, and ensure your work area is clear of distractions. Familiarize yourself with the tool's manual and practice safe handling techniques.

Benefits of Hand Tools
When it comes to crafting a wooden serving tray, hand tools can be your best friend. While power tools have their place, there’s something uniquely satisfying about using hand tools that can elevate your woodworking experience. For starters, hand tools offer a level of precision and control that power tools simply can't match. Imagine carefully chiseling away at a piece of wood, feeling the texture beneath your fingers as you shape it into something beautiful. This tactile connection can make your project feel more personal and rewarding.
Another significant advantage of hand tools is their portability. You can easily take them anywhere without needing to worry about power sources or heavy equipment. This means you can work on your tray project in the comfort of your living room, out in the garden, or wherever inspiration strikes. Plus, hand tools are typically less expensive than their power counterparts, making them a great option for beginners who may not want to invest heavily right away.
Hand tools also promote a deeper understanding of woodworking techniques. As you manipulate the wood with your hands, you learn to appreciate the grain, the weight, and the behavior of the material. This knowledge can prove invaluable as you progress in your woodworking journey. Moreover, using hand tools can be a quieter experience, allowing you to immerse yourself in the rhythm of your work without the noise of a power saw buzzing in the background.
Lastly, let’s not forget about the environmental impact. Hand tools consume no electricity, making them a more sustainable choice for eco-conscious DIY enthusiasts. You’re not just creating a beautiful serving tray; you’re also making a choice that’s better for the planet. With all these benefits, it’s clear that incorporating hand tools into your woodworking routine can enhance your skills, your project, and even your overall enjoyment of the craft.
- What are the essential hand tools needed for woodworking? Common hand tools include chisels, hand saws, clamps, and sanders. Each tool serves a specific purpose and enhances your ability to work with wood.
- Can beginners use hand tools effectively? Absolutely! Hand tools are often easier to handle for beginners and allow for a more hands-on learning experience.
- Are hand tools more time-consuming than power tools? While they may take longer for certain tasks, the precision and control they offer can lead to a more satisfying final product.
- How do I maintain my hand tools? Regular cleaning, sharpening blades, and proper storage will ensure your hand tools remain in great condition for years to come.
Advantages of Power Tools
When it comes to crafting a wooden serving tray, the choice between hand tools and power tools can significantly influence your project’s outcome. Power tools are often the go-to choice for many DIY enthusiasts, and for good reason! They bring a level of efficiency and speed that hand tools simply can't match. Imagine trying to cut through a thick piece of hardwood with just a hand saw; it can be a real workout! In contrast, a power saw can slice through that wood like butter, saving you time and energy.
One of the most notable advantages of power tools is their ability to handle larger cuts and more labor-intensive tasks with ease. For instance, when you're working on a bigger project or need to cut multiple pieces to the same size, a power miter saw can make quick work of it. This not only speeds up your workflow but also helps maintain consistency across all your cuts, which is crucial for assembly later on.
Moreover, power tools often come equipped with features that enhance precision. Many modern tools have laser guides or built-in measurements, allowing you to achieve a level of accuracy that can be challenging with hand tools. This precision is particularly important when you're assembling your tray, as it ensures that all parts fit together seamlessly, creating a professional-looking finish.
Another advantage is the reduced physical strain on your body. Woodworking can be physically demanding, especially if you're using hand tools for extended periods. Power tools take a lot of the grunt work out of the equation, allowing you to focus on the creative aspects of your project rather than the physical labor. This means you can enjoy the process without feeling completely exhausted by the end of the day.
However, it’s important to remember that while power tools offer many benefits, they do require a certain level of responsibility. Safety precautions are paramount, as these tools can be dangerous if not used properly. Always wear protective gear, such as goggles and ear protection, and ensure you’re familiar with the tool's operation before you start. With the right approach, power tools can be a fantastic asset in your woodworking arsenal!
In summary, the advantages of using power tools in your wooden serving tray project include:
- Speed and efficiency: Get your cuts done in no time.
- Precision: Achieve accurate cuts effortlessly.
- Less physical strain: Enjoy woodworking without the exhaustion.
So, whether you're a seasoned DIYer or just starting, incorporating power tools into your woodworking projects can elevate your craftsmanship and make the entire process more enjoyable!
Q: Do I need to use power tools to make a wooden serving tray?
A: While power tools can make the process faster and easier, you can still create a beautiful serving tray using hand tools. It just may take more time and effort!
Q: What safety gear should I wear when using power tools?
A: Always wear safety goggles, ear protection, and a dust mask when using power tools to protect yourself from debris and noise.
Q: Can I use recycled wood for my serving tray?
A: Absolutely! Recycled wood can add character to your tray and is an eco-friendly choice.
Safety Precautions
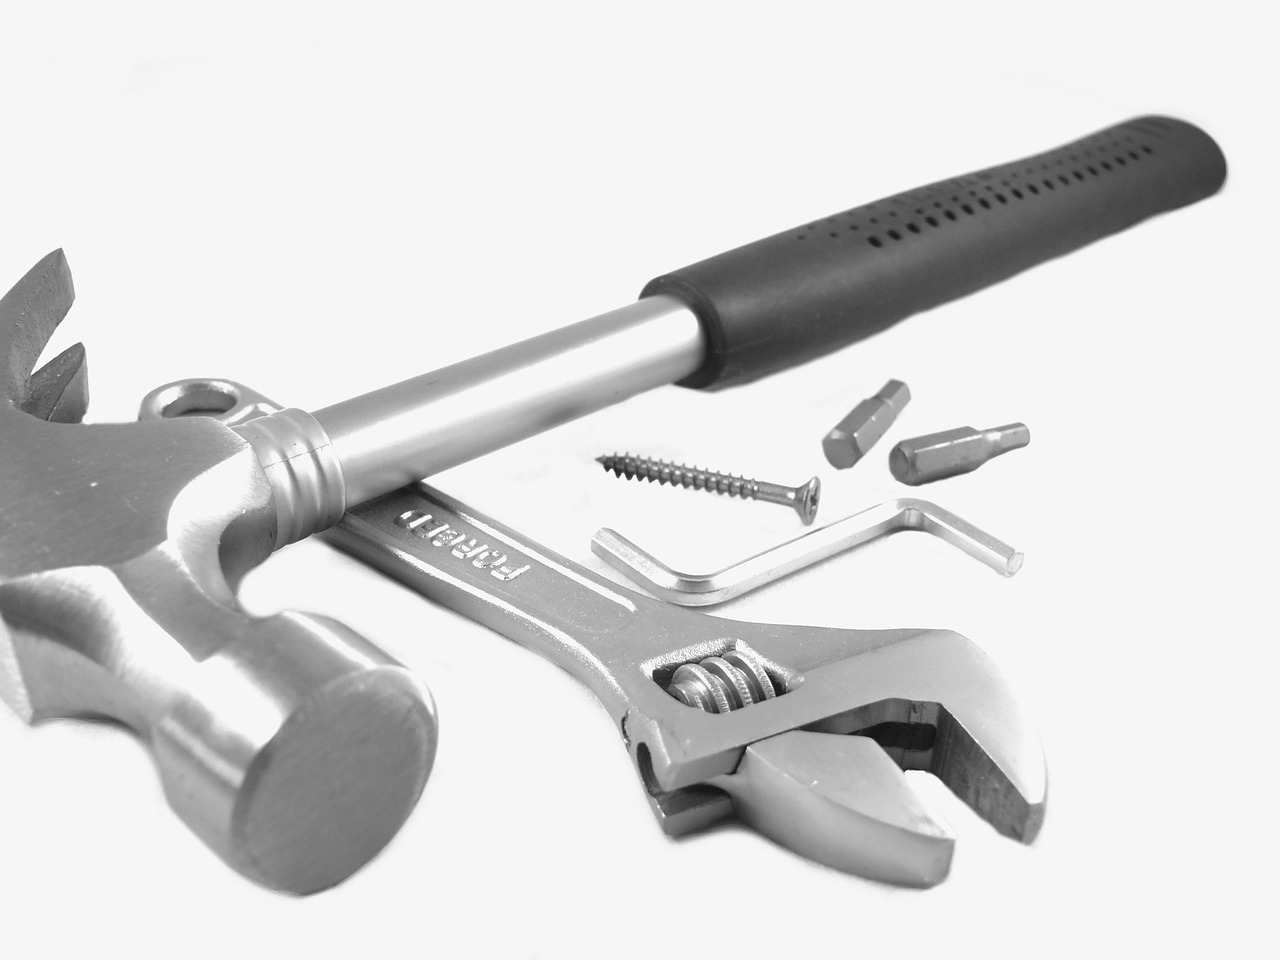
When diving into the world of woodworking, safety should be your top priority. Just like a knight donning armor before heading into battle, you need to equip yourself with the right safety measures to protect against potential hazards. Whether you’re wielding a saw or sanding down a rough edge, accidents can happen in the blink of an eye. So, let’s explore some essential safety precautions that will keep you safe and sound while crafting your beautiful wooden serving tray.
First and foremost, always wear protective gear. This includes safety goggles to shield your eyes from flying debris, ear protection to guard against the loud noises of power tools, and a dust mask to prevent inhaling fine wood particles. It might feel a bit cumbersome at first, but think of it as your personal shield against the woodworking dragons!
Next, keep your workspace organized and free of clutter. A tidy workspace is not just aesthetically pleasing; it’s crucial for safety. Ensure that all tools are stored properly when not in use, and clear away any sawdust or offcuts that could pose a tripping hazard. Imagine trying to navigate a minefield—every step counts, and in woodworking, each step should be safe.
Additionally, familiarize yourself with the tools you’re using. Each tool has its quirks and operating procedures. Before you start, take a moment to read the user manuals or watch tutorial videos. Knowledge is power, and understanding how to operate your tools safely will greatly reduce the risk of accidents.
Another important aspect is to always work in a well-ventilated area. Woodworking can produce harmful fumes and dust, especially when using finishes and adhesives. Open windows, use fans, or invest in an air filtration system to ensure you’re breathing clean air. Think of it as giving your lungs a breath of fresh air—literally!
Lastly, never rush through your project. Woodworking is an art that requires patience and precision. Take your time to measure twice and cut once. Rushing can lead to mistakes, which can result in injuries. Remember, it’s not a race; it’s about creating something beautiful and functional.
By following these safety precautions, you’ll ensure that your woodworking experience is enjoyable and accident-free. Now, let’s move on to the fun part—designing and creating your stunning wooden serving tray!
To wrap up this guide, here are some frequently asked questions that might pop up as you embark on your woodworking journey:
- What type of wood is best for a serving tray? - Hardwoods like oak, maple, or walnut are excellent choices due to their durability and aesthetic appeal.
- Do I need special tools to make a serving tray? - While basic hand tools can suffice, power tools can make the process quicker and easier.
- How do I maintain my wooden serving tray? - Regularly clean it with mild soap and water, and apply mineral oil to keep the wood hydrated.
- Can I customize my tray design? - Absolutely! Personal touches like engravings or painted designs can make your tray unique.
Designing Your Tray
Designing your wooden serving tray is an exciting part of the crafting process, where your creativity can truly shine. Think of it as the canvas before the masterpiece; every decision you make will influence the final look and feel of your tray. Start by sketching out a few ideas on paper. Don’t worry about making it perfect; just let your imagination flow! Consider the dimensions that will best suit your needs. A larger tray might be ideal for hosting gatherings, while a smaller one could be perfect for breakfast in bed. Remember, the size should complement both your lifestyle and the space where it will be used.
Next, consider the style of the tray. Are you leaning towards a modern, minimalist look, or perhaps something more rustic and traditional? The style you choose will not only reflect your personal taste but also how well the tray integrates with your home decor. Popular styles include:
- Modern: Clean lines and simple shapes.
- Rustic: Aged wood and natural finishes.
- Farmhouse: A mix of vintage charm and practicality.
- Bohemian: Colorful patterns and eclectic designs.
As you finalize your design, think about incorporating personal touches. This could be anything from engraving a meaningful quote or your family name to using a unique color palette that resonates with you. Personalization not only enhances the aesthetic appeal but also adds sentimental value to your creation. If you're feeling adventurous, consider adding decorative elements like handles, stencils, or even a splash of paint to make your tray truly one-of-a-kind.
Once you have a clear vision, it’s time to put your ideas into action. Measure and mark your wood accurately, ensuring that all pieces will fit together seamlessly. A well-thought-out design not only enhances the beauty of your tray but also its functionality. For example, if you plan to use your tray for serving drinks, ensure it has raised edges to prevent spills.
In conclusion, designing your wooden serving tray is about blending functionality with creativity. Take your time to explore different styles and personal touches that reflect your personality. After all, this is more than just a serving tray; it's a piece of art that tells your story.
Q: What type of wood is best for a serving tray?
A: Hardwoods like oak, maple, or walnut are excellent choices due to their durability and attractive grain patterns.
Q: Can I use paint on my wooden serving tray?
A: Yes! Just make sure to use food-safe paint and seal it properly to protect the finish.
Q: How can I personalize my tray?
A: You can engrave your initials, add a favorite quote, or use a color scheme that matches your home decor.
Q: What should I do if my tray gets scratched?
A: Light scratches can often be buffed out with fine sandpaper, followed by reapplying the finish to restore its beauty.

Incorporating Personal Touches
When it comes to crafting your own wooden serving tray, adding personal touches can transform a simple project into a cherished piece that reflects your unique style. Think of your serving tray as a canvas; it’s not just a functional item, but also an opportunity to express creativity and individuality. So, how can you make your tray truly yours? Let’s dive into some exciting ideas!
One of the most effective ways to personalize your wooden serving tray is through engraving. Whether it’s your family name, a favorite quote, or a meaningful date, engraving adds a touch of sentimentality that can make the tray a memorable gift or a family heirloom. Many local woodworking shops offer engraving services, or you can invest in a simple engraving tool to do it yourself. Just imagine serving snacks at a gathering and having guests admire the thoughtful detail you’ve added!
Another way to incorporate your style is by experimenting with colors and finishes. You can opt for a classic wood stain that highlights the natural grain of the wood, or you might choose to paint your tray in vibrant colors that match your kitchen decor. If you’re feeling adventurous, consider using a decoupage technique to apply decorative paper or fabric to the surface. This not only adds color but also creates a unique texture that can be a conversation starter.
Don’t forget about the shape and size of your tray! While traditional rectangular trays are popular, you can opt for circular, square, or even custom shapes that suit your personality. Consider the purpose of your tray—will it be used for serving drinks, appetizers, or as a decorative piece? Tailoring the dimensions to fit your needs ensures that your creation is both beautiful and functional.
Finally, think about functional enhancements. Adding handles can not only improve the usability of your tray but also provide another opportunity for personalization. You could choose rustic metal handles, sleek modern ones, or even make your own out of wood. Each choice can significantly impact the overall look and feel of your tray, making it a reflection of your style.
Incorporating personal touches into your wooden serving tray is all about letting your creativity shine. By engraving, painting, choosing unique shapes, and adding functional enhancements, you can craft a tray that is not just a serving dish but a true representation of you. So grab your tools and start thinking outside the box—your perfect serving tray awaits!
- What type of wood is best for a serving tray? Hardwoods like oak, maple, or walnut are excellent choices due to their durability and aesthetic appeal.
- Can I use paint on my wooden tray? Yes! Ensure you use a paint that is suitable for wood and consider sealing it afterward for durability.
- How do I maintain my wooden serving tray? Clean it with a soft cloth and mild soap, and periodically apply a food-safe mineral oil to keep the wood hydrated.
- Is engraving difficult? It can be challenging, but with practice and the right tools, it can also be a fun and rewarding experience!
Choosing a Style
When it comes to crafting your wooden serving tray, choosing the right style is like picking the perfect outfit for a special occasion; it sets the tone and reflects your personality. There are numerous styles to consider, each with its own unique flair. Whether you prefer a modern minimalist look or a rustic farmhouse vibe, the style you choose will dictate not only the aesthetics but also the functionality of your tray.
First off, think about the overall decor of your home. Is it contemporary, traditional, or maybe a bit eclectic? Here are a few popular styles to consider:
- Modern: Clean lines, geometric shapes, and a sleek finish characterize modern trays. They often use lighter woods like birch or maple, which can be left natural or painted in bold colors.
- Rustic: If you love the charm of nature, a rustic tray made from reclaimed wood can add warmth to your space. This style often features a more organic shape and a rougher finish, celebrating the wood's natural imperfections.
- Farmhouse: Combining functionality with a cozy aesthetic, farmhouse trays often have a distressed look, complete with handles for easy carrying. They can be painted in soft pastels or kept natural to accentuate the wood grain.
- Vintage: Vintage trays can evoke nostalgia and charm. You might want to incorporate intricate carvings or decoupage techniques to give your tray a timeless appeal.
Choosing a style shouldn’t just be about looks; think about how you plan to use your tray. Will it serve snacks at a party, display decorative items, or hold your morning coffee? For instance, if you envision using it for serving food, you might want to consider a style that allows for easy cleaning and durability, such as a modern or farmhouse design.
Also, consider how your tray will interact with the other elements in your home. A bold, colorful tray can serve as a statement piece, while a more subdued design can blend seamlessly into your decor. Think about the colors and textures that will complement your existing furnishings. For example, a dark wood tray can create a beautiful contrast against a light table, drawing the eye and adding depth to your space.
Finally, don’t forget to add your personal touch! Whether it’s through a unique finish, a custom engraving, or a splash of color, your tray should reflect your individual style and creativity. After all, the best DIY projects are those that tell a story, and your wooden serving tray can be a beautiful chapter in the narrative of your home.
Q: What type of wood is best for a serving tray?
A: Popular choices include maple for its durability, walnut for its rich color, and pine for its affordability. Ultimately, the best wood depends on your desired style and use.
Q: Can I customize my serving tray?
A: Absolutely! You can personalize your tray with engravings, paint, or by choosing unique hardware for handles.
Q: How do I maintain my wooden serving tray?
A: Regularly clean it with a damp cloth and mild soap. Avoid soaking it in water to prevent warping, and apply mineral oil periodically to keep the wood hydrated.

Assembly Techniques
When it comes to assembling your wooden serving tray, the techniques you choose can make all the difference between a sturdy, functional piece and a flimsy one that falls apart at the first sign of use. The goal here is to ensure that your tray not only looks great but also stands the test of time. There are several methods to join the wood pieces together, and understanding these techniques will help you achieve the best result.
One of the most common methods for assembly is the use of wood glue. This adhesive is incredibly strong and can create a bond that is often stronger than the wood itself. When using glue, it’s essential to apply it evenly across the surfaces that will be joined, ensuring that you clamp the pieces together tightly while the glue sets. It’s a good idea to wipe away any excess glue before it dries, as this can make the finishing process much smoother.
On the other hand, screws provide a mechanical way to hold your tray together. They can offer additional strength and are particularly useful for larger trays or when working with thicker wood. When using screws, pre-drilling holes is crucial to prevent the wood from splitting. Screws also allow for adjustments; if you need to take your tray apart for any reason, it’s as simple as unscrewing the joints. However, keep in mind that visible screw heads can affect the aesthetic appeal, so plan your design accordingly.
In some cases, combining both glue and screws can yield the best results. For instance, you might use glue for the initial bond and then reinforce it with screws for added security. This hybrid approach can give you the benefits of both methods, ensuring that your tray remains intact even under heavy use.
Another technique to consider is using dowels. Doweling involves drilling holes into the edges of the wood pieces and inserting wooden dowels to align and secure them. This method can create a clean look, as the dowels can be hidden within the wood, giving your tray a seamless appearance. However, it does require precise measurements and drilling, so it’s best suited for those with a bit more experience.
Finally, don’t forget about the importance of creating a stable base for your tray. A solid base not only adds to the functionality but also enhances the overall aesthetic. You can achieve this by ensuring that all four corners of the tray are level and securely joined. Consider adding corner brackets or supports if you're working with larger pieces of wood, as this can help distribute weight evenly and prevent sagging over time.
In conclusion, the assembly techniques you choose for your wooden serving tray will greatly influence its durability and functionality. Whether you opt for glue, screws, or a combination of both, make sure to take your time and pay attention to detail. A well-assembled tray not only serves its purpose but also adds a touch of elegance to your home.
- What type of wood is best for a serving tray? - Hardwoods like oak or maple are great choices for durability and aesthetic appeal.
- Can I use only glue for assembly? - Yes, but for larger trays, combining glue with screws can provide extra strength.
- How do I ensure my tray has a stable base? - Make sure all corners are level and consider adding supports if necessary.
- What finishes are best for wooden trays? - Food-safe finishes like mineral oil or polyurethane are ideal for protecting your tray.

Glue vs. Screws
When it comes to assembling your wooden serving tray, one of the most important decisions you'll face is whether to use glue or screws. Each method has its own set of advantages and disadvantages, and understanding these can help you make the best choice for your project.
Glue is often favored for its ability to create a seamless bond between wood pieces. When used correctly, wood glue can be incredibly strong, providing a clean and aesthetically pleasing finish. This is particularly important for projects like serving trays where visible hardware can detract from the overall design. Additionally, glue allows for a bit of flexibility during assembly, as you can reposition the pieces slightly before the glue sets. However, it’s essential to remember that glue requires adequate drying time, which can slow down your project if you're eager to see the final product.
On the other hand, screws offer immediate strength and stability. They are particularly useful for larger or heavier trays that will bear significant weight. Screws can provide a sense of security that glue alone may not, especially in high-use items. However, they do require drilling, which can sometimes lead to visible holes or unsightly hardware. If aesthetics are a concern, you can always countersink the screws and fill the holes with wood filler for a smoother finish. Another consideration is that screws are more forgiving if you need to disassemble the tray for repairs or modifications in the future.
To help you visualize the differences, here’s a quick comparison:
| Feature | Glue | Screws |
|---|---|---|
| Strength | High when cured | Immediate strength |
| Aesthetics | Seamless finish | Visible hardware |
| Flexibility | Adjustable before curing | Fixed once installed |
| Repairability | More difficult to disassemble | Easy to remove and replace |
In conclusion, the choice between glue and screws ultimately depends on your specific project needs. If you prioritize aesthetics and a seamless finish, glue may be your best bet. However, if you’re looking for quick assembly and durability, screws might be the way to go. Many experienced woodworkers even use a combination of both methods—gluing the pieces together and then reinforcing them with screws for added strength. This hybrid approach can give you the best of both worlds, ensuring your wooden serving tray is both beautiful and built to last.
Q: Can I use both glue and screws together?
A: Absolutely! Many DIY enthusiasts use both methods to enhance the strength of their projects. Applying glue first, then using screws can provide a robust and aesthetically pleasing result.
Q: How long does wood glue take to dry?
A: Most wood glues require about 30 minutes to set, but it’s best to wait at least 24 hours for a full cure before putting any weight on your tray.
Q: Are there specific types of glue I should use for wood projects?
A: Yes, PVA (polyvinyl acetate) glue, often referred to as wood glue, is ideal for most woodworking projects. There are also polyurethane glues that provide a stronger bond but can be messier to work with.
Q: Will screws weaken the wood over time?
A: If installed correctly, screws shouldn’t weaken the wood. However, over-tightening can cause the wood to split, so make sure to drill pilot holes and use the right size screws.
Creating a Stable Base
When it comes to crafting a wooden serving tray, one of the most critical aspects you cannot overlook is creating a stable base. Think of it as the foundation of a house; without a solid base, everything else can crumble. A sturdy base not only enhances the functionality of your tray but also ensures that it can withstand the weight of your delicious treats and drinks without wobbling or collapsing. So, how do you go about achieving this? Let’s dive into some essential techniques and tips.
First and foremost, you need to consider the dimensions of your tray. A wider base provides more stability, much like a broad tree trunk supporting its branches. If your design is on the smaller side, consider adding additional support features. For instance, you can incorporate corner supports or use a thicker piece of wood as the base. This will help distribute weight evenly and prevent any tipping. Remember, a well-balanced tray is not only safer but also adds a touch of elegance to your presentation.
Next, let's talk about the materials. Choosing the right wood is essential for durability. Hardwoods like oak or maple are excellent choices because they are dense and can bear significant weight. However, if you're working with softer woods, ensure that you reinforce them adequately. You could use wood glue or screws to secure the joints, creating a more robust structure. Here’s a quick comparison of wood types that can help you decide:
| Wood Type | Durability | Weight Capacity |
|---|---|---|
| Oak | High | Excellent |
| Maple | High | Very Good |
| Pine | Medium | Good |
| Birch | Medium | Good |
Additionally, consider the shape of your tray. A rectangular or square tray generally offers more stability compared to round ones, which can sometimes tip over if not designed properly. If you're set on a circular design, ensure that the base is wide enough to support the sides. Using a thicker rim can also help enhance stability and provide a more substantial feel.
Finally, don't forget about the finishing touches. Sanding the edges and corners not only improves aesthetics but also prevents splinters and enhances grip. A well-sanded base will feel smoother and more comfortable to hold, making it practical for carrying food and drinks. After sanding, apply a suitable finish that will protect the wood and enhance its natural beauty. This will also help in maintaining the integrity of the base over time.
In summary, creating a stable base for your wooden serving tray involves thoughtful consideration of dimensions, materials, and design. By focusing on these aspects, you will not only ensure that your tray is functional but also a beautiful addition to your home. So, roll up your sleeves and get started on crafting a tray that will impress your guests!
- What type of wood is best for a serving tray? Hardwoods like oak and maple are ideal due to their durability and weight capacity.
- How can I ensure my tray is stable? Use a wider base, thicker materials, and proper reinforcement techniques like screws or glue.
- Is it necessary to sand the tray? Yes, sanding is crucial for a smooth finish and to prevent splinters.
- What finish should I use? Choose a food-safe finish that enhances the wood’s appearance while providing protection.
Finishing Touches
Once you've meticulously crafted your wooden serving tray, it’s time to add those all-important finishing touches that elevate it from a simple DIY project to a stunning centerpiece in your home. Finishing is not just about aesthetics; it also plays a crucial role in protecting your tray from wear and tear. So, let’s dive into the best practices for sanding, staining, and sealing your masterpiece.
First things first, sanding is an essential step that should never be overlooked. It smooths out any rough edges and imperfections, ensuring that your tray feels as good as it looks. Start with a coarse sandpaper (around 80-grit) to tackle any major bumps, then gradually work your way up to a finer grit (220-grit) for a silky-smooth finish. Remember, patience is key here! The time you spend sanding will pay off with a beautiful, touchable surface.
Next up is staining. This is where the magic happens! Choosing the right stain can dramatically alter the appearance of your tray, enhancing the wood’s natural grain and color. You can opt for a classic walnut or go bold with a rich mahogany, depending on your style. Apply the stain with a clean cloth or brush, working it into the wood in the direction of the grain. Allow it to sit for a few minutes before wiping off the excess. If you desire a deeper color, you can always apply additional coats. Just be sure to let each coat dry thoroughly before applying the next.
After staining, it’s time to seal your tray. A good sealant protects the wood from moisture, spills, and scratches, ensuring your serving tray remains beautiful for years to come. There are several options for sealants, including polyurethane, varnish, and natural oils. Polyurethane is a popular choice for its durability and water resistance, while natural oils can enhance the wood's beauty without creating a plastic-like finish. When applying the sealant, use a clean brush or cloth, and follow the manufacturer's instructions for the best results. Typically, two to three coats are recommended, with light sanding in between to ensure a smooth finish.
Finally, let's not forget about maintenance. To keep your wooden serving tray looking its best, it’s essential to take proper care of it. Here are a few maintenance tips:
- Clean your tray with a damp cloth immediately after use to prevent stains.
- Avoid soaking it in water or placing it in the dishwasher, as this can warp the wood.
- Reapply the sealant every few years to maintain protection and enhance its appearance.
By paying attention to these finishing touches, you’ll not only create a beautiful wooden serving tray but also ensure that it stands the test of time. Remember, the finish is what brings your project to life, so take your time and enjoy the process!
Q: What type of wood is best for a serving tray?
A: Hardwoods like oak, maple, and walnut are excellent choices due to their durability and aesthetic appeal.
Q: Can I use food-safe finishes on my serving tray?
A: Yes! Look for finishes labeled as food-safe, such as mineral oil or specific food-safe polyurethane products.
Q: How often should I clean my wooden serving tray?
A: Clean it after each use with a damp cloth and mild soap, and avoid soaking it in water.
Q: Is it necessary to sand between coats of finish?
A: Yes, light sanding between coats helps achieve a smoother finish and better adhesion.
Choosing the Right Finish
When it comes to crafting your wooden serving tray, selecting the right finish is like choosing the perfect outfit for a special occasion—it can truly make all the difference! A well-chosen finish not only enhances the natural beauty of the wood but also provides protection against spills, stains, and everyday wear and tear. So, what should you consider when making this important decision? Let's dive into the world of finishes and explore how each type can transform your creation.
First off, you need to think about the functionality of your tray. Will it be used for serving food and drinks, or is it more of a decorative piece? If it's the former, you'll want a finish that is durable and easy to clean. For example, polyurethane is a popular choice for its robust protective qualities, making it ideal for trays that will see regular use. It comes in both oil-based and water-based options, with the latter drying faster and emitting fewer fumes. On the other hand, if your tray is more for show, you might opt for a natural oil finish, like tung or linseed oil, which can enhance the wood's grain without creating a thick film over it.
Another factor to consider is the sheen level. Finishes come in various sheens, from matte to high gloss. A matte finish can give your tray a rustic, understated look, while a glossy finish can add a touch of elegance and sophistication. It's essential to choose a sheen that complements your overall design and the atmosphere of your home. For instance, if your decor is more modern, a high-gloss finish could work wonders, while a matte finish might suit a farmhouse or shabby chic style better.
To help you decide, here’s a quick comparison of some common finishes:
| Finish Type | Durability | Appearance | Ease of Application |
|---|---|---|---|
| Polyurethane | High | Glossy or satin | Moderate |
| Tung Oil | Medium | Natural | Easy |
| Linseed Oil | Medium | Natural | Easy |
| Varnish | High | Glossy | Moderate |
Finally, don't overlook the importance of maintenance. Some finishes require more upkeep than others. For example, while a polyurethane finish is tough and long-lasting, it may need to be reapplied every few years to maintain its protective qualities. On the other hand, oil finishes may need more frequent reapplication but are easier to touch up. So, consider how much time and effort you're willing to invest in maintaining your tray over time.
In summary, choosing the right finish for your wooden serving tray is a blend of personal preference and practical considerations. Think about how you plan to use the tray, the look you want to achieve, and how much maintenance you're willing to commit to. With the right finish, your tray will not only look stunning but also stand the test of time.
- What is the best finish for a wooden serving tray? The best finish depends on how you intend to use the tray. For functional trays, polyurethane is often recommended for its durability.
- Can I use food-safe finishes on my serving tray? Yes! Look for finishes labeled as food-safe, such as certain mineral oils or specific brands of polyurethane.
- How do I maintain the finish on my wooden serving tray? Regularly clean your tray with a damp cloth and avoid soaking it in water. Reapply the finish as needed based on the type you've chosen.

Maintenance Tips
Taking care of your wooden serving tray is essential not only for its longevity but also to keep it looking as stunning as the day you crafted it. Just like a fine wine, your tray deserves a little TLC to maintain its charm. Start by regularly wiping down the surface with a soft, damp cloth. Avoid using harsh chemicals or abrasive scrubbers, as these can scratch and damage the wood. Instead, think of your tray as a delicate piece of art that requires gentle handling.
When it comes to cleaning, a simple mixture of warm water and mild soap can work wonders. Just remember to dampen the cloth rather than soaking the tray, as excess moisture can warp the wood over time. After cleaning, dry your tray thoroughly to prevent any water damage. It’s like giving your tray a refreshing bath—clean, but not too much water!
Another critical aspect of maintenance is protecting your tray from heat and moisture. Always use coasters or placemats when serving hot dishes or drinks, as the heat can cause the wood to crack or warp. Think of your tray as a shield for your surfaces; it needs to be protected to do its job well. If you notice any scratches or dents, don’t fret! A little bit of wood polish or a touch-up marker can work miracles, restoring your tray to its former glory.
Lastly, consider applying a food-safe mineral oil or beeswax finish every few months. This not only enhances the wood's natural beauty but also provides a protective layer against spills and stains. Just like moisturizing your skin, this step keeps your tray looking fresh and vibrant. Remember, a well-maintained wooden serving tray is not just a functional item; it’s a piece of craftsmanship that tells a story. Treat it with care, and it will serve you beautifully for years to come.
Here are some common questions that may arise regarding the maintenance of your wooden serving tray:
- How often should I clean my wooden serving tray? It’s best to clean your tray after each use to prevent stains and buildup.
- Can I use my tray for serving hot foods? Yes, but always place a heat-resistant barrier like a coaster underneath to protect the wood.
- What should I do if my tray gets scratched? Use a wood polish or touch-up marker to conceal minor scratches.
- Is it safe to use soap on my wooden tray? Yes, as long as you use a mild soap and a damp cloth, avoiding soaking the wood.
- How can I enhance the shine of my wooden serving tray? Regularly applying food-safe mineral oil or beeswax will keep it shiny and protected.
Frequently Asked Questions
- What type of wood is best for making a serving tray?
When it comes to crafting a serving tray, hardwoods like oak, maple, and cherry are fantastic choices. They’re durable, look great, and can withstand the wear and tear of daily use. If you're looking for something a bit lighter on the wallet, pine is also an option, but keep in mind it may not be as sturdy.
- Do I need special tools to make a wooden serving tray?
Not necessarily! While having power tools can speed up the process, you can definitely use hand tools to create a beautiful tray. Essential tools include a saw, drill, and some sandpaper. Just remember, safety first! Always wear protective gear when using any tools.
- What are the safety precautions I should take?
Safety is key in woodworking! Always wear safety goggles to protect your eyes, use ear protection with loud tools, and make sure your workspace is clean and organized. Also, never rush the process; taking your time can help prevent accidents.
- How can I personalize my wooden serving tray?
Personalizing your tray is part of the fun! You can add engravings, paint it in your favorite colors, or even use stencils for unique designs. Think of it as a blank canvas where your creativity can shine!
- Should I use glue or screws for assembly?
It really depends on your preference! Glue offers a clean look and is great for a seamless finish, while screws add extra strength, especially for larger trays. If you want the best of both worlds, consider using both methods together!
- What finish should I use for my serving tray?
The finish you choose can enhance the wood's natural beauty and protect it from spills and stains. Options like polyurethane or mineral oil are popular choices. Just remember to follow the manufacturer's instructions for the best results!
- How do I maintain my wooden serving tray?
To keep your tray looking its best, clean it with a damp cloth after use and avoid soaking it in water. Periodically, you can reapply a food-safe finish or mineral oil to maintain its luster. Treat it well, and it will last for years!


