How to Create a Patchwork Quilt from Scraps
Creating a beautiful patchwork quilt from fabric scraps is not just a way to recycle leftover materials; it’s an opportunity to unleash your creativity and express your personal style. Imagine transforming a bunch of mismatched pieces into a stunning quilt that tells a story—your story! Whether you're a seasoned quilter or just starting out, this guide will walk you through each step of the process, from selecting the right fabrics to adding those final touches that make your quilt truly unique.
Selecting the right fabrics is crucial for a successful patchwork quilt. Think of it as picking the colors for a painting; each choice influences the overall composition. You want to consider color schemes, fabric types, and patterns to create a cohesive and visually appealing design. For instance, you might choose a palette of soft pastels for a calming effect or vibrant, contrasting colors for something more energetic. The fabric types should also complement each other; mixing cotton with flannel can add texture, while different patterns can create visual interest. The key is to reflect your personal style while ensuring that all elements work harmoniously together.
Before diving into the sewing process, it’s essential to prepare your fabric scraps. This preparation involves washing, ironing, and cutting them into uniform sizes. Think of this as setting the stage for a performance; a well-prepared stage makes for a better show! By washing your scraps, you remove any dirt or residues, while ironing helps to eliminate wrinkles that could interfere with your sewing. Cutting your scraps into uniform pieces is like assembling puzzle pieces; they must fit together perfectly for the final picture to be complete.
Properly washing and ironing your fabric scraps is a step that should never be overlooked. It’s not just about cleanliness; it’s about creating a foundation for your quilt that will last for years. Washing helps to pre-shrink the fabric, preventing any surprises after your quilt is completed. When ironing, use the appropriate heat setting for each fabric type to avoid scorching or damaging the material. This attention to detail will pay off in the long run, ensuring that your quilt maintains its beauty and integrity.
Selecting the right detergent can make a significant difference in maintaining fabric quality. Opt for gentle, color-safe detergents that preserve the vibrancy of your scraps without causing damage. Harsh chemicals can fade colors and weaken fibers, so it’s worth investing in a good detergent that will keep your fabrics looking fresh.
Using the correct ironing techniques can help flatten your fabric scraps effectively. Start by ensuring your iron is clean and set to the right temperature for the fabric you’re working with. For cotton, a high setting is usually best, while delicate fabrics may require a lower setting. Always iron on the reverse side when possible to avoid shine and preserve the fabric’s texture.
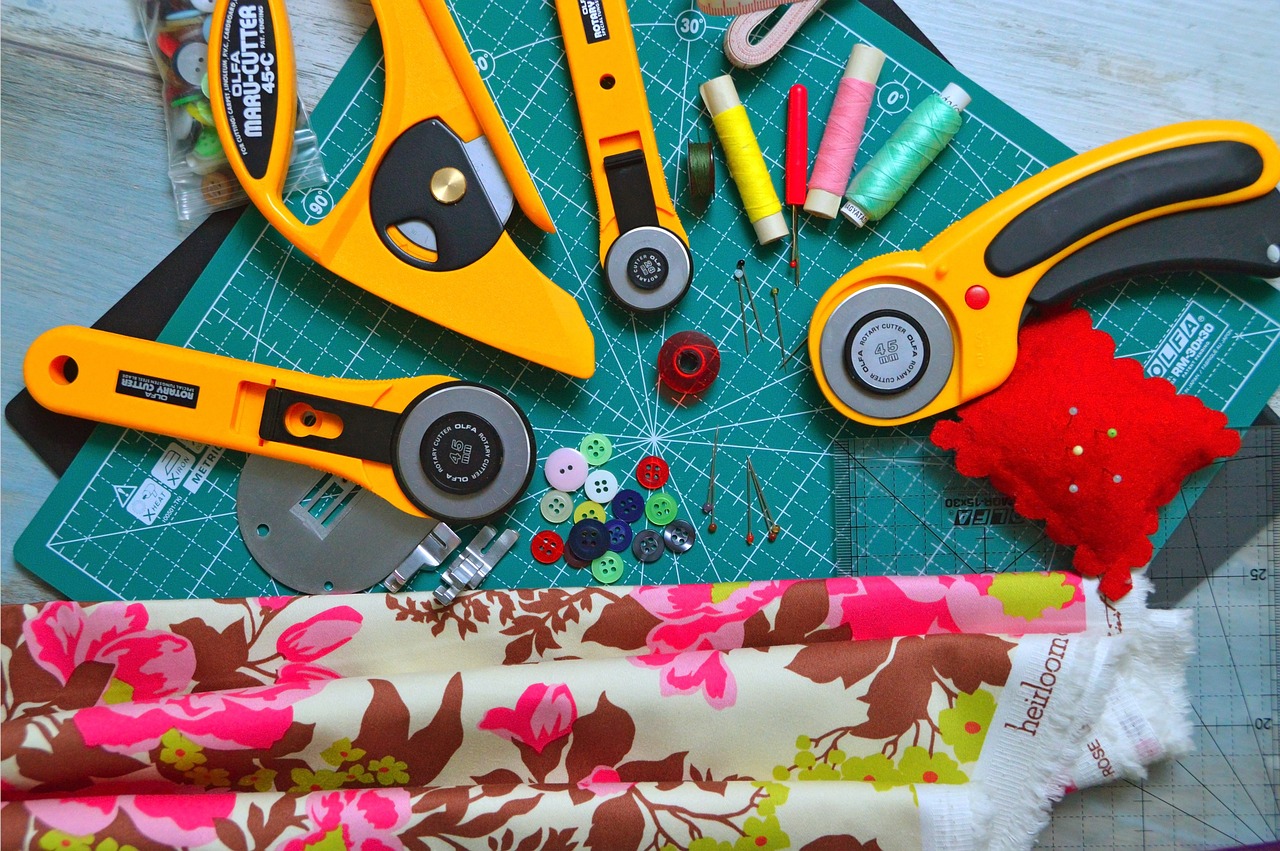
Cutting your fabric into uniform pieces is essential for a harmonious quilt design. A rotary cutter and cutting mat are your best friends here, allowing for precision and accuracy. Aim for pieces that are consistent in size—this not only makes sewing easier but also contributes to a polished final look. When you cut with care, you ensure that all pieces fit together seamlessly during assembly, much like the pieces of a well-crafted jigsaw puzzle.
Creating a layout for your quilt is an exciting step in the process. It’s where your vision starts to take shape! Experiment with different arrangements to find a design that showcases your fabric scraps beautifully and tells a story. Don’t be afraid to play around; sometimes the best designs come from unexpected combinations.
Color coordination plays a significant role in quilt design. Choose complementary colors and patterns that enhance each other, creating a visually stunning quilt that captures attention. Consider using a color wheel as a guide; it can help you identify which colors work well together and which might clash. Remember, the goal is to create a quilt that feels cohesive and inviting, drawing the eye in.
Exploring various pattern ideas can inspire your quilt layout. Traditional patchwork designs like the nine-patch or log cabin can provide a solid foundation, while modern interpretations can reflect your unique style and creativity. Don’t hesitate to mix and match patterns; a little experimentation can lead to stunning results!
Once your layout is finalized, it’s time to assemble the quilt. Follow a systematic approach to sewing the pieces together, ensuring accuracy and consistency throughout the process. Remember, this is where your hard work starts to pay off, so take your time and enjoy the journey!
Utilizing the right sewing techniques is key to a successful quilt assembly. Learn about seam allowances, pressing techniques, and how to handle bulky fabric layers for a smooth finish. A consistent seam allowance will ensure that your quilt pieces fit together perfectly, while proper pressing will help eliminate any puckering or distortion.
Joining the quilt top, batting, and backing requires careful attention. Use basting techniques to secure the layers before quilting, ensuring everything stays in place during the sewing process. Think of this step as the glue that holds your quilt together; without it, you may find yourself with a chaotic mess rather than a cohesive quilt.
The final steps of quilting and adding finishing touches bring your patchwork quilt to life. Discover various quilting techniques and embellishments to enhance your quilt's beauty and functionality. This is where your quilt truly becomes a work of art!
Choosing the right quilting technique can elevate your quilt's design. Explore options like straight-line quilting, free-motion quilting, or hand quilting to add texture and visual interest. Each technique offers a different aesthetic, so choose one that resonates with you and complements your overall design.
Binding is the finishing touch that frames your quilt. Learn how to create and attach binding effectively, ensuring a polished look and durability for your completed patchwork quilt. It’s the cherry on top of your quilt sundae, so take the time to do it right!
- What type of fabric is best for patchwork quilts? Cotton is the most popular choice due to its durability and ease of handling.
- How do I choose a color scheme? Consider using a color wheel to help identify complementary colors and patterns.
- Can I use old clothing for my quilt? Absolutely! Old clothing can add sentimental value and unique textures to your quilt.
- What's the best way to store fabric scraps? Keep them in a cool, dry place, organized by color or type, to prevent damage.
Choosing the Right Fabrics
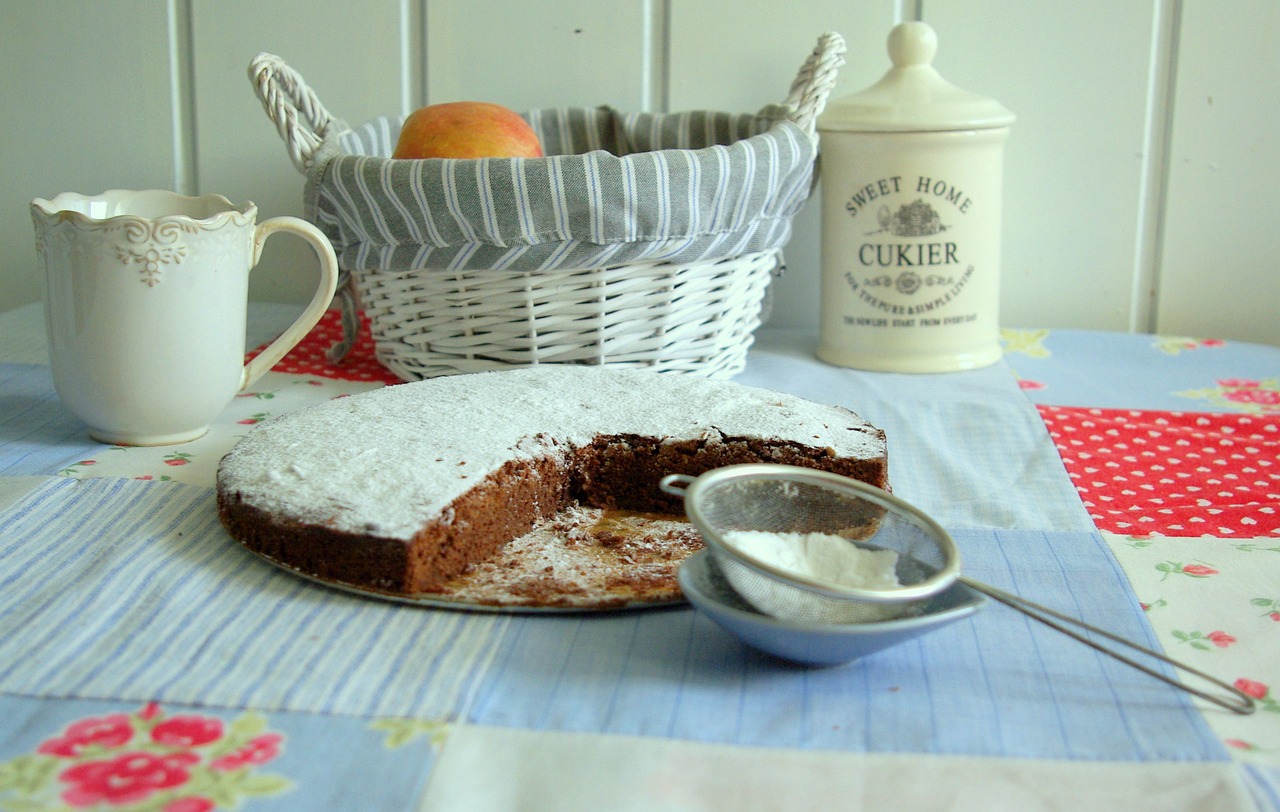
When it comes to creating a stunning patchwork quilt, is absolutely crucial. Think of your quilt as a canvas where each fabric scrap is a brushstroke that contributes to the overall masterpiece. You want to select fabrics that not only complement each other but also resonate with your personal style. So, how do you go about this? Let’s dive into some key considerations that will help you curate the perfect fabric selection for your quilt.
First, consider the color scheme. This is where the magic begins! Whether you’re drawn to vibrant hues or prefer a more subdued palette, the colors you choose will set the tone for your quilt. For instance, a quilt made with warm colors like reds and yellows can create an inviting, cozy feel, while cool colors like blues and greens can evoke a sense of calm and tranquility. To help you visualize your color choices, you might want to create a small color palette using fabric swatches or even digital tools.
Next, think about the types of fabric you want to incorporate. Different fabric materials bring unique textures and characteristics to your quilt. For example:
- Cotton: This is the most popular choice for quilting due to its durability and ease of use.
- Flannel: This adds a soft, cozy touch, perfect for warm quilts.
- Silk: While a bit more challenging to work with, silk can add a luxurious feel to your quilt.
Mixing and matching these fabrics can create a dynamic visual experience, but be mindful of their different weights and textures to ensure they work well together.
Patterns also play a significant role in the overall design of your quilt. You might opt for solid fabrics to create a classic look, or you could go wild with prints and patterns to add depth and interest. Consider using a combination of both for a balanced design. For example, pairing a bold floral print with solid colors can help the patterns pop without overwhelming the eye.
Lastly, don't forget about the theme or story you want your quilt to tell. Are you aiming for a vintage vibe, a modern aesthetic, or perhaps a seasonal theme? Choosing fabrics that align with your desired theme will help you create a quilt that not only looks beautiful but also holds personal meaning. For example, using fabrics that remind you of family gatherings or special occasions can transform your quilt into a cherished keepsake.
In summary, selecting the right fabrics for your patchwork quilt is an art form in itself. By considering color schemes, fabric types, patterns, and themes, you can curate a collection that not only reflects your style but also tells a story. Happy quilting!
Preparing Your Scraps
Before diving into the exciting world of patchwork quilting, it's essential to prepare your fabric scraps properly. This preparation phase is like the foundation of a house; if it's not solid, everything built on top might crumble. Start by washing your scraps to remove any dirt, oils, or residues that may have accumulated over time. This step is crucial because it ensures that your quilt remains clean and fresh, even after years of use.
Once your scraps are washed, the next step is to iron them. Wrinkles can be a quilter's worst enemy, causing uneven seams and misaligned pieces. When ironing, make sure to adjust the heat setting according to the fabric type. For instance, cotton can handle a higher temperature, while synthetic fabrics require a cooler setting to avoid damage. This attention to detail will not only enhance the appearance of your quilt but also improve the overall sewing experience.
When washing your fabric scraps, consider using a gentle cycle with cold water to preserve the integrity of the fabric. After washing, hang them to dry or use a low-heat dryer setting. This method helps maintain the fabric's shape and prevents shrinkage. Once dry, use a steam iron for those stubborn wrinkles. The steam will relax the fibers, making it easier to achieve a smooth finish. Remember, a well-prepared scrap is the first step toward a stunning quilt!
Not all detergents are created equal. When selecting a detergent for your fabric scraps, opt for gentle, color-safe options. These detergents help maintain the vibrancy of your fabrics while ensuring they remain soft and pliable. Avoid harsh chemicals that can fade colors or weaken fibers. Your quilt deserves the best treatment!
Ironing isn't just about getting rid of wrinkles; it's about setting the stage for perfect seams. Always start by testing the iron on a small piece of fabric to ensure the heat is appropriate. Use long, even strokes and avoid pressing down too hard, which can stretch or distort the fabric. If you're dealing with multiple layers, consider using a pressing cloth to protect delicate fabrics. This simple technique can save you from potential mishaps and ensure your scraps are ready for cutting.
After washing and ironing, the next crucial step is cutting your fabric into uniform pieces. This is where the magic of patchwork really begins! Using a rotary cutter and a cutting mat allows for precision and accuracy, ensuring that each piece fits seamlessly together. Aim for consistent sizes, as this will create a harmonious look in your quilt design. A good rule of thumb is to cut all pieces to the same dimensions, which can be anywhere from 2.5 inches to 5 inches square, depending on your desired pattern.
As you cut, keep your workspace organized. A clutter-free area not only makes the process smoother but also reduces the risk of losing small pieces. You might even consider using labeled containers to keep different fabric types or colors separate. This organization will save you time and frustration later on, allowing you to focus on the fun part—creating your quilt!
- How do I know if my fabric scraps are suitable for quilting? Look for fabrics that are 100% cotton or cotton blends, as they are durable and easy to work with.
- Can I use fabric scraps from old clothing? Absolutely! Just make sure to wash and prepare them properly before using them in your quilt.
- What is the best way to store my fabric scraps? Store them in a cool, dry place, ideally in clear bins or boxes so you can easily see what you have.
Washing and Ironing
This article provides a comprehensive guide to making a beautiful patchwork quilt using fabric scraps. Discover techniques, tips, and creative ideas to transform leftover materials into a stunning quilt masterpiece.
Selecting the right fabrics is crucial for a successful patchwork quilt. Consider color schemes, fabric types, and patterns to create a cohesive and visually appealing design that reflects your personal style.
Before you begin sewing, it's essential to prepare your fabric scraps. This involves washing, ironing, and cutting them into uniform sizes to ensure a smooth quilting process and a polished final product.
Properly washing and ironing your fabric scraps helps remove any dirt or wrinkles. This step is vital for achieving a professional finish and ensuring that your quilt lasts for years to come. When washing your fabric scraps, always remember that the goal is not just to clean them but to maintain their integrity. Using a gentle cycle and cold water is often the best approach, as it minimizes the risk of shrinking or damaging the fabric.
After washing, the next step is ironing. Ironing your scraps is crucial because it flattens out any creases and helps you achieve more accurate cuts. For this, you should use the appropriate heat setting for each type of fabric. For instance, cotton can usually handle a higher heat, while synthetic fabrics require a cooler setting. Always use steam to help relax the fibers, but be cautious with fabrics that may be sensitive to moisture.
Here are a few tips to keep in mind:
- Always check the care label on your fabrics before washing.
- Use a color-safe detergent to preserve the vibrancy of your scraps.
- For delicate fabrics, consider hand washing to avoid any potential damage.
By taking the time to properly wash and iron your fabric scraps, you're setting a solid foundation for your patchwork quilt. This extra attention to detail will not only enhance the appearance of your quilt but also increase its longevity.
Selecting the right detergent can make a difference in maintaining fabric quality. Opt for gentle, color-safe detergents to preserve the vibrancy of your scraps without causing damage. Avoid harsh chemicals that can fade colors or weaken fibers. Always test a small piece of fabric first, especially if you're working with vintage or delicate materials.
Using the correct ironing techniques can help flatten your fabric scraps effectively. Always use the appropriate heat setting for each fabric type to avoid scorching or damaging the material. Additionally, consider using a pressing cloth for delicate fabrics to provide an extra layer of protection. This simple tool can prevent direct contact with the iron, reducing the risk of burns or shine on your fabric.
Cutting your fabric into uniform pieces is essential for a harmonious quilt design. Use a rotary cutter and cutting mat for precision, ensuring all pieces fit together seamlessly during assembly.
Creating a layout for your quilt is an exciting step in the process. Experiment with different arrangements to find a design that showcases your fabric scraps beautifully and tells a story.
Color coordination plays a significant role in quilt design. Choose complementary colors and patterns that enhance each other, creating a visually stunning quilt that captures attention.
Exploring various pattern ideas can inspire your quilt layout. Consider traditional patchwork designs or modern interpretations that reflect your unique style and creativity.
Once your layout is finalized, it's time to assemble the quilt. Follow a systematic approach to sewing the pieces together, ensuring accuracy and consistency throughout the process.
Utilizing the right sewing techniques is key to a successful quilt assembly. Learn about seam allowances, pressing techniques, and how to handle bulky fabric layers for a smooth finish.
Joining the quilt top, batting, and backing requires careful attention. Use basting techniques to secure the layers before quilting, ensuring everything stays in place during the sewing process.
The final steps of quilting and adding finishing touches bring your patchwork quilt to life. Discover various quilting techniques and embellishments to enhance your quilt's beauty and functionality.
Choosing the right quilting technique can elevate your quilt's design. Explore options like straight-line quilting, free-motion quilting, or hand quilting to add texture and visual interest.
Binding is the finishing touch that frames your quilt. Learn how to create and attach binding effectively, ensuring a polished look and durability for your completed patchwork quilt.
Q: How do I choose the right fabrics for my patchwork quilt?
A: Consider color schemes, fabric types, and patterns that complement each other and reflect your personal style.
Q: Can I use any fabric scraps for quilting?
A: Yes, but make sure the fabrics are compatible in terms of washing and durability to ensure a lasting quilt.
Q: How do I prevent my quilt from shrinking after washing?
A: Pre-wash your fabric scraps before sewing to minimize shrinkage and always wash your completed quilt in cold water on a gentle cycle.
Choosing Detergents
When it comes to washing your fabric scraps, the choice of detergent can significantly impact the quality and longevity of your quilt. You want to ensure that your beautiful fabrics remain vibrant and intact throughout the washing process. So, what should you look for in a detergent? Here are some important factors to consider:
First and foremost, opt for gentle, color-safe detergents. These formulations are designed to protect the colors of your fabrics, preventing them from fading or bleeding during washes. A harsh detergent can strip away the vibrancy of your fabric, leaving your quilt looking dull and lifeless. Think of it like using a gentle cleanser on your skin; you want to maintain that fresh, healthy glow!
Additionally, consider using liquid detergents instead of powders. Liquids tend to dissolve better in water and are less likely to leave residue on your fabrics. You wouldn’t want your quilt to have unsightly white spots, would you? Furthermore, some liquid detergents come in eco-friendly formulas, which can be a bonus if you're conscious about your environmental footprint.
Another tip is to check for hypoallergenic options. If you or anyone in your household has sensitive skin, hypoallergenic detergents can be a lifesaver. They are formulated without harsh chemicals and fragrances, making them safe for everyone while still effectively cleaning your fabrics. Just like finding the right skincare product, it’s essential to choose a detergent that won’t irritate your skin.
Lastly, don't forget to read the labels! Look for detergents that are specifically marked as suitable for washing fabrics. Some detergents are marketed for general use and may not be ideal for delicate materials. You want to treat those fabric scraps with the utmost care, ensuring they stay as lovely as the day you bought them.
In summary, selecting the right detergent is crucial for maintaining the quality of your fabric scraps. A gentle, color-safe liquid detergent that is hypoallergenic can work wonders in preserving the beauty of your quilt. So, before you dive into the washing process, make sure you have the right products at hand!
- Can I use regular detergent for my quilt fabrics? It's best to avoid regular detergents as they can be too harsh and may damage the colors and fibers of your fabric scraps.
- What is the best way to wash fabric scraps? Use a gentle, color-safe liquid detergent and wash your scraps on a delicate cycle to protect their quality.
- Are there any eco-friendly detergent options? Yes! Many brands offer eco-friendly detergents that are safe for both your fabrics and the environment.

Ironing Techniques
When it comes to quilting, can make or break your project. Imagine trying to build a house on a shaky foundation—your quilt is no different. If your fabric scraps are wrinkled or uneven, it can lead to misaligned seams and an overall sloppy appearance. To avoid this, always start with a clean, flat surface. A sturdy ironing board is essential, as it provides the support needed to press your fabrics effectively.
First, let’s talk about the heat settings. Each fabric type has its own ideal temperature. For instance, cotton can handle high heat, while synthetic fabrics like polyester require a lower setting. Always check the fabric care label for guidance. If you're unsure, a medium heat setting is often a safe bet. To prevent scorching, use a pressing cloth—this acts as a protective barrier between your iron and the fabric.
Another critical aspect is the direction of your iron strokes. Always iron in the direction of the grain of the fabric. This helps to avoid stretching and distorting your pieces. When you’re dealing with seams, press them open to reduce bulk, which can help your quilt lay flatter. If you prefer to press seams to one side, make sure to consistently choose the same side throughout your project to maintain uniformity.
For those tricky areas, such as curves or corners, consider using a tailor's ham. This handy tool allows you to press curved seams without flattening them. Additionally, a point presser can help you get those sharp corners you desire. When working with multiple layers, it’s crucial to use steam sparingly; too much moisture can warp your fabric, especially if it’s not pre-washed.
Lastly, remember that patience is key. Rushing through the ironing process can lead to mistakes that you'll have to correct later. Take your time, enjoy the process, and your quilt will thank you for it!
- How do I know which heat setting to use? Always refer to the fabric care label for guidance on the appropriate heat setting. If in doubt, start with a medium heat.
- Can I use steam when ironing? Yes, but use it sparingly. Too much steam can warp your fabric, especially if it hasn't been pre-washed.
- What is a pressing cloth, and why do I need one? A pressing cloth is a protective layer placed between your iron and fabric to prevent scorching and shine. It's especially useful for delicate fabrics.
- How can I avoid stretching my fabric while ironing? Always iron in the direction of the grain, and avoid pulling or tugging on the fabric as you press.
Cutting Uniform Pieces
When it comes to creating a stunning patchwork quilt, the importance of cutting uniform pieces cannot be overstated. Think of your quilt as a beautiful tapestry, where each piece of fabric is a thread woven into a larger narrative. If the threads are uneven, the story becomes jumbled and less appealing. To achieve that harmonious look, you need to ensure that each fabric scrap is cut to the same size. This not only helps with the overall aesthetic but also makes the sewing process much smoother.
To start, gather your fabric scraps and lay them out on a cutting mat. A rotary cutter is your best friend here—it allows for precision cutting that scissors simply can't match. When you’re cutting, aim for uniformity. For example, if you decide that each square should be 5 inches by 5 inches, stick to that measurement throughout. This consistency will help your quilt pieces fit together seamlessly, much like puzzle pieces snapping into place.
As you cut, it’s beneficial to stack your fabric scraps in groups of similar colors or patterns. This not only makes the cutting process more organized but also allows you to visualize how the colors will play off each other in your final design. If you find it challenging to keep track of your measurements, consider creating a simple table to help you remember the sizes for each piece:
| Fabric Color | Piece Size |
|---|---|
| Red | 5"x5" |
| Blue | 5"x5" |
| Green | 5"x5" |
After cutting your pieces, take a moment to inspect them. Are they all the same size? If you notice any discrepancies, it’s better to trim them now than to deal with uneven edges later on. Remember, attention to detail at this stage will pay off in the long run, leading to a quilt that looks professionally made. Finally, store your cut pieces in separate labeled bags or containers to keep them organized and ready for the assembly process. That way, you won’t waste precious time searching for that perfect piece when you’re ready to sew.
- What tools do I need for cutting fabric scraps? A rotary cutter, cutting mat, and a clear ruler are essential for precise cutting.
- Can I use scissors instead of a rotary cutter? While scissors can work, they are less precise and may lead to uneven pieces.
- How do I ensure my pieces are the same size? Always measure and cut with a ruler, and double-check your measurements before cutting.
- What should I do if I cut a piece too small? You can either trim other pieces to match or use the smaller piece in a different part of your quilt design.
Designing Your Quilt Layout
Creating a layout for your quilt is an exciting and crucial step in the quilting process. It’s like painting a blank canvas; you get to express your creativity and personal style through fabric. When you start designing your quilt layout, think about how each piece of fabric will interact with the others. Will you go for a harmonious blend of colors, or do you want to create a bold contrast that makes each piece pop? The choices you make here will set the tone for your entire quilt.
One effective way to begin is by experimenting with different arrangements. Lay out your fabric scraps on a flat surface and play around with their positioning. You might find that certain colors or patterns complement each other beautifully, while others clash in ways you didn’t expect. It can be helpful to take a photo of your arrangements, as this allows you to step back and see your design from a different perspective. Sometimes, what looks great in person may not translate as well in a photograph.
When it comes to color coordination, remember that colors evoke emotions. Warm colors like reds and yellows can create a sense of energy and vibrancy, while cool colors like blues and greens tend to be more calming. Consider the mood you want your quilt to convey. You may also want to explore the concept of color theory, which can guide you in selecting complementary colors. For instance, pairing a bold print with a solid color can help balance the overall design.
Another aspect to consider is the pattern ideas you want to incorporate. Traditional patchwork patterns, such as the beloved nine-patch or log cabin designs, can add a classic touch to your quilt. Alternatively, you might want to go for a more modern look with asymmetrical layouts or geometric shapes. The beauty of patchwork quilting lies in its versatility—there are no strict rules! You can even mix and match traditional and contemporary patterns to create a unique style that’s all your own.
As you finalize your quilt layout, it’s essential to think about the story your quilt tells. Each fabric scrap has its own history, whether it’s a cherished piece from an old shirt or a vibrant remnant from a recent project. By thoughtfully arranging these pieces, you can weave a narrative that reflects your journey as a quilter. Consider how the colors, patterns, and textures of your scraps come together to create a cohesive story that resonates with you.
In summary, designing your quilt layout is a personal and creative endeavor. Take your time with it, and don’t hesitate to try out different configurations until you find the one that feels just right. Remember, quilting is not just about the end product; it’s also about the joy of the creative process. Embrace the journey, and let your imagination guide you!
- What if I don't have enough fabric scraps? You can always supplement with new fabric or swap scraps with fellow quilters!
- How do I know if my colors will work together? Use a color wheel or take photos of your arrangements to see how they look together.
- Can I mix different fabric types? Yes! Just be mindful of how they will behave when washed and quilted together.
Color Coordination
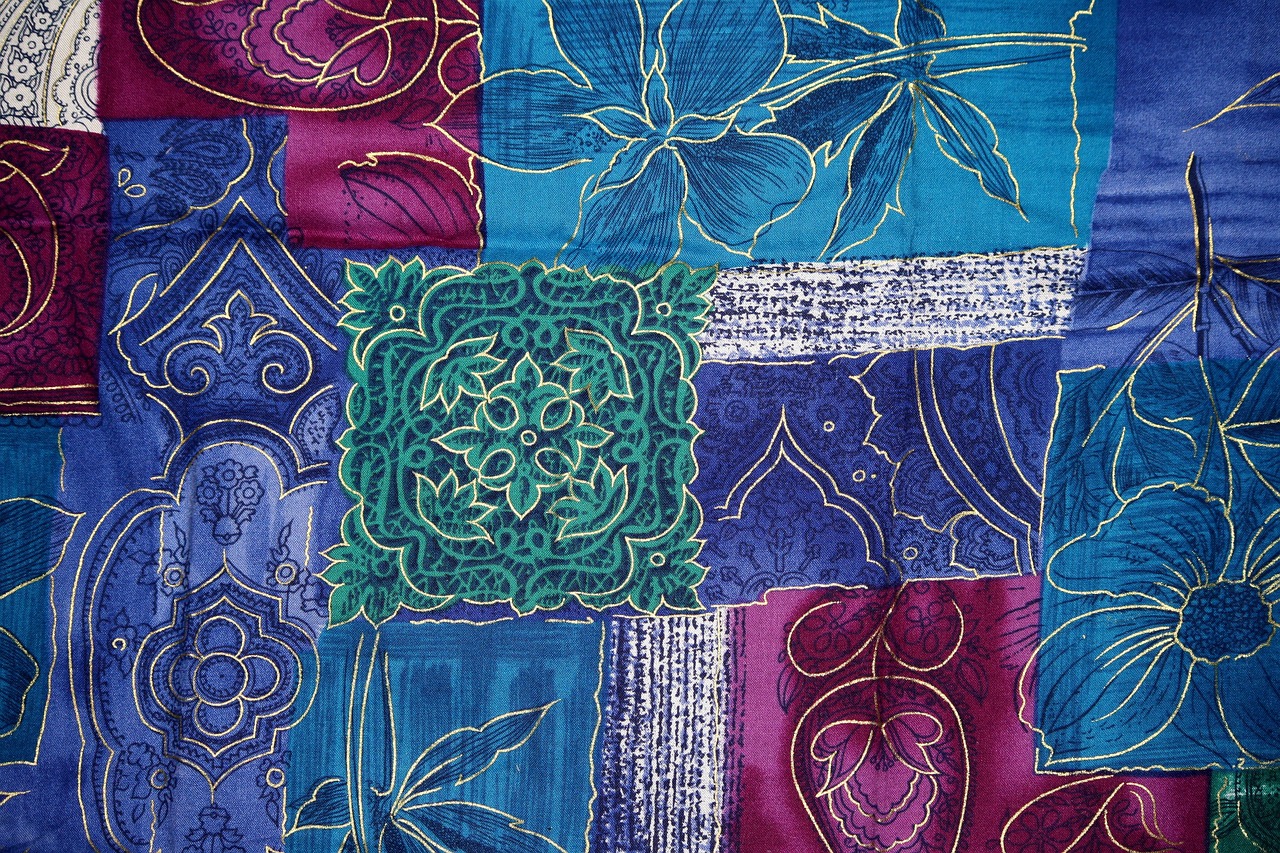
Color coordination is a vital aspect of quilt design that can make or break your patchwork masterpiece. Imagine walking into a room and being immediately drawn to a quilt that seems to dance with color harmony. That’s the power of well-coordinated colors! When selecting your fabric scraps, consider how the colors interact with one another. A quilt that boasts a cohesive color palette not only looks more polished but also tells a story through its hues.
To achieve stunning color coordination, start by choosing a color scheme that resonates with you. Here are some popular options:
- Monochromatic: Different shades of the same color create a soothing effect.
- Analogous: Colors that are next to each other on the color wheel, like blue, blue-green, and green, provide a natural and harmonious look.
- Complementary: Colors opposite each other on the color wheel, such as blue and orange, create a vibrant contrast that can make your quilt pop.
Don't be afraid to experiment! Lay out your fabric scraps on a flat surface and play around with different combinations. Sometimes, unexpected pairings can yield delightful surprises. For instance, a splash of bright yellow against deep navy can evoke a sense of joy and energy, while soft pastels can bring about a calm and serene vibe.
Additionally, consider the scale of patterns within your fabrics. Mixing large-scale prints with smaller ones can create visual interest and depth. Just like a well-composed painting, a quilt benefits from a balance of busy and simple designs. A good rule of thumb is to have a mix of at least three different scales in your fabric choices.
Lastly, always keep in mind the overall mood you want to convey with your quilt. Are you aiming for something cheerful and bright, or perhaps something more muted and sophisticated? Your color choices should reflect this intention, guiding the viewer's emotions as they admire your work.
By paying careful attention to color coordination, you can transform a simple collection of fabric scraps into a breathtaking quilt that not only showcases your creativity but also serves as a cherished keepsake for years to come.
Q: How do I choose a color scheme for my quilt?
A: Start by selecting a color palette that resonates with you. Consider using a color wheel to explore monochromatic, analogous, or complementary schemes. Experiment with different combinations of fabric scraps until you find a layout that feels right.
Q: Can I mix different fabric types in my quilt?
A: Yes! Mixing different fabric types can add texture and depth to your quilt. Just be mindful of how they interact when washed, as some fabrics may shrink or wear differently than others.
Q: What's the best way to test my color combinations?
A: Lay out your fabric scraps together on a flat surface. This allows you to see how the colors and patterns interact in real life. Don't hesitate to rearrange and swap out pieces until you achieve the look you desire.
Pattern Ideas
When it comes to crafting a patchwork quilt, the you choose can make all the difference in transforming your fabric scraps into a stunning masterpiece. Think of your quilt as a blank canvas, where each piece of fabric tells its own story while contributing to a larger narrative. The beauty of patchwork lies in its versatility, allowing you to mix and match various styles and designs. So, let’s dive into some exciting pattern ideas that can inspire your creativity!
One classic approach is the traditional patchwork pattern, which often features geometric shapes like squares and triangles. This style is not only timeless but also offers a fantastic way to showcase a variety of fabrics. You can create a simple checkerboard design by alternating two different fabrics, or you might opt for a more intricate layout with multiple shapes. The beauty of this method is that it allows for a lot of experimentation—play around with different arrangements until you find something that resonates with you.
If you’re feeling a bit more adventurous, consider exploring modern quilt patterns. These often incorporate asymmetrical designs and bold color palettes, making them a favorite among contemporary quilters. Think about using large blocks of solid colors paired with smaller patterned pieces to create a striking contrast. This approach not only highlights your fabric scraps but also adds a fresh, vibrant touch to your quilt. Remember, the key to modern quilting is to embrace simplicity while still making a statement.
For those who want to add a bit of whimsy to their quilts, themed patterns can be a delightful option. Imagine a quilt that tells a story—perhaps a nature theme with fabrics featuring leaves, flowers, and animals, or a travel theme showcasing fabrics that represent different cultures. This not only makes your quilt unique but also allows you to reminisce about special memories associated with each fabric. As you select your scraps, think about how they can come together to create a cohesive theme.
Another popular choice is the scrappy quilt pattern, which embraces the beauty of randomness. This pattern allows you to use all sorts of fabric scraps—regardless of their size or shape—creating a delightful patchwork of colors and textures. The key here is to maintain a sense of balance; while the pattern may seem chaotic, aim for a harmonious blend of colors and designs. This style is perfect for those who want to make a quilt that feels warm, inviting, and full of character.
As you explore these pattern ideas, don't be afraid to mix and match elements from different styles. The world of quilting is all about creativity and self-expression. Whether you choose a traditional, modern, or themed approach, the most important thing is to enjoy the process and let your imagination run wild. Remember, every quilt has the potential to be a unique work of art, reflecting your personal style and the stories behind each piece of fabric.
Q: How do I choose the right pattern for my fabric scraps?
A: Consider the colors and types of fabric you have. Look for patterns that complement your scraps and reflect your personal style. Experiment with different arrangements until you find a design you love.
Q: Can I mix different fabric types in my quilt?
A: Absolutely! Mixing different fabric types can add texture and interest to your quilt. Just be mindful of the weight and drape of each fabric to ensure they work well together.
Q: What if I don’t have enough scraps for a specific pattern?
A: Don't worry! You can always supplement your scraps with new fabric or adjust your pattern to accommodate the materials you have. The beauty of patchwork is its flexibility.
Assembling the Quilt
Once you’ve meticulously crafted your quilt layout, it’s time to dive into the exciting phase of . This step is where all your hard work truly begins to take shape, and you can finally see your vision come to life. To ensure a smooth assembly process, it’s essential to follow a systematic approach. Think of it as putting together a jigsaw puzzle – each piece has its place, and finding that perfect fit is crucial for a cohesive final product.
First things first, let’s talk about sewing techniques. Understanding seam allowances is key. Typically, a seam allowance of about ¼ inch is standard for patchwork quilts. This means you’ll need to sew your pieces together with that distance from the edge of the fabric. It might sound simple, but getting this right can make a world of difference in how your quilt turns out. If your seams are too narrow, you risk fraying and losing fabric; too wide, and your pieces won't align correctly. Remember, precision is your best friend here!
Next, let’s tackle the pressing techniques. After sewing two pieces together, it’s crucial to press the seams open or to one side. This not only helps in achieving a flatter, more polished look but also makes the subsequent steps much easier. When pressing, always use the appropriate heat setting for the fabric type you’re working with to avoid scorching. If you’re unsure what heat setting to use, a good rule of thumb is to start with a lower setting and gradually increase it as needed.
Now, onto the more intricate part – joining the layers. Your quilt consists of three main layers: the quilt top (the patchwork you just assembled), the batting (the fluffy middle layer), and the backing (the fabric that forms the back of your quilt). To ensure these layers stay aligned during the quilting process, you’ll want to employ some basting techniques. Basting can be done using safety pins or a long stitch on your sewing machine. This temporary hold is vital; it prevents any shifting that could ruin your hard work. Think of it as the glue that keeps everything together while you work your magic!
Finally, take a moment to step back and admire your quilt top before moving on to the quilting phase. This is your chance to ensure that everything is aligned correctly and that you’re happy with the overall look. If you spot any discrepancies or pieces that don’t quite fit, now is the time to make adjustments. Remember, attention to detail during assembly will pay off in the end, resulting in a stunning quilt that you’ll be proud to showcase.
- How do I choose the right fabric for my quilt? Consider color schemes and fabric types that reflect your personal style.
- What is the best way to press seams? Always use the appropriate heat setting for each fabric type to avoid damage.
- How do I keep my layers from shifting while quilting? Use basting techniques like safety pins or long stitches to secure them.
Sewing Techniques
When it comes to sewing your patchwork quilt, the right techniques can make all the difference between a quilt that looks homemade and one that looks professionally crafted. First and foremost, understanding seam allowances is crucial. A seam allowance is the space between the edge of your fabric and the line where you sew. Typically, a 1/4 inch seam allowance is standard for quilting. This narrow allowance helps to keep your pieces aligned and ensures that your quilt retains its intended dimensions.
Next, let’s talk about the importance of pressing techniques. Pressing your seams as you go is not just about aesthetics; it helps to eliminate bulk and allows your quilt to lay flat. After sewing two pieces together, take the time to press the seam open or to one side, depending on your pattern. This simple step can significantly improve the overall look of your quilt.
Handling bulky fabric layers can be a challenge, especially as your quilt grows in size. When sewing through multiple layers, it’s essential to keep your fabric aligned. Here are a few tips to manage those layers effectively:
- Use a walking foot: This specialized presser foot helps to evenly feed multiple layers of fabric, preventing them from shifting during sewing.
- Take your time: Don’t rush through the sewing process. Slow and steady will help you maintain control over your fabric layers.
- Pin strategically: Use plenty of pins to secure your layers before sewing. This will help keep everything in place and reduce the chances of puckering.
Another technique worth mentioning is chain piecing. This method involves sewing multiple pieces of fabric together in a continuous chain without cutting the threads in between. Not only does this save time, but it also helps maintain the accuracy of your seams. It's like a production line for your quilt pieces, making the process more efficient and enjoyable!
Lastly, don’t forget about the importance of consistent stitching. Aim for even stitches throughout your quilt. This attention to detail will elevate the quality of your work and ensure that your quilt stands the test of time. Remember, practice makes perfect, so don’t be discouraged if your first few attempts aren’t flawless.
Q: What is the best sewing machine for quilting?
A: The best sewing machine for quilting often depends on personal preference, but look for machines with a good feed system, adjustable speed, and a wide throat space to accommodate larger quilts.
Q: Can I use any fabric for my quilt?
A: While you can technically use any fabric, it’s best to stick with quilting cotton or cotton blends. These fabrics are durable and easy to work with, making them ideal for quilting.
Q: How do I prevent my quilt from puckering?
A: To prevent puckering, ensure that your seams are consistent and that you’re using the right tension settings on your sewing machine. Additionally, pressing your seams as you go will help keep everything flat.
Joining the Layers
Joining the layers of your quilt is a crucial step that requires careful attention and precision. To achieve a beautifully finished quilt, you need to ensure that the quilt top, batting, and backing are securely attached before you start the quilting process. This not only keeps everything in place but also prevents any shifting of layers that could lead to uneven stitching or puckering. Think of this step as laying the foundation for a house; if the base isn’t solid, everything built on top is likely to falter.
Before you start joining the layers, it’s wise to gather your materials and tools. You’ll need:
- Quilt top
- Batting
- Backing fabric
- Basting spray or safety pins
- Scissors or rotary cutter
- Cutting mat
Once you have everything ready, lay your backing fabric down first, right side facing down on a clean, flat surface. Make sure it’s smooth and free of wrinkles. Next, place the batting on top of the backing, followed by the quilt top, which should be right side up. This layering method ensures that when you finish quilting, the backing will be on the bottom, the batting in the middle for warmth and cushioning, and your beautiful quilt top on display.
Now, it’s time to secure the layers together. You can choose between two popular methods: basting spray or safety pins. If you opt for basting spray, lightly mist the batting with the spray adhesive before placing the quilt top on it. This method is quick and effective, but be cautious about overspray on your workspace. On the other hand, safety pins are a traditional and reliable method. Simply insert the pins through all three layers, spacing them about 6 to 8 inches apart. This will keep everything in place while you quilt.
After securing the layers, it’s essential to check for any puckers or folds. Gently smooth out any imperfections, as a flat surface will lead to a more polished final product. You wouldn’t want your quilt to resemble a wrinkled shirt, right? Take the time to ensure everything is perfectly aligned before moving on to the actual quilting.
Finally, once you’re satisfied with the layout and everything is securely joined, you’re ready to start quilting! Remember, the time spent in this joining process will pay off immensely when you see your finished quilt come to life.
Q: What is the best method to join quilt layers?
A: Both basting spray and safety pins are effective methods. Choose based on your comfort and the tools you have available.
Q: How do I prevent my layers from shifting while quilting?
A: Secure your layers well with basting spray or safety pins and work slowly, checking for any shifts as you go.
Q: Can I use fabric glue instead of basting spray?
A: While fabric glue can be used, it may not provide the same level of flexibility as basting spray or pins, which can make the quilting process easier.
Quilting and Finishing Touches
As you approach the final stages of your patchwork quilt journey, the excitement builds! This is where the magic happens, transforming your carefully chosen scraps into a tangible masterpiece. Quilting and adding those finishing touches is not just about functionality; it's about showcasing your creativity and hard work. Think of it as the cherry on top of a delicious sundae – it completes the experience and makes everything come together beautifully!
First up, let’s talk about quilting techniques. The method you choose can dramatically affect the overall look and feel of your quilt. For instance, straight-line quilting is a popular choice for beginners. It’s straightforward and allows you to create clean, crisp lines that enhance the patchwork design. On the other hand, if you’re feeling adventurous, you could dive into free-motion quilting, which offers limitless possibilities for creativity. Imagine swirling patterns or intricate designs that dance across your quilt, adding depth and texture. Hand quilting is another option that many crafters adore for its personal touch, providing a sense of connection to each stitch.
Now, let’s not forget the importance of binding. This is the final flourish that frames your quilt and gives it a polished look. Binding is like the finishing touch on a beautiful painting; it pulls everything together. You can opt for a fabric that complements your quilt top or go bold with a contrasting color that makes a statement. The process involves cutting strips of fabric, sewing them around the edges, and folding them over to the back, securing them with either hand stitches or machine sewing. It’s a labor of love, but the satisfaction of seeing your quilt complete is worth every moment!
To help you visualize the process better, here’s a simple
| Step | Description |
|---|---|
| 1 | Cut binding strips (usually 2.5 inches wide) from your chosen fabric. |
| 2 | Sew the strips together to create one long continuous piece. |
| 3 | Press the binding in half lengthwise to create a crease. |
| 4 | Pin the binding to the quilt edge, aligning raw edges. |
| 5 | Sew the binding to the quilt top, then fold over to the back and secure. |
Finally, remember that the beauty of a quilt lies not just in its appearance but also in the stories it tells. Each patch, each stitch, and each choice reflects your personality and creativity. So, as you quilt and bind, take a moment to appreciate the journey you’ve taken with your fabric scraps. Whether you’re creating a quilt for yourself or as a heartfelt gift, the love and effort you put into it will be felt by everyone who sees it.
- How long does it take to make a patchwork quilt? The time varies based on the size and complexity of the quilt, but on average, it can take anywhere from a few days to several weeks.
- Can I use any type of fabric for my quilt? While you can use various fabrics, it's best to stick to cotton or cotton blends for durability and ease of sewing.
- What is the best way to care for my quilt? Most quilts can be machine washed on a gentle cycle with cold water. It's advisable to air dry to preserve the fabric's integrity.
Quilting Techniques
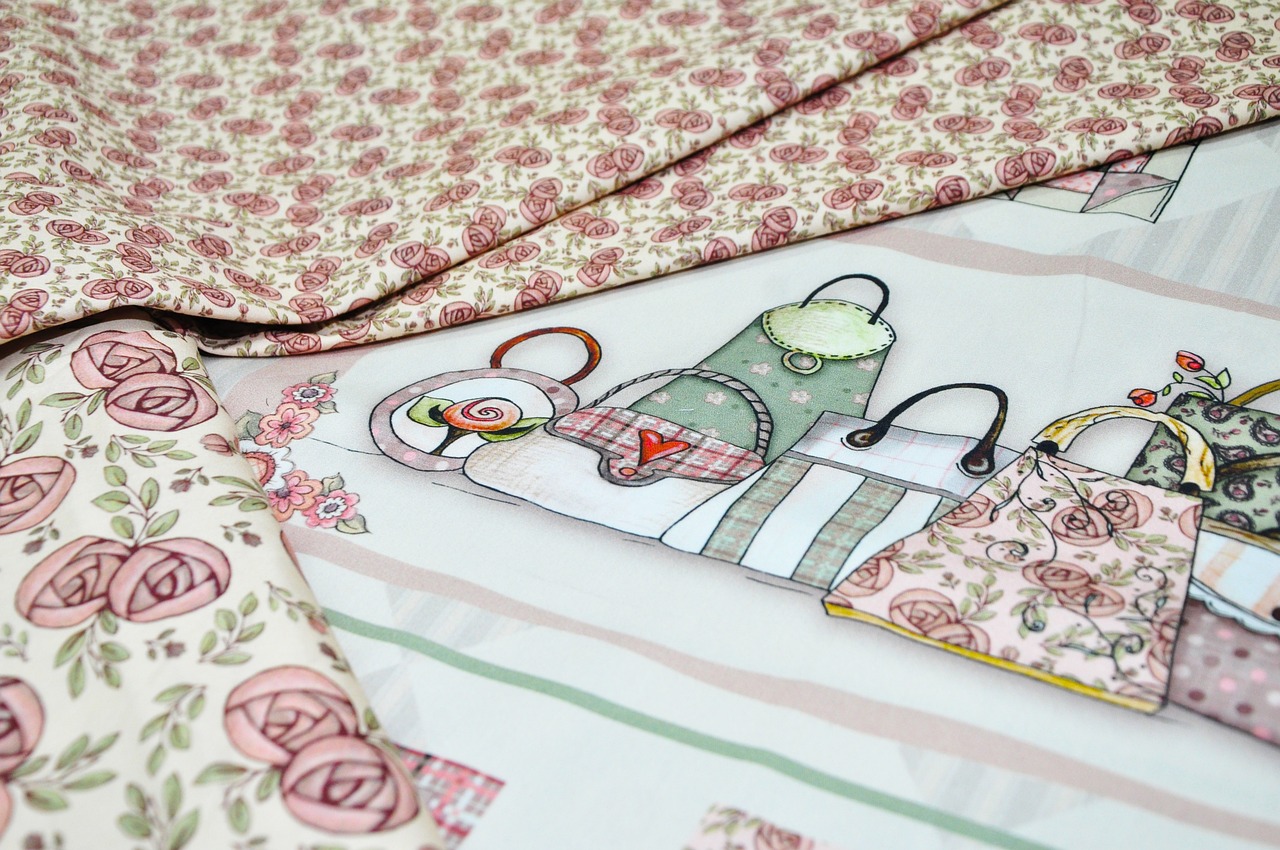
When it comes to quilting, the techniques you choose can dramatically influence the overall look and feel of your patchwork quilt. It's like choosing the right spices in a recipe; the right techniques can transform a simple dish into a gourmet meal! One of the most popular techniques is straight-line quilting, which involves sewing straight lines across your quilt. This method is not only straightforward but also creates a clean, modern aesthetic that highlights the beauty of your fabric scraps. Imagine the satisfaction of watching those lines come together, creating a stunning visual rhythm that pulls your quilt together.
Another exciting option is free-motion quilting, where you can let your creativity flow like a river! This technique allows you to sew in any direction, creating unique patterns and textures that can add a personal touch to your quilt. Whether you opt for swirling designs or intricate florals, free-motion quilting can transform your quilt into a one-of-a-kind masterpiece. However, be prepared for a bit of practice; it’s a dance between you and your sewing machine, and like any dance, it takes time to master!
For those who appreciate the charm of tradition, hand quilting is a technique that brings a sense of warmth and nostalgia to your project. Each stitch is a labor of love, connecting you to the history of quilting while allowing you to slow down and enjoy the process. Hand quilting can be a meditative experience, perfect for those quiet evenings when you want to unwind. Plus, the tactile quality of hand-stitched quilts often evokes a sense of comfort that machine quilting can’t quite replicate.
To help you decide which technique suits your style and project, here’s a quick comparison:
| Technique | Pros | Cons |
|---|---|---|
| Straight-Line Quilting | Simple, modern look | Can be less creative |
| Free-Motion Quilting | Highly creative, unique designs | Requires practice and skill |
| Hand Quilting | Personal touch, nostalgic | Time-consuming |
Whichever technique you choose, remember that quilting is an art form that allows you to express your personality and creativity. Don't be afraid to experiment with different methods and find what resonates with you. After all, the journey of creating your quilt is just as important as the final product!
- What is the best fabric for quilting? Cotton is often recommended due to its durability and ease of use.
- How do I choose the right batting? Consider the thickness and material; cotton batting is breathable, while polyester is more durable.
- Can I quilt without a sewing machine? Yes! Hand quilting is a wonderful alternative that many crafters enjoy.
- How do I maintain my quilt? Regularly wash it on a gentle cycle and avoid harsh detergents to keep it looking fresh.
Binding Your Quilt
Binding your quilt is like putting the icing on a cake; it’s the finishing touch that not only enhances the overall appearance but also adds durability to your masterpiece. Think of binding as the frame around a beautiful painting—it holds everything together while providing a polished look. To start, you’ll want to choose a fabric that complements your quilt top. It should be sturdy enough to withstand wear and tear but also visually appealing to enhance the quilt's design.
When preparing your binding, you’ll typically cut strips of fabric that are 2.5 inches wide. The length of these strips will depend on the perimeter of your quilt. A good rule of thumb is to measure the total length of all four sides of the quilt and add a little extra for seams and overlaps. For example, if your quilt measures 60 inches by 80 inches, you would calculate:
| Measurement | Calculation |
|---|---|
| Length | 60 inches + 60 inches + 80 inches + 80 inches 280 inches |
| Extra for seams | 280 inches + 20 inches 300 inches |
Now that you have your binding strips cut, it’s time to sew them together. Lay the strips end to end, right sides together, and sew at a 45-degree angle. This technique creates a smooth, flat seam that won’t add bulk to your quilt’s edges. After sewing, press the seams open and trim any excess fabric. Once you have your long strip of binding ready, fold it in half lengthwise and press it again. This will create a crease that will help you attach it to the quilt more easily.
Now, let’s talk about the actual binding process. Start by aligning the raw edges of the binding with the raw edges of your quilt. It’s best to begin at the center of one side, leaving a tail of about 6-8 inches. Pin or clip the binding in place to keep it secure while you sew. As you sew, use a 1/4 inch seam allowance, and remember to stop about 1/4 inch from the corner. This is where the magic happens—fold the binding up so it forms a triangle, then fold it back down to create a mitered corner. Pin it in place and continue sewing along the next side. Repeat this process for all four corners.
Once you’ve sewn all the way around, it’s time to finish the binding. You can either hand-stitch it to the back for a more polished look or machine-stitch it for a quicker finish. If you choose the hand-stitching route, take your time to ensure the stitches are even and hidden. This will give your quilt that professional touch that makes all the difference.
In conclusion, binding your quilt is not just a task; it’s an art form that adds the final flourish to your hard work. With the right techniques and a bit of creativity, you can elevate your quilt from simply beautiful to absolutely stunning. So grab your fabric, and let’s get binding!
- What fabric should I use for binding? - It's best to choose a fabric that complements your quilt top and is durable enough to withstand wear.
- How wide should my binding strips be? - A common width is 2.5 inches, but you can adjust it based on your preference.
- Can I machine stitch my binding? - Yes, you can machine stitch your binding for a quicker finish, but hand-stitching gives a more polished look.
- What is the best way to create mitered corners? - Stop sewing 1/4 inch from the corner, fold the binding up to form a triangle, and then fold it back down before continuing to sew.
Frequently Asked Questions
- What types of fabrics are best for a patchwork quilt?
When it comes to fabrics, the best choices are those that complement each other in color and pattern. Cotton is a popular choice due to its durability and ease of handling. You can also mix in some flannel or linen for added texture. Just remember to keep your overall theme in mind!
- How do I wash and prepare my fabric scraps?
Start by washing your fabric scraps with a gentle, color-safe detergent to remove any dirt or chemicals. After washing, iron them flat to eliminate wrinkles. This ensures that your pieces are clean and ready for cutting, which is crucial for a polished final product.
- What cutting tools do I need for patchwork quilting?
A rotary cutter and a cutting mat are essential for achieving precise cuts. They allow you to cut multiple layers of fabric at once, ensuring that all your pieces are uniform in size, which is vital for a cohesive quilt design.
- How do I choose a layout for my quilt?
Experimentation is key! Lay out your fabric pieces on a flat surface and try different arrangements until you find one that feels right. Consider color coordination and how the patterns interact to create a visually appealing design.
- What are some common quilting techniques I should know?
There are several techniques you can explore, including straight-line quilting, free-motion quilting, and hand quilting. Each method offers its own unique texture and look, so feel free to experiment and find what suits your style best!
- How do I bind my quilt?
Binding is the final touch that frames your quilt beautifully. To bind your quilt, cut strips of fabric, fold them in half, and sew them around the edges. Make sure to miter the corners for a polished finish that adds durability to your masterpiece.


