Decorate Your Nursery with DIY Ideas on a Budget
Discovering creative and affordable ways to transform your nursery into a cozy and stylish space can be a thrilling adventure for any parent. After all, your little one deserves a room that is not only functional but also filled with love and imagination. The best part? You don’t need to break the bank to achieve this! With a bit of creativity, some elbow grease, and a sprinkle of DIY magic, you can create a nursery that reflects your personal style while being budget-friendly.
Imagine walking into a nursery that feels like a warm hug, where every corner tells a story and every detail has been lovingly crafted. From choosing the perfect color palette to upcycling old furniture, this article will guide you through various DIY projects that are easy to implement and won’t empty your wallet. Whether you’re a seasoned DIYer or a newbie, there’s something here for everyone. So roll up your sleeves and let’s dive into the world of nursery decor!
Selecting the right colors for your nursery can set the tone for the entire room. Think about it—colors can evoke emotions and create an atmosphere that promotes relaxation and joy. When choosing a color palette, consider soft pastels or neutral tones that create a calming environment. You might find that a gentle mint green, a soothing lavender, or a warm beige can make all the difference.
To help you visualize your options, here’s a simple table showcasing some popular color combinations:
| Color | Emotion |
|---|---|
| Soft Blue | Calm and Peaceful |
| Pastel Pink | Warmth and Comfort |
| Light Yellow | Cheerful and Bright |
| Mint Green | Fresh and Inviting |
Consider using an accent wall or colorful accessories to add pops of color without overwhelming the space. You could even involve your little one in the decision-making process as they grow, allowing them to express their personality through their room’s decor.
Now that you have your color palette, let’s talk about furniture! Upcycling is a fantastic way to breathe new life into old pieces while saving money. You might have an old dresser or crib just sitting in your garage, waiting to be transformed. With a little creativity, those forgotten items can become stunning focal points in your nursery.
Painting is one of the simplest and most effective ways to refresh furniture. Have you ever tried chalk paint? This magical concoction adheres beautifully to most surfaces and gives a lovely matte finish. If you’re feeling adventurous, consider stenciling designs onto your furniture to add a unique flair. Think of it like adding a personal touch to a blank canvas!
When it comes to painting your nursery, safety should always come first. Prioritize using non-toxic paints that are eco-friendly and safe for your little one. Brands like Milk Paint or Behr offer a variety of options that are both stylish and safe, allowing you to unleash your creativity without worry.
Don’t stop at just paint! Incorporate patterns and textures into your furniture for a truly unique touch. You could use fabric to reupholster an old chair or apply decals for a fun and whimsical look. Imagine a dresser adorned with adorable animal decals or a chair covered in colorful fabric—it’s like adding a sprinkle of magic to your nursery!
Wall art can transform a nursery and express your personal style. The walls are like a blank canvas waiting for your creative touch! Consider making your own wall art projects. You could create a gallery wall filled with family photos, or even craft a beautiful piece using your child’s handprints. It’s a fun project that not only beautifies the space but also creates lasting memories.
Let’s not forget about the little details! DIY decor accents can add charm and personality to your nursery. From handmade mobiles that dance above the crib to personalized name signs that welcome your little one, these projects are simple yet impactful.
A DIY mobile can be a stunning focal point in your nursery. You can create one using materials that are inexpensive and easy to find, such as felt, twigs, or even repurposed toys. Picture a mobile that sways gently above the crib, filled with colorful shapes and characters—it's sure to delight your baby!
Personalized name signs add a special touch to your nursery decor. Crafting a name sign is a wonderful way to reflect your child's personality and style. You could use wood, canvas, or even cardboard to create a sign that spells out your child’s name in a fun and creative way. It’s a project that’s not only easy but also meaningful!
- What is upcycling? Upcycling is the process of transforming old or discarded materials into new products, often enhancing their value and appeal.
- How can I choose a color palette for my nursery? Consider colors that evoke calmness and joy. Soft pastels or neutral tones are excellent choices.
- Is it safe to use regular paint in a nursery? It’s best to use non-toxic, eco-friendly paints to ensure a safe environment for your child.
- What are some easy DIY decor projects for a nursery? DIY mobiles, personalized name signs, and wall art are all simple and impactful projects.

Choosing a Color Palette
When it comes to decorating your nursery, one of the most exciting yet challenging tasks is . The colors you select can significantly impact the mood of the room, creating a warm and inviting atmosphere for both you and your little one. Think of your nursery as a blank canvas, waiting for your unique touch to bring it to life. So, how do you choose the right colors? Let's dive into some tips and tricks!
First off, consider the emotional impact of colors. Soft pastels like light pinks, blues, and greens are often favored because they evoke feelings of calmness and serenity. On the other hand, bolder colors like yellows and oranges can add a fun and energetic vibe to the space. It’s essential to strike a balance between soothing tones and vibrant hues to create a harmonious environment.
Another critical factor is the size of the nursery. If you’re working with a smaller space, lighter colors can make the room feel more open and airy. Darker shades, while cozy, can sometimes make a small room feel even smaller. So, if you’re leaning towards deeper tones, consider using them as accents rather than the primary color. For example, you might paint one wall a rich navy while keeping the others a soft cream. This technique not only adds depth but also creates a focal point that draws the eye.
Don’t forget about the lighting! Natural light can dramatically alter how colors appear in a room. Make sure to test paint samples on the walls at different times of the day to see how they look in various lighting conditions. This step is crucial because a color that seems perfect in the store might look entirely different in your nursery. Grab some paint swatches and tape them to the wall. Observe them throughout the day, and you’ll get a better sense of what works best.
Finally, think about cohesiveness. Your nursery should feel like a unified space, so consider how the colors you choose will work with the rest of your home. If your living areas feature warm earth tones, it might be nice to carry that palette into the nursery with soft beige or muted greens. On the flip side, if you want the nursery to stand out, don’t be afraid to choose something bold and unexpected!
In summary, selecting a color palette for your nursery can be a delightful journey. Keep in mind the emotional impact of colors, the size of the room, the lighting, and how it fits into your overall home decor. Remember, there are no strict rules—only what feels right for you and your baby. So, grab a paintbrush, and let your creativity flow!

Upcycling Furniture
When it comes to decorating your nursery on a budget, is a fantastic way to combine creativity and sustainability. Instead of purchasing brand new items that can break the bank, why not breathe new life into old furniture? Not only is it cost-effective, but it also allows you to infuse your personal style into the space. Imagine transforming a worn-out dresser into a charming changing table or giving a tired crib a fresh look with a splash of paint. The possibilities are endless!
To get started, think about the pieces you already have or can acquire inexpensively. Thrift stores, garage sales, and even your own attic might hold hidden treasures waiting to be revamped. Before diving into any project, consider the following upcycling techniques that can elevate your nursery’s aesthetic:
- Painting: A fresh coat of paint can work wonders. Choose colors that align with your nursery's overall theme.
- Reupholstering: If you have an old chair or ottoman, consider reupholstering it with fun, colorful fabric that complements your decor.
- Adding New Hardware: Sometimes, all it takes is a new set of knobs or handles to make a piece feel brand new.
One of the most popular methods of upcycling is painting. It’s not just about slapping on a coat of color; it’s about creating a masterpiece. You can explore various painting techniques that can add depth and personality to your furniture. For instance, using chalk paint gives a soft, matte finish that is perfect for a cozy nursery vibe. Or, if you’re feeling adventurous, try your hand at stenciling or adding patterns with painter's tape to create unique designs that reflect your child's personality.
When selecting your painting technique, consider the overall look you wish to achieve. Here are some popular options:
| Technique | Description | Best For |
|---|---|---|
| Chalk Paint | Provides a matte finish and easy application. | Furniture with a vintage look. |
| Spray Paint | Quick and even coverage for intricate designs. | Smaller pieces like chairs or decorative items. |
| Stenciling | Allows for creative patterns and designs. | Adding personalized touches to dressers or cribs. |
As you embark on your upcycling journey, remember to prioritize safety, especially in a nursery environment. Choose non-toxic paint options to ensure the air quality remains safe for your little one. Brands that offer eco-friendly paints are increasingly popular, so you won’t have to sacrifice style for safety.
Finally, don’t shy away from adding patterns and textures to your furniture. You can use decals or fabric to enhance visual interest. Imagine a dresser adorned with whimsical decals or a rocking chair covered in a soft, patterned fabric. These small touches can make a big impact, transforming ordinary pieces into extraordinary focal points in your nursery.
In conclusion, upcycling furniture is not only a budget-friendly approach but also a way to create a space that is uniquely yours. With a little creativity and effort, you can turn old, tired pieces into stunning additions to your nursery that reflect your style and love for your child.
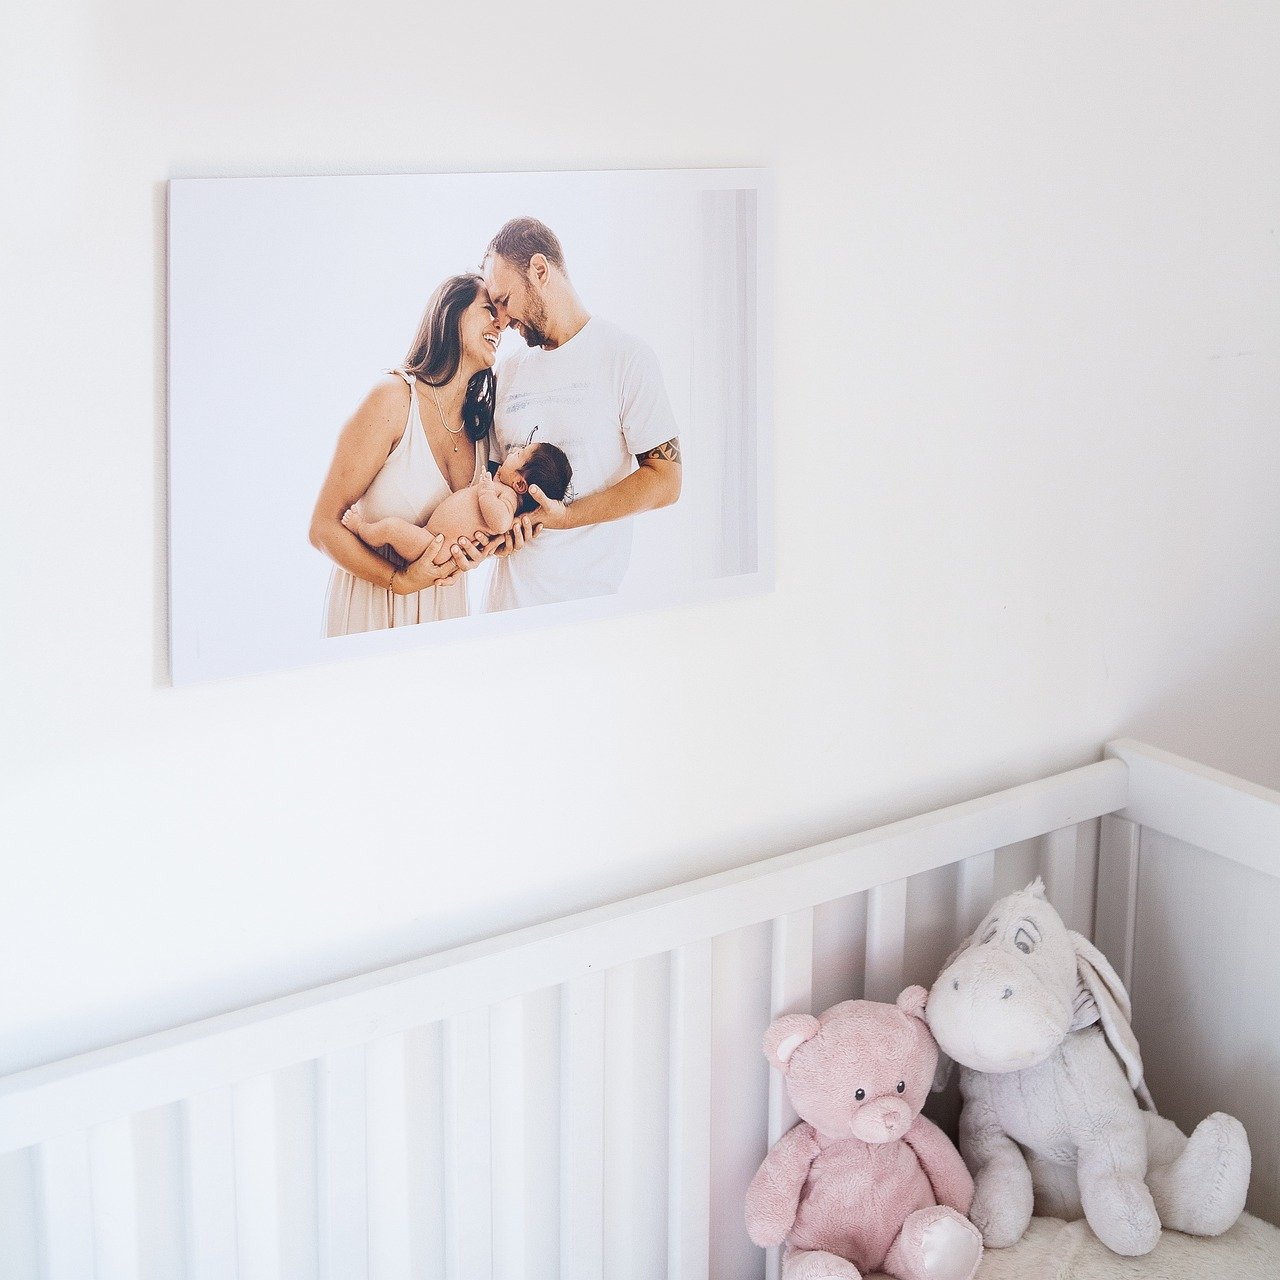
Painting Techniques
When it comes to refreshing your nursery furniture, can be your best friend. Not only do they breathe new life into old pieces, but they also allow you to express your creativity and personal style without breaking the bank. Imagine transforming a worn-out dresser into a beautiful statement piece that complements your nursery’s theme. Sounds exciting, right? Let’s dive into some popular painting techniques that can elevate your furniture’s appearance!
One of the most popular choices for nursery furniture is chalk paint. This paint provides a matte finish that is not only chic but also incredibly easy to work with. It adheres well to various surfaces, meaning you can use it on wood, metal, or even plastic. Plus, it requires minimal prep work—just a quick clean-up, and you’re good to go! Chalk paint also allows you to create a vintage look, which can add a touch of charm to your nursery.
Another technique to consider is stenciling. This method involves using stencils to create intricate designs on your furniture. Whether you want to add playful animals, whimsical shapes, or even your child’s name, stenciling can make your furniture uniquely yours. You can purchase stencils or even make your own with a craft knife and some plastic sheets. The best part? You can easily change the design as your child grows and their tastes evolve!
If you're feeling adventurous, you might want to try a gradient or ombre effect. This technique involves blending two or more colors seamlessly, creating a stunning visual impact. For instance, you can start with a soft pastel color at the bottom of a crib and gradually transition to a deeper shade at the top. This effect not only looks beautiful but can also make the furniture appear taller and more elegant. Just remember to practice the blending technique on a scrap piece of wood before applying it to your nursery furniture!
For those who appreciate a little bit of sparkle, consider using metallic paint. This type of paint can add a touch of glamour to your nursery. Whether you choose to paint the edges of a dresser or add some metallic accents to a rocking chair, the shimmer can create a magical atmosphere. Just be cautious with metallic finishes, as they can sometimes require more coats to achieve full coverage.
Finally, don’t forget about the power of color blocking. This technique involves painting sections of your furniture in contrasting colors. It’s a fun way to incorporate multiple hues into your nursery without overwhelming the space. For example, you could paint the drawers of a dresser one color and the frame another, creating a playful yet stylish look. Color blocking is not only trendy but also allows you to bring in your nursery’s color palette in a bold way.
To summarize, here’s a quick overview of the painting techniques we discussed:
| Technique | Description | Best For |
|---|---|---|
| Chalk Paint | Matte finish, easy to use, minimal prep | Vintage looks |
| Stenciling | Intricate designs using stencils | Personalized touches |
| Gradient/Ombre | Blending colors for a seamless effect | Elegant appearance |
| Metallic Paint | Shimmering finish for added glamour | Magical accents |
| Color Blocking | Contrasting colors on different sections | Bold and playful designs |
With these painting techniques in your toolkit, you’re well on your way to creating a nursery that is both stylish and personalized. So grab your brushes, unleash your creativity, and watch as your furniture transforms into beautiful pieces that reflect your family’s unique style!
- What type of paint is best for nursery furniture? It's recommended to use non-toxic paints like chalk paint or eco-friendly options to ensure safety for your child.
- How do I prepare furniture for painting? Clean the surface thoroughly, and if necessary, lightly sand it to help the paint adhere better.
- Can I paint over old paint? Yes, but make sure to clean and possibly sand the surface to ensure a smooth finish.
- How long does painted furniture take to dry? It typically takes about 1-2 hours for the paint to dry, but it’s best to wait 24 hours before using the furniture.
Using Non-Toxic Paint
When it comes to decorating your nursery, safety should always be a top priority, especially when you're dealing with paint. The last thing you want is for your little one to be exposed to harmful chemicals that could be lurking in conventional paints. That's why opting for non-toxic paint is a game changer! Not only does it provide peace of mind, but it also allows you to unleash your creativity without compromising your child's health.
Non-toxic paints are formulated without harmful solvents and heavy metals, making them a safer choice for indoor environments. You might be wondering, "What exactly makes paint non-toxic?" Great question! Here’s a quick rundown of what to look for:
- Low VOCs: Volatile Organic Compounds (VOCs) are chemicals that can evaporate into the air and cause various health issues. Look for paints labeled as low-VOC or zero-VOC.
- Natural Ingredients: Many non-toxic paints use natural ingredients, such as plant-based oils and pigments, which are less likely to emit harmful fumes.
- Certification: Check for certifications from reputable organizations that test for safety and environmental impact, such as Greenguard or EcoLabel.
Choosing non-toxic paint doesn’t mean you have to sacrifice style! There are plenty of beautiful colors and finishes available that can transform your nursery into a cozy haven. You can find non-toxic options in a variety of finishes—from matte to glossy—so you can achieve the look you desire without worrying about toxicity.
Another fantastic aspect of using non-toxic paint is that it often dries faster than traditional paints, which means less waiting time before you can move in the furniture and start decorating. Plus, many non-toxic paints are easier to clean up, making your DIY projects a breeze. Just think of it as a win-win situation!
And if you're feeling adventurous, consider mixing your own non-toxic paint using natural pigments and binders. This can be a fun project that not only allows you to customize colors but also ensures that every ingredient is safe for your little one. Just remember to test your mixtures on a small area first to see how the colors turn out and how they adhere to your surfaces.
In summary, using non-toxic paint is a smart choice for anyone looking to create a beautiful and safe nursery. With so many options available, it’s easier than ever to find the perfect colors that reflect your style while keeping your baby’s health in mind. So, roll up your sleeves, grab that brush, and let your creativity flow—safely!
Q: What is the difference between non-toxic paint and regular paint?
A: Non-toxic paint is formulated without harmful solvents and heavy metals that can release toxic fumes. Regular paint may contain high levels of VOCs and other chemicals that can be harmful to health.
Q: How can I tell if a paint is non-toxic?
A: Look for labels that indicate low or zero VOCs, natural ingredients, and certifications from safety organizations like Greenguard or EcoLabel.
Q: Can I use non-toxic paint on furniture?
A: Absolutely! Non-toxic paint is safe for furniture, but make sure to check that it's suitable for the surface you're painting.
Q: Is non-toxic paint more expensive than regular paint?
A: It can vary, but many non-toxic options are competitively priced. The investment is worth it for the safety and peace of mind they provide.
Adding Patterns and Textures
When it comes to decorating your nursery, adding patterns and textures can make all the difference in creating a visually stimulating and cozy environment. Think of your nursery as a blank canvas; it’s not just about the colors but also how you can play with different elements to create a space that feels alive and inviting. Imagine walking into a room where the walls whisper stories through playful prints, and the furniture invites you to touch with its delightful textures. Sounds dreamy, right? Let’s dive into how you can achieve this!
First off, consider using decals or wall stickers. These are not only easy to apply but also remove, making them perfect for a nursery that may undergo changes as your child grows. You can find decals in various themes—think animals, stars, or even whimsical clouds. Placing these on a feature wall can create a stunning focal point without the commitment of paint. Plus, they’re often reusable, which is a win for both your wallet and the environment!
Next, let’s talk about fabric. Incorporating different fabrics can add both texture and warmth to the space. For example, you could use a soft, patterned throw blanket draped over a rocking chair or opt for textured cushions in your chosen color palette. Consider mixing and matching different fabrics like cotton, linen, and even knitted materials for a layered look that feels inviting. Just imagine curling up in that chair with a book, surrounded by all those cozy textures—what a perfect way to bond with your little one!
Another exciting option is to create your own fabric wall art. You can stretch patterned fabric over a canvas or wooden frame to add a splash of color and texture to your walls. This DIY project is not only budget-friendly but also allows you to personalize your nursery with fabrics that reflect your style. Choose patterns that are playful and soothing, such as soft florals or gentle geometric designs. Hang them at eye level to create an engaging visual experience for both you and your baby.
Now, let’s not forget about the flooring! A soft area rug can serve as both a textural element and a safe play area for your little one. Look for rugs that are washable and feature fun patterns or colors that complement your nursery's theme. A plush rug can invite your child to explore and play, while also providing a cozy spot for storytime or tummy time.
Lastly, you can incorporate patterns through small decor items like lampshades, picture frames, or even curtains. These elements may seem minor, but they can tie the entire room together. A patterned lampshade can cast beautiful shadows and create a warm ambiance, while colorful curtains can frame the windows beautifully, allowing natural light to filter in softly. It’s all about creating a harmonious blend of colors and textures that feels cohesive and inviting.
In summary, adding patterns and textures to your nursery is about more than just aesthetics; it's about creating a space that feels nurturing and joyful. By incorporating decals, fabrics, wall art, rugs, and small decor accents, you can transform your nursery into a delightful haven for both you and your baby. So, roll up your sleeves and get creative—your dream nursery awaits!
- What types of patterns are best for a nursery? Soft, playful patterns such as animals, stars, or floral designs are ideal as they create a soothing yet engaging environment.
- How can I add texture without overwhelming the space? Start with a few key pieces, like a textured rug or cushions, and build from there. Balance is key!
- Are decals safe for nursery walls? Yes, most decals are removable and safe for walls, but always check for non-toxic options, especially in a child's space.

Creating Wall Art
Wall art can truly transform your nursery, turning blank walls into vibrant canvases that reflect your personal style and create a warm, inviting atmosphere. The beauty of DIY wall art lies not only in its affordability but also in the ability to infuse your unique touch into the space. Imagine walking into a nursery where every piece of art tells a story, each brushstroke a whisper of creativity and love. So, how do you get started? Let's dive into some fun and easy ideas that will leave your walls looking fabulous!
One of the simplest ways to create stunning wall art is by using canvas prints. You can purchase blank canvases from any craft store and unleash your inner artist. Whether you choose to paint abstract designs, soft animal silhouettes, or even a whimsical landscape, the options are limitless. You don't need to be a Picasso; just let your imagination run wild! If you're not confident in your painting skills, consider using stencils to create crisp and clean designs that will wow anyone who enters the room.
Another great idea is to create a gallery wall. This concept allows you to display a collection of art pieces, photographs, and even quotes that resonate with you. Mix and match different frame styles and sizes to create an eclectic look that feels personal and curated. You can even incorporate your child’s artwork as they grow, making this wall a dynamic part of your nursery that evolves over time. To help you visualize your gallery wall, here’s a simple layout idea:
| Frame Style | Size | Content |
|---|---|---|
| Wooden Frame | 8x10 | Child's drawing |
| Metal Frame | 11x14 | Quote about love |
| Colorful Frame | 16x20 | Abstract art |
Don't forget about the power of text-based art. You can create beautiful typographic prints using quotes that inspire you or phrases that reflect your hopes for your child. Websites like Canva offer user-friendly templates where you can customize fonts and colors to match your nursery's theme. Print them out, frame them, and voilà! You have your own personalized art that speaks volumes.
Lastly, consider incorporating natural elements into your wall art. Think of hanging dried flowers, leaves, or even twigs in a creative arrangement. This brings a touch of nature indoors and can be a soothing addition to your nursery. You can use a simple wooden board as a base and attach your natural finds with twine or nails for a rustic yet charming look.
In summary, creating wall art for your nursery is all about expressing your creativity and making the space feel uniquely yours. With a little imagination and some DIY spirit, you can craft stunning pieces that not only beautify the room but also bring joy and warmth to your little one’s environment.
Q: What materials do I need for DIY wall art?
A: Basic materials include canvases, paint, brushes, stencils, frames, and natural elements like flowers or twigs. You can also use printed quotes or images.
Q: How can I ensure the art is safe for my baby?
A: Use non-toxic paints and materials, and avoid small parts that could pose a choking hazard.
Q: How do I hang the wall art securely?
A: Use wall anchors and picture hanging strips to ensure your art stays securely in place.
DIY Decor Accents
When it comes to decorating your nursery, adding can make a world of difference. Not only do these personalized touches add charm and character, but they also allow you to express your creativity without breaking the bank. Imagine walking into a room filled with unique, handmade items that reflect your style and your little one's personality. Sounds dreamy, right? Let's dive into some exciting DIY projects that are easy to create and will surely enhance the atmosphere of your nursery.
One of the most delightful DIY projects you can embark on is crafting a handmade mobile. A mobile can serve as a stunning focal point, hanging gracefully above the crib and captivating your baby's attention. To make your own mobile, gather materials such as lightweight wooden hoops, colorful felt, and string. You can cut shapes like stars, clouds, or animals from the felt and attach them to the hoop using the string. Hang it at a comfortable height, and voilà! You've created a charming piece of art that will not only look great but also stimulate your baby's visual senses.
Another fantastic idea is to create personalized name signs for your nursery. This project is not only fun but also deeply meaningful. You can use wooden letters, paint them in colors that match your nursery's palette, and decorate them with patterns or stickers. Consider incorporating elements that reflect your child’s interests or themes you love. For example, if your little one is destined to be an astronaut, you could paint stars and planets around their name. These signs can be hung above the crib or on the door, welcoming everyone into your cozy space.
For those who love a bit of whimsy, how about crafting fabric wall art? This project is simple yet impactful. All you need are some canvases, fabric scraps, and a glue gun. Choose fabrics in various textures and patterns, cut them into shapes or letters, and adhere them to the canvas. This not only adds color and texture to the walls but also creates a tactile experience that your child can enjoy as they grow. Hang these pieces at eye level for your baby to admire as they start to explore their surroundings.
Lastly, don't overlook the power of photo displays as a decor accent. You can create a beautiful gallery wall by framing memorable photos of your family and your little one’s milestones. Use mismatched frames for a more eclectic look, or paint them in a uniform color for a streamlined appearance. This personal touch not only decorates the nursery but also tells a story, making the space feel warm and inviting. As your child grows, you can easily update this display with new photos, keeping the decor fresh and relevant.
In summary, DIY decor accents are a wonderful way to add personality and warmth to your nursery. From mobiles to name signs, each project allows for creativity and customization that store-bought items simply can't match. So gather your materials, unleash your inner artist, and start creating beautiful pieces that will make your nursery feel like home!
Here are some common questions that new parents often ask when it comes to DIY nursery decor:
- What materials are safe for nursery decor? Always opt for non-toxic paints and materials, especially for items that will be near your baby.
- How can I ensure my DIY projects are safe? Make sure items are securely attached and avoid small parts that could pose a choking hazard.
- Can I change the decor as my child grows? Absolutely! Many DIY projects can be easily updated or repurposed as your child's interests change.

Crafting a Mobile
Creating a DIY mobile can be an incredibly rewarding project that adds a stunning focal point to your nursery. Not only does it serve as a captivating decoration, but it can also stimulate your baby's visual senses. Imagine your little one gazing up at a beautiful, gently swaying mobile, filled with colors and shapes that spark their imagination! The best part? You don’t have to break the bank to make one.
To start, gather some basic materials that are both inexpensive and easy to find. You’ll need a sturdy base, such as a wooden embroidery hoop or a lightweight branch, some string or fishing line, and various decorative items like felt shapes, pom-poms, or even paper cutouts. The beauty of crafting a mobile is that you can customize it to fit your nursery's theme, whether it's whimsical clouds, playful animals, or even celestial bodies. The sky's the limit!
Once you have your materials, it’s time to get creative. Begin by deciding on a color scheme that complements your nursery's palette. For example, if your nursery is adorned with soft pastels, consider using similar shades for your mobile. This will create a cohesive look that ties the room together. You can even involve your little one in the process by letting them choose their favorite colors or shapes!
Here’s a simple step-by-step guide to crafting your mobile:
- Step 1: Create your decorations. Cut out shapes from felt or paper, or use pre-made items like pom-poms. Make sure to have a variety of sizes and colors to keep it visually interesting.
- Step 2: Attach the decorations to your base using string or fishing line. Ensure that they hang at different lengths to create a dynamic look.
- Step 3: Securely attach the string to your base. If you’re using an embroidery hoop, you can tie the string around the hoop in a crisscross pattern to distribute the weight evenly.
- Step 4: Hang your mobile in a safe spot above the crib, ensuring that it’s out of reach of your baby.
As you work on your mobile, remember to have fun! This project is not just about the end result; it’s also about the process of creating something special for your baby. You can even personalize it by adding your child's name or initials to the design. This little touch will not only make the mobile unique but also create a lasting keepsake that you can cherish for years to come.
Incorporating a DIY mobile into your nursery decor is not only budget-friendly but also a meaningful way to express your creativity. Plus, every time you see it swaying gently above your baby's crib, you'll feel a sense of pride knowing that you crafted it with love. So gather your materials, unleash your imagination, and get crafting!
Q: What materials do I need to make a mobile?
A: You will need a sturdy base (like an embroidery hoop or branch), string or fishing line, and decorative items such as felt shapes, pom-poms, or paper cutouts.
Q: How high should I hang the mobile?
A: Ensure that the mobile is hung out of your baby's reach, typically about 30 inches above the crib is a safe height.
Q: Can I wash the mobile if it gets dirty?
A: It depends on the materials used. If you used felt or paper, it might be best to spot clean. If you used fabric, you can hand wash it gently.
Q: How can I personalize my mobile?
A: You can add your child’s name or initials, or use shapes and colors that reflect their personality or nursery theme.
Making Personalized Name Signs
Creating personalized name signs for your nursery is not just a fun project; it's a fantastic way to add a unique touch that showcases your child's individuality. Imagine walking into a room where your little one’s name is beautifully displayed, instantly making the space feel more inviting and special. The best part? You don’t need to break the bank to achieve this! With a few simple materials and a sprinkle of creativity, you can craft a name sign that’s not only charming but also a true reflection of your child’s personality.
First things first, gather your materials. Depending on the style you want, you could use wooden letters, canvas, or even cardboard. Here’s a quick list of what you might need:
- Wooden letters or a blank canvas
- Acrylic or non-toxic paint
- Paintbrushes or sponges
- Glue or adhesive (if using separate letters)
- Decorative elements like ribbons, stickers, or washi tape
Once you have your materials ready, it’s time to get creative! Start by deciding on the color scheme that aligns with your nursery's theme. Soft pastels or vibrant hues can work wonders depending on the mood you want to create. If you're feeling adventurous, consider using a combination of colors to make the name pop! For example, if your child’s name is “Ella,” you could paint the letters in a gradient from pink to purple, making it visually striking.
After painting, let your letters dry completely. This is where you can really let your imagination run wild! Think about adding textures or patterns. You could use stencils to create fun designs or even apply some glitter for a touch of sparkle. If you're using a canvas, you might want to paint a background that complements the letters, like clouds or stars, to create a dreamy atmosphere.
Once everything is dry and you’re happy with your design, it’s time to assemble your name sign. If you’re using individual letters, arrange them on a piece of wood or canvas to see how they look before gluing them down. This is the perfect moment to play around with spacing and alignment. Remember, it’s all about what feels right for you and your little one’s space!
Finally, consider how you’ll display your masterpiece. You can hang it above the crib, place it on a shelf, or even lean it against the wall for a more relaxed look. No matter where it goes, your personalized name sign will undoubtedly become a cherished piece of decor in your nursery.
In conclusion, making personalized name signs is a delightful way to express your creativity while adding a personal touch to your nursery. Not only will it brighten up the room, but it will also create a warm and inviting environment that your child will love. So, gather your materials, unleash your inner artist, and enjoy the process of crafting something truly special!
Q: What materials are best for making name signs?
A: Wooden letters, canvas, or cardboard work well. Choose materials that suit your style and the nursery's theme.
Q: How can I make my name sign more unique?
A: Consider using different colors, textures, or patterns. Adding decorative elements like ribbons or stickers can also enhance its uniqueness.
Q: Is it safe to use regular paint for nursery decor?
A: It’s best to use non-toxic, eco-friendly paint options to ensure safety for your little one.
Q: Where should I hang the name sign?
A: You can hang it above the crib, place it on a shelf, or lean it against the wall. Choose a spot that feels right for your nursery layout.
Frequently Asked Questions
- What are some budget-friendly color palettes for a nursery?
When decorating your nursery on a budget, consider soft pastels like mint green, light pink, or pale blue. These colors create a calming atmosphere and can be easily complemented with white or beige accents. You can also mix and match colors to create a playful yet soothing environment!
- How can I upcycle old furniture for my nursery?
Upcycling old furniture is a fantastic way to save money while adding character to your nursery. Start by sanding down old pieces and applying a fresh coat of non-toxic paint. You can also add new knobs to dressers or reupholster chairs with fun fabrics to give them a new lease on life!
- What painting techniques can I use for nursery furniture?
There are several fun painting techniques you can try! Chalk paint offers a matte finish that's easy to work with, while stenciling can add unique patterns to your furniture. Don't forget about sponging or ombre effects for a modern twist that will surely impress!
- Are there safe paint options for nurseries?
Absolutely! Look for paints labeled as non-toxic and low-VOC (volatile organic compounds). Brands that focus on eco-friendly products often have great options. This ensures that your nursery is not only beautiful but also safe for your little one!
- How can I add patterns and textures to my nursery decor?
You can easily incorporate patterns and textures by using decals, fabric swatches, or even wallpaper. Consider adding a textured throw blanket or patterned cushions to your rocking chair. These elements can create visual interest and make your nursery feel more inviting!
- What are some DIY wall art ideas for a nursery?
Creating your own wall art can be a fun project! Think about making canvas paintings with your child's name or handprints, or even creating a gallery wall with framed pictures and quotes. You can also use washi tape to create fun shapes and designs directly on the wall!
- How do I craft a DIY mobile for my nursery?
Crafting a DIY mobile is easier than you might think! Use a lightweight hoop or branch as the base, and hang felt shapes, paper cranes, or even small plush toys from it using string. This not only adds a whimsical touch but also becomes a captivating focal point in the room!
- What materials do I need to make personalized name signs?
To create a personalized name sign, you’ll need a piece of wood, paint or markers, and some decorative elements like stickers or fabric. Simply paint the wood in your desired color, write your child's name, and embellish it to reflect their personality. Hang it proudly in your nursery!


