Making a DIY Rope Rug for Your Entryway
Are you looking to add a touch of creativity and warmth to your entryway? A DIY rope rug might just be the perfect project for you! Not only does it serve as a functional flooring solution, but it also acts as a stunning decorative piece that can reflect your personal style. Crafting your own rope rug allows you to experiment with different designs, colors, and sizes, making it a unique addition to your home. Imagine stepping onto a beautiful rug that you made with your own hands every time you enter your home—how satisfying is that?
In this article, we will take you through the entire process of creating a rope rug, from gathering materials to the final touches. We'll cover essential tips, techniques, and safety precautions to ensure your crafting experience is enjoyable and productive. So, grab your materials, roll up your sleeves, and let's dive into the wonderful world of DIY rope rugs!
Gathering the right materials is essential for creating a beautiful DIY rope rug. Here’s what you’ll need:
- Rope: Choose a durable, thick rope that can withstand foot traffic. Natural fibers like jute or cotton work best.
- Scissors: A sharp pair will make cutting the rope easier.
- Hot glue gun: This will be your best friend for securing the rope together.
- Measuring tape: To ensure your rug is the right size for your entryway.
- Fabric or canvas backing (optional): This can provide extra stability and protect your floors.
A well-organized workspace can significantly impact your crafting experience. Start by finding a comfortable area with enough room to spread out your materials. It’s essential to have a flat surface to work on, whether it's a table, the floor, or a crafting mat. Make sure you have all your materials within arm's reach, so you can focus on creating without unnecessary interruptions.
Selecting the perfect spot for your DIY project can enhance focus and creativity. Look for a well-ventilated area, preferably near a window for natural light. If you’re working with a hot glue gun, make sure your workspace is away from flammable materials. Consider setting up a small table or mat where you can comfortably sit or kneel while crafting.
Good lighting is crucial for any crafting project. Natural light is ideal, but if that’s not an option, invest in a bright, adjustable lamp. This will help you avoid straining your eyes while working, especially when you’re cutting and gluing the rope. A well-lit workspace not only improves visibility but also keeps your mood elevated—who doesn’t love a bright, cheerful environment?
Keeping your tools organized saves time and frustration. Use small containers or trays to separate your materials, such as rope, glue sticks, and scissors. Label everything if necessary, so you can quickly find what you need. A tidy workspace fosters creativity and allows you to focus on the fun part—making your rug!
Safety should always be a priority when working on DIY projects. Here are some essential safety tips:
- Always use scissors and hot glue guns with caution. Keep them out of reach of children.
- Work in a well-ventilated area, especially if you’re using adhesives.
- Wear protective gloves if you have sensitive skin, particularly when handling hot glue.
The design of your rope rug can reflect your personal style. Think about the colors and patterns that would complement your entryway. Do you prefer a classic look, or are you leaning towards something more modern and eclectic? The possibilities are endless! Consider sketching out a few ideas on paper before you start, which will help solidify your vision.
Inspiration for patterns can come from various sources. Here are some creative pattern ideas:
- Spiral design: A classic choice that adds a touch of elegance.
- Chevron pattern: This trendy design can make your rug stand out.
- Simple stripes: Easy to create and can be customized with different colors.
Color plays a significant role in the overall look of your rug. Consider the existing color scheme of your entryway. You want your rug to either complement or contrast beautifully with the surrounding decor. For a cohesive look, stick to a palette of two or three colors. If you’re feeling adventurous, don’t shy away from bold, vibrant hues!
Now, let’s get into the nitty-gritty of creating your rope rug. Follow these detailed, easy-to-follow instructions to assemble and secure the rope:
The base is crucial for the stability of your rug. Begin by measuring and cutting your rope to the desired length. Lay out your rope in the shape of your rug, whether it’s circular, rectangular, or an abstract design. Once you’re satisfied with the layout, start gluing the rope together, ensuring each piece is securely attached.
Adding finishing touches can elevate your rug’s appearance. After the main structure is complete, consider securing the edges with extra glue to prevent fraying. You can also add decorative elements like tassels or fabric borders for a personalized touch. Don’t forget to let your rug dry completely before placing it in your entryway!
To ensure longevity, proper maintenance of your rope rug is essential. Regular upkeep will keep it looking fresh and new for years to come. Here are some tips for maintaining your DIY rope rug:
Regular cleaning is vital to maintain your rug's appearance. Vacuum it regularly to remove dirt and debris. For deeper cleaning, spot clean with a damp cloth and mild detergent. Avoid soaking the rug in water, as this can damage the rope fibers.
When not in use, proper storage can prevent damage. Roll your rug up and store it in a cool, dry place. Avoid folding it, as this can create creases that are difficult to remove. If you have limited storage space, consider hanging it on a wall as a decorative piece!
1. How long does it take to make a rope rug?
The time it takes can vary based on the size and complexity of your design, but generally, you can expect to spend a few hours to a couple of days.
2. Can I use any type of rope?
While you can experiment with different types of rope, natural fibers like jute or cotton are recommended for durability and aesthetics.
3. Is it difficult to clean a rope rug?
Not at all! Regular vacuuming and occasional spot cleaning will keep your rug looking great.
4. Can I customize the size of my rope rug?
Absolutely! You can create a rug in any size that fits your entryway perfectly.

Materials Needed
Gathering the right materials is essential for creating a beautiful DIY rope rug. To kick off your project, you'll need to consider various types of rope, tools, and additional supplies that will help you craft a stunning and functional piece for your entryway. The most commonly used ropes for this project include cotton, jute, and sisal, each offering unique textures and durability. For instance, cotton rope is soft and easy to work with, making it an excellent choice for beginners, while sisal adds a rustic charm and durability.
Here’s a quick overview of the materials you'll need:
| Material | Description |
|---|---|
| Rope | Choose between cotton, jute, or sisal based on your desired texture and durability. |
| Hot Glue Gun | Essential for securing the rope together as you build your rug. |
| Scissors | For cutting the rope to your desired lengths. |
| Measuring Tape | To ensure your rug is the right size for your entryway. |
| Fabric or Canvas Base | A sturdy foundation to attach your rope and provide stability. |
| Optional: Paint or Stain | For those who want to add a pop of color or enhance the natural look of the rope. |
Once you have gathered all your materials, it’s essential to set aside enough time to work on your rug without interruptions. This project can be quite enjoyable if you have everything you need at hand. Additionally, don't forget to wear comfortable clothing and have a cozy spot to work, as you'll be spending some time crafting your masterpiece. Now that you have your materials sorted, you’re ready to dive into the creative process of making your own rope rug!
Preparing the Workspace
Creating a DIY rope rug is not just about the materials and the design; it's also about the environment in which you craft. A well-organized workspace can significantly impact your crafting experience, making it more enjoyable and efficient. Imagine trying to cook a gourmet meal in a cluttered kitchen—it's a recipe for disaster! Similarly, when preparing to make your rope rug, you want to ensure your workspace is conducive to creativity and productivity.
First things first, let's talk about choosing the right location. You want a spot that inspires you, perhaps near a window where natural light pours in, or a cozy corner of your home that feels inviting. Factors like noise levels, temperature, and even the type of flooring can influence your comfort while working. A quiet, well-lit area can help you focus on your project without distractions. Think about it—would you rather work in a chaotic environment, or one that feels like a serene sanctuary?
Now, let’s shine a light on lighting considerations. Good lighting is crucial for any crafting project. Not only does it help you see the intricate details of your rope rug, but it also prevents eye strain. Ideally, you want a combination of natural light and artificial lighting. Consider placing your workspace near a window for daylight and supplementing it with a bright lamp when the sun goes down. A warm, adjustable desk lamp can work wonders, allowing you to focus on your work without squinting.
Next up is organizing your tools. Keeping your materials and tools in order can save you time and frustration. Picture this: you're in the zone, ready to glue down that last piece of rope, but you can't find your adhesive! To avoid this scenario, take a few moments to arrange your workspace. Use small containers or trays to group similar items together—think scissors, glue, and measuring tape in one spot, while your rope and fabric scraps are neatly stored nearby. This way, everything you need is within arm's reach, letting you craft without interruption.
To further enhance your workspace, consider creating a small checklist of items you’ll need for your rope rug project. Here’s a quick overview:
| Item | Purpose |
|---|---|
| Rope | Base material for the rug |
| Adhesive | To secure the rope together |
| Scissors | For cutting the rope to desired lengths |
| Measuring Tape | To ensure accurate dimensions |
Lastly, don’t forget about safety precautions. Crafting can sometimes lead to minor accidents, so it’s wise to keep a first aid kit nearby and wear protective gear if necessary. Safety should always be a priority when working on DIY projects. Ensure your workspace is free of clutter to minimize the risk of tripping or cutting yourself while maneuvering around your materials.
In conclusion, preparing your workspace is an essential step in the DIY rope rug-making process. By choosing the right location, ensuring good lighting, organizing your tools, and keeping safety in mind, you’ll create an environment that not only inspires creativity but also enhances your overall crafting experience. So roll up those sleeves and get ready to create a stunning piece for your entryway!

Choosing the Right Location
When it comes to crafting your DIY rope rug, the location you choose can make all the difference in your experience and the final product. Think of your workspace as the stage where your creativity will unfold; a well-chosen location can inspire you and keep distractions at bay. So, where should you set up shop? First, consider the space available. You’ll want a flat surface that’s large enough to accommodate your rug as it grows, so a dining table or a spacious floor area works well. Avoid cramped corners or cluttered spaces that can stifle your creativity and lead to frustration.
Next, think about access to power outlets if you're using tools that require electricity, such as hot glue guns or electric scissors. Having everything within reach can save you from unnecessary trips back and forth, which can break your focus. And let’s not forget about comfort. If you’re going to spend hours working on this project, make sure you’re comfortable. A chair with good back support or a cushion on the floor can make the world of difference.
Another important factor is distraction levels. Choose a spot that allows you to concentrate. If you have kids or pets, setting up in a quieter room or during their nap times can help you dive into your project without interruptions. You might even want to consider putting on some music or a podcast to keep your energy up while you work!
Lastly, consider the lighting. Natural light is ideal, as it can help you see colors and details more clearly, but if that’s not an option, ensure you have bright, adjustable artificial lighting. This way, you won’t strain your eyes while working on intricate patterns. In summary, when choosing your workspace, think about space, comfort, accessibility, distraction levels, and lighting. Each of these elements will contribute to a more enjoyable and productive crafting experience!

Lighting Considerations
When embarking on your DIY rope rug project, lighting plays a crucial role that often goes unnoticed. Imagine trying to craft a beautiful rug in a dimly lit room; it’s like trying to paint a masterpiece in the dark! Good lighting not only enhances your visibility but also boosts your creativity and focus. You want to ensure that your workspace is well-lit to avoid straining your eyes and to see the true colors of your materials.
Consider using a combination of natural and artificial light. If possible, set up your workspace near a window to take advantage of natural light during the day. However, since crafting can often extend into the evening, having sufficient artificial lighting is essential. A bright, adjustable desk lamp can provide the focused light you need without overwhelming glare. Additionally, using LED bulbs can help reduce eye strain while providing a crisp, clear light that allows you to see every detail of your rope and tools.
Another important aspect of lighting is to avoid harsh shadows. Position your light source so that it illuminates your workspace evenly. You might want to experiment with different angles and heights to find what works best for you. If you notice any shadowy areas on your work surface, try adjusting your lighting setup. Remember, a well-lit workspace not only helps in crafting but also makes the entire experience more enjoyable.
To summarize, here are some key points to consider for optimal lighting:
- Utilize natural light by working near windows.
- Incorporate adjustable desk lamps for focused lighting.
- Choose LED bulbs to minimize eye strain.
- Adjust the position of your light source to eliminate shadows.
By paying attention to these lighting considerations, you’ll create a more comfortable and efficient crafting environment, allowing your creativity to flow freely as you work on your stunning rope rug!

Organizing Your Tools
When embarking on your DIY rope rug adventure, one of the most overlooked yet crucial aspects is . Imagine diving into a project only to spend half your time searching for that elusive pair of scissors or the right type of adhesive. Frustrating, right? A well-organized workspace not only boosts your efficiency but also enhances your creative flow. So, let’s dive into some practical tips that will help you keep everything in its place!
First and foremost, consider using a dedicated workspace. Whether it's a corner of your living room or a designated craft table, having a specific area for your project helps create a mental space for creativity. Start by gathering all the necessary tools and materials before you begin. This includes:
- Rope (various types)
- Scissors
- Hot glue gun and glue sticks
- Measuring tape
- Fabric or rug backing material
- Markers for marking your design
Once you have everything collected, it’s time to organize. You can use a variety of containers—think baskets, bins, or even repurposed jars—to keep your tools sorted. For example, keep all your adhesives in one container, while another can hold your scissors and measuring tools. This way, when you need something, it’s just a quick grab away!
Labeling is another excellent strategy. Use simple labels or tags to identify what’s inside each container. This is especially helpful if you have multiple bins or baskets. You can even color-code them to make it visually appealing and easy to navigate. This simple step can save you precious minutes during your crafting session.
Additionally, consider the layout of your workspace. Place frequently used tools within arm's reach. For instance, your scissors and glue gun should be easily accessible, while less frequently used items can be stored further away. This not only saves time but also reduces the risk of accidents as you won’t need to reach across the table for something sharp or hot while working.
Lastly, don’t forget about cleanup! After each crafting session, take a few minutes to tidy up your workspace. Return tools to their designated spots, and ensure that everything is clean and ready for next time. This habit not only keeps your space organized but also sets you up for success in your future projects.
By following these organizing tips, you’ll create a more enjoyable and productive environment for making your stunning DIY rope rug. Remember, a little organization goes a long way in unleashing your creativity!
Safety Precautions
When diving into the world of DIY, especially with projects like crafting a rope rug, safety should always be your top priority. Imagine you're embarking on a fun adventure, but you wouldn't want to trip over a hidden obstacle, right? Here are some essential safety tips to keep in mind:
First and foremost, protective gear is a must. At a minimum, consider wearing safety goggles to shield your eyes from any stray fibers or glue that might fly around during the crafting process. Additionally, gloves can keep your hands safe from cuts or abrasions, especially when handling rough or sharp materials. Think of these items as your trusty armor, ready to guard you against unexpected mishaps!
Next, ensure your workspace is well-ventilated. If you're using adhesives or paints, the fumes can be harmful if inhaled over prolonged periods. Open a window or turn on a fan to keep the air fresh and flowing. It's like giving your crafting area a breath of fresh air, making it a more pleasant place to work.
Another important aspect is to keep your workspace organized and clutter-free. A messy area can lead to accidents, such as tripping over loose materials or misplacing tools. Make it a habit to put things back in their designated spots after use. You wouldn’t want to lose your favorite crafting scissors in a sea of ropes, right?
Lastly, always read the labels and instructions on any materials or tools you are using. Understanding how to properly use them can prevent accidents and ensure that your project goes smoothly. It's akin to following a recipe; skipping steps can lead to unexpected results!
By keeping these safety precautions in mind, you can enjoy the creative process of making your rope rug without any unnecessary worries. Remember, a safe crafting experience is a happy crafting experience!
To further assist you as you embark on your DIY rope rug journey, here are some frequently asked questions:
- What type of rope is best for a DIY rug? - Natural fibers like jute or cotton are great choices as they are durable and easy to work with.
- How do I clean my rope rug? - Regular vacuuming and spot cleaning with mild soap and water will keep your rug looking fresh.
- Can I use synthetic rope? - Yes, synthetic ropes can also be used, but they may not have the same aesthetic appeal as natural fibers.
Choosing Your Design
When it comes to crafting your DIY rope rug, design is everything. It's not just about functionality; it's also about expressing your personal style and enhancing the overall aesthetic of your entryway. Think of your rug as a canvas where you can showcase your creativity. The right design can transform a simple space into something inviting and unique. So, how do you choose the perfect design? Let's dive into some considerations that will help you make that decision.
First, consider the overall theme of your entryway. Is it modern and minimalistic, or does it have a rustic charm? The design of your rope rug should complement the existing decor rather than clash with it. For instance, if your entryway features natural wood elements, a braided rope rug in earthy tones can create a harmonious look. Alternatively, if your space is more contemporary, you might opt for a geometric pattern in bold colors to make a statement.
Next, think about the patterns and shapes that resonate with you. Patterns can range from simple and classic to intricate and vibrant. For inspiration, you might want to browse through design magazines, Pinterest boards, or even local home decor stores. Some popular pattern ideas include:
- Chevron: A timeless zig-zag pattern that adds a dynamic feel.
- Stripes: Simple yet effective, stripes can elongate the look of your entryway.
- Floral: Perfect for a touch of whimsy, floral patterns can soften the space.
Color selection is another critical aspect of your design. Colors evoke emotions and set the tone for your space. You might want to choose colors that either contrast with or complement your walls and furnishings. For example, if your entryway has light-colored walls, a darker rug can create a striking visual contrast. Conversely, if your space is already filled with vibrant colors, a neutral-toned rug can help balance everything out.
Lastly, don’t forget about the size and shape of your rug. The dimensions should fit well within your entryway without overwhelming it. Consider whether you want a round, square, or rectangular rug, as each shape brings its own vibe. A round rug can soften sharp corners, while a rectangular rug can define a space more clearly. Measure your area before you start, as this will help you visualize how your design will come together.
In summary, choosing the right design for your DIY rope rug is a blend of personal preference and practical considerations. By aligning your rug's design with your entryway's theme, selecting appealing patterns and colors, and ensuring the right size and shape, you can create a stunning focal point that welcomes guests and reflects your style.
Q: What type of rope is best for making a rug?
A: Natural fibers like jute or cotton are popular choices for their durability and aesthetic appeal. Synthetic ropes can also work but may not have the same texture.
Q: How do I clean my rope rug?
A: Regular vacuuming is essential. For deeper cleaning, you can spot clean with mild soap and water. Avoid soaking the rug to prevent damage.
Q: Can I use my rope rug outdoors?
A: While some rope rugs are suitable for outdoor use, it's best to check the material's durability against weather conditions. Natural fibers may not withstand moisture well.
Q: How long will my DIY rope rug last?
A: With proper care and maintenance, your rope rug can last for several years. Regular cleaning and avoiding excessive wear will extend its lifespan.
Pattern Ideas
When it comes to crafting your DIY rope rug, the pattern you choose can truly make or break the entire look of your entryway. Think of your rug as a canvas where you can express your personal style and creativity. Whether you prefer something classic and understated or bold and contemporary, the options are practically endless. One popular approach is to create a geometric pattern, which can add a modern flair to your space. Imagine a series of triangles or diamonds seamlessly woven together, creating a visual rhythm that draws the eye.
If you're looking for a more organic feel, consider using nature-inspired designs. You could mimic the gentle curves of leaves or the flowing lines of waves, which can bring a sense of tranquility and warmth to your entryway. For instance, a spiral pattern can evoke the feeling of a seashell, inviting guests to feel at home even before they step inside.
Another exciting idea is to incorporate a color gradient into your rug. By transitioning from one color to another, you can create a stunning ombre effect that adds depth and dimension. This technique can be particularly striking when using complementary colors that resonate with your home’s color palette. Imagine a rug that shifts from a deep navy blue at one end to a soft sky blue at the other, reminiscent of a serene sunset.
For those who love a bit of nostalgia, striped patterns are a timeless choice. You can play with varying widths and colors to create a dynamic look that feels both classic and fresh. Think of alternating thick and thin stripes in earthy tones to give your entryway a cozy, inviting vibe. Additionally, a checkerboard pattern can add a playful touch, making your rug a focal point as soon as someone walks in.
Lastly, don't shy away from mixing patterns! Combining different styles can lead to a unique and eclectic design that reflects your personality. For example, you could pair a bold geometric pattern with a softer, floral design in smaller sections of the rug. This contrast can create an engaging visual experience that keeps the eye moving and engaged.
In conclusion, the pattern you choose for your rope rug should resonate with your personal taste and the overall aesthetic of your home. Whether you go for geometric shapes, nature-inspired designs, color gradients, stripes, or even a mix of patterns, make sure it’s something that brings you joy every time you step into your entryway. The right pattern can transform a simple rug into a stunning piece of art that welcomes your guests with open arms.
- What type of rope is best for making a rug? Natural fiber ropes like jute or cotton are excellent choices as they are durable, eco-friendly, and easy to work with.
- How do I maintain the shape of my rope rug? Regularly fluffing and reshaping your rug can help maintain its form. Additionally, using a rug pad underneath can provide extra support.
- Can I wash my rope rug? Yes, but it’s best to spot clean it with mild soap and water. Avoid soaking it completely to prevent damage.
- What colors should I choose for my entryway rug? Choose colors that complement your existing decor. Neutral tones can create a calming effect, while vibrant colors can add a pop of excitement.
Color Selection
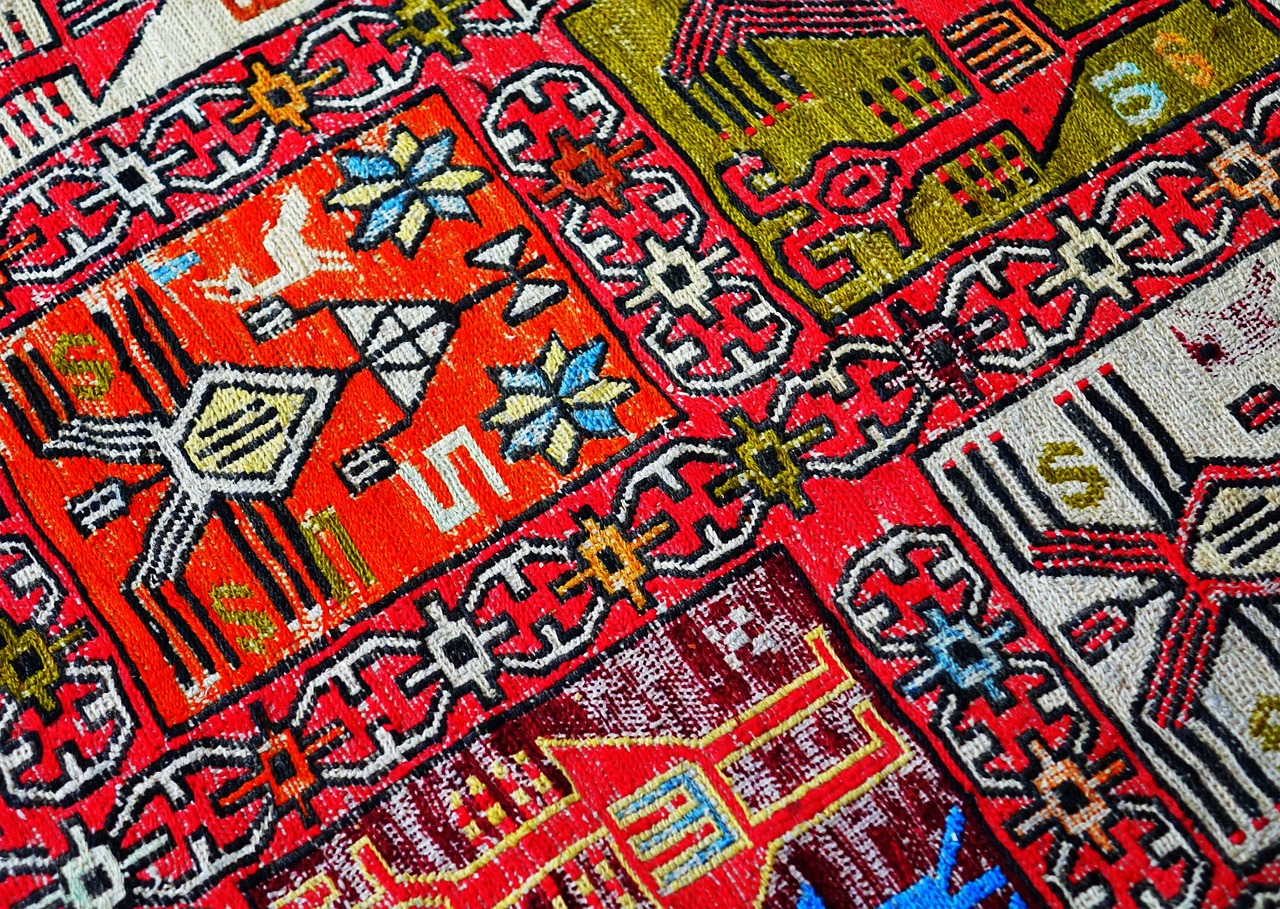
Choosing the right colors for your DIY rope rug is like picking the perfect outfit for a big occasion; it sets the tone and reflects your personal style. The colors you select can transform your entryway from drab to fab, creating an inviting atmosphere that welcomes guests as soon as they step through the door. So, how do you go about making this important decision? Let's dive into some tips and tricks that will make color selection a breeze!
First off, consider the existing color scheme of your entryway. Are your walls painted in a soft pastel, or do you have bold, vibrant hues? The rug should either complement or contrast these colors effectively. For instance, if your walls are a muted gray, a bright yellow or turquoise rug can add a pop of color and make the space feel lively. On the other hand, if your entryway is already colorful, a neutral color like beige or cream might be the way to go, allowing the rug to blend seamlessly into the background.
Another factor to consider is the mood you want to evoke. Colors have psychological effects; for example, blue is often associated with calmness, while red can energize a space. If you want your entryway to feel warm and inviting, consider using warm tones like reds, oranges, and yellows. Conversely, if you prefer a more serene atmosphere, cool colors like greens and blues can work wonders.
Don't forget about patterns! Sometimes, a solid color isn’t enough to make a statement. Incorporating patterns can add depth and interest to your rug. Think about stripes, chevrons, or even floral designs that can tie together various elements in your entryway. If you’re feeling adventurous, you might even consider a multi-colored rope to create a unique, eye-catching effect.
To help you visualize your options, here’s a simple table that outlines some popular color combinations and their effects:
| Color Combination | Effect |
|---|---|
| Blue & White | Calm and refreshing |
| Gray & Yellow | Modern and vibrant |
| Red & Beige | Warm and inviting |
| Green & Brown | Natural and earthy |
Finally, always remember to test your color choices in the actual space. Colors can look vastly different depending on lighting and surrounding elements. Grab some paint swatches or fabric samples and hold them up against your walls and other decor. This way, you can make sure that your chosen colors will truly shine in your entryway.
In conclusion, color selection is a fun and essential part of creating your DIY rope rug. By considering your existing color scheme, the mood you want to create, and even experimenting with patterns, you can find the perfect colors that will not only enhance your entryway but also reflect your unique style.
Step-by-Step Instructions
Creating a DIY rope rug may seem daunting at first, but with the right approach, it can be a fun and rewarding project. Let’s break it down into manageable steps, ensuring you have a beautiful rug to welcome guests into your home. First, gather all your materials, including your chosen rope, scissors, hot glue gun, and a sturdy base like a piece of canvas or a thick cardboard. Having everything at your fingertips will streamline the process and keep you focused.
Now, let’s get started on laying the foundation for your rug. Begin by cutting your base material to the desired size. If you want a round rug, a circular base works best; for a rectangular shape, a rectangular base will do. Once your base is ready, it’s time to start coiling your rope. Take one end of the rope and secure it to the base with hot glue. This initial glue application is crucial as it will hold the entire rug together.
As you coil the rope, be sure to keep it tight and close together, creating a neat spiral. You can use a hot glue gun to attach the rope to the base as you go, applying glue every few inches to ensure it stays in place. This method not only adds to the rug's durability but also gives it a polished look. Remember, this is where you can get creative! Feel free to change directions, overlap the rope, or even incorporate different colors to add a unique touch.
Once you've reached the desired size of your rug, it’s time to secure the edges. Cut the rope, leaving a few extra inches to tuck under the last coil. Apply glue to the underside of the rope and press it firmly against the base. This step is essential for preventing any unraveling and ensuring your rug remains intact for years to come.
Now for the finishing touches! This is your chance to personalize your rug. You might want to add decorative elements like tassels or fringe at the edges. To do this, cut small lengths of rope, fold them in half, and glue them to the edges of your rug for a playful, bohemian vibe. Alternatively, you could dye sections of the rope before gluing them down for an ombre effect. The possibilities are endless!
Once everything is glued and secure, let your rug dry completely. This is a crucial step; rushing it might result in a floppy rug that doesn’t hold its shape. After drying, give your rug a gentle shake to remove any loose fibers, and voilà! You have a stunning DIY rope rug that not only enhances your entryway but also showcases your creativity and craftsmanship.
Q: How long does it take to make a rope rug?
A: The time it takes can vary based on the size of the rug and your crafting speed, but typically, you can expect to spend a few hours to a full day on the project.
Q: Can I wash my rope rug?
A: Yes, but be sure to check the materials used. Most rope rugs can be spot cleaned or hand washed gently. Avoid machine washing as it may damage the rug.
Q: What type of rope should I use?
A: Natural fibers like jute or cotton are great options for a rustic look, while synthetic ropes can offer durability and a pop of color. Choose based on your desired aesthetic and functionality.
Q: How do I prevent my rug from slipping?
A: Consider adding a non-slip rug pad underneath or applying a layer of silicone adhesive to the bottom of the rug to keep it securely in place.
Starting the Base
Creating a sturdy base is the first step in crafting your DIY rope rug, and it’s crucial for ensuring that your rug will stand the test of time. Think of the base as the foundation of a house; without a solid base, everything else crumbles. To get started, you’ll need to choose a suitable material for the base. Many crafters opt for a sturdy fabric like burlap or canvas, which provides a strong foundation while also being flexible enough to allow for creativity in your design.
Begin by cutting your base material to the desired size of your rug. It’s essential to leave a little extra around the edges to account for any adjustments you might need to make later. A good rule of thumb is to add an extra 2-3 inches on each side. Once you’ve cut your fabric, lay it flat on a clean surface. This is where the magic begins!
Next, you’ll want to start laying out your rope. Before you begin attaching it to the base, it’s wise to plan out your design. Visualize how you want the rope to flow across your base. Are you going for a circular pattern, or perhaps a more linear design? Take a moment to experiment with different arrangements. You can even use fabric chalk to sketch out your design lightly on the fabric. This will help guide you as you start to secure the rope.
Once you’re satisfied with the layout, it’s time to start attaching the rope. Using a strong adhesive or a hot glue gun, begin at one edge of the fabric and work your way across. Apply a generous amount of glue to the base and press the rope firmly into place. It’s important to keep the rope taut as you work to avoid any sagging in the finished product. Remember, patience is key here; take your time to ensure that each section is secure before moving on to the next.
As you progress, you may find it helpful to use a clamp or weight to hold down sections of the rope as the glue dries. This will prevent any shifting and help maintain the integrity of your design. If you’re working with multiple colors or types of rope, consider alternating them as you attach them to create a dynamic look.
Finally, once you’ve covered the entire base with rope, give the glue ample time to dry completely. This is crucial because a well-secured base will ensure your rug remains durable and functional for years to come. After the glue has dried, you can trim any excess rope from the edges of the base, ensuring a clean and polished finish. With the base complete, you’re one step closer to creating a beautiful and unique rope rug that will enhance your entryway!

Finishing Touches
Once you’ve successfully crafted the base of your DIY rope rug, it’s time to focus on the that will elevate your project from ordinary to extraordinary. These final details are crucial not only for aesthetics but also for ensuring the durability and functionality of your rug. Think of these touches as the icing on the cake; they can make a world of difference in the overall presentation.
One important aspect to consider is how you will secure the edges of your rug. A neatly finished edge not only looks professional but also helps prevent fraying. You might choose to use a simple whip stitch or a more decorative method like a braided edge. For those who love a bit of flair, adding a contrasting color of rope for the edge can create a stunning visual effect. Here’s a quick overview of some popular edge finishing techniques:
| Technique | Description |
|---|---|
| Whip Stitch | A simple method that involves wrapping thread around the edge to secure it. |
| Braided Edge | Using three strands of rope, braid them together and attach them to the edge for a textured look. |
| Contrast Stitching | Using a different color of thread or rope to create a decorative edge that stands out. |
In addition to securing the edges, consider adding some decorative elements to your rug. This could be anything from tassels at the corners to fabric patches that reflect your personal style. You might even want to incorporate some natural elements, like dried flowers or leaves, for a rustic touch. Remember, the goal is to make this rug uniquely yours, so let your creativity shine!
Lastly, don't forget to give your rug a good once-over before placing it in your entryway. Check for any loose threads or uneven spots, and make any necessary adjustments. A well-finished rug will not only enhance your home’s aesthetic but will also impress your guests as they step inside. So take a moment to step back, admire your handiwork, and bask in the satisfaction of a job well done!
- How do I clean my rope rug? Regularly vacuum your rug to remove dirt and debris. For deeper cleaning, spot clean with mild soap and water.
- Can I use different types of rope? Yes! Experiment with various materials like cotton, jute, or synthetic ropes to achieve different textures and appearances.
- How do I store my rope rug? When not in use, roll your rug and store it in a cool, dry place to prevent damage and maintain its shape.
Maintenance Tips
To ensure your DIY rope rug remains a stunning centerpiece in your entryway, proper maintenance is crucial. Just like any cherished item in your home, your rug deserves some TLC to keep it looking fresh and vibrant. Regular maintenance not only extends the life of your rug but also preserves its aesthetic appeal. So, let’s dive into some essential maintenance tips that will help you keep your rope rug in tip-top shape!
First and foremost, cleaning your rope rug regularly is vital. Dust and dirt can accumulate over time, dulling its appearance. A simple vacuuming session can do wonders! Use a vacuum cleaner with a brush attachment to gently remove debris without damaging the fibers. If your rug is particularly dirty, consider giving it a deeper clean. You can do this by:
- Mixing a mild soap solution with water.
- Dipping a soft cloth into the solution and gently scrubbing the affected areas.
- Rinsing with a damp cloth to remove any soap residue.
- Allowing it to air dry completely before placing it back in your entryway.
Another aspect of maintenance involves being mindful of the rug's placement. If your entryway sees a lot of foot traffic, consider rotating your rug periodically. This simple act can prevent uneven wear and tear. Moreover, if your rug is exposed to direct sunlight, it may fade over time. To combat this, try to position it in a way that minimizes sun exposure or consider using window treatments to filter light.
When it comes to storage, if you ever find yourself needing to tuck your rug away, make sure to roll it rather than fold it. Folding can create creases that might be difficult to flatten out later. Store it in a cool, dry place, away from moisture and direct heat sources. This will help prevent any potential mold or mildew growth, which can be detrimental to both the rug and your home environment.
Lastly, keep an eye out for any signs of damage. If you notice fraying edges or loose strands, take action immediately to prevent further deterioration. You can use a needle and thread to secure any loose ends or consult a professional if the damage is extensive.
Q: How often should I clean my rope rug?
A: It’s recommended to vacuum your rope rug at least once a week and perform a deeper clean every few months, depending on foot traffic and exposure to dirt.
Q: Can I use bleach on my rope rug?
A: No, bleach can damage the fibers and color of your rug. Stick to mild soap solutions for cleaning.
Q: How can I remove stains from my rope rug?
A: For stains, gently blot the area with a cloth soaked in a mild soap solution, then rinse with a damp cloth. Avoid scrubbing, as this can damage the fibers.
Q: What’s the best way to store my rope rug?
A: Roll your rug instead of folding it, and store it in a cool, dry place to prevent damage.

Cleaning Techniques
Keeping your DIY rope rug looking fresh and inviting is crucial, especially since it’s often the first thing guests notice when they step into your home. Regular maintenance not only enhances its aesthetic appeal but also extends its lifespan. So, how do you go about cleaning this unique flooring piece? Let’s dive into some effective cleaning techniques that will keep your rope rug in top-notch condition.
First and foremost, vacuuming is your best friend. Using a vacuum cleaner with a brush attachment, gently go over the surface of your rug to remove dust, dirt, and pet hair. This should be done at least once a week to prevent debris from embedding itself into the fibers. If your rug is particularly large or heavy, you might consider taking it outside and giving it a good shake to dislodge any stubborn particles.
In case of spills or stains, it’s essential to act quickly. Blot the area with a clean, dry cloth to absorb as much liquid as possible. Avoid rubbing, as this can push the stain deeper into the fibers. For stubborn stains, you can create a mild cleaning solution using warm water and a few drops of dish soap. Dampen a cloth with the solution and gently dab the stained area until the stain lifts. Always remember to rinse the area with clean water afterward to remove any soap residue.
For deeper cleaning, you might want to consider a spot cleaning method. Mix equal parts of white vinegar and water in a spray bottle and lightly mist the affected area. Let it sit for about 10-15 minutes before blotting it with a clean cloth. This natural solution not only cleans but also helps eliminate any odors that may have settled in the fibers.
Here’s a quick rundown of the cleaning techniques you can follow:
- Vacuum regularly to remove dirt and dust.
- Blot spills immediately to prevent stains.
- Use a mild soap solution for spot cleaning.
- Vinegar solution for deeper cleaning and odor removal.
Lastly, consider the environment in which your rug resides. If it’s in a high-traffic area, you might need to clean it more frequently. On the other hand, if it’s in a less frequented space, a monthly cleaning routine might suffice. By following these techniques, you’ll ensure that your rope rug remains a stunning focal point in your entryway for years to come.
Q: Can I machine wash my rope rug?
A: It’s generally not recommended to machine wash rope rugs as it can cause them to lose shape and integrity. Stick to vacuuming and spot cleaning for best results.
Q: How can I remove tough stains from my rug?
A: For tough stains, use a mixture of vinegar and water or a mild soap solution. Always blot instead of rubbing to avoid damaging the fibers.
Q: How often should I clean my rope rug?
A: Vacuum your rug at least once a week and perform deeper cleaning as needed, especially in high-traffic areas.
Q: What should I do if my rope rug starts to smell?
A: Use a vinegar solution to clean the rug, as it helps eliminate odors. Ensure the rug dries completely afterward to prevent mildew.
Storage Solutions
When it comes to storing your DIY rope rug, it's essential to consider both protection and accessibility. You want to ensure that your beautiful creation remains in top condition, ready to grace your entryway whenever you need it. One effective method is to roll your rug rather than folding it. Rolling minimizes creases and maintains the integrity of the rope fibers. Use a soft fabric or a breathable storage bag to protect it from dust and moisture. This approach not only keeps your rug safe but also makes it easy to unroll and display when the time comes.
Another great option is to hang your rug on a sturdy hook or a dedicated wall rack. This method prevents any pressure or weight from being applied to the fibers, which can lead to deformation over time. If you have limited wall space, consider using a large storage bin or a decorative basket to keep your rug neatly tucked away. Just remember to choose a container that allows air circulation, as this helps prevent mold and mildew.
Here’s a quick breakdown of some effective storage solutions:
- Rolling: Roll your rug tightly and store it in a breathable fabric bag.
- Hanging: Use hooks or racks to hang your rug, ensuring it stays flat and protected.
- Bins or Baskets: Store your rug in a large container that allows for air circulation.
By taking these simple steps to store your rope rug, you’ll not only prolong its lifespan but also keep it looking fresh and stylish for years to come. Remember, a little care goes a long way in maintaining the beauty and functionality of your handmade creations!
Q: How often should I clean my rope rug?
A: It's best to clean your rope rug regularly, ideally every few weeks, depending on foot traffic. Vacuuming can help maintain its appearance, while deeper cleaning can be done every few months.
Q: Can I use a washing machine for my rope rug?
A: It's generally not recommended to machine wash your rope rug, as the agitation can damage the fibers. Instead, opt for spot cleaning or hand washing with mild soap and water.
Q: What should I do if my rope rug gets wet?
A: If your rug gets wet, gently blot it with a clean, dry towel to absorb excess moisture. Then, allow it to air dry completely in a well-ventilated area, avoiding direct sunlight to prevent fading.
Q: How can I prevent my rope rug from slipping?
A: To prevent slipping, consider using a non-slip rug pad underneath your rope rug. This will provide extra grip and keep it securely in place.
Frequently Asked Questions
- What materials do I need to make a DIY rope rug?
To create your own rope rug, you'll need a few essential materials. These include the type of rope you prefer (like cotton or jute), scissors, a hot glue gun, and a sturdy base such as a piece of cardboard or a non-slip rug pad. Having these items ready will help streamline your crafting process.
- How do I prepare my workspace for making a rope rug?
Preparing your workspace is crucial for a smooth crafting experience. Make sure to choose a well-lit area, free from distractions. Organize your tools and materials so that they are easily accessible. A clean and comfortable workspace can significantly enhance your focus and creativity while working on your rug.
- What design options can I choose for my rope rug?
Your rope rug can be a true reflection of your personal style! Consider various designs such as geometric patterns, spirals, or even a simple solid color. Don’t hesitate to mix and match colors to create a unique look that complements your entryway.
- What are the step-by-step instructions for making the rug?
Start by laying down the base for your rug, then begin coiling and gluing the rope in your desired pattern. Make sure to secure the edges properly to prevent fraying. Once you’ve reached your desired size, add any finishing touches, like decorative elements or additional color accents.
- How do I maintain my DIY rope rug?
To keep your rope rug looking fresh, regular cleaning is essential. You can vacuum it gently or spot clean with mild soap and water. When storing it, roll it up and keep it in a cool, dry place to prevent any damage. Proper maintenance will ensure your rug lasts for years to come!


