Give Life to Woods: Carving Wooden Animal Figures
Have you ever looked at a piece of wood and imagined what it could become? The art of carving wooden animal figures allows you to transform a simple block of wood into a stunning representation of nature's beauty. It’s not just about whittling away at wood; it’s about breathing life into your creations, making them resonate with personality and charm. Whether you’re a novice eager to explore this captivating craft or a seasoned carver looking to refine your skills, the journey of carving wooden animals is both rewarding and fulfilling.
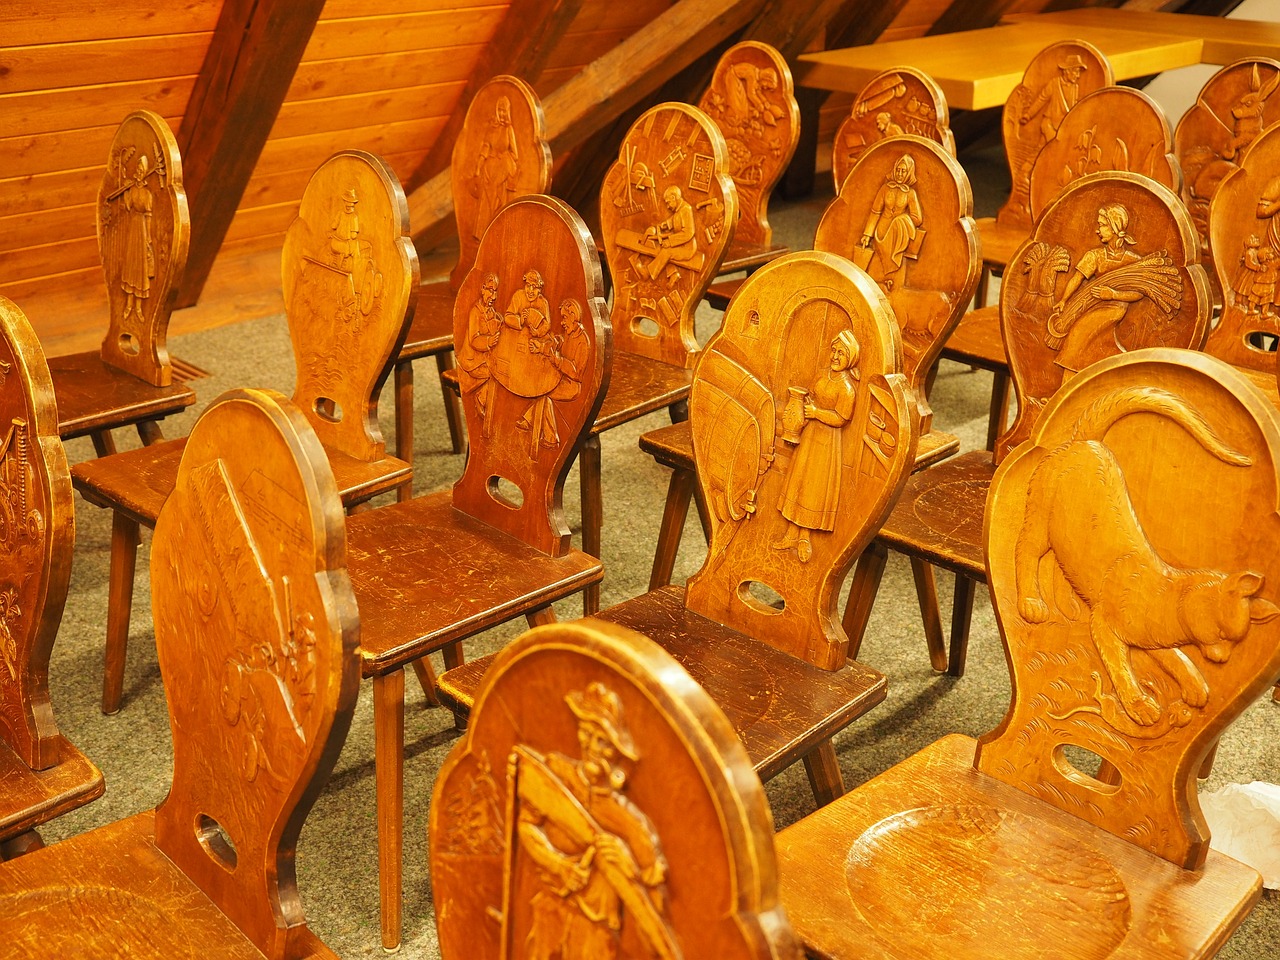
Carving wooden animal figures is an ancient art form that has stood the test of time, evolving through various cultures and eras. From the intricate totems of Native American tribes to the whimsical carvings of European artisans, the tradition of wood carving is steeped in history and creativity. This article will guide you through the essential techniques and tools needed to embark on your own carving adventure, and inspire you to create pieces that reflect your unique vision.
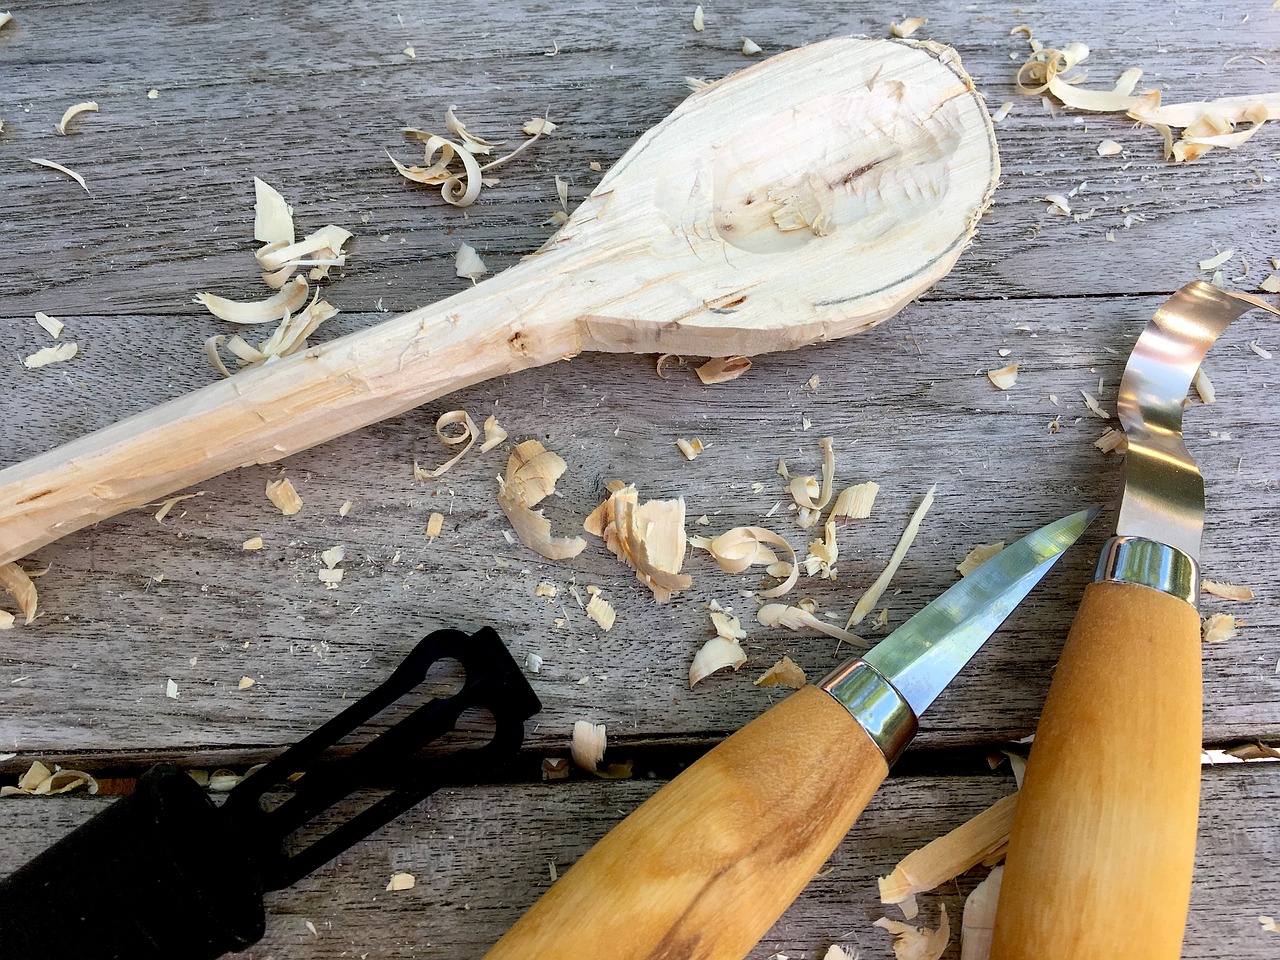
Imagine sitting in a cozy workshop, surrounded by the scent of fresh wood shavings, as you carefully carve out the contours of a majestic eagle or a playful bear. The process can be meditative, allowing you to connect with the material and the artistic spirit within you. Each cut you make brings you closer to revealing the creature hidden within the wood, and that excitement is what makes this craft so special.
Throughout this article, we’ll explore the rich history of wood carving, the essential tools that every carver should have in their arsenal, and the different types of wood that are perfect for creating animal figures. We’ll also cover basic carving techniques, tips for finding inspiration, and how to add those all-important finishing touches that will make your creations shine.
So, grab your tools and let’s dive into the world of wood carving! Whether you want to create a charming gift, a decorative piece for your home, or simply enjoy the process of making something beautiful, the art of carving wooden animal figures is waiting for you. Are you ready to unleash your creativity and give life to your wooden creations?
- What type of wood is best for carving animal figures? - Softwoods like pine and basswood are often recommended for beginners due to their ease of carving.
- Do I need special training to start carving? - No, while training can help, many carvers are self-taught and learn through practice.
- How long does it take to complete a carving project? - It varies depending on the complexity of the piece, but a simple figure can take a few hours to a couple of days.
- Can I use power tools for carving? - Yes, power tools can speed up the process, but traditional hand tools allow for greater precision and detail.
History of Wood Carving
This article explores the art of carving wooden animal figures, discussing techniques, tools, and inspiration for both beginners and seasoned carvers. Discover how to bring your wooden creations to life!
Understanding the historical context of wood carving enriches the craft. The art of wood carving dates back to ancient civilizations, where it was not just a form of artistic expression but also a practical necessity. Early humans utilized wood to create tools, shelter, and art, with carvings often reflecting their cultural beliefs and daily lives. For instance, the ancient Egyptians carved intricate wooden figures to accompany their pharaohs in the afterlife, believing that these figures would serve them in the next world.
As we moved through history, wood carving evolved significantly. In the Middle Ages, wood became a primary material for religious sculptures, as artisans crafted elaborate altarpieces and icons that adorned churches and cathedrals. During this time, the demand for detailed and expressive carvings grew, leading to the development of specialized tools and techniques. The Renaissance period saw a resurgence in interest for classical themes, with woodcarvers drawing inspiration from mythology, nature, and human emotion, which paved the way for more lifelike representations.
In contrast, the 19th century brought about the Industrial Revolution, which transformed wood carving into a more commercial enterprise. While mass production of wooden items became commonplace, skilled artisans began to focus on unique, handcrafted pieces that showcased their individual style and craftsmanship. This era also saw the rise of folk art, where everyday objects were transformed into beautiful works of art through carving.
Today, wood carving continues to thrive as both a hobby and a profession. With modern tools and techniques, carvers can create stunningly intricate animal figures that capture the essence of their subjects. The influence of ancient practices is still evident, as many contemporary carvers pay homage to traditional methods while also experimenting with new styles and materials. This blend of history and innovation keeps the art of wood carving alive and vibrant, inspiring both new and seasoned artists alike.
The right tools are crucial for successful wood carving. Here, we examine the essential tools every carver should have, from knives to chisels, and how they contribute to creating detailed animal figures.
Different types of knives serve various purposes in wood carving. This section outlines the specific knives used for intricate details versus larger cuts, helping carvers choose the right tool for their projects.
Detail knives are designed for precision work. We discuss their features and how they can enhance the fine details of your wooden animal figures, making them more lifelike and appealing.
Carving knives are versatile tools that can handle a range of tasks. This section covers their uses in shaping and refining animal figures, emphasizing their importance in the carving process.
Chisels and gouges add depth and texture to wood carvings. Here, we explore the different types of chisels and gouges available, and how each can be used effectively in animal figure carving.
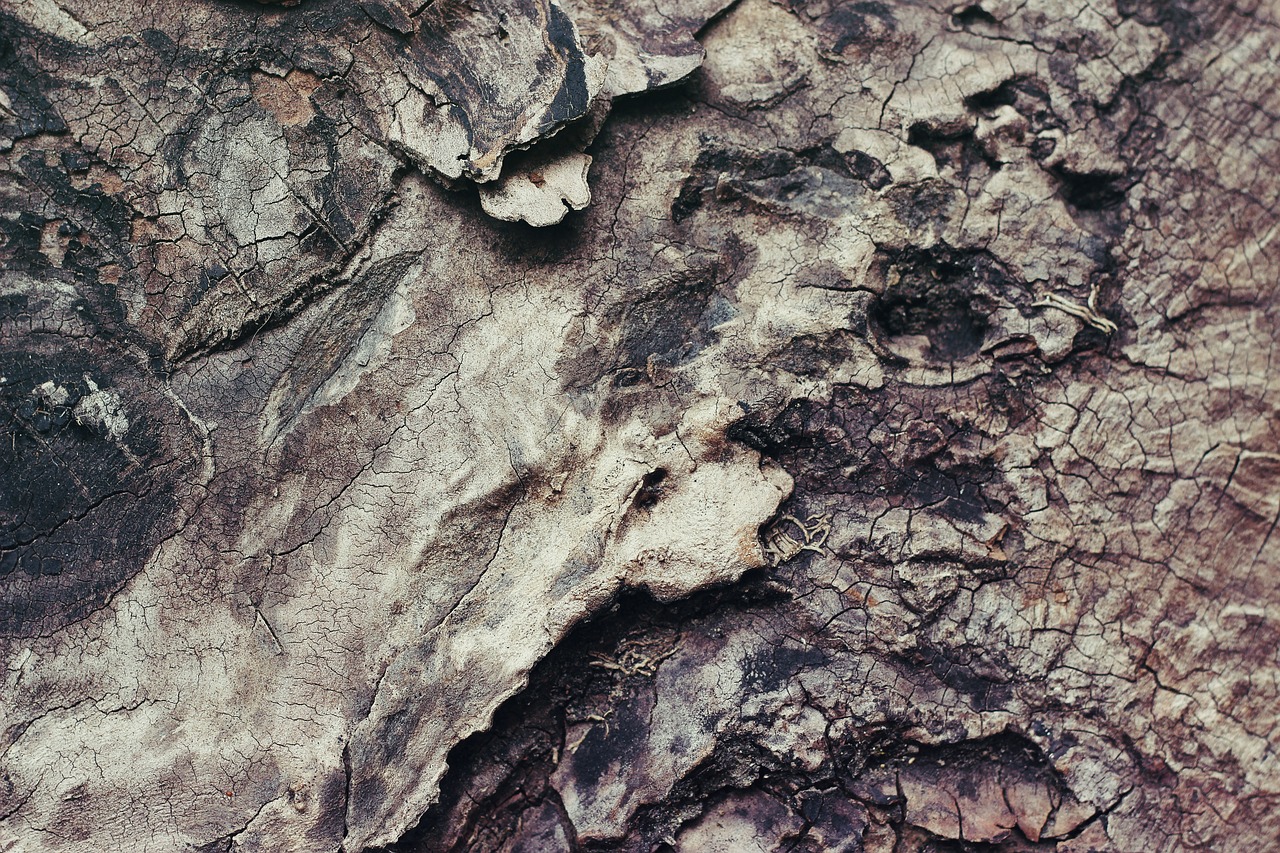
Selecting the appropriate wood is vital for successful carving. This section discusses various types of wood, their characteristics, and how they influence the final appearance and durability of wooden animal figures.
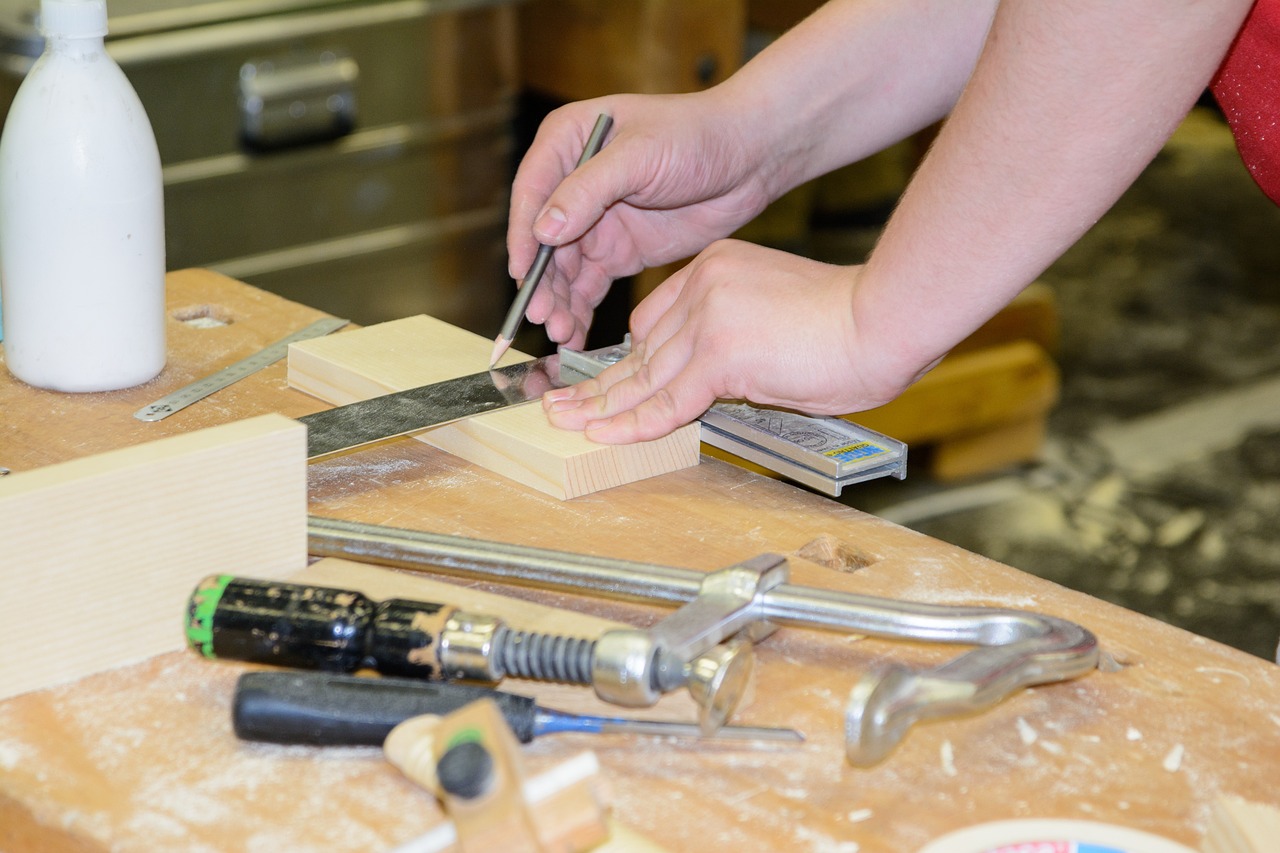
Mastering basic carving techniques is essential for beginners. In this part, we cover fundamental methods, including roughing out shapes and detailing, providing a solid foundation for creating wooden animal figures.
Roughing out shapes is the first step in carving. We explain how to start with a block of wood and gradually form the basic outline of your animal figure, ensuring a solid structure for further detailing.
Detailing techniques bring your carvings to life. This section highlights methods for adding features such as fur texture and facial expressions, transforming a simple figure into a captivating work of art.
Finding inspiration is crucial for any artist. Here, we explore sources of inspiration for carving wooden animal figures, from nature to mythology, encouraging creativity and originality in your work.
Finishing touches can elevate your carved figures. This section discusses sanding, painting, and sealing techniques to protect and enhance the beauty of your wooden animal creations, ensuring they stand the test of time.
- What type of wood is best for carving animal figures?
Softwoods like pine and basswood are popular choices for beginners due to their ease of carving, while hardwoods such as oak and cherry offer durability and a beautiful finish.
- Do I need specialized tools to start carving?
While specialized tools can enhance your carving experience, a few basic knives and chisels are sufficient for beginners to get started.
- How can I improve my carving skills?
Practice is key! Start with simple projects, seek feedback from fellow carvers, and consider taking workshops to learn new techniques.

Essential Tools for Carving
When it comes to carving wooden animal figures, having the right tools is essential for ensuring that your artistic vision comes to life. Imagine trying to paint a masterpiece with a brush that’s too stiff or a palette that’s lacking color; similarly, the right carving tools can make all the difference in your woodwork. Whether you're a novice just starting out or a seasoned carver looking to refine your craft, understanding the tools at your disposal is crucial.
First and foremost, let's talk about the knives. Knives are the backbone of any woodcarver's toolkit, and they come in various shapes and sizes, each designed for specific tasks. For instance, detail knives are perfect for intricate work, allowing you to etch fine lines and textures into your wood. On the other hand, carving knives are more versatile, suitable for both shaping and detailing. It's like having a Swiss Army knife for your wood carving – one tool can do many things!
Next up are chisels and gouges. These tools are fantastic for adding depth and texture to your carvings. Chisels have a straight edge and are great for making clean cuts, while gouges have a curved blade that allows for more rounded shapes. Together, they can help you create stunning animal figures that feel alive. Think of chisels as your sculpting tools, carving out the finer details, while gouges are like your paintbrushes, adding texture and dimension.
To give you a clearer picture, here's a quick overview of the essential tools:
| Tool Type | Purpose |
|---|---|
| Detail Knives | For intricate detailing and fine lines |
| Carving Knives | Versatile for shaping and refining |
| Chisels | For clean cuts and shaping |
| Gouges | For adding depth and texture |
Aside from knives and chisels, you’ll also need a good whittling knife, which is perfect for beginners. It’s a simple tool that can help you get started with basic shapes before you dive into more complex designs. Think of it as the first step on your carving journey, like learning to walk before you run.
Don’t forget about safety equipment! A good pair of gloves and a carving apron can protect you from slips and accidents. After all, the last thing you want is to mar your masterpiece with an injury. Safety should always be a priority, just like ensuring you have the right tools for the job.
In conclusion, having the right tools is like having a solid foundation for a house. Without them, your carving journey may become frustrating and less enjoyable. So, gather your knives, chisels, and gouges, and get ready to unleash your creativity! The world of wood carving awaits you with open arms.
- What is the best type of wood for beginners? Basswood is often recommended due to its softness and ease of carving.
- Do I need to sharpen my tools? Yes, keeping your tools sharp is essential for clean cuts and easier carving.
- Can I use power tools for carving? While some carvers use power tools, traditional hand tools allow for greater control and detail.
Types of Knives
When it comes to the art of wood carving, having the right tools is equivalent to a painter possessing a fine set of brushes. Among these tools, knives play a pivotal role, each designed with specific purposes in mind. Understanding the different types of knives can significantly enhance your carving experience and the quality of your wooden animal figures.
First and foremost, we have the detail knives. These are the precision instruments of the carving world, crafted to handle intricate work. If you think of detail knives as the fine-tipped pens of an artist, you’ll appreciate how they allow for the delicate strokes that bring your animals to life. Their narrow blades are perfect for carving features like eyes, fur texture, and other fine details that can make your figures truly stand out. The sharpness and shape of a detail knife enable you to create depth and realism, transforming a simple block of wood into a lifelike creature.
Next up are carving knives, which serve as the workhorses in your toolkit. These versatile tools are designed for a variety of tasks, from shaping larger areas to refining the overall form of your animal figures. Think of carving knives as the Swiss Army knives of wood carving; they can tackle a broad range of cuts and shapes, making them essential for both beginners and seasoned carvers alike. Their broader blades allow for smooth, sweeping motions, making it easier to remove material efficiently and shape your piece without much hassle.
In addition to these, there are also specialized knives that cater to specific styles of carving. For instance, hook knives are fantastic for hollowing out areas, making them perfect for creating bowls or other concave shapes in your animal figures. Similarly, whittling knives are ideal for those who enjoy creating smaller, more detailed pieces, often used in folk art or decorative carvings.
To sum it up, choosing the right knife for your carving project is crucial. It’s not just about having a collection of tools; it’s about understanding how each knife can contribute to your artistic vision. Whether you’re adding the tiny details that make a fox look fluffy or the smooth curves of a dolphin, the right knife can make all the difference. So, as you embark on your carving journey, remember to invest in a quality set of knives tailored to your needs. Your creations will thank you!
- What is the best type of wood for beginners? Basswood is often recommended due to its softness and ease of carving.
- How do I maintain my carving knives? Regularly sharpen your knives and clean them after each use to ensure longevity.
- Can I use regular kitchen knives for carving? While it’s possible, it’s not advisable as they lack the precision and design needed for wood carving.
- What safety precautions should I take while carving? Always carve away from your body, use a carving glove, and work in a well-lit area to avoid accidents.
Detail Knives
When it comes to carving wooden animal figures, are the unsung heroes of the craft. These specialized tools are designed for precision and finesse, allowing carvers to create intricate designs that breathe life into their creations. Imagine sculpting a delicate feather or defining the subtle curve of an animal’s ear; that’s where detail knives truly shine.
Detail knives feature a thin, sharp blade that is typically less than an inch wide, making them perfect for tight spaces and fine work. The handle is often ergonomically designed, providing a comfortable grip that allows for extended carving sessions without fatigue. The blade’s geometry is crucial; a curved or angled blade can help you reach those tricky spots that flat blades simply can’t manage.
To give you a clearer picture, here’s a quick comparison of some popular types of detail knives:
| Knife Type | Blade Length | Best Use |
|---|---|---|
| V-Tool | 1 inch | Creating lines and textures |
| Detail Knife | 0.5 - 1 inch | Fine detailing and shaping |
| Chip Carving Knife | 1 inch | Chip carving and decorative patterns |
Using a detail knife effectively requires practice and patience. Start with soft woods like basswood or butternut, as they are easier to carve and allow you to hone your skills without the frustration of harder materials. As you gain confidence, you can experiment with different woods and more complex designs.
One of the most rewarding aspects of using detail knives is the ability to add personality to your animal figures. Whether it’s the twinkle in a bird’s eye or the texture of a fur coat, these small details can make a significant difference. It’s akin to an artist adding the final brush strokes to a painting; those finishing touches transform a simple carving into a captivating piece of art.
In conclusion, detail knives are indispensable for any woodcarver looking to elevate their work. They offer the precision needed to bring out the finest details in your wooden animal figures, making your creations not just carvings, but stories waiting to be told. So, grab your detail knife and let your creativity flow!
- What is the best wood for using detail knives? Softwoods like basswood and pine are ideal for beginners due to their ease of carving.
- How do I maintain my detail knives? Regularly sharpen your blades and keep them clean to ensure optimal performance.
- Can I use detail knives for larger cuts? While they are primarily for fine work, they can be used for small sections of larger cuts if needed.

Carving Knives
When it comes to the world of wood carving, stand out as one of the most versatile tools a carver can possess. These knives are not just simple blades; they are the artist's brush, enabling the creation of detailed and lifelike wooden animal figures. Carving knives come in various shapes and sizes, each designed for specific tasks, making them essential for anyone looking to delve into this captivating craft.
One of the most important aspects of a carving knife is its blade shape. A typical carving knife features a thin, curved blade that allows for intricate cuts and smooth curves. This design is particularly useful when shaping the contours of an animal figure, as it enables precision and control. The handle of a carving knife is also crucial; it should fit comfortably in your hand, allowing for extended periods of carving without causing fatigue.
As a beginner, you might wonder, "How do I choose the right carving knife for my project?" Here are a few tips:
- Consider the project size: For larger pieces, a longer blade can help you make broad cuts, while smaller projects benefit from shorter, more agile blades.
- Look for comfort: A well-balanced knife with a comfortable grip is essential. You’ll want a tool that feels like an extension of your hand.
- Quality matters: Investing in a high-quality carving knife can make a significant difference in your carving experience. A sharp, durable blade will yield better results and reduce the risk of accidents.
Additionally, different carving techniques can be achieved with the right knife. For example, when creating fur texture or feather details, a knife with a fine edge allows for delicate cuts that mimic the natural patterns found in animals. On the other hand, for broader strokes and shaping, a wider blade can help you remove larger sections of wood more efficiently.
It’s also worth mentioning that maintaining your carving knives is crucial. Regular sharpening and proper storage will prolong the life of your tools and enhance your carving experience. A dull knife can be frustrating and dangerous, leading to slips and uneven cuts. So, invest in a good sharpening stone and make it a habit to keep your knives in top condition.
In conclusion, carving knives are indispensable in the art of wood carving. They not only allow for precise and detailed work but also enhance the overall enjoyment of the craft. Whether you're a novice or a seasoned carver, having the right carving knives at your disposal will undoubtedly elevate your wooden animal figures from simple shapes to stunning pieces of art.

Chisels and Gouges
When it comes to carving wooden animal figures, are your best friends. These tools are not just for making cuts; they are essential for adding depth, texture, and intricate details that truly bring your creations to life. Imagine chiseling away at a block of wood, and with each stroke, you unveil a beautiful creature that seems to leap off the surface. It’s like unearthing a hidden treasure, and the right tools make all the difference.
Chisels come in various shapes and sizes, each designed for specific tasks. For instance, a straight chisel is perfect for making clean, straight cuts, while a bevel-edged chisel allows for more control and precision in shaping the wood. On the other hand, gouges are curved tools that can scoop out wood, creating hollows and rounded shapes. They are particularly useful for carving features like the gentle curves of an animal’s body or the intricate details of its face.
Here’s a quick breakdown of some common chisels and gouges you might consider adding to your toolkit:
| Tool Type | Purpose |
|---|---|
| Straight Chisel | For making clean, straight cuts and edges. |
| Bevel-edged Chisel | For detailed work and precise shaping. |
| U-Gouge | For scooping out wood and creating hollows. |
| V-Gouge | For making fine lines and details, perfect for textures. |
Using chisels and gouges effectively requires practice and a good understanding of their capabilities. Start with simple projects to get a feel for how each tool interacts with the wood. As you gain confidence, you’ll find that these tools can help you add more intricate details to your animal figures, such as the texture of fur or the delicate features of a face. The right technique can transform a basic shape into a stunning representation of nature.
Moreover, it’s essential to keep your chisels and gouges sharp. Dull tools can lead to frustration and can even cause damage to your workpiece. Regularly honing your tools will ensure clean cuts and allow you to focus on the art of carving rather than struggling with your equipment. Remember, a sharp tool is a happy tool!
In summary, chisels and gouges are indispensable in the world of wood carving. They allow you to express your creativity and bring your artistic vision to life. So, whether you're a novice just starting out or a seasoned carver refining your skills, investing in quality chisels and gouges will undoubtedly enhance your carving experience.
- What is the difference between a chisel and a gouge? A chisel has a straight edge, while a gouge has a curved blade, which allows for different types of cuts and textures.
- How do I maintain my chisels and gouges? Regularly sharpen your tools and keep them clean. Store them in a dry place to prevent rust.
- Can I use regular knives for wood carving? While some knives can work, specialized carving tools like chisels and gouges are designed for better control and precision.
Choosing the Right Wood
When it comes to carving wooden animal figures, selecting the right type of wood is like choosing the perfect canvas for a painter. The wood you choose not only affects the ease of carving but also the final appearance and durability of your creation. Different woods possess unique characteristics that can enhance or hinder your artistic vision. For instance, some woods are softer and easier to carve, while others are denser and more challenging but can result in stunning detail.
Let’s dive into some popular wood types and their features:
| Type of Wood | Characteristics | Best Uses |
|---|---|---|
| Basswood | Soft, lightweight, and easy to carve | Beginners and detailed work |
| Butternut | Soft, with a rich, warm color | Carving and sculpting |
| Oak | Hard, dense, and durable | Durable outdoor sculptures |
| Cherry | Medium hardness, beautiful grain | Fine furniture and decorative pieces |
Each type of wood brings its own flavor to your project, so it’s essential to consider what you want to achieve. For example, if you are a beginner, Basswood is often recommended due to its softness and ease of handling. It allows you to practice your skills without the frustration of working with harder woods. On the other hand, if you’re aiming for a more intricate design that showcases detail, Butternut offers a beautiful finish that can elevate your work.
Moreover, the grain of the wood can significantly affect the final look of your animal figure. Woods with a pronounced grain, like Oak, can add texture and depth to your carving, while smoother woods like Basswood provide a clean slate for detailed work. Remember, the choice of wood can also influence the longevity of your piece; denser woods tend to withstand the test of time better than softer varieties.
In addition to these factors, consider the availability of the wood. Some types may be harder to find, or more expensive, depending on your location. It’s always a good idea to source your materials sustainably, supporting local suppliers and ensuring that you’re using wood that has been harvested responsibly.
In summary, choosing the right wood is a fundamental step in the wood carving process. It’s not just about aesthetics; it’s about finding a material that complements your skill level and artistic vision. Take your time to explore different options, and don’t hesitate to experiment with various woods to discover what works best for you!
- What is the best wood for beginners? Basswood is highly recommended for beginners due to its softness and ease of carving.
- Can I use any type of wood for carving? While you can technically carve any wood, softer woods are generally easier to work with and yield better results for detailed projects.
- How do I know if the wood is suitable for carving? Look for wood that is free of knots and has a consistent grain; softer woods are usually more suitable for carving.
Basic Carving Techniques
Mastering is essential for anyone looking to dive into the world of wood carving, especially when it comes to creating stunning wooden animal figures. The journey begins with understanding the fundamental methods that lay the groundwork for your artistic expression. Think of it as learning the alphabet before writing a novel; each technique builds upon the last, allowing you to craft intricate designs that breathe life into your wood.
One of the first techniques you'll encounter is roughing out shapes. This process involves taking a solid block of wood and gradually shaping it into the basic outline of your animal figure. Start with a larger, more manageable piece of wood and use your carving knife to chip away excess material. Imagine sculpting clay; you’re removing the parts that don’t belong to reveal the form hidden within. This step is crucial, as it sets the foundation for further detailing. The key is to work slowly and methodically, ensuring that you maintain a solid structure before moving on to finer details.
Once you have your basic shape, it’s time to dive into detailing techniques. This is where the magic happens! Detailing is what transforms a simple block of wood into a captivating animal figure. Techniques such as adding texture for fur, carving facial expressions, and refining body contours are essential. For instance, when creating the texture of fur, you can use a combination of your detail knife and chisels to create depth and realism. The goal is to evoke emotion and life in your carvings, making them not just objects, but characters with stories to tell.
To help you visualize these techniques, here’s a brief overview of the basic carving process:
| Step | Description |
|---|---|
| 1. Roughing Out | Begin with a block of wood and carve away excess material to form a basic shape. |
| 2. Detailing | Add intricate details like fur texture, facial features, and body contours to bring your figure to life. |
| 3. Finishing Touches | Sand, paint, and seal your carving to enhance its appearance and protect it from wear. |
Remember, practice makes perfect! Don’t be discouraged if your first few attempts don’t turn out as expected. Each carving is a learning experience, and with time, you’ll develop your unique style. Moreover, consider experimenting with different woods, as each type can yield different results and textures, adding further dimension to your work.
Finding inspiration is also crucial in this process. Look around you—nature, art, and even mythology can spark ideas for your next carving project. Whether you’re inspired by the majestic grace of a wolf or the playful spirit of a squirrel, let your imagination run wild. The world of wood carving is vast and filled with possibilities!
- What type of wood is best for beginners? Basswood is often recommended for beginners due to its softness and ease of carving.
- How long does it take to learn wood carving? Learning wood carving can take time; however, with consistent practice, you can see significant improvement within a few months.
- Do I need special training to start carving? No special training is required, but watching tutorials or taking a class can be beneficial.
Roughing Out Shapes
Roughing out shapes is the essential first step in the art of carving wooden animal figures. Imagine standing before a block of wood, your canvas, waiting for your vision to come to life. This stage is all about removing the excess material to reveal the creature hidden within. It’s like sculpting a masterpiece from a block of marble; you must chip away the unnecessary parts to unveil the beauty inside. The key here is to start big and gradually work your way to the finer details.
To begin, you'll want to assess the wood block and visualize the animal figure you plan to create. Take a moment to sketch a simple outline on the wood's surface—this will serve as your roadmap. Using a carving knife or a roughing knife, you can start making broad strokes to remove the bulk of the wood. Think of this process as carving a rough draft of your animal; you’re not concerned with the little details just yet. Instead, focus on the overall shape and proportions.
Here are a few tips to keep in mind while roughing out your shapes:
- Work with the Grain: Always try to carve in the direction of the wood grain. This will not only make your work easier but will also help prevent splintering.
- Use the Right Pressure: Apply even pressure as you carve. Too much force can lead to accidents, while too little may not effectively remove the wood.
- Regularly Step Back: Every few minutes, take a step back to assess your progress. This will help you see the overall shape and make adjustments as needed.
As you progress, don’t hesitate to switch tools if necessary. A larger knife might be useful for removing significant amounts of wood, while a smaller one can help refine the shape as you get closer to your desired form. Remember, this is a process, and patience is key. It’s about gradually transforming that rough block into a recognizable figure, and each cut brings you closer to your vision.
Once you have a rough shape that resembles your intended animal, it’s time to move on to the detailing phase. But before you rush ahead, take a moment to appreciate the work you've done. Each carve, each stroke, is a step toward bringing your creation to life. So, breathe it in, and get ready to dive deeper into the world of wood carving!
- What is the best type of wood for beginners? Basswood is often recommended due to its softness and ease of carving.
- How do I prevent my wood from splitting? Always carve with the grain and use sharp tools to minimize the risk of splitting.
- Can I use power tools for roughing out shapes? Yes, power tools can speed up the process, but they require careful handling to avoid accidents.
Detailing Techniques
When it comes to carving wooden animal figures, are where the magic truly happens. These techniques breathe life into your creations, transforming a simple block of wood into a captivating representation of nature. Imagine sculpting a majestic eagle or a playful puppy; the details you add can evoke emotions and tell stories. So, how do you achieve that level of detail? Let's dive into some key techniques that can enhance your carvings.
One of the first steps in detailing is to focus on texture. For instance, if you're carving a furry animal, you'll want to create the illusion of fur. This can be done using a variety of tools, such as detail knives and gouges, to carve small, repetitive cuts that mimic the look of fur. By varying the depth and direction of your cuts, you can create a more realistic appearance. Think of it as painting with your knife; each cut adds a stroke to your masterpiece.
Next, consider the facial expressions of your figures. The face is often the focal point of any carving, and capturing the right emotion can make all the difference. For example, a slight tilt of the mouth or a well-placed eye can convey happiness, curiosity, or even mischief. Spend time refining these features, using your detail knife to carve subtle lines and shapes that enhance the character of your animal. Remember, even the smallest detail can evoke a powerful response from the viewer.
Another essential technique is layering. This involves carving in stages, where you first establish the overall shape and then gradually add details. Start by roughing out the primary features, and once you're satisfied with the silhouette, begin to add finer details. This approach allows you to maintain control over the process and ensures that you don’t get overwhelmed by the intricacies of detailing too early on.
For those intricate areas, such as the paws of a bear or the feathers of a bird, consider using burnishing techniques. This involves smoothing the surface with a tool or even a piece of cloth to create a polished look. Burnishing can highlight the details you've carved, making them stand out even more. Additionally, it can add a tactile quality to your work, inviting viewers to reach out and touch your creation.
Lastly, don’t forget about the importance of finishing touches. After you've completed your carving, sanding and sealing the piece can enhance its visual appeal and protect it from the elements. A well-finished piece not only looks better but also lasts longer. Consider applying a natural oil or a varnish to bring out the grain of the wood and add a subtle sheen that highlights the details you’ve worked so hard to achieve.
In summary, mastering detailing techniques in wood carving is essential for any artist looking to elevate their work. By focusing on texture, facial expressions, layering, burnishing, and finishing touches, you can create stunning wooden animal figures that are not only beautiful but also resonate with those who view them. So, grab your tools and let your imagination run wild—your next masterpiece awaits!
- What tools are best for detailing in wood carving?
The best tools for detailing include detail knives, small gouges, and chisels. These allow for precision and control when adding intricate features.
- How do I choose the right wood for carving detailed figures?
Softwoods like pine or basswood are often recommended for beginners due to their ease of carving. However, hardwoods like cherry or walnut can provide beautiful finishes and are great for detailed work.
- Can I use power tools for detailing?
Yes, power tools can be used for detailing, but they require a steady hand and experience. It's often recommended to start with hand tools for finer details.
Inspiration for Animal Figures
Finding inspiration for carving wooden animal figures can be as thrilling as the act of carving itself. Just like a painter gazes at a blank canvas, a woodcarver stares at a block of wood, envisioning the creature that lies within. Inspiration can come from various sources, and understanding where to look can ignite your creativity and help you create stunning pieces that resonate with people.
One of the most profound sources of inspiration is nature. Observing animals in their natural habitats can provide insights into their forms, movements, and characteristics. Whether it's the graceful arch of a deer’s neck or the fierce gaze of a wolf, these details can be translated into your carvings. Taking a walk in the woods, visiting a zoo, or even watching documentaries can spark ideas. Imagine capturing the essence of a soaring eagle or the playful antics of a squirrel in your next project!
Another fascinating source of inspiration comes from mythology and folklore. Many cultures have rich traditions that feature animals as symbols or characters. For example, the majestic lion often represents strength and courage, while the wise owl symbolizes knowledge. By delving into these stories, you can infuse your carvings with deeper meaning. Think about how you can interpret these symbols through your art, creating pieces that tell stories or convey messages.
Additionally, looking at art history can provide a wealth of inspiration. Artists throughout the ages have depicted animals in various forms and styles. From the intricate carvings of ancient civilizations to modern interpretations, studying these works can stimulate your imagination. Consider how you can blend traditional techniques with contemporary styles to create something truly unique. You might even find inspiration in the textures and colors used by other artists.
Sometimes, inspiration can come from the emotional connections we have with animals. Pets, for instance, hold a special place in our hearts. Carving a figure of a beloved pet not only serves as a tribute but also allows you to channel your feelings into your work. This personal touch can make your carvings more meaningful, both to you and to those who admire them.
Lastly, don’t underestimate the power of community and collaboration. Joining a woodcarving group or attending workshops can expose you to new ideas and techniques. Sharing your experiences and seeing what others create can inspire you to try new approaches. You might even find a mentor who can guide you on your journey, helping you to refine your skills and expand your artistic vision.
In summary, inspiration for carving wooden animal figures can be found all around you. Whether it's the beauty of nature, the depth of mythology, the lessons of art history, personal connections, or the camaraderie of fellow artists, each source can help you breathe life into your creations. So, grab your tools and let your imagination run wild!
- What type of wood is best for carving animal figures? Softwoods like basswood and butternut are popular choices for beginners due to their ease of carving.
- Do I need to have prior experience to start carving? No, beginners are welcome! Start with simple projects and gradually work your way up to more complex figures.
- How can I protect my carved figures? Sealing your carvings with a wood finish or varnish will help protect them from moisture and wear.
- Where can I find carving patterns for animal figures? Many resources are available online, including free patterns, books, and dedicated woodcarving websites.
Finishing Touches
After investing your time and effort into carving a beautiful wooden animal figure, the are what truly elevate your creation from good to extraordinary. Just like the icing on a cake, these final steps can enhance the beauty, durability, and overall appeal of your work. So, what are the key finishing techniques that every woodcarver should know?
First off, sanding is an essential step in the finishing process. It’s not just about making your piece smooth; it’s about preparing the surface for further treatments. Start with a coarser grit sandpaper to remove any rough spots, and gradually move to finer grits. This progression will help you achieve a silky finish that feels as good as it looks. Remember, the goal is to make your figure inviting to touch, so don’t rush this step!
Next, consider adding a stain or paint to bring out the natural beauty of the wood. Stains can enhance the grain and color, allowing the unique characteristics of the wood to shine through. If you prefer a more vibrant look, paints can be used to add color and personality to your animal figures. Just make sure to choose products that are suitable for wood and compatible with your chosen finish. It’s always a good idea to test your stain or paint on a scrap piece of wood first to see how it reacts.
Once you’ve applied your stain or paint, sealing your piece is crucial. A good sealant protects your artwork from moisture, dirt, and wear, ensuring it lasts for years to come. There are various options available, including oils, varnishes, and polyurethane. Each has its own benefits, so choose one that aligns with your desired finish and the type of wood you’ve used. For instance, oils can give a warm, natural look, while varnishes offer a glossy finish that can really make your figure pop.
Here’s a quick overview of the finishing products you might consider:
| Product Type | Benefits |
|---|---|
| Oil | Enhances natural grain, easy to apply |
| Varnish | Durable, high gloss finish |
| Polyurethane | Water-resistant, great for high-use items |
Finally, don’t forget about the final inspection. Step back and admire your work. Look for any areas that might need a little more sanding or touch-up paint. This is your chance to make sure every detail is just right before you call it complete. Remember, the finishing touches are not just about aesthetics; they are about ensuring your creation is something you can be proud of and that will stand the test of time.
In conclusion, the finishing touches in wood carving are where the magic happens. By taking the time to sand, stain, seal, and inspect your wooden animal figures, you’re not just completing a project; you’re creating a lasting piece of art that tells a story. So grab your tools, and let’s give life to those woods!
- What type of wood is best for carving animal figures?
Softwoods like basswood and pine are popular choices for beginners due to their ease of carving. - How long does it take to finish a carved wooden figure?
It varies based on size and complexity, but expect several hours to a few days for detailed work. - Can I use regular paint on my carvings?
It’s best to use paints specifically designed for wood to ensure proper adhesion and durability. - How do I maintain my carved figures?
Keep them away from direct sunlight and moisture, and consider reapplying sealant every few years.
Frequently Asked Questions
- What tools do I need to start carving wooden animal figures?
To get started, you'll need a few essential tools, including a set of carving knives, chisels, and gouges. A detail knife is crucial for precision work, while carving knives are great for shaping. Don’t forget safety gear like gloves and a carving glove to protect your hands!
- What type of wood is best for carving animals?
Choosing the right wood is key! Softwoods like pine and basswood are popular for beginners due to their ease of carving. Hardwoods, such as oak or cherry, offer durability and a beautiful finish but can be more challenging to work with. It really depends on your skill level and the look you want to achieve!
- How can I find inspiration for my carvings?
Inspiration can come from anywhere! Look to nature—observe the animals around you, or visit a zoo. Mythology and folklore are also rich sources of ideas. Don’t forget to check out art books or online galleries to see what other carvers are creating!
- What are the basic techniques I should learn first?
Start with roughing out shapes to create a solid base for your figure. Once you have that down, move on to detailing techniques, like adding texture and facial features. These foundational skills will set you up for success in more intricate projects!
- How do I finish my carved wooden figures?
Finishing touches can make a huge difference! Sand your figure to smooth out rough spots, then consider painting or staining to add color. Finally, seal your piece with a protective finish to enhance its beauty and ensure it lasts for years to come!