
How to Build a DIY Wine Rack for Your Home
Are you a wine enthusiast looking to showcase your collection in a stylish and functional way? Building your own DIY wine rack can be a rewarding project that not only enhances your home decor but also provides a practical solution for storing your favorite bottles. In this comprehensive guide, we'll walk you through everything you need to know to create a stunning wine rack that complements your space and meets your needs.
First things first: selecting the ideal spot for your wine rack is crucial. You might be tempted to plop it down anywhere, but think again! Consider factors such as temperature, humidity, and accessibility. Wine is sensitive to its environment, so a cool, dark place is often best. A basement or a dedicated wine cellar can be perfect, but if that's not an option, look for a corner of your kitchen or dining room that stays relatively stable in temperature. You want your wine to age gracefully, just like a fine cheese!
Now that you've picked the perfect location, it’s time to gather the right materials. The sturdiness of your wine rack will heavily depend on the type of wood you choose, so let’s break down the essentials:
Choosing the right wood can impact both aesthetics and durability. Here are some popular options:
- Pine: Affordable and easy to work with, pine is a great choice for beginners.
- Oak: Known for its strength and beautiful grain, oak can add a touch of elegance to your rack.
- Cedar: This wood not only smells great but also has natural resistance to moisture and pests.
Each type of wood comes with its own set of benefits, so think about what fits your style and budget best. Remember, the right wood can make your wine rack a stunning focal point in your home.
Finishing your wine rack is like putting the cherry on top of a sundae; it enhances its appearance and protects it from wear. Popular finishing techniques include:
- Staining: This allows the natural beauty of the wood to shine through while adding color.
- Sealing: A sealant can protect against spills and moisture, ensuring longevity.
Choose a finish that complements your home decor and highlights the wood’s natural beauty. Your wine rack will not only be functional but also a piece of art!
If sustainability is a priority for you, consider eco-friendly materials for your wine rack. Options like reclaimed wood and non-toxic finishes are stylish and environmentally responsible. Reclaimed wood adds character and history to your project, while non-toxic finishes ensure that your wine storage is safe for you and your family.
A successful DIY project requires the right tools. Here’s a quick list of essential tools you’ll need:
- Saw (hand saw or power saw)
- Drill
- Screwdriver
- Measuring tape
- Sandpaper
Having the right tools will help you efficiently construct your wine rack and achieve professional results. Imagine trying to bake without a mixer – it just wouldn’t work, right?
Ready to get your hands dirty? This section provides detailed, easy-to-follow instructions for building your DIY wine rack. Each step is broken down for clarity, ensuring that both beginners and experienced DIYers can successfully complete the project.
Accurate measurements and cuts are critical for a well-fitted wine rack. Use your measuring tape to mark the dimensions of each piece carefully. When cutting, take your time; precision is key to avoiding mistakes during assembly. Think of it like cutting a pizza: you want even slices for the best experience!
Once the pieces are cut, assembly begins. Start by laying out your pieces to visualize the final product. This will help you see how everything fits together. Use your drill and screws to secure the joints, ensuring stability in the final product. A sturdy wine rack is essential, especially if you plan on filling it with bottles of your favorite vintages.
Q: How many bottles can a DIY wine rack hold?
A: This depends on the design and size of your wine rack. You can customize it to hold as few or as many bottles as you like.
Q: Can I use plywood for my wine rack?
A: Yes, plywood can be a great option for a wine rack, especially if you finish it nicely. Just ensure it's sturdy enough to hold the weight of the bottles.
Q: How do I maintain my wine rack?
A: Regularly dust your wine rack and check for any signs of wear or damage. If you notice any issues, address them promptly to keep your rack in top shape.

Choosing the Right Location
When it comes to building your own wine rack, the first and perhaps most crucial decision is . This isn't just about finding a spot that looks good; it's about ensuring that your wine is stored in optimal conditions. Think of your wine as a delicate flower; it needs the right environment to bloom and develop its full potential. So, what should you consider?
First and foremost, temperature plays a vital role in wine storage. Ideally, wine should be kept at a consistent temperature between 50°F and 60°F (10°C to 15°C). Fluctuations in temperature can cause the wine to expand and contract, which may lead to cork damage and spoilage. Therefore, avoid placing your wine rack in areas that experience direct sunlight or near heat sources like radiators or ovens. A dark, cool corner of your home is often the best choice.
Next up is humidity. Wine needs a certain level of humidity to keep the cork from drying out. If the cork dries, it can allow air to seep into the bottle, ruining the wine. Aim for a humidity level of around 70%. If your home is particularly dry, consider placing a small humidifier near your wine rack. This will help maintain that perfect moisture level, ensuring your wine stays fresh and flavorful.
Another factor to keep in mind is accessibility. You don’t want to place your wine rack in a spot that’s hard to reach. Think about how often you plan to enjoy a glass of wine. If you’re a regular enthusiast, having your wine rack in a convenient location, such as your kitchen or dining area, will make it easier to grab a bottle without hassle. On the other hand, if you’re more of a casual drinker, a less accessible spot like a basement might work just fine.
Lastly, consider the overall aesthetics of your home. Your wine rack should complement your existing décor and enhance the ambiance of the room. Whether you prefer a rustic wooden rack or a sleek modern design, the location should harmonize with your home’s style. After all, a wine rack isn’t just a storage solution; it’s also a decorative piece that can serve as a conversation starter during gatherings.
To summarize, here are the key factors to consider when choosing the right location for your DIY wine rack:
- Temperature: Keep it between 50°F and 60°F.
- Humidity: Aim for around 70% to protect the cork.
- Accessibility: Make sure it’s easy to reach.
- Aesthetics: Ensure it complements your home’s decor.
By taking these factors into account, you can create a perfectly curated space for your wine collection that not only looks great but also keeps your wine in fantastic condition.

Materials Needed
When embarking on your DIY wine rack project, gathering the right materials is essential to ensure that your creation is not only sturdy but also visually appealing. The materials you choose will greatly influence the durability and overall aesthetic of your wine rack. First and foremost, you’ll need to select the appropriate wood. Common choices include pine, oak, and cedar, each offering unique benefits. For instance, pine is lightweight and easy to work with, making it a great choice for beginners. Oak, on the other hand, is incredibly durable and gives a classic look, while cedar is naturally resistant to moisture and pests, which can be a significant advantage for wine storage.
In addition to wood, you’ll need some hardware to hold everything together. This typically includes screws, nails, and wood glue. The screws and nails ensure that your rack remains intact, while the wood glue adds an extra layer of strength to the joints. Remember, you can never have too much glue when it comes to woodworking!
Let’s not forget about the tools required for this project. You will need a saw for cutting the wood, a drill for making holes, and a screwdriver to secure the screws. A measuring tape is also crucial to ensure that your cuts are precise. If you have access to a miter saw, it can make your cuts much cleaner and more accurate, saving you time and hassle.
Here’s a quick overview of the materials and tools you’ll need:
| Materials | Description |
|---|---|
| Wood (Pine, Oak, Cedar) | Choose based on durability and aesthetics. |
| Screws | To secure the wood pieces together. |
| Nails | For additional support in joints. |
| Wood Glue | Extra bonding strength for joints. |
With your materials gathered, you’re well on your way to creating a beautiful wine rack that will not only hold your favorite bottles but also serve as a stunning piece of decor in your home. Remember, the quality of your materials will reflect in the final product, so take your time choosing the right ones!
Q: What type of wood is best for a wine rack?
A: The best type of wood for a wine rack depends on your personal preference and budget. Pine is a great choice for beginners due to its affordability and ease of use, while oak offers durability and a classic look. Cedar is excellent for its moisture resistance.
Q: How much space do I need for my wine rack?
A: The space required for your wine rack will depend on how many bottles you plan to store. Measure your available space and consider the dimensions of the wine rack you want to build. It's always good to leave a little extra room for accessibility.
Q: Can I use recycled materials for my wine rack?
A: Absolutely! Using reclaimed wood not only adds character to your wine rack but also promotes sustainability. Just ensure that the wood is in good condition and free from pests.

Wood Selection
When embarking on your DIY wine rack project, the choice of wood is not just a matter of aesthetics; it significantly impacts the overall durability and functionality of your rack. Think of wood as the backbone of your creation—without the right support, your beautiful wine collection could be at risk. So, let’s dive into some of the most popular wood types that are not only visually appealing but also practical for your wine storage needs.
Pine is often the go-to choice for many DIY enthusiasts due to its affordability and ease of work. It’s lightweight, making it easier to handle during construction. However, pine is softer than other hardwoods, so while it can be a great starter option, it may not withstand heavy use over time. If you opt for pine, consider reinforcing your structure to ensure it can hold the weight of your wine bottles without sagging.
On the other hand, oak is a fantastic choice if you’re looking for something that combines beauty with strength. Oak is known for its durability and resistance to warping, which makes it ideal for a wine rack that you want to last for years. Plus, its rich grain patterns add a touch of elegance, making your wine rack not just a functional piece, but a stunning addition to your home décor.
Another excellent option is cedar. This wood is particularly popular for wine racks due to its natural resistance to moisture and decay, which is crucial for storing wine properly. Cedar not only helps in maintaining the right humidity levels but also imparts a subtle aroma that can enhance the flavor of your wine over time. If you’re leaning towards a more rustic look, cedar can be a beautiful choice, with its warm tones and aromatic qualities.
In summary, when selecting wood for your DIY wine rack, consider the following factors:
- Durability: Will it withstand the weight of your wine collection?
- Aesthetics: Does it match your home décor?
- Cost: Is it within your budget?
Ultimately, the wood you choose should reflect both your personal style and the practical needs of your wine storage. Take your time to explore the options available, and remember that the right wood will not only enhance the look of your wine rack but also ensure that your bottles are stored safely and beautifully.
Q: What is the best type of wood for a wine rack?
A: The best type of wood depends on your budget and aesthetic preference. Oak and cedar are great options for durability and beauty, while pine is a more affordable choice.
Q: How much weight can a DIY wine rack hold?
A: This varies based on the wood type and design, but a well-constructed wine rack can typically hold several bottles without issue. Always reinforce joints for added stability.
Q: Can I use plywood for my wine rack?
A: Yes, plywood can be used, but ensure it is of high quality and consider using a solid wood veneer for the visible parts for a more finished look.

Finishing Options
When it comes to creating your DIY wine rack, the finishing touches can make all the difference. Not only do they enhance the overall appearance, but they also protect your wood from the wear and tear of time. Think of the finish as the icing on the cake; it can elevate something simple into a stunning centerpiece for your home. There are several finishing options to consider, each with its own unique benefits and aesthetic appeal.
One popular choice is staining. This technique allows you to add color while still showcasing the natural grain of the wood. You can choose from a wide variety of stain colors, ranging from deep mahogany to light oak, depending on the look you wish to achieve. Staining not only beautifies but also helps to protect the wood from moisture, which is essential for a wine rack that may be exposed to spills or humidity.
Another excellent option is sealing. Sealing your wine rack involves applying a protective layer that guards against scratches, spills, and other forms of damage. Clear sealants are particularly popular because they maintain the wood's natural look while providing a robust barrier. If you want to ensure that your wine rack remains in pristine condition for years to come, a good sealant is a must.
For those looking to add a bit of flair, consider using paint. While it may not be the traditional choice for a wine rack, a splash of color can be a fun way to express your personality. Whether you go for a bold hue or a soft pastel, painting your wine rack can turn it into a statement piece. Just remember to use paint that is safe for wood and suitable for the environment where the rack will be placed.
If sustainability is at the forefront of your values, look into eco-friendly finishes. These options are made from natural ingredients and are free from harmful chemicals. You can find non-toxic stains and sealants that not only protect your wood but also contribute positively to the environment. By choosing eco-friendly finishes, you can create a beautiful wine rack that aligns with your commitment to sustainability.
Ultimately, the finishing option you choose should reflect your style and the overall aesthetic of your home. Whether you prefer the rustic charm of a stained wood finish or the sleek look of a painted surface, make sure to take your time to apply the finish properly. A well-finished wine rack will not only look great but will also last longer, ensuring that you can enjoy your collection of wines for years to come.
- What type of wood is best for a wine rack? The best wood types for wine racks include oak, pine, and cedar, each offering unique benefits in terms of durability and aesthetics.
- How do I maintain my wine rack? Regularly dusting and checking for any signs of wear will help maintain your wine rack. If you notice any damage, consider reapplying the finish.
- Can I use reclaimed wood for my wine rack? Absolutely! Reclaimed wood not only adds character but is also an eco-friendly option.
- How long does it take for the finish to dry? Drying times can vary based on the product used; however, most finishes will require at least 24 hours to cure fully.

Eco-Friendly Choices
In today's world, where sustainability is becoming increasingly important, choosing eco-friendly materials for your DIY wine rack is not just a trend; it’s a responsibility. By opting for sustainable choices, you can create a beautiful piece that aligns with your values while also contributing to the health of our planet. One of the best options is using reclaimed wood. This type of wood is salvaged from old structures, furniture, or other sources, giving it a unique character and history. Not only does it help reduce waste, but it also requires less energy to process compared to new lumber.
Another great alternative is to use non-toxic finishes. Traditional wood finishes often contain harmful chemicals that can off-gas and affect indoor air quality. By selecting natural oils or water-based stains, you can protect your wine rack without compromising your health or the environment. Many of these eco-friendly finishes enhance the wood’s natural beauty while providing a durable protective layer.
When considering the overall design of your wine rack, think about incorporating local materials. Sourcing wood from nearby suppliers not only reduces transportation emissions but also supports local economies. Plus, local woods often have unique traits that can add a special touch to your project. Popular local options might include maple, cherry, or walnut, depending on your region.
Lastly, remember that sustainability extends beyond just the materials. Consider the entire lifecycle of your project. For instance, using screws and fasteners made from recycled materials can further enhance the eco-friendliness of your wine rack. By making mindful choices throughout your DIY process, you can create a stunning wine rack that is not only functional but also a testament to your commitment to sustainability.
- What type of wood is best for a wine rack? While many types of wood can be used, oak, pine, and cedar are popular choices due to their durability and aesthetic appeal.
- Can I use paint on my wine rack? Yes, but it's advisable to use non-toxic, water-based paints to maintain a safe environment.
- How do I maintain my wine rack? Regularly dust the rack and apply a fresh coat of finish as needed to keep it looking its best.
- Is reclaimed wood safe for food storage? Yes, as long as it is properly cleaned and treated, reclaimed wood can be a safe and stylish choice.

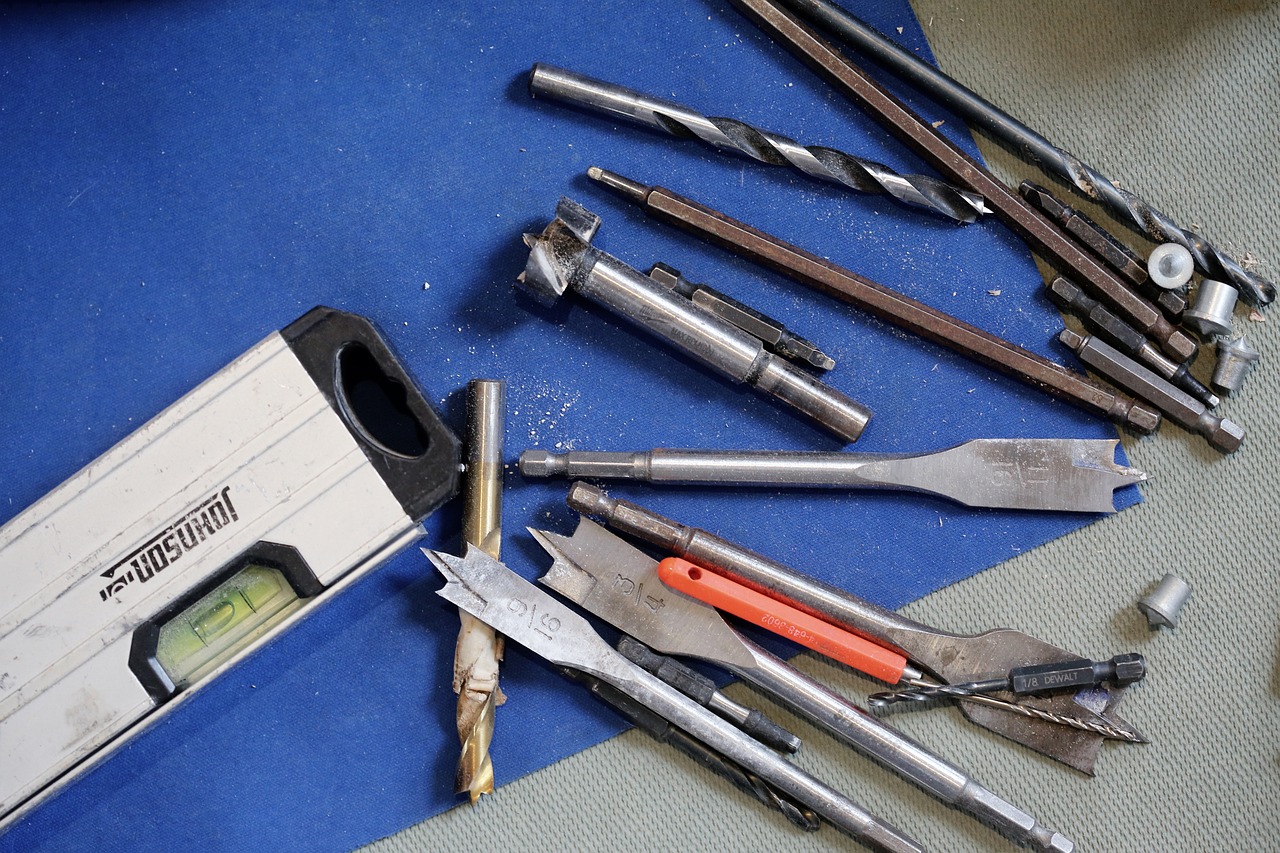
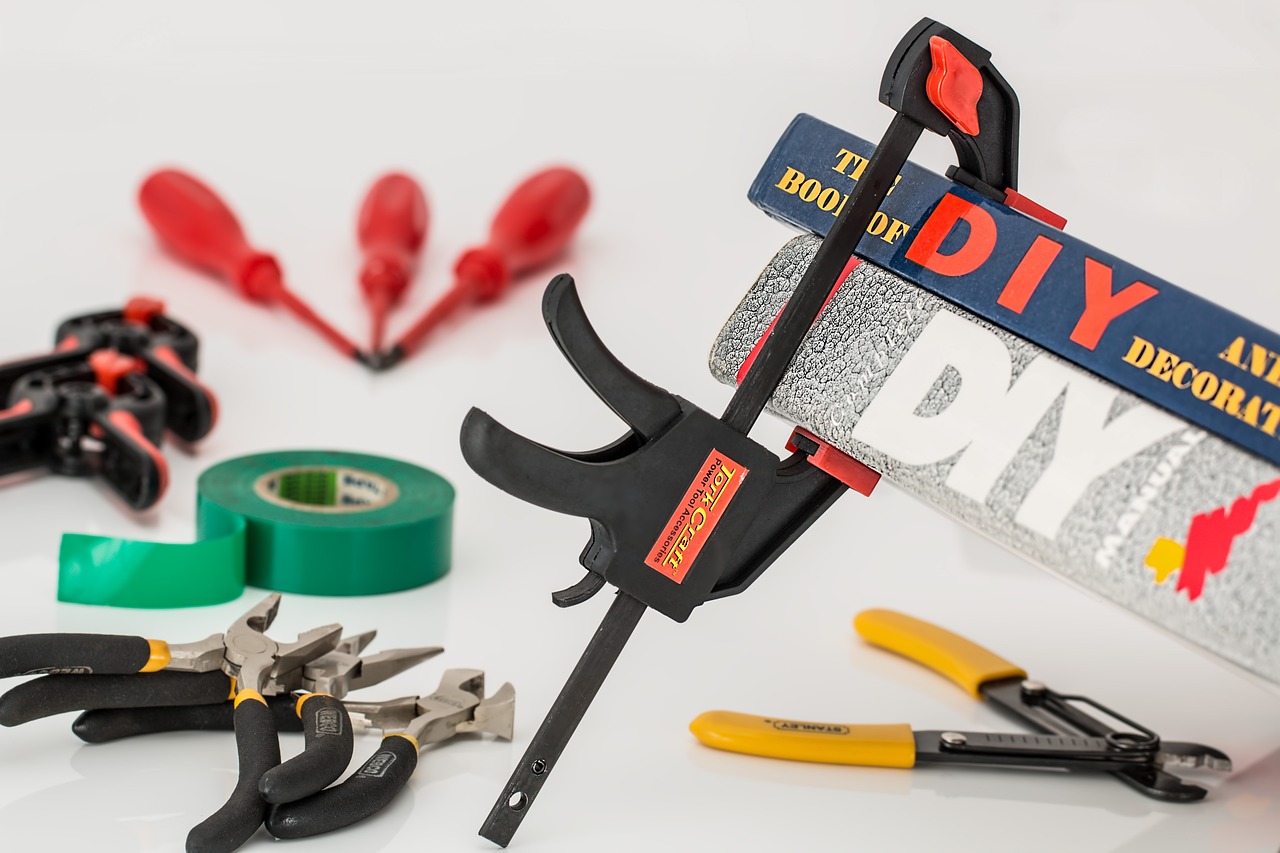
Tools Required
When embarking on your DIY wine rack project, having the right tools is absolutely essential. Think of your tools as the magic wands that will transform raw materials into a beautiful addition to your home. Without them, you might as well be trying to bake a cake without an oven! Let’s dive into the must-have tools that will make your project smoother than a fine Merlot.
First and foremost, you’ll need a good quality circular saw or miter saw. These saws will help you achieve precise cuts, ensuring that your wine rack pieces fit together seamlessly. If you’re working with thicker wood, a jigsaw might be necessary for those intricate cuts. Next up, a drill is crucial for making pilot holes and securing screws. A cordless drill is particularly handy as it allows for more mobility around your workspace.
In addition to these, a level is essential to ensure that your wine rack stands straight and doesn’t wobble—because no one wants a wine rack that leans like a tipsy friend! You’ll also need a tape measure for accurate measurements, along with a square to ensure your corners are perfectly aligned. Remember, a well-measured project is a successful project!
To keep your workspace organized and your materials safe, consider investing in a workbench or a sturdy table. This will provide a solid surface to work on and will help you avoid any unnecessary accidents. Lastly, don’t forget about safety gear. Protective eyewear and gloves are a must to keep you safe from sawdust and splinters.
Here’s a quick overview of the tools you’ll need:
| Tool | Purpose |
|---|---|
| Circular saw / Miter saw | For precise cuts in wood |
| Jigsaw | For intricate cuts |
| Drill | To make pilot holes and secure screws |
| Level | To ensure your rack is straight |
| Tape measure | For accurate measurements |
| Square | To ensure corners are aligned |
| Workbench | For a sturdy workspace |
| Safety gear (gloves, eyewear) | To protect yourself while working |
With these tools in hand, you’ll be well-equipped to tackle your DIY wine rack project with confidence. Remember, the right tools not only make the job easier but also enhance the quality of your work. So, gear up and get ready to create something beautiful!
- What type of wood is best for a wine rack? While many types of wood can be used, oak and cedar are popular choices due to their durability and aesthetic appeal.
- Can I use reclaimed wood for my wine rack? Absolutely! Reclaimed wood not only adds character but is also an eco-friendly choice.
- How many bottles can a standard wine rack hold? This depends on the design, but a typical rack can hold anywhere from 12 to 36 bottles.
- Do I need to seal my wine rack? Yes, sealing your wine rack helps protect it from moisture and enhances its longevity.
Step-by-Step Instructions
Building your own DIY wine rack might sound daunting, but with a little patience and the right guidance, you can create a stunning piece that not only showcases your wine collection but also adds a touch of elegance to your home. Let’s break down the process into manageable steps, ensuring you have a seamless experience from start to finish.
First and foremost, accurate measurements are key. Before you even pick up a saw, you need to decide how many bottles you want to store and the space you have available. Measure the area where you plan to place your wine rack, taking into account the height, width, and depth. This will help you determine the dimensions of each rack section. Remember, a good rule of thumb is to allow for at least 12 inches of height per bottle to accommodate standard wine bottles comfortably.
Once you have your measurements, it’s time to cut the wood. Using a miter saw or a circular saw, carefully cut your wood pieces according to the dimensions you’ve recorded. This step requires patience; double-check your measurements before making any cuts. An error here can lead to misaligned pieces during assembly. If you’re feeling unsure, practice on scrap wood first to get the hang of your cutting technique.
After cutting, lay out all your pieces on the floor to visualize how they will come together. This is a great time to play around with the design and make adjustments if necessary. Once you’re satisfied with the layout, it’s time to start assembling the rack. Begin by creating the base; this will provide the necessary support for the rest of the structure. Use wood glue to secure the joints, and reinforce them with screws for added durability. Remember, the base needs to be sturdy enough to hold the weight of the wine bottles.
Next, you’ll want to attach the vertical supports. These will hold the wine bottles in place and provide stability to the entire rack. Make sure to space them evenly, allowing enough room for the bottles to fit snugly but not too tight. Use a level to ensure that everything is straight — no one wants a lopsided wine rack! Once the vertical supports are in place, you can move on to adding the horizontal shelves or slats. These can be spaced according to your design preferences, but typically, a distance of 4-6 inches between shelves works well for standard bottles.
After assembling the main structure, it’s time to add the finishing touches. This is where you can get creative! Consider using a stain or sealant to enhance the wood's natural beauty and protect it from moisture. Apply the finish with a brush or cloth, following the manufacturer’s instructions. If you’re looking for an eco-friendly option, there are plenty of non-toxic finishes available that will still give your rack a beautiful shine.
Finally, once the finish has dried, it’s time to secure the wine rack in its designated spot. If it’s a larger unit, consider anchoring it to the wall for added safety. Now, all that’s left is to fill it with your favorite bottles of wine. Enjoy the fruits of your labor as you pour yourself a glass and admire your handiwork!
Here are some common questions that DIY enthusiasts often have when building their own wine racks:
- What type of wood is best for a wine rack? - Generally, hardwoods like oak or maple are preferred for their durability, but softwoods like pine can also work well if treated properly.
- How many bottles can a standard wine rack hold? - This depends on the design, but most standard wine racks hold between 12 to 48 bottles.
- Is it necessary to treat the wood? - Yes, treating the wood helps protect it from moisture and enhances its longevity.
- Can I use reclaimed wood for my wine rack? - Absolutely! Reclaimed wood adds character and is an eco-friendly option.

Measuring and Cutting
When it comes to building your DIY wine rack, your wood pieces accurately is crucial for a polished and functional final product. Imagine trying to fit a square peg in a round hole—frustrating, right? The same principle applies here. If your measurements are off, your wine rack will not only look awkward but may also compromise its stability. Before you even pick up a saw, take the time to plan out your design. Sketching a simple blueprint can help you visualize the layout and dimensions of your rack, making the measuring process much easier.
Start by determining the dimensions of your wine rack based on the space where it will reside. Measure the height, width, and depth of the area, and then consider how many bottles you want to store. A standard wine bottle is about 12 inches tall and 3 inches in diameter, so it’s wise to allow a bit of extra space for easy access. Once you have your measurements, jot them down and double-check them—after all, measure twice, cut once is a rule worth following!
Next, gather your materials. You’ll need a measuring tape, a square for precise angles, and a pencil to mark your cuts. When marking your wood, be sure to use a straight edge to ensure your lines are clean and accurate. This will make a significant difference when you start cutting, as uneven lines can lead to jagged edges that are difficult to assemble.
Now, let’s talk about cutting. Depending on the thickness of your wood, you may need a circular saw or a miter saw for clean, straight cuts. If you’re using a hand saw, a steady hand and patience will be your best friends. As you cut, remember to keep your fingers clear of the blade and to wear safety goggles to protect your eyes from any flying debris. Here’s a quick table to summarize the cutting tools you might need:
| Tool | Purpose |
|---|---|
| Circular Saw | For straight cuts on thicker wood |
| Miter Saw | For angled cuts and precision |
| Hand Saw | For smaller projects or tight spaces |
Once you’ve made your cuts, it’s a good idea to sand down the edges to avoid splinters and ensure a smooth finish. Use a medium-grit sandpaper followed by a finer grit for a polished look. This step not only enhances the appearance of your wine rack but also prepares the wood for any finishing touches you plan to add later.
In summary, taking the time to measure accurately and cut carefully will set the foundation for a successful DIY wine rack project. It’s like baking a cake; the better the ingredients and preparation, the tastier the outcome. So grab your tools, channel your inner craftsman, and let’s get building!
- What type of wood is best for a wine rack? Pine, oak, and cedar are popular choices, each offering unique aesthetics and durability.
- How much space do I need for my wine rack? Consider the dimensions of your wine bottles and the space available in your home. Aim for at least 12 inches in height per bottle.
- Can I use recycled materials for my wine rack? Absolutely! Reclaimed wood can add character and is an eco-friendly option.
- Do I need special tools to build a wine rack? Basic woodworking tools like a saw, measuring tape, and drill will suffice for most DIY projects.
Assembling the Rack
Once you have all your pieces cut and ready, it’s time to bring your DIY wine rack to life! Assembling the rack can be one of the most satisfying parts of the project, as you’ll see your vision transform into a tangible piece of furniture. First, gather all your materials, including wood pieces, screws, and any additional hardware you might need. Having everything on hand will streamline the process and keep you from running back and forth.
Begin by laying out the pieces on a flat surface. This will help you visualize the final structure and ensure that you have all the necessary components. It’s like putting together a puzzle; you want to see how everything fits before you start connecting the dots. If you’re using a design with multiple shelves, start by assembling the base. Use wood glue at the joints for added strength, and then secure them with screws. This combination of glue and screws will create a sturdy foundation that can withstand the weight of your wine bottles.
Next, attach the vertical supports to the base. This step is crucial because these supports will bear the weight of the entire rack. Make sure they are perfectly vertical by using a level; nothing is worse than a wine rack that leans! Once the supports are secure, you can begin adding the horizontal shelves. Depending on your design, you may want to create a staggered effect for visual interest or keep them evenly spaced for a more traditional look. If you’re not sure about the spacing, a good rule of thumb is to allow at least 12 inches between each shelf to accommodate standard wine bottles.
As you assemble, pay attention to the alignment of each piece. It’s essential that everything lines up properly to avoid any wobbles later on. If you notice any misalignments, don’t hesitate to make adjustments before the glue sets. Think of it as fine-tuning a musical instrument; every adjustment brings you closer to perfection.
Once the shelves are in place, reinforce the structure with additional screws at the joints. This not only adds stability but also ensures that your wine rack can handle the weight of your collection. If your design includes a back panel, now is the time to attach it. This panel will help keep your bottles secure and prevent them from tipping over. Remember, the goal is not just functionality but also a design that complements your home decor.
Finally, take a step back and admire your work. Before you finish, consider giving your wine rack a light sanding to smooth out any rough edges. If you plan to stain or finish the wood, now is the perfect time to do so. This will not only enhance the beauty of the wood but also protect it from moisture and wear over time.
In summary, assembling your DIY wine rack is a rewarding experience that combines creativity with craftsmanship. By following these steps, you’ll create a beautiful and functional piece that showcases your wine collection while adding a touch of elegance to your home.
- What type of wood is best for a wine rack? Pine, oak, and cedar are all excellent choices, each offering unique aesthetics and durability.
- How much weight can a DIY wine rack hold? This largely depends on the design and materials used, but a well-constructed rack can typically hold several dozen bottles without issue.
- Do I need special tools to build a wine rack? Basic woodworking tools like a saw, drill, and screwdriver are usually sufficient for most DIY wine rack projects.
- Can I customize the design of my wine rack? Absolutely! Feel free to modify dimensions and styles to fit your personal taste and available space.
Frequently Asked Questions
- What materials do I need to build a DIY wine rack?
To create a sturdy DIY wine rack, you'll need wood (like pine, oak, or cedar), screws, wood glue, and possibly a finish like stain or sealant. Don’t forget tools like a saw, drill, and measuring tape!
- Where is the best location to place my wine rack?
Choosing the right spot is key! Look for a cool, dark place with stable temperatures and humidity levels. Ideally, it should be easily accessible so you can grab your favorite bottle without hassle.
- Can I use reclaimed wood for my wine rack?
Absolutely! Reclaimed wood not only adds character and charm to your wine rack, but it’s also an eco-friendly choice. Just make sure it's in good condition and free of any harmful chemicals.
- How do I ensure my wine rack is stable?
Stability is all about the assembly! Make sure to secure all joints tightly using screws and wood glue. Additionally, using a level during assembly can help ensure that everything is even and stable.
- What finishing options do I have for my wine rack?
You can choose from various finishing options like staining for color, sealing for protection, or even painting for a pop of personality. Each option will enhance the look and longevity of your rack!
- Is it difficult to build a wine rack as a beginner?
Not at all! With clear instructions and the right tools, even beginners can create a beautiful wine rack. Just take your time, follow the steps carefully, and don’t hesitate to ask for help if you need it!
- How many bottles can I store in a DIY wine rack?
The number of bottles you can store depends on the design and size of your rack. You can customize it to hold anywhere from a few bottles to a full collection, making it as big or small as you need!


