
How to Create Handmade DIY Artwork for Your Home
Creating handmade DIY artwork for your home is not just a fun activity; it’s a way to express your unique personality and style. Imagine walking into a room adorned with pieces that you crafted yourself, each telling a story or evoking a memory. This article explores various methods and tips for creating unique handmade artwork that can enhance the aesthetic of your home. Whether you’re an experienced artist or a complete novice, you’ll find that the world of DIY art is accessible and rewarding. So, roll up your sleeves, gather your materials, and let’s dive into the exciting realm of creativity!
Selecting the appropriate materials is essential for crafting beautiful artwork. The right materials not only determine the quality of your work but also influence your creative process. Canvas, wood, and paper are popular surfaces for painting and drawing, each offering a different texture and feel. For example, canvas provides a sturdy base for acrylics and oils, while watercolor paper is perfect for delicate washes. Additionally, consider the types of paints you want to use:
| Type of Paint | Best For |
|---|---|
| Acrylic | Bold colors and quick drying |
| Watercolor | Soft, transparent effects |
| Oil | Rich textures and blending |
Choosing the right materials is like selecting the perfect ingredients for a recipe; it sets the foundation for your creative masterpiece!
Experimenting with different artistic techniques can elevate your DIY projects. Each technique offers a unique way to express your creativity and can lead to unexpected results. From painting and drawing to collage and mixed media, there’s an entire universe of methods to explore. Why not try your hand at something new? You might discover a hidden talent!
Understanding various painting techniques can help you create stunning pieces. For instance, acrylic pouring is a fun and fluid technique that creates mesmerizing patterns. It’s all about mixing paints with a pouring medium and letting them flow together on the canvas. On the other hand, watercolor painting offers a delicate and ethereal quality to artwork. Techniques like wet-on-wet and wet-on-dry can produce breathtaking effects that capture the light beautifully. So, grab your brushes and let’s get started!
Acrylic pouring is not only visually stunning but also incredibly satisfying. To get started, you’ll need:
- Acrylic paints
- Pouring medium
- Canvas or a suitable surface
- Cups for mixing
- Protective covering for your workspace
Mix your paints with the pouring medium, then pour them onto your canvas in a way that creates beautiful swirls and patterns. The results are often unpredictable, which adds to the excitement!
Watercolor painting is all about mastering the flow of water and pigment. Start with a few basic techniques:
- Wet-on-Wet: Apply wet paint onto a wet surface for soft edges.
- Wet-on-Dry: Apply wet paint onto a dry surface for sharper lines.
These techniques will help you create beautiful landscapes or abstract pieces that radiate tranquility.
Collage and mixed media art allow for creativity and experimentation. By combining various materials such as paper, fabric, and found objects, you can create visually striking compositions that tell a story. It’s like putting together a puzzle, where each piece adds depth and meaning to your artwork. Don’t be afraid to mix textures and colors; the beauty of this technique lies in its unpredictability!
Inspiration can come from many sources, including nature, architecture, and personal experiences. Learning how to tap into your surroundings and emotions can fuel your artistic creativity. Take a walk outside and observe the colors and shapes around you. What catches your eye? What emotions do those sights evoke? Channel those feelings into your art, and you’ll find that your creations are not only unique but also deeply personal.
Nature offers a wealth of inspiration for artists. From lush landscapes to intricate floral motifs, the natural world is brimming with beauty. Consider keeping a sketchbook handy while you explore the outdoors. Jot down your observations and ideas, and use them as a springboard for your artwork. Remember, nature is a constant reminder of the beauty that surrounds us; let it guide your creative journey!
Familiarizing yourself with different artistic styles and movements can broaden your creative horizons. Explore elements of impressionism, abstract art, and contemporary styles to see what resonates with you. Incorporating aspects of these styles into your DIY projects can add depth and variety to your artwork.
Once your artwork is complete, showcasing it effectively is key. The way you display your pieces can transform your space and draw attention to your creativity. Consider various display options, including framing, mounting, and arranging pieces to create an eye-catching gallery wall. A well-displayed artwork can be the focal point of a room, sparking conversations and admiration.
Choosing the right frame can enhance your artwork's appeal. Different framing styles and materials can complement your DIY creations and elevate their presentation. For instance, a sleek black frame can give a modern touch, while a rustic wooden frame can add warmth to your piece. Don’t underestimate the power of a good frame!
A gallery wall is a fantastic way to display multiple pieces of art in a cohesive manner. To create a harmonious arrangement, consider the following tips:
- Mix different sizes and shapes of frames.
- Maintain a consistent color palette.
- Leave equal spacing between the pieces for balance.
With careful planning, your gallery wall can become a stunning showcase of your artistic journey.
Q: What materials do I need to start creating DIY artwork?
A: Basic materials include canvas or paper, paints (acrylic, watercolor, or oil), brushes, and any additional items like collage materials or mixed media supplies depending on your chosen technique.
Q: How do I find inspiration for my artwork?
A: Inspiration can be found everywhere! Nature, personal experiences, art history, and even everyday objects can spark your creativity. Keep a journal to jot down ideas and observations.
Q: What is the best way to display my artwork?
A: Display options include framing, mounting, or creating a gallery wall. Choose a method that complements your artwork and fits your space. Experiment with different arrangements until you find what works best!
Choosing the Right Materials
When it comes to creating stunning handmade artwork, is crucial. The materials you select not only influence the final look of your piece but also impact your creative process. Imagine walking into a room filled with vibrant colors and textures that resonate with your personal style; that’s the magic of the right materials! So, let’s dive into the world of artistic supplies and discover what will best suit your vision.
First, consider the base for your artwork. Common options include:
- Canvas: A popular choice among painters, canvas is sturdy and provides a great surface for various paint types. It’s perfect for both beginners and seasoned artists.
- Wood: For those looking to add a rustic touch, wood panels can be an excellent choice. They offer a unique texture and can stand out as a statement piece.
- Paper: If you’re into drawing or watercolor, high-quality paper is essential. Different weights and textures can dramatically change the outcome of your artwork.
Next, let’s talk about the mediums you’ll use. The type of paint can transform your project:
- Acrylic Paint: Fast-drying and versatile, acrylics are great for layering and creating vibrant colors.
- Watercolors: These allow for a soft, translucent effect, perfect for delicate landscapes or portraits.
- Oil Paint: Known for their rich colors and blending capabilities, oil paints can take longer to dry but offer stunning results.
Don’t forget about additional materials that can enhance your artwork! Think about incorporating:
- Textiles: Fabrics can add depth and interest, especially in mixed media projects.
- Found Objects: Items from nature or everyday life can be used to create unique textures and layers.
- Adhesives and Sealants: These are important for mixed media pieces to ensure everything stays in place and lasts over time.
In summary, the right materials can make or break your artwork. It’s all about finding what resonates with you and your artistic vision. Don’t hesitate to experiment with different combinations! The beauty of DIY art lies in its flexibility—you have the freedom to create something truly unique. So gather your supplies, unleash your creativity, and let your imagination run wild!

Exploring Different Techniques
When it comes to creating stunning DIY artwork, exploring different techniques is like opening a treasure chest of creative possibilities. Each technique brings its own unique flair, allowing you to express your artistic vision in ways you might never have imagined. Whether you're a seasoned artist or just dipping your toes into the world of creativity, experimenting with various methods can elevate your projects to new heights.
One of the most exciting aspects of art is the freedom to mix and match techniques. You might start with a simple painting, but why stop there? Why not add some collage elements or experiment with mixed media? The beauty of DIY art lies in its versatility. You can layer textures, colors, and materials to create something truly unique that reflects your personality and style.
Painting is often the first technique that comes to mind when we think of creating art. It’s a classic for a reason! Understanding various painting techniques can help you create stunning pieces that captivate the eye. For instance, watercolor painting offers a delicate and ethereal quality that can transform a simple landscape into a dreamy escape. On the other hand, acrylic pouring invites spontaneity, allowing colors to flow and blend in mesmerizing patterns that are different every time.
Acrylic pouring is a fun and fluid technique that creates mesmerizing patterns. Imagine watching vibrant colors swirl and dance together on your canvas! To get started with acrylic pouring, you'll need to gather a few materials:
- Acrylic paints
- Pouring medium
- Canvas or a sturdy surface
- Cups for mixing
- Stir sticks
Mix your paints with the pouring medium to achieve the right consistency, then simply pour them onto your canvas. Tilt the canvas to let the colors flow and watch as they create unique designs. Each pour is like a fingerprint—no two are ever the same!
Watercolor painting offers a different kind of magic. The transparency of watercolors allows for beautiful layering and blending. Start with the wet-on-wet technique, where you wet the paper before applying paint, creating soft edges and gentle washes. Alternatively, the wet-on-dry method gives you sharper lines and more defined shapes. Experiment with both to see which style resonates with you!
If you're looking to unleash your creativity even further, collage and mixed media art are fantastic avenues to explore. This approach allows you to combine various materials—think paper, fabric, and even found objects—into a cohesive piece. Imagine layering vibrant magazine cutouts with textured paper and splashes of paint to create a visually striking composition that tells a story.
When creating a mixed media piece, consider incorporating elements that resonate with you personally. For example, if you love travel, you might include maps, postcards, or photographs from your adventures. This not only adds depth to your artwork but also makes it a reflection of your experiences and passions.
In conclusion, the world of DIY artwork is vast and filled with endless possibilities. By exploring different techniques like painting, collage, and mixed media, you can unlock your creative potential and produce pieces that are not just art but also an extension of who you are. So grab your materials, let your imagination run wild, and start creating your masterpiece today!
Painting Techniques
When it comes to creating stunning artwork, mastering various can truly elevate your DIY projects. Each technique offers a unique way to express your creativity, allowing you to explore different textures, colors, and styles. Whether you're a beginner or an experienced artist, understanding these techniques will open up a world of possibilities for your handmade creations.
One of the most popular methods is acrylic painting. This versatile medium dries quickly and can be used in various styles, from bold and vibrant to soft and subtle. With acrylics, you can easily layer colors, which adds depth to your artwork. You can also experiment with different tools, such as brushes, palette knives, or even your fingers, to create various effects. For example, using a sponge can give you a textured look, while a brush can help you achieve smooth gradients.
Another exciting technique is watercolor painting. This medium is renowned for its delicate and ethereal quality, making it perfect for creating dreamy landscapes or soft floral compositions. To get started with watercolors, you should familiarize yourself with some fundamental techniques:
- Wet-on-wet: This involves applying wet paint onto a wet surface, allowing the colors to blend beautifully, creating soft edges and fluid shapes.
- Wet-on-dry: Here, wet paint is applied to a dry surface, resulting in sharper edges and more defined shapes.
Watercolor can be challenging, but with practice, you'll learn how to control the water and pigment to achieve the desired effect. Don't be afraid to experiment with different brush sizes and strokes, as this will help you develop your unique style.
For those looking to add a bit of excitement to their artwork, acrylic pouring is a technique worth exploring. This method involves mixing acrylic paints with a pouring medium to create a fluid consistency that can be poured onto a canvas. The result is mesmerizing patterns and swirls that are different every time. To get started, you'll need to gather your materials:
| Materials | Description |
|---|---|
| Acrylic Paints | Choose a variety of colors to create vibrant patterns. |
| Pouring Medium | This helps the paint flow smoothly and enhances the finish. |
| Canvas | A sturdy surface to pour your paint onto. |
| Plastic Cups | For mixing your paint and pouring medium. |
Mix your paints with the pouring medium in separate cups, then pour them onto the canvas in layers. You can tilt the canvas to spread the paint or use a straw to blow it around for even more unique designs. The beauty of acrylic pouring lies in its unpredictability; no two pieces will ever be the same!
Lastly, don’t overlook the possibilities of mixed media painting. This technique allows you to combine various materials, such as paper, fabric, and paint, to create complex and textured artworks. You can start with a base layer of paint, then add elements like magazine clippings or fabric swatches to create a rich, layered effect. This approach not only enhances the visual interest of your artwork but also introduces a tactile quality that can be quite captivating.
In conclusion, experimenting with different painting techniques can truly transform your DIY art projects. Whether you choose to dive into the fluid world of acrylic pouring, the delicate nature of watercolors, or the textured layers of mixed media, each method offers a unique opportunity for self-expression. So grab your brushes, paints, and canvases, and let your creativity flow!
Q: What is the easiest painting technique for beginners?
A: Acrylic painting is often recommended for beginners due to its versatility and quick-drying properties, making it easier to layer and correct mistakes.
Q: Can I use watercolor on canvas?
A: While watercolors are typically used on paper, you can use specially treated watercolor canvas for a unique effect. Just keep in mind that the texture will be different.
Q: How can I prevent my acrylic pour from drying too quickly?
A: To slow down the drying process, you can mix your acrylic paint with a pouring medium that extends the drying time or work in a cooler environment.
Acrylic Pouring
Acrylic pouring is one of those mesmerizing art techniques that transforms a simple canvas into a vibrant explosion of colors. Imagine watching paint flow and blend together, creating unique patterns that are as unpredictable as they are beautiful. This method is not just about splashing paint; it’s about embracing the chaos and letting your creativity run wild. Whether you’re a seasoned artist or just starting your DIY journey, acrylic pouring can be an exhilarating experience that results in stunning artwork.
To get started with acrylic pouring, you’ll need a few essential materials. First, gather your acrylic paints. It's important to choose high-quality paints to ensure vibrant colors and smooth pouring. You'll also need a pouring medium, which helps to achieve the right consistency for the paint. This medium allows the colors to flow freely without becoming too thick or clumpy. Additionally, you’ll require a canvas or a wooden panel as your base, as well as some plastic cups for mixing your paints.
Here's a quick rundown of the basic steps involved in acrylic pouring:
- Prepare Your Workspace: Lay down some plastic or newspaper to protect your surfaces from spills. Trust me, this can get messy!
- Mix Your Paints: In separate cups, mix your acrylic paints with the pouring medium. The ratio is often about 1:1, but feel free to experiment to achieve your desired consistency.
- Choose Your Pouring Technique: There are several techniques you can try, such as the flip cup method, where you layer paints in a cup and then flip it onto the canvas, or the dirty pour, where you mix several colors in one cup before pouring.
- Pour and Tilt: Once you’ve poured the paint onto your canvas, gently tilt it to allow the colors to flow and mingle. This is where the magic happens!
- Let It Dry: Allow your artwork to dry completely. This might take a day or two, depending on the thickness of the paint.
One of the most exciting aspects of acrylic pouring is that no two pieces are ever the same. Each pour can yield completely different results, making every artwork a unique masterpiece. You might find yourself creating beautiful swirls, cells, or even stunning lace-like patterns, all depending on your technique and the colors you choose.
As you dive into the world of acrylic pouring, don’t be afraid to experiment. Try different color combinations, adjust the pouring medium, or even incorporate additives like silicone oil to create interesting effects. The key is to enjoy the process and let your creativity flow. After all, art is about expression, and acrylic pouring is a fantastic way to express yourself in a colorful, fluid manner.
Q: Do I need special equipment for acrylic pouring?
A: While you don’t need professional equipment, having quality acrylic paints, a pouring medium, and a suitable canvas is essential. You might also want to invest in some gloves and a mask if you’re sensitive to odors.
Q: Can I use any kind of paint for pouring?
A: It’s best to use acrylic paints specifically designed for pouring. Regular craft paints may not have the same consistency or vibrancy.
Q: How do I store leftover paint?
A: Leftover mixed paint can be stored in airtight containers for a short period. However, it’s best to use it soon after mixing for optimal results.
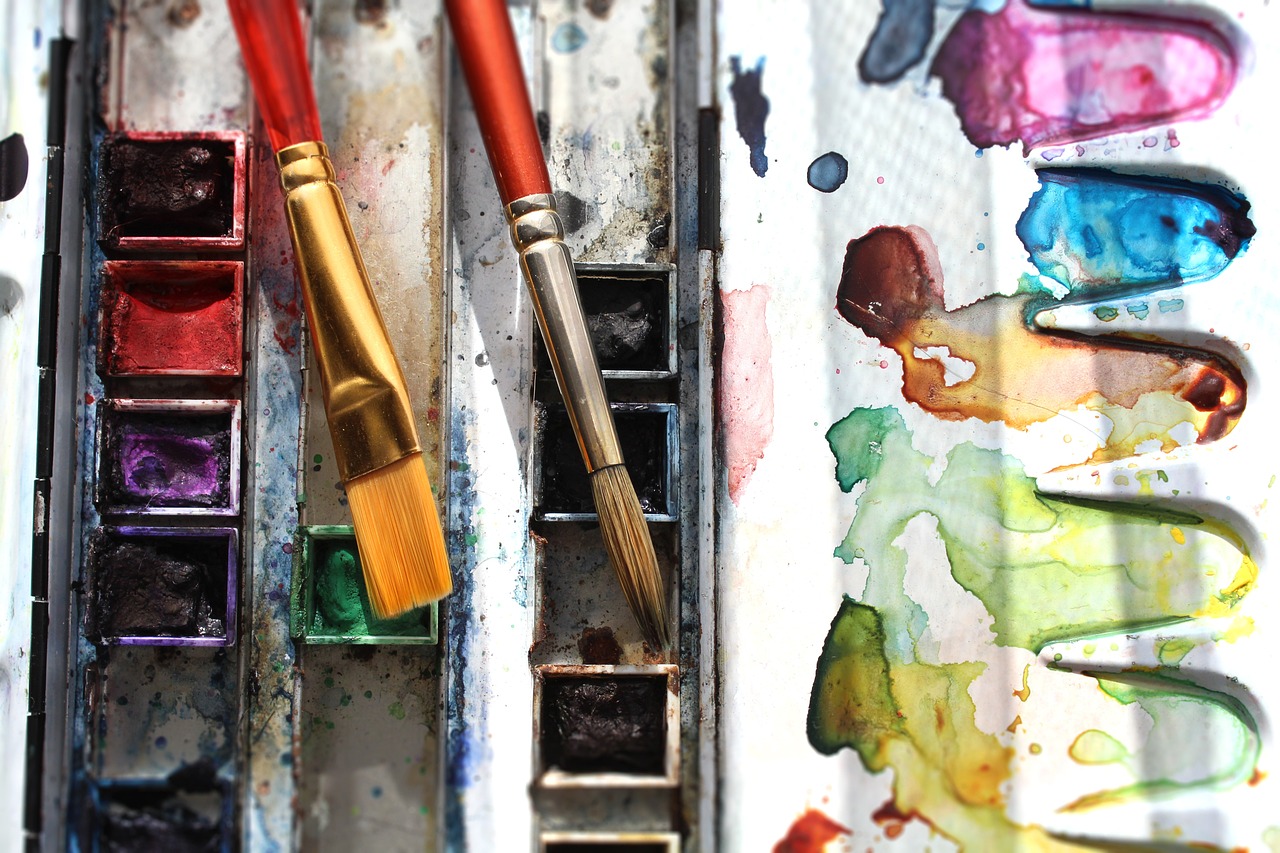
Watercolor Basics
Watercolor painting is like capturing a moment in time with a brush dipped in dreams. This medium is renowned for its delicate and ethereal quality, allowing artists to create pieces that seem to float off the canvas. If you're new to watercolor, it can feel a bit intimidating at first, but once you understand the basics, you'll find a world of creativity waiting for you. So, grab your brushes, and let’s dive into the essentials!
First things first, let's talk about the materials you'll need. Watercolor paints come in two primary forms: tubes and pans. Tubes are great for vibrant, intense colors, while pans are perfect for portability and convenience. Regardless of your choice, make sure to invest in good quality paints, as they can significantly affect your results. You'll also need a selection of brushes, with different shapes and sizes, as well as high-quality watercolor paper that can handle the water without warping.
Now, onto some fundamental techniques that will help you get started:
- Wet-on-Wet: This technique involves applying wet paint onto wet paper, allowing colors to blend and bleed into each other. It’s perfect for creating soft backgrounds or dreamy landscapes.
- Wet-on-Dry: Here, you apply wet paint onto dry paper. This method gives you more control over your brush strokes and is excellent for detailed work.
- Glazing: This involves layering transparent washes of color over one another. Each layer adds depth and richness to your artwork.
As you experiment with these techniques, remember that practice makes perfect. Don’t be afraid to make mistakes; they often lead to the most beautiful surprises in art. Consider keeping a sketchbook dedicated to your watercolor practice, where you can try out different techniques and color combinations without the pressure of creating a 'finished' piece.
Lastly, the beauty of watercolor lies in its unpredictability. Just like life, you can plan your strokes, but sometimes the unexpected happens, and that’s where the magic lies. Embrace those moments, and let your creativity flow!
Q: What type of paper is best for watercolor painting?
A: Look for watercolor paper that is at least 200gsm (grams per square meter) for best results. Cold-pressed paper is great for texture, while hot-pressed paper offers a smooth surface.
Q: How do I prevent my colors from becoming muddy?
A: To avoid muddy colors, make sure to clean your brush between colors and work from light to dark. Using fresh water and avoiding over-mixing can also help maintain vibrancy.
Q: Can I use regular brushes for watercolor?
A: While you can use regular brushes, investing in brushes specifically designed for watercolor will yield better results. Look for soft bristles that hold water well.
Collage and Mixed Media
Collage and mixed media art are like a treasure chest for artists. They invite you to break free from traditional methods and explore a world where creativity knows no bounds. Imagine taking your favorite magazine cutouts, bits of fabric, and even some old photographs, and combining them into a single piece of art that tells a story. This technique not only allows for a personal touch but also encourages experimentation with various materials and textures. The beauty of collage lies in its versatility; you can create anything from a whimsical piece filled with bright colors to a more subdued, textured work that evokes deep emotions.
To get started, gather a variety of materials. Here are some common items you might consider using:
- Old magazines or newspapers
- Fabric scraps
- Paints and inks
- Photographs
- Natural elements like leaves or flowers
- Stickers and stamps
Once you have your materials, the next step is to think about the composition. This is where the magic happens! You can layer different elements, overlap them, or even tear them for a more textured look. The process is akin to cooking; you might start with a recipe, but the best dishes often come from adding a pinch of this and a dash of that until it feels just right. Don't be afraid to trust your instincts and let your emotions guide your choices. Remember, there are no mistakes in art—only opportunities to create something unexpected!
One of the most exciting aspects of mixed media is the ability to combine various artistic techniques. For instance, you can start with a painted background, then add collage elements on top, and finish with some ink or pencil details. This layering not only adds depth but also creates a dynamic visual experience. Think of it as building a sandwich: each layer contributes to the overall flavor, making it more satisfying and complex.
As you dive into collage and mixed media, consider the stories you want to tell. Each piece can reflect your experiences, thoughts, and feelings. Maybe you want to capture a memory from a recent trip, or perhaps you're inspired by a particular theme, like nature or urban life. By incorporating personal elements, your artwork becomes a unique expression of who you are, resonating with both you and your audience.
Lastly, don't forget about the importance of finishing touches. Once you've assembled your collage, think about how you want to present it. You might choose to frame it, mount it on a canvas, or even leave it unframed for a more casual look. The way you display your artwork can significantly affect its impact, so take your time to find the perfect presentation that complements your creative vision.
Q1: What is the best glue to use for collage?
A1: The best glue depends on your materials. For paper, a glue stick or PVA glue works well. For heavier items like fabric or wood, consider using a stronger adhesive like Mod Podge or hot glue.
Q2: Can I use digital elements in my mixed media art?
A2: Absolutely! Digital prints or photographs can add a modern twist to your collage. Just ensure they are printed on suitable paper for your project.
Q3: How do I protect my finished mixed media artwork?
A3: Once your artwork is complete, consider sealing it with a clear varnish or spray sealant to protect it from dust and fading.

Finding Inspiration
Inspiration is the lifeblood of any artistic endeavor, and it can come from the most unexpected places. Just like a spark ignites a fire, the right source of inspiration can set your creativity ablaze. You might find yourself gazing out the window, captivated by the vibrant colors of a sunset, or wandering through a local park, where the intricate details of nature beckon you to capture their beauty. The world around us is filled with endless possibilities, and learning to tap into these sources can transform your DIY artwork from ordinary to extraordinary.
One of the most profound sources of inspiration lies in nature itself. Have you ever noticed how the changing seasons can evoke different emotions? The bright blooms of spring can inspire feelings of renewal, while the crisp air of autumn may bring a sense of nostalgia. When you step outside, take a moment to observe the colors, shapes, and textures that surround you. Consider how you can translate these elements into your artwork. For instance, you might choose to paint a landscape that reflects the serene beauty of a forest or create a collage using leaves and flowers you’ve collected during your walks.
Another rich source of inspiration can be found in architecture. The lines and forms of buildings can tell stories of their own. Whether it's the sleek modernity of a skyscraper or the rustic charm of an old cottage, architecture can inspire your artistic vision in unique ways. Try visiting different neighborhoods or cities, and take photographs of structures that catch your eye. These images can serve as a foundation for your artwork, helping you to explore shapes and perspectives you might not have considered before.
Personal experiences also play a crucial role in fueling your creativity. Think about moments in your life that have left a lasting impression. Perhaps a family vacation to the beach, a cozy evening spent with friends, or even a challenging time that shaped who you are today. These memories can be translated into art that resonates not just with you, but with others as well. You might choose to create a series of paintings that reflect your journey or design a mixed media piece that incorporates photographs and mementos from significant moments in your life.
To further enhance your creative process, consider keeping an inspiration journal. This journal can be a treasure trove of ideas, sketches, and notes that capture your thoughts and feelings. Whenever you come across something that inspires you—be it a quote, a color palette, or a particular texture—jot it down. Over time, you’ll build a personal collection of inspiration that you can refer to whenever you need a creative boost.
Finally, don’t underestimate the power of artistic styles and movements. Familiarizing yourself with different genres can open up new avenues of creativity. For example, you might find inspiration in the vibrant colors of Impressionism, the bold shapes of Cubism, or the emotional depth of Abstract Expressionism. By studying these styles, you can incorporate elements into your own work, making it a unique blend of influences that reflect your personal aesthetic.
In conclusion, inspiration is all around us, waiting to be discovered. Whether you find it in nature, architecture, personal experiences, or artistic movements, the key is to remain open and curious. So, the next time you pick up your paintbrush or gather your materials, remember to look around and embrace the world as your canvas. Your next masterpiece could be just a moment of inspiration away!
- What if I can't find inspiration? Don't worry! Inspiration can be elusive. Try changing your environment, taking a walk, or exploring new hobbies to spark your creativity.
- How can I keep track of my ideas? Consider keeping an inspiration journal where you can jot down thoughts, sketches, and images that inspire you.
- Is it okay to draw inspiration from other artists? Absolutely! Just make sure to put your own spin on it to create something uniquely yours.
Nature as a Muse
When it comes to finding inspiration, nature is like a treasure chest overflowing with ideas just waiting to be explored. Have you ever taken a moment to appreciate the vibrant colors of a sunset, the intricate patterns on a leaf, or the soothing sound of a flowing stream? These elements are not just beautiful; they can ignite your creativity in ways you never thought possible. By immersing yourself in the great outdoors, you can unlock a world of artistic potential that translates into your handmade artwork.
Imagine taking a stroll through a lush forest, where the sunlight filters through the leaves, creating a beautiful dance of light and shadow. Each step reveals new textures, colors, and forms that can inspire your next piece. Perhaps the soft curves of a flower petal remind you of a gentle brushstroke, or the rough bark of a tree suggests a new technique in mixed media. The key is to observe closely and let your surroundings speak to you.
To harness the beauty of nature effectively, consider these approaches:
- Sketching on Location: Bring a sketchbook along on your nature walks. Quick sketches can capture the essence of what you see, serving as a reference for later artwork.
- Photography: Take photos of your favorite landscapes or details. These images can be a great source of inspiration when you're back in your studio.
- Color Palettes: Use nature to inspire your color choices. The vibrant hues of flowers, the earthy tones of soil, and the cool blues of water can all influence your palette.
Incorporating elements of nature into your artwork can also evoke emotions and tell a story. For instance, a painting of a stormy sea might convey feelings of turmoil, while a serene landscape can evoke peace. The beauty of nature is that it reflects the human experience, allowing you to connect with your audience on a deeper level.
Additionally, don't forget to explore the changing seasons. Each season brings its own unique palette and mood. Spring bursts with life and color, summer radiates warmth, autumn showcases rich, warm tones, and winter offers a serene, minimalist aesthetic. By observing these seasonal changes, you can continually refresh your artistic vision.
Ultimately, nature is not just a backdrop for your artwork; it can be the very heartbeat of your creative process. So next time you feel a creative block or lack inspiration, step outside, breathe in the fresh air, and let the world around you fill your mind with ideas. You might just be surprised at what you discover!
Q1: How can I start using nature as inspiration for my artwork?
A1: Begin by spending time outdoors. Bring a sketchbook or camera to capture what you see. Pay attention to colors, shapes, and textures that resonate with you.
Q2: What materials should I use to replicate natural elements in my art?
A2: You can use a variety of materials. Watercolors can mimic the fluidity of water, while acrylics can capture the vibrancy of flowers. Experiment with mixed media to combine different textures.
Q3: How do I incorporate seasonal changes into my artwork?
A3: Observe the colors and moods of each season. Create pieces that reflect these changes, whether it’s a bright spring landscape or a stark winter scene.
Artistic Styles and Movements
This article explores various methods and tips for creating unique handmade artwork that can enhance the aesthetic of your home. Discover materials, techniques, and inspiration to get started on your DIY journey.
Selecting the appropriate materials is essential for crafting beautiful artwork. Explore various options such as canvas, wood, paper, and paint types to find what best suits your artistic vision.
Experimenting with different artistic techniques can elevate your DIY projects. From painting and drawing to collage and mixed media, learn how to incorporate various methods into your artwork.
Understanding various painting techniques can help you create stunning pieces. Discover methods like watercolor, acrylic pouring, and sponge painting to add depth and texture to your artwork.
Acrylic pouring is a fun and fluid technique that creates mesmerizing patterns. Learn the basics of this method, including how to mix paints and pour them onto your canvas for unique results.
Watercolor painting offers a delicate and ethereal quality to artwork. Explore fundamental techniques, such as wet-on-wet and wet-on-dry, to master this versatile medium.
Collage and mixed media art allow for creativity and experimentation. Discover how to combine various materials and textures to create visually striking compositions that tell a story.
Inspiration can come from many sources, including nature, architecture, and personal experiences. Learn how to tap into your surroundings and emotions to fuel your artistic creativity.
Nature offers a wealth of inspiration for artists. Explore how to observe and interpret natural elements in your artwork, from landscapes to floral motifs.
Familiarizing yourself with different artistic styles and movements can broaden your creative horizons. Each style has its own unique characteristics and philosophies that can inspire your artwork. For instance, Impressionism emphasizes the effects of light and color, capturing fleeting moments in time. This style encourages artists to paint quickly and expressively, often outdoors, allowing the natural world to influence their palettes and techniques.
On the other hand, Abstract Art breaks away from traditional representation, focusing instead on colors, shapes, and forms to convey emotions and ideas. This movement invites you to explore your feelings and perceptions without the constraints of realism, making it a fantastic avenue for personal expression.
Another fascinating style is Contemporary Art, which encompasses a wide range of practices and mediums, reflecting current issues and cultural contexts. It challenges conventions and encourages dialogue, pushing the boundaries of what art can be. By engaging with these styles, you can incorporate elements into your DIY projects, creating a unique blend that resonates with your personal artistic voice.
To help you understand these movements better, here's a brief comparison:
| Artistic Style | Main Characteristics | Key Artists |
|---|---|---|
| Impressionism | Focus on light and color, loose brushwork | Claude Monet, Edgar Degas |
| Abstract Art | Non-representational, emphasis on form and color | Pablo Picasso, Wassily Kandinsky |
| Contemporary Art | Diverse media, reflects current cultural issues | Damien Hirst, Ai Weiwei |
Understanding these movements not only enriches your own artistic practice but also allows you to connect more deeply with the art world. So, why not dive into these styles and see how they can inspire your next DIY artwork?
Once your artwork is complete, showcasing it effectively is key. Learn about various display options, including framing, mounting, and arranging pieces to create an eye-catching gallery wall.
Choosing the right frame can enhance your artwork's appeal. Discover different framing styles and materials to complement your DIY creations and elevate their presentation.
A gallery wall is a fantastic way to display multiple pieces of art. Learn tips for arranging your artwork harmoniously, considering size, color, and spacing for a cohesive look.
Q: What materials do I need to start creating my own artwork?
A: You can start with basic materials like canvas, acrylic or watercolor paints, brushes, and mixed media supplies. As you explore, you may want to try other materials like wood or fabric.
Q: How can I find my artistic style?
A: Experiment with different techniques and styles. Create a variety of artworks and pay attention to what resonates with you. Over time, your unique artistic voice will emerge.
Q: What are some tips for displaying my artwork?
A: Consider the size and color of your pieces, use proper framing, and think about creating a gallery wall for a cohesive look. Don't be afraid to mix different styles and sizes for an eclectic display!
Displaying Your Artwork
Once you've poured your heart and soul into creating stunning artwork, the next exciting step is showcasing it in your home. effectively not only enhances its beauty but also elevates the overall aesthetic of your space. Think of your walls as a blank canvas just waiting to tell your story. So, how do you transform your creations into a focal point that captivates visitors?
First off, consider the display options available to you. From framing to mounting, the way you present your artwork can significantly impact its appeal. A well-chosen frame can act as a beautiful border, drawing attention to your piece while complementing its colors and style. For instance, a sleek modern frame might enhance a contemporary painting, while a rustic wooden frame could add warmth to a nature-inspired piece.
When it comes to framing, here are some factors to keep in mind:
- Style: Choose a frame that matches the vibe of the artwork and your home decor.
- Color: Consider colors that harmonize with your piece to create a cohesive look.
- Material: Different materials like metal, wood, or acrylic can change the overall feel of the display.
Next, let’s talk about creating a gallery wall. This is a fantastic way to display multiple pieces of art, allowing you to curate a personal exhibition right in your living room. When arranging your artwork, think about the size, color, and spacing of each piece. You want to create a flow that guides the eye naturally from one artwork to the next. A good rule of thumb is to keep the center of your gallery wall at eye level, which is typically around 57 inches from the floor.
Here are some tips for arranging your gallery wall:
- Mix Sizes: Combine large and small pieces for visual interest.
- Create Balance: Use symmetry or asymmetry to create a balanced look.
- Consider Themes: Group pieces by color, theme, or style for a more cohesive feel.
Lastly, don’t forget about lighting! Proper lighting can dramatically enhance the visibility and impact of your artwork. Consider using spotlights or picture lights to highlight key pieces. Natural light can also work wonders, but be cautious of direct sunlight, which can fade your artwork over time. A well-lit piece can become a conversation starter, inviting guests to engage with your creativity.
In conclusion, displaying your artwork is as much an art form as creating it. With thoughtful framing, a well-planned gallery wall, and the right lighting, you can transform your home into a vibrant gallery that reflects your unique style and passion. So go ahead, let your creativity shine on those walls!
1. What is the best way to frame my artwork?
There are various framing options available, but the best way to frame your artwork depends on its style and the decor of your home. Consider using materials and colors that complement the piece and your interior design.
2. How do I create a cohesive gallery wall?
To create a cohesive gallery wall, focus on a theme, color scheme, or style. Mixing different sizes and shapes can add visual interest, but ensure that the overall arrangement feels balanced.
3. What type of lighting is best for displaying artwork?
Spotlights and picture lights are excellent for highlighting artwork. Ensure the lighting is adjustable to avoid direct sunlight, which can damage your pieces over time.
Framing Techniques
When it comes to showcasing your handmade DIY artwork, the right framing technique can make all the difference. Imagine your stunning creation nestled in a frame that complements its colors and style, drawing every eye in the room. Choosing the perfect frame isn't just about aesthetics; it’s also about protecting your artwork from dust, moisture, and fading. So, how do you select the best framing technique for your masterpiece? Let’s dive into some popular options that will elevate your art's presentation.
One of the most traditional yet effective techniques is the use of a simple matted frame. This involves placing your artwork behind a mat board, which not only adds a touch of elegance but also creates a visual buffer between the art and the frame itself. The matting can be a different color that enhances the artwork or a neutral tone that allows it to shine. For instance, if your piece has vibrant colors, a white or cream mat can help those hues pop even more.
Another technique is the float frame. This is particularly popular for canvases and gives the illusion that your artwork is “floating” within the frame. The frame is designed to allow for a gap between the artwork and the frame itself, creating a stunning visual effect that draws attention to the art. Float frames come in various materials, including wood and metal, and can add a modern twist to your presentation.
If you want to add a bit of rustic charm, consider using a shadow box frame. This type of frame is deeper than standard frames and is perfect for three-dimensional pieces or artworks that incorporate mixed media. A shadow box allows you to display items that have depth, like textiles or small objects, creating a dynamic and engaging display. It’s like creating a mini-exhibit right in your home!
Now, let’s talk about colors and materials. The frame's material can significantly affect the overall feel of your artwork. Here’s a quick comparison of some popular framing materials:
| Material | Characteristics | Best For |
|---|---|---|
| Wood | Warm, natural look; versatile finishes | Traditional and rustic artworks |
| Metal | Modern and sleek; durable | Contemporary and minimalist pieces |
| Plastic | Lightweight and affordable; various colors | Budget-friendly options |
When selecting your frame, consider the overall theme of your home decor. A cohesive look can be achieved by matching the frame style to your existing furniture or wall colors. And don’t forget about the importance of spacing when arranging multiple pieces. Proper spacing can create a harmonious flow and ensure each piece gets the attention it deserves.
Finally, remember that framing is not just about the artwork itself; it’s also about the presentation. Once you’ve chosen the right frame, think about how you’ll hang it. Use appropriate hardware to ensure your artwork is securely displayed. A well-hung piece can transform a room, making it feel more curated and polished.
- What is the best material for framing artwork? It depends on your style! Wood is great for traditional looks, while metal suits modern decor.
- How do I choose the right frame size? Measure your artwork and consider the matting if you choose to use it. Aim for a frame that complements, not overwhelms.
- Can I frame artwork myself? Absolutely! With the right tools and materials, DIY framing can be a fun and rewarding project.

Creating a Gallery Wall
Creating a gallery wall is more than just hanging up a few pictures; it's about telling a story through your artwork. Imagine walking into a room and being greeted by a vibrant display of colors, textures, and emotions that reflect your personal journey. It’s like stepping into a mini art exhibit that you’ve curated yourself! But how do you achieve that perfect blend of art pieces that feels both cohesive and exciting? Let’s dive into some tips and tricks that will help you create a stunning gallery wall that will leave your guests in awe.
First and foremost, consider the theme of your gallery wall. Are you aiming for a modern look, a vintage vibe, or perhaps something eclectic? Defining a theme can guide your selection of artwork and help create harmony in your display. For instance, if you’re drawn to nature, you might include landscape paintings, botanical prints, and photographs of your outdoor adventures. On the other hand, a more abstract theme could incorporate bold colors and geometric shapes.
Next, think about the layout. Before you start hammering nails into the wall, it’s wise to plan out your arrangement. You can do this by laying your pieces on the floor to visualize how they will look together. Consider using painter’s tape to outline the dimensions of your artwork on the wall, which will give you a clear idea of spacing and alignment. A few popular layout styles include:
- Grid Layout: Perfect for a clean and organized look, where all pieces are the same size.
- Salon Style: A more casual approach that allows for varying sizes and orientations, creating a dynamic feel.
- Linear Layout: Arranging art in a straight line can create a sense of order and simplicity.
Once you’ve settled on a layout, it’s time to consider framing. The right frame can elevate your artwork and tie the entire gallery wall together. You might choose to use matching frames for a uniform appearance or mix and match for an eclectic feel. Don’t forget to consider the color scheme of your frames as well; they should complement the artwork and the overall decor of the room.
Finally, don’t shy away from accessorizing your gallery wall. Adding elements like shelves, mirrors, or even decorative objects can enhance the visual interest of your display. Think of it as adding layers to your artwork; just like a well-prepared dish, a little extra seasoning can make all the difference! For example, placing a small plant or a decorative clock can break up the visual space and add depth to your gallery wall.
In conclusion, creating a gallery wall is an exciting opportunity to express yourself and showcase your artistic taste. By carefully selecting your theme, planning your layout, choosing the right frames, and adding personal touches, you can transform a blank wall into a captivating focal point in your home. So grab those hammers and nails, and let your creativity flow!
Q1: How many pieces should I include in my gallery wall?
A1: There's no set number, but a good rule of thumb is to start with 3-5 pieces and expand from there. The key is to maintain balance and harmony.
Q2: Can I mix different types of artwork?
A2: Absolutely! Mixing photographs, paintings, and even textiles can create a dynamic gallery wall. Just ensure that they share a common theme or color palette.
Q3: What is the best height to hang my artwork?
A3: A common guideline is to hang artwork at eye level, which is typically around 57-60 inches from the floor to the center of the piece.
Q4: How can I avoid making my gallery wall look cluttered?
A4: To avoid clutter, stick to your theme, maintain consistent spacing between pieces, and choose a limited color palette for your frames.
Frequently Asked Questions
- What materials do I need to start creating handmade artwork?
To kick off your DIY artwork journey, you'll need a few basic materials. Consider starting with canvas or high-quality paper, some paints (like acrylics or watercolors), brushes, and perhaps some mixed media supplies such as magazines or fabric. Don't forget to gather tools like scissors, glue, and a palette for mixing colors!
- How can I learn different painting techniques?
Learning painting techniques can be a fun adventure! You can find numerous online tutorials, video workshops, or even local art classes that focus on specific methods like acrylic pouring or watercolor. Experimenting at home is also a fantastic way to discover what resonates with you, so don’t be afraid to get your hands dirty!
- Where can I find inspiration for my artwork?
Inspiration is all around you! Nature, architecture, and personal experiences can spark creativity. Take a walk in the park, visit art galleries, or browse through art books. Sometimes, simply reflecting on your emotions or memories can lead to the most profound artistic ideas!
- What is acrylic pouring, and how do I do it?
Acrylic pouring is a mesmerizing technique that involves mixing acrylic paints with a pouring medium and then pouring them onto a canvas to create beautiful, fluid designs. To get started, you’ll need to mix your paints with the medium, pour them into cups, and then let your creativity flow as you pour and tilt the canvas to create unique patterns!
- How should I display my finished artwork?
Displaying your artwork can be just as creative as making it! You can frame your pieces for a polished look or mount them directly on the wall. Creating a gallery wall with various sizes and styles can add a dynamic touch to your space. Play around with arrangements until you find a layout that feels right!
- What are some tips for creating a gallery wall?
When creating a gallery wall, consider the size, color, and spacing of your artwork. Start by laying out your pieces on the floor to find a harmonious arrangement before hanging them. A consistent color palette can unify diverse artworks, while varying frame styles can add interest. Don’t forget to leave some space between pieces for a balanced look!


