DIY Puzzle Making Crafts for Kids
Are you looking for a fun and engaging activity that can spark creativity in your kids while also enhancing their cognitive abilities? Look no further! DIY puzzle making crafts are not just entertaining; they are a fantastic way for children to develop essential skills like problem-solving, fine motor coordination, and patience. Picture this: a rainy afternoon, your little ones gathered around the table, scissors in hand, giggling as they cut and assemble their very own puzzles. Sounds delightful, right? In this article, we will explore various DIY puzzle-making projects that are simple, affordable, and perfect for family bonding time. Whether it's creating picture puzzles from family photos or crafting shape sorting puzzles, there’s something for every child to enjoy!
Creating puzzles offers a multitude of benefits for children. Not only do they provide a fun challenge, but they also significantly improve problem-solving skills. When kids piece together different parts of a puzzle, they learn to think critically and strategize their approach. Additionally, puzzle making enhances hand-eye coordination, allowing children to develop their fine motor skills as they cut, glue, and assemble. Most importantly, engaging in such activities promotes patience and perseverance. Have you ever noticed how a child can be so focused when working on a puzzle? That’s the beauty of it! They learn to stay engaged and see a project through to completion, which is a valuable lesson in today’s fast-paced world.
Before diving into the exciting world of puzzle making, it’s crucial to gather the right materials. Having everything on hand ensures a smooth crafting experience and keeps the kids focused on creating rather than searching for supplies. Here’s a quick overview of the basic materials you’ll need:
- Paper: Cardstock or thick paper works best for durability.
- Scissors: Child-safe scissors for easy cutting.
- Glue: A reliable adhesive to hold pieces together.
- Markers or Crayons: For decorating and personalizing puzzles.
- Printable Templates: Optional, for those who prefer guided designs.
Having these materials ready will make the puzzle-making process enjoyable and stress-free!
When it comes to puzzle making, selecting the appropriate type of paper is crucial. You want your puzzles to be durable enough to withstand frequent handling. Here are some paper options to consider:
- Cardstock: Thick and sturdy, perfect for making long-lasting puzzles.
- Construction Paper: Great for colorful designs, but may not be as durable.
- Recycled Paper: An eco-friendly choice that works well for simple puzzles.
Choosing the right paper can make all the difference in how well your puzzles hold up over time, so consider your project before making a decision!
The right tools can enhance the puzzle creation experience, making it easier and more enjoyable for kids. Here’s a quick rundown of essential cutting tools and assembly techniques that are safe for children:
- Child-Safe Scissors: Ideal for little hands, ensuring safety while cutting.
- Craft Knife: For older kids, but always supervised by an adult.
- Glue Sticks: Easy to use and mess-free for assembling puzzle pieces.
With these tools, your kids will be well-equipped to create their masterpieces!
Now that you have all the materials and tools ready, it’s time to get creative! Here are a couple of simple DIY puzzle ideas that kids can easily create with minimal supervision:
Creating picture puzzles is a delightful way for kids to personalize their crafts. Imagine turning a family photo or a drawing into a fun puzzle! Here’s how to do it:
- Select a favorite photo or drawing.
- Glue it onto a piece of cardstock.
- Once dry, draw puzzle piece shapes on the back.
- Cut along the lines to create individual pieces.
- Mix them up and have fun putting them back together!
This project not only fosters creativity but also creates lasting memories as kids piece together their favorite images.
Shape sorting puzzles are fantastic for younger children to learn shapes and colors while having fun. Here’s a simple way to create one:
Start by cutting out various shapes from colorful cardstock, such as circles, squares, and triangles. Then, create a matching board by drawing the outlines of these shapes on a larger piece of paper. Kids can then match the shapes to their corresponding outlines, making it an engaging learning experience. This activity is not just about fun; it’s a great way for children to enhance their cognitive skills while playing!
Incorporating themes into puzzle-making can enhance creativity and engagement. Themes can inspire unique and imaginative puzzle designs, making the crafting experience even more enjoyable. Here are a couple of ideas:
Nature-themed puzzles can teach kids about the environment while they craft. Consider creating puzzles featuring animals, plants, and landscapes. For instance, you could have your child draw their favorite animal and turn it into a puzzle. This not only sparks creativity but also encourages an appreciation for the natural world!
Storybook puzzles connect reading with crafting, making it a wonderful activity for book lovers. Choose a favorite story and create a puzzle that reflects its characters or scenes. This way, kids can engage with the story in a new and interactive way, making reading more enjoyable. Imagine the excitement of piecing together a puzzle that tells a story!
Q: What age is appropriate for DIY puzzle making?
A: DIY puzzle making can be suitable for kids as young as 3, with adult supervision. Older children can work independently.
Q: How long does it take to make a puzzle?
A: The time varies depending on the complexity of the puzzle, but most simple projects can be completed in 30 minutes to an hour.
Q: Can we use recycled materials?
A: Absolutely! Using recycled materials is a fantastic way to promote sustainability while crafting.
So, gather your materials and let the puzzle-making adventures begin! It's a great way to bond with your kids and create something they can cherish for years to come.
Understanding the Benefits of Puzzle Making
Puzzle making is not just a fun activity; it’s a fantastic way for children to develop a variety of essential skills. When kids engage in creating their own puzzles, they are not only entertained but also learning valuable lessons that will benefit them in numerous aspects of life. For instance, one of the most significant advantages is the improvement in problem-solving skills. As children work through the process of assembling their puzzles, they learn to think critically and approach challenges with a creative mindset. It’s like giving them a mini workout for their brains!
Moreover, puzzle making enhances hand-eye coordination. When kids cut out pieces, fit them together, and manipulate them to complete the puzzle, they are honing their motor skills. This tactile experience is crucial for younger children who are still developing their dexterity. Think of it as a fun way to build the same skills they would use in sports or other physical activities.
In addition to cognitive and motor skills, patience is a virtue that children can cultivate through puzzle making. Completing a puzzle takes time and perseverance, teaching kids the importance of sticking with a task until it’s finished. This sense of accomplishment can boost their self-esteem and encourage them to tackle other challenges with the same determination. You might say that every puzzle they complete is a small victory that adds to their confidence!
Let’s not overlook the social benefits either. When children work on puzzles with family or friends, they learn to collaborate, communicate, and share ideas. This interaction fosters a sense of community and teamwork, which is incredibly valuable in our increasingly interconnected world. In fact, research shows that children who engage in cooperative play tend to develop better social skills overall. So, when you sit down to create puzzles together, you’re not just crafting; you’re building relationships!
In summary, the benefits of puzzle making are multifaceted. From enhancing cognitive abilities and fine motor skills to promoting patience and social interaction, this activity is a win-win for kids and parents alike. So, why not grab some materials and dive into the world of DIY puzzles? You’ll be amazed at how much fun and learning can be packed into such a simple project!
Essential Materials for DIY Puzzles
Before diving into the exciting world of DIY puzzle-making, it's crucial to gather the right materials. Having everything you need on hand not only streamlines the crafting process but also ensures that the kids can focus on the fun of creating rather than running around looking for supplies. Let's explore the essential materials that will help you embark on this creative journey.
First and foremost, you'll need some sturdy paper. The type of paper you choose can significantly affect the durability and quality of your puzzles. Options like cardstock or thick construction paper work best, as they can withstand the wear and tear of little hands. If you're feeling adventurous, consider using recycled cardboard from old cereal boxes or shipping boxes, which adds an eco-friendly twist to your project.
Next on the list are cutting tools. Safety should always come first, especially when kids are involved. A pair of child-safe scissors is essential for little hands to manage. If you're crafting with older kids, a craft knife can be useful for more intricate designs, but always supervise its use. Additionally, having a cutting mat is a great idea to protect your surfaces and provide a stable base for cutting.
In addition to paper and cutting tools, you might want to gather some adhesives. Glue sticks or liquid glue work well for attaching different pieces together, especially if you're layering images or decorations onto your puzzle pieces. For those who want a more polished finish, consider using a clear sealant spray once the puzzle is complete, which will help preserve the artwork and make it last longer.
Creating puzzles can get messy, so having some protective gear is a smart move. An old tablecloth or newspaper can protect your workspace from glue spills and scraps of paper. And don’t forget to have some markers, crayons, or colored pencils handy for decorating the puzzles. Kids love to personalize their creations, and having a variety of colors at their disposal will spark their creativity.
Lastly, consider incorporating some thematic elements into your materials. For instance, if you're making a nature-inspired puzzle, you could include stickers or cutouts of animals and plants. This not only makes the puzzle more visually appealing but also adds an educational aspect as kids learn about different themes while crafting. The combination of these materials will not only enhance the puzzle-making experience but also encourage creativity and learning through play.
In summary, gathering the right materials is the first step in creating engaging DIY puzzles. By ensuring you have sturdy paper, safe cutting tools, reliable adhesives, protective gear, and thematic elements, you're setting the stage for a fun and creative crafting session that your kids will love. Now that you have your materials ready, let’s move on to some simple DIY puzzle ideas that will keep the little ones entertained!

Choosing the Right Paper
When it comes to crafting DIY puzzles, is essential for ensuring durability and ease of use. The type of paper you select can significantly affect how well your puzzles hold up to the enthusiastic hands of children. Not all papers are created equal, and understanding the differences can help you make an informed choice that enhances your puzzle-making experience.
First off, consider the weight of the paper. Heavier paper, typically measured in grams per square meter (gsm), is more durable and can withstand repeated handling. For puzzle making, a weight of around 200-300 gsm is ideal. This thickness provides the right balance between rigidity and flexibility, making it easy for kids to manipulate the pieces without them bending or tearing easily.
Next, think about the texture of the paper. Smooth paper is great for printing images or drawings, as it allows for vibrant colors and clear details. On the other hand, textured paper can add an interesting sensory element to the puzzle, making it more engaging for younger children. If you're looking to create a personalized picture puzzle, glossy photo paper is an excellent choice, as it enhances the colors and gives a professional finish.
Here are some common types of paper you might consider for your DIY puzzles:
- Cardstock: Thick and sturdy, perfect for durable puzzles.
- Construction Paper: Colorful and easy to cut, great for younger kids.
- Photo Paper: Ideal for picture puzzles with high-quality images.
- Recycled Paper: Eco-friendly option that adds a unique touch.
Moreover, if you're feeling adventurous, you can also explore creative options like using patterned or themed paper. This can add an extra layer of fun and excitement to your puzzles, making them visually appealing and unique. Imagine a puzzle that features a beautiful floral pattern or one that showcases your child's favorite cartoon characters!
In summary, the right paper can elevate your DIY puzzle-making project from ordinary to extraordinary. By considering the weight, texture, and creativity of your paper choices, you can create puzzles that are not only fun to make but also enjoyable to play with. So, gather your materials and let your imagination run wild!
Tools for Cutting and Assembly
When it comes to creating your own puzzles, having the right tools is essential for a smooth and enjoyable crafting experience. You want to ensure that the tools are not only effective but also safe for kids to use. This way, you can focus on having fun while making memories together. So, what tools should you consider? Let's dive into some of the must-haves for cutting and assembling your DIY puzzles!
First off, a good pair of child-safe scissors is a must. These scissors are designed with rounded tips to prevent accidents while still being sharp enough to cut through various materials like paper, cardboard, and thin foam. It’s a great way to teach kids about using tools safely while they get hands-on with their projects.
Next, you'll want to have a reliable cutting mat. This not only protects your work surface but also provides a stable base for cutting. A cutting mat can be especially helpful when working with sharper tools like craft knives or rotary cutters, which should be used under adult supervision. If you’re looking for a more straightforward approach, consider using a paper cutter. These are often easier for kids to manage and can make precise cuts quickly, which is perfect for larger projects.
Speaking of cutting tools, let’s not forget about craft knives. These are great for more intricate designs and shapes. However, it's crucial to supervise your children closely when using them. A simple rule of thumb is to let kids use craft knives only when they are older and can follow safety precautions. Always remind them to cut away from their bodies and to keep their fingers clear of the blade.
Once your pieces are cut, you’ll need some adhesive for assembly. Depending on the materials you've chosen, you might want to use glue sticks, liquid glue, or even double-sided tape. Each option has its pros and cons. For instance, glue sticks are less messy and easy to use, while liquid glue can provide a stronger bond but requires more drying time. You can also consider using mod podge if you want to seal and protect your puzzle once it’s completed.
Lastly, don’t overlook the importance of markers or colored pencils. These can be used to decorate your puzzles, adding a personal touch that makes them truly unique. Kids can draw their favorite characters, write their names, or even create a theme for their puzzles, allowing them to express their creativity fully.
Here’s a quick summary of the essential tools for cutting and assembly:
| Tool | Description | Safety Notes |
|---|---|---|
| Child-safe scissors | Rounded tips for safe cutting | Supervise younger children |
| Cutting mat | Protects surfaces and stabilizes cutting | Use with adult supervision for sharp tools |
| Craft knives | For detailed cuts | Adult supervision required |
| Adhesive | Glue sticks, liquid glue, or double-sided tape | Check for allergies |
| Markers/Colored pencils | For decorating puzzles | Avoid permanent markers for younger kids |
By gathering these tools, you’re setting the stage for a fun and productive puzzle-making session. Remember, the aim is to enjoy the process as much as the end result. So, roll up your sleeves, get creative, and let the puzzle-making adventure begin!
Simple DIY Puzzle Ideas
When it comes to engaging children in creative activities, DIY puzzles are a fantastic option. They not only spark imagination but also provide a wonderful opportunity for kids to express themselves. Here are some simple yet enjoyable DIY puzzle ideas that your little ones can tackle with minimal supervision. These projects are designed to be fun and educational, allowing kids to learn while they play.
First up, we have Picture Puzzles. Imagine your child creating a puzzle that features their favorite family photo or a drawing they've made. This project is not only a great way to personalize their craft but also a fun way to reminisce about cherished memories. To make a picture puzzle, start by selecting a vibrant image. Print it out on sturdy paper, then cut it into various shapes. You can make it as challenging as you like by varying the size of the pieces. Kids will love putting their own creations back together, and it’s a fantastic way to boost their problem-solving skills.
Next, let’s dive into Shape Sorting Puzzles. These are especially beneficial for younger children who are just starting to learn about shapes and colors. To create a shape sorting puzzle, you’ll need some cardboard and colored paper. Cut out different shapes—like circles, squares, and triangles—from the cardboard. Then, cover them with colored paper to make them visually appealing. The objective is for kids to match the shapes to corresponding cutouts on a larger piece of cardboard. This hands-on activity not only encourages learning but also enhances fine motor skills as they manipulate the pieces.
Another exciting idea is to create a Colorful Alphabet Puzzle. This project is perfect for preschoolers who are beginning to recognize letters. You can use foam sheets or thick cardboard to cut out each letter of the alphabet. Decorate each letter with different colors, patterns, or even stickers. Once the letters are ready, challenge your child to put them in order or spell out simple words. This activity reinforces letter recognition and spelling in a playful way.
For those who want to take it a step further, consider making a Map Puzzle. This is an excellent way to teach geography while having fun. You can sketch a simple map of your town or a favorite place on a large piece of cardboard. Then, cut it into puzzle pieces. Kids can learn about locations, landmarks, and directions while piecing the map back together. It’s like a mini adventure right in their living room!
Lastly, a Seasonal Puzzle can be a delightful project. Depending on the time of year, you can create puzzles that reflect seasonal themes. For example, in the fall, you can make a puzzle featuring colorful leaves or pumpkins, while in winter, you can create a snowy scene or holiday-themed puzzle. These seasonal projects not only keep the crafting fresh but also help children connect with nature and the changing seasons.
These DIY puzzle ideas are not just about creating something fun; they also provide an avenue for learning and growth. Each project can be tailored to suit your child's interests and skill level, ensuring that they remain engaged and excited throughout the crafting process. So gather your materials and get ready for some quality family bonding time filled with creativity and laughter!
Q: What materials do I need to start making DIY puzzles?
A: You will need sturdy paper or cardboard, scissors, glue, and markers or colored pencils for decoration. Optional materials include stickers and printed images for picture puzzles.
Q: How can I ensure the puzzles are safe for my kids?
A: Always supervise your children during crafting activities, especially when using scissors. Choose age-appropriate materials and ensure that all tools are safe for their age group.
Q: Can I use digital images for picture puzzles?
A: Absolutely! Digital images can be printed on sturdy paper. Just make sure to select high-resolution images for the best results.
Q: How can I store the completed puzzles?
A: You can store them in ziplock bags or small boxes. Label each bag or box with the puzzle's name or image to keep them organized.
Picture Puzzles
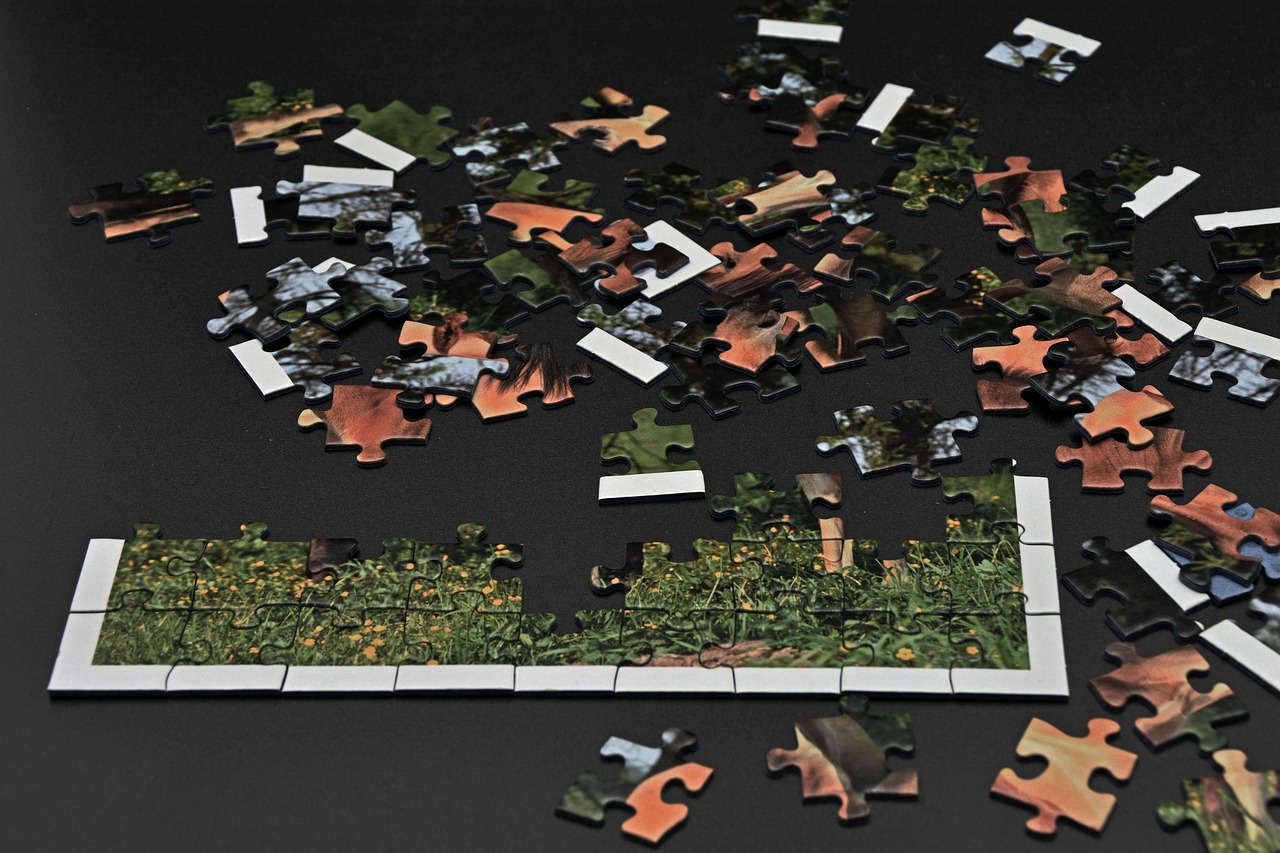
Creating is not just an engaging activity; it's a fantastic way for kids to express their creativity and personalize their crafts. Imagine transforming a cherished family photo or a colorful drawing into a fun puzzle that can be enjoyed again and again! This project is perfect for kids of all ages and can be a delightful bonding experience for the whole family. Plus, it offers a unique opportunity to develop fine motor skills and problem-solving abilities.
To get started, gather the following materials:
- Cardstock or thick paper: This will provide the durability needed for puzzle pieces.
- Glue stick: Ideal for adhering pictures to the cardstock.
- Scissors: Safety scissors are recommended for younger children.
- Markers or crayons: For adding personal touches or designs.
- Clear adhesive laminate: Optional, but it can protect the puzzle and make it last longer.
Here’s a simple step-by-step guide to make your own picture puzzle:
- Choose Your Image: Select a photo or drawing that your child loves. It could be a family vacation snapshot, a favorite pet, or even a colorful abstract drawing.
- Prepare the Base: Cut a piece of cardstock to the desired size for your puzzle. A standard size is around 8x10 inches, but you can adjust it based on the image.
- Glue the Image: Carefully glue the chosen picture onto the cardstock. Make sure to smooth out any bubbles for a flat surface.
- Cut the Puzzle Pieces: Once the glue is dry, use scissors to cut the picture into various shapes. You can create traditional jigsaw shapes or simply cut them into squares or rectangles for younger kids.
- Decorate (Optional): Encourage your child to decorate the back of the puzzle pieces with markers or crayons. They can add their name, doodles, or even a fun message.
And voilà! You have a unique, personalized puzzle that your child can enjoy. This project not only fosters creativity but also helps improve cognitive skills as they figure out how to piece their creation back together. Plus, it’s a great conversation starter during family gatherings!
As an added tip, consider making a few picture puzzles with different themes or images. You could create a series of puzzles featuring family milestones, holidays, or even favorite cartoon characters. This variety keeps the activity fresh and exciting, encouraging kids to engage with their puzzles repeatedly.
1. What age is appropriate for making picture puzzles?
Most children aged 4 and up can participate in making picture puzzles, with supervision for cutting tasks. Younger kids can enjoy the gluing and decorating aspects.
2. Can we use digital images?
Absolutely! If you have a digital photo, you can print it out on cardstock. Just ensure the image is high quality for the best results.
3. How can we make the puzzles more challenging?
To increase the difficulty, try cutting the pieces into smaller shapes or creating more intricate designs. You can also mix pieces from different puzzles to make it a fun challenge!
4. How do we store the puzzles?
Store the puzzles in a small box or an envelope. You can label them with the image on the front, making it easy to keep track of multiple puzzles.

Shape Sorting Puzzles
Shape sorting puzzles are not just fun; they're a fantastic way for younger children to learn about shapes and colors while developing essential cognitive skills. Imagine a world where your little ones can explore geometry through play! These puzzles challenge kids to match shapes with their corresponding slots, promoting critical thinking and problem-solving abilities. Plus, they can unleash their creativity by decorating their own puzzles, making it a truly personalized experience.
To create a shape sorting puzzle, you can start by gathering some basic materials. All you need is a sturdy piece of cardboard or wood, some colored paper, and child-safe scissors. You can draw or print out various shapes such as circles, squares, triangles, and stars. Once you have your shapes, cut them out and trace them onto the cardboard or wood, creating slots for each shape. This hands-on approach not only enhances fine motor skills but also provides a tangible way for children to grasp abstract concepts like shapes and spatial relationships.
But wait, there’s more! You can take this crafting session up a notch by incorporating colors and textures. For instance, you might paint the shapes in vibrant colors or use different materials like felt or sandpaper for added sensory experience. This way, children can not only see the shapes but also feel the differences, making it a multi-dimensional learning activity.
Here’s a quick overview of how to make your own shape sorting puzzle:
- Gather materials: Cardboard or wood, colored paper, scissors, and glue.
- Design your shapes: Choose shapes that are age-appropriate and appealing to your child.
- Cut out shapes: Cut the shapes from the colored paper and trace them onto the cardboard or wood.
- Create slots: Cut out slots for each shape, ensuring they fit snugly.
- Decorate: Add colors and textures to make the puzzle visually engaging.
Once completed, your child will have a wonderful tool to play with while learning. They can sort the shapes by color, size, or type, adding layers of complexity to the game. This not only keeps them entertained but also reinforces their learning through repetition and exploration. So, why not gather your supplies and dive into the world of shape sorting puzzles? It's a win-win for fun and education!
- What age group is suitable for shape sorting puzzles? Shape sorting puzzles are ideal for toddlers and preschoolers, typically ages 2 to 5 years.
- Can I make shape sorting puzzles at home? Absolutely! Homemade shape sorting puzzles are easy to create with simple materials.
- Are there any benefits to using shape sorting puzzles? Yes! They help improve fine motor skills, cognitive abilities, and color recognition.
- How can I make the puzzles more challenging? You can increase the number of shapes or introduce new shapes and colors as your child progresses.
Creative Themes for Puzzles
Incorporating themes into puzzle-making not only enhances creativity but also makes the crafting experience more engaging for children. Imagine diving into a world where each puzzle tells a story or explores a different aspect of our planet! Themed puzzles can spark imagination and curiosity, transforming a simple craft into an educational adventure. Whether it’s learning about the environment, exploring favorite stories, or even diving into the world of art, the possibilities are endless. Let's explore some fantastic themes that can inspire unique and imaginative puzzle designs!
One delightful theme is nature-inspired puzzles. These puzzles can teach kids about different elements of the environment while they craft. For instance, children can create puzzles featuring various animals, plants, and landscapes. This not only enhances their artistic skills but also encourages an appreciation for the natural world. Imagine a vibrant forest scene where each piece represents a different animal or plant! Such puzzles can be both fun to assemble and educational, as they can include facts about each element depicted. Here are some ideas for nature-themed puzzles:
- Animal Puzzles: Use pictures of local wildlife or favorite zoo animals.
- Plant Puzzles: Create puzzles featuring different types of flowers or trees.
- Landscape Puzzles: Design puzzles that showcase beautiful landscapes like mountains, beaches, or forests.
Another exciting theme is storybook puzzles. These puzzles connect the joy of reading with the fun of crafting. Kids can create puzzles based on their favorite stories or characters, making reading more interactive and enjoyable. Imagine a puzzle that, when completed, reveals a scene from "Alice in Wonderland" or "The Very Hungry Caterpillar." This not only helps children engage with literature but also reinforces comprehension skills as they piece together the story visually. To make storybook puzzles, consider the following:
- Choose a beloved story or character as the focal point.
- Use illustrations from the book or have the children draw their own versions.
- Encourage kids to narrate the story as they complete the puzzle, making the experience even more immersive.
In summary, the incorporation of creative themes into puzzle-making opens a treasure trove of possibilities for children. By engaging with themes such as nature and storybooks, kids can enhance their cognitive skills while diving into new worlds of imagination and learning. So, gather your materials, let your creativity flow, and watch as your children embark on exciting crafting adventures that are both fun and educational!
Q: What age group is suitable for DIY puzzle-making?
A: DIY puzzle-making is suitable for a wide range of ages. Younger children can enjoy simpler puzzles, while older kids can tackle more complex designs. Always supervise younger kids when using tools.
Q: Can we use recycled materials for making puzzles?
A: Absolutely! Recycled materials like cardboard, old magazines, or even cereal boxes can be great for creating puzzles. This not only saves money but also teaches children about sustainability.
Q: How can I encourage my child to personalize their puzzles?
A: Encourage your child to use their favorite colors, drawings, or photographs. Personalizing puzzles makes them more meaningful and exciting to assemble!
Q: What are some tips for making puzzles more challenging?
A: To increase the difficulty, consider using smaller pieces, more intricate designs, or creating puzzles with similar colors that require careful observation to assemble.
Nature-Inspired Puzzles
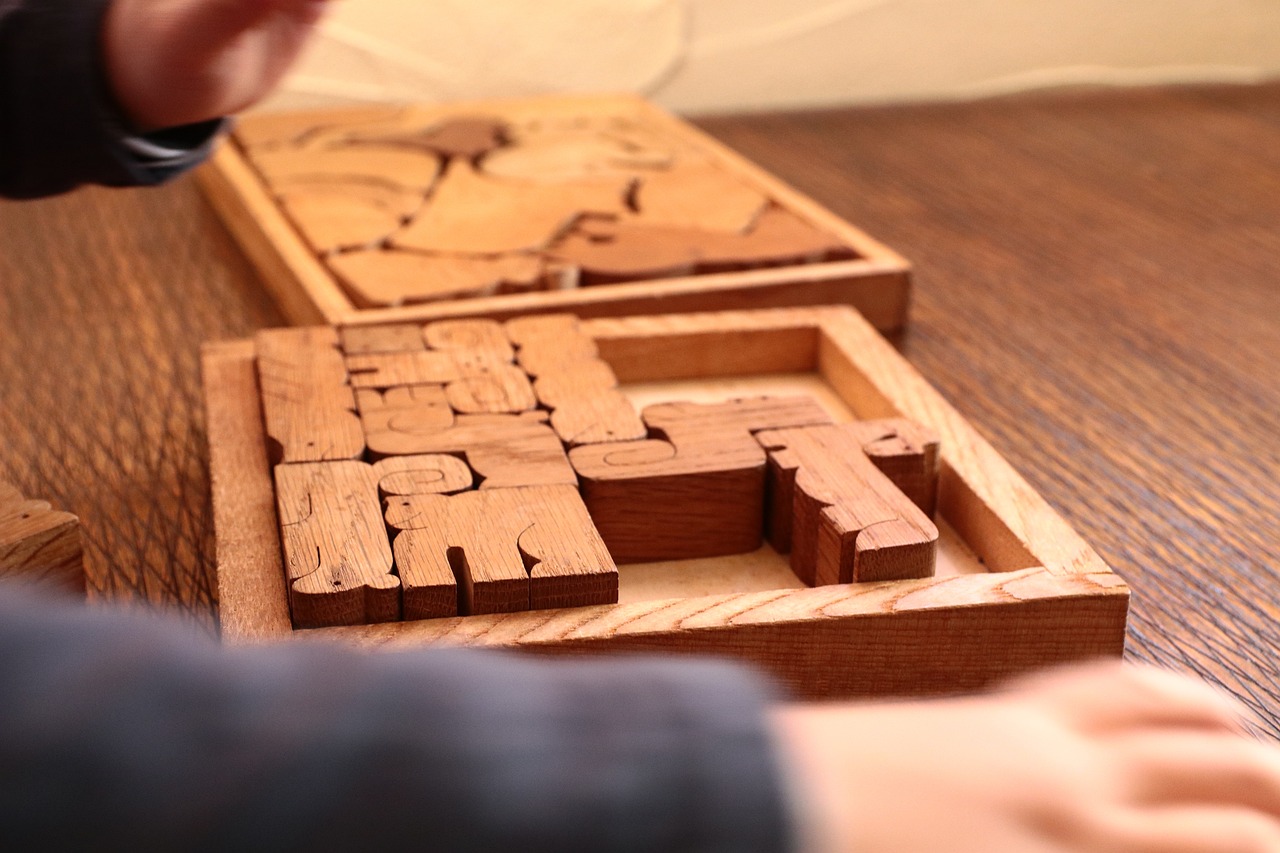
Creating is not only a fantastic way to engage children in crafting but also an opportunity to teach them about the environment. Imagine your little ones piecing together images of vibrant flowers, majestic animals, or breathtaking landscapes. Each puzzle becomes a canvas for creativity and a gateway to learning. By incorporating elements from nature, kids can develop a deeper appreciation for the world around them while honing their cognitive skills through problem-solving.
One of the best aspects of nature-inspired puzzles is the variety they offer. You can create puzzles featuring:
- Animals: From playful dolphins to towering elephants, animal puzzles can spark curiosity about wildlife and conservation.
- Plants: Crafting puzzles with different types of flora can introduce children to various species and their habitats.
- Landscapes: Pictures of mountains, forests, and oceans can inspire a love for nature and the outdoors.
To start making these puzzles, you can use simple materials like cardboard or thick paper. Begin by selecting a beautiful image from a nature magazine or a family photo taken during a hike. Once you have your image, follow these steps:
- Prepare the Base: Cut a piece of cardboard to the size of your chosen image.
- Adhere the Image: Use glue to stick the image onto the cardboard, ensuring there are no air bubbles.
- Mark Puzzle Pieces: Lightly draw shapes on the back of the cardboard to indicate where to cut. You can create traditional jigsaw shapes or even abstract forms.
- Cut the Pieces: Carefully cut along the marked lines. Make sure to supervise younger children during this step to ensure safety.
- Enjoy! Once the pieces are cut, mix them up and let your kids assemble their unique nature puzzle!
Not only do these puzzles provide hours of entertainment, but they also serve as a great conversation starter about environmental issues. You can discuss the importance of protecting wildlife, the role of plants in our ecosystem, or even share stories of your own adventures in nature. This interactive crafting experience can lead to meaningful discussions that enrich your child's understanding of the world.
Moreover, you can turn this activity into a fun family project by organizing a puzzle-making day. Gather family members, choose different nature themes, and let everyone create their own puzzle. Once completed, you can have a puzzle-solving competition, where each family member tries to complete each other's puzzles. It's a great way to bond while fostering creativity and learning!
In conclusion, nature-inspired puzzles are an excellent way to combine crafting and education. They allow children to express their creativity while learning about the beauty and diversity of the natural world. So gather your materials, unleash your imagination, and let the puzzle-making adventure begin!
Q: What age group is suitable for making nature-inspired puzzles?
A: Nature-inspired puzzles can be suitable for children aged 4 and up. Younger kids may need assistance with cutting, while older children can enjoy more complex designs.
Q: Can we use digital images for puzzles?
A: Absolutely! You can print digital images from your computer or use photos taken during family outings. Just ensure the images are of high quality for the best results.
Q: How can we make the puzzles more challenging?
A: To increase the difficulty, consider creating more intricate designs, using smaller pieces, or introducing themes that require additional problem-solving skills, like color matching or pattern recognition.
Storybook Puzzles
Storybook puzzles are a fantastic way to merge the magic of storytelling with the joy of crafting. Imagine your child not only reading their favorite tales but also actively participating in them! By creating puzzles based on beloved storybooks, children can enhance their comprehension and retention skills while having a blast. This hands-on approach to learning transforms reading from a passive activity into an interactive adventure.
To kick off your journey into storybook puzzles, start by selecting a few of your child's favorite books. This could be anything from classic fairy tales to modern stories filled with vibrant characters. Once you've chosen the stories, gather some essential materials, such as:
- Cardstock or thick paper for durability
- Scissors for cutting out pieces
- A glue stick or double-sided tape
- Markers or colored pencils for decoration
Now, let’s dive into the process of creating these engaging puzzles. First, have your child pick a scene or character from the story. This could be a magical castle, a brave knight, or even a friendly dragon! Once the selection is made, print or draw the chosen image on the cardstock. The next step is to cut the image into various puzzle pieces. The number of pieces can vary depending on your child's age and skill level—more pieces for older kids and fewer for younger ones.
After cutting out the pieces, it’s time for some fun decoration. Encourage your child to add their own twist to the puzzle by coloring it or adding stickers that relate to the story. This not only makes the puzzle unique but also allows them to express their creativity. Once the puzzle is complete, you can challenge your child to put it back together. This not only reinforces their understanding of the story but also boosts their problem-solving skills.
Moreover, you can take this a step further by creating a storybook puzzle gallery. Dedicate a wall or a section of your home where these puzzles can be displayed. Each time your child completes a new puzzle, they can hang it up, creating a colorful and interactive storybook wall that not only decorates your space but also serves as a constant reminder of their literary adventures.
Incorporating storybook puzzles into your child's routine is not just about fun; it’s about fostering a love for reading and learning. As they piece together the stories they adore, they’ll develop a deeper connection with the characters and plots, enriching their overall understanding of literature.
Q: What age group is suitable for storybook puzzles?
A: Storybook puzzles can be tailored to any age group. For younger children, simpler puzzles with fewer pieces are ideal, while older kids can handle more complex designs.
Q: Can we use digital images for puzzles?
A: Absolutely! You can print out digital images from e-books or online sources, making it easy to create personalized puzzles based on your child's favorite stories.
Q: How can we make storybook puzzles more challenging?
A: To increase the challenge, consider using more intricate designs, increasing the number of pieces, or even introducing time limits for putting the puzzles together.
Q: What if my child wants to create their own story?
A: Encourage them to write and illustrate their own story, which can then be transformed into a puzzle. This not only enhances their creativity but also boosts their confidence in storytelling.
Frequently Asked Questions
- What are the benefits of DIY puzzle making for kids?
Creating DIY puzzles offers a multitude of benefits for children. Not only does it enhance their problem-solving skills, but it also improves hand-eye coordination and fosters patience. As kids work through the process of designing and assembling their puzzles, they're engaging their minds in a fun and creative way, which can lead to better cognitive development.
- What materials do I need to make puzzles at home?
Before diving into your puzzle-making adventure, it's crucial to gather the right materials. You'll typically need sturdy paper (like cardstock), scissors or a craft knife, and glue for assembly. Depending on the puzzle type, you might also want to include markers or paint for decoration, and perhaps some lamination sheets to make your puzzles more durable.
- Can I use family photos for picture puzzles?
Absolutely! Using family photos is a fantastic way to create personalized picture puzzles. Kids will love seeing their favorite memories transformed into a fun activity. Just print the photos on sturdy paper, cut them into puzzle pieces, and watch as they enjoy piecing their memories back together!
- What age group is suitable for DIY puzzle making?
DIY puzzle making is suitable for a wide range of ages. Younger children, typically ages 3-5, can start with simple shape sorting puzzles, while older kids (ages 6 and up) can tackle more complex picture puzzles or themed designs. Always ensure that the materials and tools used are age-appropriate to keep crafting safe and enjoyable.
- How can I incorporate educational themes into puzzle making?
Incorporating educational themes into puzzle making is a great way to combine learning with fun. For instance, you can create nature-themed puzzles that teach kids about different animals or plants. Alternatively, storybook puzzles can help connect reading with crafting, making the stories they love even more interactive!
- Are there any safety tips for children using cutting tools?
Yes, safety is paramount when kids are using cutting tools. Always supervise children closely and consider using child-safe scissors or craft knives designed for young users. Teach them proper cutting techniques and ensure they work on a stable surface. This way, they can enjoy crafting without unnecessary risks!


