Creative DIY Cushion Covers for Your Home Decor
Are you tired of looking at the same old cushions on your sofa? Do you want to breathe new life into your living space without breaking the bank? If so, you're in the right place! DIY cushion covers are not just a fun project; they can also completely transform the look and feel of your home. Imagine walking into your living room and being greeted by vibrant colors, unique textures, and patterns that reflect your personality. It's like giving your home a stylish makeover without the hefty price tag!
Creating your own cushion covers allows you to express your creativity and add a personal touch to your decor. Whether you’re going for a modern, bohemian, or classic look, the possibilities are endless. Plus, making your own covers means you can choose fabrics that not only match your decor but also suit your lifestyle. For instance, if you have kids or pets, you might want to select durable, easy-to-clean materials. On the other hand, if you’re looking for something cozy and inviting, consider soft fabrics like velvet or linen.
In this article, we’ll explore innovative ideas and techniques to craft unique cushion covers that enhance your home decor. From selecting the right fabric to learning basic sewing techniques, we’ll cover everything you need to know to get started on this exciting DIY journey. So, roll up your sleeves, grab your materials, and let’s dive into the world of creative cushion covers!
When it comes to DIY cushion covers, choosing the right fabric is crucial. The fabric you select will not only determine the aesthetic appeal of your cushions but also their durability and comfort. Start by considering the following factors:
- Durability: If your cushions will see a lot of use, opt for sturdy fabrics like canvas or denim.
- Texture: Think about how the fabric feels. Soft fabrics like cotton or fleece can make your space feel cozy.
- Color and Pattern: Choose colors and patterns that complement your existing decor. Don’t be afraid to mix and match!
By keeping these factors in mind, you can ensure that your cushion covers not only look great but also stand the test of time.
Now that you’ve chosen your fabric, it’s time to dive into some basic sewing techniques. Whether you’re a seasoned pro or a complete beginner, understanding the fundamentals will help you create beautiful cushion covers. Start by familiarizing yourself with essential sewing methods such as stitching, cutting, and finishing. These skills will ensure that your covers not only look professional but also last longer.
One of the first decisions you’ll need to make is whether to hand sew or machine sew your cushion covers. Both methods have their pros and cons:
| Method | Pros | Cons |
|---|---|---|
| Hand Sewing | Great for small projects; more control over details | Time-consuming; may not be as durable |
| Machine Sewing | Faster; produces stronger seams | Requires more equipment; can be intimidating for beginners |
Ultimately, the choice depends on your skill level and the finish you desire for your cushion covers.
If you choose to hand sew, you’ll need a few essential tools to get started:
- Needles: Choose the right size for your fabric.
- Thread: Match the thread color to your fabric for a seamless look.
- Fabric Scissors: Invest in a good pair for clean cuts.
For machine sewing, make sure you have the following:
- A sewing machine: Familiarize yourself with its features.
- Presser feet: Different feet can help with various techniques.
- Fabric guides: These can help you sew straight seams.
With the right tools and techniques, you’ll be well on your way to creating stunning DIY cushion covers!
Now that you have the basics down, let’s unleash your creativity! There are countless design ideas to explore for your cushion covers. From bold patterns to subtle textures, you can truly make your cushions a reflection of your style.
One fun way to personalize your cushion covers is by using stencils and fabric paint. This technique allows you to create custom designs that are uniquely yours. Just imagine a beautiful floral pattern or a quirky geometric design gracing your cushions—how exciting is that?
Don’t shy away from embellishments! Adding buttons, lace, or appliqué can elevate a simple cushion cover into a stunning decor piece. Think of embellishments as the jewelry of your cushions—just like the right necklace can transform an outfit, the right embellishments can take your cushion covers to the next level.
Once you’ve created your masterpiece, you’ll want to keep it looking fresh and vibrant. Proper maintenance and care are essential for ensuring the longevity of your DIY cushion covers. Here are some tips:
Different fabrics require different washing techniques. Always check the care label and follow the best practices to maintain the quality and appearance of your cushion covers. For instance, some fabrics might be machine washable, while others may need to be hand washed or dry cleaned.
When your cushion covers aren’t in use, store them properly to keep them in pristine condition. Consider using breathable storage bags or bins to prevent dust accumulation. This way, your cushions will be ready to brighten your space whenever you need them!
Q: Can I use any fabric for my cushion covers?
A: While you can technically use any fabric, it’s best to choose materials that are durable and easy to clean, especially if you have pets or children.
Q: Do I need a sewing machine to make cushion covers?
A: No, you can hand sew your cushion covers if you prefer! Just be aware that it may take more time.
Q: How do I know what size to cut my fabric?
A: Measure your cushions and add a seam allowance (typically 1-2 inches) to ensure a good fit.
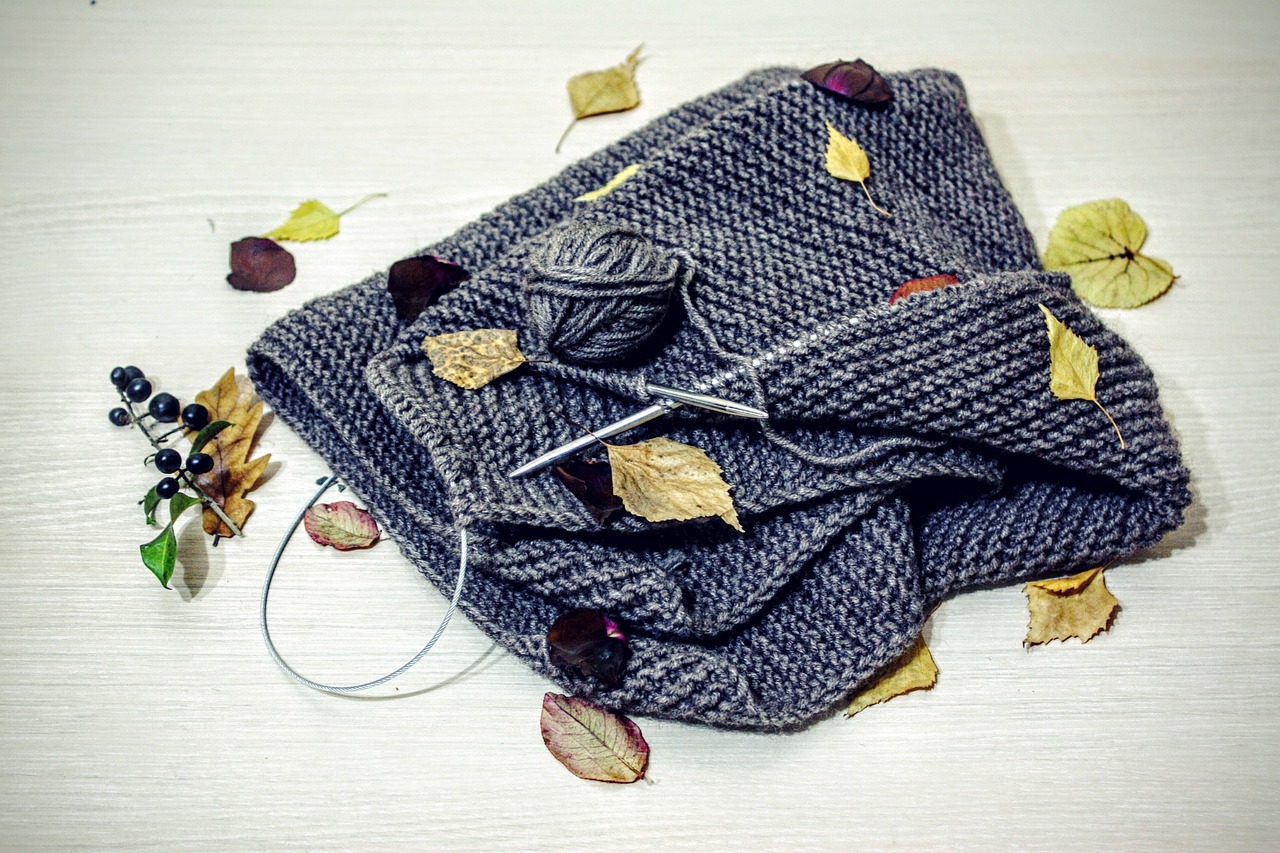
Choosing the Right Fabric
When it comes to crafting your own cushion covers, is absolutely essential. Think of fabric as the canvas for your artistic expression; it sets the tone for your entire home decor. You want something that not only looks good but also feels good and stands the test of time. So, what should you consider? Let's dive into the key factors that will help you make the best choice for your DIY project.
Durability is one of the most important aspects to keep in mind. If your cushions are going to be used frequently, you'll want a fabric that can withstand the wear and tear of daily life. Fabrics like canvas, denim, or outdoor upholstery are fantastic options for their strength and resilience. On the other hand, if your cushions are more for decorative purposes, you might consider lighter fabrics such as cotton or linen.
Next up is texture. The feel of the fabric can completely change the vibe of your living space. A soft, plush fabric like velvet can add a touch of luxury, while a textured fabric like boucle can introduce an interesting visual element. Think about the overall aesthetic you want to achieve; do you want something cozy and inviting, or sleek and modern?
Color is another crucial factor. The color of your cushion covers should harmonize with your existing decor. If your space is filled with vibrant colors, consider using neutral fabrics to balance it out. Conversely, if your decor is more subdued, a pop of color can bring life to the room. Don't shy away from patterns either! Floral, geometric, or abstract designs can make your cushions stand out and become conversation starters.
In summary, when choosing the right fabric for your DIY cushion covers, keep these key points in mind:
- Durability: Opt for fabrics that can handle daily use.
- Texture: Choose a fabric that complements the feel of your space.
- Color: Select colors and patterns that enhance your existing decor.
By taking the time to carefully select your fabric, you not only ensure that your cushion covers will be visually appealing but also practical for everyday use. So go ahead, unleash your creativity and make those cushions a true reflection of your style!
Basic Sewing Techniques
When it comes to crafting your own cushion covers, mastering some is essential. Whether you're a novice or have some experience under your belt, understanding these techniques will help you create beautiful cushion covers that not only look great but also stand the test of time. First off, let’s talk about the importance of stitching. The type of stitch you choose can make a significant difference in the durability and appearance of your cushion covers. For instance, a straight stitch is perfect for basic seams, while a zigzag stitch is ideal for preventing fraying on the edges of your fabric. Don't underestimate the power of a good stitch!
Next, we have cutting. Accurate cutting is crucial for achieving a professional finish. Always use sharp fabric scissors and consider using a rotary cutter for straight edges. It’s like slicing through butter! Make sure to measure your fabric twice before cutting, as the old adage goes, “measure twice, cut once.” This will save you from unnecessary fabric wastage and frustration. You can use a cutting mat and a ruler for added precision.
Another technique to consider is finishing methods. Once your cushion covers are sewn, you want to ensure they are finished properly to prevent unraveling. Techniques like serging or using pinking shears can give your edges a neat and tidy look. And let’s not forget about the importance of pressing your seams. A good press with an iron can elevate your project from “meh” to “wow” in an instant!
Now, you might be wondering whether to go for hand sewing or machine sewing. Each method has its own set of advantages and disadvantages. Hand sewing allows for greater control and is perfect for small details or delicate fabrics. On the other hand, machine sewing is faster and ideal for larger projects. If you’re just starting out, you might want to try both methods to see which one you prefer. It’s like choosing between a leisurely walk and a fast-paced jog; each has its benefits!
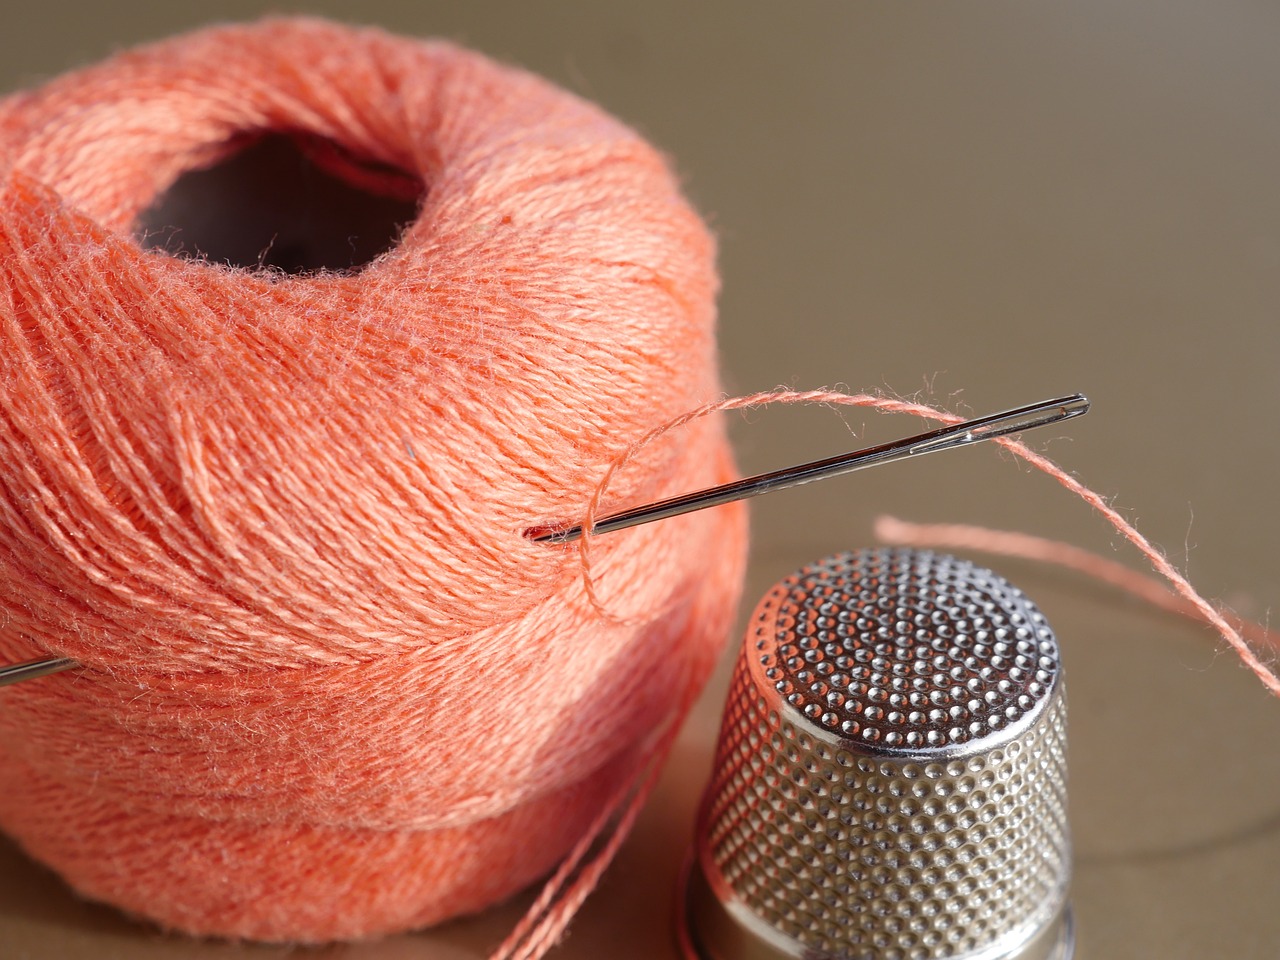
If you decide to go the hand sewing route, there are a few essential tools you’ll need. Gather your needles, thread, and fabric scissors. A thimble can also come in handy to protect your fingers. These tools are your best friends in the world of hand sewing. Just imagine yourself as a wizard, crafting magic with each stitch!
On the flip side, if you opt for machine sewing, ensure you have the right tools. A reliable sewing machine is a must, along with various presser feet and fabric guides. These tools can significantly streamline your DIY process. Think of your sewing machine as a trusty steed, ready to gallop through your crafting journey!
In conclusion, mastering these basic sewing techniques will set you on the right path to creating stunning cushion covers. Remember, practice makes perfect, so don’t be afraid to experiment and make mistakes along the way. After all, every great craftsman started somewhere!
Q: What type of fabric is best for cushion covers?
A: Fabrics like cotton, linen, and canvas are great choices due to their durability and ease of cleaning.
Q: Can I use old clothes to make cushion covers?
A: Absolutely! Upcycling old clothes is a fantastic way to create unique cushion covers while being eco-friendly.
Q: How do I wash my DIY cushion covers?
A: Always check the fabric care label, but generally, cold water and a gentle cycle work best to maintain quality.
Q: What if I don’t have a sewing machine?
A: No worries! Hand sewing can be just as effective, especially for smaller projects.
Hand Sewing vs. Machine Sewing
Explore innovative ideas and techniques to craft unique cushion covers that enhance your home decor, adding a personal touch and style to your living spaces.
Selecting the perfect fabric is crucial for your DIY cushion covers. Consider durability, texture, and color to ensure your cushions complement your home decor while being practical for everyday use.
Familiarize yourself with essential sewing techniques that will help you create beautiful cushion covers. Learn about stitching, cutting, and finishing methods to achieve professional-looking results.
When it comes to crafting your DIY cushion covers, one of the most important decisions you’ll face is whether to hand sew or machine sew. Each method has its own unique advantages and drawbacks, and understanding these can help you choose the best approach for your project. Hand sewing is often seen as a more personal touch, allowing you to connect with your fabric and create intricate designs. It’s perfect for those who enjoy the meditative process of sewing and want to add a bit of character to their cushions. However, it can be time-consuming, and the results may vary depending on your skill level.
On the other hand, machine sewing is all about speed and efficiency. If you’re looking to create multiple cushion covers in a short amount of time, a sewing machine can be your best friend. It allows for consistent stitching and can handle thicker fabrics more easily. However, it might feel less personal, and some people find it intimidating at first. Here’s a quick comparison to help you decide:
| Aspect | Hand Sewing | Machine Sewing |
|---|---|---|
| Speed | Slower | Faster |
| Control | High | Moderate |
| Skill Level Required | Beginner-friendly | Requires some practice |
| Cost | Low (no machine needed) | Higher (cost of machine) |
Ultimately, the choice between hand sewing and machine sewing comes down to your personal preference and the specific project at hand. If you’re a beginner, you might want to start with hand sewing to get a feel for the fabric and techniques. Once you’re comfortable, you can transition to machine sewing for larger projects. Whichever method you choose, the satisfaction of creating your own cushion covers will undoubtedly add a unique charm to your home decor!
Unleash your creativity with various design ideas for your cushion covers. From patterns and colors to embellishments, explore how to make your cushions stand out.
Discover how to use stencils and fabric paint to create custom designs on your cushion covers, adding a unique flair to your home decor.
Explore different embellishments like buttons, lace, and appliqué to enhance your cushion covers, transforming simple designs into eye-catching decor pieces.
Learn how to properly care for your DIY cushion covers to ensure their longevity. Discover washing techniques and storage tips to keep them looking fresh and vibrant.
Understand the best washing practices for different fabrics to maintain the quality and appearance of your cushion covers while preventing damage.
Explore effective storage solutions for your cushion covers when not in use, ensuring they remain in pristine condition and ready to brighten your space whenever needed.
- Can I use any fabric for cushion covers? - While you can use many types of fabric, it's best to choose materials that are durable and easy to clean, like cotton or polyester.
- How do I know what size to cut my fabric? - Measure your cushion insert and add seam allowances to get the correct fabric size.
- Is it difficult to sew cushion covers? - Not at all! With some basic sewing skills and patience, you can create beautiful cushion covers.
Tools for Hand Sewing
When diving into the world of DIY cushion covers, having the right tools for hand sewing can make all the difference between a frustrating experience and a delightful one. Think of your tools as your trusty sidekicks—without them, even the most creative ideas can fall flat. So, what do you need to get started?
First and foremost, a good quality needle is essential. Needles come in various sizes and types, tailored for different fabrics. For instance, if you're working with heavier materials like canvas or denim, you'll need a thicker needle that can withstand the stress. Conversely, for delicate fabrics like silk, a finer needle will do the trick. It's always a good idea to have a variety of needles on hand, just like a chef keeps different knives for different tasks.
Next up is thread. The thread you choose should match your fabric in both color and type. Polyester thread is a popular choice because of its strength and versatility, but cotton thread works wonders for natural fabrics. Consider investing in a thread organizer to keep your spools untangled and easily accessible. After all, nothing is more annoying than searching for that perfect shade of blue when you're in the zone!
Don't forget about fabric scissors. A sharp pair of scissors is crucial for clean cuts, which is vital for achieving professional-looking edges on your cushion covers. Dull scissors can lead to frayed edges and uneven cuts, which can be a real bummer. If you're serious about sewing, consider investing in a pair specifically designed for fabric to avoid using them for paper or other materials.
In addition to these basics, a tape measure is indispensable for ensuring your fabric pieces are cut to the right size. Precision is key, and a flexible tape measure allows you to easily navigate curves and corners. Pair this with a fabric marking tool, like chalk or a fabric pen, to outline your cutting lines without leaving permanent marks on your fabric.
Lastly, having a thimble can save your fingers from the wear and tear of pushing needles through fabric. It’s a small investment for a big payoff in comfort. While it may seem trivial, you’ll appreciate the extra protection when you’re deep into your sewing project.
To summarize, here are the essential tools for hand sewing your cushion covers:
- Needles - Various sizes for different fabrics
- Thread - Color and type to match your fabric
- Fabric scissors - For clean, precise cuts
- Tape measure - To ensure accurate measurements
- Fabric marking tool - For outlining cutting lines
- Thimble - To protect your fingers
With these tools in your arsenal, you'll be well-equipped to tackle any DIY cushion cover project that comes your way. Remember, the right tools not only enhance your sewing experience but also ensure that your finished products look fabulous!
Q1: Do I need a sewing machine to make cushion covers?
A1: Not at all! You can create beautiful cushion covers by hand sewing. However, a sewing machine can speed up the process and provide a more polished finish.
Q2: What fabric is best for cushion covers?
A2: It depends on your style and the use of the cushions. Cotton, linen, and canvas are great for durability and ease of cleaning, while silk or velvet can add a touch of luxury.
Q3: How do I wash my DIY cushion covers?
A3: Always check the care label of your fabric. Generally, machine washing on a gentle cycle with cold water is safe for most fabrics. Air drying is recommended to prevent shrinking.
Q4: How can I make my cushion covers unique?
A4: Get creative! Use stencils, fabric paint, or add embellishments like buttons and lace to personalize your cushion covers and make them stand out in your home decor.
Machine Sewing Essentials
When diving into the world of machine sewing for your DIY cushion covers, having the right tools is essential to ensure a smooth and enjoyable crafting experience. Think of your sewing machine as your trusty steed in the quest to create beautiful home decor; without proper gear, even the best rider can struggle. So, let’s explore the must-have tools that will help you achieve precision and efficiency in your sewing projects.
First and foremost, your sewing machine is the star of the show. Investing in a good quality machine can make all the difference. Look for features like adjustable stitch lengths, a variety of stitch patterns, and a reliable motor. Brands like Brother, Singer, and Janome offer a range of machines suitable for beginners to advanced sewists. Remember, a machine that feels comfortable and intuitive to you will inspire your creativity.
Next on the list is the presser foot. This small but mighty accessory plays a crucial role in guiding your fabric as you sew. Different types of presser feet are designed for various tasks, such as zipper installation, buttonholes, or even quilting. Having a few different presser feet on hand will allow you to tackle a variety of projects with ease. For cushion covers, a standard foot and a zipper foot are particularly useful.
Fabric guides are another essential tool that can help you achieve straight seams and precise cuts. These guides attach to your sewing machine and assist in keeping your fabric aligned as you sew. They are especially handy when working with thicker fabrics or multiple layers, ensuring your cushion covers have that professional finish.
To further enhance your sewing experience, consider investing in some quality sewing supplies:
- Thread: Use high-quality thread that matches your fabric. Polyester thread is durable and works well for most projects.
- Needles: Different fabrics require different needles. A universal needle is a good start, but you may want to stock up on specialty needles for heavier fabrics or knits.
- Cutting Tools: Invest in a good pair of fabric scissors and a rotary cutter for clean, precise cuts.
Lastly, don't forget about the importance of a sewing machine manual. This handy guide is your roadmap to understanding your machine's features and troubleshooting any issues that arise. Familiarize yourself with it, and keep it close by as you embark on your cushion cover journey.
In summary, having the right machine sewing essentials can make your DIY cushion cover project not only easier but also a lot more enjoyable. With the right tools, you'll be able to unleash your creativity and craft stunning cushion covers that reflect your personal style and enhance your home decor.
Q: What type of sewing machine is best for beginners?
A: For beginners, a basic mechanical sewing machine with adjustable stitch settings and a few built-in stitches is ideal. Brands like Brother and Singer offer great options that are user-friendly.
Q: Do I need a special needle for sewing cushion covers?
A: It depends on the fabric. For heavier fabrics like canvas or upholstery, a heavy-duty needle is recommended. For lighter fabrics, a universal needle will work just fine.
Q: How can I prevent my fabric from slipping while sewing?
A: Using a walking foot can help prevent fabric from shifting. Additionally, pinning your fabric layers together before sewing can provide extra stability.

Measuring and Cutting Fabric
When it comes to crafting your own cushion covers, one of the most critical steps is accurately. Think of it as laying the foundation for a beautiful house; if the base isn’t right, everything else might crumble! Start by gathering your materials: a measuring tape, fabric scissors, and a straight edge. These tools will be your best friends in this process.
First, measure the dimensions of your cushions. If you’re covering existing cushions, use a tape measure to get the width, height, and depth. For a snug fit, add an extra inch to each measurement for seam allowances. If you’re creating a cushion from scratch, consider the desired size and shape. A standard cushion is typically around 18 inches square, but feel free to experiment with different sizes to suit your decor.
Once you have your measurements, it’s time to cut your fabric. Lay your fabric flat on a clean, smooth surface. Using a straight edge, draw lines where you’ll cut. Ensure you’re cutting in a straight line to avoid jagged edges. When cutting, use sharp fabric scissors; dull scissors can lead to frayed edges, which can ruin the look of your cushion cover. As you cut, take your time—precision is key!
For those who may be new to this, here’s a quick tip: consider using a cutting mat and rotary cutter for more precise cuts. This method allows for smoother edges and can save you time. If you’re working with patterned fabric, make sure to align the pattern correctly before cutting to maintain a cohesive look across your cushion covers.
After cutting, it’s a good idea to pin the fabric pieces together before sewing. This will help keep everything in place and ensure that your edges align perfectly. Remember, taking the time to measure and cut accurately will not only enhance the appearance of your cushion covers but will also make the sewing process much smoother.
To summarize, here are the essential steps for measuring and cutting fabric:
- Measure the cushion dimensions accurately.
- Add seam allowances for a snug fit.
- Use sharp fabric scissors for clean cuts.
- Pin fabric pieces together before sewing.
By following these guidelines, you'll be well on your way to creating stunning DIY cushion covers that fit perfectly and elevate your home decor. Remember, the more careful you are in this initial stage, the more professional your finished product will look!
Q1: How do I choose the right fabric for my cushion covers?
A1: Consider durability, texture, and color. Fabrics like cotton or linen are great for everyday use, while velvet can add a touch of luxury.
Q2: What tools do I need for measuring and cutting fabric?
A2: A measuring tape, fabric scissors, a straight edge, and possibly a cutting mat and rotary cutter for precision.
Q3: How do I ensure my cushion covers have clean edges?
A3: Use sharp scissors, cut along straight lines, and consider finishing the edges with a zigzag stitch to prevent fraying.
Q4: Can I use old fabric for my cushion covers?
A4: Absolutely! Upcycling old fabric is a great way to create unique cushion covers while being environmentally friendly.

Creative Design Ideas
Unleashing your creativity when crafting DIY cushion covers can transform your living space into a vibrant, personalized haven. Imagine walking into a room where every cushion tells a story, reflecting your unique style and personality. The beauty of DIY projects is that they allow you to experiment with patterns, colors, and textures that resonate with you. Whether you're a fan of bold prints or subtle tones, the possibilities are endless!
One fantastic way to give your cushions a unique touch is by using stencils and fabric paint. This method not only adds a splash of color but also allows you to create intricate designs that can match your home decor perfectly. Picture this: a serene living room adorned with soft pastel cushions featuring delicate floral patterns, all crafted by your own hands. To get started, simply choose your favorite stencil design, secure it to your cushion cover, and apply fabric paint using a sponge or brush. The result? A stunning piece of art that enhances your space!
Additionally, adding embellishments can elevate your cushion covers from simple to spectacular. Think about incorporating elements like buttons, lace, or even appliqué. For instance, a plain cushion cover can be transformed into a chic statement piece by sewing on a row of colorful buttons or a strip of delicate lace along the edges. These small details not only add texture but also invite conversation and admiration from your guests. The trick is to balance the embellishments with the overall design so that it enhances rather than overwhelms the cushion.
For those who love a bit of whimsy, consider mixing and matching different fabrics and patterns. You could create a patchwork effect by combining various materials, such as floral prints with stripes or polka dots. This playful approach allows you to express your creativity and can result in a truly unique look that stands out in any room. Just remember to keep a cohesive color palette in mind to ensure that the final product feels harmonious.
Lastly, don't shy away from incorporating seasonal themes into your cushion covers. For example, during the fall, you could use warm colors and leaf patterns, while in the spring, fresh florals can breathe new life into your decor. This not only keeps your home feeling fresh and inviting but also allows you to showcase your creativity throughout the year!
Q: What type of fabric is best for DIY cushion covers?
A: The best fabric depends on your style and intended use. Cotton is durable and easy to work with, while linen offers a more luxurious feel. For outdoor cushions, consider weather-resistant fabrics.
Q: How can I ensure my cushion covers fit perfectly?
A: Always measure your cushions before cutting your fabric. A good rule of thumb is to add an extra inch for seam allowances. This ensures a snug fit without being too tight.
Q: Can I wash my DIY cushion covers?
A: Yes, most DIY cushion covers can be washed. However, always check the fabric care instructions. For painted or embellished covers, hand washing is often recommended to preserve the design.
Using Stencils and Paint
When it comes to personalizing your DIY cushion covers, using stencils and fabric paint can truly elevate your designs to the next level. Imagine transforming a plain cushion into a vibrant piece of art that reflects your personality and style! The beauty of stenciling lies in its simplicity and versatility. You can create anything from intricate patterns to bold statements, all while adding a unique flair to your home decor.
First, you'll want to gather your materials. Here’s a quick rundown of what you’ll need:
- Stencils: You can either purchase pre-made stencils or create your own using cardstock or plastic sheets.
- Fabric Paint: Choose a high-quality fabric paint that suits your color palette.
- Sponges or Brushes: These tools will help you apply the paint evenly.
- Masking Tape: This is essential for securing your stencil in place while you work.
Before you start painting, it’s crucial to prepare your cushion cover. Make sure it’s clean and ironed to eliminate any wrinkles. Lay it flat on a protected surface to avoid any mess. Now, position your stencil on the cushion cover and use masking tape to secure it. This will prevent any paint from bleeding underneath the stencil, ensuring crisp, clean lines.
Now comes the fun part! Dip your sponge or brush into the fabric paint, removing excess paint to avoid drips. Gently dab or brush the paint onto the stencil, applying even pressure. If you’re feeling adventurous, consider using multiple colors for a more dynamic look. Once you’re satisfied with the coverage, carefully lift the stencil to reveal your masterpiece. Allow the paint to dry completely before flipping the cushion cover over to paint the other side, if desired.
For those who want to take their creativity a step further, consider layering stencils. Start with a base color and let it dry before applying a second stencil in a contrasting color. This technique can create stunning depth and dimension, making your cushion covers truly one-of-a-kind.
Finally, don't forget to seal your designs. Once the paint is dry, you can use a fabric medium or a spray sealant to protect your artwork from wear and tear. This will ensure your cushion covers remain vibrant and beautiful for years to come!
Q: Can I use regular paint for stenciling on fabric?
A: It's best to use fabric paint specifically designed for textiles, as it adheres better and remains flexible after drying.
Q: How do I clean my stencils after use?
A: Simply wash them with warm, soapy water immediately after use to prevent the paint from drying and ruining your stencils.
Q: Will the paint wash out after cleaning the cushion covers?
A: If you use high-quality fabric paint and properly set it according to the instructions, it should withstand washing without fading.
Adding Embellishments
When it comes to DIY cushion covers, adding embellishments is like adding the cherry on top of a delicious sundae—it elevates the entire look and feel of your creation. Imagine a simple, solid-colored cushion cover transformed into a vibrant statement piece with just a few thoughtful additions. The beauty of embellishments lies in their ability to reflect your personal style and creativity, making your cushions not just functional, but also a true representation of your home decor aesthetic.
There are countless ways to enhance your cushion covers, and the options are only limited by your imagination. For instance, you might consider using buttons, which can add a playful touch or a vintage vibe depending on their style. A cluster of mismatched buttons can create a quirky, eclectic look, while uniform buttons can lend a more polished appearance. Additionally, think about incorporating lace or trim along the edges of your cushions. This simple addition can introduce a delicate, feminine touch that softens the overall design.
Another exciting avenue to explore is appliqué. This technique allows you to sew or glue fabric shapes onto your cushion covers, creating beautiful patterns or images. Whether you opt for floral designs, geometric shapes, or even whimsical characters, appliqué can turn your cushions into a canvas for your artistic expression. And if you're feeling particularly adventurous, consider using fabric paint to add your own hand-painted designs. This method opens up a world of possibilities, allowing you to customize your cushions with unique patterns that no one else will have.
To give you a clearer idea of how to incorporate these embellishments effectively, here’s a quick comparison of some popular options:
| Embellishment | Effect | Skill Level |
|---|---|---|
| Buttons | Playful, Vintage | Easy |
| Lace/Trim | Delicate, Feminine | Easy |
| Appliqué | Artistic, Customizable | Intermediate |
| Fabric Paint | Unique, Personalized | Intermediate to Advanced |
As you embark on your journey to embellish your cushion covers, remember that the key is to have fun and let your personality shine through. Don't be afraid to mix and match different elements; after all, home decor is all about expressing who you are. So, gather your materials, unleash your creativity, and watch as your cushions transform into stunning pieces of art that not only beautify your space but also tell your unique story.
- What types of fabric are best for embellishing cushion covers? Natural fabrics like cotton and linen work well, as they hold embellishments nicely and are easy to sew.
- Can I use hot glue for embellishments? Yes, hot glue can be a quick solution for attaching lighter embellishments, but sewing is generally more durable.
- How do I care for embellished cushion covers? Always check the care instructions for your embellishments; most can be gently hand washed or spot cleaned.
Maintenance and Care
When you've put your heart and soul into creating beautiful DIY cushion covers, the last thing you want is for them to fade or wear out quickly. Proper maintenance and care are essential to keep your creations looking fresh and vibrant for years to come. First off, let's talk about washing. Different fabrics require different washing techniques, and knowing the right method can save you from potential disasters. For instance, cotton and linen cushion covers can usually be tossed into the washing machine, but delicate fabrics like silk or velvet might need a more gentle approach, such as hand washing or dry cleaning.
To help you navigate the world of fabric care, here's a quick reference table:
| Fabric Type | Washing Method | Drying Method |
|---|---|---|
| Cotton | Machine wash | Tumble dry or air dry |
| Linen | Machine wash | Air dry recommended |
| Silk | Hand wash or dry clean | Air dry |
| Velvet | Dry clean | Do not tumble dry |
Now, let’s dive into washing instructions. Always check the care label on your fabric before washing. If you decide to machine wash, use a gentle cycle with cold water to prevent shrinking and color fading. For hand washing, fill a basin with lukewarm water and a mild detergent, gently agitating the water before submerging your cushion covers. After washing, avoid wringing them out; instead, press the water out gently. This will help maintain the fabric's integrity.
Next up is drying. While some fabrics can handle the heat of a dryer, others are best left to air dry. If you're using a dryer, choose a low-heat setting to avoid any mishaps. For air drying, lay your cushion covers flat on a clean towel, reshaping them to their original form. This method prevents any stretching that might occur when hanging them up.
When it comes to storage, you want to keep your cushion covers in the best condition possible when they’re not in use. If you're changing your decor seasonally, consider storing them in a breathable cotton bag rather than plastic. This prevents moisture buildup and keeps them smelling fresh. Make sure they're clean before storing, as any dirt or stains can set in over time.
Finally, here are some storage tips to ensure your cushion covers remain in pristine condition:
- Keep them in a cool, dry place away from direct sunlight to prevent fading.
- Avoid stacking too many covers on top of each other; this can cause creases and wrinkles.
- If possible, store them flat rather than folded to maintain their shape.
With these maintenance and care tips, your DIY cushion covers will not only look stunning but also last through countless seasons of style changes and family gatherings. Remember, a little care goes a long way in preserving the beauty of your handmade creations!
Q: Can I machine wash all types of fabric?
A: Not all fabrics are created equal! Always check the care label. While cotton and linen can usually be machine washed, delicate fabrics like silk or velvet may require hand washing or dry cleaning.
Q: How can I prevent my cushion covers from fading?
A: Store them in a cool, dry place away from direct sunlight and wash them using cold water. Avoid using harsh detergents that can strip color.
Q: What's the best way to remove stains?
A: For fresh stains, gently blot the area with a clean cloth and cold water. For tougher stains, consider using a fabric-safe stain remover, but always test it on a small area first.
Q: How often should I wash my cushion covers?
A: It depends on usage. If they're in a high-traffic area or frequently used, washing them every few months is a good idea. For decorative cushions, a wash once or twice a year might suffice.
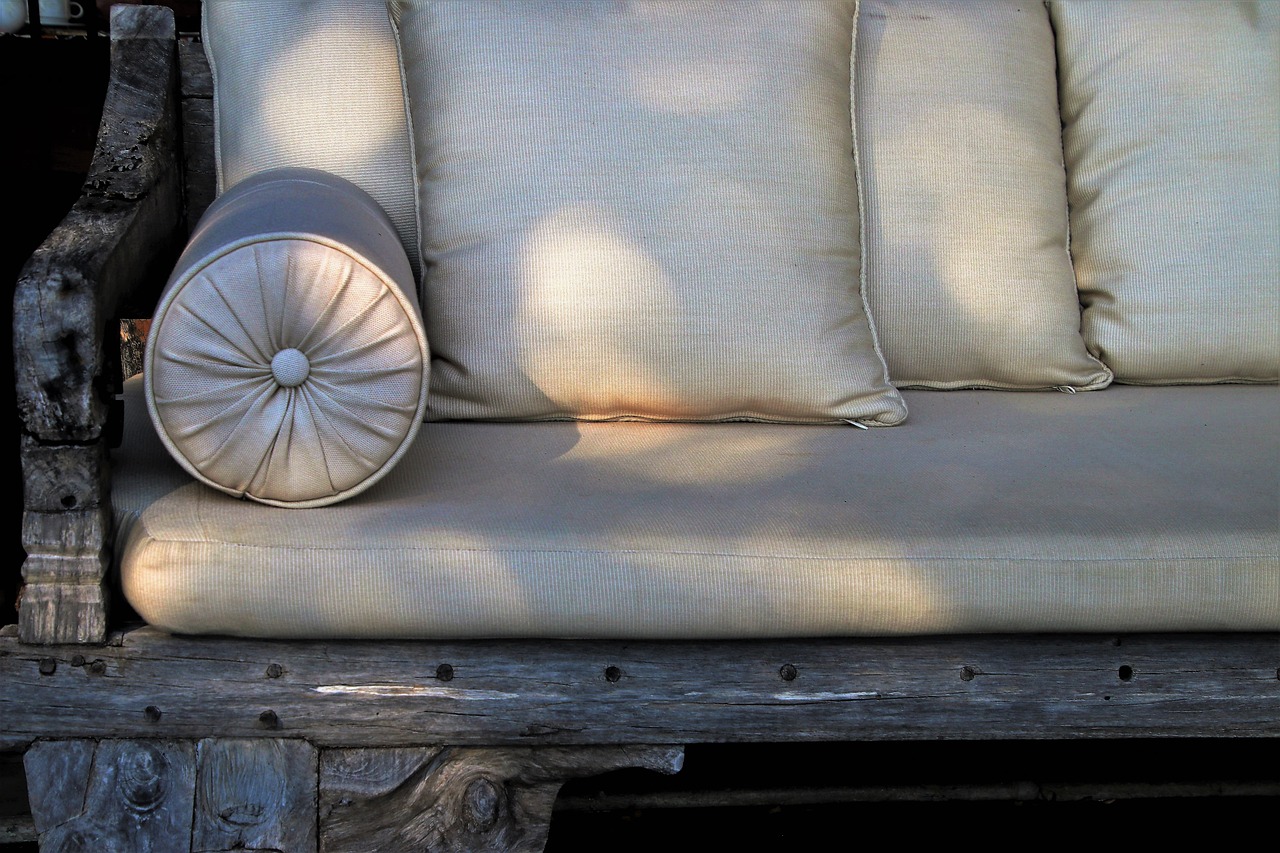
Washing Instructions
Taking care of your DIY cushion covers is essential to keep them looking fresh and vibrant. Just like how you wouldn't wear your favorite outfit without considering the washing instructions, your cushion covers deserve the same level of attention. Here are some key washing practices you should follow to maintain their quality:
First and foremost, always check the care label on your fabric. Different materials have unique requirements, and ignoring them could lead to fading, shrinking, or even damage. For example, cotton can usually withstand a good wash, while silk may need a gentler approach. If your cushion covers are made from a blend of fabrics, it's best to follow the most delicate care instructions to avoid any mishaps.
When it comes to washing, hand washing and machine washing are both viable options, but they come with their own sets of guidelines:
| Washing Method | Instructions |
|---|---|
| Hand Washing | Fill a basin with cool water and a mild detergent. Gently agitate the water and immerse your cushion covers. Let them soak for about 10-15 minutes, then rinse thoroughly with cool water. |
| Machine Washing | Use a gentle cycle with cold water and a mild detergent. Place your cushion covers in a mesh laundry bag to protect them from snagging. Avoid washing them with heavy items like towels. |
After washing, it’s crucial to dry your cushion covers properly. Avoid using a tumble dryer unless the care label specifically states it's safe. Instead, opt for air drying by laying them flat on a clean surface or hanging them up. This helps prevent any potential shrinkage and keeps the fabric's integrity intact.
Additionally, if your cushion covers have any embellishments such as buttons or lace, you should take extra care. These delicate features can be easily damaged in the wash, so consider spot cleaning them instead. Use a damp cloth with mild soap to gently clean any stains or marks, which will help preserve their beauty.
Lastly, remember that prevention is often better than cure. Using cushion covers with removable inserts allows you to wash only the covers, reducing the frequency of cleaning. Also, consider using a fabric protector spray before you start using your cushion covers. This can help repel stains and spills, making maintenance a breeze.
By following these washing instructions, your DIY cushion covers will not only look stunning but will also stand the test of time, bringing joy and comfort to your living spaces for years to come.
- Can I machine wash all types of fabric? - Not all fabrics are machine washable. Always check the care label for specific instructions.
- How often should I wash my cushion covers? - It depends on usage, but a good rule of thumb is to wash them every 3-6 months or when they appear dirty.
- What if my cushion covers shrink after washing? - To prevent shrinking, always wash in cold water and avoid the dryer. If they do shrink, try gently stretching them back into shape while damp.
- Can I use bleach on my cushion covers? - It's best to avoid bleach unless the fabric is white and specifically mentions it's safe. Opt for color-safe detergents instead.
Storage Tips
When it comes to preserving your beautifully crafted DIY cushion covers, proper storage is essential. Think of your cushion covers as delicate works of art; just like a painting, they need the right environment to maintain their vibrant colors and textures. Here are some effective storage solutions to keep your cushion covers in pristine condition:
First and foremost, always ensure that your cushion covers are clean and dry before storing them. Storing damp or dirty covers can lead to mildew or unpleasant odors, which can ruin all your hard work. If your covers are machine washable, a gentle wash followed by a thorough air dry will do wonders. For delicate fabrics, consider spot cleaning or dry cleaning to maintain their integrity.
Next, consider the storage space. A climate-controlled environment is ideal, as extreme temperatures and humidity can cause fabrics to fade or deteriorate. If you have a closet or a dedicated storage bin, that’s perfect! Use breathable cotton or linen storage bags instead of plastic, as these allow air to circulate and prevent moisture buildup.
When it comes to folding your cushion covers, take your time. Fold them neatly to avoid creases and wrinkles. A good tip is to lay a clean, soft towel between the layers to prevent friction. For those who want to go the extra mile, consider rolling your cushion covers instead of folding them. This method not only saves space but also minimizes creasing.
If you have a variety of cushion covers, organizing them by season or color can make finding the right one a breeze. You might even want to label your storage bins or bags for quick identification. Another handy tip is to store smaller embellishments like buttons or lace in separate pouches to keep everything together and avoid losing them.
Lastly, if you’re short on space, think creatively! Use decorative baskets or stylish boxes that can double as decor while storing your cushion covers. This way, they’re not just hidden away but also contribute to your home’s aesthetic.
Q: How often should I wash my cushion covers?
A: It depends on usage, but generally, washing them every few months is sufficient, unless they become visibly soiled.
Q: Can I store my cushion covers in a damp basement?
A: It's best to avoid damp areas for storage. Instead, opt for a dry, cool place to prevent mildew and damage.
Q: What’s the best way to remove wrinkles from stored cushion covers?
A: You can use a steamer or iron on a low setting to gently remove wrinkles. Always check the fabric care label first!
Q: Are there any special considerations for storing outdoor cushion covers?
A: Yes! Make sure they are completely dry before storing them indoors, and consider using waterproof storage bins to protect them from moisture.
Frequently Asked Questions
- What type of fabric is best for DIY cushion covers?
When choosing fabric for your DIY cushion covers, consider options like cotton, linen, or canvas. These materials are durable and easy to work with. Cotton is great for everyday use, while linen offers a more luxurious feel. Canvas is perfect for outdoor cushions due to its sturdiness.
- Do I need a sewing machine to make cushion covers?
No, you don’t necessarily need a sewing machine! Hand sewing is a viable option, especially for beginners. However, a sewing machine can speed up the process and give you a more polished finish. It really depends on your comfort level and the time you want to invest.
- How do I measure fabric for cushion covers?
To measure fabric accurately, first measure the dimensions of your cushion. Add an extra inch on each side for seam allowances. For example, if your cushion is 18 inches square, cut your fabric to 20 inches square. This ensures a perfect fit!
- Can I use paint on my cushion covers?
Absolutely! Using fabric paint and stencils allows you to create unique designs. Just make sure to follow the instructions on the paint for best results, and always test on a scrap piece of fabric first to ensure you love the look.
- How should I wash my DIY cushion covers?
Washing instructions vary by fabric type. Generally, it's best to machine wash in cold water on a gentle cycle. Avoid bleach unless your fabric can handle it. Always check the care label for specific instructions to keep your cushion covers looking fresh!
- What are some good storage tips for cushion covers?
When not in use, store your cushion covers in a cool, dry place. Avoid folding them to prevent creases; instead, roll them up or store them flat. Use breathable storage bags to keep dust at bay and maintain their vibrancy.
- How can I add embellishments to my cushion covers?
You can enhance your cushion covers with embellishments like buttons, lace, or appliqué. Simply sew them on or use fabric glue for a no-sew option. These little details can transform a basic cover into a stunning decor piece!


