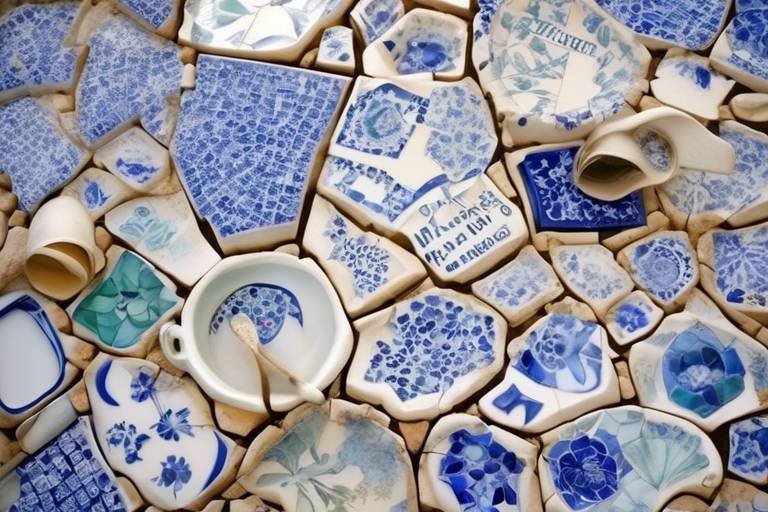
Repurpose Wall Tiles as Heatproof Stand for Pots and Pans
Have you ever found yourself juggling hot pots and pans, desperately searching for a safe spot to place them? If so, you're not alone! The kitchen can be a chaotic place, and having a reliable surface to put down your cookware is essential. What if I told you that you could transform those unused wall tiles into stylish and functional heatproof stands? Not only will this innovative solution keep your countertops safe from burns and scratches, but it will also add a touch of creativity and flair to your kitchen decor. In this article, we'll dive into the world of wall tiles, exploring their properties, benefits, and how to turn them into practical stands for your pots and pans.
Before we jump into the repurposing process, let's take a moment to understand wall tiles. These versatile pieces come in various materials, colors, and designs, making them a popular choice for home decor. From vibrant ceramics to sleek porcelain and rustic stone, wall tiles can elevate any space. Their inherent properties, such as durability and heat resistance, make them ideal candidates for repurposing as heatproof stands. Imagine transforming those leftover tiles from your last renovation project into something functional and chic!
So, why should you consider using wall tiles for your kitchen? The advantages are numerous:
- Heat Resistance: Wall tiles are designed to withstand high temperatures, making them perfect for holding hot cookware.
- Durability: Tiles are tough and can handle the wear and tear of daily kitchen use, ensuring they last for years.
- Easy Cleaning: A simple wipe down with a damp cloth is usually all it takes to keep your tile stands looking fresh.
These benefits not only provide functionality but also enhance the overall aesthetic of your kitchen, creating a welcoming and stylish atmosphere.
When it comes to heat resistance, not all wall tiles are created equal. Various materials exhibit different levels of thermal stability. For instance, ceramic tiles can endure high temperatures, making them suitable for placing hot pots directly on them. On the other hand, porcelain tiles, known for their dense structure, can withstand even higher heat levels, making them a superior choice for our purpose. Understanding these properties can help you select the right tiles for your DIY project.
Here’s a quick look at some of the best types of tiles for heat resistance:
| Tile Type | Heat Resistance | Benefits |
|---|---|---|
| Ceramic | Moderate | Affordable and widely available |
| Porcelain | High | Durable and less porous |
| Stone | High | Natural look and excellent heat retention |
Choosing the right tile type ensures that your stands will not only be functional but also visually appealing.
Another critical factor to consider is the thickness of the wall tiles. Thicker tiles generally offer better durability and heat resistance. A sturdy tile can act as a reliable barrier between your hot cookware and the surface beneath it, preventing damage and ensuring safety. When selecting tiles for your project, look for those that are at least 0.25 inches thick. This thickness will provide the necessary support and longevity for your heatproof stands.
Now that you understand the benefits and properties of wall tiles, let’s explore some creative design ideas for incorporating them into your kitchen. Imagine a rustic farmhouse kitchen with natural stone tiles serving as charming stands, or a modern space featuring sleek porcelain tiles in vibrant colors. The possibilities are endless!
Here are some design ideas to consider:
- Use patterned tiles for a pop of color and personality.
- Mix and match different tile materials for an eclectic look.
- Incorporate tiles that complement your existing kitchen decor.
Ultimately, the goal is to create a space that feels uniquely yours while being practical and stylish.
Ready to get started on your DIY project? Repurposing wall tiles into heatproof stands is a straightforward process that anyone can tackle. All you need are a few essential tools and materials, which we’ll cover next.
Before you dive into the project, gather the following tools and materials:
- Wall tiles (ceramic, porcelain, or stone)
- Tile adhesive or silicone glue
- Felt pads (optional, for added protection)
- Measuring tape
- Utility knife or tile cutter
Having everything on hand will make the process smooth and enjoyable.
Here’s a simple guide to help you transform your wall tiles into stylish stands:
- Measure the area where you plan to place the stands.
- Cut the tiles to your desired size if necessary.
- Apply tile adhesive to the bottom of each tile.
- Press the tiles firmly onto a flat surface, ensuring they are level.
- If desired, attach felt pads to the bottom for extra protection.
And voilà! You now have beautiful, heatproof stands ready to support your cookware.
To keep your newly created tile stands looking great, it’s essential to maintain them properly. Regular care will ensure they remain functional and visually appealing for years to come.
Cleaning your tile stands is a breeze. Simply wipe them down with a damp cloth and a mild detergent. Avoid harsh chemicals that could damage the tile surface. For tougher stains, a baking soda paste can work wonders without scratching the tiles.
To prevent damage and wear, always use trivets or heat-resistant mats under extremely hot cookware when possible. This extra layer of protection will help preserve the integrity of your tile stands, ensuring they last through countless cooking adventures.
Q: Can I use any type of wall tile for this project?
A: While you can technically use any wall tile, it's best to choose heat-resistant materials like ceramic, porcelain, or stone for optimal safety and durability.
Q: How do I clean my tile stands?
A: Use a damp cloth and mild detergent for regular cleaning. Avoid harsh chemicals that could damage the tiles.
Q: Are there specific thickness requirements for the tiles?
A: Ideally, choose tiles that are at least 0.25 inches thick for better heat resistance and durability.
By repurposing wall tiles into heatproof stands, you not only enhance the functionality of your kitchen but also add a unique touch to your decor. So, gather your materials and start creating your own stylish stands today!

Understanding Wall Tiles
When it comes to kitchen design, wall tiles often take a backseat to more prominent features like cabinets and countertops. However, understanding wall tiles can open up a world of possibilities for repurposing them into functional and stylish kitchen accessories, such as heatproof stands for pots and pans. Wall tiles are not just decorative elements; they are crafted from various materials, each with unique properties that can enhance your kitchen's functionality.
Wall tiles are typically made from materials like ceramic, porcelain, and stone. Each of these materials has distinct characteristics that make them suitable for different applications. For instance, ceramic tiles are widely known for their affordability and versatility, making them a popular choice for many homeowners. On the other hand, porcelain tiles are denser and more durable, providing excellent heat resistance, which is crucial when using them as stands for hot cookware. Lastly, natural stone tiles, such as granite or marble, not only offer stunning aesthetics but also boast impressive heat resistance, making them ideal for kitchen use.
One of the most critical aspects to consider when repurposing wall tiles is their heat resistance. This property ensures that hot pots and pans do not damage your countertops or other surfaces. The ability of wall tiles to withstand high temperatures is largely dependent on their material composition. For example, porcelain tiles can typically endure temperatures of up to 1,200°F (649°C), while ceramic tiles may only handle around 1,000°F (538°C). Understanding these differences can help you choose the right tile for your DIY project.
Moreover, the thickness of the tiles plays a significant role in their durability and effectiveness as heatproof stands. Thicker tiles tend to be more robust and can better absorb and distribute heat, preventing any potential damage to the surfaces beneath. When selecting tiles, look for options that are at least 1/4 inch thick, as these will provide the best protection against heat. This simple yet essential consideration can make a huge difference in the longevity and functionality of your repurposed tile stands.
In summary, wall tiles are a versatile and practical choice for creating heatproof stands for your kitchen. By understanding the different types of tiles, their materials, and their properties, you can make informed decisions that not only enhance the aesthetic of your kitchen but also improve its functionality. So, the next time you think about wall tiles, remember that they can do much more than just beautify your walls—they can also serve as reliable supports for your hot cookware!
Benefits of Using Wall Tiles
When it comes to enhancing your kitchen's functionality and style, repurposing wall tiles into heatproof stands for pots and pans is a game-changer. Not only do these tiles offer a unique aesthetic appeal, but they also come packed with a plethora of benefits that make them an ideal choice for any home chef. Let's dive into some of the key advantages that wall tiles bring to the table—literally!
First and foremost, one of the standout features of wall tiles is their heat resistance. This property is crucial when you're dealing with hot cookware. Unlike wooden or plastic stands that can warp or melt, wall tiles can easily handle high temperatures without breaking a sweat. Imagine placing a sizzling pot of pasta on a surface that remains cool to the touch—now that’s a win!
Moreover, wall tiles are incredibly durable. Made from materials like ceramic, porcelain, and stone, these tiles can withstand the daily rigors of kitchen life. They resist scratches, chips, and stains, ensuring that your stands will look as good as new even after countless uses. This durability not only saves you money in the long run but also reduces waste, as you won't need to replace them frequently.
Another major advantage is the ease of cleaning. Wall tiles are non-porous, which means they don’t absorb spills or stains. A simple wipe with a damp cloth is often all it takes to keep them looking pristine. This is particularly beneficial in a busy kitchen where accidents are bound to happen. Plus, you can use a variety of cleaning products without worrying about damaging the surface.
Let’s not forget about the design versatility that wall tiles offer. They come in a multitude of colors, patterns, and textures, allowing you to customize your kitchen space to reflect your personal style. Whether you prefer a sleek, modern look or a rustic, farmhouse vibe, there’s a tile out there that can help you achieve your vision. You can even mix and match different tiles to create a unique stand that serves as a conversation starter during dinner parties.
In summary, repurposing wall tiles as heatproof stands for pots and pans not only enhances the practicality of your kitchen but also elevates its aesthetic appeal. With their heat resistance, durability, ease of cleaning, and design versatility, wall tiles are truly a top-notch choice for anyone looking to add a functional yet stylish element to their culinary space. So why not give it a try? Your kitchen deserves it!
- Can all wall tiles be used as heatproof stands?
Not all wall tiles are created equal. It's best to choose materials like ceramic, porcelain, or stone for their superior heat resistance. - How do I clean my tile stands?
A simple wipe with a damp cloth is usually sufficient. For tougher stains, you can use mild cleaning agents without worrying about damage. - Will the tiles crack under high heat?
If you select high-quality tiles designed for heat resistance, they should withstand high temperatures without cracking.
Heat Resistance Properties
When it comes to choosing materials for your kitchen, especially for items that will come into contact with hot pots and pans, heat resistance is a critical factor to consider. Wall tiles, particularly those made from specific materials, are not just decorative; they serve a functional purpose that can enhance your cooking experience. The heat resistance properties of wall tiles can vary significantly based on their composition, thickness, and manufacturing process. For instance, ceramic tiles are often fired at high temperatures, making them capable of withstanding heat up to 1,200 degrees Fahrenheit. This means they can easily handle the heat from freshly cooked dishes without warping or cracking.
Another popular option is porcelain tiles. These tiles are denser than traditional ceramic tiles and are known for their exceptional durability and heat resistance. Porcelain can typically withstand temperatures ranging from 1,400 to 1,600 degrees Fahrenheit, making it an excellent choice for kitchen stands. On the other hand, natural stone tiles, such as granite or slate, also provide remarkable heat resistance. Their natural composition allows them to absorb and dissipate heat effectively, protecting your countertops from damage.
To better understand the heat resistance properties of different tile materials, consider the following table:
| Tile Type | Heat Resistance (°F) | Durability |
|---|---|---|
| Ceramic | Up to 1,200 | Moderate |
| Porcelain | 1,400 - 1,600 | High |
| Natural Stone | Varies (generally high) | Very High |
In addition to the inherent heat resistance of these materials, the thickness of the tiles plays a vital role in their ability to withstand heat. Thicker tiles can absorb more heat without transferring it to the underlying surfaces, which is why selecting the right thickness is essential when repurposing wall tiles as stands. A thicker tile not only provides better insulation but also adds a layer of durability against everyday wear and tear.
In summary, when considering wall tiles for use as heatproof stands, it's essential to choose materials that are both heat resistant and durable. The right choice will not only protect your surfaces but also add a stylish touch to your kitchen. With the correct understanding of these properties, you can confidently repurpose wall tiles and enjoy their functionality in your culinary adventures.

Types of Heat-Resistant Tiles
When it comes to selecting the right tiles for your kitchen, particularly for repurposing as heatproof stands, understanding the different types of heat-resistant tiles is essential. Not all tiles are created equal, and some materials stand out due to their ability to withstand high temperatures without compromising their integrity. Here’s a breakdown of the most popular types of heat-resistant tiles you might consider:
Ceramic Tiles are among the most common choices for kitchen surfaces. They are made from clay that is fired at high temperatures, which gives them a decent level of heat resistance. While they can handle moderate heat, it's important to note that extreme temperature changes can sometimes lead to cracking. However, their vibrant glazes and patterns make them an attractive option for decorative stands.
Porcelain Tiles take the heat resistance game up a notch. They are denser and more durable than standard ceramic tiles, making them less porous and more resistant to thermal shock. This means you can confidently place your hot pots and pans directly on them without worrying about damage. Their sleek finish and variety of designs also allow for a stylish touch in your kitchen.
Natural Stone Tiles, such as granite or slate, are another excellent choice for heat resistance. These tiles are not only beautiful but also incredibly durable. They can withstand high temperatures and are less likely to crack under heat stress. However, it’s essential to seal natural stone tiles properly to prevent staining and moisture absorption, which can occur over time.
To help you visualize the differences, here’s a quick comparison table:
| Type of Tile | Heat Resistance | Durability | Maintenance |
|---|---|---|---|
| Ceramic | Moderate | Good | Easy to clean, but can crack |
| Porcelain | High | Excellent | Low maintenance, very durable |
| Natural Stone | Very High | Excellent | Requires sealing, more maintenance |
In conclusion, when selecting tiles for your heatproof stands, consider the specific properties of ceramic, porcelain, and natural stone tiles. Each type has its unique benefits that can enhance not only the functionality of your kitchen but also its aesthetic appeal. Choosing the right tile can make all the difference in creating a stylish and practical space for your culinary adventures!
What tiles are best for heat resistance?
The best tiles for heat resistance are porcelain and natural stone tiles, as they can withstand high temperatures without damage.
Can I use ceramic tiles for hot pots?
While ceramic tiles can handle moderate heat, it's advisable to avoid placing extremely hot pots directly on them to prevent cracking.
How do I maintain my tile stands?
Regular cleaning with mild detergents and avoiding harsh chemicals will help maintain the appearance and longevity of your tile stands.
Do I need to seal natural stone tiles?
Yes, sealing natural stone tiles is essential to prevent staining and moisture absorption, ensuring they remain beautiful and functional.
Tile Thickness and Durability
When it comes to repurposing wall tiles as heatproof stands for pots and pans, tile thickness and durability are two critical factors that can significantly impact their performance in your kitchen. The thickness of the tiles not only affects their ability to withstand heat but also their overall strength and resilience against everyday wear and tear. Generally, thicker tiles tend to be more durable, providing a robust surface that can handle the weight of heavy cookware without cracking or breaking. For instance, tiles that are at least 10mm thick are often recommended for use as stands, as they offer a good balance between weight and stability.
Moreover, the material composition plays a vital role in determining the durability of the tiles. For example, ceramic tiles are known for their affordability and aesthetic appeal, but they may not be as resilient as porcelain tiles, which are denser and less porous. On the other hand, natural stone tiles, such as granite or slate, provide exceptional durability and can withstand high temperatures, making them an excellent choice for heatproof stands.
To better understand the relationship between tile thickness, material, and durability, consider the following table:
| Tile Material | Recommended Thickness (mm) | Durability Rating |
|---|---|---|
| Ceramic | 8-10 | Moderate |
| Porcelain | 10-12 | High |
| Natural Stone | 12-15 | Very High |
It's essential to choose tiles that not only meet your aesthetic preferences but also align with the practical needs of your kitchen. Think of tile thickness as the foundation of a house; the sturdier the foundation, the more secure and reliable the structure will be. Similarly, investing in thicker, more durable tiles can provide peace of mind, knowing that your heatproof stands will hold up against the rigors of cooking and serving.
In summary, when selecting wall tiles for repurposing as heatproof stands, always consider both the thickness and the material. This ensures that your stands not only look great but also perform exceptionally well, providing a safe and reliable surface for your hottest pots and pans.
- Can I use any type of wall tile for heatproof stands? - Not all wall tiles are suitable for heat resistance. It's best to choose materials like porcelain or natural stone.
- How thick should the tiles be for optimal durability? - A thickness of at least 10mm is recommended for effective heat resistance and durability.
- How do I clean my tile stands? - Use mild soap and water, avoiding abrasive cleaners that can scratch the surface.
- Will the tiles crack under high heat? - If made from the right materials and of sufficient thickness, tiles should withstand high temperatures without cracking.

Design Ideas for Your Kitchen
Transforming wall tiles into functional stands for pots and pans is not just about practicality; it’s also an opportunity to express your style and creativity in the kitchen. Imagine walking into your culinary space and being greeted by stunning, customized heatproof stands that not only serve a purpose but also add a splash of personality to your decor. Whether your kitchen is modern, rustic, or somewhere in between, there are countless design ideas to explore.
One exciting approach is to use tiles with vibrant colors or unique patterns. For instance, if your kitchen has a minimalist vibe, consider using bold, geometric-patterned tiles that can serve as a striking contrast against a neutral backdrop. These eye-catching stands can become conversation starters, drawing attention to your cooking area. Alternatively, if you prefer a more subdued aesthetic, opting for tiles in soft pastels or earthy tones can create a harmonious look that complements your existing decor.
Another fantastic idea is to incorporate different shapes and sizes of tiles to create a layered effect. By mixing rectangular, square, and even circular tiles, you can design stands that are not only functional but also visually interesting. This approach allows for customization based on your cookware; larger pots may require bigger stands, while smaller pans can rest comfortably on petite tiles. The variety in shapes can evoke a sense of playfulness in your kitchen, making it feel more inviting.
For those who enjoy a touch of nature, consider using natural stone tiles. Their organic textures and colors can bring an earthy element into your cooking space. Pairing these stands with wooden kitchen accessories can enhance the rustic charm. Imagine a beautifully crafted wooden spoon resting on a slate tile stand; it’s not just practical, it’s a visual feast!
Don’t forget about the possibility of personalizing your tile stands. You can paint or stencil designs onto plain tiles to make them uniquely yours. This DIY approach allows you to match your stands with seasonal themes or special occasions, like festive colors during the holidays or floral designs for spring. The options are endless, and your kitchen can reflect your personality and creativity.
Lastly, consider the functionality of your design. Incorporating a small ledge or a raised border on your tile stands can help prevent pots from sliding off. This not only enhances safety but also adds an interesting design element. You can even create a cohesive look by matching the colors of your stands with other kitchen accessories, such as oven mitts or dish towels, tying the entire space together.
In summary, repurposing wall tiles into heatproof stands is a fantastic way to blend functionality with design in your kitchen. From choosing the right colors and patterns to experimenting with shapes and personal touches, the possibilities are virtually limitless. So why not get creative and make your kitchen not just a place for cooking, but a canvas for your artistic expression?
- Can I use any type of wall tile for this project? While most wall tiles can be used, it's best to choose those that are heat-resistant, such as ceramic, porcelain, or stone.
- How do I ensure the tiles are safe for hot cookware? Make sure to select tiles that have been specifically designed for heat resistance and check their specifications before use.
- What is the best way to clean my tile stands? Use mild soap and water to clean your tile stands, and avoid abrasive cleaners that can scratch the surface.
- Can I paint or modify the tiles after repurposing them? Yes! You can personalize your tiles with paint or stencils to match your kitchen decor.
DIY Process for Creating Tile Stands
Creating your own heatproof stands from wall tiles is not only a fun DIY project but also a fantastic way to add a personal touch to your kitchen. Imagine transforming ordinary tiles into stylish and functional accessories that can withstand the heat of your hottest pots and pans. This project is accessible to everyone, regardless of skill level, and can be completed in just a few hours. So, let’s dive into the exciting process of repurposing wall tiles!
Before you get started, it's essential to gather all the necessary tools and materials to ensure a smooth crafting experience. Here's a quick overview of what you'll need:
- Wall Tiles: Choose tiles that are heat-resistant, such as ceramic or porcelain.
- Tile Cutter: A handy tool for shaping tiles if needed.
- Sandpaper: To smooth out any rough edges after cutting.
- Adhesive: A strong adhesive suitable for tiles, if you're layering them.
- Sealant: To protect your finished product from stains and moisture.
- Protective Gear: Safety glasses and gloves to keep you safe while working.
Once you have your materials ready, it’s time to get creative! The first step in the DIY process is to plan your design. Consider how many tiles you want to use and whether you want a single tile stand or a multi-tile arrangement. You can even mix and match different colors and patterns to create a unique look that complements your kitchen décor. Remember, your imagination is your only limit!
After you’ve settled on a design, it’s time to cut the tiles if necessary. If you’re using whole tiles, you can skip this step. However, if you want to create a more intricate design, you may need to use a tile cutter to shape the tiles to your liking. Make sure to wear your protective gear during this process to avoid any accidents.
Next, it’s time to assemble your stand. If you’re using multiple tiles, apply a strong adhesive to the edges of the tiles you want to connect. Press them together firmly and allow the adhesive to set according to the manufacturer’s instructions. For added stability, you can place a heavier object on top of the tiles while they dry.
Once the adhesive has dried, take your sandpaper and smooth out any rough edges. This step is crucial not only for aesthetics but also for safety, as sharp edges can be a hazard in the kitchen. After sanding, you can apply a sealant to your tile stand. This will help protect it from heat, moisture, and stains, ensuring it remains a beautiful and functional part of your kitchen for years to come.
Finally, let your stand cure for the recommended time before using it. Once it’s fully set, you can proudly display your new heatproof stand in your kitchen, ready to support your favorite pots and pans. Not only will you have a practical kitchen accessory, but you’ll also enjoy the satisfaction of having created something unique with your own hands.
Q: Can I use any type of tile for this project?
A: It's best to use heat-resistant tiles such as ceramic or porcelain to ensure they can withstand the heat from cookware.
Q: How do I clean my tile stands?
A: You can clean them with a damp cloth and a mild detergent. Avoid abrasive cleaners that could scratch the surface.
Q: Can I customize the size of my tile stands?
A: Absolutely! You can cut tiles to your desired size and shape, allowing for complete customization.
Tools and Materials Needed
Embarking on your journey to repurpose wall tiles into stylish heatproof stands is both exciting and rewarding. However, before you dive into this creative project, it's essential to gather the right tools and materials to ensure a smooth and enjoyable experience. Think of it like preparing for a cooking adventure; having your ingredients and utensils ready makes all the difference!
First and foremost, you'll need the wall tiles themselves. Opt for ceramic, porcelain, or stone tiles, as these materials boast excellent heat resistance and durability. It's like choosing the right cookware for your favorite dish—selecting quality tiles will ensure your stands are both functional and long-lasting.
Next, you'll need some basic tools to help you with the transformation. Here’s a quick rundown of what you should have on hand:
- Tile Cutter or Wet Saw: This will help you achieve clean, precise cuts if you're working with larger tiles or if you want to create custom shapes.
- Sandpaper: A few sheets of fine-grit sandpaper will be useful for smoothing any rough edges after cutting the tiles.
- Adhesive: Use a strong, heat-resistant adhesive to secure any additional elements you might want to add to your stands, such as felt pads or decorative accents.
- Measuring Tape: Accurate measurements are crucial for creating stands that fit your cookware perfectly.
- Protective Gear: Don’t forget safety glasses and gloves! Working with tiles can create sharp edges, so it’s essential to protect yourself.
In addition to these tools, consider any decorative elements you might want to incorporate into your design. Perhaps you want to paint the tiles or add some stencils for a personal touch. The possibilities are endless, and this is where you can let your creativity shine. Just like a chef adds their secret ingredient to a dish, your personal flair will make these stands uniquely yours.
Lastly, make sure you have a clean workspace. A clutter-free area not only enhances your focus but also minimizes the risk of accidents. Think of it as preparing your kitchen before a big meal; a tidy space allows for a more enjoyable cooking process. Once you’ve gathered all your tools and materials, you’ll be ready to dive into the fun part—creating your heatproof stands!
Q1: Can I use any type of wall tile for this project?
A1: While you can technically use any wall tile, it's best to choose ceramic, porcelain, or stone tiles for their superior heat resistance and durability.
Q2: Do I need any special skills to repurpose wall tiles?
A2: Not at all! Basic DIY skills are sufficient. Just take your time, follow the instructions, and enjoy the process!
Q3: How do I clean and maintain my tile stands?
A3: Cleaning is simple! Use warm soapy water and a soft cloth. Avoid abrasive cleaners that can scratch the surface.

Step-by-Step Instructions
Creating your very own heatproof stands from wall tiles is not only a fun DIY project but also a fantastic way to add a personal touch to your kitchen. Let’s dive into the step-by-step process that will transform those unused wall tiles into stylish and functional cookware stands. Before you start, make sure you have all the necessary materials and tools at hand. This will make the process smoother and more enjoyable.
First, gather your supplies. You’ll need:
- Wall tiles (ceramic, porcelain, or stone)
- Tile adhesive or strong glue
- Felt pads or rubber feet (to protect your surfaces)
- A level
- A measuring tape
- Tile cutter (if you need to resize your tiles)
- Sandpaper (for smoothing edges)
Once you have your materials ready, it’s time to start the project. Here’s how to do it:
- Measure and Cut: Begin by determining the size of the stands you want to create. Use your measuring tape to mark the dimensions on the wall tiles. If you need to cut them down to size, carefully use the tile cutter to achieve clean edges. Remember, safety first! Wear protective eyewear when cutting tiles.
- Sand the Edges: After cutting, take the sandpaper and smooth out any rough edges. This step is crucial as it prevents any sharp edges that could cause injury or damage your surfaces.
- Apply Adhesive: Once your tiles are cut and smoothed, it’s time to apply the tile adhesive. Spread a thin layer on the bottom of each tile. Make sure to follow the instructions on the adhesive packaging for the best results.
- Attach Rubber Feet: To ensure your stands don’t scratch your countertops, attach felt pads or rubber feet to the corners of each tile. This will provide stability and protect your surfaces from scratches.
- Let it Cure: Allow the adhesive to cure as per the instructions on the packaging. This is usually a few hours but could be longer depending on the adhesive used. Patience is key here!
- Final Touches: Once the adhesive is fully cured, inspect your stands. If you notice any imperfections, you can touch them up with paint or sealant for a polished look.
And voila! You now have beautiful, heatproof stands ready to support your pots and pans. Not only do they serve a practical purpose, but they also add a unique flair to your kitchen decor. Feel free to experiment with different tile designs and colors to match your kitchen’s aesthetic. The best part? You’ve just turned something ordinary into something extraordinary!
Q1: Can I use any type of wall tile for this project?
A1: While you can technically use any wall tile, it’s best to choose materials like ceramic, porcelain, or stone due to their heat resistance and durability.
Q2: How do I clean my tile stands?
A2: Cleaning is simple! Just use a damp cloth with mild soap to wipe down the tiles. Avoid harsh chemicals that could damage the finish.
Q3: How long does the adhesive take to cure?
A3: The curing time varies based on the adhesive used, but it typically takes a few hours. Always refer to the adhesive's instructions for specific times.
Q4: Can I customize the size of the stands?
A4: Absolutely! You can cut the tiles to any size you prefer, just ensure they are large enough to support your cookware safely.
Q5: Will the stands withstand heavy pots and pans?
A5: Yes! As long as you use durable tiles and follow the instructions for creating the stands, they should easily support heavy cookware.

Maintenance Tips for Tile Stands
Maintaining your repurposed wall tile stands is essential to ensure they remain not only functional but also visually appealing over time. Just like any other kitchen accessory, these stands require a little love and care to keep them looking their best. One of the first things to consider is the cleaning process. Using a gentle cleaner that is safe for the tile material will help preserve its shine and color. You can simply mix warm water with a mild dish soap and use a soft cloth or sponge to wipe down the surface. Avoid abrasive cleaners or scrubbers, as they can scratch the surface and diminish the aesthetic appeal of your stands.
To further enhance the longevity of your tile stands, it's important to implement some preventive measures. For instance, consider placing felt pads or coasters underneath your pots and pans when setting them down on the tiles. This can help minimize direct contact and reduce the risk of chipping or scratching. Additionally, be mindful of the temperature of the cookware you place on the stands; while tiles are heat resistant, extreme temperature changes can still cause damage over time.
Another key aspect of maintenance involves regular inspections. Take a moment every now and then to check your tile stands for any signs of wear or damage. Look for cracks, chips, or discoloration. If you notice any issues, addressing them promptly can prevent further deterioration. For minor chips, you may be able to use a tile repair kit to fill in the gaps and restore the stand's appearance. However, if the damage is extensive, it might be time to consider replacing the tile.
Lastly, to keep your tile stands looking fresh, consider periodically applying a sealant designed for the specific type of tile you are using. This can help protect against stains and make cleaning easier. It's a simple step that can significantly extend the life of your stands. Remember, a little bit of maintenance goes a long way in preserving the beauty and functionality of your kitchen accessories.
- How often should I clean my tile stands? It's best to clean them after each use to prevent any buildup of stains or grease.
- Can I use any type of cleaner on my tile stands? No, avoid harsh chemicals and abrasives. Stick to mild dish soap and warm water.
- What should I do if my tile stand gets chipped? For minor chips, use a tile repair kit. For major damage, consider replacing the tile.
- Is it necessary to seal my tile stands? While not mandatory, applying a sealant can help protect against stains and make cleaning easier.
Cleaning and Care Techniques
When it comes to maintaining your stunning repurposed wall tile stands, a little care goes a long way. These stands not only add a touch of elegance to your kitchen but also serve a practical purpose by protecting your countertops from heat damage. To keep them looking their best, follow these essential cleaning and care techniques.
First off, regular cleaning is key. After each use, make it a habit to wipe down your tile stands with a damp cloth. This simple step helps remove any food particles or moisture that could lead to stains or mold over time. For a deeper clean, mix a solution of warm water and a few drops of mild dish soap. Use a soft sponge to gently scrub the surface, ensuring you reach any crevices where grime might accumulate. Rinse with clean water and dry thoroughly with a soft towel to prevent water spots.
Now, you might be wondering about tougher stains or residues. For those pesky marks, a paste made from baking soda and water can work wonders. Apply the paste to the stained area, let it sit for about 10-15 minutes, and then scrub gently with a soft cloth. The baking soda acts as a natural abrasive that lifts stains without scratching the tile surface. Rinse well afterward to remove any residue.
It's important to avoid harsh chemicals or abrasive cleaners, as these can damage the finish of your tiles. Instead, consider using natural cleaning solutions. For instance, a mixture of vinegar and water can be effective for disinfecting and deodorizing your tile stands. However, be cautious with vinegar on certain types of tiles, like natural stone, as it can cause etching. Always do a patch test in an inconspicuous area first!
Additionally, to prevent wear and tear, consider placing felt pads on the bottom of your stands. This not only protects your countertops from scratches but also minimizes the impact of placing heavy pots and pans down. Over time, the weight can cause micro-scratches, so these pads are a great preventive measure.
Lastly, remember to periodically check the condition of your stands. Look for any chips or cracks that could worsen with time. If you notice any damage, it's best to address it right away to prevent further deterioration. A little vigilance goes a long way in ensuring your tile stands remain a beautiful and functional part of your kitchen for years to come.
- Can I use any type of tile for this project? While most wall tiles can work, it's best to stick with heat-resistant options like ceramic, porcelain, or stone.
- How often should I clean my tile stands? A quick wipe after each use is recommended, with a deeper clean every couple of weeks.
- Are there any specific cleaning products I should avoid? Yes, avoid harsh chemicals and abrasive cleaners that can damage the tile surface.
- What should I do if my tile stand gets damaged? Inspect your stands regularly and address any chips or cracks immediately to prevent further damage.
Preventing Damage and Wear
When it comes to keeping your repurposed wall tile stands looking fresh and functioning well, a little bit of care goes a long way. Just like you wouldn’t let your favorite pair of shoes get scuffed up without a second thought, your tile stands deserve the same level of attention. Here are some essential tips to help you prevent damage and wear, ensuring that your stands remain a reliable and attractive addition to your kitchen setup.
First and foremost, consider the placement of your tile stands. Avoid putting them in areas where they might be subjected to heavy impacts or accidental knocks. You wouldn’t want a clumsy moment to shatter your stylish creation. Instead, designate a stable spot on your countertop or dining table where they can shine without the risk of being bumped into. Think of your tile stands as the delicate flowers of your kitchen decor—place them in a safe spot where they can bloom!
Moreover, it’s crucial to use protective pads or coasters underneath your pots and pans when placing them on the tile stands. This simple step can significantly reduce the risk of scratches and heat marks. Just like a cozy blanket protects you from the cold, these pads act as a barrier between your cookware and the tiles, ensuring that both remain in pristine condition.
Another vital aspect of maintenance is regular cleaning. While wall tiles are generally easy to clean, neglecting them can lead to a buildup of grime that can dull their appearance over time. Use a soft cloth or sponge with a mild detergent to wipe them down after each use. This not only keeps them looking great but also helps prevent any potential stains from setting in. Think of it as giving your tiles a refreshing spa day—who doesn’t love a little pampering?
In addition to cleaning, be mindful of the types of pots and pans you use on your tile stands. Heavy, cast-iron cookware can be beautiful and functional, but they can also be quite abrasive. If you frequently use such items, consider placing a soft mat or cloth underneath to absorb the impact. It's like putting on a pair of comfy shoes before heading out—your tiles will thank you for the extra care!
Lastly, keep an eye on the edges of your tile stands. If you notice any chips or cracks, address them immediately. A simple touch-up with tile repair kits can save your stands from further damage. Think of it as a little first aid for your kitchen—quick and easy fixes can prolong the life of your beloved creations.
By implementing these preventive measures, you can ensure that your repurposed wall tile stands not only serve their purpose effectively but also remain a stunning focal point in your kitchen for years to come. Just like any cherished item, a little love and attention will go a long way in preserving their beauty and functionality.
- How do I clean my tile stands? Use a soft cloth and mild detergent to wipe them down after each use. Avoid abrasive cleaners that can scratch the surface.
- Can I use any type of pot on the tile stands? While most pots are fine, avoid using extremely heavy or abrasive cookware directly on the tiles without protection.
- What should I do if my tile stand gets chipped? Use a tile repair kit to touch up any chips or cracks to prevent further damage.
- Are there specific tiles that are better for heat resistance? Yes, ceramic, porcelain, and stone tiles are ideal for heat resistance and durability.
Frequently Asked Questions
- Can I use any type of wall tile for making heatproof stands?
While you can technically use any wall tile, it's best to choose tiles that are specifically designed for heat resistance, like ceramic, porcelain, or stone. These materials are capable of withstanding high temperatures without cracking or warping, ensuring your surfaces stay protected.
- How do I know if my wall tiles are heat resistant?
To determine if your wall tiles are heat resistant, check the manufacturer's specifications or labels. Look for tiles that mention heat resistance or are rated for kitchen use. Additionally, ceramic and porcelain tiles are generally good choices for heat resistance.
- What tools do I need to create my own tile stands?
Creating your own tile stands is a fun DIY project! You'll typically need the following tools:
- Tile cutter or a wet saw for shaping tiles
- Adhesive for securing any additional materials
- Sandpaper to smooth edges
- Protective gear like gloves and goggles
- How can I maintain my tile stands to keep them looking new?
To maintain your tile stands, regularly clean them with a mild detergent and a soft cloth. Avoid abrasive materials that could scratch the surface. Additionally, consider applying a sealant to protect against stains and moisture, keeping them looking fresh for years to come!
- Can I use my tile stands for other purposes besides holding pots and pans?
Absolutely! Your creative side can shine here. Tile stands can also be used as decorative coasters, serving trays, or even as a base for potted plants. The possibilities are endless, so feel free to experiment!
- Are there any safety concerns when using wall tiles as stands?
While wall tiles are generally safe to use, ensure they are thick enough to support the weight of your pots and pans. Also, be cautious when handling hot cookware to avoid burns. As with any kitchen accessory, a little common sense goes a long way!


