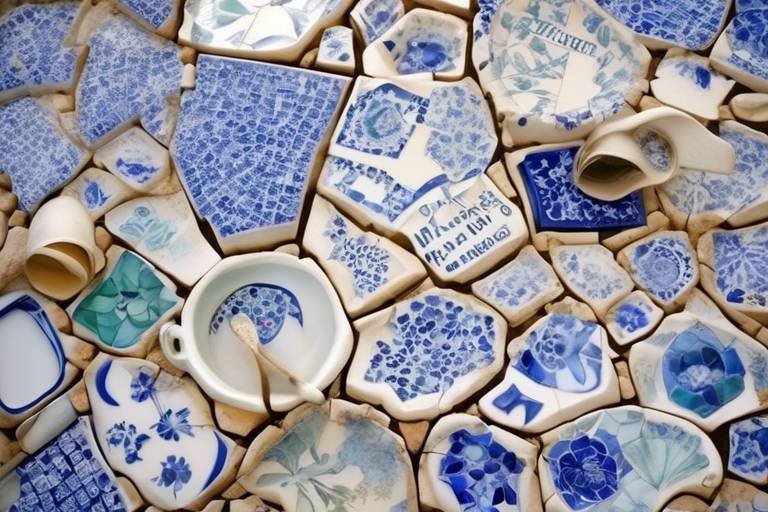
Repurposing Broken China into a Beautiful Mosaic
Have you ever looked at a broken piece of china and thought, “What a waste!”? Well, it’s time to change that mindset! This article explores creative ways to transform those shattered remnants into stunning mosaics that not only breathe new life into your decor but also tell a story. Repurposing broken china is not just an art form; it’s a sustainable practice that allows you to express your creativity while reducing waste. Imagine turning that chipped plate or cracked teacup into a vibrant work of art that can brighten up any space. Whether you’re a beginner eager to dive into the world of mosaics or an experienced crafter looking for fresh inspiration, this guide is here to help you embrace this beautiful and eco-friendly art form.
Mosaic art has a rich history, dating back to ancient civilizations. From the stunning mosaics of Roman villas to the intricate designs found in Byzantine churches, this art form has captivated people for centuries. The beauty of mosaics lies in their ability to transform even the simplest materials into something extraordinary. Incorporating broken china into contemporary mosaics adds a unique charm, as each piece carries its own history and character. Imagine the stories behind those vintage china patterns! By using these fragments, you’re not just creating art; you’re preserving memories and giving them a new lease on life. Plus, the variety of colors and textures in broken china can create mesmerizing designs that are both eye-catching and meaningful.
Before you embark on your mosaic adventure, it’s essential to gather the right materials. The types of china you choose can significantly impact the overall look of your mosaic. Look for china that has interesting patterns, vibrant colors, or unique textures. You can often find broken pieces at thrift stores, garage sales, or even in your own cabinets! Don’t forget to collect some basic tools to make the process smoother. Here’s a quick rundown of what you’ll need:
- China Pieces: Look for a variety of shapes and sizes.
- Adhesive: A strong glue that can bond china to your base.
- Grout: To fill in the gaps between pieces.
- Tools: Tile nippers, a hammer, and safety glasses for breaking china safely.
Proper preparation of broken china is crucial for a successful mosaic. If you have intact pieces that you want to break, use a hammer wrapped in a cloth to safely shatter them into smaller fragments. Always wear safety glasses to protect your eyes from flying shards! Once you have your pieces, it’s time to clean them. Use warm soapy water to wash away any dirt or residue, and let them dry completely. This step ensures that the adhesive will bond effectively. After cleaning, take a moment to sort your pieces by color and pattern. This will make the design process much easier and more enjoyable!
Creating a design is an important step in the mosaic process. You might want to sketch your ideas on paper before you start. Think about the overall theme and color scheme you want to achieve. Would you prefer a harmonious blend of colors or a bold contrast? Planning your layout on a flat surface can help you visualize how the final piece will look. Don’t be afraid to play around with different arrangements! Sometimes, the most unexpected combinations can lead to stunning results. Remember, the beauty of mosaic art lies in its imperfections, so embrace the uniqueness of each piece!
Once your design is finalized, it’s time to adhere the china pieces. Use a strong adhesive that is suitable for ceramics. Apply a small amount of glue to the back of each piece and press it firmly onto your base. Make sure to leave enough space between pieces for grouting later on. It’s important to work patiently, allowing each piece to set before moving on to the next. This will help ensure a durable and professional finish. If you find that some pieces are tricky to hold in place, using small weights can help until the adhesive dries.
Grouting is the final touch that brings your mosaic together. This step not only enhances the visual appeal but also provides structural integrity. Choose a grout color that complements your design; lighter colors can highlight the china, while darker shades can create a dramatic effect. Follow the manufacturer’s instructions for mixing and applying the grout. Use a rubber spatula to spread it over the mosaic, ensuring it fills all the gaps. Once it’s applied, wipe off any excess with a damp sponge. Allow the grout to dry completely before moving on to the next step.
To ensure longevity, sealing your mosaic is essential. A good sealant will protect your artwork from moisture, dirt, and UV rays. Choose a sealant that is appropriate for the materials you used, and apply it according to the manufacturer’s instructions. This step is particularly important if your mosaic will be displayed outdoors. A well-sealed mosaic can withstand the elements while retaining its beauty for years to come.
Once completed, showcasing your mosaic is an exciting step. You can display it indoors as a stunning art piece on a wall or as a decorative tabletop. For outdoor settings, consider using it as a garden stepping stone or a birdbath. The options are endless! Think about how the light interacts with your mosaic; different times of day can bring out different colors and patterns. Whatever you choose, be proud of your creation and share it with friends and family!
Q: Can I use any type of china for mosaics?
A: Yes! However, vintage china with interesting patterns often yields the best results.
Q: What if I don’t have broken china?
A: You can also use ceramic tiles or even glass for your mosaic projects.
Q: Is it difficult to learn mosaic art?
A: Not at all! With practice and patience, anyone can create beautiful mosaics.
Q: How do I clean my mosaic once it’s finished?
A: Use a damp cloth to gently wipe the surface. Avoid harsh chemicals that could damage the sealant.

Understanding Mosaic Art
Mosaic art is a captivating form of expression that has stood the test of time, with its origins tracing back to ancient civilizations such as the Greeks and Romans. These cultures utilized small pieces of colored stone, glass, and ceramics to create intricate patterns and images that adorned their floors and walls. The significance of mosaic art lies not only in its aesthetic appeal but also in its ability to tell stories and convey cultural narratives. Imagine walking on a beautifully crafted mosaic floor that depicts a historical scene or a vibrant landscape; it's like stepping into a living painting!
Today, the art of mosaic has evolved, embracing modern materials and techniques while still holding onto its rich heritage. One of the most delightful aspects of contemporary mosaic art is the incorporation of broken china, a sustainable practice that breathes new life into discarded items. Using broken china in mosaics adds a unique charm and character, as each piece carries its own history and personality. This transformation of the mundane into something extraordinary is what makes mosaic art so enchanting.
There are various styles of mosaic art, each with its own unique flair. Some popular styles include:
- Classical Mosaics: Characterized by intricate designs often depicting mythological themes.
- Contemporary Mosaics: These can range from abstract designs to realistic portraits, utilizing a mix of materials.
- Garden Mosaics: Often made with weather-resistant materials, these mosaics bring color and life to outdoor spaces.
The charm of mosaics lies in their versatility. Whether you’re creating a small decorative piece for your home or a large outdoor installation, the possibilities are endless. Each mosaic tells a story, and when you incorporate broken china, you add layers of history and meaning to your work. It's like piecing together a puzzle where every fragment has a tale to tell. So, whether you’re a seasoned artist or a curious beginner, mosaic art invites you to explore your creativity and craft something beautiful from the remnants of the past.

Gathering Materials
Before you dive headfirst into the enchanting world of mosaic art, it’s crucial to gather the right materials. Think of this step as laying the foundation for a beautiful home; without the right tools and supplies, your masterpiece might crumble before it even begins. So, where do we start? First and foremost, let’s talk about the types of china you can use. Broken plates, cups, and saucers are all excellent choices. Look for pieces that have interesting patterns or colors, as these will add character to your mosaic. You can often find these treasures at thrift stores, garage sales, or even your own kitchen cupboard if you’re feeling a bit adventurous.
Next, let’s discuss the tools you’ll need. A few essential items will make your crafting journey smoother:
- Safety goggles: Protect your eyes when breaking china.
- Hammer: For safely breaking the china into manageable pieces.
- Tile nippers: These are perfect for shaping the pieces to fit your design.
- Adhesive: A strong glue or thinset mortar will ensure your pieces stay put.
- Grout: This will fill the gaps between your china pieces and give your mosaic a finished look.
- Sealer: To protect your artwork once it’s complete.
Now, you might be wondering how to source broken china effectively. One of the best ways is to connect with local artisans or craft groups who might have leftover pieces from their projects. You could also consider reaching out to restaurants or cafes that may be discarding chipped dishware. It’s a win-win situation; they clear out space, and you get beautiful materials for your art! Don't forget to check online marketplaces or community boards where people often give away or sell broken china at a fraction of the price.
Finally, remember that the beauty of mosaic art lies in its imperfections. Embrace the cracks and chips as they tell a story, adding depth and texture to your creation. So, gather your materials with excitement and let your imagination run wild. In the next section, we’ll dive into the proper techniques for preparing your china, ensuring that every piece is ready to shine in your mosaic masterpiece.

Preparing the China
Getting your broken china ready for a mosaic project is like preparing your canvas before painting; it’s a crucial step that can make or break your artistic vision. First things first, you need to ensure you have the right pieces. Not all china is created equal! Some types are more suitable for mosaics than others. Look for ceramic plates, teacups, and bowls that have interesting patterns and colors. The more unique the design, the more captivating your mosaic will be. Remember, beauty often lies in the imperfections!
Now, let’s talk about the fun—and sometimes a little dangerous—part: breaking the china. You’ll want to do this safely, so grab some protective gear first! Put on gloves and goggles to protect yourself from sharp edges. A sturdy cloth bag is ideal for containing the pieces as you break them. Simply place your china inside the bag, and using a hammer, gently tap the surface. You can create a variety of sizes, from small chips to larger pieces, depending on your design. Just remember, the goal is to have a mix of shapes and sizes to add visual interest to your mosaic.
Once you’ve broken your china, it’s essential to clean the pieces thoroughly. Dust and grime can interfere with the adhesive later on. Use warm, soapy water to wash each piece, and a soft brush can help remove any stubborn dirt. After washing, rinse them well and let them dry completely. This step is crucial because any moisture left on the china can lead to issues when you start adhering them to your base.
Speaking of bases, before you start your mosaic, think about what surface you’ll be working on. Popular options include wood boards, concrete, or even old furniture. Make sure your surface is clean and dry as well. If you’re using a wooden base, consider sealing it with a primer to ensure the adhesive sticks well.
In summary, preparing your china involves:
- Choosing the right types of china for your project.
- Breaking the china safely and creatively.
- Cleaning the pieces thoroughly to remove any dirt.
- Selecting a suitable base for your mosaic.
By taking these steps, you’ll set a solid foundation for your mosaic masterpiece. Remember, the preparation phase is where the magic begins, so take your time and enjoy the process!

Designing Your Mosaic
Designing your mosaic is like painting a masterpiece, but instead of a brush, you’ll use the unique shapes and colors of broken china. The first step in this creative journey is to sketch your ideas. Grab some paper and a pencil, and let your imagination flow! Don't worry if you’re not an artist; even simple shapes can lead to stunning results. Think of your mosaic as a puzzle where each piece contributes to the bigger picture. Consider the theme or message you want to convey—do you want something whimsical, elegant, or perhaps a little quirky?
Once you have a basic sketch, it’s time to dive into color schemes. The beauty of broken china lies in its variety. You might find vibrant floral patterns, delicate pastels, or even striking geometric designs. When choosing your colors, think about how they will complement each other. A harmonious palette can evoke emotions and create a cohesive look. You could even create a color wheel to visualize how different shades interact. Remember, contrasting colors can also make certain elements pop, so don’t shy away from mixing and matching!
Now that you have your sketch and color scheme, it’s essential to plan your layout. This step is crucial for ensuring that your pieces fit together beautifully. You can lay out your china pieces on a flat surface, mimicking the final design. This allows you to see how they interact before committing to the adhesive. Pay attention to the spacing between pieces; leaving small gaps can enhance the overall look, especially once grouted. Think of it like arranging flowers in a vase—balance and spacing can make all the difference!
As you finalize your design, consider the size and shape of your mosaic. Will it be a small decorative plate or a large garden feature? The scale can influence your design choices significantly. Larger mosaics may require bolder patterns, while smaller pieces can showcase intricate details. Additionally, think about the surface you’ll be working on. A flat surface is ideal for beginners, but if you’re feeling adventurous, consider creating a three-dimensional piece, like a birdbath or a stepping stone.
Don’t forget to incorporate personal touches! Adding elements that reflect your personality or tell a story can make your mosaic even more special. Perhaps you have a favorite color or a pattern that reminds you of a cherished memory. These details not only enhance your design but also make your artwork uniquely yours.
In summary, designing your mosaic is an exciting and rewarding process that allows you to express your creativity. From sketching your ideas and choosing color schemes to planning your layout and incorporating personal touches, each step contributes to the beauty of the final piece. So grab those broken china shards, unleash your imagination, and get ready to create something truly spectacular!

Adhering the Pieces
Once you’ve meticulously crafted your design and gathered your beautiful shards of broken china, it’s time to bring your mosaic to life by adhering the pieces. This step is crucial, as it determines not only the aesthetics of your artwork but also its durability. So, let’s dive into the world of adhesives and techniques that will hold your mosaic together like a well-constructed puzzle.
First off, choosing the right adhesive is key. There are several types of adhesives to consider, each with its own strengths. For most mosaic projects, thin-set mortar, tile adhesive, or even craft glue can be used, depending on the size and weight of the pieces. Thin-set mortar is ideal for outdoor projects or larger pieces due to its strong hold and weather resistance. On the other hand, craft glue works wonders for smaller, indoor mosaics. Here’s a quick comparison to help you decide:
| Adhesive Type | Best For | Pros | Cons |
|---|---|---|---|
| Thin-Set Mortar | Outdoor, heavy pieces | Durable, weather-resistant | Requires mixing, longer drying time |
| Tile Adhesive | Indoor, medium pieces | Strong bond, easy to use | Can be messy, not waterproof |
| Craft Glue | Lightweight, small pieces | Quick drying, easy cleanup | Less durable, not suitable for outdoor use |
Now that you’ve chosen your adhesive, it’s time to apply it. Make sure to work in a well-ventilated area and wear gloves to protect your hands. Use a small palette knife or a toothpick to spread the adhesive evenly on the back of each china piece. This ensures a solid bond and prevents any gaps that could compromise your design. As you place each piece onto your base, remember to apply gentle pressure to secure it in place.
As you adhere the pieces, it’s essential to keep your design in mind. You might want to step back occasionally to ensure that the layout remains true to your vision. If you find that a piece is not sitting right, don’t hesitate to adjust it while the adhesive is still wet. This is one of the perks of using a flexible adhesive—adjustments can be made without too much hassle!
Another tip is to work in sections. Start with one area of your mosaic and complete it before moving on to the next. This method helps you maintain focus and ensures that you don’t accidentally disturb already placed pieces. Plus, it allows you to admire your progress as you go! Once all your pieces are adhered, let the mosaic dry completely according to the adhesive instructions, which is typically around 24 hours.
In conclusion, adhering the pieces is not just about sticking them down; it’s about creating a cohesive work of art that reflects your personal style. With the right adhesive and a little patience, you’ll be well on your way to showcasing a stunning mosaic that tells a story through its intricate design. So, gather your tools, unleash your creativity, and watch your broken china transform into a breathtaking masterpiece!
- What type of adhesive is best for outdoor mosaics?
Thin-set mortar is recommended for outdoor projects due to its durability and weather resistance. - Can I use regular glue for my mosaic?
While craft glue can work for lightweight projects, it is not suitable for outdoor use or heavier pieces. - How long should I wait for the adhesive to dry?
Typically, you should allow 24 hours for the adhesive to fully cure, but always check the manufacturer's instructions for specific drying times. - Is it necessary to grout my mosaic after adhering the pieces?
Yes, grouting fills the gaps between the pieces and adds stability, as well as a polished finish to your artwork.
Grouting Your Mosaic
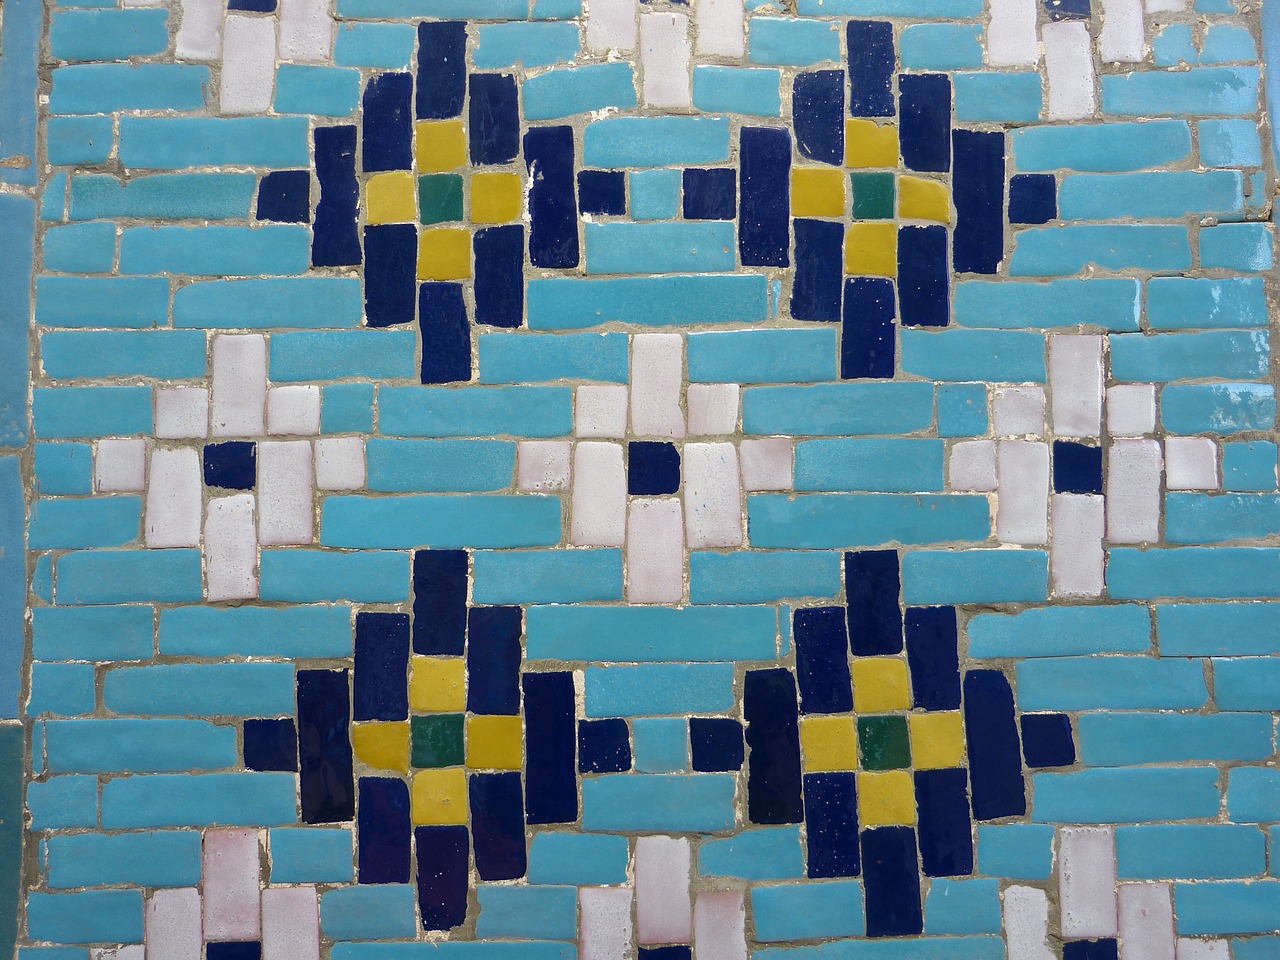
Grouting is the final touch that brings your mosaic masterpiece to life. It’s that magical moment when the individual pieces of broken china come together to form a cohesive work of art. But, before you dive in, it’s crucial to understand the grouting process and how it can enhance the beauty and durability of your creation. Think of grout as the glue that binds your artwork, filling in the gaps and providing a polished finish that elevates your design.
Choosing the right type of grout is essential. You’ll find a variety of options available, each with its unique properties. For instance, traditional cement-based grout is a popular choice for its strength and versatility. However, if you’re working on a project that requires flexibility, such as outdoor mosaics, you might want to consider using epoxy grout. This type is not only waterproof but also resistant to stains, making it ideal for high-moisture areas.
When it comes to application, you’ll want to ensure that your workspace is clean and organized. Begin by mixing your chosen grout according to the manufacturer's instructions. The consistency should be similar to peanut butter—spreadable but not too runny. Using a rubber float, apply the grout diagonally across your mosaic, ensuring that it fills all the gaps between the china pieces. Don’t be afraid to press down a bit; this will help the grout settle and adhere properly.
After you’ve applied the grout, it’s time for the fun part: cleaning up! Use a damp sponge to gently wipe away the excess grout from the surface of your mosaic. Be careful not to pull grout out from between the pieces; this is where the delicate balance lies. Rinse your sponge frequently to avoid smearing grout across your artwork. Once you’ve completed this step, allow the grout to cure for the time specified on the package—usually around 24 hours.
To achieve that polished look, you might want to consider a second round of cleaning. After the grout has set, use a soft cloth to buff the surface, removing any haze that may have formed. This will reveal the vibrant colors of your china and give your mosaic that professional finish. Remember, patience is key here; rushing through the grouting process can lead to uneven surfaces and a less-than-stellar final product.
Finally, let’s talk about sealing your mosaic after grouting. Sealing is vital, especially if your piece will be exposed to the elements. A good sealant will protect your artwork from moisture, dirt, and fading, ensuring that your mosaic remains as stunning as the day you created it. When applying a sealant, follow the manufacturer's instructions and allow adequate drying time.
In summary, grouting your mosaic is an art in itself. From choosing the right grout to applying and sealing it properly, each step is crucial in creating a beautiful and lasting piece. So, roll up your sleeves, gather your materials, and get ready to transform those broken pieces of china into a stunning mosaic that will surely be the talk of the town!
- What type of grout should I use for my mosaic? It depends on your project! For indoor mosaics, traditional cement-based grout works well, while epoxy grout is ideal for outdoor or high-moisture areas.
- How long should I let the grout cure? Typically, grout should cure for at least 24 hours, but check the manufacturer's instructions for specific guidance.
- Can I use colored grout? Absolutely! Colored grout can add an extra dimension to your mosaic, enhancing the overall aesthetic.
- Do I need to seal my mosaic after grouting? Yes, sealing your mosaic is essential for protecting it from moisture and ensuring its longevity.

Sealing and Protecting Your Art
After pouring your heart and soul into creating a stunning mosaic from broken china, the last thing you want is for your masterpiece to fade or deteriorate over time. is crucial for ensuring its longevity and maintaining its vibrant appearance. Think of sealing as the armor that shields your artwork from the elements, dust, and potential damage. Just as you wouldn’t leave a beautiful painting exposed to the harsh sunlight, your mosaic deserves the same level of care.
When it comes to sealing your mosaic, there are various types of sealants available, each catering to different needs. Water-based sealants are popular for indoor mosaics, as they are easy to apply and clean up, while solvent-based sealants offer robust protection for outdoor pieces, standing up to moisture and UV rays. Before diving into the application process, it's essential to consider the environment where your mosaic will reside. For instance, if your artwork will be displayed outdoors, a high-quality sealant designed for exterior use is a must.
Here’s a quick overview of the most common types of sealants you might consider:
| Sealant Type | Best For | Application Method |
|---|---|---|
| Water-Based Sealant | Indoor mosaics | Brush or spray |
| Solvent-Based Sealant | Outdoor mosaics | Brush or spray |
| Epoxy Sealant | High durability | Mix and apply |
Before applying any sealant, make sure your mosaic is completely dry. This step is crucial; applying sealant on a damp surface can trap moisture, leading to mold or other issues. Once you’ve confirmed that your piece is dry, use a clean brush or spray bottle to evenly apply the sealant over the entire surface. It’s often recommended to apply two to three coats, allowing each layer to dry completely before adding the next. This ensures optimal protection and a polished finish that enhances the colors of your mosaic.
After sealing, it’s also wise to consider how you will protect your artwork from physical damage. If your mosaic is displayed in a high-traffic area, consider placing it behind glass or in a shadow box. This not only adds an extra layer of protection but also elevates the presentation of your art. Additionally, if your mosaic is outdoors, positioning it in a shaded area can help prevent fading from the sun, ensuring that your colors remain vibrant for years to come.
In summary, sealing and protecting your mosaic is not just about aesthetics; it’s about preserving the story and effort you’ve poured into your creation. By choosing the right sealant, applying it carefully, and taking additional protective measures, you can ensure that your beautiful mosaic remains a cherished piece of art for generations to enjoy.
- How long does the sealant take to dry? Generally, water-based sealants can dry within a few hours, while solvent-based ones may take longer. Always check the manufacturer’s instructions for specific drying times.
- Can I use regular paint sealant on my mosaic? It’s best to use sealants specifically designed for mosaics to ensure optimal protection and adhesion.
- Is sealing necessary for indoor mosaics? While not strictly necessary, sealing can help protect your artwork from dust and moisture, extending its life.
Showcasing Your Mosaic
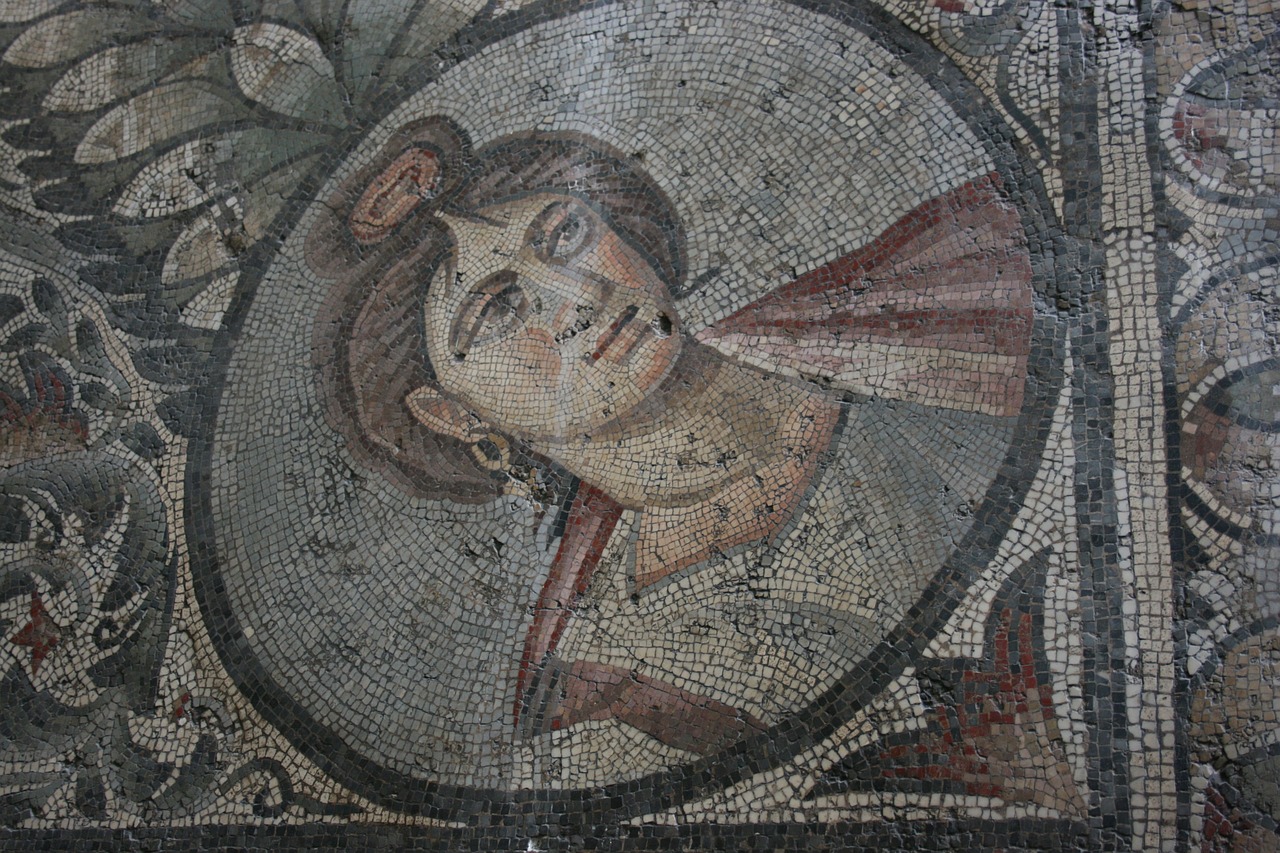
Once you've poured your heart and soul into creating a stunning mosaic, the next thrilling step is showcasing your masterpiece! Think of this as the grand reveal of a magician's trick—it's your moment to shine and let others appreciate the beauty of your hard work. But where and how do you display your mosaic to ensure it truly stands out? Let’s explore some creative options that will make your artwork the talk of the town!
First, consider the location of your mosaic. Are you leaning towards an indoor display or an outdoor installation? Each option has its own set of advantages. For instance, placing your mosaic indoors allows for a controlled environment, protecting it from harsh weather conditions. You might want to choose a spot that gets plenty of natural light, like a living room or hallway, to illuminate the colors and details of your work. On the other hand, an outdoor setting can add a charming rustic feel, especially if you place it in a garden or on a patio. Just remember to ensure it's sealed properly to withstand the elements!
Here are some popular display ideas to consider:
- Wall Art: Mount your mosaic as a focal point on a wall. Use a simple frame or hang it directly for a more rustic look.
- Garden Feature: Integrate your mosaic into a garden pathway or as a decorative stepping stone. This not only beautifies your garden but also showcases your creativity!
- Tabletop Centerpiece: Place your mosaic on a table, perhaps under a glass cover, to protect it while allowing everyone to admire it during gatherings.
- Functional Art: Consider transforming your mosaic into a functional piece, like a tabletop or a birdbath. This way, you can enjoy its beauty while it serves a practical purpose!
Additionally, think about how you can enhance the display with lighting. Soft spotlights or fairy lights can create a magical ambiance, especially if your mosaic has reflective pieces that catch the light. You could also create a small exhibit by grouping several mosaics together, showcasing different designs or themes. This not only draws attention but also tells a story about your journey as an artist.
Finally, don’t forget to share your mosaic with the world! Social media platforms like Instagram and Pinterest are fantastic for showing off your work. A well-taken photo can inspire others and even lead to new opportunities. You might also consider participating in local art fairs or exhibitions, where you can connect with fellow artists and art lovers alike. So, grab your camera and start snapping those pictures because your mosaic deserves to be celebrated!
Q: How do I protect my outdoor mosaic from weather damage?
A: Ensure your mosaic is sealed with a high-quality outdoor sealant. Consider placing it in a sheltered area to minimize exposure to harsh weather.
Q: Can I display my mosaic in a bathroom?
A: Yes! Just make sure it's well-sealed to resist moisture. A bathroom can be a unique spot to showcase your creativity.
Q: What’s the best way to photograph my mosaic for social media?
A: Use natural light and avoid direct sunlight to prevent harsh shadows. Experiment with different angles to find the most flattering view!
Frequently Asked Questions
- What types of broken china are best for mosaics?
When it comes to choosing broken china for your mosaic, consider using plates, cups, and tiles that have interesting patterns or colors. Porcelain and ceramic are great choices due to their durability and aesthetic appeal. Remember, the more unique the piece, the more character it adds to your mosaic!
- How do I safely break china for my mosaic project?
To safely break china, you can wrap the pieces in a towel and gently tap them with a hammer. Always wear safety goggles to protect your eyes from flying shards. Alternatively, you can use a tile cutter for more precise breaks if you want specific shapes or sizes.
- What adhesive should I use for adhering the china pieces?
A good quality adhesive is crucial for a strong mosaic. Waterproof adhesives like thin-set mortar or tile adhesive work well, especially for outdoor projects. For indoor mosaics, you can also use craft glue, but ensure it’s strong enough to hold the pieces in place.
- How do I apply grout to my mosaic?
To apply grout, mix it according to the package instructions and use a rubber float to spread it over your mosaic. Make sure to fill all the gaps between the china pieces. After applying, wipe off excess grout with a damp sponge, being careful not to pull it out from between the pieces.
- Do I need to seal my mosaic after grouting?
Yes, sealing your mosaic is essential for protecting it from moisture and dirt. Use a clear sealant spray or a brush-on sealant for best results. This will help maintain the vibrancy of your colors and extend the life of your artwork, especially if it’s displayed outdoors.
- What are some creative ways to showcase my mosaic?
Showcasing your mosaic can be as fun as creating it! Consider displaying it in a shadow box, framing it, or using it as a tabletop. For outdoor settings, you can mount it on a garden wall or use it as a stepping stone. Let your creativity shine!

