
Convert Your Old Board Games into a Crafty Jewel Box
Have you ever looked at your old board games and thought, "What a waste to just let these sit on a shelf?" Well, it's time to breathe new life into them! This article will guide you through the creative process of transforming those forgotten classics into unique and stylish jewel boxes, combining nostalgia with functionality. Imagine turning a dusty Monopoly game into a chic storage solution for your favorite trinkets or a vintage Scrabble set into a stunning display for your jewelry collection. Not only will you declutter your space, but you'll also create something truly special that reflects your personality. Are you ready to embark on this crafty adventure?
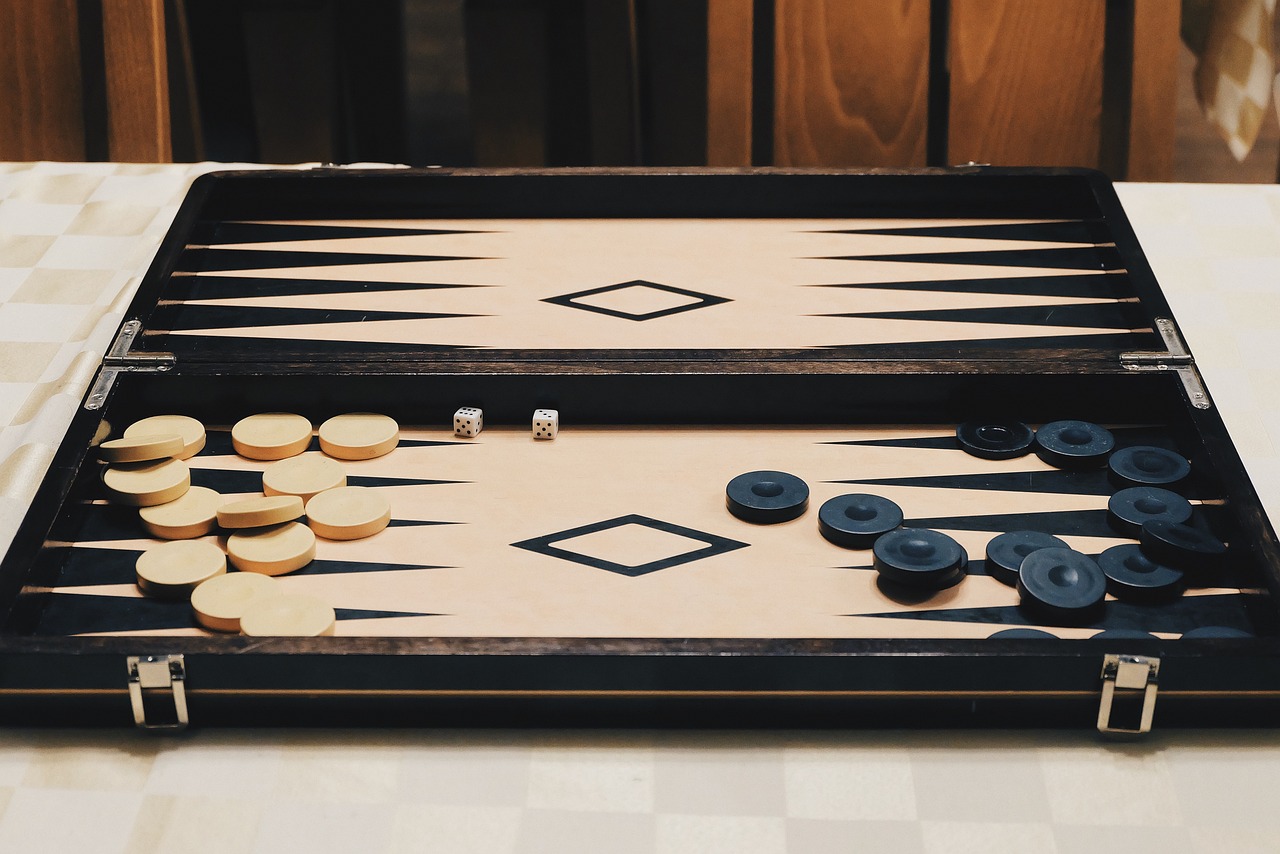
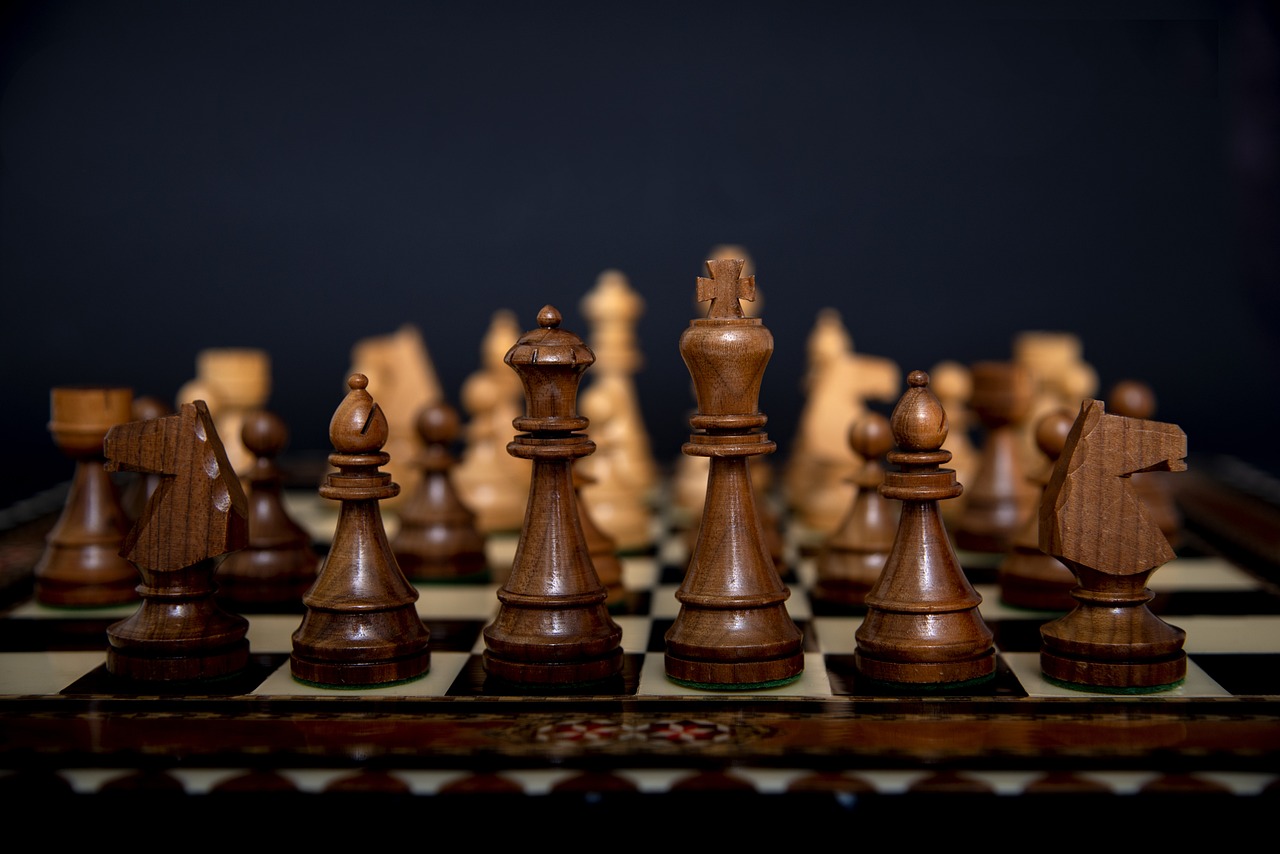
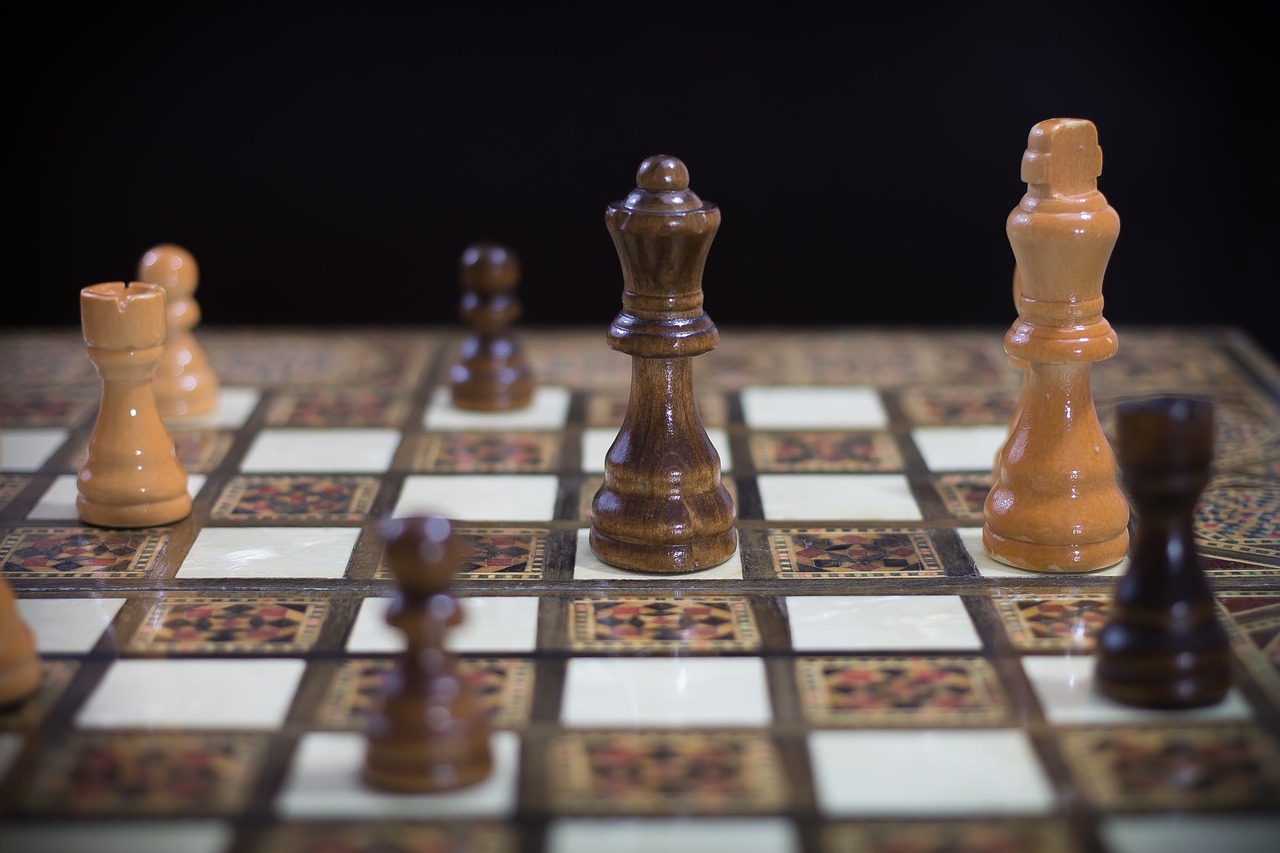
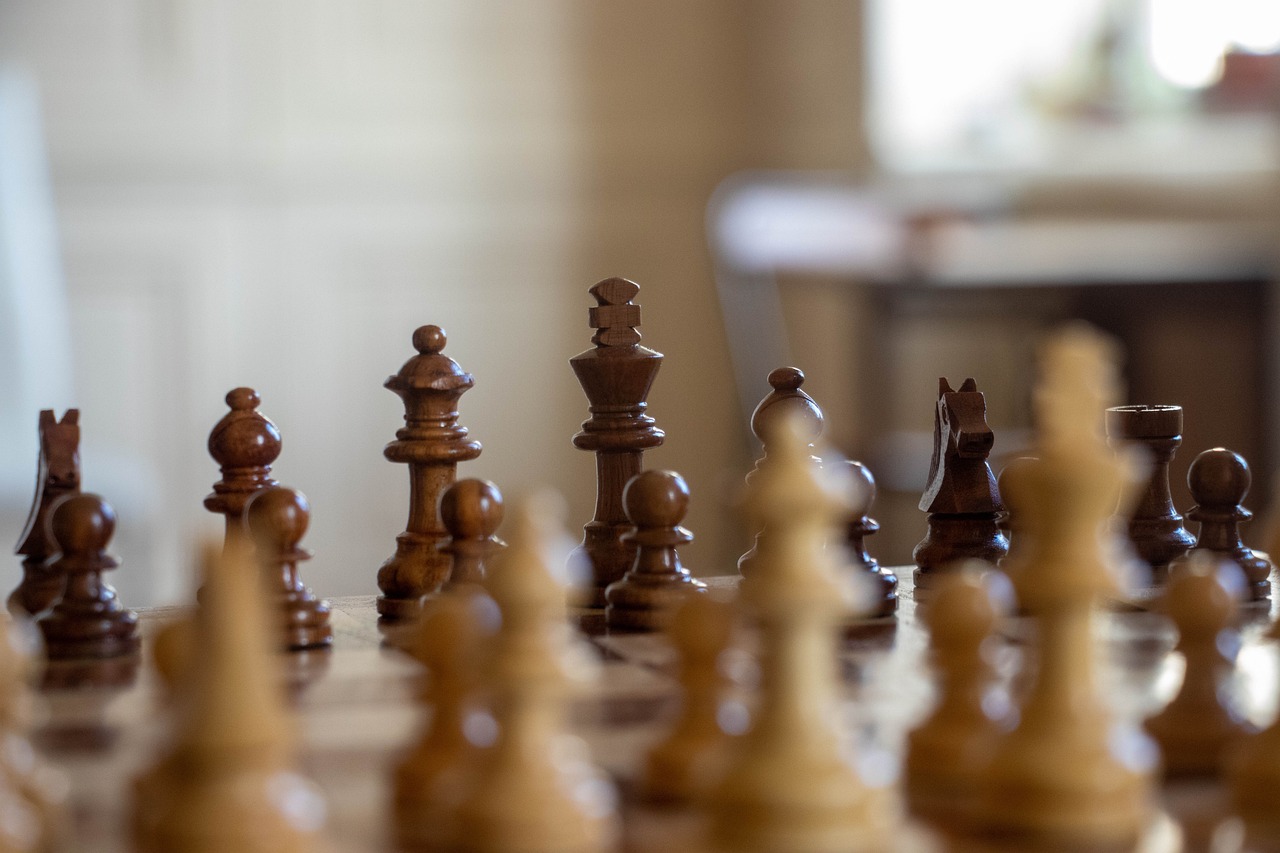
Selecting the perfect board game is crucial for your project. You want to consider games that have vibrant artwork and sturdy components that can be repurposed into a beautiful jewel box. Think about games that have a nostalgic value to you; perhaps a childhood favorite or a game that brings back fond memories of family game nights. The right board game can set the tone for your entire project, so take your time and choose wisely. Look for games with interesting graphics or unique shapes, as these will add character to your finished product.
Before diving into the project, it’s essential to gather all necessary materials such as tools, paints, and embellishments. This preparation will streamline the crafting process and enhance the final product. You don’t want to find yourself halfway through and realize you’re missing that one crucial item! Here’s a quick checklist to help you get started:
- Board Game: Choose your base game.
- Tools: Scissors, glue, paintbrushes, and a utility knife.
- Paints: Acrylic paints for vibrant colors.
- Decorative Elements: Stickers, beads, fabric, and other embellishments.
- Sealant: To protect your finished product.
Having everything at your fingertips will make the crafting process more enjoyable and less stressful.
Having the right tools at hand is essential for a successful transformation. Basic tools like scissors, glue, and paintbrushes will help you achieve a polished look. But don’t stop there! Consider investing in a few extra items that can make your project easier:
- Craft Knife: For precise cuts.
- Ruler: To measure and ensure straight lines.
- Paint Palette: To mix colors and create unique shades.
With these tools, you’ll be well-equipped to tackle any challenge that comes your way during the crafting process.
Choosing the right paints and finishes can elevate your jewel box's aesthetic. Consider using acrylic paints for vibrant colors that pop and sealants for a lasting finish. The beauty of acrylics is that they dry quickly and are easy to work with, making them perfect for beginners and seasoned crafters alike. A good sealant will protect your artwork from scratches and wear, ensuring that your creation stands the test of time.
Incorporating decorative elements like stickers, beads, or fabric can personalize your jewel box. Explore various options to add a unique touch that reflects your style. You might consider using:
- Fabric: Line the inside of your box with a soft fabric for a luxurious feel.
- Stickers: Use themed stickers that match the original game for a cohesive look.
- Beads: Add beads around the edges for a touch of elegance.
Let your imagination run wild! The more personal touches you add, the more special your jewel box will be.
The structure of your jewel box is vital for functionality. Learn how to disassemble the game and reassemble it into a sturdy and attractive storage solution. Start by carefully removing the game components, ensuring you don’t damage the pieces you want to keep. You can use the game board as the base of your box, and the card compartments can serve as dividers for your jewelry or other small items. This way, you maintain the essence of the game while giving it a new purpose. It’s like giving your old board game a second chance at life!
Adding personal touches is what makes your jewel box truly special. Explore various design ideas and customization techniques to make it uniquely yours. Think about what colors resonate with you, what patterns you love, and how you can incorporate your personal style into the design. The possibilities are endless!
Integrating photos or cherished mementos into your design can create sentimental value. Discover ways to incorporate these elements seamlessly into your jewel box. You could create a collage on the inside lid with pictures from memorable moments or add small slots for tickets and postcards that hold special meaning. This not only makes your jewel box a storage solution but also a beautiful keepsake that tells your story.
Selecting a cohesive color palette will enhance the overall design. Explore color theory and trends to find the perfect combination that complements your board game's original design. You might want to go for a monochromatic scheme for a sleek look or a complementary color scheme for something more vibrant. Remember, the goal is to create a piece that feels harmonious and visually appealing!
Q: Can I use any board game for this project?
A: Yes! However, it's best to choose games with sturdy components and interesting artwork.
Q: What if I don't have all the materials?
A: You can always improvise! Use what you have at home or visit a local craft store for affordable options.
Q: How long does this project take?
A: It varies depending on your design, but you can expect to spend a few hours to a couple of days for a complete transformation.
Q: Is this project suitable for kids?
A: Absolutely! With adult supervision, children can have a blast crafting their own jewel boxes.
Choosing the Right Board Game
This article will guide you through the creative process of transforming old board games into unique and stylish jewel boxes, combining nostalgia with functionality.
When it comes to embarking on this delightful crafting journey, selecting the right board game is crucial. Think of it as picking the perfect canvas for your masterpiece. Not all board games are created equal, and some will lend themselves better to this transformation than others. Look for games that have vibrant artwork and sturdy components. After all, you want your jewel box to be not only visually appealing but also durable enough to hold your precious trinkets.
Consider games that you have fond memories of or those that have a special place in your heart. Perhaps it’s that classic Monopoly set that you played with family on rainy days, or maybe a colorful Clue game that sparked your inner detective. The nostalgia attached to these games will add an extra layer of sentimentality to your jewel box.
Here are a few tips to guide you in choosing the perfect game:
- Artwork: Look for games with eye-catching graphics. The more vibrant and engaging, the better your jewel box will look!
- Material: Opt for games made of sturdy cardboard or wood. These materials will hold up well when restructured into a box.
- Size: Consider the size of the game. A larger game might provide more material to work with, but ensure it fits your intended space.
Once you’ve narrowed down your choices, take a moment to envision the final product. Will it be a compact box for rings and earrings, or a larger storage solution for bracelets and necklaces? This will help you decide which game will best suit your needs. Remember, the goal is to create a functional piece that not only serves a purpose but also brings a smile to your face every time you see it.
In conclusion, choosing the right board game is the first and perhaps the most important step in your crafting adventure. It sets the tone for the entire project and ensures that your jewel box is not only a storage solution but also a conversation starter. So, dig through your attic or scavenge your local thrift store, and find that perfect game that will be transformed into a beautiful, crafty jewel box!
Before diving into the project, gather all necessary materials such as tools, paints, and embellishments. This preparation will streamline the crafting process and enhance the final product.
Having the right tools at hand is essential for a successful transformation. Basic tools like scissors, glue, and paintbrushes will help you achieve a polished look.
Choosing the right paints and finishes can elevate your jewel box's aesthetic. Consider using acrylic paints for vibrant colors and sealants for a lasting finish.
Incorporating decorative elements like stickers, beads, or fabric can personalize your jewel box. Explore various options to add a unique touch that reflects your style.
The structure of your jewel box is vital for functionality. Learn how to disassemble the game and reassemble it into a sturdy and attractive storage solution.
Adding personal touches is what makes your jewel box truly special. Explore various design ideas and customization techniques to make it uniquely yours.
Integrating photos or cherished mementos into your design can create a sentimental value. Discover ways to incorporate these elements seamlessly into your jewel box.
Selecting a cohesive color palette will enhance the overall design. Explore color theory and trends to find the perfect combination that complements your board game's original design.
Q: Can I use any board game for this project?
A: While you can use any board game, it's best to choose one with sturdy materials and appealing artwork for the best results.
Q: Do I need special skills to create a jewel box?
A: No special skills are required! Just a little creativity and patience will go a long way.
Q: How long will this project take?
A: The time varies depending on your design and materials, but you can expect to spend a few hours to a couple of days on it.

Gathering Your Materials
Before you embark on the exciting journey of transforming your old board games into a stunning jewel box, it's crucial to gather all the necessary materials. Think of this step as laying the foundation for a beautiful house; without the right tools and supplies, your masterpiece might not stand the test of time. So, what do you need? Let's dive into the essentials!
First and foremost, you'll need to collect your board game. Choose one that resonates with you, perhaps one from your childhood filled with nostalgia or a game that has vibrant artwork. The game's components will play a pivotal role in the final design of your jewel box. Once you have your game, it’s time to gather additional materials that will help bring your vision to life.
Here’s a quick rundown of some essential materials you'll want to have on hand:
- Tools: Scissors, a craft knife, glue (preferably a strong adhesive), and a paintbrush are must-haves. These tools will help you cut, assemble, and decorate your jewel box with ease.
- Paints: Acrylic paints are highly recommended for their vibrant colors and ease of use. They dry quickly and can be layered for depth.
- Sealants: A clear sealant will protect your artwork and ensure that your jewel box lasts for years to come.
- Decorative Elements: Think about embellishments like stickers, beads, fabric scraps, or even buttons. These can add a personal touch and make your jewel box uniquely yours.
Now, while it may seem like a lot to gather, consider this: each item contributes to the overall aesthetic and functionality of your jewel box. Imagine how exciting it will be to sift through your collection of decorative elements, choosing what will best express your personality. This is where your creativity can truly shine!
Additionally, it’s wise to consider the workspace where you’ll be crafting. Make sure you have a clean, well-lit area where you can spread out your materials and work comfortably. A clutter-free space can help you think clearly and focus on the task at hand. Don't forget to protect your work surface with newspaper or a craft mat to avoid any accidental spills or scratches.
Once everything is gathered, take a moment to visualize the final product. Picture how each piece will come together to create something functional yet beautiful. This visualization will guide your crafting process and keep you motivated. So, roll up your sleeves, and let's get ready to turn those old board games into something spectacular!
Essential Tools for Crafting
This article will guide you through the creative process of transforming old board games into unique and stylish jewel boxes, combining nostalgia with functionality.
Selecting the perfect board game is crucial for your project. Consider games with vibrant artwork and sturdy components that can be repurposed into a beautiful jewel box.
Before diving into the project, gather all necessary materials such as tools, paints, and embellishments. This preparation will streamline the crafting process and enhance the final product.
Having the right tools at hand is essential for a successful transformation. Just like a chef needs their knives, you need your crafting tools to whip up something amazing from those old board games. Here are some must-have items to consider:
- Scissors: A good pair of scissors will be your best friend. They should be sharp enough to cut through cardboard and other materials with ease.
- Glue: Opt for a strong adhesive like craft glue or hot glue. This will ensure that everything sticks together nicely and holds up over time.
- Paintbrushes: Different sizes of paintbrushes will help you apply paint evenly and reach those tricky corners.
- Utility Knife: For more intricate cuts, a utility knife is invaluable. Just be sure to handle it with care!
- Ruler and Pencil: Precise measurements are key, so don’t skip on these essentials. They’ll help you plan and execute your design flawlessly.
Having these tools ready will not only make your crafting smoother but also help you achieve a polished look that you can be proud of. Imagine the satisfaction of turning a once-forgotten game into a chic jewel box, all thanks to your trusty toolkit!
Choosing the right paints and finishes can elevate your jewel box's aesthetic. Consider using acrylic paints for vibrant colors and sealants for a lasting finish.
Incorporating decorative elements like stickers, beads, or fabric can personalize your jewel box. Explore various options to add a unique touch that reflects your style.
The structure of your jewel box is vital for functionality. Learn how to disassemble the game and reassemble it into a sturdy and attractive storage solution.
Adding personal touches is what makes your jewel box truly special. Explore various design ideas and customization techniques to make it uniquely yours.
Integrating photos or cherished mementos into your design can create a sentimental value. Discover ways to incorporate these elements seamlessly into your jewel box.
Selecting a cohesive color palette will enhance the overall design. Explore color theory and trends to find the perfect combination that complements your board game's original design.
Q: Can I use any board game for this project?
A: While you can technically use any board game, it's best to choose one with sturdy components and appealing artwork for the best results.
Q: What if I don't have all the tools listed?
A: You can still create a beautiful jewel box with basic tools. Just get creative with what you have on hand!
Q: How long does the crafting process take?
A: The time varies depending on your design and skill level, but you can expect to spend a few hours to a couple of days on this project.
Paints and Finishes
This article will guide you through the creative process of transforming old board games into unique and stylish jewel boxes, combining nostalgia with functionality.
Selecting the perfect board game is crucial for your project. Consider games with vibrant artwork and sturdy components that can be repurposed into a beautiful jewel box.
Before diving into the project, gather all necessary materials such as tools, paints, and embellishments. This preparation will streamline the crafting process and enhance the final product.
Having the right tools at hand is essential for a successful transformation. Basic tools like scissors, glue, and paintbrushes will help you achieve a polished look.
Choosing the right paints and finishes can elevate your jewel box's aesthetic. Think of paint as the wardrobe of your jewel box; just as a great outfit can transform your look, the right colors and textures can make your project shine. Acrylic paints are a fantastic option due to their vibrant colors and quick-drying properties. They adhere well to various surfaces, making them perfect for your board game pieces. When selecting colors, consider the original artwork of the game; you want your jewel box to complement its history while adding your personal flair.
In addition to paints, sealants play a crucial role in protecting your work. A good sealant not only enhances the finish but also provides durability, ensuring that your jewel box withstands the test of time. You might opt for a glossy finish for a modern look or a matte finish for a more rustic feel. The choice is yours! Here’s a quick comparison of common finishes:
| Finish Type | Characteristics | Best For |
|---|---|---|
| Glossy | Shiny, reflective surface | Modern designs, vibrant colors |
| Matte | Non-reflective, soft appearance | Rustic styles, subtle colors |
| Satin | Between glossy and matte | Balanced look, versatile designs |
When applying paint, don’t rush the process. Take your time to layer colors, allowing each coat to dry before adding the next. This technique not only enhances the depth of color but also gives your jewel box a professional finish. Remember, crafting is as much about the journey as it is about the destination. Enjoy the process, and let your creativity flow!
Adding personal touches is what makes your jewel box truly special. Explore various design ideas and customization techniques to make it uniquely yours.
Integrating photos or cherished mementos into your design can create a sentimental value. Discover ways to incorporate these elements seamlessly into your jewel box.
Selecting a cohesive color palette will enhance the overall design. Explore color theory and trends to find the perfect combination that complements your board game's original design.
- What types of board games work best for this project? Look for games with sturdy components and interesting artwork, like classic Monopoly or Scrabble.
- Can I use any type of paint? Acrylic paints are recommended for their vibrant colors and quick drying time.
- How do I seal my jewel box after painting? Use a clear sealant spray or brush-on sealant to protect your paint job.

Decorative Elements
This article will guide you through the creative process of transforming old board games into unique and stylish jewel boxes, combining nostalgia with functionality.
Selecting the perfect board game is crucial for your project. Consider games with vibrant artwork and sturdy components that can be repurposed into a beautiful jewel box.
Before diving into the project, gather all necessary materials such as tools, paints, and embellishments. This preparation will streamline the crafting process and enhance the final product.
Having the right tools at hand is essential for a successful transformation. Basic tools like scissors, glue, and paintbrushes will help you achieve a polished look.
Choosing the right paints and finishes can elevate your jewel box's aesthetic. Consider using acrylic paints for vibrant colors and sealants for a lasting finish.
Incorporating decorative elements into your jewel box can truly bring it to life and reflect your personal style. Think of these embellishments as the icing on the cake; they can transform a simple structure into a stunning piece of art. You might want to explore options like stickers, beads, fabric, or even natural elements like dried flowers. Each of these can add a unique flair to your creation.
For instance, if you’re a fan of a particular color scheme or theme, you can use thematic stickers that resonate with your interests. Imagine adorning your jewel box with whimsical stickers of your favorite characters or symbols. Alternatively, fabric pieces can be glued on the interior to create a soft lining for your jewelry, ensuring that your treasures are both stylishly stored and protected.
Moreover, if you're feeling extra crafty, consider creating your own decorative elements. This could be as simple as painting small rocks or crafting beads from polymer clay. These personal touches not only enhance the aesthetic but also add a story to your jewel box. You could even incorporate upcycled materials, such as old jewelry or buttons, giving your box a vintage charm.
To help you visualize your options, here’s a quick overview of popular decorative elements:
| Element | Description | Best Use |
|---|---|---|
| Stickers | Colorful designs that can be easily applied. | Exterior decoration or interior lining. |
| Fabric | Soft materials that add texture. | Lining for protection or exterior embellishment. |
| Beads | Small decorative pieces that can be strung or glued. | Accent details on edges or as drawer pulls. |
| Dried Flowers | Natural elements that add a rustic touch. | Exterior decoration for a whimsical feel. |
Ultimately, the goal is to create a jewel box that not only serves a functional purpose but also tells a story. So, let your imagination run wild, and don’t be afraid to experiment with different combinations of decorative elements!
Adding personal touches is what makes your jewel box truly special. Explore various design ideas and customization techniques to make it uniquely yours.
Integrating photos or cherished mementos into your design can create a sentimental value. Discover ways to incorporate these elements seamlessly into your jewel box.
Selecting a cohesive color palette will enhance the overall design. Explore color theory and trends to find the perfect combination that complements your board game's original design.
- What type of board games are best for this project? Games with sturdy components and vibrant artwork work best.
- Do I need special tools to create a jewel box? Basic crafting tools like scissors, glue, and paintbrushes are sufficient.
- Can I use any type of paint? Acrylic paints are recommended for their vibrant colors and durability.
- How can I personalize my jewel box? Incorporate photos, mementos, and decorative elements that reflect your style.
Creating the Jewel Box Structure
When it comes to crafting your jewel box from an old board game, the first step is to focus on the structure. This is where the magic happens! You want to ensure that your new creation is not only visually appealing but also functional and sturdy enough to hold your precious items. Start by carefully disassembling the board game. If you’re working with a classic like Monopoly or Scrabble, you’ll find that the box itself can serve as the perfect foundation for your jewel box. Use a utility knife or scissors to remove any unnecessary components, but be cautious—safety first!
Next, consider how you want to organize the interior of your jewel box. You might want to create compartments to separate rings, necklaces, and other trinkets. To do this, you can use the game pieces or even the cards from the game. For instance, if you have a game with small plastic tokens, they can be repurposed as dividers. Just imagine how fun it would be to open your jewel box and see those nostalgic pieces, each holding a special memory!
After you’ve planned your layout, it’s time to start assembling the structure. Here’s a simple guide to follow:
- Base Layer: Use the bottom of the game box as your base. If it’s damaged, consider reinforcing it with a piece of cardboard.
- Wall Dividers: Cut smaller pieces from the game board to create dividers. Secure them with glue or tape to ensure they stay in place.
- Top Cover: If the original lid is still in good shape, you can use it as the cover. If not, consider creating a new one using cardboard or even fabric for a soft touch.
Once you have the basic structure in place, take a step back and admire your work! This is the skeleton of your jewel box, and it’s crucial to make sure everything is secure before moving on to the fun part—decorating! Remember, the sturdiness of your jewel box will determine its longevity, so don’t rush through this stage. If you want to ensure that it holds up over time, consider adding a layer of varnish or sealant to protect the surface from wear and tear.
In summary, creating the jewel box structure is about combining creativity with functionality. By carefully disassembling your board game and thoughtfully assembling the components, you’ll create a unique storage solution that not only looks great but also serves a purpose. Now that you have a solid foundation, the next step is to personalize your jewel box, making it a true reflection of your style!
Q: What type of board games work best for this project?
A: Look for games with sturdy boxes and vibrant artwork. Classic games like Monopoly, Scrabble, or even vintage games with interesting designs can be great choices.
Q: Can I use any materials to decorate my jewel box?
A: Absolutely! You can use paints, stickers, fabric, beads, and even photos. The sky's the limit when it comes to personalizing your jewel box.
Q: How do I ensure the compartments are secure?
A: Use strong adhesive glue or tape to secure your dividers. You might also consider reinforcing them with additional layers of cardboard for extra stability.
Q: Is it necessary to use a sealant?
A: While it's not mandatory, applying a sealant can help protect your jewel box from damage, especially if you plan to use it frequently.
Personalizing Your Jewel Box
When it comes to crafting your jewel box, personalization is the secret ingredient that transforms a simple storage solution into a cherished keepsake. Think of your jewel box as a canvas, waiting for your unique touch to bring it to life! Whether it's through colors, textures, or personal mementos, the possibilities are endless. So, how do you infuse your personality into this project? Let's explore some creative ideas!
First off, consider the design elements that speak to you. Are you drawn to a bohemian style with lots of vibrant colors and textures? Or perhaps a minimalist approach with clean lines and subtle hues? Whichever direction you choose, the key is to ensure your jewel box reflects your personal aesthetic. You might want to incorporate elements like fabric swatches, painted designs, or even decoupage techniques using old magazine cutouts or scrapbook paper. These techniques not only add personality but also create a visually stunning piece.
Another fantastic way to personalize your jewel box is by incorporating photos and mementos. Imagine opening your jewel box and being greeted by snapshots of your favorite memories or small tokens from special occasions. You can easily integrate these elements by using a collage technique on the inside lid of the box or even on the sides. Secure your photos with a strong adhesive and consider using a protective sealant to ensure they stay safe and vibrant over time.
If you’re unsure where to start, here’s a simple approach to get your creative juices flowing:
- Choose a Theme: Decide on a theme that resonates with you—be it travel, nature, or a favorite color scheme.
- Collect Your Materials: Gather photos, decorative paper, and any embellishments that fit your theme.
- Arrange and Adhere: Play around with the layout before sticking anything down. Once satisfied, adhere your pieces securely.
Choosing a color palette is also essential in personalizing your jewel box. A cohesive color scheme can elevate the overall look and feel of your project. You might want to consider colors that complement the original artwork of your board game or perhaps colors that evoke specific emotions for you. For instance, soft pastels can create a calming effect, while bold hues can energize your space. Utilize color theory to guide your choices, ensuring that the colors work harmoniously together.
Finally, don’t forget about the decorative elements! Adding embellishments like beads, buttons, or even small charms can give your jewel box that extra flair. You can create a textured look by gluing on fabric patches or using stencils to paint intricate designs. The beauty of crafting is that it allows you to express yourself, so let your imagination run wild!
Q: Can I use any board game for this project?
A: Absolutely! Just ensure the game has sturdy components and artwork that you love. The more vibrant and interesting, the better!
Q: What if I'm not crafty? Can I still personalize my jewel box?
A: Of course! Personalization doesn’t have to be complex. You can simply choose colors and decorations that resonate with you, or even use pre-made stickers and embellishments to make the process easier.
Q: How do I keep my photos safe inside the jewel box?
A: Use a protective sealant over your photos, or consider laminating them before adhering them to your box. This will help preserve them from wear and tear.
Incorporating Photos and Mementos
Incorporating photos and mementos into your jewel box design is a fantastic way to add a personal touch that tells your unique story. Imagine opening your jewel box and being greeted by cherished memories captured in photographs or small tokens that represent significant moments in your life. This transformation not only enhances the aesthetic appeal of your creation but also adds a layer of emotional value that makes your jewel box truly one-of-a-kind.
To seamlessly integrate these elements, you might consider the following approaches:
- Photo Collages: Create a small collage of your favorite snapshots and adhere it to the inside lid of the box. This way, every time you open it, you’ll be reminded of those joyful moments.
- Memorable Tokens: Incorporate small items such as ticket stubs, postcards, or even dried flowers. These can be placed in a compartment within the box or glued onto the interior surfaces.
- Decorative Frames: Use mini frames to display your photos. This not only protects the images but also adds a stylish touch that complements the overall design of your jewel box.
When selecting photos and mementos, think about the theme you want to convey. Are you aiming for a nostalgic feel with sepia-toned pictures, or perhaps a vibrant and lively vibe with colorful snapshots? The choice of imagery can significantly impact the overall aesthetic of your jewel box. You might even consider using a color palette that aligns with the original design of your board game, creating a cohesive look that ties everything together.
Additionally, don’t hesitate to experiment with different layouts. You could arrange your photos in a linear fashion, or go for a more abstract, scattered approach. The key is to ensure that the arrangement feels organic and reflects your personality. Remember, there are no strict rules in crafting; it’s all about what resonates with you!
Lastly, consider adding a protective layer over your photos and mementos. A clear sealant or a piece of glass can help preserve them, ensuring that your jewel box remains a treasure trove of memories for years to come. By thoughtfully incorporating photos and mementos, you’re not just creating a storage solution; you’re crafting a heartfelt keepsake.
Q: What types of photos work best for my jewel box?
A: Any photos that hold sentimental value to you work great! Think about family gatherings, vacations, or milestones.
Q: Can I use digital photos?
A: Absolutely! You can print digital photos in various sizes to fit your design perfectly.
Q: How do I ensure my mementos are preserved?
A: Use a clear sealant or laminate your mementos to protect them from wear and tear.
Choosing a Color Palette
When it comes to creating your one-of-a-kind jewel box from an old board game, choosing the right color palette is essential. The colors you select not only enhance the aesthetic appeal but also reflect your personal style and the nostalgia associated with the game. Think about how the original colors of the board game resonate with you. Do you want to maintain that vintage vibe, or are you aiming for a modern twist? This decision will guide your entire design process.
To kick things off, consider the emotional impact of colors. Each color evokes different feelings and associations. For example, blue often symbolizes calmness and tranquility, while red can ignite passion and energy. You might want to create a jewel box that feels serene and inviting or one that sparks joy and excitement. Understanding color psychology can help you make choices that resonate with your intended vibe.
Another important aspect is color harmony. This concept refers to how well colors work together. You can choose a monochromatic scheme, which uses variations of a single color, or opt for complementary colors that sit opposite each other on the color wheel, creating a vibrant contrast. For instance, pairing a rich blue with a warm orange can create a striking visual impact. Additionally, you can explore analogous colors, which are adjacent on the wheel, such as blue, green, and teal, for a more harmonious look.
To help you visualize your options, consider creating a small color palette swatch. You can use paint samples or colored paper to arrange your chosen colors. This not only allows you to see how they interact but also helps you decide if they truly represent your vision. Here's a simple table to illustrate some popular color combinations:
| Color Scheme | Example Colors | Vibe |
|---|---|---|
| Monochromatic | Light Blue, Medium Blue, Dark Blue | Calm and Serene |
| Complementary | Blue and Orange | Vibrant and Energetic |
| Analogous | Blue, Teal, Green | Harmonious and Natural |
As you experiment with colors, don’t forget to think about how they will look with the embellishments and finishes you plan to use. For instance, if you choose a bright yellow for the base of your jewel box, consider how gold or silver accents might complement that choice. Balancing your colors with metallics or neutrals can create a polished and sophisticated look.
Lastly, remember that this is your creation! Don’t be afraid to break the rules and mix colors that you love, even if they don’t traditionally go together. Your jewel box should be a reflection of you, filled with memories and style. So grab those paints, unleash your creativity, and let your color palette tell your story!
- What type of paint should I use for my jewel box? Acrylic paints are recommended due to their vibrant colors and quick drying time.
- Can I use fabric or paper to decorate my jewel box? Absolutely! Fabric and paper can add unique textures and patterns to your design.
- How do I seal my jewel box after painting? Use a clear sealant spray or mod podge to protect your artwork and give it a finished look.
Frequently Asked Questions
- What type of board games are best for creating a jewel box?
When choosing a board game for your crafty jewel box, look for those with vibrant artwork and sturdy components. Games like Monopoly or Scrabble are popular choices because they often have colorful designs and durable pieces that can be easily repurposed.
- Do I need any special tools to start this project?
No need to go out and buy fancy tools! Basic crafting tools like scissors, glue, and paintbrushes will do the trick. Just make sure you have everything ready before you start, so you won’t get stuck halfway through your project.
- Can I use any type of paint for my jewel box?
Acrylic paints are your best friends here! They offer vibrant colors and dry quickly, making them perfect for crafting. Plus, you can seal them with a clear finish to ensure your masterpiece lasts for years to come.
- How can I personalize my jewel box?
Personalizing your jewel box is where the fun begins! You can add decorative elements like stickers, beads, or even fabric that reflects your style. Don't forget to incorporate photos or mementos to give it that special touch!
- What if I want to incorporate photos into my design?
Integrating photos into your jewel box can create a sentimental value. You can use decoupage techniques to apply them seamlessly or even create compartments specifically designed to hold your cherished memories.
- How do I choose a color palette for my project?
Choosing a color palette can greatly enhance your jewel box's design. Consider looking into color theory or current trends to find combinations that complement the original design of your board game. A cohesive palette will make your jewel box pop!


