Using DIY Paper Wreaths for Your Wall Decor
Have you ever walked into a room and felt that something was missing? Perhaps the walls seemed a bit bare, or the decor felt uninspired. Well, let me introduce you to the enchanting world of DIY paper wreaths! These delightful creations not only add a pop of color and texture to your space but also serve as a canvas for your creativity. Imagine crafting a stunning wreath that reflects your personal style, welcoming guests with a unique flair. Whether you’re a seasoned crafter or just starting, the beauty of paper wreaths lies in their versatility and the opportunity to express yourself.
Paper wreaths can fit any theme, season, or occasion. Want to celebrate spring with vibrant florals? Or perhaps create a cozy autumn vibe with warm hues and rustic elements? The possibilities are endless! Plus, they’re relatively easy to make, requiring just a few materials and some imagination. In this article, we’ll explore the essential techniques, materials, and decoration ideas to help you create your very own masterpiece.
But before we dive into the crafting process, let’s take a moment to appreciate how these wreaths can transform your living space. Picture this: you walk into your home after a long day, and there it is, your beautifully crafted paper wreath hanging on the wall, radiating warmth and personality. It’s not just decor; it’s a reflection of you! So grab your scissors, unleash your creativity, and let’s get started on this exciting journey of crafting DIY paper wreaths that will undoubtedly elevate your wall decor.
To create a stunning paper wreath, you first need to gather the right materials. Choosing the best paper types and tools is crucial for achieving beautiful results. Here are some materials you might consider:
- Cardstock: This sturdy paper is perfect for creating a solid base for your wreath.
- Patterned Paper: Use various colors and patterns to add depth and interest to your design.
- Adhesives: Hot glue guns, double-sided tape, or glue sticks are essential for assembling your wreath.
- Embellishments: Ribbons, faux flowers, and other decorative items can personalize your creation.
By carefully selecting these materials, you’ll set yourself up for success in crafting a wreath that not only looks good but also complements your home decor beautifully.
Now that you have your materials ready, let’s delve into the fundamental techniques that will help you craft your paper wreaths. Understanding how to cut, fold, and assemble your paper pieces is essential for creating stunning designs with ease.
Mastering different cutting techniques can significantly impact the appearance of your wreath. Here are a few methods you might explore:
Using scissors might seem straightforward, but there are some tricks to achieve clean, precise cuts. Hold the scissors comfortably and use smooth, steady motions. This will help you avoid jagged edges and make your wreath look polished. Remember, the key is to practice; the more you cut, the better you’ll get!
If you’re looking to create intricate designs, consider investing in a die-cutting machine. These machines can cut shapes and patterns with precision, saving you time and effort. When choosing a machine, consider factors like size, compatibility with different materials, and ease of use. With the right machine, you can take your paper crafting to the next level!
Assembling your paper wreath is where your creativity truly shines. Start by arranging your cut pieces in a way that appeals to you before gluing them down. This allows you to play around with colors and shapes until you find the perfect combination. Remember, there’s no right or wrong way to do this—let your imagination run wild!
Once your wreath is assembled, it’s time to add those personal touches that make it uniquely yours. Think about incorporating decorative elements such as ribbons, flowers, and seasonal accents. These embellishments can elevate your paper creations and make them stand out even more.
Incorporating seasonal themes into your wreath can keep your decor fresh and exciting. For spring, think pastel colors and floral patterns. Summer might call for bright hues and tropical motifs, while fall can bring in warm tones and rustic elements. Winter wreaths can be adorned with snowflakes and evergreen accents. Each season offers a new opportunity to refresh your decor!
Finally, don’t forget to personalize your wreath! Consider customizing your design with colors, patterns, and meaningful elements that reflect your style. Adding a family name or a favorite quote can make your wreath even more special. After all, it’s your creation, so let it tell your story!
Q: What materials do I need to start making a paper wreath?
A: You’ll need cardstock, patterned paper, adhesives, and any embellishments you'd like to use, such as ribbons or faux flowers.
Q: Can I use recycled paper for my wreath?
A: Absolutely! Recycled paper is a fantastic option that adds character and is eco-friendly.
Q: How long does it take to make a paper wreath?
A: The time can vary based on the complexity of your design, but most wreaths can be completed in a few hours.
Q: Where can I hang my paper wreath?
A: Paper wreaths look great on doors, walls, or above mantels. Just make sure they’re in a spot where they can be appreciated!

Choosing the Right Materials
When it comes to crafting beautiful DIY paper wreaths, the choice of materials is paramount. Think of your wreath as a canvas; the materials you select will determine not only the aesthetic but also the durability of your creation. So, what should you look for? First and foremost, consider the type of paper. There are various options available, each offering unique textures and colors that can dramatically affect the final look of your wreath.
One of the most popular choices is cardstock. This heavyweight paper is perfect for creating sturdy wreaths that can withstand a bit of wear and tear. It comes in a multitude of colors and finishes, allowing you to pick something that aligns perfectly with your home decor. If you're aiming for something more whimsical or vibrant, patterned paper is an excellent option. Think floral prints for spring or rich, warm tones for fall. The patterns can add depth and interest, making your wreath truly stand out.
Another crucial aspect to consider is the adhesives you'll use. A strong adhesive is essential for ensuring that your wreath holds together beautifully. Hot glue guns are a favorite among crafters for their quick-drying capabilities, but don't overlook options like double-sided tape or liquid glue for more delicate work. Each adhesive has its strengths and weaknesses, so choose based on the materials you’re working with and the intricacy of your design.
Additionally, think about incorporating embellishments like ribbons, faux flowers, or even seasonal accents. These decorative elements can transform a simple paper wreath into a stunning piece of art. For example, adding a vibrant ribbon can not only enhance the visual appeal but also serve as a hanging mechanism. When selecting embellishments, ensure they complement the primary materials you’ve chosen, creating a harmonious and cohesive look.
To summarize, here are the key materials you should consider when crafting your paper wreath:
- Cardstock: For durability and a wide range of colors.
- Patterned Paper: To add visual interest and seasonal themes.
- Adhesives: Choose between hot glue, double-sided tape, or liquid glue based on your project needs.
- Embellishments: Ribbons, flowers, and other decorative elements to personalize your wreath.
By carefully selecting your materials, you'll set the stage for a stunning DIY paper wreath that not only looks fantastic but also reflects your personal style. So, gather your supplies, unleash your creativity, and let your wreath-making journey begin!

Basic Techniques for Paper Wreaths
Creating a stunning DIY paper wreath is not just about picking the right materials; it’s also about mastering some basic techniques that will make your crafting experience enjoyable and rewarding. Whether you're a seasoned crafter or a complete novice, understanding these foundational skills can elevate your wreath-making game. Let's dive into the essential techniques that will help you transform simple sheets of paper into beautiful wall decor.
First up, we have cutting techniques. This is where your journey begins. The way you cut your paper can dramatically affect the overall look of your wreath. Think of it like sculpting; the cleaner your cuts, the better your final piece will look. You can use various tools such as scissors, craft knives, or even die-cutting machines. Each has its own set of advantages and can produce different effects. For example, scissors are great for freehand designs, while die-cutting machines can create intricate shapes with precision.
Mastering different cutting techniques can significantly impact your wreath's appearance. Here, we’ll explore the various methods you can employ:
When using scissors, grip is everything. Hold the scissors close to the pivot point for better control, and use smooth, even strokes to achieve clean cuts. For more complex shapes, consider using decorative scissors that create unique edges, adding an extra flair to your design. Remember, practice makes perfect; the more you cut, the better you'll become!
If you want to take your wreath-making to the next level, investing in a die-cutting machine is a game-changer. These machines can cut through multiple layers of paper at once, allowing you to create intricate designs with ease. When selecting a die-cutting machine, consider factors like the size of the machine, the types of dies it can use, and its compatibility with various materials. Additionally, familiarize yourself with the machine's settings for optimal results. Here’s a quick comparison of popular die-cutting machines:
| Machine | Size | Ease of Use | Price Range |
|---|---|---|---|
| Silhouette Cameo | 12 inches | Moderate | $200-$300 |
| Cricut Maker | 12 inches | Easy | $300-$400 |
| Sizzix Big Shot | 6 inches | Easy | $100-$200 |
Once you've mastered cutting, the next step is assembling your wreath. This is where your creativity can really shine. Start by laying out your cut pieces in a way that pleases your eye. Don’t be afraid to experiment with different arrangements before committing to a final design. Use a hot glue gun or double-sided tape to secure your pieces together. Make sure to apply pressure while the adhesive sets to ensure a strong bond.
Finally, remember that practice is key. Each wreath you create will be a learning experience. As you gain confidence in your cutting and assembling techniques, you’ll discover new ways to express your creativity. So grab your materials, unleash your imagination, and let the crafting begin!
Q: What type of paper is best for making wreaths?
A: Cardstock is often recommended for its sturdiness, but patterned paper can add flair. Consider using a mix for variety!
Q: Can I use recycled paper for my wreath?
A: Absolutely! Recycled paper not only adds texture but is also eco-friendly. Get creative with old magazines or wrapping paper!
Q: How do I hang my paper wreath?
A: You can use a wreath hanger, command strips, or even a decorative ribbon tied to a door or wall hook.

Cutting Techniques
When it comes to crafting stunning paper wreaths, mastering the art of cutting techniques is crucial. The precision of your cuts can significantly influence the overall look of your wreath. Think of cutting as the foundation of your design; without a solid base, everything else can crumble. Whether you're a seasoned crafter or a newbie, understanding the various cutting methods available will elevate your paper wreath game to new heights.
One of the most common tools in any crafter's arsenal is the trusty scissors. While they may seem simple, using scissors effectively requires a bit of finesse. To achieve clean, precise cuts, hold the scissors with a comfortable grip, ensuring your thumb is in the top hole and your fingers are in the bottom. This grip allows for better control. When cutting intricate shapes, don’t rush—take your time to follow the lines carefully. If you find yourself struggling with more complex cuts, it might be beneficial to use a craft knife instead. A craft knife provides the precision needed for detailed designs, especially when paired with a cutting mat to protect your surfaces.
For those who want to take their cutting skills to the next level, die-cutting machines are an excellent investment. These machines can create intricate designs with ease, allowing you to produce uniform shapes quickly. Imagine being able to cut out dozens of the same flower shape in a matter of minutes! When selecting a die-cutting machine, consider factors such as the types of materials it can handle, its size, and whether it’s manual or electronic. Popular brands include the Cricut and Sizzix, both of which have a variety of dies available for different themes and styles. Remember, investing in a good die-cutting machine can save you time and enhance the quality of your cuts.
Here’s a quick comparison of the cutting methods:
| Cutting Method | Pros | Cons |
|---|---|---|
| Scissors | Affordable, easy to use | Time-consuming for intricate designs |
| Craft Knife | Precision cutting, great for details | Requires a steady hand, safety concerns |
| Die-Cutting Machine | Speedy, consistent results | Higher initial investment, requires space |
In conclusion, whether you choose scissors, a craft knife, or a die-cutting machine, each method has its unique advantages that can cater to your crafting needs. Experiment with different techniques to discover what works best for you. With practice, you’ll find that cutting can be both enjoyable and rewarding, paving the way for your beautiful DIY paper wreaths to come to life. So, grab your tools, and let’s get cutting!
- What type of paper is best for making wreaths? Cardstock is a popular choice due to its durability, but patterned paper can add a fun touch.
- Can I use a regular pair of scissors for detailed cuts? While you can, using a craft knife or die-cutting machine will yield better results for intricate designs.
- How do I keep my cuts straight? Use a ruler or cutting guide to help maintain straight lines, especially for geometric shapes.
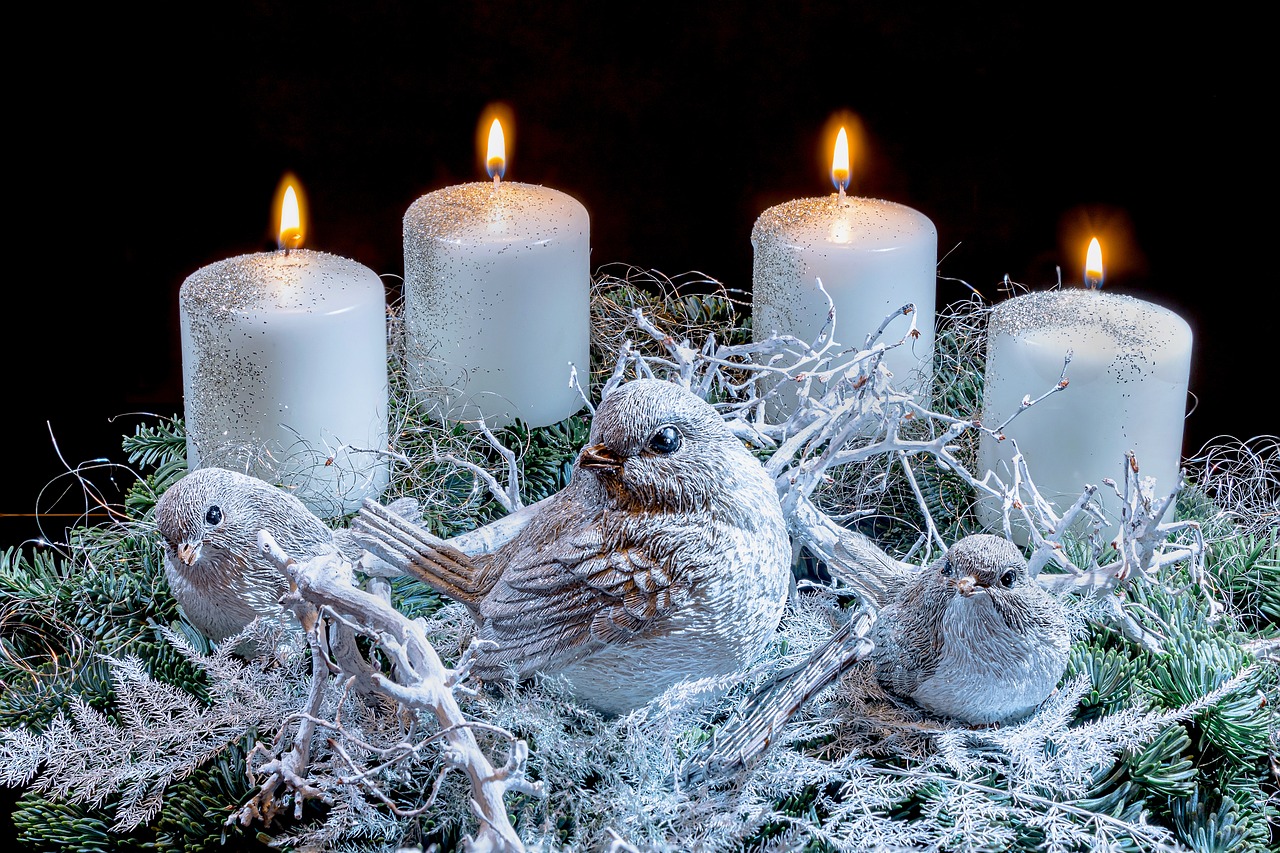
Using Scissors Effectively
When it comes to crafting beautiful DIY paper wreaths, mastering the art of using scissors is a game changer. You might think that scissors are just your average cutting tool, but with the right techniques, they can become your best friend in the world of paper crafting. First off, let's talk about grip. Holding your scissors correctly is essential for achieving clean, precise cuts. Make sure to hold them comfortably in your dominant hand, with your thumb in the top hole and your index finger in the bottom hole. This grip not only gives you better control but also reduces hand fatigue during those long crafting sessions.
Next, consider the type of scissors you are using. Different projects may require different types of scissors. For instance, if you’re working with thicker cardstock, a pair of heavy-duty scissors will make your life a lot easier. On the other hand, for more intricate designs, a pair of fine-point scissors can help you navigate those tight corners and curves. It's all about choosing the right tool for the job!
Now, let’s dive into some effective cutting techniques. One popular method is the rocking motion. Instead of moving your scissors up and down, try a gentle rocking motion as you cut. This technique allows for smoother cuts and helps you maintain control over the paper. Additionally, always cut away from your body and keep your non-dominant hand steady to avoid any accidents. Remember, safety first!
Another tip is to use a cutting mat or a sturdy surface when cutting. This not only protects your table but also provides a solid base for your cutting. If you find yourself struggling to cut straight lines, you might want to invest in a ruler. Lay it down along your cutting line to guide your scissors, ensuring a straight cut every time.
Lastly, practice makes perfect! Don’t be discouraged if your first few cuts aren’t as clean as you’d like. Take some time to practice on scrap paper. Experiment with different techniques and see what works best for you. The more you practice, the more confident you’ll become in your scissor skills, and soon enough, you’ll be cutting like a pro!
- What type of scissors should I use for paper wreaths? For most paper crafting, a good pair of standard scissors will suffice. However, for thicker materials, consider using heavy-duty scissors, and for intricate designs, fine-point scissors are ideal.
- How can I improve my cutting technique? Practice is key! Try using the rocking motion while cutting, and always ensure you have a steady grip on your scissors. Cutting on a solid surface can also help improve your technique.
- Are there any safety tips I should follow while using scissors? Always cut away from your body, keep your non-dominant hand steady, and ensure your workspace is clear of clutter to avoid accidents.
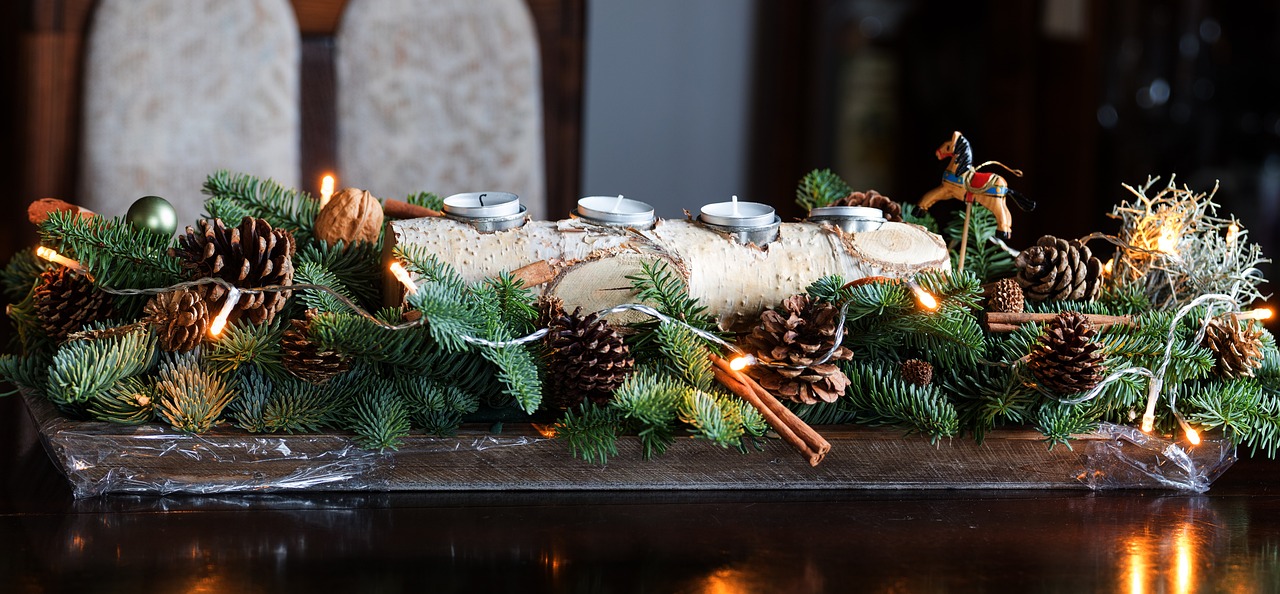
Die-Cutting Machines
When it comes to crafting stunning paper wreaths, are a game changer. These machines allow you to create intricate designs with precision and ease, turning a simple crafting project into a professional-looking masterpiece. Imagine being able to cut out delicate flowers, leaves, or even intricate shapes that would be nearly impossible to achieve with scissors alone. With a die-cutting machine, the possibilities are endless!
There are various types of die-cutting machines available, ranging from manual to electronic models. Each type has its own set of features and advantages. For instance, manual die-cutters require you to crank a handle to pass the paper through the die, which can be satisfying and gives you a sense of control. On the other hand, electronic machines can cut multiple layers of paper at once and often come with software that allows you to design your own shapes. This flexibility is particularly useful for creating personalized wreaths that reflect your unique style.
When selecting a die-cutting machine, consider the following factors:
- Size: Ensure that the machine can accommodate the size of paper you plan to use. Some machines are compact and portable, while others are larger and designed for more extensive projects.
- Compatibility: Check if the machine is compatible with various materials, including cardstock, felt, and even thin wood. This versatility can expand your crafting options.
- Ease of Use: Look for machines that offer user-friendly features, especially if you're a beginner. Some models come with tutorials or pre-set designs to help you get started.
Once you've chosen the right machine, it's essential to familiarize yourself with its operation. Most die-cutting machines come with a manual that provides detailed instructions on how to load materials, set up dies, and execute cuts. Practice is key! Start with simple shapes before moving on to more complex designs. You’ll find that as you gain confidence, your creativity will flourish.
One of the biggest advantages of using a die-cutting machine is the time-saving aspect. Instead of spending hours cutting out shapes by hand, you can quickly produce multiple pieces in a fraction of the time. This efficiency allows you to focus on the fun part—assembling and decorating your wreath!
In conclusion, investing in a die-cutting machine can elevate your DIY paper wreath projects to new heights. With the precision and versatility these machines offer, you can create beautiful, intricate designs that will make your wreaths truly stand out. So, whether you’re making a festive wreath for the holidays or a simple floral design for spring, a die-cutting machine is a fantastic tool to have in your crafting arsenal.

Assembling Your Wreath
Assembling your paper wreath is where your creativity truly comes to life! This is the stage where all those beautiful paper pieces come together, transforming your individual elements into a stunning work of art. The process can be as enjoyable as the final product itself. To start, gather all your cut pieces and lay them out in a way that pleases your eye. It’s like putting together a puzzle, but with the added bonus of being able to create your own picture!
Begin by selecting a sturdy base for your wreath. You can use a variety of materials such as a foam ring, a cardboard circle, or even a wire frame. The choice of base will depend on the style of your wreath and how heavy the paper pieces are. For instance, if you’re using heavier cardstock, a foam ring might provide the support you need. Once you’ve chosen your base, it’s time to start attaching your paper pieces.
Using a hot glue gun is often the best method for assembly, as it provides a strong bond and dries quickly. However, if you prefer a less permanent solution, double-sided tape or glue dots can work well too. Start by applying a small amount of glue to the back of your first piece and press it firmly onto the base. It’s best to work from the outside in, layering your pieces as you go. This technique not only adds depth but also creates a visually appealing design.
As you assemble your wreath, don’t hesitate to play around with the arrangement of your pieces. Sometimes, a piece that looks out of place in one spot may find its perfect home in another. Embrace the process! If you find certain areas looking sparse, consider adding smaller pieces or even some decorative elements like glitter or sequins for added flair. Remember, there are no strict rules in crafting; it’s all about what feels right to you.
Here’s a quick overview of the assembly steps:
- Choose your wreath base (foam, cardboard, or wire).
- Gather all your cut paper pieces.
- Use hot glue or double-sided tape to attach pieces, starting from the outside.
- Layer and arrange pieces until you achieve your desired look.
- Add embellishments for extra charm.
Once you’ve finished assembling your wreath, take a step back and admire your handiwork. You might want to tweak a few pieces here and there until it feels just right. After all, this wreath is a reflection of your personal style! Don’t forget to let your wreath dry completely before hanging it up. A little patience goes a long way in ensuring that your creation stays intact and beautiful for a long time to come.
Incorporating your wreath into your home decor is the final touch. Whether you choose to hang it on a door, display it on a wall, or even use it as a centerpiece, your paper wreath will undoubtedly add a unique charm to your space. So gather your materials, unleash your creativity, and enjoy the delightful process of assembling your very own paper wreath!
Q: What materials do I need to assemble a paper wreath?
A: You’ll need a wreath base (foam, cardboard, or wire), cut paper pieces, glue (hot glue or double-sided tape), and decorative embellishments if desired.
Q: How long does it take to assemble a paper wreath?
A: The time can vary based on complexity, but typically, you can assemble a wreath in 1-2 hours.
Q: Can I use recycled paper for my wreath?
A: Absolutely! Recycled paper adds a unique touch and is an eco-friendly option.
Q: How do I hang my paper wreath?
A: You can use a wreath hanger, command hooks, or even a ribbon tied to the top for easy hanging.
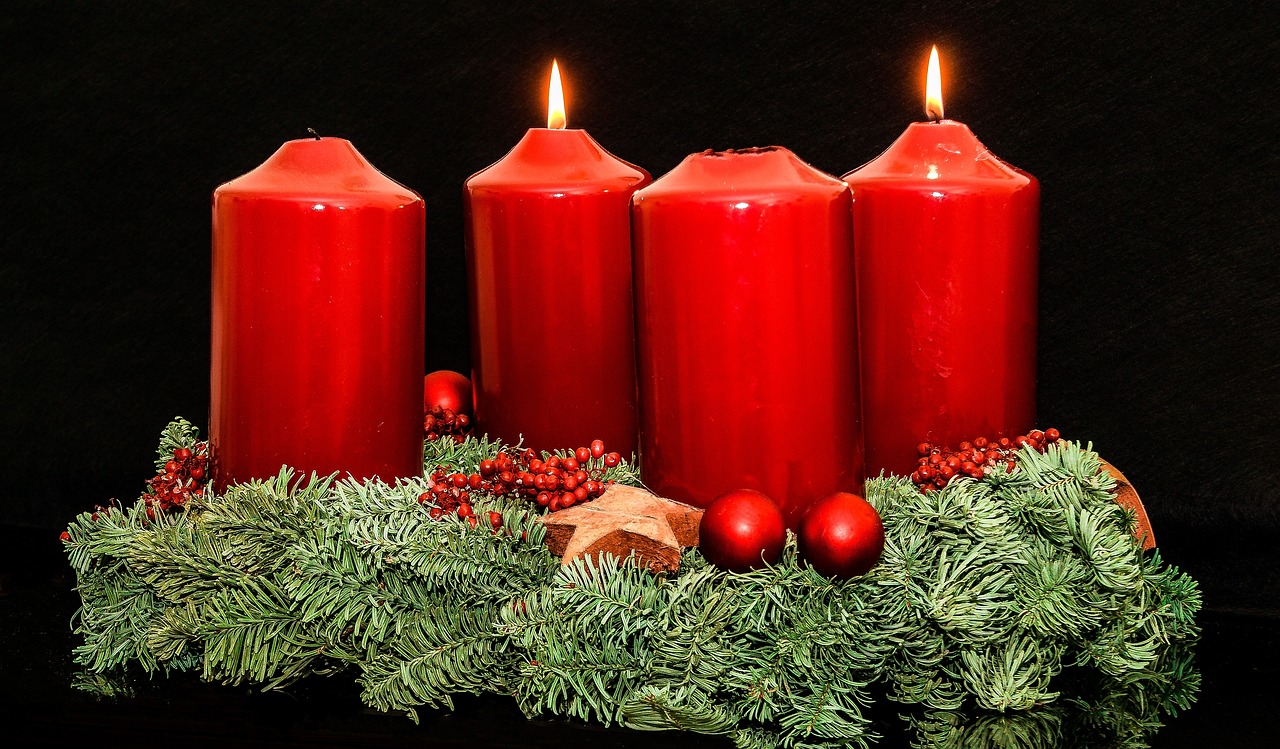
Decorating Your Paper Wreath
Decorating your paper wreath is where the magic truly happens! It's the moment when your creativity takes flight and your personal style shines through. The beauty of a DIY paper wreath lies not just in its structure but in the unique embellishments that you choose to adorn it with. Think of your wreath as a blank canvas, waiting for your artistic touch. Whether you prefer a minimalist approach or a more elaborate design, the options are endless.
One of the most exciting aspects of decorating your wreath is the ability to change it with the seasons. For instance, in spring, you might want to incorporate soft pastel colors and floral accents, while in the fall, rich oranges and browns with leaves can create a warm and inviting feel. Here are some ideas to consider:
- Ribbons: A beautiful ribbon can add a touch of elegance to your wreath. Consider using wired ribbons for a fuller look or sheer ribbons for a delicate touch.
- Flowers: Paper flowers can be crafted from various types of paper, adding dimension and color. You can create simple daisy-like flowers for a cheerful vibe or intricate roses for a more sophisticated look.
- Seasonal Accents: Incorporate elements that reflect the current season. Think pinecones and berries for winter, or seashells for a coastal summer theme.
Remember, the key to a stunning wreath is balance. Too many embellishments can overwhelm your design, while too few might leave it looking sparse. Aim for a harmonious blend of colors, textures, and shapes. You can even create a focal point by clustering your decorations in one area, drawing the eye and making your wreath truly stand out.
As you decorate, don’t be afraid to experiment! Mixing different materials like fabric, twine, and even natural elements can create a unique look that reflects your personality. And if you’re feeling adventurous, try layering your decorations. For example, place a cluster of paper flowers atop a bed of greenery to create depth and interest.
Finally, think about how you’ll display your wreath. Will it hang on your front door, or perhaps above the mantelpiece? The placement can influence how you decorate it. A wreath meant for outdoors might need sturdier materials to withstand the elements, while an indoor wreath can be more delicate and intricate.
Q: How do I secure the decorations on my wreath?
A: Using a hot glue gun is often the best method for securing decorations. It provides a strong bond and dries quickly, allowing you to continue crafting without long waits.
Q: Can I use non-paper materials in my paper wreath?
A: Absolutely! Feel free to incorporate elements like fabric, ribbons, or even small ornaments to enhance your design. Just make sure they complement the paper elements.
Q: How do I store my wreath after the season ends?
A: To keep your wreath in good condition, store it in a cool, dry place away from direct sunlight. Consider using a box or wrapping it in tissue paper to avoid crushing any delicate decorations.
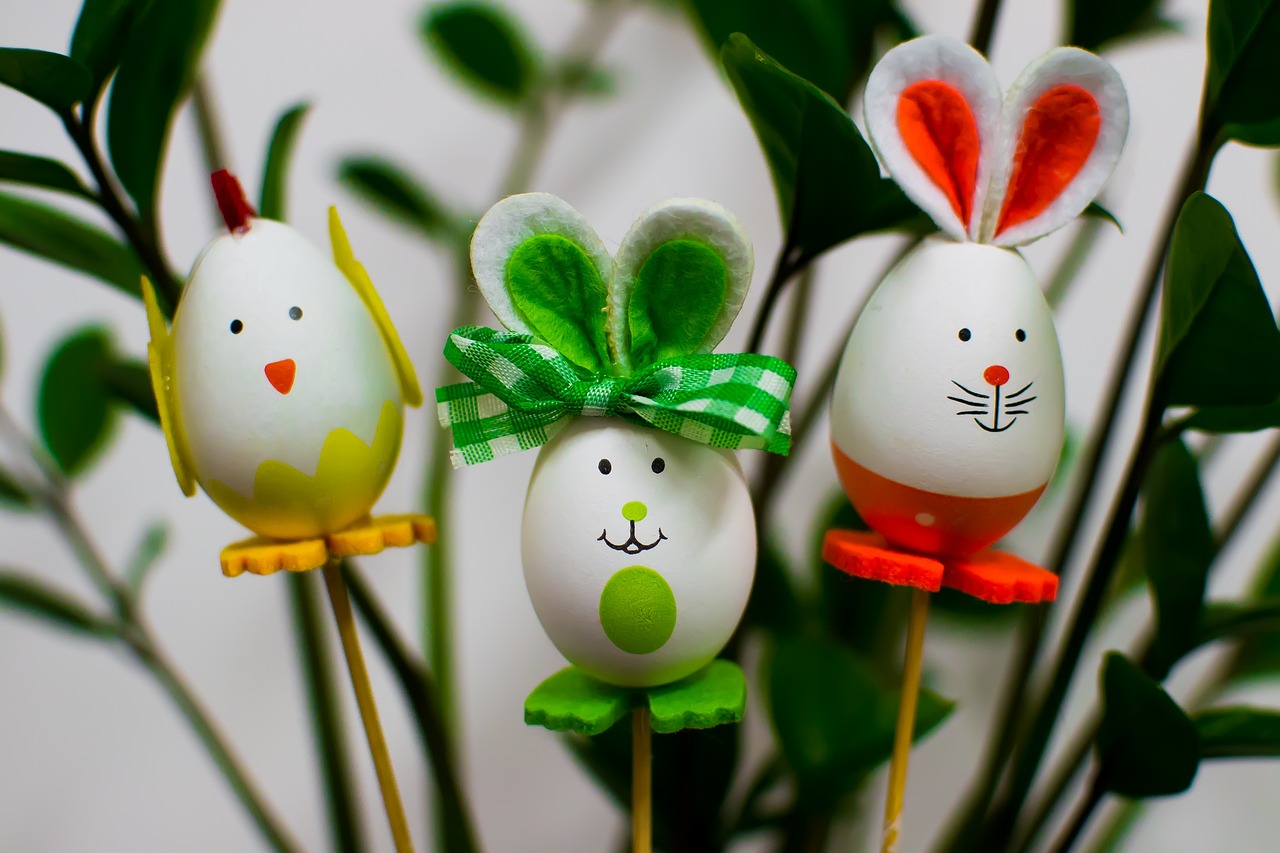
Seasonal Themes
One of the most delightful aspects of crafting DIY paper wreaths is the opportunity to celebrate the changing seasons. Each season brings its own unique colors, textures, and themes that can be beautifully reflected in your wreath designs. Imagine walking into your home and being greeted by a vibrant spring wreath adorned with blooming flowers or a cozy fall wreath that captures the essence of autumn leaves. The possibilities are endless, and the best part? You can easily switch them out to keep your decor fresh and engaging!
When it comes to seasonal themes, consider the following ideas to inspire your creativity:
- Spring: Embrace the freshness of spring with pastel colors and floral patterns. Use shades of pink, yellow, and green, and incorporate elements like paper flowers, butterflies, and even small bird cutouts to evoke a sense of renewal.
- Summer: Capture the essence of summer with bright, bold colors. Think of the beach and sunshine! Incorporate elements such as seashells, sunflowers, or even tropical leaves to give your wreath a vibrant, sunny vibe.
- Fall: Fall is all about warm, earthy tones. Use oranges, browns, and deep reds to create a cozy atmosphere. You can add paper pumpkins, acorns, and even a touch of burlap to give your wreath that rustic autumn feel.
- Winter: For winter, think of serene whites and icy blues. Create a wreath that resembles a winter wonderland with snowflakes, pinecones, and perhaps a touch of glitter to mimic the sparkle of frost.
Each of these themes can be tailored to reflect your personal style. For instance, if you have a love for nautical decor, you might combine summer elements with a blue and white color scheme, incorporating paper boats or anchors. Alternatively, if you’re drawn to a vintage aesthetic, consider using aged paper or lace to add a touch of nostalgia to your seasonal wreaths.
Moreover, don’t hesitate to mix and match elements from different seasons. A wreath that blends spring florals with summer brightness can create a unique statement piece that stands out. The key is to let your imagination run wild and to enjoy the process of creating something that not only beautifies your space but also resonates with your personal style.
In addition to colors and themes, think about the shapes and sizes of your wreaths. A larger wreath can serve as a stunning focal point, while smaller wreaths can be grouped together for a charming clustered effect. The versatility of DIY paper wreaths allows you to experiment with various designs, ensuring that your decor remains dynamic and engaging throughout the year.
So, as you dive into the world of seasonal themes for your DIY paper wreaths, remember that the joy lies in the details. Personalize each wreath with elements that speak to you, and don’t shy away from trying new things. Whether you’re crafting for yourself or as a gift for someone special, your creativity will shine through, making each wreath a cherished piece of art in your home.
Q: How long does it take to create a paper wreath?
A: The time it takes to create a paper wreath can vary based on the complexity of the design and your crafting speed. Generally, you can expect to spend anywhere from 1 to 3 hours on a single wreath.
Q: What types of paper work best for wreath making?
A: Cardstock is a popular choice due to its sturdiness, but patterned paper, scrapbook paper, and even old book pages can add unique textures and visual interest to your wreaths.
Q: Can I use my paper wreaths outdoors?
A: While paper wreaths are primarily designed for indoor use, you can use weather-resistant materials or seal them with a protective spray if you want to hang them outside. However, be cautious about prolonged exposure to moisture and sunlight.
Q: How can I store my paper wreaths when not in use?
A: To keep your paper wreaths in good condition, store them in a cool, dry place, ideally in a box or container to prevent crushing or bending.
Personalizing Your Design
When it comes to crafting a paper wreath, personalization is where you can truly let your creativity shine. Imagine walking into your home and being greeted by a wreath that not only looks stunning but also tells a story about you and your style. Personalizing your design is like adding a sprinkle of magic; it transforms a simple decoration into a heartfelt expression of who you are. So, how can you elevate your paper wreath from generic to extraordinary? Let’s dive into some exciting ideas!
First, consider the color palette. Colors evoke emotions and set the mood of your space. If you want a warm, inviting atmosphere, think about using earthy tones or soft pastels. On the other hand, if you’re aiming for a vibrant, energetic vibe, bold colors can do the trick! Don’t be afraid to mix and match; sometimes the most unexpected combinations create the most striking designs. For example, pairing deep navy with bright coral can create a stunning contrast that draws the eye.
Next, think about incorporating patterns and textures. You can use patterned paper to add depth and interest to your wreath. Floral prints, stripes, or polka dots can all bring a unique flair to your creation. To add even more dimension, consider layering different types of paper. A mix of matte and glossy finishes can create a visual feast that keeps on giving!
Another way to personalize your wreath is by adding meaningful elements. This could be anything from family photos to small trinkets that hold sentimental value. For instance, if you have a collection of vintage buttons or family heirlooms, why not incorporate them into your design? This not only adds a personal touch but also makes your wreath a conversation starter. You could even create a themed wreath that reflects a special occasion, such as anniversaries or birthdays, by including elements that represent those moments.
To help you visualize your options, here’s a quick table summarizing some personalization ideas:
| Personalization Element | Description |
|---|---|
| Color Palette | Choose colors that evoke the desired mood for your space. |
| Patterns & Textures | Incorporate various paper patterns and finishes for added depth. |
| Meaningful Elements | Include personal items or themes that reflect your story. |
Finally, don’t forget about the finishing touches! Adding embellishments like ribbons, bows, or even artificial flowers can elevate your paper wreath to new heights. These elements can tie the whole design together and make it pop. If you’re feeling adventurous, you might even consider seasonal accents that you can swap out throughout the year. This way, your wreath can evolve with the seasons, keeping your decor fresh and exciting!
In essence, personalizing your paper wreath is all about making it your own. It’s about weaving your personality into every fold and cut, creating a piece that is not just decorative but also meaningful. So go ahead, unleash your creativity, and let your paper wreath reflect the unique story of you!
- What materials do I need to personalize my paper wreath?
You’ll need various types of paper, scissors, adhesives, and any additional embellishments you wish to include, such as ribbons or decorative items. - Can I change the design of my wreath seasonally?
Absolutely! Personalizing your wreath with seasonal themes is a fantastic way to keep your decor fresh and relevant throughout the year. - How do I ensure my wreath lasts?
Use high-quality materials and consider applying a sealant to protect it from moisture and dust, especially if you plan to hang it outdoors.
Frequently Asked Questions
-
What materials do I need to make a DIY paper wreath?
To create a stunning DIY paper wreath, you'll need a few essential materials. Start with high-quality cardstock or patterned paper for the base. You’ll also want a good pair of scissors, a craft knife for precision cuts, and some adhesive like glue or double-sided tape. Don't forget to gather decorative elements like ribbons, flowers, or any seasonal accents you want to incorporate!
-
Can I use recycled paper for my wreath?
Absolutely! Using recycled paper not only adds a unique touch to your wreath but also makes your project environmentally friendly. Old magazines, newspapers, or even wrapping paper can be transformed into beautiful wreaths. Just make sure the paper is sturdy enough to hold its shape!
-
How do I choose the right cutting technique for my wreath?
The cutting technique you choose depends on the design you want to achieve. If you're going for intricate details, a die-cutting machine is a fantastic option. For simpler designs, a good pair of scissors will do just fine. Remember, practice makes perfect, so don’t hesitate to experiment with different methods!
-
What are some tips for assembling my paper wreath?
When assembling your paper wreath, start by laying out your pieces before gluing them down. This way, you can visualize the final look and make adjustments as needed. Use hot glue for a quick hold, or craft glue for a more flexible option. Layering different shapes and sizes can create depth and interest!
-
How can I personalize my paper wreath?
Personalizing your paper wreath is all about expressing your style! You can choose colors that match your home decor, add meaningful patterns, or incorporate elements that reflect your personality. Think about including photos or mementos for a truly unique touch!
-
Are there seasonal themes I can use for my wreaths?
Definitely! Seasonal themes can keep your decor fresh and exciting. For example, use bright colors and floral patterns for spring, warm tones and leaves for fall, or festive decorations for winter. You can change the wreath with the seasons to keep your space feeling vibrant and welcoming!


