How to Create a DIY Jewelry Holder for Your Earrings
Are you tired of rummaging through tangled necklaces and missing earrings? Well, you’re not alone! Many of us face the daily struggle of keeping our jewelry organized and accessible. That’s why creating a DIY jewelry holder for your earrings can be a game-changer. Not only does it help you keep your accessories neat, but it also adds a personal touch to your space. Imagine walking into your room and seeing a beautifully crafted holder that showcases your favorite earrings like precious art pieces. In this guide, we’ll walk you through the entire process, from selecting materials to adding those final decorative touches that make it truly yours.
When it comes to crafting your jewelry holder, the first step is to select materials that are both durable and visually appealing. You have a plethora of options available, including wood, fabric, and metal. Each material brings its own unique charm to the table. For instance, wood can provide a rustic and warm feel, while metal might give a sleek and modern vibe. If you’re leaning towards a more bohemian style, consider using fabric or even repurposed materials like an old picture frame. The choice of materials can set the tone for your entire project, so take your time and think about what resonates with your personal style.
Before you dive into the building phase, it’s beneficial to sketch out a design. This doesn’t have to be a masterpiece; a simple doodle can help you visualize the final product. Think about different shapes and layouts that will not only complement your space but also maximize storage for your earrings. For example, do you want a vertical holder that saves space or a horizontal one that can sit atop your dresser? By planning ahead, you’ll avoid potential pitfalls during the construction phase and create something that truly reflects your aesthetic.
Now, let’s talk functionality! Your jewelry holder should not only be beautiful but also practical for everyday use. Consider incorporating features like hooks, compartments, or even a small mirror. Hooks are fantastic for hanging earrings, allowing you to see all your options at a glance. Compartments can help separate different styles, making it easier to find that perfect pair. And a mirror? Well, it’s just the cherry on top, allowing you to check your look before heading out the door.
Incorporating hooks into your design is a smart move! They allow for easy access to your earrings while keeping them untangled and organized. When positioning your hooks, think about the height and spacing. You want to ensure that you can easily reach for your favorite pairs without having to dig through a pile. A good rule of thumb is to space hooks about two inches apart to prevent overcrowding and allow for easy visibility.
Compartments can be a lifesaver when it comes to organizing your earrings. They help separate different styles—like studs, hoops, and dangly earrings—making it a breeze to find what you’re looking for. You can create compartments using small boxes, dividers, or even by cutting sections into a piece of wood. The goal is to create a system that works for you, ensuring that your earring collection is as easy to navigate as your favorite playlist!
The color scheme of your jewelry holder can greatly impact its overall look. Think about colors that match your decor or reflect your personal style. Whether you prefer a bold pop of color or a soft pastel palette, your choice can transform a simple holder into a stunning statement piece. Don’t shy away from mixing and matching to create a unique look that speaks to you!
Now that you have your materials and design ready, it’s time to get your hands dirty and start building! Follow a step-by-step process to ensure your DIY project is successful and results in a stunning jewelry holder. Remember, taking your time and being precise during this phase will pay off in the end.
Here’s a simple outline to guide you through the assembly process:
- Gather all your materials and tools.
- Cut your wood or chosen material to the desired size.
- Drill holes for hooks or compartments.
- Assemble the pieces together using glue or screws.
- Sand down any rough edges for a polished finish.
- Paint or decorate your holder as desired.
Finally, let’s talk about the fun part—adding those finishing touches! Whether it’s a splash of paint, some embellishments, or even personal photos, these details can make your jewelry holder uniquely yours. Think about what reflects your personality and style. Maybe you want to add a quote that inspires you or some decorative elements that match your room. The options are endless, and this is where you can truly let your creativity shine!
Q: What materials are best for a DIY jewelry holder?
A: The best materials depend on your style! Wood, fabric, and metal are all great options. Choose what resonates with you and your decor.
Q: How can I ensure my earrings don’t get tangled?
A: Using hooks and compartments can significantly reduce tangling. Make sure to space hooks adequately and separate different styles of earrings.
Q: Can I personalize my jewelry holder?
A: Absolutely! You can add paint, embellishments, or even personal photos to make your holder reflect your unique style.

Choosing the Right Materials
When it comes to creating a DIY jewelry holder for your earrings, the choice of materials is absolutely crucial. Not only do the materials affect the overall durability of your holder, but they also play a significant role in the aesthetic appeal of the finished product. Imagine a beautifully crafted holder that not only showcases your earrings but complements your home decor as well. So, let’s dive into the various options available for your project!
One of the most popular choices is wood. It’s sturdy, versatile, and can be stained or painted to match your personal style. You can opt for reclaimed wood for a rustic look or go with a sleek, modern finish. If you’re feeling adventurous, consider creating a layered design with different types of wood to add depth and interest. Just think about how a beautifully grained wood could serve as a stunning backdrop for your sparkling earrings!
Another fantastic option is fabric. Using fabric can give your jewelry holder a soft, inviting feel. You can select vibrant patterns or soothing colors that resonate with your personality. Fabrics like velvet or cotton can be used to create a padded surface for your earrings, preventing them from getting scratched. Plus, it’s a great way to incorporate a bit of texture into your design. Just picture a fabric-covered board where you can pin your earrings—it’s both functional and stylish!
If you prefer a more industrial look, metal can be an excellent choice. Metal holders can be sleek and modern, providing a chic and minimalistic approach. You can use wire, mesh, or even repurpose old items like colanders or baking racks. The beauty of metal is that it can often be found in various finishes—think matte black, shiny silver, or even a pop of color. It’s all about what fits your vibe!
To help you decide, here’s a quick comparison of the materials:
| Material | Durability | Aesthetic | Cost |
|---|---|---|---|
| Wood | High | Warm, Natural | Moderate |
| Fabric | Moderate | Soft, Colorful | Low to Moderate |
| Metal | Very High | Modern, Industrial | Moderate to High |
Ultimately, the best material for your DIY jewelry holder will depend on your personal style, the look you want to achieve, and how much you want to spend. So, take a moment to think about what resonates with you. Do you lean more towards the rustic charm of wood, the cozy feel of fabric, or the sleekness of metal? The right choice will not only enhance your space but also make your earring collection shine!

Designing Your Jewelry Holder
When it comes to designing your very own jewelry holder, the world is your oyster! The first step is to let your creativity flow. Think about the space where you’ll place your holder—do you have a cozy nook in your bedroom or perhaps a bright spot in your bathroom? This will help you determine the size and style that will best fit your environment. You want your holder to be not just functional but also a delightful addition to your decor, like a cherry on top of a sundae!
Start by sketching out some ideas. Grab a piece of paper and let your imagination run wild. Consider different shapes—do you want a classic rectangular holder or something more whimsical like a tree or a circular design? The layout is equally important; think about how you’ll display your earrings. You might want to consider a vertical design to save space, or perhaps a horizontal one that allows for more visibility. Remember, the goal is to create a piece that showcases your beautiful earrings while keeping them organized and easy to access.
As you sketch, think about the materials you’ve chosen. If you’re using wood, for instance, a rustic design with natural finishes can add a warm touch to your room. On the other hand, if you’re leaning towards metal, a sleek, modern design can give your space an industrial vibe. Don’t forget about fabric! A fabric-covered holder can add a soft, cozy feel, making it perfect for a feminine touch. The combination of materials can also create a unique look—mixing wood and metal, for example, can give your holder a trendy, eclectic feel.
To help you visualize better, here’s a simple table comparing different design elements you might consider:
| Design Element | Material Options | Style |
|---|---|---|
| Shape | Rectangular, Circular, Tree-like | Classic, Whimsical, Modern |
| Layout | Vertical, Horizontal | Space-saving, Display-focused |
| Material | Wood, Metal, Fabric | Rustic, Industrial, Cozy |
Once you’ve got a solid design in mind, consider how you want to incorporate functional features. For example, if you envision a holder with hooks, think about how many you’ll need based on your earring collection. Will you include compartments for storing other accessories? These details can significantly enhance the usability of your jewelry holder while maintaining its aesthetic appeal.
Ultimately, the design process is all about reflecting your personal style. Whether you prefer a minimalist approach or something more ornate, make sure your jewelry holder feels like an extension of you. It’s not just a place to store your earrings; it’s a piece of art that tells a story. So, don’t be afraid to experiment and let your personality shine through in your design!
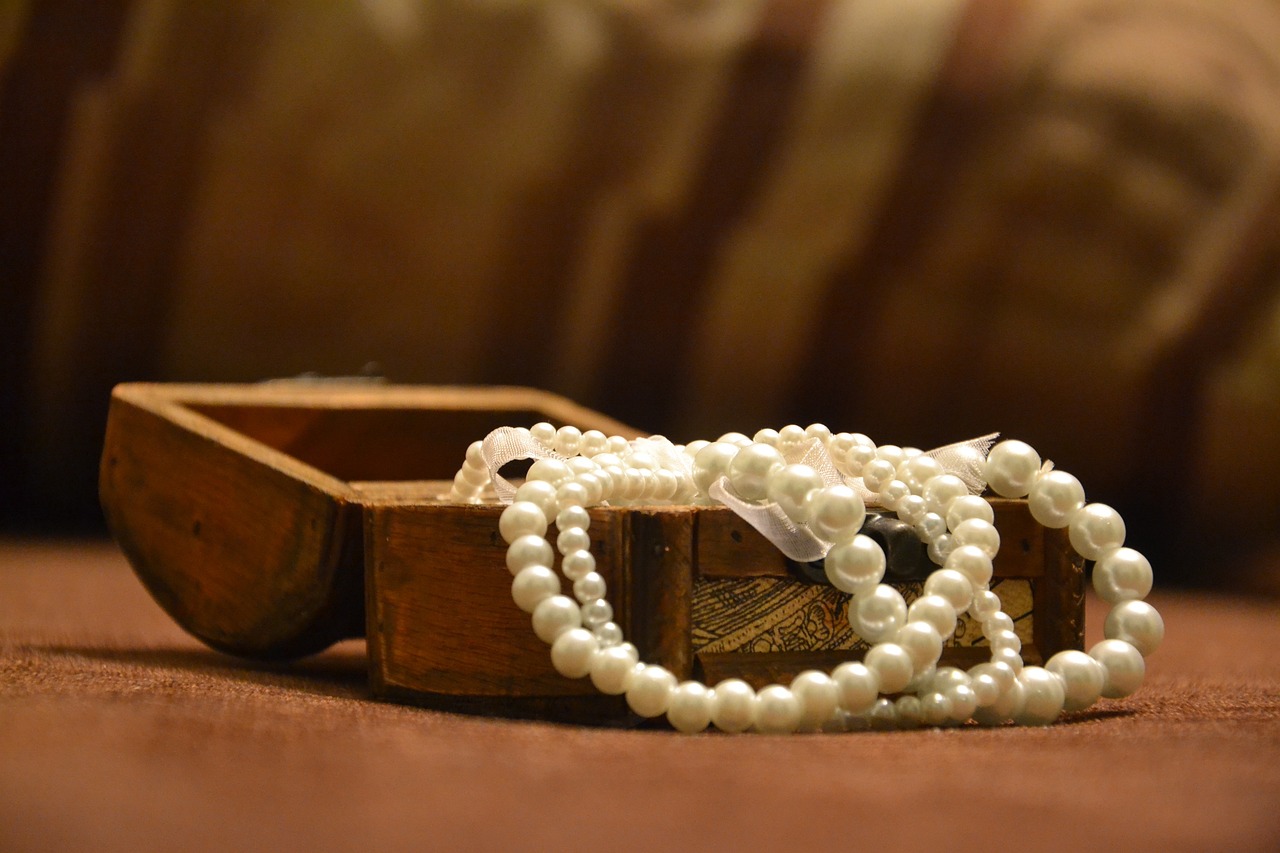
Incorporating Functional Features
When it comes to creating a DIY jewelry holder, the magic often lies in the details. can transform your holder from a simple storage solution into a stylish, efficient, and practical accessory that enhances your space. Think about your daily routine and how you use your earrings; this will guide you in adding features that make your life easier. For instance, hooks are a fantastic addition that allows for easy access to your favorite pairs while keeping them untangled and neatly displayed. Imagine reaching for your earrings in the morning without having to rummage through a tangled mess—sounds great, right?
Another functional element to consider is the inclusion of compartments. Compartments can be game-changers when it comes to organization. They help separate different styles of earrings, making it a breeze to find the perfect pair for any outfit. You could create small sections for studs, hoops, and dangling earrings, ensuring that everything has its place. This not only saves time but also protects your jewelry from damage, as they won’t be clashing against each other. You can easily incorporate compartments by using small boxes, trays, or even by crafting dividers from your chosen materials.
Additionally, think about adding a small mirror to your jewelry holder. A mirror can serve multiple purposes: it allows you to check your look as you select your earrings and can also make your space feel larger and more open. Position it at a height that’s easy to see while you’re selecting your jewelry. Not only does this add a touch of elegance, but it also enhances the functionality of your holder. You could even consider a rotating mirror for a touch of flair!
Ultimately, the key is to blend style with usability. Your jewelry holder should not only reflect your personal aesthetic but also cater to your daily needs. By thoughtfully incorporating hooks, compartments, and mirrors, you can create a jewelry holder that is both beautiful and practical, making your accessory routine feel effortless.
- What materials are best for creating a jewelry holder? - The best materials depend on your style, but wood, fabric, and metal are popular choices for their durability and aesthetic appeal.
- How can I ensure my earrings don’t get tangled? - Using hooks and compartments can help keep your earrings organized and untangled.
- Can I personalize my jewelry holder? - Absolutely! You can add paint, embellishments, or even personal photos to make it uniquely yours.
- What’s the best way to clean my jewelry holder? - Regular dusting and occasional deep cleaning with a damp cloth will keep your holder looking fresh.
Using Hooks for Easy Access
When it comes to organizing your earrings, incorporating hooks into your DIY jewelry holder is a game-changer! Imagine a beautiful display where your favorite pairs are not only visible but also easily accessible. Hooks allow you to hang your earrings in a way that prevents tangling, making it a breeze to choose the perfect pair for any outfit. By having your earrings on display, you can also add a touch of decor to your space, showcasing your collection like a gallery of art.
To maximize functionality, consider the placement of the hooks. You want to create a layout that not only looks good but also makes sense for your daily routine. For instance, think about grouping earrings by style or color. You might want to have a section for hoops, another for studs, and perhaps a spot for dangles. This way, when you're in a rush, you can quickly grab the earrings that fit your mood and outfit.
When selecting hooks, you have a variety of options. Here are some popular choices:
- Wall-mounted hooks: Perfect for saving space and can be easily customized to fit your design.
- Magnetic hooks: Great for a modern look and can hold lightweight earrings securely.
- Decorative hooks: Add a personal touch with unique designs that complement your decor.
Positioning is key! Ensure that the hooks are spaced adequately to avoid overcrowding, which can lead to tangled earrings. A good rule of thumb is to leave at least an inch between each hook. This not only keeps your earrings organized but also allows you to appreciate each piece as it shines in the light. Additionally, consider using a mix of hook heights for a dynamic display that draws the eye and adds interest to your jewelry holder.
In conclusion, using hooks for easy access is not just about functionality; it's about creating a stunning display that reflects your style. With a little creativity and thoughtful design, you can transform your earring storage into a beautiful and practical feature of your home. So, grab those hooks and get started on your DIY journey!
Q1: What type of hooks are best for heavier earrings?
A1: For heavier earrings, look for sturdy wall-mounted hooks or hooks made from durable materials like metal. Ensure they are securely anchored to support the weight.
Q2: Can I use hooks for other types of jewelry?
A2: Absolutely! Hooks can be versatile. Consider using them for necklaces, bracelets, or even scarves to keep everything organized.
Q3: How do I prevent my earrings from falling off the hooks?
A3: To prevent earrings from slipping off, choose hooks with a slight curve or a design that holds the earrings securely. You can also use rubber earring backs for added security.
Adding Compartments for Organization
When it comes to organizing your earrings, adding compartments can be a game changer. Imagine opening your jewelry holder and instantly spotting the perfect pair of earrings without having to sift through a tangled mess. It’s like having a personal assistant that knows exactly where everything is! By creating compartments within your jewelry holder, you not only enhance the visual appeal but also make your collection more accessible.
There are several ways to incorporate compartments into your DIY jewelry holder. You can use small boxes, dividers, or even repurpose items like ice cube trays or small wooden crates to create designated spaces for each pair of earrings. This not only helps in keeping your earrings sorted by style, color, or occasion but also adds an element of creativity to your design. For instance, you might want to group your earrings into categories such as:
- Studs: Perfect for everyday wear.
- Hoops: Great for making a statement.
- Dangles: Ideal for special occasions.
When designing your compartments, consider the size and type of your earrings. You wouldn’t want to create compartments that are too small for your larger statement pieces, nor too large for your delicate studs. A good rule of thumb is to measure your earrings and plan your compartments accordingly. This ensures that each pair has enough room to breathe, preventing them from getting scratched or tangled.
Additionally, think about the materials you’ll use for your compartments. Wood offers a rustic charm, while fabric-lined boxes can add a touch of elegance. You can even opt for clear plastic containers, allowing you to see your earrings at a glance. The choice of materials can greatly influence the overall aesthetic of your jewelry holder, so choose something that resonates with your personal style.
Lastly, don’t forget to leave some empty compartments for future additions to your collection. After all, as any jewelry lover knows, there’s always room for one more pair! By planning ahead, you can ensure your jewelry holder remains functional and stylish for years to come.
Q: How can I make my compartments more visually appealing?
A: Consider using decorative paper or fabric to line the compartments. You can also paint the dividers in colors that match your decor.
Q: What if I have a lot of different types of earrings?
A: You can create various sized compartments to accommodate different styles. Group similar earrings together to make it easier to find what you’re looking for.
Q: How do I prevent my earrings from getting tangled?
A: By creating individual compartments for each pair, you can keep them separated and tangle-free. Using hooks for dangle earrings can also help keep them organized.
Choosing a Color Scheme
When it comes to creating a stunning DIY jewelry holder, choosing the right color scheme can make all the difference. The colors you select not only reflect your personal style but also enhance the overall aesthetic of your space. Think of your jewelry holder as a canvas; the colors you choose will set the mood and ambiance of the area where it resides. Are you looking for something vibrant and eye-catching, or do you prefer a more subdued and elegant palette? The choice is yours!
To start, consider the existing color palette of your room. Is it filled with warm tones like reds and yellows, or does it lean towards cool shades of blues and greens? Matching your jewelry holder to your decor creates a cohesive look that ties everything together. For instance, if your bedroom has a calming blue theme, a soft pastel blue or even a crisp white jewelry holder can complement the surroundings beautifully.
Another approach is to use contrasting colors to make your jewelry holder stand out. Imagine a sleek black holder against a bright white wall or a vibrant red holder on a neutral-toned dresser. This contrast can create a focal point in your room, drawing attention to your beautiful earrings. Think of it as wearing a bold accessory that catches the eye!
Here are some popular color schemes you might consider:
- Monochromatic: Stick to variations of a single color for a sophisticated look.
- Analogous: Choose colors that are next to each other on the color wheel for a harmonious feel.
- Complementary: Pair colors that are opposite each other on the color wheel for a vibrant contrast.
Don’t forget about the finish of your colors, too! A matte finish can give a more understated and modern vibe, while a glossy finish can add a touch of elegance and sophistication. Consider how the light interacts with the colors you choose; a glossy finish can reflect light beautifully, adding dimension to your jewelry holder.
So, take a moment to envision your ideal color scheme. Whether you want something bold and colorful or soft and subtle, the right choice will elevate your DIY jewelry holder from ordinary to extraordinary. Remember, this is not just about functionality; it’s also about expressing your unique style and personality!
Building Your Jewelry Holder
Once you have your materials and design ready, it’s time to start building your DIY jewelry holder! This is where the fun really begins, as you transform your vision into a tangible piece of art that not only serves a purpose but also enhances your space. Before diving in, gather all your supplies and tools; this includes the materials you’ve chosen, any decorative items, and essential tools like a saw, drill, or glue. Don’t worry if you’re not a seasoned DIY expert; with a little patience and creativity, you can create something truly special!
Start by cutting your materials according to your design. If you’re using wood, make sure to measure twice and cut once to avoid any mishaps. If you're working with fabric, consider how it will be attached to your base. This is a great time to channel your inner artist—think about the textures and colors that will make your holder pop! Once everything is cut, lay out your pieces to visualize how they will fit together. This step is crucial as it allows you to make adjustments before you start assembling.
Next, it’s time for assembly. Begin by attaching the main components of your holder together. If you’re using wood, wood glue or screws will work wonders. For fabric, a strong adhesive or staple gun can help secure it in place. Remember, this is your creation, so don’t hesitate to get a little creative! You can add decorative elements like beads or paint to enhance its look. For example, if you’ve opted for a rustic wooden base, consider using a distressed paint technique to give it character.
After the main structure is complete, it’s time to add any functional features like hooks or compartments. Position the hooks at varying heights to accommodate different types of earrings. This not only adds visual interest but also makes it easier to see all your options at a glance. If you’re incorporating compartments, think about how you want to categorize your earrings—by color, style, or occasion. You can create compartments by using small boxes or dividers made from leftover materials.
Finally, don’t forget about the finishing touches. This is where you can personalize your jewelry holder to reflect your unique style. Consider adding a coat of varnish for a polished look or embellishing it with stickers, paint, or even a small mirror. These details can transform your holder from a simple organization tool to a stunning piece of decor. Once you’re satisfied with your creation, allow everything to dry completely before placing your earrings in their new home.
To help you visualize the process, here’s a quick overview of the steps involved in building your jewelry holder:
| Step | Description |
|---|---|
| 1 | Gather all materials and tools. |
| 2 | Cut materials according to your design. |
| 3 | Assemble the main components together. |
| 4 | Add functional features like hooks and compartments. |
| 5 | Apply finishing touches for personalization. |
Now that your jewelry holder is complete, you can enjoy the satisfaction of having a beautifully organized space for your earrings. Plus, every time you reach for a pair, you’ll be reminded of the effort and creativity you put into making your own unique holder!
Step-by-Step Assembly Instructions
Now that you've gathered your materials and sketched out your design, it's time to roll up your sleeves and get to work on building your DIY jewelry holder. This part can be incredibly satisfying as you see your vision come to life! Follow these detailed steps to ensure a smooth assembly process:
First, start by preparing your workspace. A clean, well-lit area will make the process much easier. Lay out all your materials, including any tools you’ll need, such as a saw, drill, and screws. Having everything organized will save you time and frustration later on.
Next, if you're using wood, measure and cut your pieces according to your design. For instance, if you've decided on a rectangular shape, you'll need a back panel, a base, and side panels. Ensure that your cuts are straight and accurate; this will help your holder look professional and polished. If you're using fabric or metal, the same principle applies—measure twice, cut once!
Once your pieces are cut, it’s time to assemble them. Begin with the back panel and attach it to the base using screws or wood glue, depending on your material. If you're using fabric, you might want to use a strong adhesive that can handle the weight of your earrings. Make sure everything is aligned properly before securing it in place.
After the base is securely attached, add the side panels. This step is crucial as it will provide the structure needed to hold your earrings. If your design includes hooks, now is the time to install them. Position them evenly along the back panel to ensure that your earrings can hang freely without tangling. You can create a visual guide by marking where each hook will go with a pencil before drilling.
As you continue assembling, consider adding compartments if your design includes them. You can make compartments by using small boxes or by creating dividers from leftover materials. This will help keep your earrings organized and make it easier to find the perfect pair when you're getting ready.
Once the main structure is complete, it’s time for the finishing touches. Sand down any rough edges to prevent snags on your earrings or skin. If you’re painting or staining your holder, do this in a well-ventilated area and allow it to dry completely before moving on to the next step. You can also apply a protective finish to ensure that your holder lasts for years to come.
Finally, once everything is dry and assembled, add any personal touches, like decorative elements or photos. This is your chance to express your style! And voila! You now have a fabulous DIY jewelry holder that not only organizes your earrings but also adds a personal flair to your space.
Building your own jewelry holder can be a fun and rewarding project. Remember, the key is to take your time and enjoy the process. If you run into any hiccups, don’t hesitate to adapt your design as needed. After all, it’s about creating something that works for you!
Q: What materials are best for a DIY jewelry holder?
A: It depends on your personal style! Wood is durable and classic, while fabric can add a soft touch. Metal can give a modern look. Choose what resonates with you!
Q: How do I prevent my earrings from tangling?
A: Using hooks and compartments can significantly reduce tangling. Position hooks strategically and use dividers for different styles of earrings.
Q: Can I customize my jewelry holder?
A: Absolutely! Personalize it with paint, embellishments, or even photos to make it uniquely yours. The sky's the limit!
Finishing Touches and Personalization
Once you’ve constructed your DIY jewelry holder, it’s time to let your creativity shine through with some finishing touches and personalization. This is where you can truly make your holder a reflection of your unique style and taste. Imagine walking into your room and being greeted by a stunning piece that not only serves a purpose but also enhances your decor. So, how can you achieve this? Let’s dive into some creative ideas!
First off, consider the color palette you want to work with. If your room is painted in soft pastels, perhaps a gentle mint or blush pink would complement your existing decor beautifully. On the other hand, if you’re a lover of bold colors, a vibrant teal or a striking gold could turn your jewelry holder into a statement piece. You might even want to experiment with a two-tone design, where the base is one color and the hooks or compartments are another. This can create a visually appealing contrast that draws the eye.
Next, let’s talk about embellishments. You can use a variety of materials to add flair to your jewelry holder. Think about incorporating decorative elements like lace, washi tape, or even small mirrors. For instance, wrapping the edges with a colorful washi tape can add a fun pop of color, while attaching a small mirror can serve both aesthetic and functional purposes. You could also glue on some small decorative stones or beads to give it a more luxurious feel. However, remember to keep it balanced; too many embellishments can make it look cluttered.
Another fantastic way to personalize your holder is by adding photos or small mementos that are dear to you. Perhaps you have a favorite photo of a cherished memory that you’d like to frame and attach to your holder. You can use small clips or frames that can be easily modified to fit your design. Not only will this make your holder more meaningful, but it will also serve as a beautiful conversation starter when guests come over.
Lastly, don’t forget about the functionality. Personalization doesn’t just stop at aesthetics; it also involves making your jewelry holder work for you. If you have a variety of earring styles, consider adding a few small compartments or boxes that can hold your studs separately from your dangling earrings. This way, you can keep everything organized while still showcasing your creativity. The goal is to create a piece that is not only beautiful but also practical and tailored to your needs.
In summary, the finishing touches and personalization of your DIY jewelry holder are what will truly make it your own. By carefully selecting colors, adding embellishments, incorporating personal elements, and ensuring functionality, you can create a stunning piece that serves as both a storage solution and a decorative item. So, what are you waiting for? Get creative and let your personality shine through in your DIY project!
- What materials are best for a jewelry holder?
Wood, fabric, and metal are popular choices. Consider what matches your decor and is durable. - How can I ensure my earrings don't tangle?
Using hooks and compartments will help keep your earrings organized and untangled. - Can I customize my jewelry holder?
Absolutely! Use paint, embellishments, and personal photos to make it uniquely yours. - What tools do I need to build a jewelry holder?
Basic tools like a saw, drill, and glue gun will be sufficient for most designs.
Frequently Asked Questions
- What materials are best for creating a DIY jewelry holder?
When it comes to crafting your DIY jewelry holder, you can choose from a variety of materials. Popular options include wood for a rustic look, fabric for a soft touch, and metal for a modern vibe. Think about your personal style and the overall decor of your space to select the materials that will work best for you!
- How can I design my jewelry holder to maximize space?
Designing your jewelry holder with space in mind is all about creativity! Sketch out different shapes and layouts before you start building. Consider using vertical space with hooks or tiered shelves to keep your earrings organized and easily accessible without taking up too much room.
- What features should I incorporate for better functionality?
To enhance the usability of your jewelry holder, think about adding features like hooks for hanging earrings, compartments for different styles, or even a mirror for last-minute checks. These functional elements not only make your holder practical but also add a stylish flair!
- How do I choose a color scheme for my jewelry holder?
Your jewelry holder should reflect your personality and complement your space. When selecting a color scheme, consider the colors already present in your decor. Whether you prefer bold and bright or soft and subtle, make sure your choice resonates with your aesthetic!
- Can I personalize my jewelry holder?
Absolutely! Personalizing your jewelry holder is a fun way to make it uniquely yours. You can add paint, embellishments, or even personal photos to give it that special touch. Think of it as a canvas that reflects your style and creativity!
- What are some tips for assembling my jewelry holder?
Assembly can be a breeze if you follow a step-by-step process. Start by gathering all your materials and tools, then carefully follow the instructions you’ve outlined. Take your time with each step, and don’t rush the finishing touches to ensure a polished and beautiful final product!


