The Best DIY Birthday Card Ideas from Kids
When it comes to celebrating birthdays, nothing beats the charm of a handmade card crafted by little hands. These DIY birthday card ideas are not just about creativity; they are about making memories and expressing love in a unique way. Imagine the joy on a friend's face when they receive a card made just for them, filled with personal touches and heartfelt messages. Kids can dive into a world of imagination, using simple materials to create cards that are as special as the occasion itself. From pop-up surprises to watercolor masterpieces, these projects not only enhance their artistic skills but also foster a sense of accomplishment. So, let’s explore some of the most exciting DIY birthday card ideas that kids can easily make, ensuring that every birthday celebration is filled with joy and creativity!
Pop-up cards are like little gifts that unfold right before your eyes, adding an element of surprise and delight to any birthday greeting. Kids can learn the basics of pop-up mechanisms while creating fun designs that will wow friends and family on their special day. Picture a colorful cake or a bunch of balloons springing to life as the card opens! It's not just about the final product; it's about the process of creating something magical. Plus, this project helps develop fine motor skills as kids cut, fold, and glue their way to a stunning card. The joy of seeing their creation come to life is priceless!
Using watercolors, kids can express their artistic flair on birthday cards. This technique allows for vibrant colors and unique designs, making each card a one-of-a-kind gift that recipients will cherish. The beauty of watercolor is that it’s forgiving; even the most abstract splotches can turn into beautiful art. Kids can experiment with colors, blending them to create stunning effects that mimic a sunset or a rainbow. And the best part? They don’t need to be professional artists to create something beautiful. Just a little imagination and a splash of color can go a long way!
Introduce kids to basic watercolor techniques like wet-on-wet and dry brush. These methods are easy to grasp and can lead to stunning results, even for young artists just starting out. Wet-on-wet involves applying wet paint onto wet paper, creating soft, blended colors that can resemble clouds or waves. On the other hand, dry brush allows for more control and texture, perfect for adding details like grass or flowers. With just a few simple techniques, kids can create breathtaking cards that showcase their creativity.
Stencils can help kids create intricate designs with ease. By using stencils, children can focus on painting and coloring, resulting in beautifully crafted cards without the stress of freehand drawing. Imagine a card adorned with perfectly shaped stars or hearts! This approach not only builds confidence in young artists but also encourages them to explore different themes and styles. Plus, it’s a fantastic way to introduce them to the world of design.
Encouraging kids to use recycled materials fosters creativity and environmental awareness. They can transform everyday items into unique birthday cards, showcasing their creativity while promoting sustainability. Think about using old magazines, wrapping paper, or even fabric scraps. It’s like a treasure hunt for materials that can be repurposed into beautiful works of art! This not only sparks creativity but also teaches kids the value of reusing and recycling.
Collages made from magazines, old cards, and scrap paper can produce eye-catching designs. Kids can cut and paste various elements, allowing them to explore textures and colors in their artwork. This project is all about layering, and it can be a fun way for kids to express their personality through art. They can create a card that tells a story or reflects their favorite things, making each piece truly special.
Fabric scraps can add dimension and texture to birthday cards. Kids can learn to sew or glue fabric pieces, creating tactile cards that stand out and feel special to the recipient. Imagine a card with a fluffy cloud made from cotton or a vibrant flower crafted from colorful fabric! This hands-on approach not only enhances their fine motor skills but also allows them to experiment with different materials and textures.
Interactive cards engage the recipient in fun ways. Kids can create cards that include games or puzzles, making the birthday greeting more memorable and entertaining for everyone involved. These cards are not just something to display; they are an experience! Kids can incorporate elements like pull tabs, hidden messages, or even small games that can be played right on the card.
Scratch-off cards can be a fun surprise element. Kids can use special paint or stickers to create scratch-off areas, revealing messages or fun images when scratched, adding excitement to the card. It’s like a mini treasure hunt right within the birthday card! This element of surprise will surely bring smiles and laughter, making the birthday celebration even more joyous.
Flip cards provide a delightful interactive experience. Kids can design cards that flip open to reveal hidden messages or images, creating an engaging way to express birthday wishes. The thrill of discovering what’s hidden inside adds an extra layer of fun. It’s a simple yet effective way to make a card that stands out from the rest!
1. What materials do I need to create DIY birthday cards?
You can use a variety of materials including cardstock, watercolors, fabric scraps, magazines, and even recycled items like old cards. The possibilities are endless!
2. Are these DIY card ideas suitable for all ages?
Absolutely! While some ideas may require adult supervision, most projects can be adapted for different age groups, making them perfect for family fun.
3. How can I encourage my child to be more creative with their card-making?
Encourage them to express their individuality! Provide a variety of materials and let them experiment without fear of making mistakes. Creativity thrives in a relaxed environment.
Handmade Pop-Up Cards
Pop-up cards are not just ordinary greeting cards; they are a magical experience that adds an element of surprise and delight to any birthday celebration. Imagine the look on your loved one's face when they open a card and a colorful, three-dimensional design springs to life! It's like opening a treasure chest filled with joy and creativity. For kids, creating pop-up cards is an exciting way to learn about basic engineering principles while also expressing their artistic flair. The process involves a few simple steps that can easily be mastered, making it perfect for young crafters.
To get started, you'll need some basic materials: colorful cardstock, scissors, a ruler, and glue. Kids can begin by folding a piece of cardstock in half to form the base of the card. From there, they can cut out various shapes—like flowers, animals, or even birthday cakes—that they want to pop up when the card is opened. These shapes can be attached to the card using small slits cut into the fold, allowing them to stand upright. This simple mechanism is not only fun but also teaches kids about geometry and design.
Here’s a quick overview of the steps involved in creating a handmade pop-up card:
| Step | Description |
|---|---|
| 1 | Fold a piece of cardstock in half to create the card base. |
| 2 | Design and cut out your pop-up shapes from another piece of cardstock. |
| 3 | Make small slits in the fold of the card where you want the shapes to pop up. |
| 4 | Insert the shapes into the slits and secure them with glue. |
| 5 | Decorate the card with drawings, stickers, or other embellishments. |
Not only does this project help enhance motor skills and hand-eye coordination, but it also encourages kids to think critically about how to make their designs work. They can experiment with different shapes and sizes, and even incorporate elements like colorful drawings or glitter to make their cards truly unique. Plus, the satisfaction of creating something that brings joy to others is a priceless lesson in creativity and giving.
So, why not gather the kids and dive into the world of handmade pop-up cards? It's a fun, engaging activity that promises to ignite their creativity while making cherished memories. And who knows? You might just find that the process of making these cards is as delightful as receiving them!
Watercolor Masterpieces
Using watercolors, kids can express their artistic flair on birthday cards in a way that feels both liberating and exciting. Imagine the vibrant colors swirling together, creating a unique masterpiece that captures the essence of the occasion. Watercolors are not just a medium; they are a gateway to creativity that allows children to experiment with different techniques, resulting in stunning cards that will be cherished by recipients. The beauty of watercolor lies in its unpredictability, making every card a one-of-a-kind gift that carries a personal touch.
One of the most appealing aspects of watercolor painting is its accessibility. Kids can easily dive into this art form with just a few basic supplies, including watercolor paints, brushes, and paper. But what if they could take their creations to the next level? Here are some simple techniques that can help young artists shine:
- Wet-on-Wet Technique: This method involves applying wet paint onto wet paper, allowing colors to blend and flow beautifully. It's perfect for creating dreamy backgrounds or soft landscapes.
- Dry Brush Technique: By using a dry brush on dry paper, kids can create textured effects that add depth to their artwork. This technique is great for adding details, such as grass or fur.
By introducing these techniques, children can discover the joy of painting without feeling overwhelmed. The thrill of watching colors mix and change on the paper can be a magical experience, sparking their imagination and boosting their confidence as budding artists.
Another fantastic way to enhance watercolor cards is through the use of stencils. Stencils can help kids create intricate designs with ease, allowing them to focus on painting and coloring rather than stressing over freehand drawing. With a variety of shapes and patterns available, children can personalize their cards with fun designs, from flowers to animals, making their creations even more special.
As they paint, encourage kids to think about the recipient of the card. What colors do they love? What themes resonate with them? This thoughtful approach not only makes the card more meaningful but also teaches children the importance of personal connection in their creativity. The final touch could involve adding a heartfelt message inside, making the card not just a piece of art but a treasured keepsake.
In conclusion, watercolor masterpieces are not just about the final product; they are about the journey of creation. The splashes of color, the experimentation with techniques, and the joy of making something special all contribute to a wonderful birthday experience. So, gather those brushes and paints, and let the kids unleash their creativity!
Q: What materials do I need for watercolor painting?
A: You'll need watercolor paints, brushes, watercolor paper, and a palette for mixing colors. Optional items include stencils and masking tape for added creativity.
Q: Can young children use watercolors?
A: Yes! Watercolors are safe and easy for children to use. Just supervise them to ensure they don't ingest any paint or water.
Q: How can I make the watercolor cards more durable?
A: To protect the artwork, consider spraying a fixative over the finished card or laminating it. This will help preserve the colors and prevent smudging.
Q: What if my child doesn't know how to paint?
A: Encourage them to experiment and have fun! Painting is about self-expression, and there are no right or wrong ways to create art.
Simple Techniques for Beginners
When it comes to introducing kids to the world of watercolor painting, there are some simple techniques that can make the experience both enjoyable and rewarding. First off, let’s talk about the wet-on-wet technique. This method involves applying wet paint onto a wet surface, which creates beautiful, soft blends of colors. Kids will love watching the colors swirl and mix together, almost like magic! It’s a great way for them to explore how colors interact without the pressure of perfection.
Another technique that is perfect for beginners is the dry brush technique. This involves using a brush with very little water, allowing for more control and texture. Kids can experiment with different brush strokes, creating interesting patterns and effects. Think of it as painting with a whisper—gentle and subtle, yet full of potential! Encouraging kids to try both techniques will not only enhance their skills but also boost their confidence as they see their unique creations come to life.
Moreover, incorporating stencils can be a game-changer for young artists. Stencils provide a structured way for kids to create intricate designs without the stress of freehand drawing. By placing a stencil on the card and painting over it, children can easily achieve stunning results. It’s like having a secret tool that transforms their artwork into masterpieces! They can use stencils of various shapes—like stars, hearts, or even animals—to add a personal touch to their birthday cards.
To make the watercolor experience even more engaging, consider setting up a mini watercolor station at home. Gather some basic supplies such as:
- Watercolor paints
- Brushes in various sizes
- Watercolor paper
- Palettes for mixing colors
- Containers for water
This setup invites creativity and experimentation, allowing kids to dive into their artistic journey with enthusiasm. With just a few supplies, they can unleash their imagination and create beautiful birthday cards that are not only heartfelt but also showcase their artistic flair.
In summary, teaching kids these simple watercolor techniques can open up a world of creativity and expression. Whether they're blending colors with the wet-on-wet method or adding details with stencils, the possibilities are endless. So, grab those brushes and let the fun begin!
Q: What age is appropriate for kids to start using watercolors?
A: Kids as young as 3 can start exploring watercolors with supervision. It's important to choose non-toxic, washable paints for younger children.
Q: How can I encourage my child if they feel frustrated with their artwork?
A: Remind them that art is about expression, not perfection. Encourage them to experiment and celebrate their unique style. Sometimes, taking a break can also help!
Q: What are some good materials to use for watercolor painting?
A: Watercolor paints, brushes, watercolor paper, and palettes are essential. You can also add fun items like salt or plastic wrap for unique textures!
Incorporating Stencils
When it comes to crafting birthday cards, incorporating stencils can be a game-changer for kids. Not only do stencils simplify the process of creating intricate designs, but they also boost kids’ confidence in their artistic abilities. Imagine a young artist, armed with a stencil, effortlessly transforming a plain card into a vibrant masterpiece. It’s like having a magic wand that turns their imagination into reality!
Using stencils allows children to focus on the fun part—painting and coloring—without getting bogged down by the stress of freehand drawing. They can choose from a variety of stencil designs, ranging from whimsical animals to elegant floral patterns. This freedom of choice fosters creativity and encourages kids to experiment with different styles. Plus, the satisfaction of seeing their card come to life is truly rewarding.
To get started, all you need are some basic materials:
- Stencils (available at craft stores or printable online)
- Cardstock or thick paper
- Paints or markers
- Sponge brushes or daubers
Here’s a simple process to follow:
- Select a stencil that resonates with the birthday theme.
- Secure the stencil onto the cardstock using tape to prevent it from moving.
- Using a sponge brush, gently dab paint over the stencil, ensuring even coverage.
- Carefully lift the stencil to reveal the beautiful design underneath!
Stencils not only help in creating stunning visuals but also serve as a fantastic tool for learning and development. Kids can practice their hand-eye coordination as they align the stencil and apply paint. Moreover, they can explore color theory by mixing different shades to see how they interact with one another. It’s a hands-on approach that combines art with education!
Incorporating stencils into birthday card crafting is not just about making pretty cards; it’s an opportunity for children to express themselves and share their creativity with loved ones. Each card becomes a unique representation of their personality and thoughtfulness. So, the next time you’re looking for a fun and engaging activity, gather some stencils and let the kids create their very own birthday card masterpieces!
Q1: What age group is suitable for using stencils in card making?
A1: Stencils can be used by children as young as 4 years old, with adult supervision. As they grow older, they can handle more complex designs.
Q2: Can I make my own stencils?
A2: Absolutely! You can create stencils from cardboard or plastic sheets by cutting out shapes or designs using a craft knife.
Q3: What types of paints work best with stencils?
A3: Acrylic paints and water-based inks are great options as they dry quickly and have vibrant colors. Avoid using overly runny paints to prevent bleeding under the stencil.
Q4: How can I clean my stencils after use?
A4: Simply wash them with warm soapy water and a soft sponge to remove any paint residue. Make sure to dry them completely before storing.

Recycled Materials Crafting
In a world where sustainability is becoming increasingly important, offers a fantastic way for kids to express their creativity while being mindful of the environment. Imagine turning what would typically be trash into a beautiful, heartfelt birthday card! This not only sparks creativity but also teaches children the value of reusing materials. By using items like old magazines, cardboard boxes, and even fabric scraps, kids can create unique birthday cards that tell a story and showcase their artistic flair.
One exciting approach is to create collages from recycled materials. Kids can gather colorful images from magazines or cut out interesting shapes from old greeting cards. This process encourages them to think outside the box and experiment with different textures and colors. They can layer various elements to create a stunning visual effect that is both eye-catching and meaningful. For instance, they might combine vibrant images of flowers with textured paper to create a garden scene on their card. The possibilities are endless, and each card becomes a true reflection of the child’s personality and creativity.
Another fun technique involves using fabric scraps. Kids can collect leftover fabric from old clothing or craft projects, which can add a delightful tactile element to their cards. By sewing or gluing these fabric pieces onto the card, they can create a card that not only looks good but also feels great to touch. This hands-on experience can help improve their fine motor skills while allowing them to explore different materials in a creative way. Imagine a birthday card adorned with soft, colorful patches that pop out at you! The recipient will surely appreciate the extra effort and thoughtfulness that went into making such a special card.
As they dive into recycled materials crafting, children also learn the importance of environmental awareness. They begin to understand that every piece of material has potential and that they can make a difference by reducing waste. This is a great opportunity for parents and educators to discuss sustainability and the impact of recycling. Encouraging kids to think about where their materials come from and how they can repurpose them opens their minds to new ideas and possibilities.
To inspire creativity, here are some common items that can be transformed into beautiful birthday cards:
- Old greeting cards
- Magazines
- Cardboard boxes
- Fabric scraps
- Wrapping paper
- Buttons and beads
In conclusion, recycling materials for crafting birthday cards is not only a fun activity but also a meaningful one. It allows kids to express their creativity, learn valuable skills, and become more environmentally conscious. So, the next time you have some old magazines or fabric lying around, consider turning them into a delightful birthday card that will surely bring a smile to someone's face!
Q: What types of recycled materials can I use for crafting birthday cards?
A: You can use a variety of materials, including old magazines, cardboard, fabric scraps, wrapping paper, buttons, and even leftover craft supplies. The key is to get creative with what you have!
Q: Are there any specific techniques for using fabric scraps on cards?
A: Yes! You can sew or glue fabric pieces onto your card. Consider layering different textures and colors for a more dynamic look. Fabric can add a tactile element that makes your card stand out.
Q: How can I encourage my child to be more creative with recycled materials?
A: Encourage them to think outside the box and experiment with different combinations of materials. Provide them with a variety of items and let them explore their ideas freely. You can also show them examples of recycled card designs for inspiration!
Creating Collages
Creating collages is not just a fun activity; it's a fantastic way for kids to unleash their creativity while developing fine motor skills. Imagine a world where every birthday card is a canvas, and every piece of scrap paper is a brushstroke waiting to happen! By using materials like old magazines, colorful wrapping paper, or even bits of fabric, children can craft unique birthday cards that are truly one-of-a-kind. The beauty of collaging lies in its versatility—there are no strict rules, allowing kids to explore their artistic instincts freely.
To start, gather a variety of materials that can be used for collaging. This could include:
- Old magazines and newspapers
- Scrapbooking paper
- Gift wrap remnants
- Fabric scraps
- Stickers and embellishments
Once you have your materials, the next step is to choose a base for the card. A sturdy piece of cardstock works great, providing a solid foundation for all the creative elements that will be added. Encourage kids to think about a theme for their card. For instance, if the birthday child loves animals, they could cut out pictures of their favorite creatures and create a jungle scene. Or, if they are into sports, they might collage images of their favorite teams or athletes. The possibilities are endless!
As they begin to cut and paste, remind kids to layer their materials. This technique not only adds depth to the card but also creates a more visually appealing design. They can experiment with different textures and colors, mixing and matching to find what looks best. Additionally, using glue sticks or double-sided tape can help ensure that everything stays in place without the messiness of liquid glue.
Once the collage is complete, kids can take it a step further by adding personal touches. This could involve writing a heartfelt message, drawing doodles around the edges, or even attaching small trinkets like buttons or ribbons. These finishing touches make the card feel even more special and tailored to the recipient.
Ultimately, creating collages for birthday cards is a wonderful way for kids to express themselves while also practicing essential skills like cutting, gluing, and arranging. It’s not just about making a card; it’s about the joy of creation and the personal connection that comes with giving something handmade. So gather those materials, unleash the creativity, and watch as each card transforms into a treasured keepsake!
Q: What materials do I need for making collages?
A: You can use old magazines, scrapbooking paper, fabric scraps, stickers, and any other decorative items you have at home.
Q: How can I help my child come up with ideas for their collage?
A: Encourage them to think about the interests of the birthday person. Ask questions about their favorite colors, hobbies, or themes that could inspire the collage design.
Q: What is the best adhesive for collaging?
A: Glue sticks and double-sided tape are great options for kids. They are easy to use and minimize mess.
Q: Can we use recycled materials for collages?
A: Absolutely! Using recycled materials not only fosters creativity but also teaches kids about sustainability.
Using Fabric Scraps
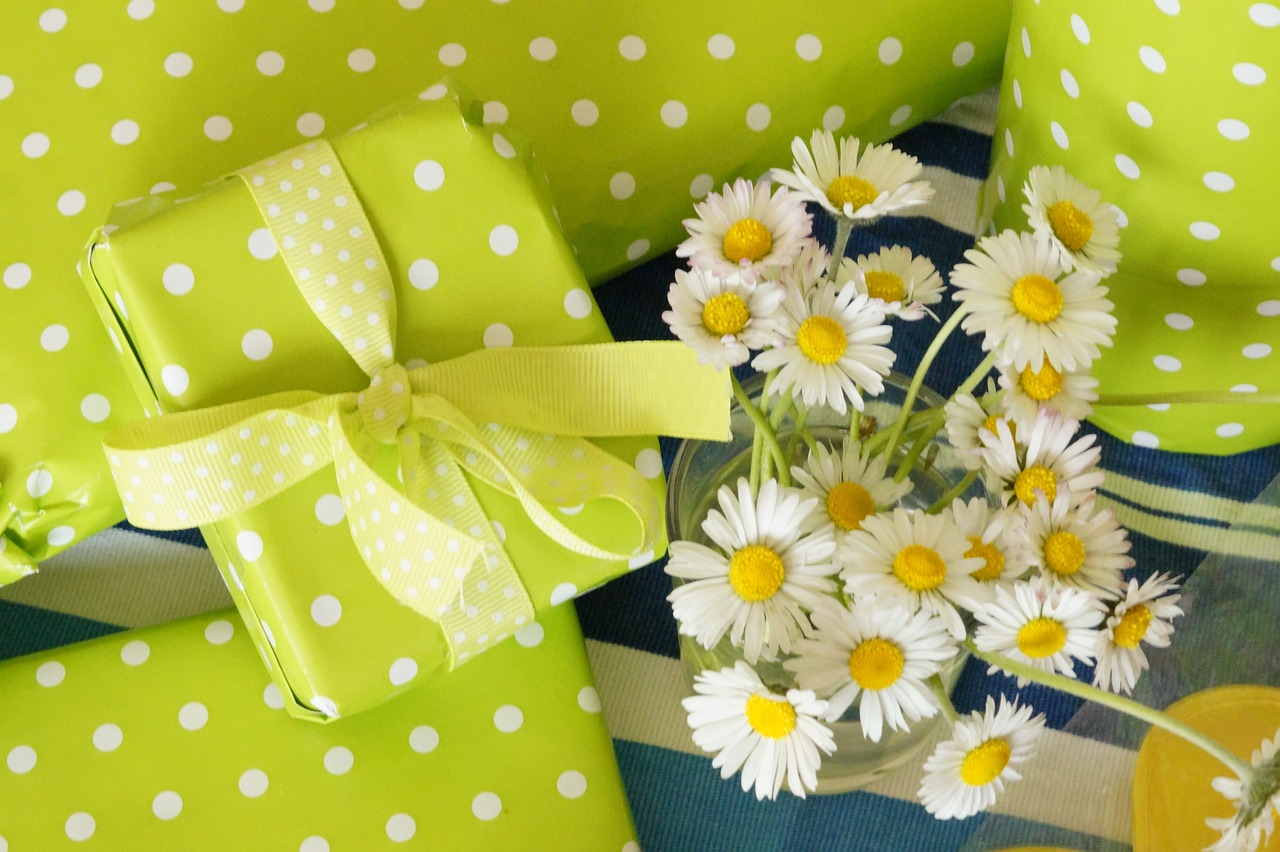
Using fabric scraps is an incredibly fun and creative way for kids to make unique birthday cards that truly stand out. Imagine the joy of transforming leftover fabric pieces into a tactile masterpiece! Not only does this method allow children to explore their artistic side, but it also introduces them to the concept of recycling and reusing materials, which is a valuable lesson in sustainability. What's more, fabric adds a wonderful texture and visual appeal to any card, making it feel special and personal.
To get started, gather an assortment of fabric scraps in various colors, patterns, and textures. You can use old clothing, leftover material from sewing projects, or even fabric remnants from craft stores. Encourage kids to think outside the box when choosing their fabrics; a soft cotton can bring warmth, while a shiny satin can add a touch of elegance. Here are some ideas on how to use fabric scraps effectively:
- Layering: Kids can layer different fabric pieces to create depth and dimension. For instance, a bright floral fabric can be placed underneath a sheer piece to create a beautiful overlay effect.
- Cut-Out Shapes: Children can cut fabric into fun shapes like hearts, stars, or even letters to spell out a name or a special message. These cut-outs can be glued onto the card to create a collage effect.
- Textured Backgrounds: Instead of traditional paper backgrounds, kids can glue fabric pieces to the card base. This not only enhances the visual appeal but also adds a delightful texture that recipients will love to touch.
Additionally, kids can experiment with different techniques to attach fabric to their cards. They can use glue for a quick fix, or they can learn some basic sewing techniques to stitch the fabric onto the card. This not only adds an extra layer of creativity but also enhances their fine motor skills. Simple stitches like running stitch or even a basic whip stitch can make the card look professionally crafted!
Finally, remind kids that the beauty of using fabric scraps is that there are no strict rules. Each card can be a reflection of their personality and creativity. The more they experiment, the more unique their creations will be. They might even find that their fabric cards become a cherished keepsake for the birthday recipient, treasured long after the celebrations have ended!
Q: What types of fabric can I use for birthday cards?
A: You can use any fabric scraps you have on hand! Cotton, felt, and even old T-shirts work great. Just ensure the fabric is not too thick, so it adheres well to the card.
Q: Do I need special tools to attach fabric to the cards?
A: No special tools are necessary! You can use regular glue or a glue stick. If you want to sew, a simple needle and thread will do the trick.
Q: Can kids of all ages participate in making fabric cards?
A: Absolutely! Younger kids may need assistance with cutting and gluing, while older kids can handle sewing and more complex designs independently.

Interactive Birthday Cards
Interactive birthday cards are a fantastic way to engage the recipient and add a fun twist to traditional greetings. Imagine opening a card that not only delivers heartfelt wishes but also invites you to play a game or solve a puzzle! These cards can turn a simple birthday message into a memorable experience, making them a hit among kids and adults alike. The beauty of interactive cards lies in their ability to surprise and delight, transforming the act of giving into an engaging activity.
One popular idea for interactive cards is the inclusion of scratch-off surprises. Kids can create areas on the card that are covered with a special paint or stickers, which can be scratched off to reveal hidden messages or fun images. This element of surprise adds an exciting twist, as the recipient eagerly scratches away to uncover what lies beneath. It's like a mini treasure hunt right inside the birthday card! Not only does this encourage creativity, but it also provides a fun and interactive way to convey birthday wishes.
Another exciting option is the flip card. This type of card can be designed to flip open, revealing hidden messages or images that are sure to bring a smile. Kids can use their imagination to create multiple layers of surprises, each flip unveiling something new. For example, a card could start with a cheerful "Happy Birthday!" on the front, and as the recipient flips it open, they might find a photo collage of fun memories or a heartfelt message from the sender. This adds a personal touch and makes the card feel special.
To help kids get started with creating their own interactive birthday cards, here are some simple tips:
- Use colorful paper and decorations to make the card visually appealing.
- Incorporate elements like ribbons or buttons that can be pulled or pressed to reveal surprises.
- Encourage kids to write creative messages that tie into the interactive elements.
Creating interactive birthday cards not only fosters creativity but also enhances fine motor skills as kids cut, fold, and design their projects. Plus, it’s a wonderful way to bond with family and friends as they work together on these fun crafts. So, why not gather some supplies and let the kids' imaginations run wild? After all, the joy of receiving a card that is not just a card, but an experience, is priceless!
| Question | Answer |
|---|---|
| What materials do I need to make interactive cards? | You will need cardstock, scissors, glue, decorative items, and any special materials for interactive elements like scratch-off paint or stickers. |
| Are interactive cards suitable for all ages? | Yes! While kids can create them easily, adults can enjoy making and giving these cards too, making them perfect for any age group. |
| Can I incorporate technology into interactive cards? | Absolutely! You can include QR codes that link to videos or messages, adding a tech-savvy twist to your handmade cards. |
Scratch-Off Surprises
Imagine the excitement on a child's face when they discover a hidden message or image beneath a scratch-off surface! Scratch-off cards are not just a fun addition to birthday cards; they also create an interactive experience that engages the recipient in a delightful way. These cards can be made easily at home with just a few supplies, making them a perfect DIY project for kids. The thrill of scratching off a layer to unveil a surprise adds an element of playfulness that traditional cards simply can't match.
To create these magical scratch-off cards, kids will need a few materials:
- Cardstock or thick paper for the card base
- Acrylic paint (black works best for the scratch-off surface)
- Dish soap
- A paintbrush or sponge
- A coin or any scratching tool
First, start by designing the card. Kids can write a heartfelt birthday message or draw a fun picture on the front. Once they have their design ready, it’s time to create the scratch-off area. Mix two parts acrylic paint with one part dish soap in a small bowl. This combination will allow the paint to adhere well while making it easy to scratch off later. Using a paintbrush or sponge, cover the area where they want the surprise to be hidden. Let it dry completely, and voilà! The card is now ready for the big reveal.
When the birthday arrives, the recipient can use a coin to scratch off the painted area, unveiling a hidden message or image beneath. This could be anything from a simple “Happy Birthday!” to a fun drawing or even a small prize like a coupon for a treat. The possibilities are endless, and this interactive element ensures that the card will be a memorable part of the celebration.
Scratch-off surprises not only enhance the joy of receiving a card but also encourage kids to think creatively. They can experiment with different messages, colors, and designs, making each card unique. Plus, it’s a fantastic way to practice fine motor skills as they paint and scratch. So, why not give it a try? This simple yet engaging project can turn an ordinary birthday card into an extraordinary experience!
Q1: What materials do I need to make scratch-off cards?
A1: You will need cardstock, acrylic paint (preferably black), dish soap, a paintbrush or sponge, and a coin for scratching.
Q2: Can I use other colors besides black for the scratch-off area?
A2: While black is the most commonly used color because it provides a strong contrast, you can experiment with other colors. Just ensure they are opaque enough to hide the message underneath.
Q3: What can I hide under the scratch-off area?
A3: You can hide messages, images, or even small prizes like coupons or stickers. Get creative!
Q4: Is this project suitable for younger children?
A4: Yes! With adult supervision, younger children can participate in creating scratch-off cards. They can help with painting and designing while learning about the process.

Flip Cards
Flip cards are not just any ordinary birthday greeting; they are a delightful way to surprise and engage the recipient! Imagine the joy on a child's face when they open a card that reveals a hidden message or a fun image. Creating flip cards is a fantastic project for kids, as it combines creativity with a touch of engineering. They can design these cards to flip open in various ways, ensuring each card is unique and special.
To make a flip card, kids can start with a sturdy piece of cardstock. The process is simple yet rewarding. They can fold the card in half and cut a flap on one side, creating a 'door' that opens to reveal a secret message or a fun drawing inside. This little element of surprise can make a birthday card feel even more personal. Plus, it’s a wonderful opportunity for children to practice their cutting and folding skills, enhancing their fine motor abilities.
Here’s a simple breakdown of the steps to create a flip card:
- Materials Needed: Cardstock, scissors, markers, stickers, and glue.
- Step 1: Fold the cardstock in half.
- Step 2: Cut a rectangle on one side to create the flap.
- Step 3: Decorate the front with colorful drawings or stickers.
- Step 4: Write a heartfelt message inside the card.
Kids can get creative with their designs. They might want to add drawings of their favorite cartoons, use bright colors, or even incorporate glitter for that extra sparkle. The beauty of flip cards lies in their versatility. Whether it’s a simple heartfelt message or an elaborate pop-up scene, the possibilities are endless! Plus, they can personalize each card based on the recipient's interests, making each birthday greeting feel truly special.
Moreover, flip cards can also serve as a fun activity for birthday parties. Kids can create these cards as party favors or even as a group activity, encouraging teamwork and collaboration. Imagine a table full of children, giggling and sharing ideas as they craft their own flip cards. It’s not just about making a card; it’s about creating memories that last a lifetime!
In summary, flip cards are a wonderful way for kids to express their creativity while adding an interactive element to their birthday greetings. They not only provide a surprise but also foster a sense of accomplishment in young creators. So, the next time you’re looking for a fun and engaging birthday card idea, consider making flip cards. They’re sure to bring a smile to anyone’s face!
Q: What age is appropriate for kids to make flip cards?
A: Kids as young as 5 years old can start making simple flip cards with adult supervision. As they grow older, they can take on more complex designs.
Q: What materials do we need to make flip cards?
A: Basic materials include cardstock, scissors, markers, stickers, and glue. You can also add embellishments like ribbons or glitter for extra flair!
Q: Can flip cards be used for occasions other than birthdays?
A: Absolutely! Flip cards can be customized for any occasion, including holidays, thank you notes, or just to say "hello" to a friend.
Frequently Asked Questions
- What materials do I need for DIY birthday cards?
To create amazing DIY birthday cards, you’ll need some basic supplies like cardstock or blank cards, colored markers, watercolors, scissors, glue, and any decorative items you want to add, such as stickers or fabric scraps. The beauty of DIY is that you can use whatever you have at home!
- How can kids learn to make pop-up cards?
Making pop-up cards is easier than it sounds! Start with simple designs by cutting slits in the card’s fold and adding shapes that can pop up when the card opens. There are plenty of online tutorials that guide kids step-by-step, making it a fun learning experience!
- Are watercolor techniques suitable for beginners?
Absolutely! Watercolor techniques like wet-on-wet and dry brush are perfect for beginners. Kids can experiment with blending colors and creating textures, which makes the process enjoyable and allows for beautiful, unique results that they can be proud of.
- What are some ideas for using recycled materials?
Recycled materials can spark creativity! Kids can use old magazines, wrapping paper, or even fabric scraps to create collages or textured cards. This not only makes the cards unique but also teaches kids the importance of recycling and being eco-friendly.
- How do you make interactive cards?
Interactive cards can be made by incorporating fun elements like scratch-off areas or flip sections. For scratch-offs, kids can use special paint or stickers to cover messages. Flip cards can be created by folding the card in a way that reveals surprises when opened, making the card more engaging!
- Can kids personalize their cards?
Definitely! Personalization is what makes DIY cards special. Encourage kids to add their own messages, drawings, or even photos. This personal touch will make the recipient feel truly cherished and loved on their birthday.


