DIY: Repurpose a Mail File into a Spice Rack
Are you tired of rummaging through your kitchen drawers, searching for that elusive spice? Well, you're not alone! Many of us have faced the chaos of disorganized spices, leading to frustration and wasted time. But what if I told you that you could turn an ordinary mail file into a stylish and functional spice rack? Yes, you heard that right! In this article, we will explore how to transform a simple mail file into a chic spice rack that not only solves your storage woes but also adds a touch of personality to your kitchen. So, roll up your sleeves and let's dive into this exciting DIY project!
Before we jump into the fun part of crafting, we need to ensure that we select the perfect mail file for our spice rack. Not all mail files are created equal, so here are some key factors to consider:
- Material: Look for a sturdy mail file made of wood or heavy-duty plastic. Wood offers a classic look, while plastic can be more colorful and lightweight.
- Size: Think about how many spices you want to store. A larger mail file can accommodate more jars, while a smaller one may be perfect for just your favorites.
- Design: Choose a design that complements your kitchen decor. Whether you prefer a minimalist style or something more ornate, there’s a mail file out there for you!
Now that you've chosen your mail file, it’s time to prepare it for its new life as a spice rack. Preparation is key to ensuring a smooth and successful transformation. Start by giving the mail file a good cleaning to remove any dust or grime. Next, if your mail file has any rough edges, a light sanding will help create a smooth surface. This step is crucial, especially if you plan to paint it. After sanding, consider applying a primer to enhance paint adhesion and ensure a polished finish.
Let’s add some color! Painting your spice rack can truly elevate its look and make it a standout feature in your kitchen. You can choose from a variety of paint options, such as spray paint for a smooth finish or chalk paint for a more rustic vibe. Here’s a quick guide on how to paint:
1. Choose your paint color.
2. Apply a coat of primer if necessary.
3. Use even strokes to paint the mail file.
4. Allow it to dry completely before applying a second coat, if needed.
Once painted, consider adding a protective finish, like a clear sealant, to keep it looking fresh and vibrant for years to come.
With your newly painted spice rack ready, it's time to organize those spices! The key to an efficient spice rack is to keep everything neat and accessible. You might categorize your spices by type (like herbs, spices, and blends) or by frequency of use. To make it even easier, consider labeling your jars. You can use a label maker, chalkboard labels, or even handwritten tags for a personal touch. Remember, the goal is to make your cooking experience smoother and more enjoyable!
Now that your spice rack is all set, how do you want to display it? There are several mounting options to consider:
- Wall-mounted: This option saves counter space and keeps your spices within easy reach.
- Countertop: If you prefer a more casual look, place your spice rack on the counter where it can be easily accessed.
- Magnetic: For a modern twist, consider magnetic spice jars that can stick to your fridge or a magnetic board.
Customization is where you can let your creativity shine! Adding personal touches can make your spice rack truly unique. Think about using stencils to paint designs on the sides, or adding decorative knobs for a pop of color. You could even decoupage your favorite recipe onto the back of the rack for a fun and functional twist. The possibilities are endless, and it’s a great way to showcase your style!
To keep your spice rack looking fabulous, regular maintenance is essential. Wipe it down with a damp cloth to remove any dust or spills. If you notice any wear on the paint, a quick touch-up can work wonders. Also, check the spices periodically to ensure they’re still fresh. A well-maintained spice rack not only looks good but also enhances your cooking experience!
If you’re feeling inspired and want to repurpose more mail files, there are plenty of other creative uses! Here are a few ideas:
- Use them to organize office supplies.
- Create a mini bookshelf for small books or magazines.
- Transform one into a photo display by adding clips for pictures.
The options are limitless, and it’s a fantastic way to reduce waste while adding functionality to your home.
Once you’ve completed your project, don’t keep it to yourself! Sharing your DIY journey can inspire others to tackle their own home projects. Consider documenting the process with photos and sharing them on social media platforms like Instagram or Pinterest. You can even join DIY communities online where you can showcase your work and exchange tips with fellow enthusiasts. Your creativity could spark someone else's inspiration!
Q: How do I choose the right size mail file for my spice rack?
A: Consider how many spices you want to store and the space you have available in your kitchen. Measure the area where you plan to place the rack to ensure a good fit.
Q: Can I use any type of paint on my mail file?
A: Yes, but it's best to use paint that adheres well to the material of your mail file. For wood, acrylic or chalk paint works great, while plastic may require specialized spray paint.
Q: How do I keep my spices fresh?
A: Store spices in a cool, dark place and check their freshness regularly. If they lose their fragrance, it’s time to replace them!
Choosing the Right Mail File
When it comes to transforming a simple mail file into a stunning spice rack, the first step is to choose the right mail file. This decision can make or break your DIY project, so let’s dig into what you should look for. Think about the materials—are you leaning towards wood, metal, or perhaps a combination? Each material brings its own charm and functionality. For instance, a wooden mail file can add a rustic touch to your kitchen, while a metal one might give a modern, industrial vibe.
Next, consider the size of the mail file. You want it to fit comfortably in your kitchen space, but also be large enough to hold all your spices. Measure the area where you plan to mount it, and then look for a mail file that complements those dimensions. It’s like finding the perfect puzzle piece that completes the picture of your kitchen organization.
Design is another crucial factor. Some mail files come with multiple compartments, which can be a game-changer for organizing your spices. Others might have a sleek, minimalist design that suits a contemporary kitchen. Don’t forget to think about the color as well; a bright pop of color can make your spice rack a focal point in the room, while a neutral tone can blend seamlessly with your existing decor.
To help you visualize your options, here’s a quick comparison table:
| Material | Style | Best For |
|---|---|---|
| Wood | Rustic | Traditional kitchens |
| Metal | Industrial | Modern kitchens |
| Plastic | Colorful | Families with kids |
Ultimately, choosing the right mail file is about aligning it with your personal style and functional needs. Picture your spices neatly arranged, easily accessible, and beautifully displayed. Isn't that a sight worth striving for? So take your time, explore your options, and when you find that perfect mail file, you’ll know it’s the right fit for your spice rack transformation!

Preparing the Mail File
Before diving into the exciting world of DIY, it’s essential to set the stage by properly preparing your mail file. Think of this step as the foundation of a house; without a solid base, everything else might crumble. First things first, you need to give your mail file a good cleaning. Dust, dirt, and grime can easily accumulate, especially if it’s been sitting in a forgotten corner. Use a damp cloth to wipe it down thoroughly, ensuring no residue is left behind. This simple act not only makes it look presentable but also helps any paint or finish adhere better.
Once your mail file is clean, the next step is sanding. This might sound tedious, but trust me, it’s worth it! Sanding smooths out any rough spots and imperfections, creating a surface that’s ready for transformation. Grab some fine-grit sandpaper and gently sand the entire surface of the mail file. If you notice any stubborn areas, don’t hesitate to give them a little extra attention. You want your spice rack to look as polished as possible, so take your time with this step.
After sanding, it’s time to prime your mail file. Priming is like the warm-up before a workout; it prepares the surface for the main event. Choose a primer that suits the material of your mail file—whether it’s wood, plastic, or metal. Apply a thin, even coat of primer using a brush or spray can, and let it dry completely. This step is crucial because it prevents the paint from peeling and ensures a vibrant color payoff. Once the primer is dry, give it a light sanding to create a smooth finish.
Now that your mail file is clean, sanded, and primed, you’re ready to unleash your creativity! But before you jump into painting, take a moment to envision how you want your finished spice rack to look. Consider your kitchen's color scheme and decor style. Do you want a bold pop of color, or are you leaning towards a more rustic, natural look? The possibilities are endless, and this is where your personality can shine through!
In summary, preparing your mail file is a crucial step in ensuring your DIY spice rack turns out beautifully. By cleaning, sanding, and priming, you're setting yourself up for success. So gather your supplies, put on some music, and enjoy the process! After all, this is more than just a project; it’s a chance to express your creativity and enhance your kitchen space.
Painting and Finishing Touches
Now that you've prepped your mail file for its new life as a spice rack, it’s time to get creative! Painting and finishing touches are where you can truly let your personality shine through. The right color can transform your project from a simple storage solution to a stunning kitchen centerpiece. But how do you choose the perfect paint and finish?
First, consider the type of paint you want to use. There are several options available, each offering unique benefits:
- Acrylic Paint: Quick-drying and available in a wide range of colors, making it an excellent choice for beginners.
- Chalk Paint: Provides a matte finish with a vintage feel, perfect for rustic kitchens.
- Spray Paint: Ideal for achieving a smooth, even coat without brush strokes, but requires some outdoor space and safety precautions.
Once you've selected your paint, it's time to think about the application method. If you're using spray paint, ensure you're in a well-ventilated area and cover any surfaces you don't want painted. For brush-on paints, a high-quality brush will help you achieve an even finish. Start by applying a primer if your mail file is made of a material that absorbs paint unevenly, like raw wood. This step is crucial for ensuring your final color pops and lasts longer.
After priming, apply your chosen paint in thin, even layers. It’s better to do multiple light coats than one thick one, which can lead to drips and an uneven finish. Allow each layer to dry completely before applying the next. This patience will pay off in a beautiful, professional-looking finish.
Once your paint is dry, consider adding a protective finish. A clear sealant, such as polyurethane, can provide a durable layer that protects against moisture and heat in the kitchen. This is especially important since spices can sometimes spill or create a mess. Just like a good coat of armor, a sealant will keep your spice rack looking fresh for years to come!
Finally, don’t forget about the finishing touches. This is where you can really get creative! Think about adding decorative elements like stencils or decals that reflect your cooking style or kitchen theme. You could even attach decorative knobs or handles that complement your kitchen decor. These small details can make your spice rack unique and truly yours.
In summary, painting and finishing your repurposed mail file can be a fun and rewarding process. By choosing the right paint, applying it carefully, and adding personal touches, you’ll create a spice rack that not only organizes your spices but also enhances your kitchen's aesthetic. So roll up your sleeves, grab your paintbrush, and let your creativity flow!
Q: Can I use any type of mail file for this project?
A: While most mail files can work, it's best to choose one made from sturdy materials like wood or metal for durability.
Q: How do I clean my spice rack after it's finished?
A: Use a damp cloth and mild soap to clean your spice rack. Avoid harsh chemicals that could damage the finish.
Q: What if I want to change the color of my spice rack later?
A: You can always repaint your spice rack! Just sand it down lightly and apply a new coat of paint.
Organizing Your Spices
Once your DIY spice rack is complete, the next exciting step is to organize your spices in a way that not only looks fabulous but also makes them easily accessible during your culinary adventures. Imagine opening a cabinet and instantly spotting your favorite spices, rather than rummaging through a chaotic mess. Sounds dreamy, right? To achieve this, you can employ several strategies that cater to your cooking style and kitchen layout.
First off, consider the size and shape of your spice containers. If you have a mix of large jars and tiny tins, it’s best to group them by size. Organizing spices by type can also be effective. For instance, keep all your baking spices like cinnamon and nutmeg together, while grouping savory spices like basil and oregano in another section. This way, you’ll know exactly where to find what you need without wasting precious time.
Another fantastic tip is to utilize labels. Labeling your spice jars not only adds a professional touch but also helps in quickly identifying each spice. You can use a label maker for a sleek look or get crafty with handwritten labels on decorative tape. Either way, this small step can make a big difference in your kitchen efficiency. If you’re feeling particularly artistic, consider using chalkboard paint on your jars, allowing you to easily change labels as your spice collection evolves.
When it comes to actual placement, think about the frequency of use. Spices you use regularly should be front and center, while those you only reach for occasionally can be tucked away. If you’re short on space, consider stacking your spice jars in a tiered fashion, which allows you to see all the labels at a glance. If your spice rack is wall-mounted, you can even install small shelves or use magnetic containers to save counter space.
Lastly, don’t forget to periodically review your spice collection. Just like your wardrobe, spices can expire and lose their flavor. Make it a habit to check your spices every few months, tossing out any that have seen better days. This not only keeps your spice rack organized but also ensures that you’re cooking with the freshest ingredients possible.
In summary, organizing your spices is all about creating a system that works for you. By grouping them logically, labeling effectively, and regularly maintaining your collection, you’ll transform your spice rack into a functional masterpiece that inspires your culinary creativity.
Mounting Options for Your Spice Rack
Now that you have crafted your stunning spice rack from a mail file, it’s time to think about how to showcase it in your kitchen. The way you mount your spice rack can significantly affect both its functionality and aesthetic appeal. There are several options to consider, each with its own benefits and style. Let’s delve into the most popular mounting methods that can transform your kitchen space.
1. Wall-Mounted Spice Rack: This is perhaps the most common and space-efficient option. By mounting your spice rack on the wall, you can free up valuable counter space while keeping your spices within easy reach. To install, you’ll need some basic hardware, such as screws and wall anchors. Make sure to choose a spot that is easily accessible yet out of the way of cooking splatters. You can even arrange it above your countertop or next to your cooking area for ultimate convenience.
2. Countertop Spice Rack: If you prefer keeping your spices on the counter, a countertop spice rack is an excellent choice. This option allows for easy access while cooking, and you can place it right next to your stove. It’s particularly useful if you have limited wall space or want to display your beautifully labeled spice jars. For added flair, consider selecting a decorative tray or a tiered stand to elevate the look of your spice collection.
3. Magnetic Spice Rack: For a modern twist, why not consider a magnetic spice rack? This innovative option involves attaching small magnetic containers to your refrigerator or a magnetic board. It not only saves space but also adds a unique visual element to your kitchen. Just ensure that your spices are stored in airtight containers to maintain freshness. Plus, it’s a fun way to show off your favorite spices, making them easy to grab while cooking.
When deciding on the best mounting option, consider the following factors:
- Space Availability: Assess how much room you have in your kitchen. If you’re short on space, wall-mounted options might be your best bet.
- Accessibility: Think about where you do most of your cooking. You want your spices to be easily reachable when you need them.
- Aesthetic Appeal: Choose a mounting style that complements your kitchen decor. Whether it’s rustic, modern, or eclectic, your spice rack should enhance the overall look of your space.
Ultimately, the choice of how to mount your spice rack boils down to your personal preference and kitchen layout. Whichever option you choose, make sure it’s securely installed and adds a touch of charm to your culinary haven. Happy cooking!
Q: How do I determine the best height for my wall-mounted spice rack?
A: Ideally, the spice rack should be mounted at eye level or just above your cooking area for easy access. Make sure it’s reachable without having to stretch or climb.
Q: Can I use a mail file that is not wooden?
A: Yes! While wooden mail files are popular for their sturdiness, you can also repurpose plastic or metal mail files. Just ensure they can withstand the weight of your spice containers.
Q: How can I ensure my spices stay fresh in a magnetic rack?
A: Use airtight containers and store them in a cool, dry place. This will help preserve their flavor and potency, regardless of the mounting style.

Personalizing Your Spice Rack
When it comes to creating a spice rack that truly reflects your personality and style, the possibilities are endless! Personalization is where you can let your creativity shine, turning a simple mail file into a stunning kitchen accessory that not only serves a functional purpose but also adds character to your space. Have you ever walked into a kitchen and felt that it lacked warmth or individuality? Well, with a little effort, your spice rack can become the centerpiece that sparks joy every time you reach for your favorite seasoning.
One of the easiest ways to personalize your spice rack is through color and design. Think about the overall theme of your kitchen. Are you going for a rustic farmhouse vibe, a sleek modern look, or maybe a vibrant bohemian style? Choose colors and finishes that complement your existing decor. For instance, if your kitchen features a lot of wood, consider a natural stain or a soft pastel paint that harmonizes with the wood tones. Alternatively, bold colors can make a statement and become a conversation starter when guests visit.
Another exciting avenue for personalization is through embellishments. You can use stencils to paint fun patterns or quotes on your spice rack. Imagine having the words “Spice Up Your Life” elegantly painted in a stylish font! This not only adds flair but also serves as a reminder to experiment with flavors in your cooking. Additionally, decorative knobs or handles can add a unique touch. Consider using vintage drawer pulls or colorful ceramic knobs that match your kitchen’s color palette. These small details can make a big impact, transforming your spice rack into a work of art.
Don't forget about labels! Organizing your spices with beautifully designed labels not only enhances functionality but also adds to the aesthetic appeal. You can create custom labels using a label maker or print them out on decorative paper. For a more rustic feel, consider using chalkboard labels that you can write on and erase as needed. This way, you can easily change the contents of your jars without needing to create new labels every time. Plus, they add a charming touch that fits perfectly with a farmhouse or vintage theme.
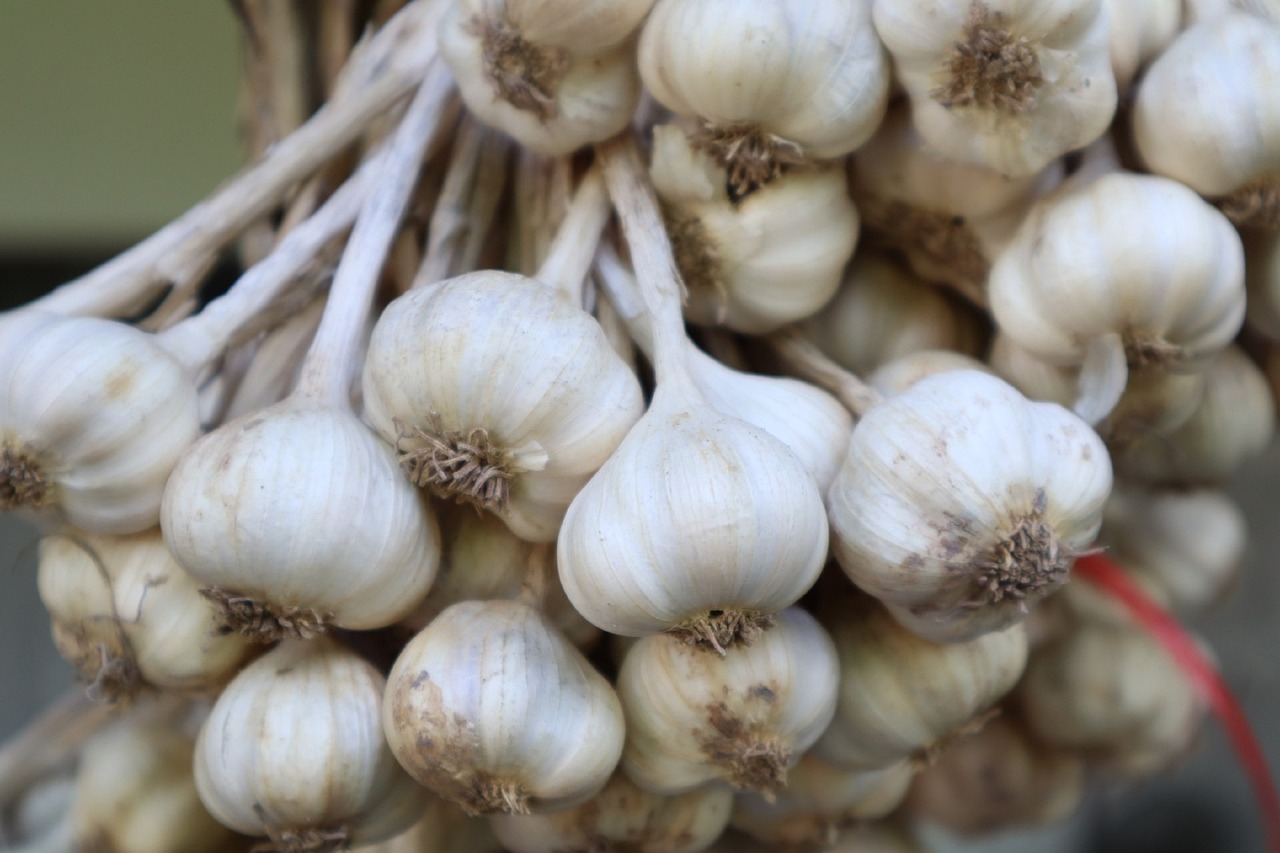
In addition to these ideas, think about how you can incorporate natural elements. Adding small potted herbs on top of your spice rack not only makes it look inviting but also provides fresh ingredients at your fingertips. Imagine snipping off a few basil leaves while cooking your favorite Italian dish! You could also hang dried herbs or spices from the sides of your rack, creating a beautiful and fragrant display.
Ultimately, personalizing your spice rack is about making it uniquely yours. Take the time to think about what elements resonate with you, whether that’s through color, texture, or functional design. Your spice rack should be a reflection of your culinary journey and a source of inspiration every time you step into your kitchen. So, roll up your sleeves, get creative, and let your spice rack tell your story!
- What materials are best for personalizing my spice rack? You can use paint, stencils, decorative knobs, and labels. Natural elements like herbs can also enhance the look.
- Can I change the design of my spice rack later? Absolutely! You can repaint, re-label, or add new embellishments whenever you want to refresh the look.
- How do I maintain the personalized features of my spice rack? Regular cleaning and gentle care will keep the paint and embellishments looking fresh. Avoid harsh chemicals that may damage the finish.
Maintenance Tips for Longevity
Once you've transformed your ordinary mail file into a stunning spice rack, the last thing you want is for it to lose its charm over time. **Proper maintenance** is essential to ensure that your creation remains both functional and visually appealing. Think of it as nurturing a plant; with the right care, it can thrive and bring beauty to your kitchen for years to come. Here are some key tips to keep your spice rack looking fresh and fabulous:
Firstly, it's crucial to **clean your spice rack regularly**. Dust and spice residue can accumulate, detracting from its beauty and potentially affecting the flavor of your spices. A simple solution is to use a damp cloth with a mild detergent. Gently wipe down the surfaces, making sure to get into the nooks and crannies where spices might settle. Avoid using abrasive cleaners, as they can scratch the finish. Think of your spice rack as a canvas; the cleaner it is, the more vibrant it will look!
Next, consider the **environment** where your spice rack is located. If it's near a stove or in direct sunlight, the heat and light can degrade the materials over time. To combat this, try to position your spice rack away from heat sources and bright sunlight. If that’s not possible, you might want to look into using UV-protective spray or a sealant to help preserve the finish. Just like a good sunscreen protects your skin, these measures can shield your spice rack from fading and wear.
Additionally, **check the stability** of your spice rack periodically. If it’s wall-mounted, ensure that the screws and brackets are secure. If it’s on the countertop, make sure it’s not wobbling or at risk of tipping over. A little maintenance goes a long way in preventing accidents. You wouldn’t want your beautifully organized spices to end up scattered across your kitchen floor, right?
Lastly, if you notice any signs of wear, such as scratches or chips, don’t hesitate to touch up the paint or finish. A quick sanding followed by a fresh coat of paint can restore its original glory. Think of it like giving your spice rack a refreshing makeover, keeping it in line with your kitchen's evolving style.
In summary, maintaining your spice rack is all about being proactive. By keeping it clean, ensuring it’s in a suitable environment, checking its stability, and touching up any wear, you can enjoy your DIY creation for many years to come. Remember, just like any cherished item in your home, a little love and attention can make a world of difference!
Here are some common questions you might have about maintaining your spice rack:
- How often should I clean my spice rack? Ideally, you should clean it every few weeks, or more often if you notice dust or spills.
- Can I use any type of cleaner? It’s best to stick to mild detergents and avoid harsh chemicals that can damage the finish.
- What should I do if my spice rack gets scratched? You can sand the area lightly and repaint it to restore its appearance.
- Is it safe to place my spice rack near the stove? While it’s convenient, try to keep it at a distance to avoid heat damage.
Alternative Repurposing Ideas
If you’re feeling inspired after transforming your mail file into a spice rack, why stop there? There are countless ways to repurpose mail files that can add functionality and flair to your home. Think of your mail file as a blank canvas, waiting for your creative touch. Here are some innovative alternatives that can help you declutter and organize your space:
One fantastic idea is to turn your mail file into a recipe holder. Imagine flipping through your favorite recipes while cooking, without the hassle of searching through a pile of papers. Simply place your recipe cards or printed recipes in the slots of the mail file, and voilà! You have a stylish and accessible way to showcase your culinary inspirations.
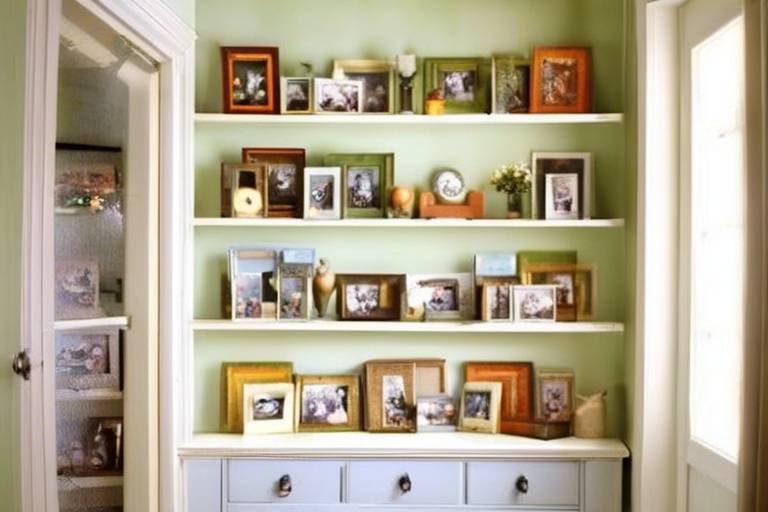
Another fun option is to create a photo display. Use your mail file to showcase family photos or artwork. You can easily switch out the pictures as your family's memories grow, keeping your decor fresh and personalized. This not only adds a decorative element to your home but also serves as a great conversation starter when guests visit.
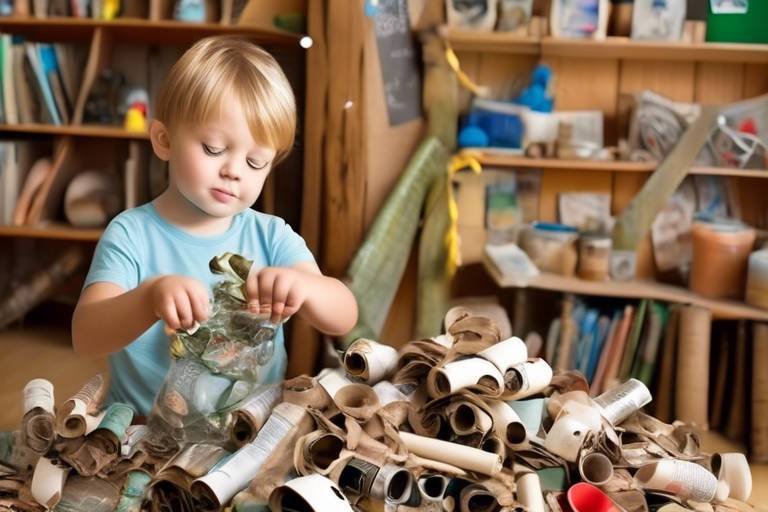
For those who are crafty, consider using mail files as a craft organizer. Store different types of papers, stickers, or small tools in each slot, making it easy to access your supplies while you work on projects. This can be especially useful for kids’ art supplies, helping to keep everything tidy and in one place.
Additionally, if you have a green thumb, you might want to transform your mail file into a plant holder. With a little creativity, you can place small potted herbs or succulents in the slots, bringing a touch of nature into your kitchen or living area. Not only does this look great, but it also allows you to grow your own herbs for cooking!
Lastly, if you have a lot of small items that need organizing, consider using a mail file as a stationery organizer. Store envelopes, notepads, and writing utensils in the slots, making it easy to grab what you need when you need it. This is a great way to keep your workspace tidy and functional.
As you can see, the possibilities are endless! Repurposing a mail file is not just about creating a spice rack; it’s about unleashing your creativity and finding new ways to enhance your living space. So, gather your materials and let your imagination run wild!
Q: Can I use any type of mail file for this project?
A: Yes, you can use various types of mail files, but those made of sturdy materials like wood or metal tend to work best for durability and aesthetics.
Q: Do I need any special tools for painting or finishing?
A: Basic tools like paintbrushes, sandpaper, and primer are usually sufficient. If you choose spray paint, ensure you work in a well-ventilated area.
Q: How can I ensure my spices stay fresh in the new rack?
A: Store spices in airtight containers and keep them in a cool, dark place to maintain their freshness and flavor.
Q: What if I want to change the theme of my kitchen later?
A: You can easily repaint or refinish your spice rack to match your new kitchen theme. Just make sure to choose colors and finishes that complement your decor.
Q: Can I use this mail file idea in other rooms?
A: Absolutely! Mail files can be repurposed for various uses in any room, from organizing craft supplies to holding magazines in your living room.
Sharing Your DIY Success
Once you've transformed your ordinary mail file into a stunning spice rack, the excitement doesn't have to end there! Sharing your DIY success can not only bring you a sense of accomplishment but also inspire others to embark on their own creative journeys. Think of it as planting a seed of creativity in the minds of your friends, family, and even strangers online. So, how can you effectively showcase your handiwork?
First and foremost, consider documenting the entire process. Take photos at different stages—from the initial mail file selection to the final touches on your spice rack. These snapshots will serve as a visual narrative that captures the essence of your project. You can create a simple slideshow or a blog post detailing each step, complete with tips and tricks you learned along the way. This not only enhances your storytelling but also provides valuable insights for those who may want to replicate your project.
Next, leverage social media platforms to share your DIY journey. Platforms like Instagram, Pinterest, and Facebook are perfect for showcasing your finished product. Use relevant hashtags like #DIYSpiceRack or #HomeOrganization to reach a broader audience. Engaging with DIY communities online can also amplify your reach. You might be surprised at how many people are eager to share their thoughts, tips, and even their own projects!
Additionally, consider creating a short video tutorial. Video content is incredibly popular and can effectively convey the process in a dynamic way. You don't need fancy equipment; a smartphone camera will do just fine. Just remember to keep it engaging—add a bit of personality to your narration, and don’t shy away from showing off your personality. After all, your unique touch is what makes your DIY project special!
Lastly, if you are part of any local community groups or workshops, don’t hesitate to share your success there too. You could host a small gathering to showcase your spice rack and even demonstrate how you made it. This not only allows you to connect with others but also fosters a sense of community around shared interests.
In conclusion, sharing your DIY success is all about connecting with others and inspiring creativity. Whether through social media, in-person gatherings, or community platforms, your journey can spark ideas and motivate others to take on their own projects. So, go ahead and let your creativity shine—who knows, you might just ignite a DIY revolution!
Q: How can I document my DIY project effectively?
A: Take clear photos at each stage of your project, and consider writing a detailed blog post or creating a slideshow to share your process.
Q: Which social media platforms are best for sharing DIY projects?
A: Instagram, Pinterest, and Facebook are excellent platforms to showcase your work and connect with other DIY enthusiasts.
Q: Should I create a video tutorial for my DIY project?
A: Yes! Video tutorials can be engaging and provide a dynamic way to share your process. Use your smartphone for simple yet effective content.
Q: How can I connect with local DIY communities?
A: Join local groups on social media, attend workshops, or participate in community events to share your projects and gather inspiration.
Frequently Asked Questions
- What type of mail file is best for a spice rack?
When choosing a mail file for your spice rack, look for one made of sturdy materials like wood or metal. The size should be appropriate for your spice jars, and the design should complement your kitchen decor. A file with multiple compartments can help organize various spices efficiently.
- How do I prepare my mail file before painting?
Preparation is key! Start by cleaning the mail file thoroughly to remove any dust or grime. Next, sand the surface to create a smooth finish, which helps the paint adhere better. Finally, apply a primer if you’re using a lighter color or if the material is slick; this will enhance the final look of your spice rack.
- What paint should I use for my spice rack?
For a spice rack, consider using spray paint for a smooth finish or chalk paint for a matte look. Both options are great, but chalk paint can provide a more rustic vibe. Ensure you choose a paint that is safe for kitchen use and can withstand humidity.
- How can I organize my spices effectively?
To keep your spices organized, group them by type or frequency of use. You can use small containers or jars with labels for easy identification. Consider arranging them alphabetically or by cuisine type to streamline your cooking process. Don't forget to leave some space for new spices you might want to try!
- What are the best mounting options for my spice rack?
There are several options for mounting your spice rack. Wall-mounted racks save counter space and keep your spices within reach. If you prefer a more flexible setup, a countertop rack can be easily moved. Magnetic spice racks can also be a fun and modern solution, allowing you to stick your spices right on the fridge!
- How can I personalize my spice rack?
Add your personal touch by using stencils to paint designs or decals that match your kitchen theme. Decorative knobs can also enhance the functionality and aesthetics of your spice rack. Get creative with colors and patterns to make it uniquely yours!
- What maintenance does my spice rack need?
To keep your spice rack looking fresh, regularly wipe it down with a damp cloth to remove dust and spills. Avoid harsh chemicals that could damage the finish. If you notice any wear, consider reapplying paint or a sealant to protect it from moisture.
- What are some alternative uses for a mail file?
If you're feeling inspired, a mail file can be repurposed for various other uses! Consider transforming it into a file organizer for paperwork, a craft supply holder, or even a small bookshelf for children's books. The possibilities are endless!
- How can I share my DIY project with others?
Once your project is complete, share your success on social media platforms like Instagram or Pinterest. You can also join DIY communities online to inspire others and exchange ideas. Documenting your process with photos can make your sharing even more engaging!