How to Design Your Own Sewing Patterns
Are you ready to unleash your creativity and dive into the fascinating world of sewing? Designing your own sewing patterns is not just a skill; it's a superpower that allows you to transform your fashion dreams into reality. Picture this: a wardrobe filled with unique pieces that no one else has, all crafted by your own hands. Sounds exciting, right? In this article, we’ll explore the essential steps and techniques for creating custom sewing patterns, empowering you to bring your unique fashion ideas to life through personalized designs. So grab your measuring tape and let’s get started!
Before we jump into the creative process, it’s essential to understand the basics of pattern making. Think of it as the foundation of a house; without a solid base, everything else can crumble. Familiarizing yourself with key concepts, terminology, and tools is crucial for successful pattern making. You'll need a few basic tools: a ruler, a measuring tape, pattern paper, and a pair of scissors. Understanding terms like grainline, seam allowance, and ease will also set you on the right path. These terms are the building blocks of your pattern-making journey, and knowing them will help you communicate your ideas more effectively.
Inspiration is the lifeblood of any creative endeavor. Where do you find it? Well, inspiration can come from anywhere! It might be a stroll through nature, a glance at the latest fashion trends, or even a cherished memory from your childhood. The key is to stay open and observant. Consider keeping a mood board or a sketchbook where you can jot down ideas, colors, and shapes that resonate with you. Don't hesitate to explore different sources of inspiration:
- Fashion magazines and blogs
- Art galleries and museums
- Social media platforms like Pinterest and Instagram
- Your own wardrobe—what do you love to wear?
By immersing yourself in these sources, you’ll discover a wealth of ideas that can help shape your unique designs.
Once you have a design in mind, the next step is selecting the right materials. This is where the magic truly happens! The fabric you choose can dramatically affect the look and feel of your finished piece. Different fabrics have unique properties that can influence your pattern’s drape, structure, and overall aesthetic. For instance, cotton is great for beginner projects due to its ease of handling, while silk can add a luxurious touch to your designs. Here’s a quick table to help you understand some common fabric types:
| Fabric Type | Properties | Best Uses |
|---|---|---|
| Cotton | Breathable, durable | Tops, dresses, quilts |
| Silk | Soft, luxurious, delicate | Evening wear, blouses |
| Wool | Warm, insulating | Coats, sweaters |
Choosing the right fabric is crucial for ensuring your design not only looks good but also feels good to wear.
A basic block is like a blank canvas for an artist; it serves as the foundation for all your patterns. Creating a basic block tailored to your measurements and style preferences is essential. Start by taking accurate measurements of your body—this will be your guide as you draft your block. Don’t worry if you’re unsure how to take measurements; there are plenty of online tutorials to help you out. Once you have your measurements, you can begin drafting your basic block on pattern paper. This block will be the starting point for all your future designs, so take your time to ensure it fits perfectly!
With your basic block ready, it’s time to unleash your creativity and draft your pattern. This step is where your unique ideas come to life! Start by sketching out your design on paper, considering elements like neckline, sleeve style, and hemline. Then, transfer these ideas onto your basic block. Make sure to include seam allowances and any necessary markings. This is a crucial step, as it will dictate how your final garment will look and fit. Don’t be afraid to make adjustments; pattern drafting is all about trial and error.
Now that you have your basic pattern drafted, it’s time to add some flair! Style lines and details are what make your pattern truly unique. Consider adding elements like darts, pleats, or pockets to enhance the design. This is your opportunity to reflect your personal style and creativity. Remember, the little details can make a big difference. Whether it’s a unique collar shape or an interesting seam line, these elements will set your design apart from the crowd.
Before you finalize your design, it’s essential to test your pattern. Creating a muslin version allows you to see how your design fits and functions in real life. This step is crucial for identifying any adjustments needed before cutting into your final fabric. Don’t skip this step! It’s much easier to make changes on a muslin than on your precious fabric. Plus, it’s a great way to learn about fit and construction.
The last step in your pattern-making journey is finalizing your design and preparing it for use. Make sure to double-check all your measurements and adjustments before printing. Formatting your pattern for printing is essential to ensure it’s easy to read and follow. Consider including clear instructions and labels for each piece. Once everything is ready, you can print your pattern and get excited about sewing your creation!
Q: Do I need to be an expert sewer to create my own patterns?
A: Not at all! While some sewing experience helps, pattern making is a skill you can learn over time. Start simple and build your skills gradually.
Q: How do I know what size to make my pattern?
A: Take accurate body measurements and refer to size charts provided by pattern companies. You can also create a custom size based on your measurements.
Q: Can I use existing patterns as a base?
A: Absolutely! Many sewists modify existing patterns to create their own unique designs.
Q: What if I make a mistake while drafting my pattern?
A: Don’t worry! Mistakes are part of the learning process. You can always adjust and refine your pattern as you go.

Understanding Pattern Making Basics
Before diving into the exciting world of sewing pattern design, it's crucial to grasp the fundamentals. Think of pattern making as the blueprint of your garment. Just like an architect wouldn't build a house without a solid plan, you shouldn't start sewing without a well-structured pattern. Understanding the basic terminology and concepts will set you up for success and make the entire process smoother.
First off, let’s talk about some essential terminology. Here are a few key terms you’ll frequently encounter:
- Block: A basic template that serves as the foundation for creating various patterns.
- Ease: The extra room added to a pattern to ensure comfort and movement.
- Seam Allowance: The area between the edge of the fabric and the stitching line, which is crucial for sewing.
- Grainline: The direction of the fabric threads, which affects how the garment drapes and fits.
Now, let’s discuss some tools you’ll need for pattern making. Having the right tools can make all the difference in accuracy and efficiency. Here’s a quick list of must-haves:
- Pattern paper: This is where your designs will come to life.
- Ruler and French curve: For creating straight lines and smooth curves.
- Measuring tape: Accurate measurements are key!
- Scissors: A good pair of fabric scissors is essential.
- Tracing wheel and carbon paper: For transferring your designs onto fabric.
Understanding the principles of fit is another crucial aspect of pattern making. Fit can make or break a garment. You want your creations to not only look good but also feel good. This involves knowing your body measurements and how different styles will fit various body types. Remember, everyone’s body is unique, and what works for one person may not work for another. So, take the time to measure yourself accurately, and don’t hesitate to make adjustments to your patterns as needed.
Lastly, let’s touch on the importance of practice. Like any skill, pattern making improves with experience. Don’t be afraid to experiment with different styles and techniques. Each pattern you create will teach you something new, and before you know it, you’ll be designing like a pro! Remember, the journey of creating your own sewing patterns is just as rewarding as the finished product.
Gathering Inspiration for Your Design
Finding inspiration is like embarking on a treasure hunt; sometimes it’s hidden in plain sight, and other times, it requires a bit of digging. The beauty of sewing lies in its limitless potential to express your unique style, and gathering inspiration is the first step in this creative journey. So, where do you start? Let’s explore some exciting sources that can ignite your imagination and fuel your design process.
First and foremost, fashion trends can be a fantastic source of inspiration. By keeping an eye on runway shows, fashion magazines, and social media platforms like Instagram and Pinterest, you can discover what’s currently in vogue. However, don’t just follow trends blindly. Instead, think of them as a buffet of ideas from which you can select elements that resonate with your personal style. For instance, if oversized silhouettes are trending, consider how you could incorporate that into your own designs without losing your unique flair.
Another rich source of inspiration is nature. The colors, textures, and patterns found in the environment can be incredibly motivating. Imagine the vibrant hues of a sunset or the intricate patterns on a butterfly’s wings. These natural elements can influence your choice of fabrics and designs. Take a stroll in a park or visit a botanical garden; you might find that the colors of blooming flowers or the shapes of leaves spark an idea for your next sewing project.
Your personal experiences and memories can also serve as profound sources of inspiration. Think about significant moments in your life or cherished memories associated with certain clothing items. Perhaps you have a favorite dress from childhood that brings back fond memories. Why not recreate that feeling with a modern twist? By tapping into your personal narrative, you can create designs that are not only beautiful but also meaningful.
While exploring these sources, it’s essential to keep an inspiration journal. This can be a physical notebook or a digital collection where you can gather images, sketches, and notes. As you compile your thoughts and visuals, you’ll start to notice patterns in what inspires you, which can guide your design process. Here’s a quick table to help you categorize your inspiration sources:
| Source of Inspiration | Description | How to Use |
|---|---|---|
| Fashion Trends | Current styles and looks in the fashion industry. | Adapt elements that resonate with your style. |
| Nature | Colors, textures, and patterns found in the environment. | Use natural elements to influence color palettes and patterns. |
| Personal Experiences | Memories and significant moments in your life. | Create designs that evoke personal feelings or stories. |
Lastly, don’t underestimate the power of collaboration. Talking to fellow sewists or joining online sewing communities can provide fresh perspectives and ideas. Sometimes, just a simple conversation about what others are working on can spark an idea for your own project. Remember, inspiration is everywhere; it’s all about having an open mind and being willing to explore.
As you gather your inspiration, keep in mind that the goal is to create something that reflects who you are. So, take your time, be curious, and let your creativity flow. Your next sewing pattern is waiting to be born!
- What if I can’t find inspiration? Sometimes, taking a break or exploring a new hobby can help clear your mind and spark new ideas.
- How do I know if my inspiration is unique? While inspiration can come from various sources, it’s the way you interpret and combine those ideas that makes your design unique.
- Can I use someone else's design as inspiration? Absolutely! Just remember to put your own spin on it to make it your own.
Choosing the Right Materials
When it comes to sewing, the fabric you choose can make or break your entire project. Imagine trying to construct a delicate evening gown out of thick canvas—it just wouldn't work! Choosing the right materials is essential for achieving the desired look and feel of your garment. So, how do you navigate the vast sea of fabrics available? Let's dive into the world of textiles and discover what makes each material special.
First off, you need to consider the type of garment you are creating. Are you designing a flowy summer dress or a structured winter coat? Each piece requires different fabric properties. For instance, lightweight fabrics like cotton voile or chiffon are perfect for summer attire, providing breathability and movement. On the other hand, heavier materials such as wool or denim offer warmth and structure, making them ideal for colder months.
Next, let's talk about fabric properties. Understanding these will help you make informed decisions. Here are some key characteristics to keep in mind:
- Weight: Heavier fabrics tend to drape differently than lighter ones. A fabric's weight can affect the overall silhouette of your design.
- Stretch: Fabrics like jersey or spandex offer elasticity, which is essential for fitted garments. If your design requires movement, opt for materials with some stretch.
- Texture: The feel of the fabric can greatly influence the comfort and aesthetic of your piece. Smooth fabrics like satin contrast beautifully with textured options like lace or brocade.
Additionally, don’t forget about the care instructions for each fabric. Some materials may require dry cleaning, while others can be easily machine washed. If you're designing something for everyday wear, you might want to choose fabrics that are easy to care for. After all, who has time for delicate hand-washing?
Another important aspect is color and pattern. Fabrics come in a plethora of colors and prints, allowing you to express your personal style. However, keep in mind that the pattern of the fabric can affect the way your design looks. For instance, large prints might overwhelm a small garment, while small prints can get lost in larger designs. It’s all about balance!
For those looking to take their designs to the next level, consider experimenting with blends. Fabric blends, such as cotton-polyester or silk-wool, can provide the best of both worlds—durability and softness. These combinations often enhance the fabric's properties, making them more versatile for different types of garments.
Finally, always source your materials from reputable suppliers. High-quality fabrics not only look better but also wear longer, saving you time and money in the long run. Plus, supporting local fabric stores can often lead to discovering unique textiles that can make your designs stand out.
In conclusion, choosing the right materials is a crucial step in the pattern-making process. By considering the type of garment, fabric properties, care instructions, and sourcing quality materials, you set yourself up for success in bringing your unique fashion ideas to life. Remember, the right fabric can elevate your design from ordinary to extraordinary!
Creating a Basic Block
Creating a basic block is like laying the foundation of a house; it sets the stage for everything that comes after. This fundamental step in pattern making is essential for crafting garments that fit perfectly and reflect your unique style. So, how do you get started? First, you’ll need to take some accurate measurements. This isn't just a quick guess; it’s about understanding your body. Take your time and consider using a friend to help you measure those tricky spots. The key measurements you'll need include:
- Chest/Bust: Measure around the fullest part.
- Waist: Measure around the narrowest part.
- Hip: Measure around the fullest part of your hips.
- Back Length: Measure from the nape of your neck to your waist.
- Front Length: Measure from the shoulder seam to your waist.
Once you've gathered your measurements, it's time to draw your basic block. You can do this on pattern paper or even a large piece of butcher paper. Start by marking a vertical line for the center front and a horizontal line for the waistline. From there, you will create a rectangle using your bust, waist, and hip measurements. This rectangle is the starting point for your block.
Next, you’ll want to add ease to your block. Think of ease as the breathing room in your garment. It’s essential for comfort and movement. Depending on the style of the garment you're creating, you might want to add anywhere from 1 to 4 inches of ease. For example, a fitted dress might require less ease, while a loose-fitting top might need more.
After you’ve added ease, it’s time to shape your block. This involves drawing the armholes, neckline, and side seams. Don’t worry about getting it perfect on the first try; this is your basic block, and it’s meant to be adjusted. You can use a French curve ruler to help get those smooth curves just right. Remember, this block is your canvas, and you can always modify it later as you experiment with different styles.
Now, let’s talk about the importance of seam allowances. A seam allowance is the extra fabric you leave when cutting out your pattern pieces, which allows you to sew them together without running out of fabric. Generally, a seam allowance of 1/4 to 5/8 of an inch is standard, but you can adjust it based on your sewing technique or fabric type. Mark this allowance clearly on your block to avoid any confusion later on.
Once you’ve finished shaping your basic block, it’s time to cut it out. Use sharp scissors to ensure clean edges and take your time. After cutting, label your block pieces clearly. This makes it easier to reference later when you start drafting your patterns. You might even want to create multiple blocks for different styles or fits, such as a fitted block for dresses and a looser block for tops.
In summary, creating a basic block is a vital part of pattern making that requires precision, patience, and a bit of creativity. It’s the blueprint for all your future designs, so take your time with it. Once you have your block perfected, you’ll find that drafting new patterns becomes a much smoother and more enjoyable process.
Q: What if my measurements change?
A: It’s perfectly normal for measurements to fluctuate. Always re-measure before starting a new project to ensure the best fit.
Q: Can I use a basic block for different styles?
A: Absolutely! A basic block is a versatile foundation that can be modified to create various styles and silhouettes.
Q: How do I know how much ease to add?
A: The amount of ease depends on the garment style. Fitted styles require less ease, while looser styles need more. Experiment to find what works best for you!
Drafting Your Pattern
Once you have your basic block ready, it's time to unleash your creativity and start . This phase is where your unique vision begins to take shape, transforming your ideas into a tangible design. Think of this as the moment when a sculptor starts chiseling away at a block of marble; you have the raw material, and now it’s time to carve out something beautiful!
To begin drafting, you’ll need a few essential tools at your disposal. Grab your pattern paper, a ruler, a pencil, and some French curves or a hip curve ruler. These tools will help you create smooth lines and accurate measurements, ensuring your pattern is as precise as possible. Remember, the key to a successful pattern lies in the details; even the slightest miscalculation can lead to a design that just doesn’t fit right.
Start by laying your basic block on the pattern paper. This block serves as the foundation, and it’s crucial to keep it as your reference point. From here, you can begin to modify the block according to your design ideas. For instance, if you want to create a dress with a flared skirt, you’ll need to add extra width at the hemline. Use your ruler to measure out the desired flare, and then draw the new lines smoothly. If you’re unsure how much to add, a good rule of thumb is to start with an additional 4 to 6 inches at the hem and adjust as necessary.
As you draft, keep in mind the overall silhouette you’re aiming for. Are you going for a fitted look or something more relaxed? This decision will guide your modifications. For example, if you’re designing a fitted bodice, you may want to take in the side seams slightly for a snugger fit. Conversely, a looser style may require you to add some ease at the waist and bust. Don’t forget to account for seam allowances, typically around 1/4 to 5/8 inches, depending on your sewing technique.
After you’ve made your adjustments, it’s time to add any design elements that will make your pattern truly yours. This could include style lines, darts, pockets, or even unique neckline shapes. Adding these details not only enhances the visual appeal of your garment but also contributes to its functionality. For example, if you’re incorporating pockets, ensure they’re positioned at an accessible height. You might want to sketch these details directly onto your pattern to visualize how they will look once sewn.
Once your drafting is complete, it’s crucial to double-check your work. Go over your lines and measurements to ensure everything is accurate. A good practice is to fold the pattern along the seam lines to see how it will fit together. This step can help you catch any mistakes before you cut into your fabric. If you’re feeling adventurous, consider creating a second version of the pattern with different modifications. This experimentation can lead to exciting new designs!
After finalizing your pattern, the next step is to create a muslin version. This test garment will allow you to assess the fit and make any necessary adjustments before cutting into your final fabric. Remember, drafting is not just about getting it right the first time; it’s a process of trial and error. Embrace the journey, and don’t be afraid to make changes along the way!
- What is the difference between a basic block and a pattern?
A basic block is a simple template based on your measurements, while a pattern is a more complex design that incorporates style lines and details. - How do I determine the right size for my pattern?
Take accurate body measurements and compare them with the sizing chart provided for the pattern. Adjust as needed for a perfect fit. - Can I use any fabric for my muslin test?
It’s best to use a fabric similar in weight and drape to your final fabric choice, but muslin or inexpensive cotton works well for testing.
Adding Style Lines and Details
When it comes to sewing patterns, the magic truly happens when you start to add style lines and details. This is where your creativity can really shine, transforming a basic shape into a stunning piece that reflects your unique vision. Think of style lines as the brush strokes on a canvas; they can change the entire look and feel of your design. Whether it’s a simple seam or an intricate embellishment, these elements can elevate your garment from ordinary to extraordinary.
To begin adding style lines, consider the overall silhouette you want to achieve. Are you aiming for a fitted look, or something more relaxed and flowing? The placement of style lines can significantly influence the garment's fit and aesthetics. For instance, vertical lines can create an illusion of height, while horizontal lines can add width. You might also want to think about incorporating curved lines to soften the look or add a touch of femininity.
Once you have a clear vision, grab your pencil and start sketching. This doesn't have to be a perfect drawing; just get your ideas down on paper. You can use darts, princess seams, or even yokes to enhance the fit and style of your garment. Each of these elements serves a specific purpose:
- Darts: These are essential for shaping the bust, waist, and hips, allowing the fabric to contour to the body.
- Princess Seams: These provide a more fitted look by running from the shoulder or armhole down to the hem, creating a beautiful silhouette.
- Yokes: Often used in shirts and dresses, yokes can add visual interest and structure to the garment.
Next, think about adding details that can make your design pop. This could be anything from pockets to embroidery or even bias binding along the edges. Each detail can add a personal touch that sets your pattern apart from others. For example, adding a contrasting fabric for pocket linings can create a fun surprise when the wearer reaches for their phone!
Don't forget about the neckline and hemline; these areas are often overlooked but can dramatically change the overall look of your garment. A boat neck can lend elegance, while a V-neck can create a more casual vibe. Similarly, a straight hem can be classic, while a curved hem can add a modern twist. Think of these elements as the finishing touches that can take your design from good to great.
Finally, it's essential to visualize how these style lines and details will work together. You might want to create a mood board or a digital collage to see how your ideas fit together. This can be a fun way to experiment with different combinations and see what resonates with your style. Remember, the goal is to create something that feels authentic to you, so don’t be afraid to take risks!
In conclusion, adding style lines and details to your sewing patterns is an exciting part of the design process. It’s where you can truly express your creativity and make your garment unique. So grab your tools, let your imagination run wild, and watch your ideas come to life!
Q: What are style lines in sewing patterns?
A: Style lines are the lines that define the shape and design of a garment. They can include seams, darts, and other elements that shape the fabric to create a specific silhouette.
Q: How can I ensure my style lines are flattering?
A: Consider your body shape and the silhouette you want to achieve. Experiment with different placements of style lines and try on muslin versions to see what works best for you.
Q: Can I use multiple style lines in one pattern?
A: Absolutely! Combining different style lines can create a unique and interesting design. Just be mindful of how they interact with each other to maintain a cohesive look.
Testing Your Pattern
Once you've drafted your sewing pattern, it's time to put it to the test. Think of this stage as a rehearsal before the big performance; you want everything to fit just right. Testing your pattern is crucial because it allows you to identify any areas that need adjustments before cutting into your precious fabric. Imagine spending hours sewing a garment only to find out it doesn’t fit as expected. That’s a nightmare, right? So, let’s dive into how to effectively test your pattern.
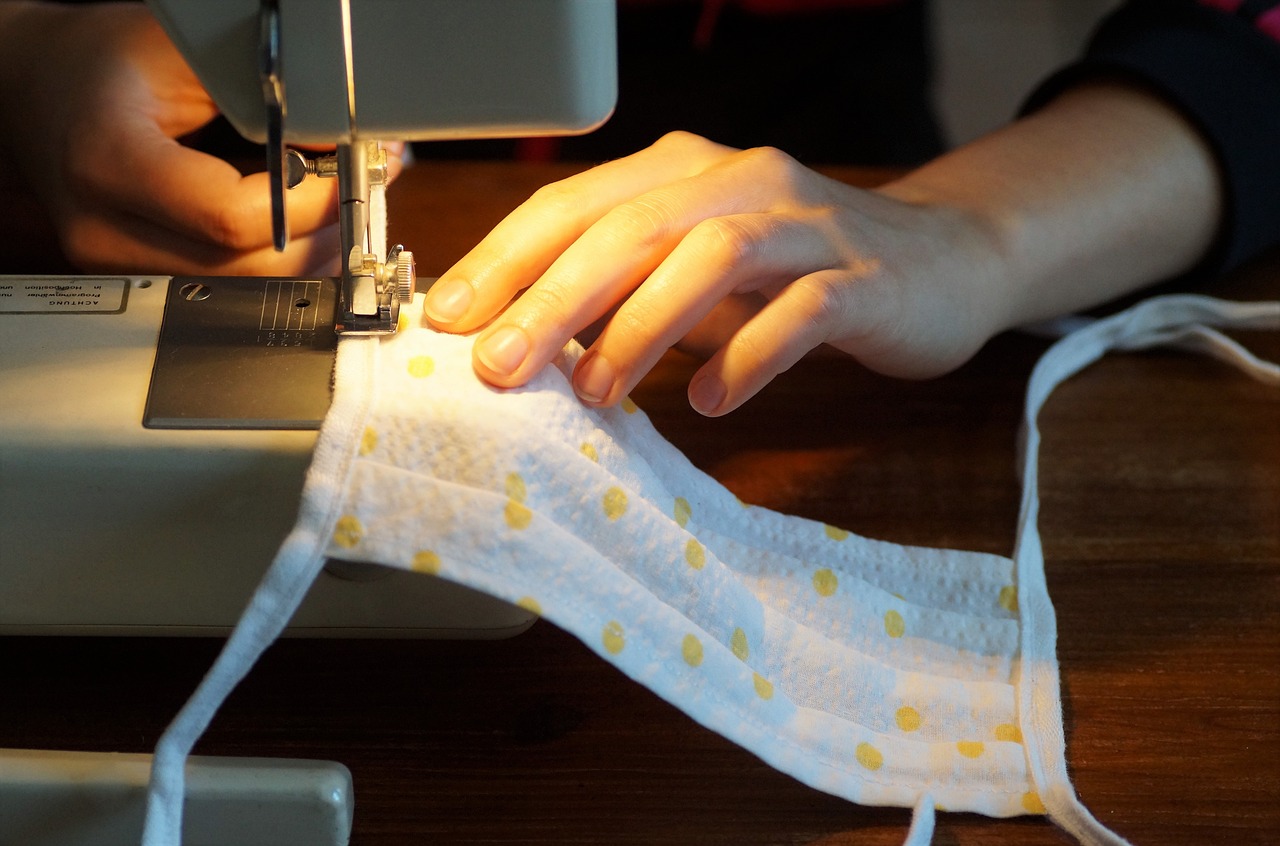
The first step in testing your pattern is to create a muslin version. Muslin is a type of cotton fabric that is inexpensive and easy to work with. It’s like the training wheels of sewing—perfect for making mistakes without the guilt of ruining expensive materials. When you cut your pattern pieces from muslin, make sure to use the same cutting techniques you would on your final fabric. This way, you’ll get a true sense of how the finished product will look and feel. Remember, the goal here is to assess the fit and functionality of your design.
As you sew your muslin together, keep an eye on several key aspects:
- Fit: Does the garment hug your curves in all the right places? Is there any excess fabric that needs to be taken in?
- Ease of Movement: Can you move comfortably? Raise your arms, sit down, and bend—does the garment allow for these movements without restriction?
- Design Details: Are the style lines and details working as you envisioned? Do they enhance the garment or detract from it?
After you've sewn the muslin, try it on and evaluate how it feels. Don't be shy—grab a friend or family member to help you assess the fit from different angles. Sometimes an extra pair of eyes can catch things you might miss. Take notes on what you like and what needs tweaking. This feedback will be invaluable when you're ready to make adjustments.
Once you've made your observations, it's time to adjust your pattern. This could involve adding or removing ease, altering seam lines, or even changing the silhouette. Don't be afraid to make bold changes; after all, this is your design! After making adjustments, it's wise to create another muslin version to ensure all changes are effective. It might feel tedious, but trust me, it’s worth the effort. Think of it as refining a diamond—every cut enhances its brilliance.
After testing and adjusting your pattern, you should have a well-fitted muslin that reflects your original vision. This process is not just about making a garment; it’s about understanding your body and how fabric interacts with it. With a solid foundation now in place, you’re ready to move on to the final stages of your sewing journey.
In conclusion, testing your pattern is a vital step that can save you time, money, and frustration in the long run. Embrace the process, make necessary adjustments, and soon you’ll be ready to cut into your favorite fabric with confidence. Remember, every great designer has gone through this process, and now it’s your turn to shine!
Q: Why is it important to test my pattern?
A: Testing your pattern ensures a proper fit and allows you to make necessary adjustments before cutting into your final fabric, saving you time and resources.
Q: What fabric should I use for my muslin?
A: Muslin is a popular choice because it’s inexpensive and easy to work with. However, any fabric that is similar in weight and drape to your final fabric can be used.
Q: How many times should I test my pattern?
A: It depends on the complexity of your design. For simple patterns, one muslin test may suffice, while more intricate designs might require multiple tests to get everything just right.
Finalizing and Printing Your Pattern
Once you've navigated the exciting journey of designing your sewing pattern, it's time to bring it to life! Finalizing and printing your pattern is the last crucial step before you can start stitching your unique creation. This phase is all about ensuring that your design is not only visually appealing but also practical and ready for use. So, how do you go about this? Let’s break it down into manageable steps.
First, you'll want to ensure that your pattern pieces are properly aligned and labeled. Each piece should have clear markings that indicate where to cut, fold, or sew. This is where clarity is key; you don’t want to be scratching your head in confusion when you finally sit down to sew. Consider using a color-coding system for different sizes or pieces, which can streamline the process and help you stay organized.
Next, it's time to format your pattern for printing. Depending on your design software, you may have options to adjust the scale of your pattern. Make sure to print a test page first to check the dimensions. A simple way to verify accuracy is to include a test square on your pattern that measures a known size, like 1 inch or 5 cm. After printing, measure the square to see if it matches the intended size. If it’s off, adjust the scale settings before printing the final version.
When you're ready to print, consider the type of paper you'll use. Standard printer paper can work, but if you want your pattern to last, opt for something sturdier like pattern paper or even lightweight cardboard. This will help prevent wear and tear, especially if you plan to use the pattern multiple times. Here’s a quick comparison of options:
| Paper Type | Durability | Best For |
|---|---|---|
| Standard Printer Paper | Low | One-time use |
| Pattern Paper | Medium | Multiple uses |
| Cardstock | High | Long-term use |
After printing, carefully cut out your pattern pieces. Use sharp scissors or a rotary cutter for clean edges. Take your time with this step; precision is crucial for a successful sewing experience. Once cut, it’s a good idea to label each piece with the corresponding name and any additional instructions, such as 'cut on fold' or 'add seam allowance'. This will save you time and frustration later on.
Finally, consider storing your patterns safely. Use a large envelope or a dedicated pattern storage folder to keep everything organized. You can even use a binder with plastic sleeves for easy access. This way, your hard work doesn’t go to waste, and you can revisit your designs whenever inspiration strikes!
In conclusion, finalizing and printing your sewing pattern is an essential step that requires attention to detail and organization. By following these guidelines, you’ll ensure that your pattern is not only ready for sewing but also easy to use and store for future projects. Now, are you ready to unleash your creativity and start sewing?
- What is the best paper to print my sewing pattern on? - It depends on how often you plan to use it. For one-time use, standard printer paper works fine, but for multiple uses, opt for pattern paper or cardstock.
- How do I ensure my pattern is the right size? - Always print a test page with a test square to verify dimensions before printing the final version.
- Can I use my pattern digitally? - Yes! Many sewing software programs allow you to use digital patterns directly on your tablet or computer, eliminating the need for printing.
Frequently Asked Questions
- What is a sewing pattern?
A sewing pattern is a template used to cut out fabric pieces for sewing garments or other items. It provides the shapes and sizes needed to construct the final product, serving as a guide for your sewing project.
- Do I need special tools to create my own patterns?
While you don't need a lot of fancy tools, having a few essentials can make the process smoother. A ruler, measuring tape, pattern paper, and a pencil are fundamental. As you gain experience, you might want to invest in more specialized tools.
- How do I gather inspiration for my sewing patterns?
Inspiration can come from anywhere! Look at fashion magazines, explore nature, or even draw from personal experiences. Keeping a sketchbook or Pinterest board can help you collect ideas and visualize your designs.
- What types of fabrics should I consider for my patterns?
The choice of fabric depends on your design and the garment's intended use. Lightweight fabrics like cotton or linen are great for summer clothes, while heavier materials like denim are perfect for structured pieces. Always consider the drape and stretch of the fabric!
- What is a basic block, and why is it important?
A basic block is a fitted pattern that serves as the foundation for all your designs. It's tailored to your measurements and helps ensure a good fit. Think of it as your sewing blueprint; everything else builds off of this!
- How do I test my pattern before finalizing it?
Creating a muslin version of your pattern is a common practice. Muslin is a cheap, lightweight fabric that allows you to check the fit and make any necessary adjustments before cutting into your final fabric.
- Can I print my patterns at home?
Absolutely! Once your pattern is finalized, you can print it using standard paper sizes. Just make sure to include any necessary markings for assembly and cutting. There are also specialized pattern printing services if you want a more professional finish.
- What if I make a mistake while drafting my pattern?
Don't sweat it! Mistakes are part of the learning process. You can always revise your pattern by making adjustments or starting over. The key is to learn from each experience and keep practicing!


