
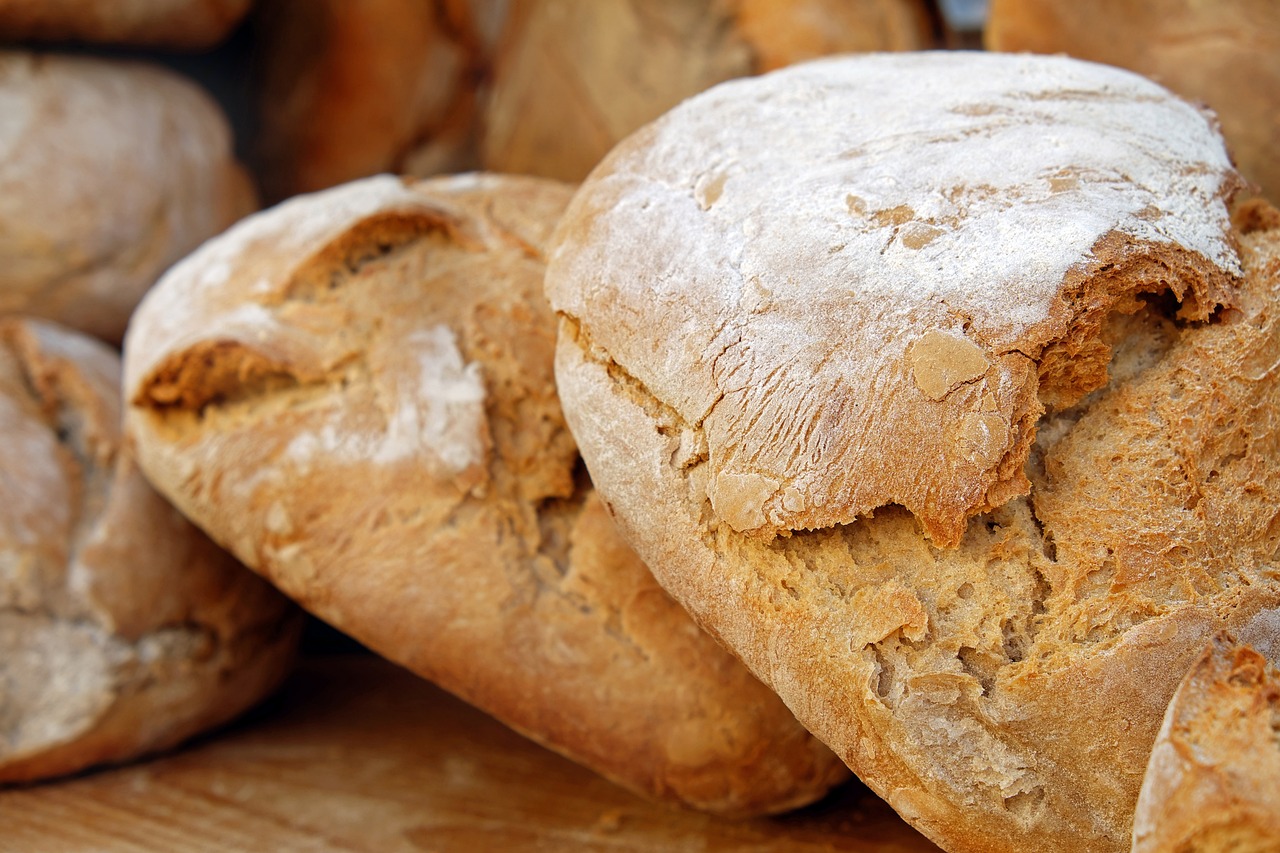
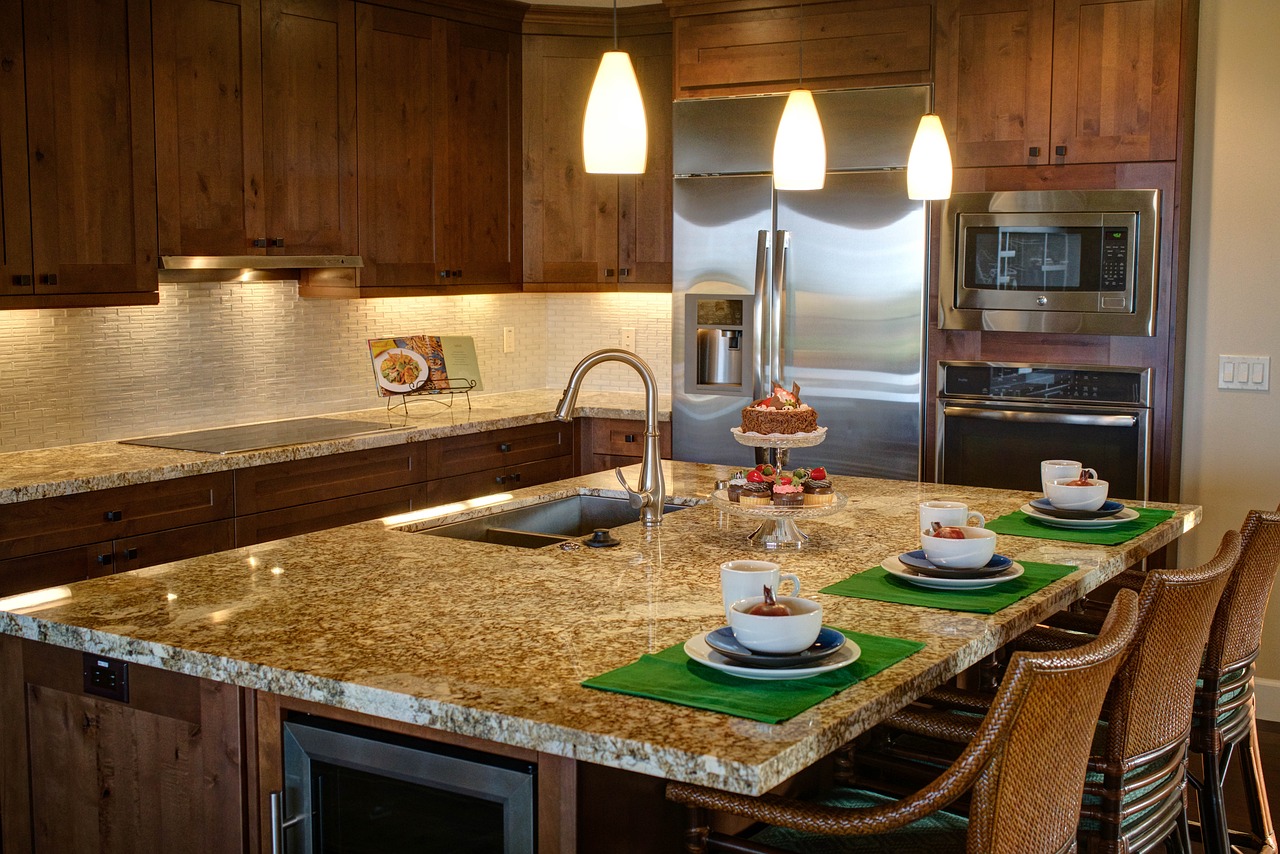
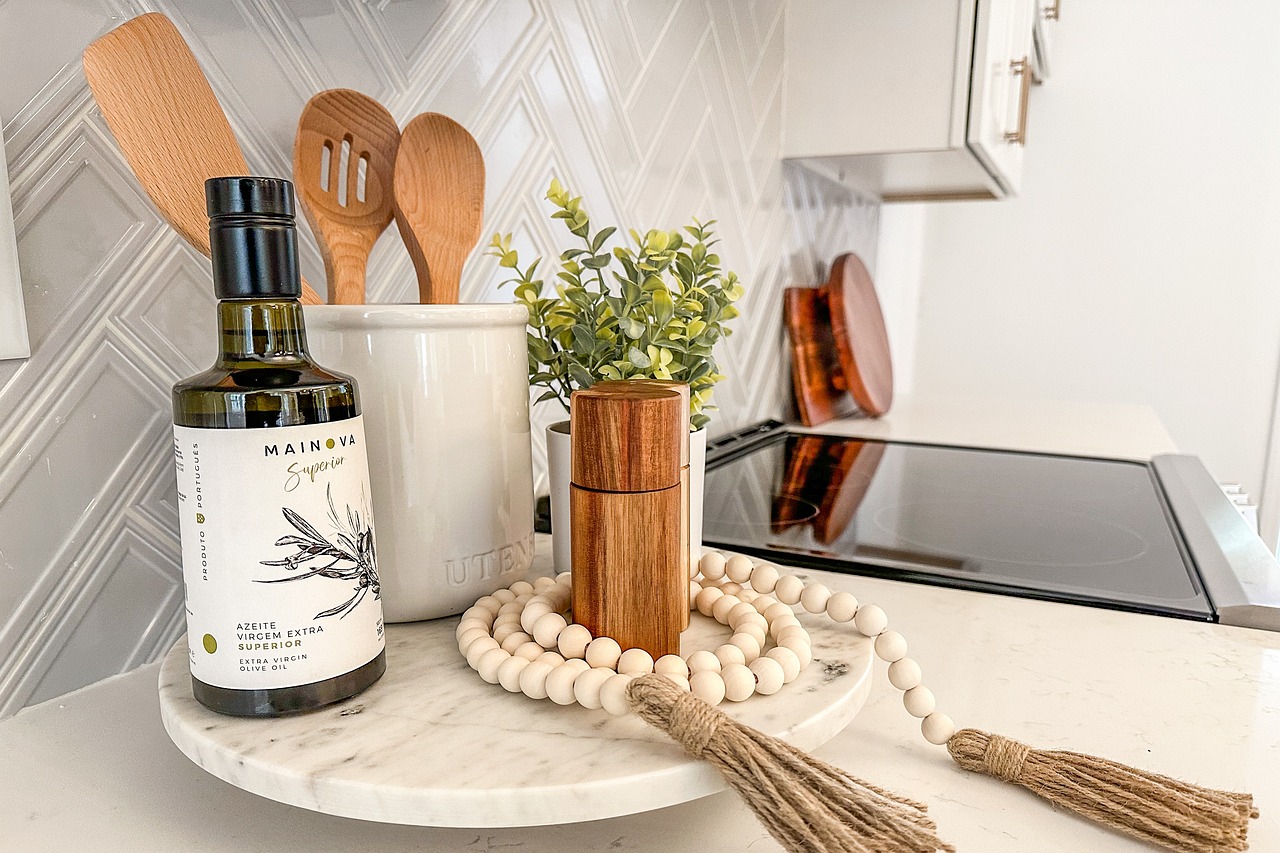
Make Your Kitchen Unique: DIY Wooden Bread Bin
Have you ever walked into a kitchen and felt an instant wave of warmth and charm? It's often the little things that make a big difference, and one of those little things could be a handmade wooden bread bin. This article explores the creative process of building a wooden bread bin, offering tips and techniques to enhance your kitchen's aesthetic while providing practical storage solutions for your bread. Not only will you add a unique piece to your kitchen, but you'll also enjoy the satisfaction of crafting something with your own hands.
Imagine waking up to the aroma of freshly baked bread, only to find it stored in a stylish, rustic wooden bread bin that you made yourself. It's not just about storage; it's about creating a focal point in your kitchen that sparks conversation and admiration. Whether you're a seasoned DIY enthusiast or a beginner looking for a fun project, building a wooden bread bin can be an exciting venture that combines functionality with creativity.
Throughout this article, we will guide you through the entire process of creating your own wooden bread bin, from choosing the right materials to the final finishing touches. We’ll dive into the essential tools you’ll need, the step-by-step construction process, and ways to customize your bin to reflect your personal style. So, roll up your sleeves and get ready to transform your kitchen with a unique, handcrafted bread bin that not only serves a purpose but also adds a touch of your personality to the space.
By the end of this journey, you’ll not only have a beautiful piece of kitchen decor but also the skills and confidence to tackle future DIY projects. Let's get started on this creative adventure and make your kitchen truly unique!
- What type of wood is best for a bread bin? Hardwoods like oak or maple are great choices due to their durability and aesthetic appeal.
- How do I maintain my wooden bread bin? Regular cleaning with a damp cloth and occasional oiling will keep it looking great.
- Can I customize my bread bin? Absolutely! You can add decorative carvings, paint, or stencils to make it uniquely yours.
Choosing the Right Wood
When it comes to crafting a wooden bread bin that not only serves its purpose but also enhances the aesthetic appeal of your kitchen, is absolutely crucial. The type of wood you select will influence not just the durability of your bread bin, but also its overall look and feel. Imagine walking into your kitchen and being greeted by a stunning bread bin that complements your decor—it's all about making that choice count!
So, what are your options? Let's dive into some popular wood types that are perfect for your DIY project:
- Maple: Known for its durability and fine grain, maple is a great choice if you want a bread bin that can withstand daily use. Its light color can brighten up your kitchen.
- Oak: Oak is a classic choice, offering a robust structure and beautiful grain patterns. Its natural resistance to moisture makes it an ideal candidate for storing bread.
- Pine: If you're looking for something more affordable, pine might be your best bet. It’s lightweight and easy to work with, although it may require more maintenance over time.
- Cherry: For a touch of elegance, cherry wood is unbeatable. It darkens beautifully with age, adding character to your kitchen.
Each of these woods has its unique characteristics that can significantly impact the final look of your bread bin. For instance, while maple provides a light and airy feel, cherry adds a warm, rich tone that can make your kitchen feel cozy. It's like choosing the perfect outfit—certain woods will complement your kitchen's color palette better than others.
Moreover, consider the environmental impact of your wood choice. Opting for sustainably sourced wood can not only reduce your carbon footprint but also give you peace of mind knowing that you're making an eco-friendly decision. You might want to look for certifications like FSC (Forest Stewardship Council) that ensure the wood is sourced responsibly.
Lastly, think about the finish you plan to use on your bread bin. Different woods respond differently to stains and sealants, which can alter their appearance. For example, oak tends to absorb stains well, resulting in a rich color, while pine may require a primer to achieve an even finish. Understanding these nuances can save you time and frustration down the road.
In summary, the wood you choose for your bread bin sets the stage for its durability, appearance, and overall integration into your kitchen. Take your time to explore various options, and don't hesitate to ask for samples if you're unsure. After all, this is a piece that will not only store your bread but also become a part of your kitchen's story!
Essential Tools and Materials
When embarking on the exciting journey of creating your very own wooden bread bin, having the right tools and materials at your fingertips is absolutely crucial. Imagine setting out to bake a cake without the proper mixing bowl or measuring cups; it just wouldn't turn out the same, right? Similarly, your woodworking project hinges on the quality and appropriateness of your tools and materials. So, let’s dive into what you’ll need to make this DIY project a breeze!
First off, you’ll need a solid selection of basic woodworking tools. These are the backbone of your project and will ensure that you can cut, shape, and assemble your bread bin with precision. Here’s a quick rundown of the essential tools you should gather:
- Saw: A circular saw or a jigsaw will be perfect for cutting your wood to size.
- Drill: A power drill will help you create holes for screws and other fasteners.
- Sander: An electric sander will save you loads of time and effort when it comes to smoothing out the surfaces.
- Measuring Tape: Accurate measurements are key, so don’t forget this!
- Square: To ensure your cuts are straight and your corners are right angles.
Next, let’s talk about the materials. The wood you choose will not only affect the durability of your bread bin but also its aesthetic appeal. Popular choices include:
| Type of Wood | Characteristics | Best For |
|---|---|---|
| Oak | Strong, durable, and has a beautiful grain. | Long-lasting bread bins. |
| Pine | Lightweight, easy to work with, and affordable. | Beginners or budget-friendly projects. |
| Maple | Hard, resistant to scratches, and has a fine grain. | Elegant and sturdy designs. |
Once you've decided on the wood, you’ll also need finishing materials to give your bread bin that polished look and to protect it from moisture. This includes stains, paints, and sealants. Choosing the right finish not only enhances the visual appeal but also prolongs the life of your wooden creation. Think of it as putting on a stylish outfit that also keeps you warm!
Lastly, let’s not forget about hardware. The hinges, handles, and latches you select can either make or break the functionality and style of your bread bin. Opt for materials that complement your wood choice, like brass for a classic look or stainless steel for a modern touch. Take the time to choose hardware that not only looks good but also feels sturdy and reliable.
In summary, gathering the right tools and materials is a vital step in your DIY adventure. By ensuring you have everything from saws and drills to quality wood and stylish hardware, you’ll set yourself up for success. So, roll up your sleeves, and let’s get crafting!
Q: Do I need advanced woodworking skills to build a bread bin?
A: Not at all! Basic woodworking skills and a willingness to learn will get you through this project.
Q: Can I use reclaimed wood for my bread bin?
A: Absolutely! Reclaimed wood can add character and uniqueness to your bread bin.
Q: How do I maintain my wooden bread bin?
A: Regular cleaning with a damp cloth and occasional oiling will keep it looking great.
Basic Woodworking Tools
When embarking on your DIY wooden bread bin project, having the right tools at your disposal is crucial for achieving a professional finish. Think of your tools as the paintbrushes of a painter; without them, your masterpiece remains a mere vision. To kick things off, let's delve into the essential woodworking tools that will make your crafting experience smoother and more enjoyable.
First and foremost, a circular saw is a must-have for making straight cuts on larger pieces of wood. This tool is like the trusty steed of your workshop, enabling you to glide through wood with precision and speed. However, if you prefer a more hands-on approach, a hand saw can also do the trick, albeit with a little more elbow grease. The choice between these two largely depends on your comfort level and the scale of your project.
Next up is the drill, which is indispensable for creating holes for screws and other fasteners. Imagine trying to build a sturdy structure without the ability to join pieces together! A good power drill can save you time and effort, making it easier to assemble your bread bin securely. If you’re feeling adventurous, consider investing in a router as well, which can add decorative edges to your wood, transforming a simple box into a piece of art.
Don’t underestimate the importance of a sander, either. This tool is your best friend when it comes to achieving that smooth finish that makes your bread bin not only look good but also feel good to the touch. You can opt for an electric sander for efficiency or a hand sander if you enjoy the tactile experience of woodworking. Regardless of your choice, sanding is a step you won’t want to skip!
To give you a clearer picture, here’s a quick table summarizing the basic woodworking tools you'll need:
| Tool | Purpose |
|---|---|
| Circular Saw | For making straight cuts on larger pieces of wood. |
| Hand Saw | An alternative for those who prefer manual cutting. |
| Drill | For creating holes for screws and fasteners. |
| Router | Adds decorative edges and grooves to wood. |
| Sander | For smoothing surfaces and edges. |
Finally, let’s not forget about the measuring tape and square. Accurate measurements are the backbone of any woodworking project. A measuring tape ensures that every cut is precise, while a square helps you check that your angles are just right. Think of these tools as your project’s GPS, guiding you toward a successful outcome.
In summary, having the right basic woodworking tools is essential for crafting your DIY wooden bread bin. Whether you opt for power tools or hand tools, each has its own charm and utility. Remember, the right tools not only enhance your efficiency but also elevate the quality of your work, making your kitchen project a true reflection of your creativity and craftsmanship.
- What type of wood is best for a bread bin? - Hardwoods like oak or maple are excellent choices due to their durability and resistance to moisture.
- Can I use a regular paint for finishing? - It’s best to use food-safe finishes or stains specifically designed for woodworking projects.
- How do I prevent my bread from getting stale? - Ensure that your bread bin has proper ventilation to keep your bread fresh for longer.
Power Tools vs. Hand Tools
When it comes to building your own wooden bread bin, one of the most critical decisions you'll face is whether to use power tools or hand tools. Each has its own set of advantages and disadvantages that can significantly impact your DIY experience. Let’s dive into the characteristics of both to help you make an informed choice.
Power tools are the superheroes of the woodworking world. They allow you to cut, drill, and shape wood with remarkable speed and efficiency. Imagine zipping through a project in half the time it would take with hand tools! For example, a power saw can slice through wood like butter, while a power drill can create holes in seconds. However, they do come with their own challenges. They often require a learning curve, can be more expensive, and may pose safety risks if not used properly. Additionally, they can be quite noisy, which might not be ideal if you live in a close-knit neighborhood.
On the other hand, hand tools offer a more traditional approach to woodworking. Tools like hand saws, chisels, and hand drills provide a level of precision and control that many DIY enthusiasts appreciate. Using hand tools can be a meditative experience, allowing you to connect with the craft on a deeper level. Plus, they are generally more affordable and portable, making them a great option for those who may not have a dedicated workspace. However, hand tools require more physical effort and time, which can be a drawback if you’re eager to see quick results.
To help you weigh your options, here’s a quick comparison:
| Feature | Power Tools | Hand Tools |
|---|---|---|
| Speed | Fast | Slow |
| Cost | Higher initial investment | Generally lower |
| Precision | Good, but can be less controlled | Excellent control |
| Noise Level | High | Low |
| Safety | Requires caution | Generally safer |
Ultimately, the choice between power tools and hand tools comes down to personal preference and the specific demands of your project. If you’re new to woodworking, you might start with hand tools to build your skills and confidence. As you progress, you can incorporate power tools to speed up your projects. Remember, the goal is to enjoy the process of creating something unique for your kitchen while ensuring that your wooden bread bin is both functional and stylish!
- Can I use both power and hand tools for my project? Absolutely! Many woodworkers find that a combination of both types of tools enhances their efficiency and creativity.
- What power tools do I really need for a beginner project? A basic set might include a circular saw, a power drill, and a sander. These tools will cover most of your needs for building a bread bin.
- Are hand tools more difficult to use? They can be more physically demanding and require practice to master, but many find them rewarding to use.
Materials for Finishing Touches
When it comes to creating a stunning and durable wooden bread bin, the finishing touches are just as crucial as the construction itself. Choosing the right materials can elevate the overall look and longevity of your project, transforming a simple bread bin into a beautiful centerpiece for your kitchen. Let's dive into the various finishing materials that will not only enhance the aesthetic appeal but also protect your bread bin from wear and tear.
First and foremost, stains are a popular choice for enhancing the natural beauty of wood. They penetrate the wood fibers, highlighting the grain and adding depth to the color. Before applying stain, it's essential to sand your bread bin thoroughly to ensure a smooth surface. You can choose from a variety of shades, from rich mahogany to light oak, allowing you to match your bread bin with your kitchen decor seamlessly.
Next up, we have paints. If you’re looking to add a pop of color or a modern twist to your rustic bread bin, paint might be the way to go. Acrylic paints are a great option because they’re easy to work with and come in a vast array of colors. For a more textured look, consider using a chalk paint, which provides a matte finish and can be distressed for a vintage appearance. Remember to use a primer before painting to ensure better adhesion and a more vibrant finish.
After you’ve stained or painted your bread bin, it’s crucial to protect it with a sealant. This is where your bread bin will really shine! Sealants create a barrier against moisture, which is vital for a kitchen item that will store bread. You can opt for water-based polyurethane for a clear finish that won’t yellow over time, or choose an oil-based option for added durability. Just be sure to apply multiple thin coats, allowing each layer to dry before adding the next, for the best results.
Finally, don’t overlook the importance of finishing oils. Natural oils like tung oil or linseed oil can nourish the wood, bringing out its natural luster while providing a protective layer. These oils are particularly beneficial for wooden items used in food storage, as they are food-safe and help to maintain the wood’s integrity over time. Regularly applying oil can keep your bread bin looking fresh and vibrant for years to come.
In summary, the finishing touches on your wooden bread bin are what will ultimately define its character and functionality. By carefully selecting the right stains, paints, sealants, and oils, you can ensure that your bread bin not only looks fantastic but also stands the test of time. So, gather your materials and get ready to transform your kitchen with a beautiful, custom-made bread bin!
- What type of wood is best for making a bread bin? Hardwoods like oak, maple, or walnut are ideal for their durability and aesthetic appeal.
- Can I use food-safe finishes on my bread bin? Yes, look for finishes labeled as food-safe, such as certain sealants and oils.
- How often should I apply finishing oil? It’s best to reapply finishing oil every few months or whenever the wood looks dry.
- Is it necessary to sand the wood before applying stain or paint? Absolutely! Sanding helps to create a smooth surface for better adhesion.
- Can I customize the size of my bread bin? Yes, you can tailor the dimensions to fit your kitchen space and storage needs.
Choosing the Right Hardware
When it comes to building your own wooden bread bin, is just as crucial as selecting the wood itself. The hardware you select not only impacts the functionality of your bread bin but also contributes significantly to its overall aesthetic appeal. Think of hardware as the jewelry of your bread bin; it can either enhance its beauty or detract from it. So, what should you consider when picking out the right pieces?
First and foremost, you'll want to focus on the functionality of the hardware. For instance, hinges are vital for allowing the lid to open and close smoothly. You might opt for piano hinges for a seamless look or traditional butt hinges for a more classic vibe. The choice between these can set the tone for your entire piece. Additionally, consider the weight of the lid; heavier lids may require sturdier hinges to ensure durability.
Next, let’s discuss handles. Handles are not just practical; they can also serve as a design element. A simple wooden knob can give a rustic charm, while a sleek metal handle can add a modern touch. When selecting handles, think about the ergonomics as well. You want something that feels comfortable in your hand, especially if you’ll be using it frequently.
Another important aspect to consider is the finish of the hardware. You may find brass, stainless steel, or even black iron options. Each material has its own unique look and feel, and they can either complement or clash with your wood finish. For example, if you’re using a light wood like pine, a darker hardware finish can create a stunning contrast, while a more uniform color scheme can lend a sophisticated look.
| Hardware Type | Best Use | Aesthetic Impact |
|---|---|---|
| Piano Hinges | Heavy lids | Seamless, modern |
| Butt Hinges | Traditional styles | Classic, vintage |
| Wooden Knobs | Rustic charm | Warm, inviting |
| Metal Handles | Modern functionality | Sleek, contemporary |
Lastly, don’t forget about additional components that can enhance your bread bin’s functionality. Consider adding a latch for security, especially if you have curious pets or children. You might also want to think about ventilation options, such as small holes or slats, to keep your bread fresh. These features can make a big difference in usability and longevity.
In summary, choosing the right hardware is about balancing functionality with style. By carefully considering your options, you can create a bread bin that not only looks fantastic but also meets your practical needs. So, take your time, explore different styles, and choose hardware that speaks to your personal taste and complements your kitchen decor.
- What type of wood is best for a bread bin? - Hardwoods like oak or maple are excellent choices due to their durability and resistance to moisture.
- How can I maintain the hardware on my bread bin? - Regularly check for rust or wear and clean with a damp cloth. Avoid harsh chemicals that can damage the finish.
- Can I customize the hardware? - Absolutely! You can paint or stain metal hardware to match your wood or kitchen decor.

Step-by-Step Construction Process
Building a wooden bread bin is not just a project; it's a journey that transforms raw materials into a functional piece of art for your kitchen. To ensure that your DIY experience is smooth and enjoyable, let’s break down the construction process into manageable steps. This way, you can savor each moment of creation, much like the aroma of freshly baked bread wafting through your home.
The first step in this exhilarating process is to gather your materials and tools. A well-organized workspace can make all the difference. Imagine walking into a cluttered garage versus a tidy workshop—the latter invites creativity! You’ll need your chosen wood, tools like saws and drills, and some essential hardware. Once you have everything ready, it’s time to measure and cut your wood accurately. Remember, “measure twice, cut once” is not just a saying; it’s a golden rule in woodworking. Precision in your cuts will ensure that all pieces fit together seamlessly, creating a polished look.
Next, let’s dive into the assembly phase. Start by joining the sides of your bread bin. You can use wood glue or screws for a sturdy finish. If you’re feeling adventurous, consider using dovetail joints; they not only provide strength but also add a touch of craftsmanship that will impress anyone who sees it. As you assemble, keep an eye on the structure’s integrity. It’s essential that your bread bin is not only beautiful but also robust enough to withstand the test of time.
Once your bread bin is assembled, it’s time for the finishing touches. Sanding is crucial here. A smooth surface not only feels great but also allows for better paint or stain adhesion. Take your time with this step; it’s akin to the final touches a chef puts on a gourmet dish. After sanding, you can apply your chosen finish. Whether you opt for a natural wood stain or a vibrant paint, this is where your personality truly shines through. Don’t rush this part—let each coat dry thoroughly before moving on to the next.
As you complete your bread bin, consider adding any decorative elements that resonate with your style. Perhaps some stenciling or woodburning designs could elevate the aesthetic. This is your chance to personalize your creation and make it a centerpiece in your kitchen. Remember, every detail counts, and those little touches can make a massive difference.
Finally, once everything is dry and set, it’s time to step back and admire your work. You’ve transformed raw materials into a beautiful, functional piece. Not only does your new wooden bread bin serve a practical purpose, but it also adds a unique charm to your kitchen. It’s a conversation starter, a testament to your skills, and a lovely home for your bread.
- How long does it take to build a wooden bread bin? The time can vary based on your experience level and the complexity of the design, but typically, it can take anywhere from a few hours to a couple of days.
- What type of wood is best for a bread bin? Hardwoods like oak, maple, or cherry are excellent choices due to their durability and aesthetic appeal.
- Can I customize the size of my bread bin? Absolutely! You can adjust the dimensions based on your kitchen space and storage needs.
- How do I maintain my wooden bread bin? Regularly clean it with a damp cloth and avoid soaking it in water. Applying mineral oil every few months can help maintain the wood's condition.
Measuring and Cutting the Wood
When it comes to crafting your own wooden bread bin, precision is key. The process of measuring and cutting the wood may seem straightforward, but it can make or break the final product. Imagine trying to fit a puzzle piece into a space that just doesn't match; that’s what happens if your measurements are off. So, let’s dive into the nitty-gritty of ensuring your cuts are as perfect as possible!
First things first, gather your materials. You will need a reliable measuring tape, a square for right angles, and a pencil for marking your cuts. It's a good idea to have a saw ready, whether it’s a hand saw or a power saw, depending on your comfort level. Remember, a well-measured piece of wood is a happy piece of wood. Take your time with the measuring process, and double-check your numbers. A common rule of thumb is to measure twice and cut once. This mantra can save you a lot of headaches and wood!
To begin, lay out your wood pieces on a flat surface. Use your measuring tape to determine the dimensions you want for your bread bin. A standard size might be around 16 inches long, 10 inches wide, and 8 inches high, but feel free to adjust based on your kitchen space and needs. Mark these measurements clearly on the wood using your pencil. A square will help you ensure that your lines are straight and your angles are right. Once you’ve marked all your pieces, it’s time to cut.
When cutting, keep safety in mind. Always wear protective eyewear and follow the safety guidelines for your specific saw. If you’re using a power saw, let the tool do the work; don’t force it through the wood. For hand saws, a smooth and steady motion will yield the best results. If you’re feeling adventurous, you might even consider using a miter saw for angled cuts, which can add a unique touch to your design.
After cutting, it’s crucial to sand the edges of your pieces. This step not only smooths out any rough edges but also helps the pieces fit together snugly when assembling your bread bin. Use a medium-grit sandpaper to start, followed by a finer grit for a polished finish. Trust me, your fingers will thank you later!
In summary, measuring and cutting the wood for your DIY bread bin is a process that deserves attention and care. By taking your time and ensuring accuracy, you’ll set a solid foundation for the rest of your project. Remember, the joy of creating something beautiful for your kitchen begins with those first cuts. Happy crafting!
- What type of wood is best for a bread bin? - Hardwoods like oak or maple are ideal due to their durability and resistance to moisture.
- Can I use reclaimed wood for my bread bin? - Absolutely! Just make sure it’s clean and free from any chemicals or treatments that could affect food safety.
- How do I ensure my cuts are straight? - Use a square to mark your cuts and consider using a straight edge or a guide when cutting.
- What if I make a mistake while cutting? - Don’t panic! You can often patch or trim pieces to fit, or use the opportunity to get creative with your design.

Assembling the Bread Bin
Assembling your DIY wooden bread bin is where all your hard work comes together, and it’s truly an exciting phase of the project! Once you’ve measured and cut your wood pieces with precision, it’s time to bring them together to form a functional and aesthetically pleasing bread bin. The key to a successful assembly lies in the techniques you use and the attention you pay to detail. So, let’s roll up our sleeves and dive right into the assembly process!
First, start by laying out all your cut pieces on a flat surface. This will give you a clear view of how everything fits together. Typically, your bread bin will consist of the base, sides, top, and a back panel. It’s essential to ensure that all pieces are aligned properly before you begin joining them. You wouldn't want to end up with a crooked bread bin that looks like it’s been through a funhouse mirror, right?
Next, you’ll want to use wood glue to bond the edges of your side panels to the base. Apply a generous amount of glue to the edges and press the side panels firmly against the base. Make sure they are square to ensure that your bread bin is stable. For added strength, you can use clamps to hold the pieces in place while the glue dries. This is a good time to take a break and admire your work so far!
Once the glue has set, it’s time to reinforce the structure. You can do this by drilling pilot holes and using screws to secure the side panels to the base. This step is crucial for ensuring that your bread bin can withstand the test of time and the weight of your delicious loaves. Remember to choose screws that are appropriate for the thickness of your wood – too long and they might poke through the other side, while too short won’t provide the necessary support.
After securing the sides, attach the back panel in the same manner. Make sure everything is aligned and that the corners are flush. You can also add a few wood dowels for extra stability if you’re feeling particularly ambitious. Dowels can help to keep everything aligned during assembly and provide additional strength.
Now, let’s move on to the top of your bread bin. Depending on your design, you may want to create a hinged lid for easy access. If so, attach the hinges to the back of the top panel and then secure it to the back panel of your bread bin. Ensure that the lid opens smoothly without any resistance. If you prefer a fixed top, simply attach the top panel using wood glue and screws as you did with the other pieces.
Finally, don’t forget to add the finishing touches! Once your bread bin is fully assembled, it’s time to sand down any rough edges and prepare for staining or painting. A smooth finish not only enhances the look of your bread bin but also makes it easier to clean. Take your time during this process; a little extra effort now will pay off in the long run.
In conclusion, assembling your wooden bread bin is an incredibly rewarding experience. By following these steps and paying attention to detail, you’ll create a beautiful and functional piece that will elevate your kitchen’s aesthetic while keeping your bread fresh. Now, let’s move on to some frequently asked questions that might help you as you embark on this exciting DIY journey!
- What type of wood is best for a bread bin? Hardwoods like oak or maple are great choices due to their durability and resistance to moisture.
- Can I use a pre-made wooden box instead of building from scratch? Yes, you can repurpose an existing wooden box, but ensure it’s food-safe and properly sealed.
- How do I maintain the finish on my bread bin? Regularly clean it with a damp cloth and reapply a food-safe mineral oil or sealant as needed.
Design Customizations
When it comes to making your wooden bread bin truly unique, the sky's the limit! Design customizations allow you to express your personal style while ensuring that the bread bin complements your kitchen decor. Think of your bread bin as a blank canvas, ready for your creative touch. Whether you're leaning towards a rustic charm or a sleek modern look, there are countless ways to elevate the aesthetic appeal of your bread bin.
One of the most exciting aspects of customizing your bread bin is the opportunity to incorporate decorative elements. You can use stencils to create beautiful patterns or even try your hand at woodburning designs. Imagine a lovely floral pattern or a geometric design that catches the eye every time you reach for a loaf of bread. Not only do these features enhance the visual appeal, but they also add a personal touch that reflects your personality and taste.
Choosing the right color scheme is another vital aspect of customization. Your bread bin can be painted or stained in a variety of colors, allowing it to blend seamlessly with your kitchen's color palette. For example, if your kitchen boasts warm earth tones, a rich walnut stain might be the perfect choice. Conversely, if you prefer a more contemporary vibe, consider a crisp white finish or a bold color that makes a statement. Here’s a quick table to help you visualize some popular color schemes:
| Color Scheme | Description |
|---|---|
| Rustic Earth Tones | Warm colors like browns and greens that evoke a natural feel. |
| Modern Minimalism | Neutral colors like whites and grays for a sleek, clean look. |
| Bold and Bright | Vibrant colors like red or blue that add a fun pop to your kitchen. |
Don't forget about the hardware you choose as well! The hinges, handles, and latches can dramatically influence the overall design. Opt for vintage-style brass hardware for a classic touch or sleek stainless steel for a modern finish. These small details can elevate your bread bin from ordinary to extraordinary, making it not just a storage solution but a stunning piece of decor.
Incorporating these design customizations will not only enhance the functionality of your wooden bread bin but also transform it into a centerpiece that sparks conversation. So, unleash your creativity, and don’t hesitate to mix and match different elements until you find the perfect combination that resonates with your style!
Q: Can I use any type of paint on my wooden bread bin?
A: It's best to use non-toxic, food-safe paints or stains, especially since the bread bin will be in close contact with food.
Q: How do I maintain the decorative elements on my bread bin?
A: Regular cleaning with a damp cloth and avoiding harsh chemicals will help preserve the designs and finish.
Q: Is it necessary to seal the wood after painting or staining?
A: Yes, sealing the wood with a food-safe sealant will protect it from moisture and prolong its lifespan.
Adding Decorative Elements
When it comes to making your wooden bread bin stand out, adding decorative elements can truly elevate its aesthetic appeal. Think of your bread bin as a blank canvas, waiting for your personal touch. From intricate carvings to simple stencils, the options are endless! Not only do these details enhance the visual aspect, but they also allow you to express your creativity and style.
One popular method for decoration is using woodburning techniques. This allows you to create unique designs directly onto the surface of the wood. Imagine adding a beautiful floral pattern or your family’s initials—these personal touches can make your bread bin a conversation starter in your kitchen. If you’re not comfortable with woodburning, consider using stencils. They are an excellent way to achieve a clean and professional look without needing advanced skills. You can find a variety of stencils online or even create your own for a truly customized design.
Another aspect to consider is the choice of colors. Painting your bread bin can completely transform its look. You might want to choose colors that complement your kitchen decor. For instance, if your kitchen features warm tones, a deep mahogany or a soft cream could work beautifully. On the other hand, if you prefer a more modern vibe, bold colors like teal or mustard yellow can make a striking statement. Remember, the finish you choose can also affect the overall feel—matte finishes lend a rustic charm, while glossy finishes offer a sleek, contemporary look.
It’s also worth considering the use of hardware as decorative elements. Unique handles or hinges can add a touch of flair to your bread bin. Look for vintage or artisan pieces that can harmonize with your design. Not only do they serve a functional purpose, but they can also be the icing on the cake, tying your entire look together.
Incorporating decorative elements into your DIY wooden bread bin is all about personal expression. Whether you opt for a simple design or something more elaborate, the key is to ensure that it reflects your personality and complements your kitchen. So, roll up your sleeves, grab your tools, and let your imagination run wild!
- What type of wood is best for a bread bin? - Hardwoods like oak or maple are ideal as they are durable and resistant to wear.
- Can I use paint on my bread bin? - Yes, but make sure to use food-safe paint and sealants to ensure safety.
- How often should I clean my wooden bread bin? - Regular cleaning is recommended, ideally once a week, to maintain hygiene.
- What if my bread bin gets scratched? - Minor scratches can usually be sanded out and re-finished for a fresh look.

Choosing a Color Scheme
When it comes to selecting a color scheme for your DIY wooden bread bin, the options are as vast as your imagination! Think about how the colors will complement your kitchen's existing decor. Do you want your bread bin to stand out as an eye-catching centerpiece, or blend seamlessly with your cabinetry? The choice is yours! A well-thought-out color scheme can elevate the aesthetic of your kitchen, making it feel more inviting and personalized.
Start by considering the overall color palette of your kitchen. If your space has a neutral tone, such as whites, grays, or beiges, you might want to opt for a bold color for your bread bin to create a striking contrast. For example, a vibrant red or deep navy blue can add a pop of color that draws the eye. On the other hand, if your kitchen is already filled with bright colors, a more subdued or natural wood finish might be the way to go, allowing your bread bin to harmonize with its surroundings.
Another factor to contemplate is the finish. Do you prefer a matte look, which can give a rustic charm, or a glossy finish that exudes modern elegance? Each finish can dramatically alter the perception of color. For instance, a matte finish may soften vibrant colors, while a glossy finish can enhance them, making them appear more vivid and lively.
Here are some tips to help you decide on the perfect color scheme:
- Consider Your Kitchen's Theme: Whether it's farmhouse chic, modern minimalist, or classic vintage, your bread bin's color should resonate with the overall theme.
- Test Samples: Before committing to a color, apply test patches on a small area of the wood to see how they look in natural light.
- Use Color Theory: Familiarize yourself with complementary colors to create a balanced and appealing look.
Lastly, don't shy away from adding personal touches through color! Maybe you have a favorite color that brings you joy, or perhaps you want to reflect a seasonal theme. Remember, your kitchen is a reflection of you, and your bread bin should tell a story that resonates with your personality. So, whether you choose a bold, bright hue or a soft, muted tone, make sure it feels right for you!
Q: What type of paint or stain should I use for my wooden bread bin?
A: It's best to use food-safe finishes or stains that are specifically designed for kitchen items. Look for non-toxic options that are safe for food contact.
Q: How can I ensure the colors I choose will look good together?
A: Consider using a color wheel to find complementary or analogous colors that work well together. Testing samples in your kitchen's lighting can also help.
Q: Can I change the color of my bread bin later?
A: Absolutely! If you decide you want a different color scheme later, you can always sand down the existing finish and repaint or restain your bread bin.
Maintenance Tips for Longevity
To keep your DIY wooden bread bin looking fresh and serving its purpose for years to come, proper maintenance is key. Just like any cherished item in your kitchen, your bread bin deserves a little love and care. Think of it as nurturing a plant; the more attention you give it, the better it thrives. So, let’s dive into some essential maintenance tips that will ensure your bread bin remains a beautiful and functional addition to your kitchen.
First and foremost, regular cleaning is vital. You want your bread bin to be a safe place for your delicious loaves, free from crumbs and bacteria. A simple wipe down with a damp cloth should do the trick. Make sure to avoid soaking the wood, as excess moisture can warp and damage it. Instead, use a mild soap solution if necessary, but remember to rinse and dry it thoroughly afterward. Imagine your bread bin as a cozy home for your bread; you wouldn’t want it to be dirty or damp!
Next, consider the environment where your bread bin is placed. Wood is sensitive to temperature and humidity changes. Keep your bread bin away from direct sunlight and heat sources, such as ovens or radiators, which can cause the wood to crack or fade over time. It’s like finding the perfect spot for your favorite plant; too much sun can scorch it, while too little can leave it droopy.
Another aspect of maintenance is periodic oiling. Using food-safe mineral oil or beeswax can help protect the wood and keep it hydrated. This not only enhances the grain and color of the wood but also creates a barrier against moisture and stains. You might want to apply this treatment every few months or whenever you notice the wood looking dry. Think of it as giving your bread bin a nice moisturizing treatment!
If your bread bin happens to suffer minor scratches or dents over time, don’t fret! These can often be repaired with a little sandpaper and some wood finish. Gently sand the affected area, being careful not to remove too much material, and then apply a matching finish to blend it in. It’s much like touching up a painting; a few careful strokes can restore its beauty.
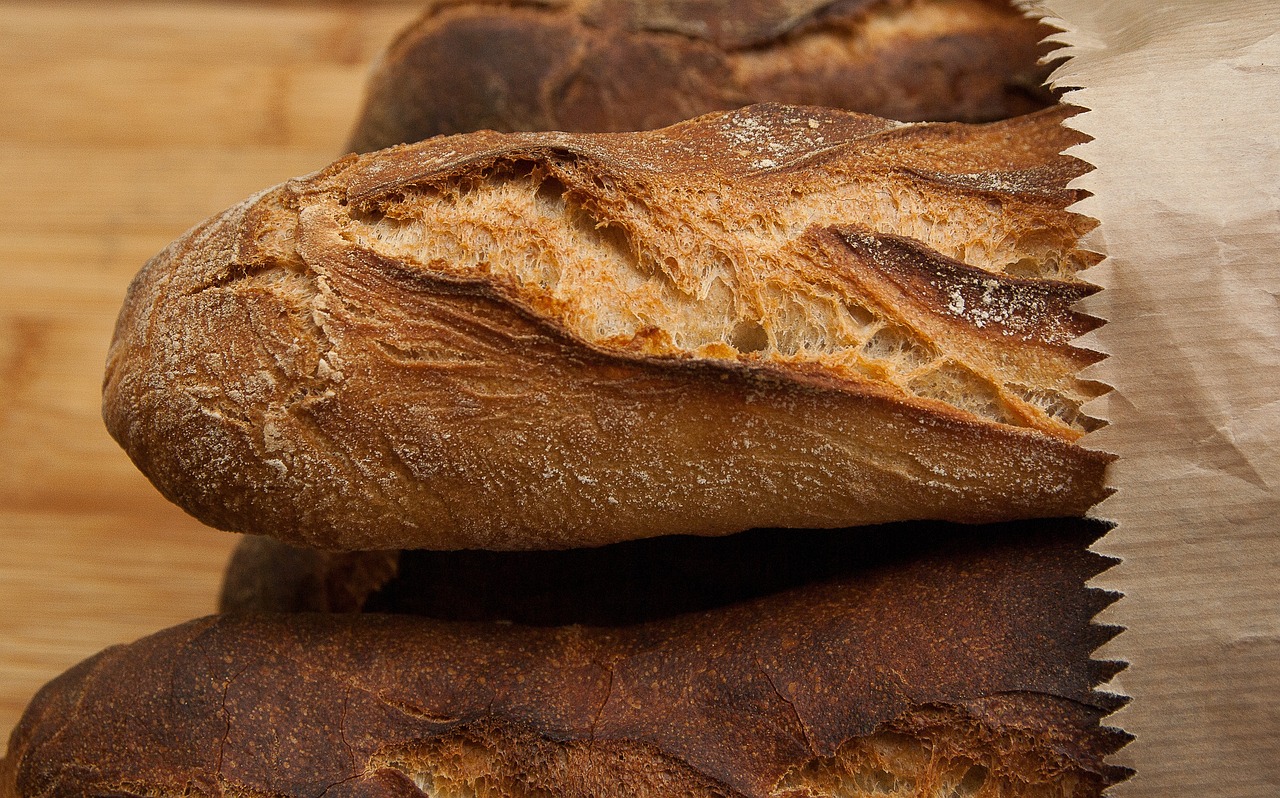
Lastly, always store your bread properly. Avoid stacking loaves directly on top of one another, as this can lead to squishing and mold. Instead, consider using a breathable bag or a cloth to wrap your bread. This way, you’re not only keeping your bread fresh but also ensuring that your bread bin remains clean and tidy. Think of it as giving your bread the royal treatment it deserves!
Q: How often should I clean my wooden bread bin?
A: It's best to clean your bread bin regularly, ideally every few days. A simple wipe with a damp cloth should suffice.
Q: Can I use any type of oil for maintenance?
A: No, it’s important to use food-safe mineral oil or beeswax to avoid any harmful chemicals leaching into your food.
Q: What should I do if my bread bin starts to smell?
A: If you notice an odor, clean it thoroughly and allow it to air out. You can also use baking soda to absorb any lingering smells.
Q: Is it safe to put my bread bin in the dishwasher?
A: No, wooden items should never be placed in the dishwasher as the heat and moisture can damage the wood.
Cleaning and Care Instructions
Keeping your DIY wooden bread bin in top-notch condition is essential not just for aesthetics but also for hygiene. After all, bread is a staple in many households, and you want to ensure it’s stored properly. Regular cleaning helps prevent the buildup of crumbs and moisture, which can lead to mold—a real no-no when it comes to bread storage!
Start by removing any bread or items stored inside the bin. Use a soft, dry cloth to wipe down the interior and exterior surfaces. This helps to catch any crumbs and dust that may have settled. If you notice any stubborn spots, you can slightly dampen the cloth with warm water. Just be sure to avoid soaking the wood, as excess moisture can warp or damage it.
For deeper cleaning, consider using a mild soap solution. Mix a few drops of liquid dish soap with warm water, and dip your cloth into this mixture. Wipe down the surfaces, but again, make sure not to saturate the wood. After cleaning, always follow up with a dry cloth to remove any moisture. This will help maintain the wood's integrity and prevent any unwanted damage.
It’s also important to regularly check for any signs of wear and tear. If you notice scratches or dents, you can gently sand the affected area with fine-grit sandpaper. This will help smooth out the surface and keep your bread bin looking fresh. After sanding, apply a food-safe mineral oil to nourish the wood and enhance its natural beauty.
Here are some additional tips for maintaining your wooden bread bin:
- Keep it in a cool, dry place away from direct sunlight to prevent fading and warping.
- Use coasters or mats underneath your bread bin if placing it on a surface that can scratch or stain.
- Avoid using harsh chemicals or abrasive cleaners, as these can damage the wood finish.
By following these simple cleaning and care instructions, you can ensure that your wooden bread bin remains a beautiful and functional addition to your kitchen for years to come. Remember, a little regular maintenance goes a long way in preserving the charm and utility of your DIY project!
Q: How often should I clean my wooden bread bin?
A: It's best to clean your bread bin regularly, ideally every week or every time you change the bread inside. This helps prevent crumbs and moisture buildup.
Q: Can I use any type of cleaner on my wooden bread bin?
A: No, avoid harsh chemicals and abrasive cleaners. Instead, use a mild soap solution or just warm water with a soft cloth.
Q: What should I do if my bread bin starts to smell?
A: If you notice any unpleasant odors, try cleaning it with a mixture of baking soda and water. Rinse thoroughly and dry completely.
Q: How can I restore the shine to my wooden bread bin?
A: Apply a food-safe mineral oil to nourish the wood and restore its shine. This should be done every few months or as needed.

Repairing Minor Damages
Even the most carefully crafted wooden bread bin can suffer from minor damages over time. Whether it's a small scratch from a knife or a dent from a heavy loaf, these imperfections can detract from the beauty of your creation. But don’t worry! Repairing these issues is often simpler than you might think. With a few basic supplies and techniques, you can restore your bread bin to its former glory, ensuring it remains a stunning centerpiece in your kitchen.
First, let's talk about scratches. For light scratches, you can often use a simple technique involving a walnut. Yes, you heard that right! Rubbing a walnut over the scratch can help to fill in the imperfections due to the natural oils in the nut. Just rub it gently over the scratch, and then buff it with a soft cloth. This will not only help to conceal the scratch but also nourish the wood. For deeper scratches, you may want to use a wood filler that matches the color of your bread bin. Simply apply the filler, let it dry, and sand it down until smooth.
Dents can be a little trickier, but there’s a nifty trick involving steam that works wonders. You’ll need a damp cloth and a hot iron. Place the damp cloth over the dent and then apply the hot iron for a few seconds. The steam will help to swell the wood fibers back into place. Be careful not to leave the iron on for too long, as you don’t want to scorch the wood. Once the dent is raised, let it cool and then sand it lightly to smooth out any rough edges.
For any stains or discoloration, a gentle cleaning solution can work wonders. Mix equal parts of vinegar and olive oil, and use a soft cloth to apply it to the stained area. This mixture not only cleans the wood but also adds a bit of shine. If the stain persists, consider using a specialized wood cleaner, but always test it on a small, inconspicuous area first to ensure it doesn’t damage the finish.
Lastly, if your bread bin has any loose hinges or handles, don’t ignore them! Tightening screws or replacing hardware can greatly improve the functionality and appearance of your bread bin. Just be sure to choose hardware that complements your design and finish.
By taking these simple steps, you can easily maintain the beauty and functionality of your DIY wooden bread bin. Regular maintenance not only keeps it looking great but also extends its lifespan, allowing you to enjoy your creation for many years to come.
- How often should I clean my wooden bread bin? It's best to clean your bread bin regularly, ideally after each use, to prevent crumbs and moisture buildup.
- Can I use regular cleaning products on my wooden bread bin? Avoid harsh chemicals. Instead, opt for natural cleaners like vinegar and olive oil to maintain the wood's integrity.
- What should I do if my bread bin starts to smell? You can deodorize it by placing an open box of baking soda inside for a few hours or overnight.
- How can I prevent scratches on my bread bin? Use a cutting board when slicing bread to minimize direct contact with the wood surface.
Frequently Asked Questions
-
What type of wood is best for a DIY bread bin?
When choosing wood for your bread bin, consider options like maple, oak, or birch. These woods are durable, have a beautiful grain, and can withstand moisture. Each type brings its own unique character, so think about the look you want to achieve in your kitchen!
-
Do I need any special tools for building a bread bin?
You don’t need to be a woodworking pro to make a bread bin! Basic tools like a saw, drill, and sander will do the trick. If you want to speed things up, using power tools can make your project easier, but hand tools can work just as well if you prefer a more traditional approach.
-
How can I customize my bread bin?
Customization is where the fun begins! You can add decorative carvings, use stencils for designs, or choose a color scheme that matches your kitchen. Think of your bread bin as a canvas—let your creativity shine!
-
What finishing materials should I use?
For finishing touches, consider using stains to enhance the wood's natural beauty or sealants to protect it from moisture. You can also use paints if you want a pop of color! Just make sure whatever you choose is safe for food storage.
-
How do I maintain my wooden bread bin?
Keeping your bread bin in top shape is easy! Regularly wipe it down with a damp cloth and avoid soaking it in water. For deeper cleaning, use a mild soap. To maintain its finish, consider applying a food-safe mineral oil every few months.
-
Can I repair scratches on my bread bin?
Absolutely! For minor scratches, you can use a wood filler or touch-up marker that matches your wood. For deeper scratches, sanding the area lightly and reapplying the finish can help restore its original look.


