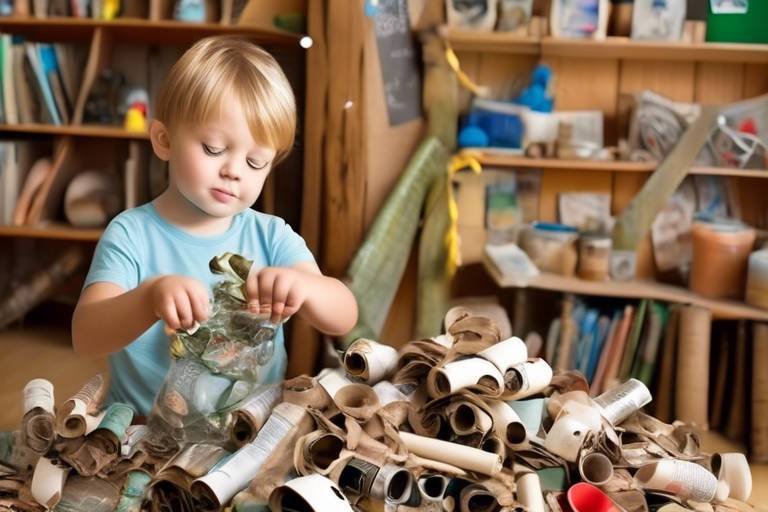
Ideas for Upcycling Old Books
In a world where digital media reigns supreme, old books often find themselves neglected and forgotten. However, rather than tossing these literary treasures into the recycling bin, why not consider upcycling them into something beautiful and functional? Upcycling is not just about recycling; it's about taking something that has lost its original purpose and transforming it into something new and exciting. It’s like giving an old friend a makeover! In this article, we will explore innovative and creative ways to give old books a new lease on life through upcycling. You'll discover unique ideas that can transform discarded literature into functional and artistic pieces, making your home more vibrant and personal.
From turning books into stunning planters that breathe life into any room, to creating beautiful art pieces that pay homage to the written word, the possibilities are endless. Imagine your old novels and encyclopedias evolving into eye-catching decor or practical items that spark conversations. Whether you’re a seasoned DIY enthusiast or just starting your crafting journey, this guide will provide you with the inspiration and steps needed to embark on your upcycling adventure. So, grab those dusty books off the shelf, roll up your sleeves, and let’s dive into the wonderful world of upcycling!
1. What types of books are best for upcycling?
Most books can be upcycled, but those with damaged spines or outdated information are perfect candidates. Consider using old encyclopedias, novels, or even children's books that may no longer be read.
2. Do I need special tools for upcycling books?
While basic crafting tools like scissors, glue, and a ruler are often sufficient, some projects may require additional items like paint, brushes, or a sewing kit, depending on the complexity of your upcycling project.
3. Can I sell my upcycled book creations?
Absolutely! Many people love unique, handcrafted items. Consider selling your upcycled creations at local craft fairs, online marketplaces, or even gifting them to friends and family.
4. How can I ensure my upcycled items last?
To enhance the longevity of your upcycled creations, use quality materials and finishes. For example, seal your book page art with a protective varnish, or ensure that any furniture pieces are properly treated for durability.
5. Are there any environmental benefits to upcycling books?
Yes! Upcycling reduces waste and encourages creativity. By repurposing old books, you're not only giving them a second life but also contributing to a more sustainable planet.

Creative Book Planters
Transforming old books into planters is not just a clever way to recycle, but it also brings a unique charm and a touch of nature into your living space. Imagine a beautifully aged novel, its pages worn and full of stories, now serving as a home for vibrant plants. This delightful upcycling project allows you to give your beloved books a new lease on life while adding greenery to your home decor. But how do you go about it? Let’s dive into the process!
First, you’ll need to choose the right type of book. Ideally, select a hardcover book that you’re willing to part with. The sturdier the cover, the better it will hold up against moisture. Once you’ve picked your book, it’s time to prepare it for planting. Carefully cut out a section of the pages, leaving a border of about an inch around the edges. This will create a cavity for your plants while ensuring the book retains its structure. Remember, you want to keep the spine intact for that authentic book look!
Next, it’s crucial to line the cavity with a waterproof material to prevent water damage. You can use plastic wrap, a small plastic bag, or even a thin layer of plastic sheeting. This step is vital, as it protects the book from moisture and allows you to enjoy your upcycled planter without worrying about ruining the pages. Now, you’re ready to add soil! Fill the cavity with potting soil, leaving enough space for your chosen plants.
When it comes to selecting plants, consider opting for smaller varieties that thrive in confined spaces. Here are some excellent options:
- Succulents: These hardy plants require minimal watering and come in various shapes and colors, making them perfect for book planters.
- Air Plants: They don’t need soil at all! Just place them in the cavity, and they’ll thrive with occasional misting.
- Small Ferns: Their lush foliage adds a nice touch of greenery and can adapt well to the conditions inside a book planter.
Once you’ve planted your greenery, place your book planter in a spot where it can receive the right amount of light. Depending on the plants you choose, this could be anywhere from bright indirect light to partial shade. Water your plants as needed, keeping in mind that less is often more, especially for succulents.
Not only do book planters serve as stunning conversation pieces, but they also offer a way to celebrate your love for literature in a practical manner. Imagine guests walking into your home and being greeted by the sight of a classic novel, now bursting with life and color. It’s a delightful fusion of nature and storytelling, reminding us that even the most forgotten books can find new purpose.
Before you embark on your upcycling adventure, consider the maintenance involved. While it’s a fun project, it’s essential to monitor the health of your plants regularly. Keep an eye out for any signs of overwatering or pests. With a little care, your book planters can thrive for years, continually bringing joy and beauty into your space.
In conclusion, creating book planters is a fantastic way to merge your love for literature with your passion for gardening. It’s an innovative project that not only beautifies your home but also gives old books a second chance. So gather your supplies, pick a few plants, and let your creativity bloom!
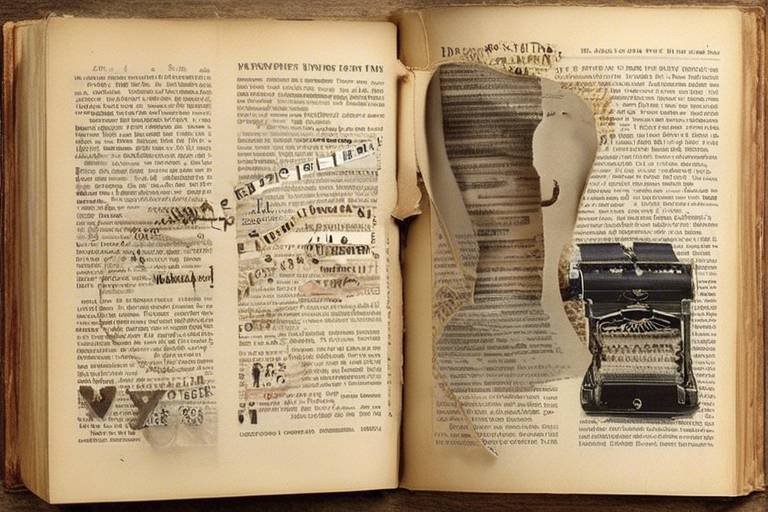
Book Page Art
Using pages from old books to create art pieces can be a beautiful homage to literature. Imagine transforming the yellowed pages of a beloved novel into stunning wall art or unique collages that tell a story of their own. Not only does this process breathe new life into discarded literature, but it also allows you to express your creativity in a way that's both personal and meaningful. Whether you're an experienced artist or just someone looking to add a touch of whimsy to your home, crafting art from book pages is an engaging project that can brighten any space.
To get started, gather your materials. You'll need some old books, scissors, a glue stick, and possibly some frames if you plan on displaying your creations. The beauty of this project is that it doesn't require a lot of fancy supplies; often, the most impactful art comes from simple beginnings. As you sift through the pages of your old books, look for interesting illustrations, beautiful typography, or evocative quotes that resonate with you. These elements can serve as the foundation for your artwork.
One popular technique is to create collages. By layering different pages, you can build a rich tapestry of textures and colors. You might choose to focus on a specific theme—like nature, adventure, or romance—and select pages that reflect that theme. For example, if you're inspired by the natural world, you could combine pages with botanical illustrations and snippets of poetry about the outdoors. The contrast between the printed text and the imagery can create a visually striking piece.
Framing individual pages or excerpts can create stunning decor that sparks conversation. Think about it: a beautifully framed page from a classic novel can serve as a reminder of your favorite story or a tribute to a beloved author. When selecting pages to frame, consider the aesthetic of your home. Do you prefer a vintage look, or are you drawn to modern minimalism? The right page can enhance your decor while adding a personal touch.
Selecting the perfect frame can elevate your book page art significantly. Here are some tips to consider:
- Material: Wood frames add warmth, while metal frames offer a sleek, contemporary vibe.
- Color: Neutral colors can complement any decor, while bold colors can create a statement.
- Style: Ornate frames can enhance vintage pages, while simple frames can let the art shine.
By choosing the right frame, you can create a cohesive look that ties your entire space together.
A gallery wall featuring framed book pages can be a focal point in any room. To achieve maximum visual impact, consider the layout carefully. You might want to arrange your frames in a grid pattern for a more structured look, or opt for a salon-style arrangement for an eclectic feel. Play with different sizes and orientations—mixing vertical and horizontal frames can add visual interest. Don't forget to leave some space between frames to let each piece breathe.
In the end, the art you create from book pages is a reflection of your personality and tastes. It’s a way to celebrate literature while also making a statement in your home. So, gather those old books, unleash your creativity, and let the pages tell a new story through your art!
Q: Can I use any book for this project?
A: Yes! However, it's best to use books that are damaged or no longer of value to you. This way, you can upcycle them without feeling guilty about destroying a beloved book.
Q: What types of glue work best for book page art?
A: A glue stick or Mod Podge works well for adhering pages. Just make sure to apply it evenly to avoid wrinkles.
Q: How do I prevent the pages from yellowing further?
A: To preserve your artwork, consider using UV-protective glass in your frames and keep your art out of direct sunlight.
Framed Book Pages
Framing individual pages or excerpts from your favorite old books is not just a way to preserve literary history; it’s a fantastic method to add a personal and artistic touch to your home decor. Imagine walking into a room and being greeted by the elegant words of your favorite author, beautifully showcased on your wall. The process of selecting the right pages is crucial; you want to choose passages that resonate with you or visually appealing illustrations that can spark conversation. Whether it's a whimsical poem, a profound quote, or a stunning illustration, each framed page tells a story.
To get started, gather your materials: old books, a frame, scissors, and possibly a mat for added depth. Carefully cut out the selected page, ensuring you leave a border that can be framed nicely. If you’re feeling adventurous, you can even combine multiple pages into a single frame, creating a collage of your literary favorites. This not only showcases your love for books but also allows you to express your creativity.
When it comes to framing, consider the style that best suits your home. A vintage frame can give a rustic charm, while a sleek modern frame may provide a contemporary feel. The choice of frame can dramatically change the overall impact of the artwork. Here’s a quick comparison of frame styles:
| Frame Style | Best For | Material |
|---|---|---|
| Vintage | Classic literature or illustrations | Wood, ornate designs |
| Modern | Contemporary texts or minimalist designs | Metal, simple lines |
| Shadow Box | 3D elements or layered pages | Wood or acrylic |
Once you’ve framed your chosen pages, consider how to display them. A well-arranged gallery wall featuring framed book pages can become a stunning focal point in any room. You can mix and match sizes and styles to create visual interest. Don’t be afraid to play with different arrangements on the floor before committing to hanging them on the wall. The key is to make sure it feels cohesive while allowing each piece to shine.
Framing book pages not only preserves the beauty of literature but also transforms it into art that you can cherish and enjoy daily. It’s a beautiful homage to the written word, allowing you to celebrate your love for books in a stylish and meaningful way.
- What type of books are best for framing? Look for books with beautiful illustrations, interesting typography, or passages that resonate with you.
- Can I frame pages from damaged books? Absolutely! Upcycling damaged books is a great way to give them new life.
- How do I choose the right frame size? Measure your page and select a frame that allows for a suitable border, or opt for a mat to enhance the display.
Choosing the Right Frame
When it comes to showcasing your framed book page art, the frame you choose can make all the difference. It’s like dressing up your art in the perfect outfit; the right frame not only protects your cherished pages but also enhances their beauty. So, how do you pick the right one? First, consider the style of the art and the room where it will hang. Is your decor modern, vintage, or eclectic? Each style has frames that complement it best.
For a modern look, sleek and minimalistic frames in black or white can create a striking contrast against the text and illustrations of the book pages. On the other hand, if your space is filled with antique furniture, ornate frames with intricate designs can add a touch of elegance and nostalgia. Here’s a quick guide to help you make the right choice:
| Frame Style | Best For | Material |
|---|---|---|
| Modern | Sleek spaces | Metal or acrylic |
| Rustic | Country or farmhouse decor | Wood with a distressed finish |
| Vintage | Traditional or classic interiors | Ornate wood or gilded frames |
Next, think about the color. A frame that contrasts with the page can draw attention and create a focal point, while a frame that matches the color scheme of your decor can create a harmonious look. Don't forget about the size of the frame, too! It should complement the dimensions of your book page art without overwhelming it. A good rule of thumb is to leave a little space around the edges of the page, which can be achieved with a mat. Mats not only add a professional touch but also help to prevent the glass from touching the art, which is crucial for preservation.
Lastly, consider the glass type. If your art is particularly valuable or you want to protect it from UV damage, opt for museum-quality glass, which minimizes glare and protects against fading. For a more budget-friendly option, regular glass works just fine, especially for casual displays. Remember, the right frame can elevate your book page art from simple decor to a stunning statement piece. So take your time, explore your options, and let your creativity shine!

Creating a Gallery Wall
Creating a gallery wall featuring framed book pages is not just a decor choice; it's a way to showcase your love for literature in a visually stunning manner. Imagine walking into a room where the walls tell stories, not just through the words printed on the pages, but through the creativity and care you've put into arranging them. The process of designing a gallery wall can be as enjoyable as reading your favorite novel, and it allows you to express your personality while adding a unique touch to your space.
To start, you'll want to gather your framed book pages. Consider selecting a variety of pages that resonate with you—whether they are excerpts from classic novels, beautiful illustrations, or even poetry. The key is to have a mix of sizes and styles to create visual interest. Once you have your collection, it's time to think about layout. A well-thought-out arrangement can transform a plain wall into a captivating display. You might want to sketch out a rough design on paper first, or even use painter's tape to outline where each frame will go on the wall. This way, you can play around with the arrangement until it feels just right.
When it comes to the actual hanging, consider the following tips to ensure your gallery wall becomes a focal point:
- Start at Eye Level: Hang your frames so that the center of the display is at eye level for the average person. This creates a more inviting and engaging atmosphere.
- Use a Consistent Theme: Whether it's color, frame style, or the type of literature, having a consistent theme can tie the whole wall together.
- Vary the Frame Styles: Mixing different frame styles—like modern, vintage, and rustic—can add depth and character to your wall.
- Leave Space Between Frames: A little breathing room between frames can help each piece stand out while still feeling cohesive.
Don’t forget to incorporate other elements, such as mirrors, photographs, or small decorative items, to enhance the overall aesthetic. Mirrors can help reflect light and create a sense of depth, making your gallery wall feel even more expansive. Additionally, consider using a color palette that complements the rest of your room. This will ensure that your gallery wall feels integrated into your home rather than an afterthought.
Finally, remember that creating a gallery wall is an evolving process. You can always swap out frames or add new pieces as your collection grows or your tastes change. This flexibility allows you to keep your decor fresh and exciting, just like the stories found within the pages of your beloved books. So, gather those old book pages, unleash your creativity, and watch as your walls come to life with the magic of literature!
Q: How do I choose which book pages to frame?
A: Look for pages that resonate with you personally, whether they contain beautiful illustrations, inspiring quotes, or significant passages. Choosing pages that evoke memories or emotions will make your gallery wall even more special.
Q: Can I mix different types of frames?
A: Absolutely! Mixing different frame styles can add character and depth to your gallery wall. Just make sure they complement each other in terms of color or theme.
Q: How do I ensure my gallery wall looks cohesive?
A: Consider using a consistent color palette or theme throughout your frames. This will help tie the display together, even if the frames themselves are different styles.
Q: Is there a specific layout that works best for gallery walls?
A: There’s no one-size-fits-all layout, but a common approach is to start with a central piece and build around it. You can also create a grid or an organic arrangement based on your personal preference.
Bookmarks and Stationery
Have you ever found yourself lost in a book, only to struggle with keeping your place? Well, it's time to say goodbye to those boring, mass-produced bookmarks and hello to something truly unique! Upcycling old books into bookmarks and stationery not only celebrates literature but also adds a personal touch to your reading experience. Imagine flipping through the pages of your favorite novel and seeing a bookmark that reflects your love for the written word. How cool is that?
Creating bookmarks from old book pages is a super simple and enjoyable process. You can cut out beautiful illustrations, quotes, or even just interesting text from the pages. The beauty of this project lies in the fact that you can customize each bookmark to suit your style. Whether you prefer a minimalist design or something more elaborate, the possibilities are endless. You can even laminate your bookmarks for durability, ensuring they last through many reading adventures!
For those who love to jot down thoughts or sketch, why not transform old book covers into personalized stationery? This not only gives new life to discarded books but also creates a one-of-a-kind writing experience. To make your own stationery, start by removing the covers from books that are beyond saving. You can then use the covers as the base for your notebooks. Simply bind some blank pages together, and you have a unique journal or sketchbook that showcases your love for literature.
Additionally, you can enhance your stationery by incorporating book-themed designs. For example, you could use pages with illustrations as the background for your notes or letters. This not only adds a creative flair but also serves as a conversation starter. Imagine gifting a beautifully crafted notebook made from an old classic! It’s a thoughtful gift for any book lover and a fantastic way to share your passion for reading.
Here’s a quick idea: why not host a crafting party with friends? Gather some old books, scissors, glue, and other craft supplies. You can all create your own bookmarks and stationery while sharing your favorite literary quotes and stories. It’s a fun way to connect with others who appreciate the art of reading and crafting.
As you dive into this upcycling journey, remember that the goal is to be creative and have fun. Each bookmark and piece of stationery you create tells a story, not just of the book it came from, but also of your unique style and personality. So, gather those old books, unleash your creativity, and let your love for literature shine through your personalized bookmarks and stationery!
- What materials do I need to create bookmarks from old books?
You will need old book pages, scissors, glue, and optional materials like ribbons or laminating sheets for durability. - Can I use any type of book for this project?
Yes, any old or damaged books can be used. Just make sure they are not valuable or rare editions. - How do I bind pages for my stationery?
You can use a simple stapler, binding clips, or even sew the pages together to create a sturdy notebook.
Book Furniture Projects
Have you ever thought about how you can elevate your living space while also giving your old books a new purpose? Upcycling old books into furniture is not just a creative endeavor but also a sustainable way to breathe life into discarded literature. Imagine turning those dusty tomes into stunning pieces that not only showcase your love for reading but also serve practical functions in your home. From coffee tables that tell a story to bookshelves that highlight your literary passion, the possibilities are endless!
One of the most exciting projects you can undertake is creating a coffee table from old books. The process is surprisingly simple, yet the result is a conversation starter that adds a unique flair to your living room. Start by stacking several hardback books to the desired height. Secure them together using a strong adhesive or even a decorative strap. To finish it off, place a glass top over the stack, allowing the colorful spines and covers to peek through, creating a beautiful aesthetic. This not only provides a functional surface for drinks and snacks but also serves as a stunning display of your literary collection.
Another fantastic project is designing a bookshelf using old books. This DIY project allows you to customize your shelf according to your space and style. You can either create a traditional bookshelf by using books as the main structure or opt for a more artistic approach. For instance, consider using books to form the sides of a floating shelf, where the books act as the brackets. This way, you can showcase your favorite reads while also creating a visually appealing display. To get started, gather your books, some durable wood planks, and brackets. Arrange the books in a way that pleases your eye, and secure the shelves to the wall for stability.
Don't forget about bookends! These are perfect for those who want to keep their books organized while adding a touch of style. Crafting bookends from old books is not only easy but also allows you to express your creativity. You can simply cut a book in half and secure it to a sturdy base, or you can create a more elaborate design by stacking several books together and securing them with a decorative strap or paint. The best part? You can choose the colors and themes that match your home decor, making your bookends a personalized piece of art.
To help you visualize these projects, here's a simple table summarizing the materials and steps required for each furniture project:
| Project | Materials Needed | Steps |
|---|---|---|
| Coffee Table | Old hardback books, strong adhesive, glass top |
1. Stack books to desired height. 2. Secure with adhesive. 3. Place glass top over the stack. |
| Bookshelf | Old books, wood planks, brackets |
1. Arrange books for desired look. 2. Secure shelves to the wall. 3. Display your favorite reads. |
| Bookends | Old books, sturdy base, decorative strap (optional) |
1. Cut book in half or stack. 2. Secure to base. 3. Decorate as desired. |
By upcycling old books into furniture, you're not just creating functional pieces; you're also telling a story. Each item holds memories and a narrative, inviting conversations and admiration from guests. So, roll up your sleeves and let your creativity flow! The world of upcycled book furniture awaits you.
Q: Can any type of book be used for furniture projects?
A: While you can technically use any book, it's best to choose hardback books for sturdiness, especially for projects like tables and shelves.
Q: Do I need special tools for these projects?
A: Basic tools like a strong adhesive, a saw (for cutting books), and a drill (for securing shelves) are usually sufficient.
Q: How can I ensure my furniture is stable?
A: Always make sure to secure your books properly and use additional supports like brackets for shelves to ensure stability.
Building a Book Shelf
Creating a bookshelf from old books is not just a way to showcase your love for reading; it’s a statement piece that reflects your personality and creativity. Imagine walking into a room and being greeted by a stunning bookshelf made entirely from vintage novels, their spines telling stories of the past while holding up your favorite reads. This project is not only sustainable but also incredibly rewarding. So, how do you get started? Let’s dive into the steps that will guide you through this exciting upcycling adventure!
First, you'll want to gather your materials. Look for books that are no longer in circulation or those that you’re willing to part with. It’s essential to choose books with sturdy spines, as they will provide the necessary support for your shelf. You can also consider using books of various sizes to create a unique and visually appealing structure. Remember, the more eclectic your collection, the more character your bookshelf will have!
Once you have your books, the next step is to decide on the design of your bookshelf. There are several styles you can consider:
- Floating Shelves: This design gives the illusion that your books are magically suspended in mid-air.
- Stacked Book Shelves: Simply stack books horizontally to create a casual, laid-back look.
- Vertical Bookends: Use large books as bookends to hold smaller books in place.
After deciding on a design, it’s time to get to work! If you’re going for floating shelves, you’ll need to secure brackets to the wall. For stacked shelves, you can create a base using wooden planks or even more books. The beauty of this project lies in its flexibility; you can mix and match methods to suit your space and style.
Next, let’s talk about assembly. If you opt for floating shelves, measure and mark where you want your brackets to go, ensuring they are level. Use a drill to secure the brackets and then place your books on the shelves. For stacked shelves, you can simply arrange your books in a way that creates a stable structure. You might want to add a few decorative items like plants or framed photos to enhance the aesthetic appeal.
Finally, don’t forget to personalize your bookshelf! You can paint or stain the wooden parts to match your decor, or even decoupage the covers of some of the books to add a splash of color. Consider adding fairy lights for a cozy ambiance or integrating a small reading nook nearby to make it a perfect spot for diving into your favorite stories.
In conclusion, building a bookshelf from old books is a fantastic way to breathe new life into discarded literature while creating a functional piece of art for your home. Not only does it help reduce waste, but it also allows you to express your creativity and love for reading. So gather your old books, unleash your imagination, and start building your very own literary masterpiece!
Q: What types of books are best for building a bookshelf?
A: Look for books that are sturdy and in good condition. Hardcovers are generally more durable than paperbacks. You can also use books that have sentimental value or are visually appealing.
Q: Do I need special tools to create a bookshelf from old books?
A: Basic tools like a drill, level, and measuring tape are helpful, especially for floating shelves. For stacked shelves, you may only need a flat surface and some creativity!
Q: How can I ensure my bookshelf is stable?
A: Make sure to use sturdy books and secure them properly if you're using brackets. For stacked designs, ensure the base is level and stable.

Bookend Creations
Creating bookends from old books is not just a way to organize your literary treasures; it's also an artistic endeavor that brings personality and charm to your space. Imagine a pair of vintage novels, their spines worn with time, standing proudly on your shelf, holding your favorite reads in place. This DIY project is not only a fantastic way to upcycle old books but also a great conversation starter for your guests. So, how do you turn those dusty pages into stunning bookends? Let’s dive in!
First, you’ll want to select the right books. Look for sturdy volumes that can withstand the weight of your other books. Consider those with beautiful covers or intriguing titles that might spark curiosity. Once you’ve chosen your books, it’s time to get creative! You can either keep them intact or cut them down to size, depending on your desired look. For a rustic vibe, leave the books as they are, perhaps even with some pages slightly peeling or frayed. If you prefer a more modern aesthetic, trim them to uniform sizes and paint or decorate the edges.
To make your bookends more functional, consider adding some weight to them. You can fill the insides with materials like sand, small stones, or even resin. This will ensure they don’t tip over when holding up your beloved novels. If you're feeling particularly crafty, you can also attach a small piece of wood or a heavy base to the bottom of the books to provide additional support.
Once your bookends are constructed, it’s time to personalize them. You might want to decorate them with paint, decoupage, or even stickers that reflect your personality or interests. For instance, if you’re a fan of classic literature, consider adding quotes from your favorite authors or motifs that resonate with their works. You could even glue on small figurines or decorative items that align with your reading preferences. The possibilities are endless!
Lastly, don't forget about the arrangement on your shelf. Position your bookends at either end of a collection of books to create a cohesive look. You can also mix in decorative items like plants or small sculptures to enhance the visual appeal of your bookshelf. This way, your bookends not only serve a practical purpose but also become a part of your home’s decor.
In summary, crafting bookends from old books is a delightful way to blend functionality with creativity. It allows you to express your love for literature while giving new life to forgotten volumes. So, gather your old books, unleash your creativity, and let your bookends tell a story of their own!
Q1: What types of books are best for making bookends?
A1: Look for sturdy hardcover books that can hold the weight of other books. Vintage books with interesting covers or titles also make great choices.
Q2: Can I use paperback books for bookends?
A2: While paperback books can be used, they may not be as stable. If you choose to use them, consider reinforcing them with weight inside or pairing them with something more solid.
Q3: What materials can I use to decorate my bookends?
A3: You can use paint, decoupage, stickers, fabric, or even small decorative items that reflect your interests. Get creative!
Q4: How can I make my bookends heavier?
A4: Fill the inside of the books with sand, small stones, or attach a heavy base to the bottom to ensure they don’t tip over.
Q5: Can I sell my upcycled bookends?
A5: Absolutely! Unique, handcrafted items are popular in markets and online platforms. Just ensure they are well-made and visually appealing.
Gift Ideas and Personalization
When it comes to gift-giving, there's something truly special about personalization. Upcycled books offer a unique canvas to create thoughtful gifts that resonate with the recipient's love for literature. Imagine wrapping a gift in pages from a classic novel or gifting a handmade journal bound from a beloved book cover. These ideas not only celebrate the joy of reading but also showcase your creativity and thoughtfulness. So, let’s dive into some delightful ways to turn old books into memorable gifts!
One of the most charming ways to personalize a gift is by using book pages as wrapping paper. This method not only adds a touch of literary flair but also shows that you put some thought into the presentation. You can choose pages from the recipient's favorite book or even use pages with beautiful illustrations. To make it even more special, consider adding a matching bookmark made from the same book pages. This little extra can make the gift feel even more cohesive and personal.
Another fantastic idea is to create handmade journals from old book covers. This project is not just about recycling; it’s about creating something functional and beautiful. To make a journal, simply remove the old pages from the book and replace them with blank or lined paper. You can bind the new pages using a simple sewing method or even use a binder ring for a more casual approach. Personalize the journal by adding a name or a meaningful quote on the first page or inside cover. This way, you’re not just giving a journal; you’re gifting a space for thoughts, dreams, and creativity!
When considering gifts for book lovers, think about customized bookends. You can craft bookends from old books by cutting them into halves or using sturdy book covers as the base. These can be painted or decorated to match the recipient's home decor. Not only are they functional, but they also serve as a conversation starter, showcasing your unique approach to upcycling.
Lastly, let’s not forget about the power of personalized bookmarks. They are simple yet effective gifts that can be made from the covers or pages of old books. You can add a touch of creativity by decorating them with quotes, illustrations, or even the recipient’s name. It’s a small token that can enhance the reading experience and remind them of your thoughtful gesture every time they open their book.
In conclusion, upcycled books provide an endless array of possibilities for creating personalized gifts that are both functional and artistic. By incorporating elements that reflect the recipient's interests and passions, you can turn a simple gift into a cherished keepsake. So, the next time you’re on the hunt for a gift, remember the beauty of upcycling old books. It’s a wonderful way to show you care while also giving new life to discarded literature!
Q: What types of books are best for upcycling?
A: Any old or damaged books can be used for upcycling. Consider using books that are no longer readable or those that have sentimental value but are not in good condition.
Q: Can I use hardcover and paperback books for these projects?
A: Absolutely! Both hardcover and paperback books can be upcycled for various projects. Hardcovers are great for sturdy items like bookends or journals, while paperbacks are perfect for wrapping and crafting.
Q: How do I ensure that the pages of the book remain intact during the upcycling process?
A: Take your time when disassembling books. Use a sharp craft knife for cutting and be gentle to avoid tearing the pages. If you’re creating something like a journal, consider leaving some pages intact for added texture.
Customized Gift Wrapping
When it comes to gift-giving, presentation is key. What if you could elevate your gift wrapping game by using something as unique and meaningful as the pages from old books? This creative approach not only adds a personal touch but also celebrates the love of literature. Imagine the delight on your friend's face when they unwrap a gift wrapped in a page from their favorite novel or a classic poem. It’s like giving two gifts in one—a present and a piece of art!
To get started, gather some old book pages. You can choose pages with beautiful illustrations, interesting typography, or even pages that hold sentimental value. The beauty of using book pages is that they come in various sizes and textures, allowing you to mix and match for a truly customized look. You might consider using pages from children’s books for a playful touch or classic literature for a more sophisticated vibe. The choice is yours!
Here’s a simple way to wrap your gifts using book pages:
- Choose Your Pages: Select pages that resonate with the recipient. For instance, if they love poetry, use pages from a poetry book.
- Measure and Cut: Measure your gift and cut the pages accordingly. You can overlap pages for larger gifts or fold them creatively.
- Wrap and Secure: Wrap the pages around the gift and secure them with twine or ribbon. This not only holds the wrapping in place but also adds a rustic charm.
- Add a Personal Touch: Consider attaching a small tag made from another page, or write a heartfelt note on a book page to accompany the gift.
For an extra special touch, you can create a collage effect by combining different pages. Layer them, allowing some of the text or illustrations to peek through. This not only makes the wrapping more visually appealing but also tells a story. Remember, the goal is to make the wrapping as interesting as the gift itself!
Using book pages for wrapping is also an eco-friendly choice. It promotes upcycling and reduces waste, making your gift not just a token of affection but also a step towards sustainability. Plus, it opens up a conversation about the importance of recycling and appreciating literature in our lives.
In conclusion, customized gift wrapping with old book pages is a wonderful way to show your creativity and thoughtfulness. It’s a simple yet impactful way to make your gifts stand out while honoring the beauty of literature. So the next time you have a gift to wrap, consider reaching for those old books collecting dust on your shelf. You’ll be amazed at the transformation!
1. Can I use any book pages for wrapping gifts?
Yes, you can use any book pages, but it’s best to choose pages that have interesting designs or text that resonates with the recipient.
2. How do I prevent the pages from tearing while wrapping?
Be gentle while handling the pages. If they are fragile, consider using a layer of tissue paper underneath for added support.
3. Can I use other materials with book pages for wrapping?
Absolutely! You can combine book pages with twine, ribbons, or even other decorative paper to create a unique look.
4. What if I don’t have old books to use?
You can often find old books at thrift stores or garage sales for very little money. Alternatively, you can print out pages from public domain texts online.
5. Is this wrapping technique suitable for all occasions?
Yes! Customized gift wrapping with book pages can be adapted for any occasion, from birthdays to holidays, and even weddings.
Handmade Journals
Transforming old book covers into is not just a creative endeavor; it's a celebration of literature and personal expression. Imagine flipping through the pages of a journal that once held stories of adventure, mystery, or romance. By upcycling these literary treasures, you breathe new life into them, allowing their stories to continue in a different form. The process is simple yet rewarding, and the results are truly unique.
To create your own handmade journal, you'll need a few materials: old book covers, blank pages (these can be recycled paper, notebook pages, or even handmade paper), a strong binding method, and some decorative elements to make your journal truly your own. Start by selecting the book cover that resonates with you. It could be a classic novel, a vintage children’s book, or even a beautiful coffee table book that you no longer need. The cover sets the tone for your journal and can inspire your writing or sketching.
Next, you'll want to gather your blank pages. The number of pages you choose will depend on how thick you want your journal to be. A good rule of thumb is to use about 40-60 pages for a comfortable size. You can mix different types of paper for variety – perhaps some pages for writing and others for sketching. Once you have your materials ready, it’s time to bind them together. There are several binding methods you can choose from:
- Saddle Stitch: This is a simple technique where you fold your pages in half and stitch them along the crease.
- Japanese Stab Binding: This decorative binding method allows for creative designs and is visually appealing.
- Spiral Binding: Using a spiral coil gives your journal a professional look and allows it to lay flat when open.
After binding your pages to the cover, don’t forget to personalize your journal! You can add embellishments such as washi tape, stickers, or even a pocket for storing notes and mementos. This is where your creativity can really shine! Consider using stamps or calligraphy to add quotes or your name on the first page, making it feel all the more special.
Handmade journals make wonderful gifts too! They carry a personal touch that store-bought journals simply can’t match. Imagine gifting a friend a journal made from their favorite book, complete with a heartfelt inscription on the first page. It’s a thoughtful gesture that shows you care and understand their interests.
In conclusion, creating handmade journals from old book covers is a delightful way to upcycle while expressing your creativity. Whether you keep it for yourself or gift it to someone special, each journal tells a story of its own. So, gather those old books and let your imagination run wild!
Q: What types of books work best for making journals?
A: Any book with a sturdy cover can work well! Consider using hardcovers for durability, but softcovers can also be charming. Look for books with covers that resonate with you personally.
Q: Can I use any type of paper for the pages?
A: Absolutely! You can use recycled paper, sketch paper, or even decorative papers. Just make sure the paper is compatible with the binding method you choose.
Q: How can I make my journal more decorative?
A: Get creative! Use washi tape, stickers, stamps, and even drawings. You can also add pockets or envelopes inside the journal for extra storage.
Q: Is this a difficult project to undertake?
A: Not at all! With a bit of patience and creativity, anyone can make a handmade journal. There are plenty of tutorials online to guide you through the process.
Frequently Asked Questions
- What is upcycling and how can I upcycle old books?
Upcycling is the creative process of transforming waste materials or old products into something new and useful. When it comes to old books, you can upcycle them by turning them into unique items like planters, wall art, furniture, or even personalized gifts. The possibilities are endless, and it’s a fun way to give new life to books that might otherwise be discarded.
- Can any type of book be used for upcycling projects?
While most books can be used for upcycling, it's best to choose those that are damaged or no longer hold sentimental value. Hardcovers, paperbacks, and even old encyclopedias can be great candidates. Just remember, the more interesting the pages or cover, the more unique your project will be!
- How do I create a book planter?
To create a book planter, start by selecting a sturdy hardcover book. Cut out a section of the pages to create a space for soil and plants. Make sure to line the inside with a plastic bag or waterproof material to prevent moisture damage. Finally, add soil and your chosen plants—succulents work wonderfully in book planters!
- What types of art can I make with old book pages?
You can create a variety of art pieces using old book pages! Consider making collages, framed art, or even decoupage projects. You can also use pages to create unique bookmarks or greeting cards. The beauty of using book pages lies in the text and illustrations that can add character to your creations.
- How can I personalize upcycled book gifts?
Personalizing upcycled book gifts can be as simple as using pages from a book that holds meaning for the recipient. You can create custom bookmarks, journals, or even gift wrap. Adding a handwritten note or a personal touch, like their favorite quotes from the book, can make your gift even more special!
- Are there any specific tools I need for upcycling books?
While you don’t need a lot of fancy tools, having some basic supplies can make the process easier. A craft knife, scissors, glue, a ruler, and a cutting mat are essential for most projects. Depending on what you’re making, you might also need paint, brushes, or frames. Just get creative and use what you have!