How to Repurpose an Old Trunk into a Side Table
Have you ever looked at an old trunk and thought, "What on earth can I do with this?" Well, you're not alone! Many of us find ourselves with vintage trunks tucked away in attics or basements, longing for a creative spark to bring them back to life. In this article, we'll explore creative ways to transform that dusty old trunk into a stylish side table that not only adds character to your home but also serves a practical purpose. Imagine the stories that trunk could tell, and now, it can be a stunning centerpiece in your living room or a charming accent in your bedroom!
First things first, selecting the ideal trunk is crucial for your project. You want to consider a few key factors: size, condition, and style. A trunk that's too small may not serve your needs, while one that's too large could overwhelm your space. Look for a trunk that complements your home decor. Is your style more rustic, vintage, or modern? The trunk you choose should reflect that aesthetic. Additionally, check the condition of the trunk—are there any significant damages? Remember, a little wear and tear can add character, but you want to ensure it's sturdy enough for daily use as a side table.
Before diving into this DIY adventure, it's essential to gather all the necessary tools and materials. Here's a brief rundown of what you might need:
- Paint or Stain: Choose a color or finish that matches your decor.
- Sandpaper: For smoothing out rough edges and surfaces.
- Wood Glue: To reinforce any loose joints.
- Legs or Feet: For stability and height.
- Protective Finish: To seal and protect your newly transformed table.
Having these items on hand will make your transformation process smoother and more enjoyable.
Now that you have your trunk and materials, it's time for some cleaning and preparation. Start by giving your trunk a good scrub to remove any dirt and grime. You want to ensure that the surface is clean and ready for whatever finish you choose. Next, use sandpaper to smooth out any rough spots or peeling paint. This step is vital because it creates a smooth surface for painting or refinishing. If your trunk has any old stickers or glue residue, a little bit of rubbing alcohol can do wonders in removing those pesky remnants.
As you prepare your trunk, take a close look at any damaged areas. Dents, scratches, or loose hinges can detract from your trunk's beauty. For minor scratches, a bit of wood filler can work wonders. Just apply it, let it dry, and sand it down to match the surrounding area. If you find any loose hinges, tighten them up with a screwdriver. This attention to detail will ensure that your final product not only looks great but is also functional.
Now comes the fun part—choosing a finish! You have a plethora of options, from vibrant paints to rich stains. If you're aiming for a bold statement, a bright color can really make your trunk pop. On the other hand, if you prefer a more classic look, a natural wood stain can highlight the trunk's unique grain. When selecting a finish, consider the overall aesthetic of your room. You want your new side table to enhance your existing decor, not clash with it.
With your trunk cleaned, repaired, and finished, it's time to transform it into a functional side table. Start by adding legs or feet to elevate your trunk. This not only adds stability but also gives it a more polished look. You can purchase pre-made legs or even repurpose old furniture legs for a unique twist. Once the legs are attached, consider adding a tabletop surface if your trunk has a lid that needs stabilization. This could be a piece of glass or wood that sits securely on top, providing a flat surface for drinks, books, or decorative items.
Once your trunk is transformed into a chic side table, it's time to think about styling. This is where you can really let your personality shine! Consider how you want to accessorize your new piece. A stylish lamp, a stack of your favorite books, or a decorative bowl can all enhance the look of your trunk. Remember, less is often more—choose a few key pieces that complement your trunk and tie in with your room's color scheme.
When accessorizing, think about the items that resonate with you. Do you love plants? A small succulent or a vase of fresh flowers can breathe life into the space. Are you a bookworm? Stack a few of your favorite reads on top for a cozy, inviting look. The goal is to create a cohesive aesthetic that feels curated yet effortless.
Lastly, to ensure your newly repurposed table stands the test of time, regular maintenance is key. Keep it clean by dusting it regularly and using a gentle cleaner suitable for the finish you've chosen. If you've painted your trunk, consider applying a protective finish every few months to keep it looking fresh and vibrant. By taking these simple steps, your side table will not only look great but will also last for years to come.
Q: Can I use any type of trunk for this project?
A: Yes! Just make sure it's sturdy and fits the style you want for your space.
Q: Do I need special tools for this project?
A: Basic tools like a screwdriver, sandpaper, and paintbrushes will suffice for most transformations.
Q: How can I ensure my trunk is safe to use as a table?
A: Make sure to repair any damaged areas and reinforce loose joints. Adding legs will also enhance stability.
Q: What if I don't want to paint my trunk?
A: You can opt for a wood stain or leave it as is for a rustic look. Just make sure to clean and protect the surface.

Choosing the Right Trunk
When it comes to transforming an old trunk into a chic side table, the selection of the trunk is a critical first step. You want to ensure that the trunk you choose not only fits your aesthetic but also serves its new purpose effectively. So, what should you look for? First, consider the size of the trunk. Ideally, it should be proportionate to the space where you plan to place it. A trunk that is too large can overwhelm a small room, while a tiny trunk might get lost in a spacious area. Imagine it like finding the perfect piece of furniture that seamlessly blends into your existing decor.
Next, think about the condition of the trunk. Look for any signs of wear and tear, such as rusted hardware, broken hinges, or significant scratches. A trunk with minor imperfections can add character, but if it’s too damaged, you might find yourself investing more time and resources into repairs than you’re willing to commit. Remember, it's all about balance! You want a trunk that tells a story without being a complete fixer-upper.
Finally, consider the style of the trunk. Is it vintage, modern, rustic, or something in between? The trunk should harmonize with your home’s overall design scheme. For example, a weathered leather trunk can add a touch of bohemian charm to a contemporary living room, while a sleek, metal trunk might fit perfectly in an industrial space. To help you visualize, here’s a quick table with some trunk styles and their corresponding aesthetics:
| Trunk Style | Best Suited For |
|---|---|
| Vintage Leather | Bohemian, Eclectic |
| Wooden Chest | Rustic, Farmhouse |
| Metal Trunk | Industrial, Modern |
| Decorative Trunk | Traditional, Classic |
In conclusion, choosing the right trunk is about finding the perfect blend of size, condition, and style. Take your time during this selection process, as it will set the foundation for your DIY project. After all, a well-chosen trunk can transform not just into a functional piece of furniture, but also a stunning conversation starter in your home.

Essential Tools and Materials
Before diving into the exciting world of transforming your old trunk into a stunning side table, it’s essential to gather all the necessary tools and materials. This preparation will not only streamline your project but also ensure that you have everything at your fingertips when creativity strikes. Think of this phase as gathering your ingredients before cooking a gourmet meal; having everything ready makes the process smoother and more enjoyable.
First and foremost, you’ll need some basic tools to get started. A screwdriver is indispensable for removing any hardware that may be attached to your trunk. If you have stubborn screws or hinges, a power drill can be a game-changer, saving you time and effort. Additionally, a sander is crucial for smoothing out the surface of the trunk, especially if it has seen better days. You might also want to have a paintbrush or roller handy, depending on whether you plan to paint or stain the trunk.
Next, let’s talk about the materials you’ll need. The choice of paint or stain is vital, as it will determine the final look of your side table. Here are some options to consider:
- Paint: Choose a color that complements your decor. Chalk paint offers a matte finish, while acrylic paint provides a more vibrant look.
- Stain: If you prefer a natural wood finish, select a stain that enhances the grain of the wood.
- Sealant: A protective finish, like polyurethane, is essential to safeguard your work from scratches and spills.
In addition to the paint or stain, you’ll need some hardware. Depending on your design, you may want to add legs to elevate your trunk or even a new hinge if the old one is worn out. You can find various styles of legs at your local hardware store, from sleek modern designs to rustic wooden options. These additions will not only provide stability but also add a unique touch to your newly transformed piece.
Finally, don’t forget about safety! A pair of work gloves will protect your hands while working, and a mask is recommended if you’re sanding or painting in a poorly ventilated area. Proper ventilation is key, so consider working outside or in a well-ventilated garage.
To summarize, here’s a quick table of the essential tools and materials you’ll need for your trunk transformation:
| Tools | Materials |
|---|---|
| Screwdriver | Paint or Stain |
| Power Drill | Sealant |
| Sander | Hardware (legs, hinges) |
| Paintbrush or Roller | |
| Work Gloves | |
| Mask |
With all your tools and materials ready, you’re now set to embark on this creative journey. Remember, the right preparation is half the battle won. So roll up your sleeves, put on your favorite playlist, and let’s get started on turning that old trunk into a fabulous side table!

Cleaning and Preparing the Trunk
When it comes to transforming an old trunk into a stunning side table, the first step is to ensure that your trunk is clean and ready for its makeover. This process is not just about aesthetics; it’s about laying a solid foundation for your DIY project. Start by removing any dust and debris that may have accumulated over the years. A simple cloth or a vacuum cleaner can do wonders. If your trunk has been sitting in a damp basement or attic, it might have developed some stubborn grime or even mildew. In such cases, a mixture of warm water and mild soap can be your best friend. Just make sure to wring out the cloth so it’s damp, not soaking wet, to avoid damaging the wood.
Once the trunk is clean, it’s time to assess its condition. Look closely for any signs of wear and tear. Are there scratches, dents, or even loose hinges? This is where your DIY skills will come into play. You’ll want to sand down any rough areas to create a smooth surface for painting or staining. Use a medium-grit sandpaper to start, followed by a finer grit to finish. This process not only prepares the surface but also helps to remove any old finishes that might interfere with your new look.
As you prepare the trunk, don’t forget about its interior! If you plan to use it for storage, a quick wipe-down inside is essential. You might even consider adding a fresh coat of paint or a decorative liner to give it a new life. Think of it as giving your trunk a little spa day, ensuring every corner looks as fabulous as the outside.
Here’s a quick rundown of the cleaning and preparation steps:
- Dust and vacuum the trunk thoroughly.
- Use a damp cloth with mild soap for stubborn stains.
- Sand down rough or damaged areas.
- Inspect hinges and locks for functionality.
- Clean the interior and consider a decorative touch.
With your trunk clean and prepped, you’re now ready to move on to the fun part: transforming it into a stylish side table! Remember, the more effort you put into this cleaning and preparation phase, the better your final product will look. So take your time, and enjoy the process!

Repairing Damaged Areas
When it comes to giving your old trunk a new lease on life as a side table, paying attention to damaged areas is essential. After all, you want your creation to look polished and inviting, right? Start by examining your trunk closely. Look for dents, scratches, or even loose hinges that could detract from its overall appearance. Remember, a trunk with a few imperfections can still be transformed into a stunning piece, but addressing these issues will elevate your DIY project to the next level.
For dents, you might find that a little heat can work wonders. Use a hairdryer on a low setting to warm the area, then gently press a damp cloth against it. The steam can help the wood swell back into shape. If the dent is particularly stubborn, you might need to repeat this process a few times. For deeper scratches, consider using a wood filler that matches the trunk's color. Apply it with a putty knife, let it dry, and then sand it smooth for a seamless finish.
Now, let’s talk about those loose hinges. They can be a real nuisance, especially if you plan to use the trunk for storage as well as a table. To fix this, you’ll want to tighten the screws or, if they're stripped, replace them with slightly larger ones. If the hinge is beyond repair, don’t fret! You can find replacement hinges at your local hardware store. Just ensure they match the style of your trunk to maintain a cohesive look.
Lastly, if your trunk has any water damage or stains, you may want to consider sanding down the affected area. This not only removes unsightly marks but also prepares the surface for painting or staining. Start with a coarse sandpaper to tackle the rough spots, then switch to a finer grit for a smooth finish. Remember to wipe away any dust with a damp cloth before moving on to the next steps of your transformation.
By focusing on these repairs, you're setting the stage for a stunning side table that not only looks great but also stands the test of time. So roll up your sleeves and get ready to breathe new life into that old trunk!
- Can I use any trunk for this project? While most trunks can be repurposed, it's best to choose one that is structurally sound and fits your desired aesthetic.
- What if my trunk has significant water damage? If the damage is extensive, consider consulting a professional or using a different trunk that requires less repair.
- How do I maintain my newly repurposed trunk side table? Regularly dust it and apply a protective finish every few months to keep it looking fresh and new.

Choosing a Finish
When it comes to giving your old trunk a fresh look, the finish you choose can make all the difference. It’s like choosing the perfect outfit for a big event; the right finish can transform your trunk from drab to fab! You have several options to consider, and each one brings its own character and charm to the piece. So, let’s dive into the world of finishes and discover what suits your style best.
First off, you need to think about the overall aesthetic you want to achieve. Are you leaning towards a rustic vibe, or do you prefer something more modern? Here are some common finishes to consider:
- Paint: A bold paint color can really make your trunk pop! Whether you go for a vibrant hue or a soft pastel, paint allows you to express your personality. Plus, it's a great way to hide imperfections.
- Stain: If you want to showcase the natural beauty of the wood, a stain might be the way to go. Stains come in various shades, from light to dark, and they can enhance the grain of the wood, adding depth and richness.
- Varnish: For those who want a glossy finish, varnish can provide a protective layer while giving your trunk a polished look. It’s perfect for high-traffic areas where durability is key.
Next, consider the durability of the finish. If your side table will be used frequently, you might want to opt for a more robust option like varnish or a protective sealant. These finishes can withstand the wear and tear of daily life, ensuring your trunk remains a stunning centerpiece for years to come.
Another factor to take into account is the environment where your trunk will reside. If it’s going to be placed in a humid area, like a bathroom or near a window, you’ll want to choose a finish that can resist moisture. In this case, a high-quality marine varnish could be your best bet!
Lastly, don't forget about the application process. Some finishes are easier to apply than others. If you’re new to DIY projects, you might want to start with paint, as it typically requires less prep work compared to stains or varnishes. Just make sure to follow the manufacturer’s instructions for the best results.
In summary, choosing the right finish for your repurposed trunk is essential to achieving the look and functionality you desire. Whether you decide to paint, stain, or varnish, each option offers unique benefits that can elevate your trunk into a stylish side table that complements your home decor beautifully. So, grab your tools and get ready to unleash your creativity!
Transforming the Trunk into a Table
Transforming your old trunk into a stylish side table is not just a fun DIY project; it's a fantastic way to inject character into your living space. To kick off this transformation, you first need to ensure that your trunk is sturdy enough to support the weight of items you plan to place on it. Start by flipping the trunk upside down to inspect the base. If it feels wobbly or unstable, consider reinforcing it with some wooden blocks or a sturdy piece of plywood to create a solid foundation.
Next, let’s talk about legs. Adding legs to your trunk will not only elevate it to a comfortable height but also give it a fresh, modern look. You can choose from various styles: hairpin legs for a sleek, industrial vibe, or even turned wooden legs for a more traditional feel. If you're feeling adventurous, why not try a combination of both? Just make sure the legs are securely attached to the trunk using screws and brackets, ensuring they can bear the weight without wobbling.
Once the legs are attached, it’s time to think about the tabletop. If your trunk has a flat top, you might want to keep it as is. However, if it’s a bit uneven or you want to add a personal touch, consider placing a piece of glass or a wooden board on top. This not only provides a smooth surface but also protects the trunk from scratches and spills. If you go with wood, you can stain or paint it to match your trunk, creating a cohesive look that ties the whole piece together.
In addition to legs and a tabletop, think about adding some decorative hardware. Handles or knobs can add a touch of elegance and make it easier to open the trunk if you’ve stored items inside. You can even get creative with this aspect by using vintage hardware or modern designs that contrast beautifully with the trunk's style. For a cohesive design, ensure that the hardware complements the overall aesthetic you’re aiming for.
Finally, consider stability. If your trunk is particularly large or heavy, you might want to add a few extra features to ensure it doesn’t tip over. Adding corner brackets or even some rubber pads underneath the legs can help prevent slipping and protect your flooring. Once everything is in place, step back and admire your work! This transformation not only breathes new life into the trunk but also gives you a functional piece of furniture that tells a story.
- Can I use any type of trunk for this project? Yes, as long as it is sturdy and in decent condition, any trunk can be repurposed into a side table.
- What if my trunk has a lot of damage? You can repair damages with wood filler, sandpaper, and a bit of creativity. Don’t shy away from embracing the trunk’s character!
- How do I choose the right legs? Consider the height and style you want. Hairpin legs are great for modern looks, while wooden legs can add a classic touch.
- Is it necessary to add a tabletop? While not mandatory, a tabletop can enhance the trunk’s functionality and protect it from wear and tear.
- How can I maintain my new side table? Regular dusting and occasional polishing will keep your trunk looking fresh. Avoid harsh chemicals that can damage the finish.
Styling Your New Side Table
Once you've transformed your old trunk into a stunning side table, the fun doesn’t stop there! Styling your new piece is where you can truly let your creativity shine. Think of your side table as a blank canvas, waiting for your personal touch to turn it into a focal point of your living space. So, how do you make it pop? Let’s dive into some tips and tricks!
First and foremost, consider the functionality of your side table. Is it going to hold a lamp, serve as a place for your coffee cup, or perhaps showcase your favorite books? Depending on its purpose, you can style it accordingly. For instance, if you plan to use it for drinks, a decorative tray can be a stylish way to corral coasters and beverages, keeping everything organized and easy to access.
Next, think about the color palette of your room. Your trunk might already have a unique finish, but adding complementary colors can enhance its appeal. If your trunk is a bold color, consider neutral decor items to balance it out. On the flip side, if it’s a more subdued hue, a splash of vibrant accessories can bring it to life. For example, a bright vase or colorful books can draw the eye and create a lovely contrast.
Don’t forget about height variation when accessorizing. Mixing different heights creates visual interest and keeps the eye moving. Place a tall lamp on one side and stack a few books on the other, or perhaps add a small plant for a touch of greenery. These elements not only add depth but also allow you to play with shapes and forms, making your side table more dynamic.
Another thing to consider is the theme of your decor. If your home has a rustic vibe, you might want to incorporate natural elements like wooden coasters or a woven basket for storage. On the other hand, if your style leans more towards modern, sleek metallics or glass accents can elevate the look. The key is to choose items that resonate with your overall design aesthetic.
Lastly, don’t shy away from adding a personal touch! Incorporating items that tell your story—like a framed photo, a souvenir from your travels, or a unique piece of art—can make your side table feel truly yours. Remember, it’s all about creating a space that feels comfortable and inviting for you and your guests.
So, as you style your new side table, keep these tips in mind. By considering functionality, color, height, theme, and personal touches, you’ll create a stunning display that not only enhances your trunk's beauty but also reflects your unique style.
- What type of decor works best for a side table? Accessories like lamps, books, plants, and decorative trays are great choices.
- How can I ensure my side table matches my existing decor? Pay attention to color palettes and themes in your room, and choose items that complement those elements.
- Can I change the decor seasonally? Absolutely! Switching out decor items with the seasons can keep your space feeling fresh and new.
Accessorizing with Decor
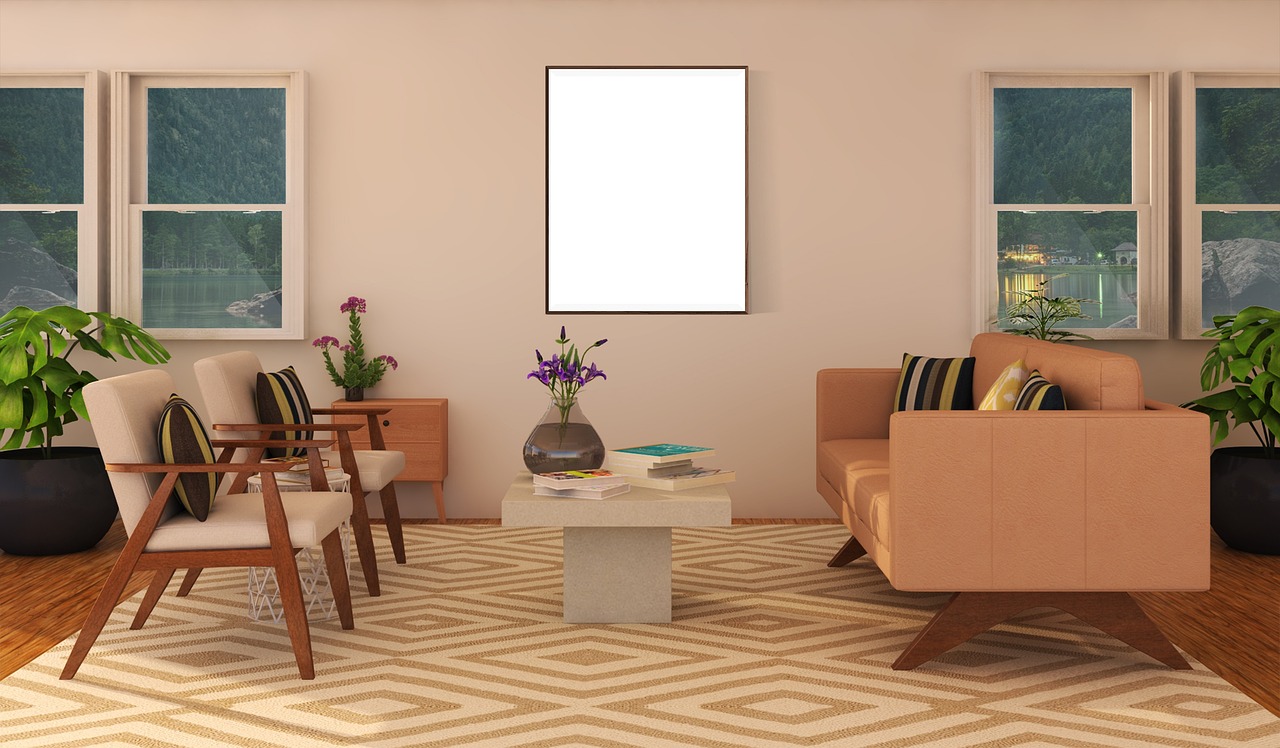
Now that your old trunk has been transformed into a stunning side table, it's time to give it the finishing touch with some thoughtful decor. Styling your new piece can be an exciting journey, akin to dressing up for a special occasion. The right accessories can elevate your trunk from a mere functional item to a striking focal point in your living space. So, what should you consider when accessorizing your trunk side table? Let's dive in!
First off, think about the color palette of your room. If your trunk has been painted in a bold hue, you might want to opt for decor items that either complement or contrast beautifully with it. For example, if you’ve chosen a deep navy blue for your trunk, consider accessorizing with gold or white decorative items to create a chic, modern look. On the other hand, if you’ve kept the trunk’s natural wood finish, earthy tones and textures will blend seamlessly.
Next, consider the functionality of your side table. Are you planning to use it primarily for holding drinks, books, or decorative items? If it’s going to serve a practical purpose, you might want to place a small tray on top. This not only organizes items but also adds a layer of style. You can fill the tray with coasters, a small plant, or even a decorative candle. The key is to create a curated look that feels intentional.
Speaking of plants, incorporating greenery is an excellent way to breathe life into your decor. A small potted plant or a vase with fresh flowers can add a burst of color and freshness to your trunk side table. Just ensure that the height of the plant doesn’t obscure any decorative items you want to showcase. You could even consider using a hanging plant or a trailing vine that can cascade down from a higher shelf if your trunk has one.
When it comes to accessorizing, don’t shy away from mixing textures. A soft fabric, like a cozy throw or a decorative pillow, can create a warm and inviting atmosphere. Imagine a plush throw draped casually over the trunk, inviting guests to sit down and relax. Additionally, consider incorporating different materials such as glass, metal, or ceramics to create visual interest. For instance, a sleek metallic lamp paired with a rustic ceramic vase can create a striking contrast.
Finally, remember that less is more. While it might be tempting to fill every inch of your trunk with decor, sometimes simplicity speaks volumes. A couple of carefully chosen items can make a more significant impact than a cluttered display. To help you visualize this, here’s a quick table summarizing some ideal decor items for your trunk side table:
| Item | Purpose |
|---|---|
| Tray | Organizes items and adds style |
| Potted Plant | Adds color and freshness |
| Decorative Candle | Creates ambiance and warmth |
| Throw Blanket | Adds texture and comfort |
| Books | Showcases personality and interests |
Accessorizing your trunk side table is all about expressing your personal style while ensuring that the piece serves its purpose. With the right combination of decor, your trunk can truly become a standout element in your home. So, unleash your creativity and enjoy the process of making your space uniquely yours!
Maintaining Your Repurposed Table
Once you've transformed your old trunk into a stunning side table, the next step is to ensure it remains in pristine condition for years to come. Just like any piece of furniture, your repurposed trunk requires a bit of love and care to keep it looking fabulous. Think of maintenance as a relationship; the more attention you give it, the better it will serve you!
First and foremost, regular cleaning is essential. Dust and dirt can accumulate quickly, especially if your side table is placed in a high-traffic area. Use a soft, damp cloth to gently wipe down the surface. Avoid harsh chemicals that could damage the finish. Instead, opt for a mild soap solution if necessary. Remember, a little TLC goes a long way!
Next, consider applying a protective finish to your trunk. If you've painted or stained the surface, a clear sealant can help guard against scratches and spills. Depending on the type of finish you used, you might need to reapply the protective layer every few years. It's like giving your trunk a spa day, ensuring it stays fresh and vibrant.
Furthermore, keep an eye out for any signs of wear and tear. If you notice any scratches or dents, address them promptly to prevent further damage. You can use touch-up paint for minor scratches or a wood filler for deeper nicks. Just like a good pair of shoes, a little repair work can keep your trunk looking sharp.
Lastly, think about the placement of your side table. Avoid areas that receive direct sunlight for extended periods, as this can fade colors and weaken materials over time. Instead, position it in a spot that allows it to shine without being overexposed. Think of it as giving your trunk the best seat in the house!
By following these maintenance tips, you can ensure that your repurposed trunk side table remains a beautiful and functional part of your home for years to come. It’s not just furniture; it’s a conversation starter, a piece of history, and a testament to your creativity. So, show it some love, and it will reward you with charm and character!
- How often should I clean my trunk side table? Aim for a quick wipe-down once a week and a deeper clean every month.
- Can I use any type of paint on my trunk? It's best to use paint designed for furniture to ensure durability and a smooth finish.
- What if my trunk has a strong odor? Try placing an open box of baking soda inside for a few days to absorb the smell.
- How can I protect my trunk from water damage? Use coasters for drinks and consider applying a waterproof sealant.
Frequently Asked Questions
- What type of trunk is best for repurposing into a side table?
When choosing a trunk, look for one that is sturdy and in good condition. Vintage trunks with character can add charm, while modern ones may offer a cleaner look. Consider the size to ensure it fits well in your space.
- What tools and materials will I need for this project?
You’ll need basic tools like a screwdriver, sandpaper, and a paintbrush. Materials include paint or stain, protective finishes, and possibly new hardware. Having everything ready will make the process smoother!
- How do I clean and prepare the trunk before starting?
Start by removing any old hardware and cleaning the trunk with a damp cloth. Sand down rough areas and repair any damage, like scratches or dents, to create a smooth surface for painting or refinishing.
- Can I fix damaged areas on my trunk?
Absolutely! For minor scratches, sanding and touch-up paint can work wonders. For bigger issues, consider using wood filler for dents or replacing loose hinges. This ensures your side table looks polished and new.
- What finish should I choose for my trunk side table?
Your choice of finish depends on the look you want. Paint offers a bold statement, while stains can enhance the natural wood grain. Think about your existing decor to select a finish that complements your space.
- How do I transform the trunk into a functional table?
Start by adding legs for height and stability. You can attach pre-made legs or even repurpose furniture legs. Ensure everything is securely fastened, and consider adding a tabletop if you want a flat surface.
- What are some styling tips for my new side table?
Accessorize your trunk with decorative items like lamps, books, or plants. Keep the decor cohesive by choosing colors and styles that match your room. This will make your trunk side table a stunning focal point!
- How can I maintain my repurposed trunk side table?
Regular cleaning is key! Use a soft cloth to dust and avoid harsh chemicals that can damage the finish. You might also want to reapply protective finishes every few years to keep it looking fresh and new.


