How to Create DIY Tassel Garland
Are you ready to add a splash of color and creativity to your home decor? Making a DIY tassel garland is not only a fun project but also a fantastic way to personalize your space. Whether you're gearing up for a party, sprucing up a room, or just looking for a new craft to dive into, this guide will walk you through everything you need to know. From gathering materials to customizing your garland, we’ll cover all the steps to ensure your creation is as unique as you are. So, grab your supplies and let’s get started!
Before diving into the world of tassel-making, it’s essential to gather all the necessary materials. Here’s a comprehensive list to ensure you have everything at hand:
- Yarn: Choose your favorite colors and textures.
- Scissors: A sharp pair will make cutting easier.
- String or Twine: This will be used to string your tassels together.
- Measuring Tape: For consistent tassel lengths.
- Optional Embellishments: Beads, flowers, or other decorative items.
Having these materials ready will set the stage for a smooth crafting experience. Remember, the more creative you get with your materials, the more unique your garland will be!
Selecting the perfect yarn is crucial for your tassel garland. The type, color, and texture of yarn can dramatically affect the overall look of your creation. Think of yarn as the paint for your artistic masterpiece. You can choose from a variety of yarns, including cotton, wool, and acrylic. Each type offers different benefits, such as softness, durability, and ease of use. When picking your yarn, consider what best matches your decor style and personal preference.
Creating a visually stunning tassel garland often starts with choosing the right colors. Here are some tips to help you mix and match effectively:
- Complementary Colors: Colors opposite each other on the color wheel can create a vibrant and eye-catching display.
- Analogous Colors: Colors next to each other on the wheel offer a more harmonious and blended look.
Choosing the right color combinations can transform your garland from basic to breathtaking!
For a more sophisticated vibe, consider a monochromatic theme. Using various shades of a single color can create a cohesive and elegant look. Imagine a garland made entirely of different shades of blue, from sky to navy. This approach not only looks chic but also allows you to play with texture and shape without overwhelming the viewer.
If you’re looking to make a bold statement, contrasting colors are the way to go. Think bright pinks against deep greens or sunny yellows paired with rich purples. This method adds visual interest and can make your garland a focal point in any room. Don’t be afraid to experiment with unexpected combinations!
Incorporating different textures can elevate your tassel garland to new heights. Mixing yarns with varied textures, such as fuzzy, smooth, or even metallic threads, can add depth and dimension to your design. Imagine the soft touch of a fluffy yarn combined with the sleekness of a shiny thread—this contrast can create a stunning visual effect!
Now that you have your materials and colors chosen, let’s get into the nitty-gritty of making your tassel garland. Follow these easy-to-understand instructions to create your very own masterpiece!
Start by cutting a length of yarn for the tassel base. The length will determine how long your tassels will hang. Once you have your desired length, wrap the yarn around your fingers or a piece of cardboard several times. The more wraps you make, the fuller your tassel will be. Carefully slide the yarn off and tie a knot at the top to secure it. Then, cut the loops at the bottom to create the tassel fringe. Voilà! You’ve made your first tassel!
Once your tassels are ready, it’s time to assemble them into a garland. Take your string or twine and begin threading the tassels onto it, spacing them evenly. You can mix and match colors and textures as you go to achieve your desired look. When you’re satisfied with the arrangement, tie a knot at both ends of the string to secure everything in place. Your DIY tassel garland is now complete!
To make your tassel garland even more unique, consider adding personal touches. Here are some creative ideas:
Enhance your garland with additional decorative elements like beads, flowers, or even small pom-poms. These additions can bring an extra layer of creativity and flair to your design. Imagine a garland with colorful beads interspersed between the tassels, catching the light and drawing attention!
Your tassel garland can be a versatile piece that changes with the seasons. For instance, you can use autumn colors and leaf shapes for a fall theme or bright pastels for spring. This adaptability makes your garland a year-round decor piece that can easily be updated.
Now that you’ve created your beautiful tassel garland, it’s time to showcase it! Here are some tips for displaying your creation:
Consider hanging your garland on a wall to transform your space. You can drape it above a bed, across a window, or even in a playroom for a fun pop of color and texture. The possibilities are endless!
Your tassel garland can also double as stunning party decor. Use it as a backdrop for photos, drape it over tables, or hang it near the entrance to welcome guests. It’s sure to be a conversation starter!
Q: How long does it take to make a tassel garland?
A: The time varies based on the number of tassels you make, but typically, you can complete a garland in a few hours.
Q: Can I use different materials besides yarn?
A: Absolutely! You can use fabric scraps, ribbons, or even paper to create tassels.
Q: How do I store my tassel garland?
A: To keep it looking fresh, store your garland in a cool, dry place, and avoid folding it to prevent creasing.

Materials Needed
Before diving into the delightful world of DIY tassel garlands, it's essential to gather all the necessary materials to ensure a smooth crafting experience. Think of this as gathering your tools before embarking on a grand adventure—having everything at your fingertips will make the process not only easier but also more enjoyable. Here’s a detailed list of what you’ll need:
- Yarn: Choose your favorite colors and textures. The type of yarn you select will significantly impact the overall look of your tassel garland.
- Scissors: A good pair of sharp scissors will help you cut the yarn cleanly and efficiently.
- String or Twine: This will serve as the base for hanging your tassels. Make sure it’s sturdy enough to hold the weight of your garland.
- Measuring Tape: To ensure your tassels are of uniform size, a measuring tape is a handy tool.
- Hot Glue Gun (optional): If you want to secure your tassels more firmly, a hot glue gun can be a great addition.
- Embellishments (optional): Consider adding beads, flowers, or other decorative elements to personalize your garland.
Now that you know what materials to gather, let’s take a moment to appreciate the versatility of yarn. With so many colors and textures available, you can truly express your personality through your tassel garland. Whether you're going for a boho vibe with natural fibers or a vibrant party atmosphere with bright acrylics, the choice is yours! And remember, the beauty of crafting lies in experimentation. Don't hesitate to mix and match different yarn types and colors to create a unique masterpiece.
Once you have all your materials ready, you'll be one step closer to creating a stunning tassel garland that will brighten up any space. So, grab your supplies, roll up your sleeves, and let’s get crafting!
Choosing the Right Yarn
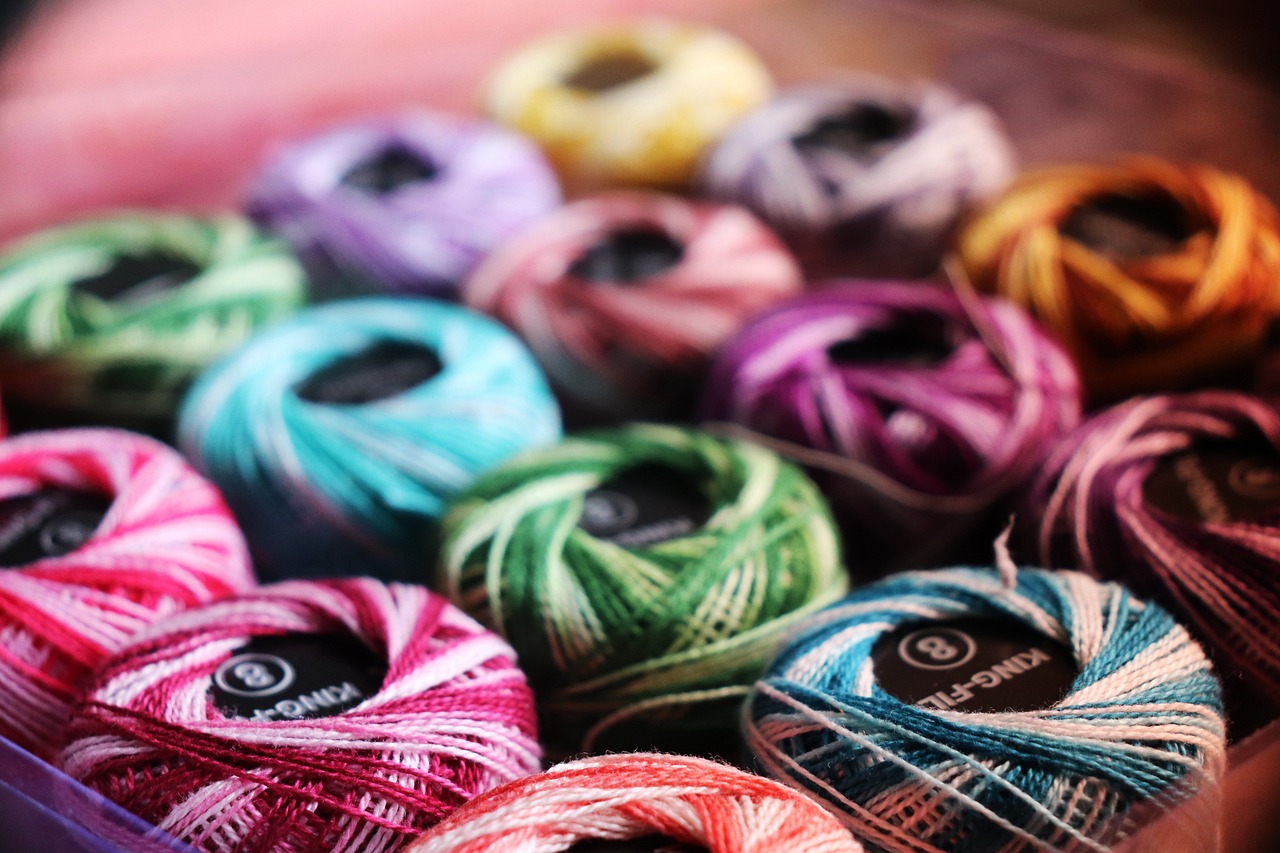
When it comes to creating a stunning DIY tassel garland, is absolutely essential. The yarn you select will not only influence the overall look of your garland but also its texture and durability. With so many options available, it can feel overwhelming. But don't worry! We're here to help you navigate through the colorful world of yarn.
First and foremost, consider the type of yarn you want to use. There are several varieties, each with its own unique characteristics:
- Acrylic Yarn: This is a popular choice due to its affordability and wide range of colors. It's also machine washable, making it a practical option for garlands that might need a little cleaning.
- Cotton Yarn: If you're looking for something soft and breathable, cotton yarn is the way to go. It's perfect for a more natural look and works beautifully for garlands that will be displayed in warm settings.
- Wool Yarn: For a cozy and luxurious feel, wool yarn is unmatched. However, it can be a bit pricier and may require special care.
Next, let’s talk about color. The color of your yarn is crucial in determining the mood and style of your tassel garland. Think about your existing decor and what colors will complement or contrast with it. You might want to opt for a monochromatic theme using various shades of a single color, which can lend an air of sophistication. On the other hand, if you're feeling adventurous, contrasting colors can create a vibrant and eye-catching display that draws the eye and sparks conversation.
Texture also plays a significant role in your selection. Mixing different yarn textures can add depth and interest to your garland. Imagine a combination of soft, fluffy yarn with a sleek, shiny one; the contrast can be visually stunning! You can even incorporate materials like twine or ribbon to enhance the tactile experience of your garland.
To help you visualize the options, here’s a simple table summarizing the yarn types and their characteristics:
| Yarn Type | Characteristics | Best For |
|---|---|---|
| Acrylic | Affordable, wide color range, machine washable | General use, outdoor displays |
| Cotton | Soft, breathable, natural look | Indoor settings, warm climates |
| Wool | Luxurious, cozy, warm | Elegant displays, colder environments |
Ultimately, the yarn you choose should reflect your personal style and the atmosphere you want to create. So, take your time, explore different options, and don't hesitate to mix and match! After all, the beauty of DIY projects lies in the ability to express your creativity and make something that is uniquely yours.

Color Combinations
Choosing the right color combinations for your DIY tassel garland is like picking the perfect outfit; it can make all the difference in how your creation is perceived. Color is powerful—it can evoke emotions, set the mood, and even tell a story. So, how do you choose the perfect hues for your tassel garland? Let's dive into the world of color theory and explore some exciting combinations that will make your garland pop!
First off, think about the overall vibe you want to create. Are you aiming for something playful and vibrant, or do you prefer a more elegant and subdued look? Here are some popular color combinations that you can consider:
- Pastel Palette: Soft pinks, mint greens, and pale yellows create a dreamy, whimsical feel.
- Bold and Bright: Neon colors like hot pink, electric blue, and bright yellow will grab attention and energize any space.
- Earth Tones: Warm browns, deep greens, and burnt oranges give a cozy, natural vibe, perfect for rustic decor.
- Classic Black and White: This timeless combination adds a touch of sophistication and works well in any setting.
When mixing colors, consider using a color wheel as your guide. Complementary colors—those that are opposite each other on the wheel—create a striking contrast. For example, pairing a vibrant orange with a deep blue can create a stunning visual impact. Alternatively, you can go for analogous colors, which are next to each other on the wheel, like blue, green, and teal, for a more harmonious look.
Another fun idea is to incorporate a monochromatic scheme, where you use different shades and tints of a single color. This technique can add depth and sophistication to your garland without overwhelming the senses. Think of it as creating a gradient effect—from light to dark shades of blue, for instance, which can be both calming and visually appealing.
Don’t forget about the importance of texture! Different yarns can have varying effects on color perception. A shiny, metallic yarn can make a color appear more vibrant, while a matte finish can soften it. Mixing textures within your color combinations can add another layer of interest to your tassel garland.
In summary, the right color combinations can elevate your DIY tassel garland from simple to spectacular. Whether you choose to go bold with contrasting colors, soft with pastels, or sophisticated with monochromatic shades, the key is to have fun and let your personality shine through in your choices!
1. What materials do I need to create a tassel garland?
You will need yarn, scissors, string or twine, and optionally, decorative elements like beads or flowers.
2. How do I choose the right colors for my garland?
Consider the mood you want to set. Use a color wheel to find complementary or analogous colors, or stick to a monochromatic theme for a sophisticated look.
3. Can I use different textures in my tassel garland?
Absolutely! Mixing different textures can add depth and interest to your design, making it more visually appealing.
4. How can I display my tassel garland?
You can hang it on walls, drape it across tables, or use it as a backdrop for parties. The possibilities are endless!

Monochromatic Themes
Creating a monochromatic tassel garland is a fantastic way to bring a sense of harmony and elegance to your decor. By using various shades of a single color, you can craft a visually stunning piece that feels cohesive and sophisticated. Imagine a garland that transitions from a soft pastel to a deeper hue, creating a gradient effect that captivates the eye. This approach not only simplifies your color choices but also allows you to play with different textures and materials within the same color family, adding depth and interest to your design.
When selecting your shades, consider the mood you want to evoke. For instance, a range of blues can create a calming and serene atmosphere, perfect for a bedroom or a relaxing reading nook. On the other hand, vibrant reds or oranges can energize a space, making them ideal for a lively party setting. Here are a few tips to help you choose your shades:
- Start with a Base Color: Choose your favorite color as the foundation.
- Explore Color Variations: Look for lighter and darker shades of your base color.
- Test Combinations: Place the shades together to see how they interact.
Additionally, incorporating different materials can enhance the monochromatic theme. For example, mixing yarns with varying textures—such as a fluffy yarn with a smooth one—can create a more dynamic look. You might also consider adding elements like felt balls or fabric flowers in the same color palette to further enrich the visual experience. The key is to maintain a balance, ensuring that all elements work together harmoniously without overwhelming the viewer.
In summary, a monochromatic tassel garland can be a striking addition to your home decor. By thoughtfully selecting shades and incorporating varied textures, you can create a piece that not only enhances your space but also reflects your personal style. So, why not give it a try? Dive into the world of color, and let your creativity flow!
Q: What is a monochromatic color scheme?
A monochromatic color scheme involves using different shades, tints, and tones of a single color. This creates a cohesive and visually appealing look.
Q: Can I use different materials in a monochromatic garland?
Absolutely! Mixing textures like yarn, felt, and fabric can add depth and interest to your garland while still maintaining a monochromatic theme.
Q: How do I choose the right shades for my garland?
Start with a base color you love, then explore lighter and darker variations. Testing combinations together will help you see how they work as a group.
Q: Is a monochromatic garland suitable for all occasions?
Yes! Depending on the color you choose, a monochromatic garland can be tailored for any occasion, from elegant events to casual gatherings.

Contrasting Colors
When it comes to creating a tassel garland that truly pops, nothing compares to the power of . Imagine walking into a room and being greeted by a vibrant display of colors that instantly uplifts the mood. Using contrasting colors can make your tassel garland not just a decoration, but a statement piece that draws the eye and sparks conversation. But how do you choose the right contrasting colors? Let’s dive into the art of color pairing!
First off, consider the color wheel. This handy tool can be your best friend when selecting colors that are opposite each other. For example, pairing a rich blue with a bright orange creates a dynamic look that is both exciting and visually appealing. Similarly, yellow and purple or red and green can yield stunning results. The key is to ensure that the colors you choose not only contrast but also complement each other in a way that reflects your personal style.
Another important aspect to consider is the intensity of the colors. Sometimes, a soft pastel can be paired with a bold, vibrant shade to create a balanced look. For instance, a soft pink tassel combined with a deep navy can create a sophisticated yet playful aesthetic. To visualize this, think of a sunset: the soft hues of the sky contrasting beautifully with the bold colors of the setting sun.
Here are some popular contrasting color combinations that work well for tassel garlands:
- Turquoise and Coral
- Fuchsia and Lime Green
- Black and Gold
- White and Red
Using contrasting colors not only enhances the visual impact of your tassel garland but also gives you the freedom to express your creativity. Don’t be afraid to experiment with different shades and materials. You might find that adding a metallic thread or a glitter yarn can elevate your garland even further, adding a touch of glamour that catches the light beautifully. Whether you’re preparing for a festive occasion or simply looking to brighten up your living space, contrasting colors can transform your tassel garland into a true work of art.
Q: What are the best contrasting color combinations for tassel garlands?
A: Some popular combinations include turquoise and coral, fuchsia and lime green, black and gold, and white and red. Experimenting with different shades can yield unique results!
Q: Can I mix textures with contrasting colors?
A: Absolutely! Mixing textures, like combining smooth yarns with fuzzy ones, can add depth to your garland while still maintaining a striking color contrast.
Q: How do I ensure my colors don’t clash?
A: Using a color wheel can help you choose complementary colors. Additionally, testing your color combinations in natural light can give you a better idea of how they will look together.

Texture Variations
When it comes to creating a stunning DIY tassel garland, can truly elevate your design to the next level. Think of your garland as a beautiful dish; just like how a chef adds spices and textures to enhance flavors, you can incorporate different materials to add depth and interest to your tassels. By mixing various yarns and embellishments, you can create a visually captivating piece that draws the eye and sparks conversation.
One way to achieve texture is by using yarns of different thicknesses. For instance, pairing a chunky yarn with a finer one can create a delightful contrast that adds dimension. Imagine the soft, fluffy feel of a thick yarn juxtaposed against the sleekness of a finer strand; it's like a cozy sweater layered over a silky blouse. You can also explore using yarns made from different materials, such as cotton, wool, or acrylic. Each type brings its own unique feel and sheen, contributing to the overall aesthetic of your garland.
Additionally, consider incorporating other materials into your tassel design. Fabrics like felt or lace can be used to create decorative accents that enhance the visual appeal. You might even think about adding ribbon or twine to your tassels for a rustic touch. These elements can be woven into the tassels or tied around them for added flair. The combination of textures not only makes your garland more interesting but also allows it to complement various decor styles, from bohemian to modern chic.
For those adventurous souls looking to push the boundaries, why not explore unconventional materials? Incorporating items like feathers, pom-poms, or even dried flowers can create a whimsical and unique garland. Just picture a tassel adorned with tiny flowers swaying gently in the breeze—it's a delightful nod to nature that can bring a fresh vibe to your space.
As you experiment with different textures, keep in mind the overall theme and color palette of your garland. A cohesive look is essential; mixing too many conflicting textures can lead to visual chaos. Instead, aim for a harmonious blend that enhances the beauty of your tassel garland. Remember, the goal is to create a piece that not only looks good but also feels good to the touch.
In summary, texture variations are a fantastic way to personalize your DIY tassel garland. By thoughtfully combining different yarns and materials, you can craft a stunning piece that reflects your personal style and adds a unique flair to your decor. So, roll up your sleeves, gather your supplies, and let your creativity flow as you explore the wonderful world of textures!
Step-by-Step Instructions
Creating your own DIY tassel garland is not only a fun and creative project, but it also allows you to add a personal touch to your home decor. To get started, make sure you have all your materials ready. Once you have everything in place, follow these simple steps to craft your beautiful tassel garland.
First, let’s dive into making the tassels. Take your yarn and cut a length of about 20 inches (50 cm) for the tassel’s tie. Then, wrap the yarn around a piece of cardboard or your hand about 15-20 times, depending on how fluffy you want your tassels to be. The more wraps you make, the fuller your tassel will look. After you’ve wrapped the yarn, carefully slide it off the cardboard, keeping it intact.
Next, take the 20-inch piece of yarn you cut earlier and tie it tightly around the top of the bundle you just created. Make a secure knot, and then you can trim the bottom of the yarn loops to create the tassel's fringe. You can adjust the length of the fringe according to your preference. If you want a more polished look, you can even trim the ends to make them even.
Once you’ve made several tassels (aim for at least 10 to 15, depending on the length of your garland), it’s time to assemble them. Start by cutting a long piece of string or twine to serve as the base of your garland. This string will hold all your tassels together. Begin by spacing out your tassels evenly along the string. You can use a ruler to ensure uniform spacing, or you can do it by eye for a more casual look.
To attach the tassels, simply tie each one onto the string with a secure knot. This is where you can get creative! Feel free to alternate colors and textures for a more dynamic look. If you want a more layered effect, you can also tie some tassels closer together and leave more space between others.
After all your tassels are attached, step back and admire your work! You can adjust the spacing if necessary. If you want to add a little extra flair, consider incorporating decorative elements like beads or flowers between the tassels. This will add a unique touch and make your garland stand out even more.
Finally, when you’re satisfied with your creation, it’s time to hang it up! Make sure to choose a spot that highlights your beautiful DIY tassel garland. Whether it’s draped across a wall, hanging from a mantel, or displayed at a party, your tassel garland is sure to impress!
Q: How long should my tassel garland be?
A: The length of your tassel garland can vary based on where you plan to display it. A good rule of thumb is to aim for about 6 to 8 feet (1.8 to 2.4 meters) for a typical wall display, but feel free to adjust based on your needs.
Q: Can I use different types of yarn?
A: Absolutely! Mixing different types of yarn can add texture and visual interest to your garland. Just be mindful of the thickness and weight of the yarn so that they hang evenly.
Q: How do I store my tassel garland when not in use?
A: To keep your tassel garland in great condition, store it in a cool, dry place. You can hang it up or wrap it gently in tissue paper to avoid tangling.
Q: Can I use this technique for other decorations?
A: Yes! The tassel-making technique can be applied to various decorations, such as gift wrapping, party favors, or even as embellishments for clothing.
Making the Tassels
Creating tassels is the heart and soul of your DIY tassel garland project. It's like the icing on a cake; without it, your garland would just be a plain old string! To get started, you’ll need some yarn, scissors, and a simple cardboard template. Don’t worry; it’s easier than it sounds! Imagine wrapping yarn around your fingers, but instead, we’re going to use a piece of cardboard to make it even more uniform and neat.
First, cut your cardboard into a rectangle. The size of the rectangle will determine the length of your tassels. A good starting point is about 6 inches wide and 4 inches tall. Now, take your yarn and wrap it around the cardboard about 20-30 times, depending on how thick you want your tassels to be. The more yarn you wrap, the fluffier your tassels will be! Think of it as building a cozy little nest.
Once you’ve wrapped enough yarn, carefully slide it off the cardboard. This is where the magic happens! Take a separate piece of yarn, about 8 inches long, and tie it tightly around the top of your yarn bundle. This knot will hold everything together, so make sure it’s secure. Now, you can cut the loops at the bottom of your bundle. Voila! You have a tassel! It’s like unwrapping a present; the excitement just builds as you see your creation come to life.
Now, let’s talk about size and shape. You can create tassels of various lengths by adjusting how much yarn you wrap. For a more whimsical look, try making some tassels shorter and some longer. This variation will add a fun element to your garland, making it feel more dynamic and lively. Think of it like a dance party where everyone has their own rhythm!
After you’ve made a bunch of tassels, it’s time to give them a little trim. Don’t be afraid to snip away at the ends to create a uniform look. Just like giving your hair a fresh cut, this step can really elevate your tassels from ‘meh’ to ‘wow!’ You want your tassels to have a neat and polished finish, so take your time with this part.
Finally, gather all your tassels and get ready to assemble them into the garland. But before you do that, consider adding some unique flair to each tassel. You can incorporate beads, glitter, or even little charms. This is your chance to let your creativity shine! Remember, the tassels are the stars of the show, so give them the spotlight they deserve!
- How many tassels do I need for my garland? The number of tassels depends on the length of your garland and how spaced out you want them. A good rule of thumb is to make at least 10-15 tassels for a standard-sized garland.
- Can I use different types of yarn? Absolutely! Mixing different types of yarn can add texture and visual interest to your garland. Just make sure they complement each other in color and style.
- How do I secure the tassels onto the garland string? You can use a simple knot to tie each tassel onto the string, or you can thread them through the top loop you created when tying the tassel. Just ensure they’re securely attached so they don’t fall off!

Assembling the Garland
Now that you've made your tassels, it's time to bring your beautiful DIY tassel garland to life! Assembling the garland is where the magic really happens, transforming your individual tassels into a stunning decorative piece. Start by laying out your tassels in the order you want them to appear. This is a crucial step because it allows you to visualize how the colors and textures will interact with each other. Think of it like creating a painting—each tassel is a brushstroke that contributes to the overall masterpiece.
Once you have your tassels arranged, take your string or twine and cut a length that suits your desired garland length. A good rule of thumb is to measure at least 1.5 times the length of your intended display area. This extra length will give you room to tie knots at both ends, ensuring your tassels stay securely in place. Now, let’s get down to the nitty-gritty of assembly!
To attach the tassels to the string, follow these steps:
- Step 1: Take one tassel and create a loop with the string by folding it over the top of the tassel.
- Step 2: Use the remaining string to wrap around the top of the tassel several times, creating a neat finish.
- Step 3: Secure the tassel by tying a knot at the top, making sure it’s tight enough to hold but not so tight that it distorts the shape of the tassel.
- Step 4: Repeat this process for each tassel, spacing them evenly along the string. A good spacing tip is to leave about 4-6 inches between each tassel, but feel free to adjust this based on your aesthetic preference.
After all your tassels are attached, give the garland a gentle shake to ensure everything is secure. This is also a great moment to step back and admire your handiwork! If you notice any tassels that seem out of place, you can easily adjust them by sliding them along the string. Once you’re satisfied with the arrangement, it’s time to tie off the ends of your garland. Make sure to leave enough string on either end for hanging or securing it in place.
Lastly, consider adding some embellishments to your garland for that extra flair. Think about incorporating beads, flowers, or even seasonal decorations, depending on the occasion. This little touch can elevate your garland from beautiful to breathtaking! With your tassel garland fully assembled, you're now ready to display it proudly in your home or at your next event.
Q1: How long should my tassel garland be?
A1: The length of your tassel garland can vary based on where you plan to hang it. A general guideline is to make it at least 1.5 times the length of the area you want to decorate.
Q2: Can I use different types of yarn for my tassels?
A2: Absolutely! Mixing different types of yarn can add interesting textures to your garland. Just make sure the yarns complement each other in color and style.
Q3: How do I hang my tassel garland?
A3: You can use adhesive hooks, nails, or even tape to hang your garland. Just ensure it’s secure enough to hold the weight of the tassels.
Q4: Is it possible to wash my tassel garland?
A4: While you may not want to wash it frequently, you can gently spot clean it if needed. Just be cautious not to get the yarn too wet, as it may lose its shape.
Customization Ideas
When it comes to creating your DIY tassel garland, the sky's the limit in terms of customization! Personalizing your garland not only showcases your unique style but also allows you to tailor it to fit various occasions and decor themes. One of the most exciting aspects of crafting is adding those special touches that make your piece truly one-of-a-kind. So, let’s dive into some creative ideas that will elevate your tassel garland from ordinary to extraordinary!
First off, consider incorporating decorative elements that reflect your personality or the theme of your space. Think about adding beads, sequins, or even small flowers to your tassels. These embellishments can bring a delightful sparkle and dimension to your garland. For instance, you can use wooden beads for a rustic look or colorful pom-poms for a fun, playful vibe. Imagine how a few strategically placed beads can transform the overall aesthetic!
Another fantastic way to customize your tassel garland is by embracing seasonal themes. This versatility means you can change your garland to suit holidays or special occasions. For example, during the fall, you might choose warm oranges and browns, adding little pumpkins or leaves as accents. In the winter, switch to icy blues and whites, incorporating snowflakes or silver beads. This adaptability not only keeps your decor fresh but also allows you to celebrate the changing seasons in style.
Additionally, think about the length and arrangement of your tassels. You don’t have to stick to a uniform size! Mixing short and long tassels can create a visually interesting garland that draws the eye. You can also play around with the spacing between the tassels—some might be closely grouped together while others are spread out. This asymmetry can add a modern touch to your design.
To take your customization even further, consider creating themed garlands for specific events. For a birthday party, you could use bright, festive colors and add little birthday-themed decorations like tiny cakes or balloons. For a wedding, think about soft pastels with delicate lace or ribbons intertwined. The possibilities are endless, and each theme can tell a story or evoke a feeling that resonates with your guests.
Finally, don’t forget about the material choices. While yarn is the most common, you can also experiment with other fibers like twine, fabric strips, or even ribbon. Each material brings its own texture and character to the garland. For example, using burlap can give a rustic charm, whereas satin ribbon can add a touch of elegance. Mixing different materials can create a rich, layered look that’s visually captivating.
Q: Can I use different types of yarn for my tassel garland?
A: Absolutely! Mixing different types of yarn can add texture and depth to your garland. Just ensure they complement each other in color and style.
Q: How do I hang my tassel garland?
A: You can hang your garland using adhesive hooks, string, or even tacks. It’s all about finding the right placement that showcases your creation!
Q: What if I want to change the colors of my garland for different seasons?
A: You can easily swap out tassels or add new ones in different colors. Just make sure your new additions fit well with the existing ones for a cohesive look.
Add Decorative Elements
When it comes to making your DIY tassel garland truly stand out, adding decorative elements is the secret sauce that can elevate your creation from simple to stunning. Think of your tassel garland as a blank canvas; the decorative elements are the vibrant colors that bring it to life. Whether you're looking to add a touch of elegance or a splash of fun, there are countless ways to enhance your garland with unique embellishments.
One of the easiest ways to personalize your tassel garland is by incorporating beads. Beads come in various shapes, sizes, and colors, allowing you to mix and match to your heart's content. You can thread them onto the string between tassels or even create tassels that incorporate beads directly into their design. Imagine a shimmering tassel with a few sparkling beads woven in—it’s like adding a little bling to your decor!
Another fantastic option is to integrate flowers into your garland. You can use faux flowers for a lasting look or dried flowers for a rustic vibe. Attach small blooms between the tassels or create mini floral arrangements that hang alongside them. This approach not only adds color but also introduces a natural element that can soften the overall appearance of your garland.
Beyond beads and flowers, consider using ribbons or lace to add texture and dimension. Ribbons can be tied around the tassels or used to create bows that dangle from the garland. Lace, on the other hand, can be woven through the yarn, lending a delicate touch that’s perfect for weddings or romantic settings. The key is to experiment with different materials until you find the combination that resonates with your style.
For a more playful twist, think about incorporating seasonal elements. For instance, during the fall, you might add small pumpkins or leaves, while winter could inspire the addition of snowflakes or pinecones. This seasonal approach not only keeps your decor fresh but also allows you to celebrate various holidays and occasions throughout the year.
Incorporating these decorative elements is all about letting your creativity shine. Don’t be afraid to mix and match different styles and materials. The beauty of a DIY project is that it reflects your personality, so trust your instincts and have fun with it! Whether you prefer a minimalist look or a more eclectic style, the right decorative touches can make your tassel garland a true showstopper.
Q: How do I secure decorative elements to my tassel garland?
A: You can use hot glue, string, or even sewing to attach decorative elements securely. Ensure they are well-fastened to avoid any mishaps.
Q: Can I use real flowers in my tassel garland?
A: While real flowers can be used, they will wilt over time. If you want longevity, consider using faux flowers or dried flowers instead.
Q: What are some good color combinations for tassel garlands?
A: Popular combinations include pastels for a soft look, bold primary colors for a vibrant feel, or monochromatic shades for a sophisticated touch.
Q: How can I change the decor of my tassel garland for different seasons?
A: Simply swap out the decorative elements based on the season, such as adding autumn leaves in fall or snowflakes in winter. This makes your garland versatile and fun!

Seasonal Themes
When it comes to decorating your home, nothing adds a personal touch quite like a DIY tassel garland tailored to the seasons. Imagine transforming your space with a simple yet effective decor piece that reflects the beauty of each season. Whether it's the vibrant colors of autumn, the icy blues of winter, or the fresh pastels of spring, your tassel garland can be a versatile canvas for seasonal creativity.
For spring, think about using soft, pastel yarns like baby pink, mint green, and light yellow. These colors evoke the feeling of blooming flowers and sunny days. You could even add small floral embellishments to your tassels, creating a delightful garden effect. On the other hand, if you want to embrace the summer vibe, opt for bright and bold colors like turquoise, sunny yellow, and coral. These hues will not only brighten your space but also bring a sense of joy and energy, perfect for summer gatherings.
As the leaves turn and fall approaches, consider incorporating rich, earthy tones like burnt orange, deep red, and mustard yellow. This color palette not only captures the essence of autumn but also provides a warm and cozy ambiance. You could even mix in some textured yarns, such as chunky wool or burlap, to enhance the rustic feel of your garland. Finally, as winter rolls in, you might want to create a garland that reflects the season's chill. Think of using icy blues, whites, and silvers that mimic the look of freshly fallen snow.
To make your garland truly special for the holidays, consider adding themed decorations. For instance, during Halloween, you could mix in black and orange yarns and attach mini pumpkins or ghost cutouts. For Christmas, red and green tassels adorned with small ornaments or twinkling fairy lights can create a festive atmosphere. This adaptability makes tassel garlands not just a decoration but a celebration of the seasons.
In conclusion, by choosing the right colors and embellishments, your DIY tassel garland can seamlessly transition through the seasons, bringing a touch of creativity and festivity to your home. So, why not gather your materials and start crafting a seasonal garland that reflects your unique style and the beauty of nature throughout the year?
- What materials do I need to make a tassel garland? You will need yarn, scissors, string, and any decorative elements you wish to add.
- How long does it take to make a tassel garland? Depending on your experience and the complexity of your design, it can take anywhere from 1 to 3 hours.
- Can I use different types of yarn? Absolutely! Mixing different textures and types of yarn can add depth and interest to your garland.
- How can I display my tassel garland? You can hang it on walls, use it as a table centerpiece, or drape it across doorways for a festive touch.
Displaying Your Tassel Garland
Once you've crafted your stunning DIY tassel garland, the next exciting step is figuring out how to display it in your home. This decorative piece can transform any space, adding a splash of color and a touch of whimsy. But where should you hang it? The possibilities are endless! Whether you want to brighten up a dull wall or add flair to a party, your tassel garland can do it all.
One of the most popular ways to showcase your tassel garland is by using it as a wall hanging. Imagine walking into a room and being greeted by a vibrant cascade of tassels that dance in the light. To achieve this, you can hang your garland above a sofa, bed, or even a dining table. Not only does it create a focal point, but it also draws the eye upward, making the space feel larger and more inviting. You can use simple adhesive hooks or nails to secure it in place, ensuring it stays put while adding a charming touch to your decor.
Another fantastic use for your tassel garland is as a party decoration. Whether it's a birthday bash, baby shower, or holiday gathering, your garland can serve as a stunning centerpiece. Picture this: a beautifully set table adorned with your tassel garland draped across the center, creating an eye-catching display that will wow your guests. You can also hang it behind a dessert table or photo booth area, adding a festive flair to your event. To make it even more special, consider matching the colors of your garland to the theme of your party!
For those who love to switch things up, consider using your tassel garland as a seasonal decoration. You can easily adapt it to fit different holidays or seasons by changing the colors or adding themed embellishments. For instance, during fall, you might incorporate warm oranges and browns, while in winter, icy blues and whites can create a cozy atmosphere. This versatility not only keeps your decor fresh but also showcases your creativity.
To give you a better idea of how to display your tassel garland, here’s a quick overview of some popular options:
| Display Option | Description |
|---|---|
| Wall Hanging | Hang above furniture or on a feature wall to create a focal point. |
| Party Decor | Use as a centerpiece or backdrop for celebrations. |
| Seasonal Decoration | Change colors and themes to match different holidays. |
In conclusion, displaying your DIY tassel garland can be as simple or as elaborate as you want it to be. With just a few creative ideas, you can turn this charming piece into a standout feature in your home or event. So go ahead, hang it, drape it, or let it flow—your tassel garland is waiting to shine!
Q: How do I secure my tassel garland to the wall?
A: You can use adhesive hooks, nails, or even washi tape to secure your tassel garland to the wall. Make sure to choose a method that will hold the weight of the garland without damaging your wall.
Q: Can I wash my tassel garland?
A: If your tassel garland is made from yarn, it’s best to spot clean it. Avoid soaking it in water, as this may cause the yarn to lose its shape.
Q: How can I store my tassel garland when not in use?
A: To keep your tassel garland in good condition, store it in a cool, dry place. You can hang it on a hanger or roll it up gently to prevent tangling.
Q: Can I mix different materials for my tassel garland?
A: Absolutely! Mixing different textures, such as fabric, twine, or even ribbon, can add depth and interest to your garland.
Wall Hangings
When it comes to showcasing your beautiful DIY tassel garland, are one of the most effective and visually appealing options. Imagine walking into a room and being greeted by a burst of color and texture that instantly lifts your mood. That’s the magic of a well-placed tassel garland! You can hang it in various ways, turning any plain wall into an eye-catching focal point.
First off, consider the height at which you want to hang your garland. A lower placement can create a cozy, intimate vibe, while hanging it higher can give a more open and airy feel to the space. For instance, if you’re decorating a child’s room, hanging the garland at eye level might be perfect for them to admire. On the other hand, for a living room or hallway, a higher placement can create a stunning visual impact.
To hang your tassel garland, you have a few options. You can use command hooks, which are fantastic for renters because they don’t leave a mark on your walls. Alternatively, if you’re looking for something a bit more permanent, you could opt for nails or tacks. Here's a simple breakdown of your choices:
| Hanging Method | Pros | Cons |
|---|---|---|
| Command Hooks | Easy to remove, no wall damage | Weight limit, may not hold heavy garlands |
| Nails/Tacks | Sturdy, can hold heavier garlands | Permanent, can leave holes |
Once you’ve decided on your hanging method, it’s time to get creative! You can drape the garland straight across or let it cascade down for a more whimsical look. If you’re feeling adventurous, try layering multiple garlands in different lengths and colors for a bohemian touch. This creates a dynamic and vibrant display that’s sure to catch the eye of anyone who enters the room.
Don’t forget about the surrounding decor! The beauty of a tassel garland is that it can complement various styles. For a modern look, pair it with geometric art or sleek furniture. If your style leans more towards rustic, consider hanging it above a wooden shelf adorned with plants or vintage books. The contrast will enhance the overall aesthetic and make your garland pop even more.
Lastly, think about the lighting in the area where you hang your garland. Natural light can bring out the colors beautifully, while soft artificial lighting can create a cozy atmosphere in the evening. You might even consider stringing fairy lights around your garland for an enchanting effect, especially for parties or special occasions.
In summary, hanging your tassel garland on a wall is not just about placement; it’s about creating a vibe. Whether you go for a simple, elegant look or a bold, layered display, your tassel garland can transform any space into a stunning visual experience. So grab those hooks, get creative, and let your decor shine!
- How do I choose the right colors for my tassel garland? - Think about the existing colors in your room. Complementary colors or a monochromatic scheme can work wonders!
- Can I use different materials for my tassels? - Absolutely! Mixing yarn with other materials like fabric or even paper can add unique textures to your garland.
- What occasions are best for displaying tassel garlands? - They’re perfect for parties, holidays, or simply to brighten up your everyday decor!
Party Decor
When it comes to throwing a memorable party, every little detail counts, and your DIY tassel garland can be the star of the show! Imagine walking into a room where colorful tassels sway gently in the breeze, instantly elevating the atmosphere and setting the tone for celebration. Whether you're hosting a birthday bash, a baby shower, or a festive holiday gathering, incorporating your tassel garland into the decor can create a stunning focal point that guests will admire.
One of the best ways to utilize your tassel garland is by draping it across tables, along walls, or even hanging it from the ceiling. This versatility allows you to adapt the garland to fit any space, making it a perfect addition to both indoor and outdoor events. For a whimsical touch, you can hang the garland above a dessert table or gift area, drawing attention to those special spots. The vibrant colors and playful textures will not only enhance your decor but also serve as a fantastic backdrop for photos!
To create a cohesive look, consider the theme of your party. For instance, if you're planning a summer garden party, opt for bright, cheerful colors like yellows, pinks, and greens. Alternatively, for a more elegant evening affair, you might choose muted tones or metallics that add a touch of sophistication. Mixing and matching tassels with other decorative elements, such as balloons or flowers, can further enhance the visual appeal. Here are some ideas to get your creative juices flowing:
- Photo Booth Backdrop: Use your tassel garland as a vibrant backdrop for a photo booth. Guests will love taking pictures in front of it, and it will add a fun element to your party.
- Table Centerpieces: Incorporate smaller versions of your tassel garland into your table centerpieces. This can be done by placing them in vases or tying them around napkin rings for a cohesive look.
- Hanging Displays: Create an eye-catching hanging display by combining your tassel garland with fairy lights. This will add a magical touch, especially for evening events.
As you plan your party decor, remember that the key is to let your personality shine through. Your DIY tassel garland is not just a decoration; it's a reflection of your style and creativity. So, don't be afraid to experiment with different arrangements and combinations. The more unique and personal your garland design, the more memorable your party will be!
Lastly, after the party is over, your tassel garland doesn't have to be packed away and forgotten. Instead, consider repurposing it as a cheerful addition to your home decor. Hang it in your child's room, drape it across a bookshelf, or use it to brighten up your workspace. With a little creativity, your tassel garland can continue to bring joy long after the last guest has left.
Q: How long does it take to make a tassel garland?
A: Depending on your experience level and the size of the garland, it can take anywhere from 1 to 3 hours to complete.
Q: What type of yarn is best for tassels?
A: Soft acrylic or cotton yarn works well, as they are easy to manipulate and come in a variety of colors.
Q: Can I use my tassel garland outdoors?
A: Yes, but make sure to use materials that can withstand the elements, or bring it inside after the event.
Q: How can I store my tassel garland?
A: To keep it looking great, store your garland flat in a box or hang it up to avoid tangling.
Frequently Asked Questions
- What materials do I need to create a DIY tassel garland?
To create a stunning DIY tassel garland, you will need yarn, scissors, string, and optionally some decorative elements like beads or flowers. Having everything ready before you start will make the crafting process smoother and more enjoyable!
- How do I choose the right yarn for my tassel garland?
Selecting the right yarn is key to achieving the look you want. Consider the color, texture, and weight of the yarn. You can choose vibrant colors for a playful look or soft pastels for a more elegant vibe. Don’t be afraid to mix different textures to add depth!
- Can I use different colors in my tassel garland?
Absolutely! Mixing colors can create a beautiful and eye-catching display. You can opt for complementary colors for harmony, or contrasting colors for a bold statement. The choice is yours, so have fun experimenting!
- What are some customization ideas for my tassel garland?
There are endless ways to personalize your tassel garland! You can add decorative elements like beads, flowers, or even seasonal themes to match holidays or events. Let your creativity shine and make it uniquely yours!
- How do I display my tassel garland?
Your tassel garland can be displayed in various ways! Consider hanging it on walls as a colorful decor piece, or using it as a stunning centerpiece for parties. The placement can really enhance the overall look of your space!
- Are there any tips for making perfect tassels?
When making tassels, keep the size and shape consistent for a professional finish. Use a template if needed, and don't hesitate to practice a few times to get the hang of it. Remember, the more you make, the better you'll get!


