Getting Creative with Scraps: Quilt Designs You Can Try
Are you sitting on a pile of fabric scraps, wondering how to breathe new life into them? You're not alone! Many crafters find themselves with leftover pieces from previous projects, and rather than tossing them aside, why not transform them into something beautiful? This article explores innovative quilt designs that utilize fabric scraps, offering inspiration for crafters and quilters looking to make the most of their leftover materials. From simple patchwork designs to advanced techniques, we'll guide you through the creative process, ensuring that your quilts not only reflect your style but also tell a story.
Fabric scraps come in various shapes and sizes, each piece holding potential waiting to be unlocked. Think of those little bits as puzzle pieces that can fit together to create a stunning picture. Understanding their potential can help you unleash creativity, transforming leftover pieces into unique quilt designs that reflect your personal style. Whether you have tiny snippets or larger remnants, every scrap can play a role in your quilt. So, gather your scraps and get ready to dive into a world of possibilities!
Selecting the right quilt patterns is essential for scrap quilting. The beauty of scrap quilting lies in its versatility; you can mix and match patterns to create a cohesive look. Some patterns are particularly suited for scraps, allowing you to showcase the unique characteristics of each piece while maintaining visual harmony. For instance, consider designs that incorporate a variety of shapes and sizes, as they can cleverly disguise mismatched fabrics. Let’s explore some exciting patterns that work well with scraps!
Patchwork designs are a classic choice for scrap quilts. They allow for easy assembly and offer limitless combinations that can bring your fabric scraps to life. Imagine a quilt that tells a story through its varied pieces—each square a memory of a project past. Simple patchwork can be as straightforward as sewing together squares and rectangles, or it can involve more intricate arrangements. The key is to let your creativity flow and enjoy the process!
Using squares and rectangles is a straightforward method for beginners. This approach provides a great foundation for experimenting with colors and textures in your quilt. By cutting your scraps into uniform shapes, you can create a visually appealing design that feels organized and intentional. Plus, it’s a fantastic way to practice your sewing skills without the pressure of complicated patterns. Remember, even the simplest designs can make a big impact!
Incorporating geometric shapes can elevate your quilt design. Think beyond the traditional squares and rectangles—triangles, hexagons, and even circles can add a dynamic flair to your scrap quilt. These shapes can create movement and rhythm within your quilt, drawing the eye and inviting closer inspection. By playing with angles and arrangements, you can turn those scraps into a modern masterpiece!
For those looking to challenge themselves, advanced techniques can create stunning results. Methods like foundation piecing and improvisational quilting can transform your scraps into masterpieces. Foundation piecing allows you to sew fabric onto a base, providing structure and precision, while improvisational quilting encourages spontaneity and creativity. Don't be afraid to experiment with these techniques; the results can be breathtaking!
Effective color coordination can enhance your quilt's appeal. Choosing the right colors and patterns that harmonize is crucial for ensuring a balanced and attractive final product. Imagine your quilt as a canvas; the colors you select will evoke emotions and set the tone for your design. So how do you achieve that perfect palette? Let’s dive into some useful tips!
A color wheel is a valuable tool for selecting colors. Understanding color theory helps in creating quilts that are visually striking and cohesive. By using complementary colors—those that sit opposite each other on the wheel—you can create vibrant contrasts. Alternatively, analogous colors, which sit next to each other, can produce a more harmonious look. Experiment with different combinations to find what resonates with you!
Neutrals play a crucial role in quilt design. They can balance bold colors and create depth in your scrap quilts. Think of neutrals as the quiet background that allows your vibrant scraps to shine. By strategically placing neutral fabrics, you can guide the viewer's eye and enhance the overall composition of your quilt. Don’t underestimate the power of a well-placed neutral!
The finishing touches can elevate your quilt from good to great. Techniques for binding, quilting, and adding embellishments will enhance your finished project. These details are what make your quilt truly unique and personal. Whether you choose to hand-stitch your binding or opt for a machine finish, the way you complete your quilt can significantly impact its final appearance.
Binding is essential for a polished look. Learn about different binding techniques that can add a unique flair to your quilt's edges. From traditional double-fold binding to bias tape, each method offers its own aesthetic. Don’t be afraid to try something new—your quilt deserves the best finish!
Choosing the right quilting method can significantly impact your quilt's texture and appearance. Explore various quilting options, from hand quilting to machine quilting, to find what suits your style best. Each method has its own charm and can bring different qualities to your quilt. So, grab your needle or your machine and get ready to add those final stitches!
- What can I do with very small scraps? Small scraps can be used for patchwork, appliqué, or even as stuffing for small pillows.
- How do I choose a pattern for my scraps? Look for patterns that allow for a variety of shapes and sizes; patchwork and geometric designs are great options.
- Can I mix different fabric types in my quilt? Absolutely! Mixing fabric types can add texture and interest, just be mindful of how they behave when sewn together.
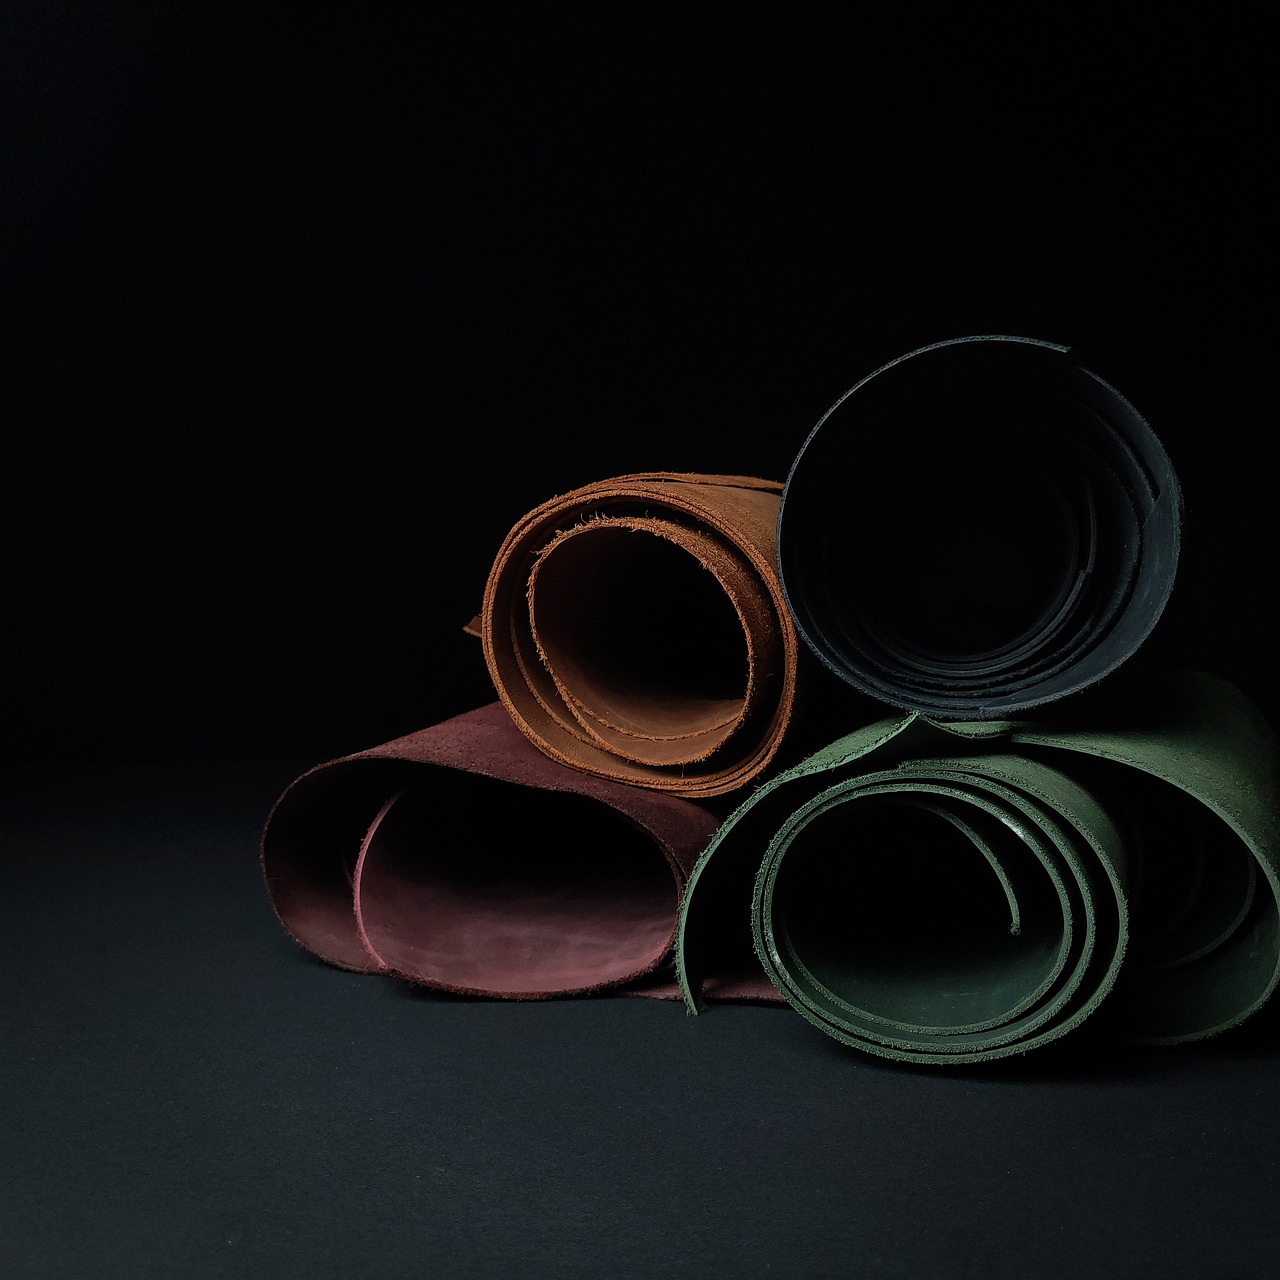
Understanding Fabric Scraps
Fabric scraps are the little pieces of material that remain after a sewing project is completed. These remnants can come in various shapes, sizes, and textures, and they often hold untapped potential for creative quilting. Just think of fabric scraps as the leftover ingredients in your kitchen; with a bit of imagination and the right recipe, you can whip up something deliciously unique! Whether it’s a small square or a long strip, each scrap can contribute to a beautiful quilt that tells a story.
When you look at a pile of fabric scraps, it’s easy to feel overwhelmed. However, understanding their potential can help you unleash your creativity. Instead of viewing them as mere leftovers, consider them as opportunities to experiment with colors, patterns, and textures. You might discover that the bright orange polka dots complement the muted gray stripes perfectly, creating a striking visual contrast. By mixing and matching different fabrics, you can create a quilt that is not only functional but also a true reflection of your personal style.
To better grasp the world of fabric scraps, let’s categorize them based on their characteristics:
| Type of Scrap | Description | Best Uses |
|---|---|---|
| Small Scraps | Pieces less than 5 inches | Patchwork quilts, appliqué |
| Medium Scraps | Pieces between 5 and 12 inches | Quilt blocks, borders |
| Large Scraps | Pieces larger than 12 inches | Backing, large quilt blocks |
As you can see, each scrap type has its own unique role in quilt making. By categorizing your scraps, you can easily identify which pieces are best suited for specific projects. This not only saves time but also helps you to visualize your quilt more clearly. So, next time you finish a project, don’t toss those scraps aside! Instead, take a moment to organize them and think about how they can be transformed into something extraordinary.
Moreover, embracing the concept of scrap quilting can be incredibly rewarding. It encourages sustainability by reducing waste and allows you to create quilts that are rich in texture and history. Each scrap has its own journey, and when stitched together, they form a collective narrative that can be cherished for years to come. So, gather your fabric scraps and let your imagination run wild. Who knows? You might just create the quilt of your dreams!
Choosing the Right Patterns
When it comes to scrap quilting, selecting the right patterns is crucial for achieving a visually appealing and cohesive quilt. The patterns you choose will dictate how your fabric scraps come together, so it's essential to consider your options carefully. Think of it like a puzzle: each piece has its place, and the right pattern will help you find that perfect fit. Whether you’re a novice or a seasoned quilter, understanding which patterns work best with scraps can open up a world of creative possibilities.
One of the most popular choices for scrap quilts is the classic patchwork design. This design allows for easy assembly and offers limitless combinations of colors and textures. It's like throwing a party where every guest brings a unique dish; the result is a delightful spread that reflects everyone’s personality. Patchwork designs can be as simple or as intricate as you desire, making them versatile for all skill levels.
For those looking to dive deeper, consider incorporating geometric shapes into your designs. Patterns that utilize triangles, hexagons, and diamonds can add an exciting layer of complexity to your quilt. Imagine your quilt as a canvas—geometric shapes can serve as the brushstrokes that bring your vision to life. They can create movement and flow, drawing the eye across the quilt and inviting viewers to explore the details.
Another excellent approach is to use a combination of patterns. Mixing and matching different styles can create a dynamic quilt that tells a story. For instance, you might pair a traditional block pattern with a more modern geometric design. This combination can evoke a sense of nostalgia while simultaneously feeling fresh and contemporary. Just like a good playlist, a well-curated mix of patterns can keep your audience engaged and entertained.
When choosing patterns, consider the scale of your fabric scraps. Larger pieces may lend themselves well to bold, graphic designs, while smaller scraps might work better in intricate, detailed patterns. It’s all about finding harmony between your materials and your design. Don’t be afraid to experiment; after all, quilting is as much about the journey as it is about the destination!
To help you visualize your options, here’s a simple table outlining some popular patterns and their suitability for scrap quilting:
| Pattern Type | Best For | Skill Level |
|---|---|---|
| Patchwork | All sizes of scraps | Beginner to Advanced |
| Geometric Shapes | Medium to large scraps | Intermediate to Advanced |
| Log Cabin | Strips and odd shapes | Intermediate |
| Improv Quilting | All sizes, freeform | Advanced |
In summary, choosing the right patterns for your scrap quilt is all about understanding your materials and letting your creativity flow. Don't be afraid to mix patterns or try something new. After all, the beauty of scrap quilting lies in its uniqueness and the personal touch you bring to each project. So grab those scraps, and let your imagination run wild!
- What is the best way to organize fabric scraps? Organizing by color or size can make it easier to find the right pieces for your quilt.
- Can I use any fabric for quilting? While you can use a variety of fabrics, cotton is the most commonly used for quilting due to its durability and ease of handling.
- How do I determine the right amount of fabric for my quilt? It depends on the size of the quilt and the pattern you choose. Always check the pattern instructions for fabric requirements.
Simple Patchwork Designs
When it comes to quilt making, stand out as a favorite among both beginners and seasoned quilters. Why? Because they are not only easy to assemble, but they also offer a canvas for creativity, allowing you to mix and match various fabric scraps in a way that feels personal and unique. Imagine transforming a pile of leftover fabric into a stunning quilt that tells a story — your story!
One of the most straightforward methods for creating patchwork quilts involves using basic squares and rectangles. This technique is perfect for those just starting out, as it requires minimal cutting and sewing skills. You can start by cutting your fabric scraps into uniform squares, which can then be sewn together in a variety of arrangements. For instance, you could create a simple grid pattern that showcases the different colors and patterns of your fabrics. The beauty of this approach lies in its versatility; you can play with the arrangement until you find a layout that resonates with you.
Another exciting option is to incorporate geometric shapes into your patchwork designs. Think triangles, hexagons, and diamonds! These shapes can add depth and visual interest to your quilt, transforming an ordinary patchwork into something extraordinary. For example, using triangles can create a dynamic look that draws the eye, while hexagons can offer a more intricate design. The key is to experiment with how these shapes interact with one another and with the colors of your fabric scraps.
As you dive into the world of patchwork quilting, don’t hesitate to mix different sizes and shapes. A quilt made from squares can be enhanced by adding a few larger rectangles or even some triangles to create a focal point. This layering effect not only adds complexity but also keeps your quilt design engaging. Remember, quilting is about expressing yourself, so let your creativity flow!
To give you a clearer picture, here’s a simple table that outlines some popular patchwork design ideas:
| Design Type | Description | Skill Level |
|---|---|---|
| Basic Squares | Uniform squares arranged in a grid pattern. | Beginner |
| Rectangles | Longer pieces that can create stripes or blocks. | Beginner |
| Triangles | Dynamic shapes that create visual interest. | Intermediate |
| Hexagons | Intricate designs that can create a honeycomb effect. | Advanced |
In conclusion, simple patchwork designs are a fantastic way to utilize fabric scraps while allowing your creativity to shine. Whether you choose basic squares, rectangles, or venture into geometric shapes, the possibilities are endless. Remember, the goal is to have fun and create something that feels uniquely yours. So grab those scraps, and let’s get quilting!

Basic Squares and Rectangles
When it comes to quilt making, are the bread and butter of any quilter's toolkit. These shapes are not only simple to cut and sew, but they also provide a fantastic foundation for unleashing your creativity. Imagine standing in front of a blank canvas; that’s what your fabric scraps feel like! With just a few squares and rectangles, you can create a stunning quilt that tells a story and reflects your unique style.
One of the best things about using squares and rectangles is their versatility. You can mix and match different fabrics, colors, and patterns to create a dynamic quilt that catches the eye. For instance, consider the following options:
- Color Combinations: Pair bold colors with softer tones to create a balanced look.
- Pattern Mixing: Use different patterns—like florals, stripes, and polka dots—to add dimension and interest.
- Size Variation: Experiment with different sizes of squares and rectangles to create a playful, patchwork effect.
To get started, you’ll want to gather your fabric scraps and decide on a color palette. A good rule of thumb is to choose a main color and a few complementary colors. This will help your quilt feel cohesive, even with the variety of fabrics. Once you have your colors selected, start cutting your scraps into squares and rectangles. A rotary cutter and mat will make this process much easier and more precise.
As you begin sewing, keep in mind that the layout of your squares and rectangles can dramatically affect the overall look of your quilt. You might choose a traditional grid layout, where all the squares are aligned neatly, or you could opt for a more spontaneous arrangement, where pieces are placed in a seemingly random order. Both methods have their charm and can lead to beautiful results.
Another fun aspect of working with basic squares and rectangles is the opportunity to play with negative space. By strategically leaving blank areas in your quilt, you can create a modern aesthetic that highlights your fabric choices. This technique can also help to make your quilt feel less cluttered and more visually appealing.
As you sew, don’t forget to press your seams! Pressing helps to flatten your fabric and ensures that your quilt lays smoothly. A well-pressed quilt top will make the finishing process much easier and more enjoyable.
In summary, basic squares and rectangles are the perfect building blocks for any scrap quilt. They offer endless possibilities for creativity and experimentation. Whether you're a beginner or an experienced quilter, embracing these shapes can lead to stunning designs that you’ll be proud to showcase. So grab those fabric scraps and let your imagination run wild!
Q1: What size should I cut my squares and rectangles?
A1: The size can vary based on your design. For beginners, starting with 5-inch squares or 2.5-inch strips is a great choice.
Q2: How do I choose colors for my quilt?
A2: Consider using a color wheel to help you select complementary colors. You can also draw inspiration from nature or your favorite fabrics.
Q3: Can I mix different fabric types?
A3: Absolutely! Mixing cotton with other fabric types can add texture and interest to your quilt. Just ensure that they have similar care instructions.
Q4: What is the best way to finish my quilt?
A4: Binding is a crucial step in finishing your quilt. You can use bias tape or cut fabric strips to create a clean edge.
Geometric Shapes
When it comes to quilt design, can truly take your creativity to the next level. Instead of sticking to traditional squares and rectangles, why not explore the exciting world of triangles, hexagons, and even circles? These shapes not only add visual interest but also allow you to play with negative space and create stunning patterns that tell a story. Imagine a quilt that resembles a vibrant kaleidoscope, with each piece fitting together like a puzzle, bringing a sense of harmony and balance to your design.
Triangles are particularly versatile; they can be arranged in countless ways to form intricate patterns. Whether you opt for equilateral triangles for a balanced look or right triangles for a more dynamic feel, the possibilities are endless. You can create a classic herringbone pattern or a modern pyramid layout, both of which can transform your fabric scraps into eye-catching designs. The key here is to embrace the asymmetry that comes with using scraps, allowing each triangle to stand out while still contributing to the overall composition.
Hexagons, on the other hand, have surged in popularity thanks to their unique shape, reminiscent of honeycombs. They can be stitched together to create a charming hexagon quilt that feels both contemporary and cozy. You can mix and match different fabrics to create a stunning contrast, or use a monochromatic palette for a more sophisticated look. The best part? Hexagons can be cut from even the smallest scraps, ensuring that no piece goes to waste.
Don't forget about circles! While they might seem challenging, incorporating circular shapes can add a playful element to your quilt. Think of appliqué circles or even yo-yos that can be layered to create texture and depth. When arranged thoughtfully, circles can create a sense of movement and flow, making your quilt not just a blanket, but a work of art.
As you venture into the realm of geometric shapes, consider how you can combine these elements to create a cohesive design. Here are a few tips to keep in mind:
- Balance is Key: Ensure that the shapes you choose complement each other. A quilt filled with too many different shapes can feel chaotic.
- Experiment with Scale: Mixing large and small shapes can create a dynamic visual effect.
- Use Color Strategically: Different colors can enhance the shapes and make them pop, drawing the viewer's eye to specific areas of your quilt.
In conclusion, incorporating geometric shapes into your quilt design can open up a new world of possibilities. Whether you choose triangles, hexagons, or circles, each shape brings its own charm and character. So grab those fabric scraps, unleash your imagination, and let the geometry of quilting inspire you to create something truly unique!
Q: What are the best geometric shapes to use for beginners?
A: Squares and triangles are great starting points for beginners. They are easy to cut and sew, making them perfect for those new to quilting.
Q: Can I mix different geometric shapes in one quilt?
A: Absolutely! Mixing shapes like triangles and hexagons can create a visually striking quilt. Just make sure to maintain balance and harmony in your design.
Q: How do I choose colors for my geometric quilt?
A: Using a color wheel can help you select complementary colors. Additionally, consider incorporating neutrals to balance out bold colors.
Advanced Techniques
For those who are ready to take their quilting skills to the next level, can truly transform your fabric scraps into stunning masterpieces. One of the most exciting methods to explore is foundation piecing. This technique involves sewing fabric pieces onto a foundation material, often paper or fabric, which allows for precise shapes and intricate designs. Imagine creating a beautiful quilt block with perfect points and sharp angles, all thanks to this method! It's like building a house; the foundation is crucial for a strong structure.
Another popular advanced technique is improvisational quilting. This method encourages freedom and creativity, allowing you to cut and sew fabric without strict patterns or rules. Think of it as jazz music—it's spontaneous and expressive! You can create unique shapes and sizes, mixing and matching fabrics as you go. The beauty of improvisational quilting is that it reflects your personal style; there are no mistakes, only happy accidents that can lead to unexpected beauty.
Additionally, curved piecing is an exciting avenue to explore. Unlike traditional straight-line piecing, curved piecing involves sewing together curved edges, which can result in stunning designs like circles and arcs. While it may seem daunting at first, with practice, you'll find it incredibly rewarding. Just like learning to ride a bike, it might be tricky initially, but once you get the hang of it, there's no stopping you!
To help you navigate these advanced techniques, consider the following table that outlines the key methods and their benefits:
| Technique | Description | Benefits |
|---|---|---|
| Foundation Piecing | Sewing fabric onto a foundation for precision. | Perfect points and intricate designs. |
| Improvisational Quilting | Freeform sewing without strict patterns. | Unique designs that reflect personal style. |
| Curved Piecing | Sewing curved edges together. | Creates stunning shapes like circles and arcs. |
As you delve into these advanced techniques, remember that practice is key. Don’t be afraid to experiment and make mistakes along the way. Each quilt you create is a stepping stone to mastering your craft. Whether you’re drawn to the precision of foundation piecing, the creativity of improvisational quilting, or the beauty of curved piecing, these methods will not only enhance your skills but also add a personal touch to your scrap quilts. So grab those fabric scraps, unleash your creativity, and watch as your quilting journey unfolds into something extraordinary!
Q: Do I need special tools for advanced quilting techniques?
A: While some techniques may benefit from specific tools like rotary cutters or specialty rulers, many can be accomplished with basic sewing supplies. Always check the requirements for the technique you wish to try.
Q: How can I practice these advanced techniques?
A: Start with small projects or practice blocks. This allows you to experiment without the pressure of completing a full quilt. You can also join quilting groups or online forums for additional support and tips.
Q: Are advanced techniques suitable for beginners?
A: While some advanced techniques may be challenging for absolute beginners, many can be learned progressively. Don’t hesitate to try new methods as you grow more comfortable with quilting!
Color Coordination Tips
When it comes to quilting, color coordination can make or break your project. It’s not just about slapping together a bunch of fabric scraps; it’s about creating a cohesive and visually stunning piece that tells a story. Imagine walking into a room and being drawn to a quilt that seems to dance with color. That’s the magic of effective color coordination! To achieve this, you need to understand the relationships between colors, which can be simplified by using a color wheel. A color wheel helps you visualize how colors interact with each other, allowing you to choose combinations that are harmonious and eye-catching.
One of the best ways to start is by selecting a dominant color. This will serve as the focal point of your quilt. From there, you can choose complementary colors that either contrast nicely or create a soothing palette. For instance, if your dominant color is a vibrant blue, consider pairing it with warm oranges or soft yellows to create a lively atmosphere. Alternatively, if you prefer a more muted look, grays and whites can provide a perfect backdrop to make your chosen colors pop.
Don’t forget about neutrals! They are your best friends in quilt design. Neutrals like beige, taupe, and gray can act as a buffer between bold colors, helping to balance the overall look. Think of them as the calm in the storm; they allow your vibrant scraps to shine without overwhelming the viewer. By incorporating neutrals, you can add depth and dimension to your quilt. For example, a quilt dominated by bright reds and yellows can be beautifully toned down with some soft gray patches, creating a more sophisticated appearance.
As you explore color combinations, consider creating a small swatch book. This can be as simple as cutting out pieces of fabric and arranging them together to see how they interact. It’s an excellent way to experiment without committing to a full quilt. You might discover unexpected pairings that you wouldn’t have considered otherwise. Plus, it’s a fun way to get your creative juices flowing!
In summary, effective color coordination is about more than just picking pretty fabrics; it’s about understanding how they work together. By using a color wheel, selecting a dominant color, incorporating neutrals, and experimenting with swatches, you can create quilts that are not only beautiful but also uniquely yours.
Using a Color Wheel
When diving into the world of quilt making, one tool that can significantly enhance your creativity is the color wheel. This handy visual guide helps you understand how colors interact with each other, allowing you to create stunning and harmonious quilt designs. Have you ever found yourself staring at a pile of fabric scraps, unsure of which colors to pair? The color wheel can be your best friend in these moments, guiding you towards combinations that pop and flow beautifully.
The color wheel is divided into primary, secondary, and tertiary colors, each playing a unique role in your design. Primary colors—red, blue, and yellow—are the foundation, while secondary colors, created by mixing primary colors, include green, orange, and purple. Tertiary colors, which are formed by mixing primary and secondary colors, add even more variety to your palette. Understanding this hierarchy can help you make informed decisions about your fabric choices.
For instance, if you want to create a quilt that feels vibrant and energetic, consider using complementary colors—those that are directly opposite each other on the wheel. Think of a deep blue paired with a bright orange; this combination can create a striking contrast that draws the eye. On the other hand, if you’re aiming for a more subdued and tranquil look, analogous colors, which sit next to each other on the wheel (like blue, blue-green, and green), can create a soothing effect. Using these color strategies can transform your quilt from a simple patchwork into a masterpiece that reflects your unique style.
Additionally, don't forget about the impact of neutrals. These colors, such as whites, grays, and browns, can serve as a backdrop that allows your vibrant colors to shine without overwhelming the viewer. Incorporating neutrals can help balance your quilt, providing a visual resting place for the eyes. By carefully considering how colors interact through the lens of the color wheel, you can elevate your scrap quilting projects to new heights.
In summary, the color wheel is not just a tool; it’s a gateway to creative exploration in quilt design. Embrace its principles, experiment with different combinations, and watch as your fabric scraps transform into beautiful quilts that tell your story. So next time you sit down to quilt, keep that color wheel close by—it just might spark the inspiration you need!
- What is a color wheel? A color wheel is a circular diagram that shows the relationships between colors, helping you to choose complementary and harmonious color combinations for your projects.
- How can I use a color wheel for quilting? You can use the color wheel to select colors that either contrast or complement each other, enhancing the visual appeal of your quilt.
- What are complementary colors? Complementary colors are pairs of colors that are opposite each other on the color wheel, creating a vibrant contrast when used together.
- Can neutrals be used in scrap quilting? Absolutely! Neutrals can help balance bold colors and provide depth, making your quilt more visually interesting.
Incorporating Neutrals
When it comes to quilt design, the role of neutral fabrics cannot be overstated. These understated yet versatile materials can act as a breath of fresh air amidst vibrant colors and busy patterns. Think of neutrals as the unsung heroes of your quilt—they provide balance and harmony, allowing the more vivid colors to shine without overwhelming the overall design. Imagine walking into a room filled with colorful artwork; the neutral walls help to frame and enhance the beauty of each piece without competing for attention. Similarly, incorporating neutrals in your quilt can create a stunning visual experience.
But how do you effectively use neutral fabrics in your quilt? First, consider the color palette of your scraps. Neutrals such as whites, creams, grays, and beiges can serve as a backdrop that allows your brighter fabrics to pop. For instance, if you have a collection of bold floral prints, pairing them with a soft gray can create a sophisticated contrast. This technique not only adds depth to your quilt but also helps in tying together different elements, making your design feel cohesive.
Additionally, neutrals can be used in various ways:
- Background Fabric: Use a neutral as the main background to let your colorful scraps stand out.
- Borders: Frame your quilt with a neutral border to provide a clean finish.
- Accent Pieces: Incorporate neutral patches within your colorful blocks to break up the intensity.
Moreover, don't shy away from experimenting with different textures and patterns in your neutral fabrics. A textured cream can add a tactile element to your quilt, while a subtle pattern can introduce visual interest without clashing with the more vibrant pieces. Think of it as adding a sprinkle of seasoning to your favorite dish; it enhances the overall flavor without overpowering the main ingredients.
In conclusion, incorporating neutrals into your quilt design is all about creating balance and enhancing the beauty of your fabric scraps. By thoughtfully selecting and placing these understated fabrics, you can transform your quilt into a harmonious masterpiece that reflects your unique style and creativity.
Q: What are some good neutral fabrics to use in quilting?
A: Good neutral fabrics include cottons in shades of white, cream, beige, light gray, and taupe. These colors work well to balance out brighter fabrics.
Q: Can I mix different textures of neutral fabrics?
A: Absolutely! Mixing textures can add depth and interest to your quilt without overwhelming the design. Just make sure they complement each other.
Q: How do I choose the right amount of neutral fabric?
A: It depends on your overall design. A good rule of thumb is to use neutrals to cover about 30-50% of your quilt, allowing the colorful scraps to take center stage.
Finishing Touches
When it comes to quilting, the can truly make or break your masterpiece. Think of it as the icing on a cake; without it, your quilt might just feel incomplete. So, let’s dive into some essential aspects that can elevate your quilt from good to great. First up, we have binding. Binding is not just a practical necessity to keep your quilt layers together; it’s also an opportunity to add a splash of personality. You can choose a contrasting color to make the edges pop or a fabric that complements the main design for a more cohesive look. Different binding techniques, like bias binding or straight binding, can also impact the overall aesthetic. Each method has its charm and can be tailored to fit the theme of your quilt.
Next, let’s talk about quilting options. The type of quilting you choose will significantly influence the texture and appearance of your quilt. Are you a fan of a cozy, hand-stitched feel? Or do you prefer the precision of machine quilting? Each method has its own set of advantages:
| Quilting Method | Description | Best For |
|---|---|---|
| Hand Quilting | Traditional method using a needle and thread for a personal touch. | Personalized quilts, heirloom pieces |
| Machine Quilting | Using a sewing machine for faster, more uniform stitching. | Large quilts, modern designs |
| Longarm Quilting | A specialized machine that allows for intricate designs over large areas. | Complex patterns, professional finishes |
Whichever method you choose, ensure it aligns with your vision for the quilt. After all, the texture created through quilting can add a whole new dimension to your fabric scraps, making them come alive in unexpected ways!
Finally, let’s not forget about embellishments. Adding small details like embroidery, buttons, or even fabric paint can enhance your quilt's character. These finishing touches can be a fun way to express your personality and creativity. Imagine a quilt adorned with whimsical embroidery or a few strategically placed buttons that draw the eye. This not only adds interest but also tells a story—your story. So, as you wrap up your project, take a moment to consider what little extras might make your quilt truly unique.
As you embark on your quilting journey, you might have some questions swirling in your mind. Here are a few frequently asked questions that can help guide you along the way:
- What is the best fabric for quilting? Cotton is often recommended for its durability and ease of use, but feel free to experiment with blends!
- How do I choose colors for my quilt? Consider using a color wheel to find complementary colors that harmonize well.
- Can I mix different fabric types in one quilt? Yes, but be mindful of the weight and drape of the fabrics to ensure a cohesive look.
- What is the ideal batting for a quilt? Cotton batting is popular for its breathability, while polyester batting offers a bit more loft and warmth.
Binding Techniques
Binding is the finishing touch that frames your quilt and gives it a polished look. It’s like the icing on a cake; without it, the quilt can feel incomplete. There are several binding techniques you can explore, each offering its own unique flair. The most common method is the traditional double-fold binding, where you cut strips of fabric, fold them in half, and sew them around the edges of your quilt. This creates a sturdy and visually appealing border.
Another popular technique is the bias binding, which is cut on the diagonal of the fabric. This method allows the binding to stretch around the quilt's corners more easily, making it ideal for quilts with curves or intricate shapes. If you want to add a bit of flair, consider using a contrasting fabric for your binding. This can create a striking visual effect, drawing attention to the edges of your quilt.
For those who want to take it a step further, there’s the technique of using a flange binding. This involves sewing a narrow strip of contrasting fabric between the binding and the quilt top, creating a layered look that adds depth and interest. It’s a fantastic way to use up even more scraps while enhancing the overall design.
When choosing your binding technique, consider the overall style of your quilt. A modern quilt may benefit from a bold, contrasting binding, while a traditional quilt might look best with a more subtle, matching color. Regardless of the method you choose, the key is to ensure that your binding is securely attached and neatly finished, as this will significantly enhance the durability and aesthetic of your quilt.
Here’s a quick overview of some binding techniques:
| Binding Technique | Description | Best For |
|---|---|---|
| Double-Fold Binding | Strips of fabric folded in half and sewn around the quilt edges. | Most quilts, provides a classic look. |
| Bias Binding | Cut on the diagonal for flexibility around curves. | Curved quilts or intricate shapes. |
| Flange Binding | Narrow contrasting strip between binding and quilt top. | Quilts needing a layered, dimensional look. |
Ultimately, the binding technique you choose can make a significant difference in the finished product. Experiment with different methods and fabrics to find the perfect match for your quilt. It’s all about personal expression, so don’t be afraid to get creative and try something new!
- What is the best fabric to use for binding? Cotton fabric is often recommended for binding due to its durability and ease of handling.
- How wide should binding strips be? Binding strips are typically cut 2.5 inches wide, but you can adjust this based on your preference and quilt design.
- Can I use leftover scraps for binding? Absolutely! Using leftover scraps for binding is a great way to minimize waste and add unique touches to your quilt.
Quilting Options
When it comes to quilting, the options are as vast as the fabric scraps in your stash. Choosing the right quilting method can significantly impact the overall look and feel of your quilt. Whether you're a seasoned quilter or just starting, understanding the different techniques available will help you find the perfect match for your project. Let's dive into some popular quilting options that can take your scrap quilt from ordinary to extraordinary!
First up, we have hand quilting. This traditional method involves stitching each layer of the quilt together by hand, often using a needle and thread. Hand quilting allows for a personal touch, and many quilters find it to be a meditative process. It’s a great way to connect with your quilt, as each stitch is made with intention. However, it can be time-consuming, so if you're working on a project with a deadline, you might want to consider other options.
On the other hand, machine quilting has become increasingly popular due to its efficiency and speed. With a sewing machine, you can quickly quilt large areas, making it an excellent choice for those who want to finish their projects in a timely manner. There are various machine quilting techniques, including free-motion quilting, where you guide the fabric under the needle, and walking foot quilting, which helps to evenly feed the fabric layers through the machine. Each method has its charm and can produce stunning results.
If you’re feeling adventurous, you might want to explore longarm quilting. This technique utilizes a specialized sewing machine designed for quilting larger quilts. Longarm machines are typically operated on a frame, allowing you to move the fabric freely while the machine stitches. This option is ideal for quilters who want to create intricate designs and patterns without the physical strain of maneuvering a heavy quilt on a standard sewing machine. Many quilters opt to hire professional longarm quilters for their larger projects, ensuring a flawless finish.
Another exciting option is improvisational quilting. This technique encourages creativity and spontaneity, allowing you to piece your quilt without strict patterns or guidelines. It’s like jazz music; you follow your instincts and let the fabric guide you. This method is particularly well-suited for scrap quilting, as it embraces the unique shapes and sizes of your fabric pieces. You might find yourself creating unexpected combinations that result in a truly one-of-a-kind quilt.
To help you decide which quilting option suits your style, here’s a quick comparison:
| Quilting Method | Pros | Cons |
|---|---|---|
| Hand Quilting | Personal touch, meditative process | Time-consuming |
| Machine Quilting | Fast, efficient, various techniques | Less personal touch |
| Longarm Quilting | Ideal for large quilts, intricate designs | Can be costly if hiring a professional |
| Improvisational Quilting | Encourages creativity, unique results | May lack cohesion if not careful |
As you explore these quilting options, remember that the best choice is the one that resonates with you. Don’t be afraid to experiment with different methods; after all, quilting is all about expressing your creativity and enjoying the process. So, gather your scraps, choose your technique, and let your imagination run wild!
Q: What is the best method for beginners?
A: For beginners, machine quilting or simple hand quilting is often recommended. They provide a good balance of ease and creativity.
Q: How do I choose between hand and machine quilting?
A: Consider your time constraints and personal preference. If you enjoy a hands-on approach, hand quilting may be for you. If you’re looking for speed, machine quilting is ideal.
Q: Can I mix different quilting methods in one project?
A: Absolutely! Many quilters enjoy combining techniques to achieve unique textures and designs in their quilts.
Frequently Asked Questions
- What are fabric scraps and how can I use them in quilting?
Fabric scraps are leftover pieces of fabric that come in various shapes and sizes. You can use them creatively in quilting by piecing them together to create unique designs. This not only helps in reducing waste but also allows you to showcase your personal style through a patchwork of colors and patterns.
- What are some easy quilt patterns for beginners using scraps?
For beginners, simple patchwork designs using basic squares and rectangles are a great starting point. These patterns are easy to assemble and offer endless combinations, making them perfect for experimenting with different colors and textures. As you gain confidence, you can explore geometric shapes to add more complexity to your quilts.
- How do I choose colors for my scrap quilt?
Choosing colors for your scrap quilt can be made easier with a color wheel. This tool helps you identify complementary colors that work well together. Additionally, incorporating neutral fabrics can balance out bold colors and create depth, making your quilt visually appealing.
- What are some advanced techniques for scrap quilting?
If you're ready to take on a challenge, consider advanced techniques like foundation piecing or improvisational quilting. These methods can turn your scraps into stunning masterpieces, allowing for greater creativity and expression in your quilt designs.
- What finishing touches can I add to my quilt?
Finishing touches can elevate your quilt significantly. Pay attention to binding techniques, as they provide a polished look. You can also choose between hand quilting and machine quilting to add texture. Don't forget about embellishments like buttons or embroidery to give your quilt a unique flair!


