DIY Upcycled Serving Tray Made from Picture Frames
Are you tired of the same old serving trays that lack personality and charm? Well, it's time to unleash your creativity and give those forgotten picture frames a new lease on life! In this article, we will explore how to create a stylish and functional serving tray using old picture frames. Not only will this project add a unique touch to your home decor, but it will also provide you with a practical item for entertaining guests or serving snacks during movie nights. So, roll up your sleeves and let's dive into the world of DIY upcycling!
Gathering the right materials is crucial for this project. You'll need:
- Old Picture Frames: The star of the show! Choose frames that you love and that have interesting designs.
- Wood Glue: This will be your best friend in securing the frames together.
- Handles: To make your tray functional and stylish, you'll want to add some handles.
- Paint: Give your tray a fresh look with some paint that matches your decor.
Each item plays a significant role in ensuring your tray is both beautiful and functional, so choose wisely!
Selecting the appropriate picture frames is essential for creating a stunning serving tray. You want to consider their size, style, and condition to ensure they complement your design. For instance, if you have a modern kitchen, sleek and minimalist frames may be the best choice. On the other hand, if your home has a rustic vibe, vintage frames can add that perfect touch. This section will guide you in making the best choices for your tray, ensuring that it not only serves a purpose but also enhances your decor.
The size of your picture frames will determine the overall dimensions of your serving tray. It's important to measure and choose frames that create a balanced and aesthetically pleasing design. For example, if you're aiming for a larger tray, consider using multiple frames of the same size or a combination of sizes that work well together. Remember, a tray that's too small may not be functional, while one that's too large can be cumbersome. So, take your time measuring and visualizing how the finished tray will look!
Combining different frame styles can add character to your serving tray. Imagine a tray that boasts a mix of ornate vintage frames alongside sleek modern ones—it's a conversation starter! Discover tips on how to mix and match frames for a cohesive yet eclectic look that enhances your home decor. To do this effectively, stick to a common color palette or theme that ties the frames together, ensuring your tray looks intentional rather than haphazard.
Inspecting the condition of your frames is vital for durability. You want to ensure that they can withstand the wear and tear of everyday use. Check for any cracks, missing pieces, or loose joints. If you find any imperfections, don't fret! This section discusses how to assess and repair frames, such as using wood filler for cracks or reinforcing weak joints with additional glue. A little TLC can go a long way in ensuring your tray is sturdy and long-lasting.
Before assembling your serving tray, proper preparation of the frames is necessary. This includes cleaning, sanding, and painting the frames to achieve the desired finish and longevity. Start by giving your frames a good clean to remove any dust or grime. Next, if your frames have a glossy finish, lightly sand them to help the paint adhere better. Finally, choose a paint color that complements your home—whether it's a bold hue or a soft pastel. This step is crucial, as it sets the tone for your entire tray!
Assembling your upcycled serving tray is a straightforward process. Follow these step-by-step instructions to combine the frames securely and create a functional piece for serving or display. Start by laying out your frames in the desired configuration, ensuring they fit together well. Once you're satisfied with the arrangement, apply wood glue to the edges where the frames meet. Hold them in place for a few minutes to allow the glue to set before moving on to the next step.
Learn how to effectively secure the frames together using wood glue and other fasteners. Proper techniques will ensure your tray is stable and ready for use. For added strength, consider using corner brackets or small screws to reinforce the joints. This will give your tray extra durability, especially if you plan to use it frequently. After everything is secured, allow the glue to cure fully according to the manufacturer's instructions before using your new tray.
Incorporating handles into your serving tray enhances both functionality and style. Explore different handle options, such as metal, wood, or even leather, to personalize your tray further. Installation methods can vary, but most handles will require simple drilling. Make sure to measure carefully to ensure the handles are placed evenly on both sides of the tray. A well-placed handle not only makes your tray easier to carry but also adds a stylish touch!
Adding finishing touches can elevate your serving tray's appearance. This section discusses painting, stenciling, or adding decorative elements to make your tray truly one-of-a-kind. Consider applying a clear sealant over the paint to protect it from scratches and spills, ensuring your tray stays beautiful for years to come. You can also add felt pads to the bottom to prevent scratches on your surfaces.
Explore various painting techniques to achieve the desired look for your tray. From spray paint to brush techniques, learn how to apply paint effectively for a professional finish. If you're feeling adventurous, try a sponge technique for a textured look or use stencils to create intricate designs. The possibilities are endless, and this is where your creativity can really shine!
Consider adding decorative elements such as stencils or decals to personalize your serving tray. This section provides ideas and tips for incorporating unique designs that reflect your style. Whether you want to add a monogram, a favorite quote, or seasonal designs, these little details can make your tray truly special. Don't be afraid to experiment—after all, it's your creation!
Q: Can I use any type of picture frame for this project?
A: While you can use various types of frames, it's best to choose ones that are sturdy and in good condition to ensure durability.
Q: What if my frames are different colors?
A: Mixing colors can create a unique look. However, if you prefer a more cohesive design, consider painting all frames the same color before assembling.
Q: How do I clean my serving tray after use?
A: Wipe the tray with a damp cloth and mild soap. Avoid soaking it in water to maintain the integrity of the frames.
Q: Can I use this tray for hot items?
A: It's best to avoid placing hot items directly on the tray, as the heat may damage the paint or the frames. Use coasters or trivets when serving hot dishes.
Q: How can I customize my serving tray further?
A: You can add decorative elements like washi tape, decals, or even a layer of fabric on the bottom for a pop of color and texture.
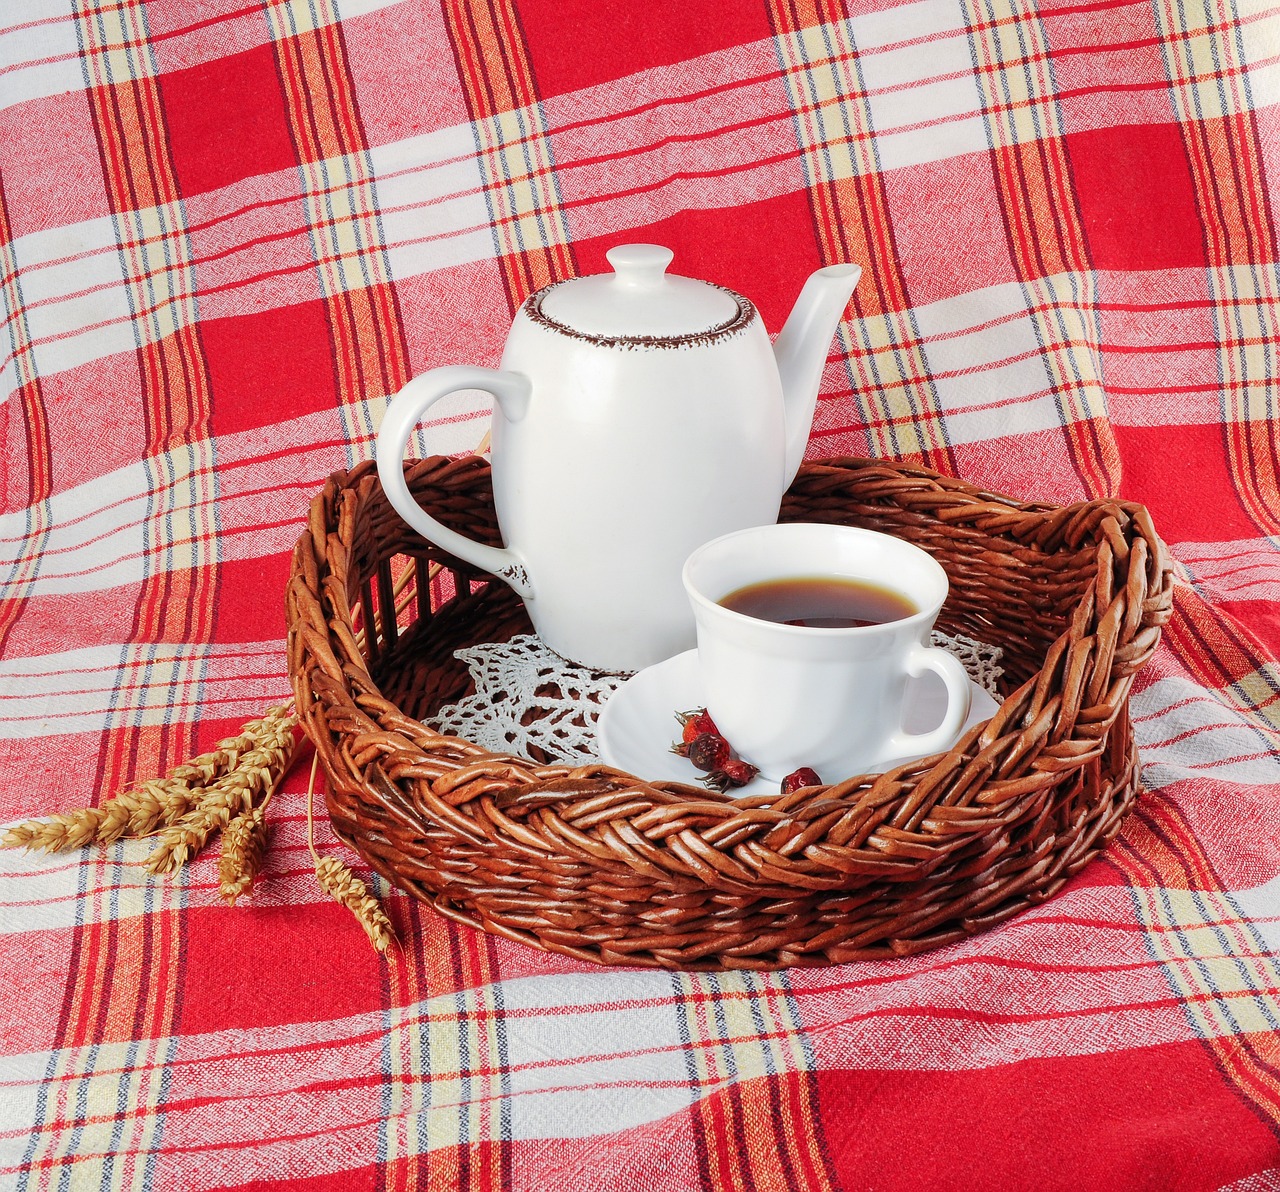
Materials Needed
Creating your own upcycled serving tray from picture frames is not only a fun project but also a sustainable way to give new life to items that might otherwise end up in the trash. To get started, you'll need to gather a few essential materials that will serve as the foundation for your beautiful tray. Here’s what you’ll need:
- Picture Frames: The heart of your tray. Choose frames that vary in size and style to give your tray a unique character.
- Wood Glue: This will hold your frames together securely. Make sure to select a strong adhesive that dries clear.
- Handles: Adding handles is crucial for functionality. You can opt for metal, wood, or even decorative options that match your style.
- Paint: If you want to give your tray a fresh look, select a paint color that complements your home decor. You might also consider using spray paint for a smooth finish.
Once you have gathered these materials, you’ll be on your way to crafting a stylish piece that not only serves a practical purpose but also showcases your creativity. Each item plays a significant role in ensuring your tray is both beautiful and functional. The picture frames set the stage for your design, while the wood glue ensures everything stays intact. The handles provide ease of use, and the paint allows you to express your personal style.
Before diving into the project, it’s also helpful to have a few tools on hand. A craft knife will be useful for any cutting you need to do, and a paintbrush or spray paint nozzle will help you apply your chosen paint evenly. Additionally, having a sandpaper handy can assist in smoothing out any rough edges on your frames, making the final product not only visually appealing but also safe to handle.
In summary, the materials you choose for your upcycled serving tray will significantly influence the final outcome. By selecting the right picture frames, strong adhesive, stylish handles, and the perfect paint color, you’ll be well on your way to creating a stunning and functional serving tray that reflects your personal style and creativity.

Choosing the Right Picture Frames
When embarking on your DIY upcycled serving tray journey, choosing the right picture frames is absolutely crucial. Think of the frames as the foundation of your creation; they set the tone and style for the entire piece. You wouldn't build a house on a shaky foundation, right? Similarly, selecting frames that are not only aesthetically pleasing but also functional will make all the difference in your final product. Start by considering the size, style, and condition of the frames you have on hand or plan to purchase.
First off, let's talk about size. The dimensions of your picture frames will ultimately dictate the overall size of your serving tray. If you choose frames that are too small, you might end up with a tray that can't hold much, while frames that are too large could make it cumbersome to handle. A good rule of thumb is to aim for frames that, when combined, create a balanced and visually appealing layout. Measure your frames carefully and visualize how they will fit together. A simple sketch can help you see the bigger picture—literally!
Next, consider the style of the frames. Are they modern, vintage, or perhaps rustic? Mixing different styles can lend a unique flair to your serving tray, but it’s important to maintain some level of cohesiveness. For example, if you have a sleek, modern frame, pairing it with a heavily ornate vintage one might clash. Instead, look for frames that share a common element, such as color or material, to create a harmonious design. Think of your tray as a canvas—you want each frame to contribute to a beautiful masterpiece.
Lastly, don’t forget to inspect the condition of your frames. A frame that looks great on the outside might be hiding some serious structural issues. Check for any cracks, broken corners, or loose joints. If a frame has seen better days, don’t worry! A little bit of wood glue and some sanding can work wonders. Just like with a good pair of shoes, you want your frames to be sturdy enough to withstand daily use. After all, your serving tray will be taking on the responsibility of holding snacks, drinks, and maybe even some of your favorite decor items.
In summary, choosing the right picture frames for your upcycled serving tray is about balancing size, style, and condition. When you take the time to select frames that complement each other and are in good shape, you set yourself up for success. So, gather your frames, let your creativity flow, and get ready to transform those forgotten pieces into a stunning serving tray that you can proudly showcase in your home!
Frame Size Considerations
When it comes to creating your own upcycled serving tray, the size of your picture frames is a crucial factor that can significantly influence the overall look and functionality of your final product. Think of your serving tray as a canvas; the frames are the borders that will define its shape and presence. To achieve a balanced and aesthetically pleasing design, you’ll want to consider a few key aspects.
First, measure the space where you plan to use your tray. Whether it's for serving snacks at a gathering or displaying decorative items on a coffee table, knowing the dimensions of the area will help you choose frames that fit perfectly. A tray that's too large may overwhelm the space, while one that's too small could look lost. Aim for proportions that enhance your decor rather than clash with it.
Next, consider the dimensions of the frames themselves. You might want to create a tray that’s rectangular for serving drinks, or perhaps a square one for displaying your favorite candles. Here’s a quick breakdown of how different frame sizes can impact your design:
| Frame Size | Best Use | Visual Impact |
|---|---|---|
| Small (4x6 inches) | Ideal for small items like coasters or snacks | Subtle, may require multiple frames for a cohesive look |
| Medium (8x10 inches) | Great for serving appetizers or holding a few decorative pieces | Balanced, offers a nice visual presence without being overwhelming |
| Large (16x20 inches) | Perfect for serving drinks or as a centerpiece | Bold statement piece that draws attention |
While selecting frame sizes, don’t shy away from mixing and matching. Combining various frame dimensions can create a unique layered effect that adds depth to your serving tray. Just remember to maintain a sense of balance; if you choose a large frame as the base, consider using smaller frames to complement it rather than competing with it.
Lastly, think about the height of the frames. If your tray will be used for serving food or drinks, ensure that the height is manageable. You wouldn’t want a tray that’s so tall that it becomes difficult to reach for items. A good rule of thumb is to keep the height of the frames under 2 inches, allowing for easy access while still providing enough depth to hold items securely.
In conclusion, the size of your picture frames can make or break your DIY serving tray project. By carefully considering the dimensions, proportions, and height of your frames, you’ll be well on your way to crafting a stunning and functional piece that enhances your home decor. So grab those old frames, measure your space, and let your creativity flow!

Mixing Frame Styles
When it comes to creating your own serving tray, mixing different frame styles can truly transform an ordinary piece into something extraordinary. Imagine your tray as a canvas, where each frame tells a story, contributing to a larger narrative of your home decor. By combining various styles, you can achieve a look that is both cohesive and eclectic, making your tray a standout piece in any setting.
First, consider the theme of your home. Are you leaning towards a rustic farmhouse vibe, or perhaps a sleek modern aesthetic? Understanding your overall decor style will help you choose frames that complement each other while still showcasing individuality. For instance, if your home features a lot of vintage elements, mixing ornate, antique frames with simpler, modern ones can create a stunning contrast that draws the eye.
Next, think about the color palette you want to work with. You don’t have to stick to one color or finish; instead, embrace the beauty of diversity. Using frames in different finishes—such as matte, glossy, or distressed—can add depth and interest. A well-thought-out color scheme can unify the different styles, making them feel intentional rather than mismatched. For example, you might choose frames in shades of white and gray for a soft, cohesive look, while adding a pop of color with a bright handle or decorative element.
It’s also important to consider the size and shape of the frames you choose. A mix of rectangular, square, and even round frames can create a dynamic visual experience. Just as a well-composed photograph draws the viewer in, a well-arranged tray can captivate your guests. When selecting frames, aim for a balance—too many large frames can overwhelm the design, while too many small frames might get lost. A good rule of thumb is to have a few larger frames as anchors, complemented by smaller ones that add variety.
Finally, don’t shy away from the unexpected. Mixing styles opens the door to creativity. You could pair a vintage floral frame with a sleek metallic one, or juxtapose a rustic wooden frame against a contemporary acrylic one. This playful approach not only enhances the tray’s visual appeal but also sparks conversations among your guests. Remember, the goal is to create a piece that reflects your personality and style.
In conclusion, mixing frame styles is all about balance, creativity, and personal expression. By thoughtfully selecting frames that complement each other while celebrating their differences, you can create a serving tray that is not just functional, but also a stunning piece of art. So go ahead, gather those frames, and let your imagination run wild!
Condition of Frames
When it comes to creating your stylish upcycled serving tray, the condition of your picture frames is paramount. After all, you want your tray to be not only visually appealing but also durable enough to withstand regular use. Before diving into the assembly process, take a moment to thoroughly inspect each frame you plan to use. Look for any signs of wear and tear, such as cracks, chips, or warped wood. These imperfections can affect the overall stability of your tray.
If you notice any damage, don’t fret! Many issues can be easily repaired with a little effort. For instance, small cracks can often be filled with wood glue or putty, while chipped edges might be sanded down or painted over. However, if a frame is severely warped or broken, it might be best to consider replacing it with a sturdier option. Remember, the goal is to create a tray that not only looks good but can also handle the weight of your favorite snacks or drinks.
Another essential factor to consider is the material of the frames. Wooden frames tend to be more durable than plastic ones, which can become brittle over time. If you’re working with plastic frames, make sure they are still flexible and not showing signs of cracking. Below is a quick reference table to help you assess the condition of your frames:
| Frame Condition | Recommended Action |
|---|---|
| Cracks | Fill with wood glue or putty |
| Chips | Sand down or paint over |
| Warped | Replace with a sturdier frame |
| Loose joints | Reinforce with wood glue or screws |
Lastly, don’t forget to give your frames a good cleaning. Dust and grime can accumulate over time, making even the most beautiful frame look dull. A simple wipe with a damp cloth can do wonders. If your frames are particularly dirty, you might want to use a mild soap solution. Just be sure to dry them thoroughly afterward to prevent any moisture damage.
By taking the time to assess and prepare your picture frames, you’ll ensure that your upcycled serving tray is not only a beautiful addition to your home but also a functional piece that stands the test of time. So, roll up your sleeves, get those frames ready, and let’s move on to the exciting part—assembling your tray!
- Can I use any type of picture frame? Yes, you can use various types of frames, but ensure they are in good condition for durability.
- What if my frame is missing the glass? It’s perfectly fine! You can create a tray without glass; just ensure the frame is sturdy.
- How can I personalize my serving tray? You can paint it, add stencils, or even incorporate decorative handles to match your decor.

Preparing the Frames
Before diving into the exciting assembly of your upcycled serving tray, it's essential to prepare the frames properly. Think of this step as the foundation of a house; if it's not solid, everything built on top can crumble. Start by giving your frames a good clean. Dust and grime can accumulate over time, especially if they've been sitting in storage. A simple mixture of warm water and mild soap will do wonders. Use a soft cloth to wipe them down, ensuring that every nook and cranny is free of dirt.
Once your frames are clean, the next step is sanding. This process is crucial because it helps to create a smooth surface for painting and ensures better adhesion of any finishes you apply later. Grab some fine-grit sandpaper and gently sand the surfaces of your frames. Pay special attention to any rough edges or areas that may have chipped paint. Not only will this enhance the look of your tray, but it will also prolong its life.
Now that your frames are clean and smooth, it’s time to think about color. If you want your serving tray to pop, consider painting the frames. Choose a color that complements your home decor or go for something bold that stands out. You might even want to use a primer first to help the paint adhere better and to make the color more vibrant. When applying paint, be sure to use even strokes and let each coat dry completely before adding another. This way, you’ll achieve a professional-looking finish that you can be proud of.
For those who want to take it a step further, consider adding a protective sealant. This will not only enhance the color but also provide a layer of protection against spills and scratches. Just remember, the key to a successful upcycled project is taking the time to prepare your materials thoroughly. By investing a little effort into preparing your frames, you’ll ensure that your serving tray is not only beautiful but also durable and functional.
In summary, preparing your frames involves:
- Cleaning: Remove dust and grime using a mild soap solution.
- Sanding: Smooth out rough edges and surfaces with fine-grit sandpaper.
- Painting: Choose a color that suits your style and apply evenly.
- Sealing: Consider adding a protective sealant for extra durability.
By following these steps, you'll set a solid groundwork for crafting a stunning serving tray that reflects your personal style and meets your functional needs. Remember, the preparation phase is where the magic begins, so take your time and enjoy the process!
Q: Can I use any type of picture frame for this project?
A: While you can use various types of picture frames, it's best to choose wooden or sturdy frames for durability. Avoid flimsy plastic frames, as they may not hold up well.
Q: What if my frames have scratches or damage?
A: Don't worry! You can often repair minor scratches with wood filler or paint. Just make sure to sand it down after applying any repair materials to ensure a smooth finish.
Q: How can I personalize my serving tray further?
A: Consider adding stencils or decals to your tray. You can also use different painting techniques, such as sponging or distressing, to give it a unique touch.
Q: Is it necessary to use a sealant after painting?
A: While not absolutely necessary, using a sealant can help protect your serving tray from spills and scratches, prolonging its life and maintaining its appearance.

Assembly Process
Assembling your upcycled serving tray is an exciting step that brings your vision to life. This process may seem daunting at first, but with the right approach, you'll find it to be quite straightforward and rewarding. First, ensure that you have all your materials ready; this includes the picture frames you've selected, wood glue, any fasteners you might need, and your handles. The key here is to work methodically to ensure each frame is securely attached, creating a sturdy and functional piece that you can proudly showcase.
To begin, lay out your frames in the desired configuration. This is your opportunity to play with the arrangement before committing to the glue. Think about how each frame complements the others. Do you want a symmetrical arrangement, or are you leaning towards a more eclectic look? Once you’re satisfied with the layout, it’s time to start securing the frames together.
Start by applying a generous amount of wood glue to the edges of the frames that will be touching each other. This is crucial because the glue will provide the necessary bond to hold everything together. After applying the glue, press the frames firmly against each other. You may want to use clamps or heavy objects to keep the frames in place while the glue dries. Depending on the type of glue you use, drying times can vary, so be sure to check the manufacturer's instructions.
Next, if you want to add extra stability, consider using small fasteners or screws. These can be particularly useful for larger trays that might need additional support. To do this, drill small pilot holes through the frames where they overlap, and then carefully insert the screws. This step is optional but can provide peace of mind, especially if you plan to use the tray for heavier items.
Once the frames are securely attached, it’s time to add the handles. Handles not only enhance the functionality of your tray but also contribute to its overall aesthetic. Choose handles that match your style—whether that’s sleek and modern or rustic and vintage. To install the handles, position them on the sides of the tray where they will be most convenient for lifting. Mark the spots where the screws will go, drill pilot holes, and then attach the handles using screws. Make sure they are tightly secured, as they will bear the weight of whatever you choose to serve.
After everything is assembled, give your tray a final inspection. Check for any excess glue that might have oozed out during the assembly process. If you find any, wipe it away with a damp cloth before it dries. Allow your tray to cure completely according to the glue's instructions. Once cured, you’ll have a beautiful, functional serving tray that showcases your creativity and resourcefulness!
Securing the Frames
Securing the frames is a critical step in the process of creating your upcycled serving tray. If you want your tray to be both functional and durable, you need to ensure that the frames are tightly bonded together. The first thing to consider is the type of wood glue you will use. A high-quality wood glue is essential, as it will provide a strong bond that can withstand the weight of items you plan to serve. Apply a generous amount of glue along the edges where the frames will connect, ensuring that the surfaces are clean and free of dust or debris.
Next, you will want to align the frames carefully. This is where patience pays off. Take your time to adjust the frames until they are perfectly aligned. A misaligned tray can be visually unappealing and may not function as intended. Once aligned, use clamps or heavy objects to hold the frames in place while the glue dries. This will help maintain pressure on the joints, ensuring a solid bond. Generally, allowing the glue to set for at least an hour is recommended, but always refer to the glue manufacturer's instructions for the best results.
For added security, consider using additional fasteners such as small screws or nails. This is particularly useful if you are working with larger frames or if you plan to use the tray frequently. Pre-drill holes to prevent the wood from splitting, and then insert the screws at an angle to provide extra strength. If you choose to go this route, be mindful of the aesthetics; you want the screws to be discreet and not detract from the overall look of your tray.
Finally, once the glue has fully cured and any additional fasteners are in place, inspect the tray for stability. Gently shake or apply light pressure to ensure everything is secure. If you notice any wobbling or movement, you may need to reinforce the connections with more glue or fasteners. Taking the time to properly secure the frames will not only enhance the longevity of your serving tray but also give you peace of mind when using it for entertaining guests or displaying items in your home.
Adding Handles
Incorporating handles into your DIY upcycled serving tray is not just about functionality; it's also an opportunity to add a touch of personal style. Handles can transform a simple tray into a statement piece that enhances your home decor. When selecting handles, consider the material, style, and color to ensure they harmonize with the overall aesthetic of your tray. For instance, if your tray has a rustic charm, wooden handles could be the perfect choice, while sleek metal handles might suit a modern vibe.
When it comes to installation, there are a few methods you can choose from. You can either attach the handles directly to the sides of the frames or use a more creative approach by incorporating them into the design of the tray. Here are some options to think about:
- Side Handles: This is the most common method, where handles are fixed to the sides of the frames. Make sure to measure the placement carefully so they are even.
- Center Handles: Placing a handle in the center of the tray can create a unique look, especially if the tray is larger. This method allows for easy lifting and adds a focal point.
- Decorative Elements: Consider using decorative brackets or embellishments to attach the handles. This can create an artistic flair while still being functional.
To install the handles, you’ll need a few tools: a drill, screws, and possibly a screwdriver. First, mark where you want the handles to go. It’s crucial to ensure they are level and spaced evenly on both sides of the tray. Once marked, drill pilot holes to make it easier to screw in the handles without splitting the wood. Then, simply attach the handles securely, and your tray will not only be functional but also stylish!
Remember, the handles you choose can reflect your personality and the overall theme of your home. Whether you go for something rustic, modern, or even whimsical, the right handles can elevate your upcycled serving tray from ordinary to extraordinary. So, get creative and have fun with this part of the project!
Q: What type of handles work best for a serving tray?
A: The best handles for a serving tray depend on the style and weight of the tray. For lightweight trays, simple wooden or plastic handles work well, while heavier trays may require sturdier metal handles for better support.
Q: How do I ensure my handles are securely attached?
A: To ensure handles are securely attached, use pilot holes when drilling, and choose screws that are appropriate for the thickness of the frame. Test the handles after installation to confirm they can support the weight of the items you plan to carry.
Q: Can I paint or customize my handles?
A: Absolutely! You can paint or customize your handles to match the color scheme of your tray. Just make sure to use paint that adheres well to the material of the handles for a durable finish.
Finishing Touches
Once you've assembled your upcycled serving tray, it's time to add those that will truly make it your own. Think of this stage as the icing on the cake; it’s where your creativity can shine and where you can transform a simple project into a stunning centerpiece. Whether you're aiming for a rustic charm or a modern flair, the right finishing touches can elevate your tray from functional to fabulous.
One of the most popular ways to personalize your tray is through painting. You can opt for a solid color that complements your home décor or experiment with multiple hues for a more vibrant look. Consider using spray paint for a smooth, even finish or a brush technique for a more textured appearance. If you're feeling adventurous, try a distressed finish by sanding the edges after painting, which can add a vintage feel. Remember, the key is to apply thin layers and allow adequate drying time between coats to achieve a professional-looking result.
Additionally, don't overlook the power of decorative elements. Adding stencils or decals can give your tray a unique personality. You might choose a fun quote, a floral design, or even geometric patterns that resonate with your style. There are countless options available, from peel-and-stick decals to hand-painted designs. If you go the stencil route, ensure you secure the stencil properly to avoid any smudging, and use a sponge brush for precise application.
Another option to consider is incorporating natural elements. Think about adding a layer of varnish or a clear coat to protect your paint job and add a beautiful sheen. This not only enhances the visual appeal but also increases the durability of your tray, making it suitable for everyday use. If you want to go a step further, you could even line the bottom of the tray with a decorative fabric or paper that complements your overall design. This adds an extra layer of texture and can be easily swapped out if you decide to change your decor in the future.
Finally, don't forget about the handles. They can play a significant role in the overall aesthetic of your tray. Consider painting them to match your tray or using contrasting colors for a bold statement. There are many styles of handles available, from sleek modern designs to ornate vintage ones, so choose what best fits your vision. The right handles will not only enhance the functionality of your tray but also contribute to its overall style.
In conclusion, the finishing touches you choose for your upcycled serving tray can significantly impact its look and feel. By carefully selecting your paint, decorative elements, protective coatings, and handles, you can create a stunning piece that reflects your personal style and serves as a beautiful addition to your home. So, get creative and let your imagination run wild—your unique serving tray awaits!
Q1: Can I use any type of picture frame for this project?
A1: Yes, you can use various types of picture frames, but ensure they are sturdy and in good condition. Mixing different styles can also add character to your tray.
Q2: What type of paint is best for finishing my serving tray?
A2: Acrylic paint or spray paint works best for wood frames. Make sure to use a sealant to protect the finish and increase durability.
Q3: How can I ensure my tray is durable for everyday use?
A3: Properly secure the frames with wood glue, add a protective layer of varnish or sealant, and choose sturdy handles to ensure your tray can withstand regular use.
Q4: Can I customize my tray for different occasions?
A4: Absolutely! You can change the decorative elements or even the lining of the tray to fit various themes or seasons, making it a versatile piece for any event.

Painting Techniques
This article explores how to create a stylish and functional serving tray using old picture frames. You'll learn about materials, tools, and step-by-step instructions to craft your own unique piece.
Gathering the right materials is crucial for this project. You'll need picture frames, wood glue, handles, and paint. Each item plays a significant role in ensuring your tray is both beautiful and functional.
Selecting the appropriate picture frames is essential. Consider their size, style, and condition to ensure they complement your design. This section will guide you in making the best choices for your tray.
The size of your picture frames will determine the overall dimensions of your serving tray. Learn how to measure and choose frames that create a balanced and aesthetically pleasing design.
Combining different frame styles can add character to your serving tray. Discover tips on how to mix and match frames for a cohesive yet eclectic look that enhances your home decor.
Inspecting the condition of your frames is vital for durability. This section discusses how to assess and repair frames to ensure they are sturdy enough for everyday use.
Before assembling your serving tray, proper preparation of the frames is necessary. This includes cleaning, sanding, and painting the frames to achieve the desired finish and longevity.
Assembling your upcycled serving tray is a straightforward process. This section outlines step-by-step instructions to combine the frames securely and create a functional piece for serving or display.
Learn how to effectively secure the frames together using wood glue and other fasteners. Proper techniques will ensure your tray is stable and ready for use.
Incorporating handles into your serving tray enhances both functionality and style. Explore different handle options and installation methods to personalize your tray further.
Adding finishing touches can elevate your serving tray's appearance. This section discusses painting, stenciling, or adding decorative elements to make your tray truly one-of-a-kind.
When it comes to painting your upcycled serving tray, the technique you choose can significantly impact its overall look and feel. A well-painted tray can transform a simple piece into a stunning centerpiece for your home. Start by selecting the right type of paint. For a smooth, professional finish, consider using acrylic paint or chalk paint, both of which adhere well to wood and offer a variety of colors. If you want a more textured look, distressed paint techniques can provide that rustic charm that many people adore.
Before you dive in, make sure to prepare your surface properly. Start by sanding the frames lightly to create a rough texture that helps the paint stick better. After sanding, wipe away any dust with a damp cloth. Once your frames are prepped, you can apply a primer if you're using a lighter color on a darker wood. This step ensures that the paint color pops and lasts longer. Now, let’s explore some popular painting techniques:
- Brush Painting: This traditional method allows you to control the paint application precisely. Use a high-quality brush to avoid streaking and achieve an even coat.
- Spray Painting: For those who prefer speed, spray paint can cover large areas quickly. Just be sure to use it in a well-ventilated area and protect surrounding surfaces.
- Sponge Painting: This technique adds texture and depth to your tray. Use a sponge to dab paint onto the surface, creating a unique, mottled effect.
Once you’ve chosen your technique, layering is key. Start with a base coat and let it dry completely before adding additional layers or colors. This not only enhances the depth of color but also allows for creative designs. You can even use painter's tape to create clean lines or geometric patterns for a modern twist.
Finally, don’t forget to seal your masterpiece. A clear acrylic sealer will protect your tray from scratches and spills, ensuring it remains a functional piece for years to come. So, roll up your sleeves, unleash your creativity, and let your serving tray shine!
Q: Can I use any type of paint for this project?
A: While you can use various types of paint, acrylic and chalk paints are recommended for their durability and ease of use on wood surfaces.
Q: How can I ensure my paint job lasts?
A: Proper surface preparation and sealing your finished tray with a clear coat will help ensure longevity.
Q: What if my picture frames are different colors?
A: Mixing and matching colors can create a unique look! Just be sure to choose colors that complement each other.

Decorative Options
When it comes to personalizing your upcycled serving tray, the decorative options are as vast as your imagination! This is where you can truly let your creativity shine and make your tray a unique reflection of your style. One of the simplest yet most impactful ways to enhance your serving tray is by incorporating stencils. Stencils allow you to add intricate designs or words that can elevate the overall aesthetic. For example, you might choose a floral pattern or a fun phrase like "Sip, Sip, Hooray!" that resonates with your entertaining style.
Another option to consider is the use of decals. These can be found in various designs and can easily be applied to your tray, giving it a polished look without the effort of hand-painting. You can choose decals that match the theme of your home or the occasion for which you plan to use the tray. For instance, if you often host summer gatherings, tropical-themed decals could add a vibrant touch.
Moreover, don't overlook the power of color in transforming your tray. A bold color can make your serving tray a statement piece, while soft pastels can lend a more subtle, elegant vibe. Consider using chalk paint for a matte finish that is both trendy and easy to work with. This type of paint adheres well to various surfaces and can be distressed for a rustic look. You can even mix colors to create an ombre effect, which is sure to turn heads!
For those who love a bit of texture, think about adding fabric or natural elements to your serving tray. Lining the bottom with a beautiful piece of fabric can add a touch of warmth and comfort, while also protecting the surface. You might choose burlap for a rustic feel or a vibrant cotton print for a pop of color. Alternatively, consider incorporating small decorative stones or seashells around the edges for a beachy vibe, especially if you're planning a summer soirée.
Lastly, don't forget the finishing touches! Adding a coat of sealant will protect your decorations and enhance the longevity of your tray. A clear spray sealant can do wonders in preserving your designs from wear and tear, ensuring that your upcycled serving tray remains a beloved piece for years to come.
Q: What type of paint is best for decorating my serving tray?
A: Chalk paint is a popular choice due to its matte finish and easy application. It adheres well to various surfaces and can be distressed for a rustic look.
Q: Can I use my serving tray for food after decorating it?
A: Yes, as long as you use food-safe sealants and paints. Always check the labels to ensure they are non-toxic and safe for food use.
Q: How can I clean my upcycled serving tray?
A: Use a damp cloth to wipe it down gently. Avoid soaking it or using harsh chemicals that could damage the paint or decorations.
Q: What if I want to change the design later?
A: You can easily repaint or re-decorate your tray. Just make sure to remove any old paint or decals thoroughly before applying new ones.
Frequently Asked Questions
- What materials do I need to create an upcycled serving tray?
To craft your own upcycled serving tray, you'll need old picture frames, wood glue, handles, and some paint. These materials are essential for creating a unique and functional piece that can elevate your home decor.
- How do I choose the right picture frames for my tray?
When selecting picture frames, consider their size, style, and condition. Make sure they complement each other and fit your desired design. A mix of different styles can add character, but ensure they harmonize for a cohesive look.
- Can I use damaged picture frames for this project?
Absolutely! Just make sure to assess the damage first. You can often repair minor issues with some wood glue or paint. However, if a frame is severely damaged, it might not be sturdy enough for everyday use.
- What is the assembly process like?
The assembly process is quite straightforward. You'll first secure the frames together using wood glue and possibly some fasteners for extra stability. Once they are securely attached, you can then add handles to enhance both style and functionality.
- What type of handles should I use?
You have a variety of handle options! From simple metal handles to decorative ones, choose based on your personal style and the overall look you want for your tray. Just ensure they are securely installed for safe handling.
- How can I add finishing touches to my tray?
Finishing touches can really make your tray stand out. You can paint it in your favorite color, use stencils for designs, or even add decals that reflect your personality. The goal is to make it uniquely yours!
- What painting techniques work best for this project?
There are several painting techniques you can try! Spray paint offers a smooth finish, while brush techniques can give you more control. Experiment with both to see which one achieves your desired look.
- Can I use this tray for serving food?
Yes, you can! Just ensure that the materials used are food-safe and that the tray is properly sealed if you’ve painted it. This way, it not only looks great but is also functional for serving your favorite snacks or drinks.


