Transform Old Coffee Cans into Flower Pots
Have you ever thought about how a simple old coffee can could be transformed into a charming flower pot? It’s amazing how everyday items can take on new life with just a little creativity and effort. Not only does this project allow you to unleash your inner artist, but it also promotes sustainability by repurposing items that might otherwise end up in the trash. Imagine your garden or home adorned with unique, personalized flower pots that tell a story—your story! In this article, we’ll explore creative ways to repurpose old coffee cans into beautiful planters, offering tips, techniques, and plenty of inspiration to get you started on this delightful journey.
When it comes to transforming coffee cans into flower pots, the first step is to choose the right can. Not all coffee cans are created equal! You’ll want to consider factors such as size, material, and design. For instance, larger cans can accommodate bigger plants or multiple smaller plants, while smaller cans are perfect for herbs or succulents. Additionally, think about the material; metal cans are durable and can withstand the elements, making them suitable for outdoor use. As for design, look for cans with interesting shapes or colors that can complement your home or garden aesthetic. Remember, the right choice sets the foundation for a successful transformation!
Before you can plant anything, proper preparation of your coffee can is essential. This includes cleaning, removing labels, and creating drainage holes. Each of these steps plays a crucial role in ensuring that your flower pot is both functional and visually appealing. Think of this preparation as the groundwork for a beautiful masterpiece—you wouldn’t paint a canvas without first priming it, right? So, let’s dive into the details of how to get your coffee can ready for its new life as a flower pot!
Cleaning your coffee can is a vital step that shouldn’t be overlooked. Residue and odors can linger, which might not be the best environment for your plants. A simple method is to wash the can with warm soapy water, scrubbing with a sponge to remove any leftover coffee stains. For stubborn odors, a mixture of vinegar and water can work wonders. Just fill the can, let it soak for a bit, and then rinse thoroughly. Not only will your can be fresh and clean, but it will also look more inviting as a flower pot!
Labels can be a bit tricky, but with the right approach, they can be removed easily. Start by soaking the can in warm, soapy water to loosen the adhesive. After a few minutes, gently peel off the label. If any sticky residue remains, a bit of rubbing alcohol or adhesive remover can help. Once the label is gone, you’ll have a clean slate to work with. This is your chance to personalize your flower pot with paint, stickers, or even decoupage techniques!
Now, let’s talk about drainage holes—these are essential for the health of your plants. Without them, excess water can accumulate at the bottom of the can, leading to root rot. To create drainage holes, simply use a hammer and a small nail or a drill if you have one. Make a few holes at the bottom of the can to ensure proper drainage. Think of these holes as tiny lifelines for your plants, allowing them to breathe and thrive!
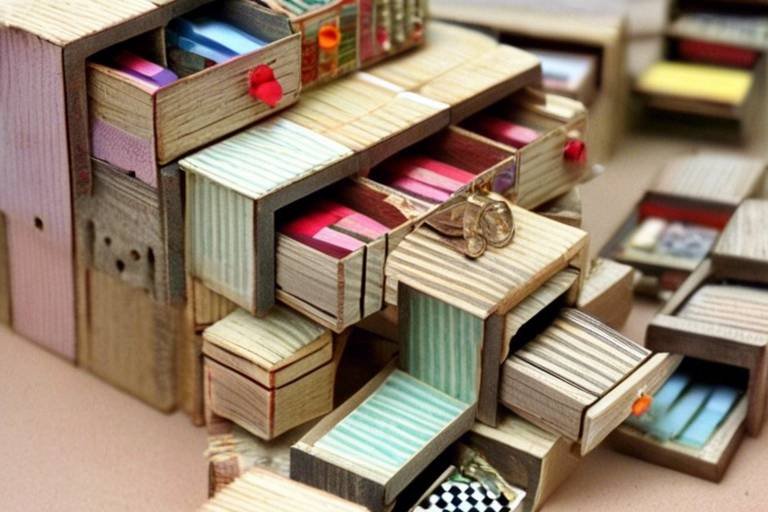
Once your coffee can is clean and prepped, it’s time for the fun part: designing your flower pot! There are countless ways to decorate your coffee can, from painting it a vibrant color to adding a layer of decoupage with your favorite images. You could even wrap it in twine or burlap for a rustic touch. Don’t hesitate to get creative—this is your chance to express yourself. Imagine how stunning a bright yellow coffee can with hand-painted flowers would look against the green of your plants!
Now that your coffee can is ready to go, it’s time to choose the right plants. This step is crucial for ensuring that your flower pot is not only beautiful but also healthy. Consider factors such as the size of the plants, their sunlight needs, and how much water they require. For instance, if you’re using a smaller coffee can, opt for plants like succulents or herbs, which thrive in compact spaces. It’s all about finding the right match!
When it comes to small pots, certain plants shine brighter than others. Here are some ideal candidates:
- Succulents: These hardy plants come in various shapes and colors, making them perfect for a coffee can.
- Herbs: Basil, mint, and parsley not only look great but also add flavor to your meals.
- Small Flowers: Consider planting pansies or marigolds for a pop of color.
Choosing seasonal plants can keep your coffee can pots vibrant throughout the year. In spring, opt for cheerful blooms like petunias, while summer might call for heat-tolerant varieties. As fall approaches, consider planting ornamental kale or chrysanthemums for a seasonal touch. Remember, adapting to changing weather conditions is key to a thriving arrangement!
Proper maintenance is crucial to keeping your coffee can flower pots healthy and flourishing. This includes regular watering, fertilizing, and repotting when necessary. Think of it as nurturing a friendship; the more care and attention you give, the stronger it grows!
Watering your coffee can pots requires a bit of finesse. It’s important to find the right balance—too much water can drown the plants, while too little can leave them parched. A good rule of thumb is to check the soil moisture before watering. Stick your finger about an inch into the soil; if it feels dry, it’s time to water. Aim for a thorough soaking, allowing excess water to drain out through the holes you created earlier.
Fertilizing is another crucial aspect of plant care. A balanced, water-soluble fertilizer can provide essential nutrients that your plants need to thrive. Apply fertilizer every few weeks during the growing season, following the package instructions for the right amount. This will promote growth and vibrant blooms, making your coffee can flower pots the envy of the neighborhood!
Q: Can I use any type of coffee can for my flower pots?
A: While most coffee cans work well, it's best to choose those made of metal for durability and drainage.
Q: Do I need to line the bottom of the can with anything?
A: It's not necessary, but adding a layer of small rocks can help with drainage.
Q: How can I make my flower pots last longer?
A: Keep them out of extreme weather conditions and regularly check for rust or wear.

Choosing the Right Coffee Can
When it comes to transforming old coffee cans into stunning flower pots, the first step is to choose the right coffee can. Not all coffee cans are created equal, and selecting the appropriate one can significantly impact the success of your new floral arrangement. Start by considering the size of the can. A larger can provides more space for roots to grow, while a smaller can may be ideal for compact plants like succulents or herbs. Think about where you plan to place your flower pot—whether it's indoors on a windowsill or outdoors in your garden—as this will influence your size choice.
Next, pay attention to the material of the coffee can. Most cans are made of metal, which is durable and can withstand outdoor conditions, but be cautious. Metal can heat up quickly in direct sunlight, potentially harming the roots of your plants. If you opt for a plastic or tin can, ensure it’s sturdy enough to hold soil and moisture without collapsing. Consider the design of the can as well; some coffee cans come with attractive graphics or colors that can complement your decor. If you find a can with a design you love, it can save you time on decorating!
Another essential factor is the drainage capability. A good flower pot needs to allow excess water to escape to prevent root rot. When choosing your coffee can, look for options that are easy to modify. You’ll need to create drainage holes, and some cans are more amenable to this than others. Remember, the goal is to create a functional and aesthetically pleasing flower pot that enhances your home or garden.
In summary, when selecting the right coffee can for your flower pot project, keep these key factors in mind:
- Size: Choose based on the plants you want to grow.
- Material: Consider durability and heat retention.
- Design: Look for visually appealing options.
- Drainage: Ensure it can be modified for drainage holes.
By thoughtfully selecting your coffee can, you’re setting the foundation for a beautiful and thriving flower pot. Remember, this is just the beginning of your creative journey into repurposing everyday items into charming decor for your home or garden!

Preparing Your Coffee Can
Before you dive into the exciting world of transforming old coffee cans into delightful flower pots, it's essential to prepare them properly. This preparation process ensures that your new planters are not only functional but also safe for your beloved plants. Think of it as laying the groundwork for a beautiful garden; without the right foundation, things might not flourish as expected. Start by giving your coffee can a good cleaning to eliminate any leftover residues or odors that could affect your plants. A clean pot is like a fresh canvas, ready for your artistic touch.
Cleaning your coffee can is a simple yet vital step. You can use warm, soapy water and a sponge to scrub away any grease or coffee residue. If you're dealing with stubborn stains, a little baking soda can work wonders. Just sprinkle some inside the can, add a bit of water to create a paste, and scrub away. Rinse thoroughly and let it dry completely. This way, you're ensuring a safe and pleasant environment for your plants.
Next up, let’s tackle those pesky labels. While some may find them charming, others might prefer a blank slate to unleash their creativity. To remove labels, soak the can in warm, soapy water for about 15-20 minutes. This will loosen the adhesive. After soaking, gently peel off the label. If any sticky residue remains, a bit of rubbing alcohol or vinegar on a cloth can help wipe it away. Voila! You now have a clean coffee can, ready for decoration!
One of the most critical steps in preparing your coffee can is creating drainage holes. Without them, water can accumulate at the bottom, leading to root rot and unhappy plants. To create these holes, simply use a hammer and a nail or a drill. Make a few small holes at the bottom of the can—about 3 to 5 should do the trick. This simple action allows excess water to escape, ensuring your plants have the right moisture levels to thrive.
In summary, preparing your coffee can is not just about cleaning; it's about setting the stage for your floral masterpiece. By ensuring cleanliness, removing labels, and creating drainage holes, you're not just recycling—you're crafting a beautiful home for your plants. So grab those coffee cans, roll up your sleeves, and let’s get to work!
Q: Can I use any type of coffee can for planting?
A: Yes, as long as the can is clean and has drainage holes, you can use various types of coffee cans, including metal and plastic.
Q: Do I need to paint my coffee can before using it?
A: It's not necessary, but painting can enhance the aesthetic appeal and allow you to personalize your flower pots.
Q: What should I do if my plants are not thriving in the coffee can?
A: Check for proper drainage, ensure you're using the right soil, and adjust your watering habits as needed.

Cleaning Techniques
When it comes to transforming old coffee cans into charming flower pots, the first step is ensuring they are clean and free from any lingering odors or residue. A clean pot not only enhances the aesthetic appeal but also creates a safe environment for your plants to thrive. So, how do you go about cleaning these cans effectively? Well, let’s dive into some simple yet effective techniques!
First off, you’ll want to gather your cleaning supplies. Here’s what you’ll need:
- Warm soapy water
- A scrub brush or sponge
- Baking soda (for stubborn stains)
- White vinegar (for deodorizing)
Start by rinsing the coffee can with warm water to remove any loose coffee grounds. Next, fill the can with warm soapy water and let it soak for about 10-15 minutes. This soaking period will help loosen any stuck-on residue. After soaking, grab your scrub brush or sponge and give it a good scrub. Pay special attention to the rim and bottom, as these areas can accumulate grime.
If you encounter stubborn stains or odors that refuse to budge, don’t worry! A sprinkle of baking soda can work wonders. Just add a tablespoon or so to the can, along with a bit of water to create a paste. Scrub the paste onto the stains, and you’ll be amazed at how easily they lift away. For any lingering odors, a splash of white vinegar can do the trick. Rinse thoroughly after using any cleaning agents to ensure no residue is left behind.
Once your coffee can is sparkling clean, it’s essential to dry it completely before moving on to the next steps in your flower pot transformation. You can air dry it or use a clean towel to speed up the process. A dry can will prevent any mold or mildew from developing once you add soil and plants.
In summary, cleaning your coffee cans is a straightforward yet crucial step in creating beautiful flower pots. By using warm soapy water, baking soda, and white vinegar, you can ensure your pots are not only clean but also ready to showcase your vibrant plants. Remember, a little effort in cleaning goes a long way in making your flower pots the star of your home or garden!

Removing Labels
Removing labels from your old coffee cans can be a bit of a chore, but it's a crucial step in transforming them into beautiful flower pots. You want a clean slate to work with, right? No one wants to see a faded logo peeking through the vibrant colors of your new planter. So, let's dive into some effective methods to get those pesky labels off!
First, you can try soaking the can in warm, soapy water. Just fill a basin with hot water and add a few drops of dish soap. Let the can soak for about 15-30 minutes. The warmth will loosen the adhesive, making it easier to peel off the label. Once the time is up, grab a sponge or cloth and gently scrub the label off. If any residue remains, a bit of baking soda sprinkled on the sponge can work wonders, acting as a gentle abrasive to lift off stubborn bits.
If soaking isn’t your style, another method involves using a hairdryer. Yes, you heard that right! The heat from the hairdryer can soften the adhesive, allowing you to peel the label off more easily. Just aim the dryer at the label for a minute or two, then carefully peel it away. If you find it still clinging on, a few more seconds of heat should do the trick.
For those who prefer a more chemical approach, you can use rubbing alcohol or adhesive remover. Simply apply a small amount on a cloth and rub it over the label. This method is particularly effective for those stubborn labels that just don’t want to budge. However, be cautious with this approach, as you want to ensure the can is safe for your plants. Always rinse thoroughly after using any chemicals to prevent any residues from harming your greenery.
Once you've successfully removed the labels, give your cans a good rinse and let them dry completely. This ensures that any leftover moisture won't interfere with your plants. After all, a clean, dry pot is a happy pot! Now, you're ready to move on to the fun part—decorating your newly transformed flower pots!
- What if the label is still sticky after removal? - If you find sticky residue left behind, try using a bit of cooking oil or vinegar on a cloth to wipe it away. This should help dissolve the adhesive.
- Can I use any type of coffee can? - Most coffee cans are suitable, but it's best to choose those made from metal or sturdy plastic for durability.
- Is it necessary to remove the label? - While not strictly necessary, removing the label helps create a more aesthetically pleasing pot and allows for better customization.

Creating Drainage Holes
When it comes to transforming old coffee cans into beautiful flower pots, one of the most crucial steps is . These little openings are vital for maintaining a healthy environment for your plants. Without proper drainage, water can accumulate at the bottom of the can, leading to root rot and other moisture-related issues that can jeopardize the life of your plants. So, how do you go about making these drainage holes? Let’s dive into it!
First off, you’ll want to gather your tools. A simple hammer and a nail or a screwdriver will do the trick. You can also use a drill if you have one handy, but for most people, the hammer and nail method is both effective and accessible. Before you start, make sure to place a cloth or paper towel underneath the can to catch any debris. This will keep your workspace tidy and prevent any accidental mess.
To create the holes, hold the can securely and gently tap the nail into the bottom using the hammer. You’ll want to create several holes—typically, three to five should suffice, depending on the size of your can. Ensure that the holes are evenly spaced to allow for optimal drainage. If you’re using a drill, simply drill a few holes in the bottom, being careful not to apply too much pressure to avoid bending the can.
After you’ve created the drainage holes, it’s a good idea to check for sharp edges around the holes. If you notice any, you can use sandpaper to smooth them out. This is particularly important if you plan to handle the can frequently or if you have pets or children around. A smooth edge will not only protect your hands but also prevent any accidental cuts.
Lastly, before you start planting, consider adding a layer of small stones or gravel at the bottom of the can. This acts as an additional drainage layer, ensuring that excess water can flow freely away from the roots of your plants. This simple step can significantly enhance the health of your plants by preventing water from pooling at the bottom of the can.
In summary, creating drainage holes in your coffee can flower pots is a straightforward but essential step in ensuring your plants thrive. By taking the time to do this properly, you’re setting your plants up for success, allowing them to absorb the right amount of moisture while preventing the dreaded root rot. Remember, happy plants make for a happy gardener!
- Why do I need drainage holes in my flower pots? Drainage holes are essential to prevent water from accumulating at the bottom of the pot, which can lead to root rot and other plant diseases.
- How many drainage holes should I make? Generally, three to five holes are sufficient for a coffee can, but you can adjust based on the size of the can.
- Can I use other materials for drainage? Yes! In addition to holes, you can add a layer of gravel or small stones at the bottom of the pot for better drainage.
- What if I don’t have tools to make drainage holes? If you don’t have a hammer or drill, consider using a heated object like a metal skewer to poke holes into the can, but be cautious and ensure safety.

Designing Your Flower Pot
When it comes to , the sky's the limit! Transforming your old coffee cans into stunning planters is not just about functionality; it's also about expressing your creativity. Think of your coffee can as a blank canvas waiting for your artistic touch. The first step in this delightful journey is to decide on a theme or style that resonates with your personal taste and the overall decor of your space. Are you leaning towards a rustic charm, a modern minimalist look, or perhaps a vibrant bohemian flair? Your choice will guide your design process.
One popular method is painting. Choose colors that complement your home or garden. Acrylic paints work wonderfully on metal surfaces, and you can even use spray paint for a smooth finish. To add depth, consider using a sponge or brush to create patterns. For example, a simple polka dot or striped design can make your flower pot pop with personality. If you’re feeling adventurous, why not try ombre effects? Gradually blending colors can create a stunning visual that draws the eye.
Don’t forget about decoupage! This technique allows you to apply decorative paper or fabric to your coffee can, giving it a unique texture and style. You can use old magazines, wrapping paper, or even fabric scraps. Just cut your desired shapes, adhere them with decoupage glue, and seal the surface with a top coat for durability. This method not only enhances the aesthetic appeal but also tells a story, as you can choose images or patterns that reflect your personality.
For those who prefer a more natural look, consider incorporating natural elements. You can wrap your coffee can in jute twine or burlap for a rustic feel. Adding small stones or pebbles around the base can also create an earthy touch. If you're feeling crafty, why not attach small wooden slices or bark pieces to the sides? This can give your flower pot a charming woodland vibe, making it a perfect addition to a garden or patio.
Lastly, think about adding some personalized touches. You can use stencils to paint your favorite quotes or the names of the plants you’re potting. This not only adds a personal flair but also serves as a reminder of your gardening journey. Remember, your flower pot is an extension of your style, so don’t be afraid to experiment and let your imagination run wild!
Q: Can I use any type of paint on my coffee can?
A: While acrylic paints are highly recommended for their durability and ease of use, you should avoid using water-based paints, as they may not adhere well to metal surfaces.
Q: How do I ensure my designs last outdoors?
A: To protect your designs from the elements, apply a clear sealant after your paint or decoupage has dried. This will help prevent fading and peeling.
Q: Are there any plants that work best with decorated coffee cans?
A: Absolutely! Succulents, herbs, and small flowering plants are perfect for coffee can pots, as they don’t require deep soil and can thrive in smaller spaces.

Choosing the Right Plants
When it comes to transforming your old coffee cans into charming flower pots, selecting the right plants is absolutely crucial. After all, you want your little green friends to thrive and bring life to your home or garden. But how do you choose the perfect plants for these unique containers? Well, it all boils down to a few key factors: size, sunlight, and water needs. Just like picking the right outfit for an occasion, choosing the right plants requires consideration of their specific requirements and your personal style.
First off, think about the size of your coffee can. Smaller cans are ideal for plants that don’t need much room to grow. For instance, succulents and herbs are fantastic choices for these petite pots. They not only add a splash of greenery but also bring a delightful aroma to your space. Imagine having fresh basil or mint right at your fingertips for cooking! On the other hand, if you have a larger can, you might consider plants like pansies or petunias, which can spread out and create a vibrant display.
Next, let’s talk about sunlight. Different plants have varying light requirements. Some thrive in full sun, while others prefer partial shade. If your coffee can pots will be placed in a sunny spot, opt for sun-loving plants like zinnias or marigolds. However, if they’ll be in a shadier area, consider ferns or begonias, which can flourish in lower light conditions. It's like finding the right balance in a relationship—too much or too little can lead to problems!
Water needs are another critical aspect to consider. Overwatering is one of the most common mistakes made by plant enthusiasts. Coffee cans, while charming, can retain moisture if not properly drained. Therefore, it’s essential to select plants that can tolerate drier conditions or to be vigilant about your watering schedule. For example, cacti and aloe vera are perfect for those who may forget to water regularly, while more delicate plants like calendula may require more frequent attention.
To summarize, here are some quick tips on choosing the right plants for your coffee can flower pots:
- Size: Select plants that fit comfortably in your can.
- Sunlight: Match your plant's light needs with the location.
- Water: Be mindful of how much water your plants require.
By considering these factors, you’ll be well on your way to creating a stunning display of flora in your repurposed coffee cans. Remember, the right plants not only enhance the aesthetic appeal of your space but also contribute to a thriving ecosystem in your home. So, roll up your sleeves and get ready to bring some life into those old coffee cans!
Q: Can I use any type of coffee can for planting?
A: While most coffee cans can be used, it's best to choose those made from metal or durable plastic that can withstand moisture.
Q: How do I ensure my plants get enough drainage?
A: Make sure to create drainage holes at the bottom of your coffee can before planting. This will prevent water from accumulating and harming your plants.
Q: What if I want to change the plants seasonally?
A: You can easily switch out plants based on the season. Just make sure to choose varieties that will thrive in your local climate during that time.
Q: Are there any plants that are particularly easy to care for?
A: Yes! Succulents and herbs like basil and mint are great options for beginners since they require minimal maintenance.

Best Plants for Small Pots
When it comes to choosing the , you want to ensure that your selections not only fit the size of your coffee can flower pots but also thrive in their cozy confines. Small pots can be a bit tricky, but with the right plants, they can burst with life and color. One of the top contenders for small pots is succulents. These hardy little guys come in a variety of shapes, sizes, and colors, making them perfect for adding a touch of personality to your space. They require minimal watering, which is a huge plus if you’re not the most attentive gardener. Just remember, they love sunshine, so place them in a bright spot!
Another fantastic option is herbs. Not only do they add a splash of green to your kitchen or patio, but they also serve a practical purpose. Imagine snipping fresh basil or rosemary for your culinary creations right from your coffee can planter! Herbs like chives, mint, and parsley are particularly well-suited for small pots. They thrive in well-drained soil and don't mind being a bit root-bound, making them ideal for your repurposed coffee cans.
For those who enjoy a bit of color, consider flowering plants such as pansies or marigolds. These cheerful blooms can brighten up any nook in your home or garden. They don’t need much space to grow, but they do appreciate regular watering and a bit of fertilizer to keep them vibrant. Just be mindful of their light requirements—most flowering plants love sunshine, so ensure your pots are placed in a sunny spot.
Additionally, air plants are an exciting choice for small pots. They don’t require soil, which means you can get creative with how you display them! You can simply place them on top of gravel or decorative stones within your coffee can, or even hang them from the rim. Air plants are incredibly low-maintenance and only need a light misting of water once a week, making them a perfect fit for busy lifestyles.
In summary, whether you opt for succulents, herbs, flowering plants, or air plants, your coffee can flower pots can truly become a garden of delight. Just remember to consider the light and water needs of your chosen plants to ensure they flourish in their new home. Happy planting!
- Can I use any type of coffee can for planting? Yes, as long as the can is clean and has drainage holes, it can be used for planting.
- How often should I water my plants in coffee cans? It depends on the type of plant, but generally, check the soil moisture and water when it feels dry to the touch.
- What if my coffee can starts to rust? If you notice rust, consider lining the can with a plastic liner to protect the plants and prevent further rusting.
- Can I grow vegetables in coffee cans? Yes, small vegetables like radishes or baby greens can thrive in coffee cans, just ensure they have enough depth and drainage.

Seasonal Planting Tips
When it comes to creating a stunning display with your coffee can flower pots, understanding the seasons is essential. Each season brings a unique set of opportunities and challenges for your plants. For instance, in the spring, you can embrace the vibrant colors of blooming flowers. Think about planting petunias, marigolds, or even pansies. These cheerful blooms will not only brighten your space but also thrive in the mild temperatures and longer daylight hours. Just imagine walking past your window and being greeted by a burst of color every morning!
As we transition into summer, the heat can be a double-edged sword. While many plants love the sunshine, it’s crucial to choose varieties that can withstand the heat without wilting. Consider planting succulents or herbs like basil and rosemary. These not only add greenery but also provide culinary delights for your kitchen. Remember, it's important to keep an eye on the moisture levels in your coffee can pots during the scorching months. A quick tip? Water your plants in the early morning or late evening to minimize evaporation.
As the leaves begin to turn and the air cools in autumn, don’t pack away your coffee cans just yet! This season is perfect for planting chrysanthemums or ornamental kale. These hardy plants can handle the cooler temperatures and will add a lovely touch to your fall decor. Plus, they can often last well into the winter months, providing you with color when many other plants have faded. Just be sure to check the weather and protect your pots from early frosts!
Finally, in the winter, while most outdoor gardening comes to a halt, you can still enjoy the beauty of your coffee can pots indoors. Consider planting indoor-friendly varieties such as poinsettias or Christmas cacti. These festive plants can bring a touch of cheer to your home during the holiday season. If you’re feeling adventurous, try creating a miniature indoor garden with a mix of seasonal plants, allowing you to enjoy a slice of nature even when it’s chilly outside.
To sum it up, seasonal planting is all about timing and choosing the right plants for your coffee can pots. By understanding the needs of your plants and the conditions they thrive in, you can create a stunning array of blooms and greenery that will keep your space lively throughout the year. So, grab those old coffee cans, get planting, and enjoy the beauty of nature right at home!
Q1: Can I use any type of coffee can for planting?
A1: While most coffee cans can be used, it's best to choose those made of metal or durable plastic. Ensure they are clean and free from any harmful residues.
Q2: How often should I water my coffee can flower pots?
A2: Watering frequency depends on the plant type and the season. Generally, check the soil moisture; if it's dry an inch below the surface, it's time to water.
Q3: What should I do if my plants are not thriving?
A3: Check for proper drainage, sunlight exposure, and watering habits. Adjust these factors as necessary to create an optimal environment for your plants.
Q4: Can I use coffee grounds in my flower pots?
A4: Yes! Coffee grounds can be a great addition to your potting mix. They provide nutrients and improve soil structure, but use them in moderation.

Maintenance and Care
Keeping your transformed coffee can flower pots healthy and vibrant requires some attention and care. Just like any other plant, your coffee can arrangements need the right balance of water, nutrients, and light to thrive. One of the first things to consider is watering. Overwatering is a common mistake that can lead to root rot, while underwatering can stress your plants. The key is to find that sweet spot—generally, you should check the soil moisture by sticking your finger about an inch into the soil. If it feels dry, it’s time to water. Remember, different plants have different needs, so adjust your watering schedule accordingly!
Next up is fertilizing. Plants in smaller pots, like your coffee can creations, can deplete nutrients faster than those in larger containers. Using a balanced, water-soluble fertilizer every 4-6 weeks during the growing season will help keep your plants happy and healthy. Just be careful not to overdo it; too much fertilizer can do more harm than good. Always dilute your fertilizer to half the recommended strength, especially for delicate plants.
Don't forget about light! Most plants prefer bright, indirect sunlight, so try to place your coffee can pots near a window where they can soak up some rays without getting scorched. If you notice your plants stretching or leaning towards the light, it might be time to rotate them or move them to a brighter spot.
Additionally, regular repotting is essential as your plants grow. If you notice roots coming out of the drainage holes or the plant seems to be outgrowing its space, it’s time to repot. Carefully remove the plant from the coffee can, gently tease the roots, and transfer it to a larger pot with fresh soil. This will give your plants the room they need to grow and flourish.
To sum it all up, here’s a quick reference table for your maintenance routine:
| Task | Frequency | Tips |
|---|---|---|
| Watering | Check weekly | Water when the top inch of soil is dry |
| Fertilizing | Every 4-6 weeks | Use diluted fertilizer |
| Light | Daily | Bright, indirect sunlight is best |
| Repotting | As needed | When roots outgrow the pot |
Taking care of your coffee can flower pots doesn’t have to be a chore. With a little love and attention, you’ll be rewarded with stunning greenery that not only beautifies your space but also gives a second life to those old coffee cans!
Q: Can I use any type of coffee can for planting?
A: Yes, as long as the can is clean and has proper drainage, feel free to use any coffee can you like!
Q: What should I do if my plants are wilting?
A: Check the soil moisture. If it’s too dry, water them. If it’s soggy, they might be overwatered.
Q: How do I prevent pests in my coffee can pots?
A: Regularly inspect your plants and keep them clean. You can use natural pest deterrents like neem oil if needed.

Watering Guidelines
When it comes to watering your coffee can flower pots, striking the right balance is essential. Overwatering can lead to root rot, while underwatering can leave your plants parched and struggling to thrive. So, how do you find that sweet spot? First, consider the type of plants you’ve chosen. Different plants have different water requirements. For example, succulents prefer drier conditions, while herbs like basil thrive in moist soil.
A good rule of thumb is to check the soil moisture before watering. You can do this by sticking your finger about an inch into the soil. If it feels dry, it’s time to water; if it’s still moist, hold off for a day or two. This simple method can save you from the common pitfall of overwatering. Remember, the size of your coffee can also plays a role in how quickly the soil dries out. Smaller cans tend to dry out faster than larger ones, so keep an eye on them!
For effective watering, use a watering can with a spout to control the flow of water. Aim to water at the base of the plants rather than from above; this helps prevent fungal diseases that can occur when leaves stay wet. Additionally, consider watering in the early morning or late afternoon when temperatures are cooler. This practice minimizes evaporation and allows plants to absorb moisture more effectively.
Here’s a quick overview of watering frequency for common plants in coffee can pots:
| Plant Type | Watering Frequency | Notes |
|---|---|---|
| Succulents | Every 2-3 weeks | Allow soil to dry completely between waterings. |
| Herbs (e.g., Basil, Mint) | Once a week | Keep soil consistently moist, but not soggy. |
| Flowering Plants | Every 5-7 days | Check soil moisture regularly; adjust based on weather. |
As seasons change, so will your watering needs. During hot summer months, your plants may require more frequent watering due to increased evaporation. Conversely, in cooler months, you might find that your coffee can pots need less water. Always observe your plants; they will often give you clues about their needs. Yellowing leaves can indicate overwatering, while wilting leaves may suggest they’re thirsty.
In summary, the key to successful watering lies in understanding your plants and their environment. With a little observation and care, your coffee can flower pots will not only survive but thrive, bringing a splash of life and color to your home or garden!
- How often should I water my coffee can flower pots? It depends on the type of plants you have. Generally, check the soil moisture and water when it feels dry.
- Can I use regular tap water for my plants? Yes, but if your tap water is heavily chlorinated, consider letting it sit out for a day to allow the chlorine to dissipate.
- What should I do if I accidentally overwater? If you notice water pooling at the bottom, consider repotting your plant in fresh, dry soil and ensure proper drainage.

Fertilizing Your Plants
When it comes to keeping your coffee can flower pots thriving, fertilization plays a crucial role. Just like humans need a balanced diet to stay healthy, your plants require essential nutrients to grow strong and vibrant. The good news is that fertilizing doesn't have to be complicated or expensive. In fact, it can be a fun and rewarding part of your gardening routine!
First and foremost, it's important to choose the right type of fertilizer. There are two main categories: organic and synthetic. Organic fertilizers, such as compost or well-rotted manure, provide a slow release of nutrients and improve soil health over time. On the other hand, synthetic fertilizers can offer a quick nutrient boost, but they often come with a risk of nutrient burn if not used correctly. For your coffee can pots, a balanced, water-soluble fertilizer is often the best choice, allowing you to easily control the amount you apply.
Now, when should you fertilize? Timing is everything! Generally, the growing season—spring and summer—is the best time to fertilize your plants, as they are actively growing and can utilize the nutrients effectively. A good rule of thumb is to fertilize every 4 to 6 weeks during this period. However, if you're using a slow-release fertilizer, you may only need to apply it once or twice a season. Just be sure to follow the instructions on the packaging for the best results.
To apply the fertilizer, you can either mix it into the soil when you first plant or dissolve it in water and use it as a liquid feed. If you're going the liquid route, make sure to water your plants thoroughly before applying the fertilizer solution. This helps prevent any potential root burn and ensures that the nutrients are absorbed effectively. Remember, less is often more, so start with a smaller amount and gradually increase it if you notice your plants looking a bit lackluster.
Lastly, don’t forget about the importance of monitoring your plants. Keep an eye on their growth and overall health. If they start to look yellow or droopy, it may be a sign that they need more nutrients. Conversely, if the leaves are turning brown at the edges or curling, you might be over-fertilizing. It's all about finding that perfect balance!
In summary, fertilizing your coffee can flower pots can lead to thriving plants that bring joy and beauty to your space. By selecting the right fertilizer, timing your applications, and observing your plants’ needs, you can create a lush, vibrant garden right from your kitchen. Happy gardening!
- How often should I fertilize my coffee can flower pots? - Generally, every 4 to 6 weeks during the growing season.
- Can I use leftover coffee grounds as fertilizer? - Yes, coffee grounds can be a great organic fertilizer, but use them in moderation.
- What signs indicate my plants need more fertilizer? - Yellowing leaves or stunted growth may suggest a nutrient deficiency.
- Is it possible to over-fertilize my plants? - Absolutely, over-fertilizing can lead to root burn and other health issues for your plants.
Frequently Asked Questions
-
Can I use any type of coffee can for my flower pots?
Absolutely! You can repurpose any coffee can, but consider the size and material. Metal cans are sturdy and great for outdoor use, while plastic cans might be lighter and easier to handle indoors. Just ensure they are clean and free from any residue.
-
How do I properly prepare my coffee can before planting?
Preparation is key! Start by cleaning the can thoroughly to remove any leftover coffee residue and odors. Next, peel off any labels. You can use warm soapy water or a bit of rubbing alcohol for stubborn adhesives. Finally, don't forget to create drainage holes at the bottom to prevent water from accumulating and harming your plants.
-
What are the best plants to grow in coffee can flower pots?
Great question! Small plants like succulents, herbs, or even small flowering plants are perfect for coffee can pots. They thrive in limited space and add a splash of greenery to your home. Just make sure to choose plants that match your light and watering conditions!
-
How often should I water my plants in coffee can pots?
Watering frequency depends on the type of plants you have and the environment. A good rule of thumb is to check the soil moisture. If the top inch of soil feels dry, it's time to water. Be careful not to overwater; drainage holes will help avoid waterlogged soil.
-
Can I decorate my coffee can flower pots?
Definitely! Decorating your flower pots is part of the fun. You can paint them, use decoupage techniques, or even wrap them in twine or fabric. Let your creativity shine and make your pots as unique as your plants!
-
Do I need to fertilize my plants in coffee can pots?
Yes, fertilizing is important! Use a balanced, water-soluble fertilizer every few weeks during the growing season to give your plants the nutrients they need. Just be sure to follow the instructions on the fertilizer package to avoid over-fertilizing.
-
What should I do if my plants outgrow the coffee can?
If you notice your plants becoming root-bound or outgrowing their space, it’s time to repot them. Carefully remove the plant from the coffee can, loosen the roots, and transfer it to a larger pot with fresh soil. This will give your plants more room to grow!