How to Create Stunning Hand-Embroidered Quilts
Creating stunning hand-embroidered quilts is not just a craft; it's an artistic expression that combines creativity, patience, and skill. Imagine wrapping yourself in a quilt that tells a story, each stitch a whisper of the love and effort poured into it. Whether you’re a seasoned quilter or just starting out, this guide will walk you through the essentials of choosing materials, mastering techniques, and designing your masterpiece. Let's dive into the world of quilting, where every piece is a unique creation waiting to be born!
When it comes to hand-embroidered quilts, the materials you select play a pivotal role in the final outcome. Think of your quilt as a canvas; the fabric, threads, and tools are your paintbrushes. You want to ensure they are of the highest quality for durability and aesthetic appeal. Start with fabrics that are soft yet sturdy, such as cotton or linen, which can withstand the test of time and wear. For threads, opt for cotton embroidery floss or silk threads, as they not only add vibrancy but also give your stitches a beautiful sheen.
Additionally, don’t underestimate the importance of your tools. A good pair of embroidery scissors, a reliable needle, and a sturdy embroidery hoop can make a world of difference. Investing in quality materials will not only enhance your quilting experience but also result in a quilt that you can cherish for years to come.
Before you jump into complex designs, it’s essential to grasp some basic embroidery techniques. Think of these as the building blocks of your quilting journey. Familiarizing yourself with essential stitches will give you the confidence to explore more intricate patterns. Start with the backstitch, which is perfect for outlines, and the running stitch, which can be used for both outlines and filling. These stitches form the foundation of your quilting skills, allowing you to create beautiful pieces with ease.
Different stitch types can dramatically alter the appearance of your quilt. Here, we explore some popular stitches that can elevate your work:
- Satin Stitch: Ideal for filling shapes and creating a smooth finish.
- Chain Stitch: Great for outlines and decorative borders.
- French Knots: Perfect for adding texture and dimension.
Satin stitch is a versatile technique that can add a polished look to your embroidery. To master this stitch, start by outlining the shape you want to fill. Then, work your stitches closely together to cover the area completely. This technique is perfect for flowers or any design where you want a smooth, filled appearance. Remember, practice makes perfect!
The chain stitch is another fantastic technique that creates beautiful outlines and decorative borders. To achieve consistent and neat chain stitches, start with a small loop and pull the thread through, creating a chain-like effect. This stitch can be used to outline shapes or even create intricate designs, adding elegance to your quilt.
One of the most exciting aspects of hand embroidery is the ability to combine various techniques. Layering stitches can create depth and visual interest in your quilt. For example, you might use a satin stitch for the petals of a flower and a chain stitch for the stem. This blend of techniques not only enhances your design but also showcases your creativity. Don’t be afraid to experiment!
A well-thought-out design is crucial for a stunning quilt. Start by planning your quilt layout, considering how different elements will work together. Think about the color schemes and themes that resonate with you. Whether you prefer vibrant colors or a more muted palette, the choices you make will set the mood for your quilt. Use color theory to guide your selections, ensuring that the colors complement each other harmoniously.
Color palettes can dramatically influence the overall feel of your quilt. When selecting colors, consider how they interact with one another. A good rule of thumb is to choose a base color and build around it with complementary shades. This approach will help you create a cohesive look that draws the eye and feels balanced. Remember, colors can evoke emotions, so choose wisely!
Incorporating patterns adds an exciting layer of interest to your quilt. Whether through fabric choices or embroidery designs, patterns can create a cohesive look and enhance the overall design. Think about using floral fabrics paired with geometric embroidery for a modern twist. The key is to maintain a balance between different elements to avoid overwhelming the viewer.
Finally, the finishing touches can elevate your quilt from good to stunning. Techniques for binding your quilt, labeling it, and caring for it are essential for ensuring it lasts through the years. A well-bound quilt not only looks professional but also protects the edges from fraying. Don’t forget to label your quilt with your name and the date; it adds a personal touch that makes your work even more special!
Q: How long does it take to create a hand-embroidered quilt?
A: The time it takes to create a quilt varies based on complexity and size, but expect several weeks to months for a detailed piece.
Q: What is the best fabric for hand embroidery?
A: Cotton is highly recommended for its durability and ease of use, but linen and silk can also be great choices for specific designs.
Q: Can I wash my hand-embroidered quilt?
A: Yes, but it's essential to wash it gently by hand or on a delicate cycle and avoid harsh detergents to preserve the embroidery.
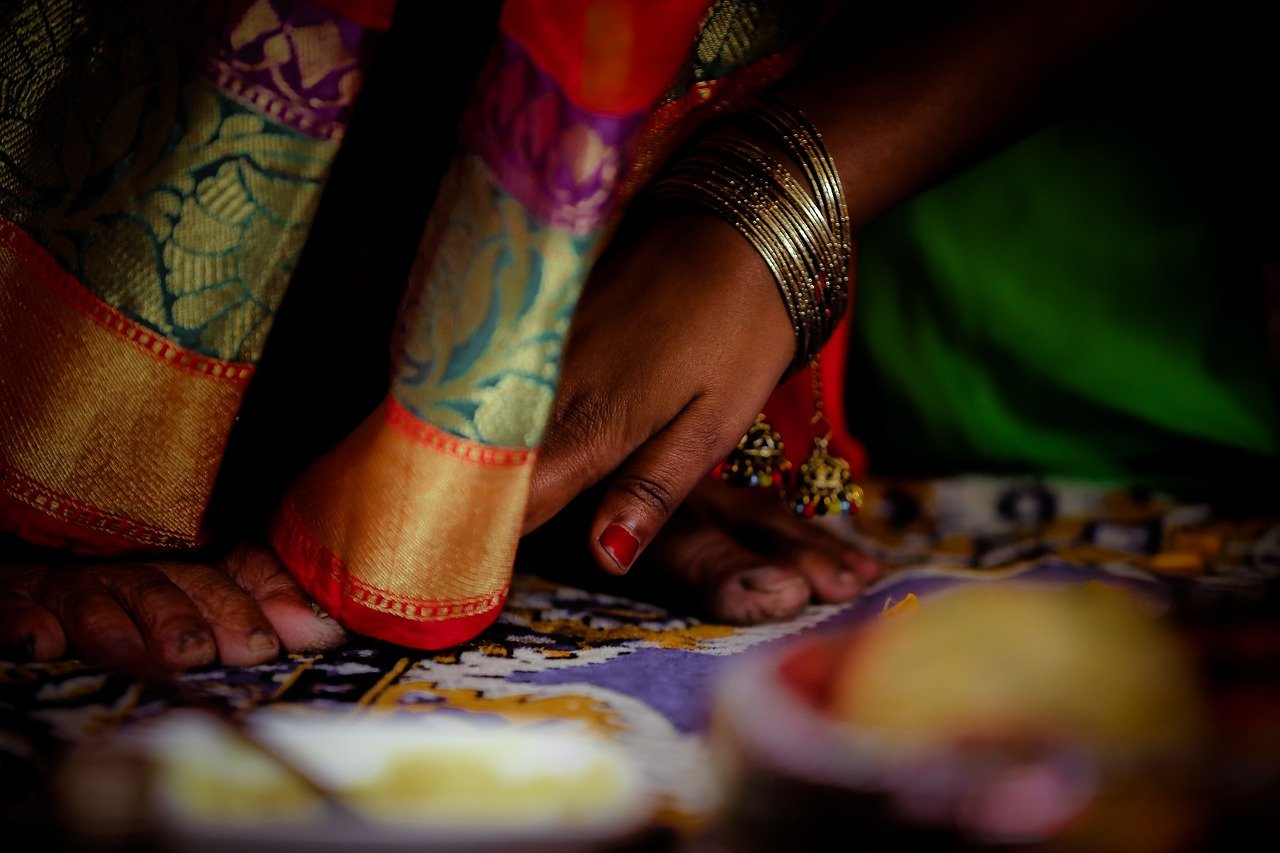
Choosing the Right Materials
When it comes to creating stunning hand-embroidered quilts, the journey begins with the right materials. Think of it like cooking; if you don't use fresh ingredients, the dish won't taste as good. The same principle applies to quilting. Selecting high-quality fabrics, threads, and tools is essential not just for durability but also for the overall aesthetic appeal of your quilt. Imagine wrapping yourself in a quilt that feels luxurious and looks exquisite—this is the magic that the right materials can bring!
First, let’s talk about fabrics. The fabric you choose sets the foundation for your quilt. Cotton is a popular choice due to its softness, durability, and ease of handling. However, don’t shy away from exploring other materials like linen or silk, which can add a unique touch to your project. For example, a quilt made from a blend of cotton and silk can have a lovely sheen and drape beautifully. When selecting fabric, consider the following:
- Weight: Heavier fabrics may be more durable but can also be harder to work with, while lighter fabrics are easier to sew but may not hold up as well over time.
- Colorfastness: Make sure the fabric won’t bleed or fade after washing. It’s always a bummer to invest time into a quilt only to have the colors run!
- Texture: Different textures can create intriguing visual effects. A mix of smooth and textured fabrics can enhance the tactile experience of your quilt.
Next up are threads. The type of thread you use can significantly impact the final look of your embroidery. Opt for high-quality cotton threads for a classic finish. If you’re feeling adventurous, try using variegated threads, which change color as you stitch, adding a dynamic element to your work. Keep in mind that thread thickness can also vary, so choose a weight that complements your fabric. Here’s a quick comparison:
| Thread Type | Best For | Characteristics |
|---|---|---|
| Cotton | General embroidery | Soft, durable, and colorfast |
| Silk | Luxury quilts | Shiny, smooth, and lightweight |
| Polyester | Durable projects | Strong, water-resistant, and less prone to fading |
Lastly, let’s not forget about tools. Investing in quality tools can make a world of difference in your quilting experience. A good pair of embroidery scissors, for instance, will allow you to make precise cuts, while a sturdy needle is essential for ensuring smooth stitching. Don’t overlook the importance of a reliable hoop, which helps keep your fabric taut and prevents puckering. Remember, the right tools can make the process enjoyable and help you achieve professional-looking results.
In summary, choosing the right materials for your hand-embroidered quilt is crucial. By carefully selecting fabrics, threads, and tools, you set the stage for a beautiful and lasting creation. So, take your time in the material selection process—after all, the journey of quilting is just as rewarding as the final product!
Basic Embroidery Techniques
When diving into the world of hand-embroidered quilts, it's essential to grasp the that will form the foundation of your craft. Think of these techniques as the building blocks of your quilting journey, enabling you to express your creativity and bring your designs to life. Whether you're a seasoned crafter or just starting out, mastering these stitches will elevate your quilting game and help you create stunning pieces that stand out.
One of the first things to consider is the variety of stitches available. Each stitch serves a unique purpose and can dramatically change the look and feel of your quilt. For example, the satin stitch is perfect for filling shapes and giving your embroidery a polished appearance, while the chain stitch creates lovely outlines and decorative borders that can frame your designs beautifully. And let's not forget the French knot, which adds a delightful texture that can make your quilt pop with interest.
To help you get started, here are a few key stitches you should familiarize yourself with:
- Satin Stitch: Ideal for filling in shapes, this stitch provides a smooth, shiny finish that can make elements of your quilt stand out.
- Chain Stitch: This versatile stitch can be used for outlining and adding decorative borders, giving your quilt a lovely, textured look.
- French Knot: Perfect for adding dimension, these little knots can be used to create flowers, berries, or any design element that needs a touch of flair.
Now, let’s delve deeper into mastering these stitches. The satin stitch requires a bit of practice to achieve that flawless finish. Start by outlining the shape you want to fill, then work your needle back and forth across the shape, making sure to keep your stitches even and close together. This technique will give your quilt a rich, filled appearance that looks professional.
For the chain stitch, begin by inserting your needle into the fabric and pulling it through to create a loop. Then, insert your needle back into the fabric at the base of the loop and pull it through to create the chain. With a bit of practice, you’ll find that this stitch can create beautiful, flowing lines that add an elegant touch to your quilt.
Finally, let’s talk about the French knot. To create a French knot, wrap the thread around your needle a few times (usually three or four) and then insert the needle back into the fabric close to where it came out. Pull the thread tight as you push the needle through, and voila! You’ve created a lovely textured knot that can be used to embellish your designs.
As you become more comfortable with these basic stitches, don’t hesitate to experiment by combining different techniques. Layering stitches can create intricate designs and add depth to your quilt, making it truly unique. For example, you might use a satin stitch for filling large areas and then add chain stitches along the edges for a decorative border. The possibilities are endless!
In summary, learning these basic embroidery techniques is crucial for anyone looking to create stunning hand-embroidered quilts. With practice and a bit of creativity, you’ll be well on your way to crafting beautiful pieces that reflect your personal style. So grab your materials, thread your needle, and let your imagination run wild!
Q: What materials do I need to start hand embroidery?
A: To begin, you'll need high-quality fabric, embroidery threads, needles, and a hoop to hold your fabric taut. Optional tools include scissors and marking pens for outlining your designs.
Q: How long does it take to learn basic embroidery techniques?
A: The time varies by individual, but with consistent practice, you can expect to grasp the basics within a few weeks. Remember, patience is key!
Q: Can I use my sewing machine for embroidery?
A: While sewing machines can be used for embroidery, hand embroidery allows for more intricate designs and personal touches that are hard to replicate with a machine.
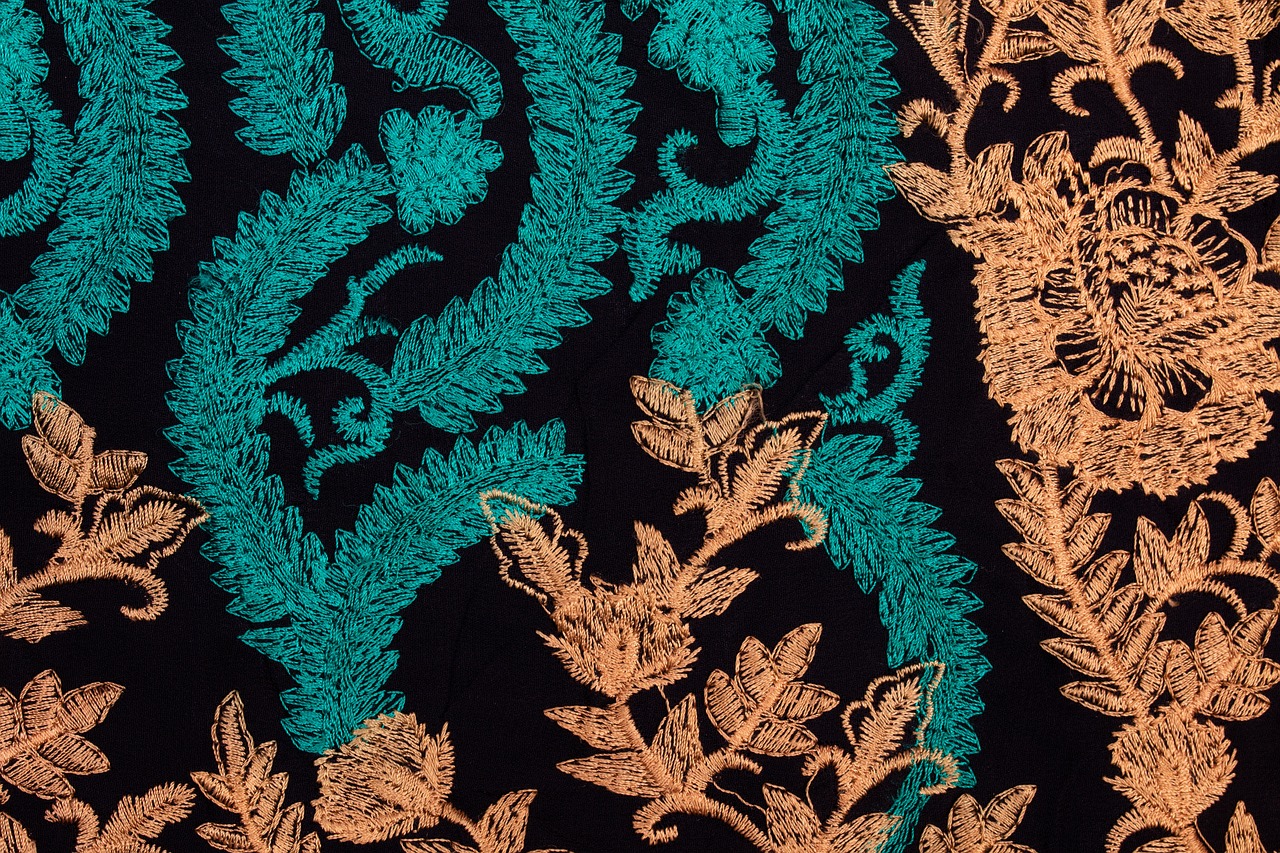
Popular Stitch Types
When it comes to hand-embroidered quilts, the choice of stitch can truly make or break your design. Different stitches not only serve various functional purposes but also add a unique flair to your quilt. Imagine each stitch as a brushstroke on a canvas; just as an artist selects colors and techniques to evoke emotions, you can choose stitches that enhance the beauty of your quilt. Here, we’ll dive into some of the most popular stitch types that can transform your quilting project into a masterpiece.
One of the most commonly used stitches is the satin stitch. This stitch is perfect for filling in shapes and creating a smooth, polished appearance. Think of it as a luxurious layer of paint that adds depth and richness to your design. To master the satin stitch, you start by outlining the shape you want to fill, then work your needle back and forth across the area, ensuring the stitches are close together to create that beautiful, satin-like finish. It’s a technique that, once learned, opens up a world of possibilities for your quilt.
Next on our list is the chain stitch. This stitch is fantastic for creating outlines and decorative borders, giving your quilt a charming, whimsical touch. Imagine it as a playful chain of links that can accentuate the edges of your design. To achieve consistent and neat chain stitches, practice forming small loops with your needle, pulling the thread through to create that signature chain effect. It’s a stitch that not only looks beautiful but also adds a tactile element to your quilt.
Another popular choice is the French knot. This stitch adds a delightful three-dimensional quality to your quilt, almost like tiny beads dotting the fabric. French knots are great for adding texture and can be used to create flowers, stars, or any other decorative elements you desire. To create a French knot, you wrap the thread around your needle several times before pulling it through the fabric. The result is a charming little knot that stands proud, ready to catch the eye of anyone who admires your handiwork.
In addition to these stitches, there are countless others to explore, each with its own unique charm and application. As you gain confidence in your embroidery skills, don’t hesitate to experiment with combining different stitches. This layering technique can lead to stunning results, transforming a simple quilt into a complex tapestry of texture and color. Remember, the beauty of hand embroidery lies in its versatility and the personal touch you bring to each piece.
To summarize, here are some popular stitch types you might want to consider for your hand-embroidered quilts:
- Satin Stitch: Ideal for filling shapes and adding depth.
- Chain Stitch: Great for outlines and decorative borders.
- French Knot: Adds texture and a three-dimensional quality.
As you embark on your quilting journey, keep these stitches in mind. They are not just techniques; they are tools that can help you express your creativity and bring your vision to life. So grab your needle and thread, and let’s get stitching!
Using Satin Stitch
The satin stitch is a versatile and visually striking embroidery technique that can truly elevate your hand-embroidered quilts. It is particularly effective for filling in shapes and adding a luxurious depth to your designs. Imagine the way a polished gemstone catches the light; that's the kind of effect satin stitch can create in your quilting projects. To begin mastering this stitch, start by ensuring you have the right materials. A smooth, tightly woven fabric is ideal, as it allows the satin stitch to glide effortlessly across the surface.
When executing the satin stitch, the key is to keep your stitches consistent in length and spacing. This creates a uniform look that enhances the overall aesthetic of your quilt. Begin by outlining the shape you wish to fill with a simple backstitch or running stitch. Once your outline is complete, you can start the satin stitch. Insert your needle from the back of the fabric to the front at one edge of the shape, then push it back down at the opposite edge, making sure to keep your stitches close together. The closer your stitches are, the more solid and polished the filled area will appear.
For those who are just starting out, it might be helpful to practice on a scrap piece of fabric before diving into your quilt. This will allow you to get a feel for the tension and flow of the stitch without the pressure of ruining your main project. Additionally, consider using different thread types; a shiny, polyester thread can give a more pronounced satin finish, while cotton thread offers a softer look. Experimenting with these options can lead to unique and personalized results that reflect your individual style.
As you become more comfortable with satin stitch, think about how you can incorporate it into various elements of your quilt. For instance, it works beautifully for floral designs, where the petals can be filled with vibrant colors that pop against the background fabric. You can also use satin stitch to create intricate borders or to highlight specific areas of your quilt, adding layers of visual interest.
In conclusion, mastering the satin stitch can open up a world of creative possibilities for your hand-embroidered quilts. Whether you’re looking to fill in shapes, define outlines, or add decorative elements, this stitch is a fantastic tool in your embroidery arsenal. So, grab your needle and thread, and start experimenting with satin stitch to bring your quilting visions to life!
- What is satin stitch used for? Satin stitch is primarily used for filling shapes and adding depth to embroidery designs, making it ideal for quilts.
- Can I use satin stitch on any fabric? While satin stitch can be used on various fabrics, smooth and tightly woven fabrics yield the best results.
- How can I achieve consistent satin stitches? Practice is key! Start with a well-defined outline and maintain even stitch lengths and spacing.
- What types of thread work best for satin stitch? Shiny polyester threads create a pronounced satin finish, while cotton threads offer a softer look.

Mastering Chain Stitch
Chain stitch is a delightful embroidery technique that not only adds a beautiful outline to your designs but also brings a sense of texture and depth to your hand-embroidered quilts. Imagine creating a piece that looks like it was plucked straight from a storybook, with intricate borders that catch the eye and invite closer inspection. To master this stitch, it's important to start with a few key principles that will guide you through the process.
First, you'll want to choose the right type of thread. A medium-weight cotton or embroidery floss works best, as it provides a nice balance between durability and flexibility. This choice will significantly affect the overall look of your chain stitch, so don't rush this step! Next, ensure your fabric is taut in your embroidery hoop; this will prevent any puckering and allow for cleaner stitches. A well-prepared workspace sets the stage for creativity.
Now, let's get into the technique itself. Begin by making a small stitch on your fabric. Then, bring your needle up through the fabric a short distance away, creating a loop with the thread. As you pull the thread through, insert the needle back into the fabric at the point where the first stitch ended. This creates the “chain” effect. The beauty of this stitch lies in its simplicity and versatility. You can adjust the size of your stitches to create different effects, making it a perfect choice for both outlines and decorative elements.
Here’s a quick breakdown of the steps to achieve a perfect chain stitch:
- Step 1: Bring your needle up through the fabric at your starting point.
- Step 2: Make a small stitch, then bring the needle up a short distance away to form a loop.
- Step 3: Insert the needle back into the fabric at the end of the first stitch to secure the loop.
- Step 4: Repeat the process, adjusting the distance between stitches for varied effects.
As you practice, you'll find that consistency is key. Aim for even spacing between your stitches to create a clean, professional look. If you encounter any bumps along the way, don’t get discouraged! Like any skill, mastering chain stitch takes time and practice. Consider keeping a small sampler piece where you can experiment with different sizes and styles of chain stitches. This not only builds your confidence but also allows you to see how this stitch can transform your quilt.
Finally, remember that chain stitch is not just for outlines. You can fill shapes or create intricate patterns by layering your stitches. Don't hesitate to let your creativity run wild! Whether you're outlining a whimsical flower or creating a flowing vine, chain stitch can adapt to your vision. So grab your needle and thread, and let’s stitch something beautiful!
Q1: What type of fabric is best for chain stitch?
A1: Medium-weight cotton fabrics work best for chain stitch as they hold the stitches well and provide a sturdy base for embroidery.
Q2: Can I use chain stitch for larger designs?
A2: Absolutely! Chain stitch can be used for both small and large designs. Just ensure that your stitches remain consistent in size for a polished look.
Q3: How do I fix mistakes in my chain stitch?
A3: If you make a mistake, gently pull out the stitches and re-stitch them. Practice makes perfect, so don't be afraid to undo and redo!
Q4: Are there any special threads for chain stitch?
A4: While standard embroidery floss works well, you can experiment with metallic threads or specialty fibers for a unique effect.

Combining Techniques
When it comes to creating stunning hand-embroidered quilts, one of the most exciting aspects is the ability to combine different techniques to achieve a unique and intricate design. Think of it like cooking; just as a chef blends various ingredients to create a delicious dish, you can layer different embroidery techniques to add depth and complexity to your quilts. By mixing stitches, you can transform a simple pattern into a breathtaking work of art that tells a story.
Let’s dive into how you can effectively combine techniques. First and foremost, consider the overall theme of your quilt. Are you going for a vintage look, or perhaps something modern and abstract? This will guide your choice of stitches. For example, you might start with a base of satin stitch to fill in large areas before adding delicate details with chain or backstitch. This layering not only enhances the visual appeal but also adds texture, making your quilt more engaging.
Another effective strategy is to use contrasting stitches. Imagine a beautiful floral design where the petals are filled with satin stitch, but the leaves are outlined with a sharp chain stitch. This contrast can create a stunning visual effect that draws the eye. Additionally, don't hesitate to explore textural contrasts—mixing flat stitches with raised ones, like French knots, can give your quilt a dynamic feel.
To help you visualize how different techniques can work together, consider this simple table:
| Technique | Best Uses | Combining Suggestions |
|---|---|---|
| Satin Stitch | Filling large areas | Layer with French knots for texture |
| Chain Stitch | Outlining and borders | Combine with backstitch for detail |
| French Knots | Adding dimension | Use with satin stitch for depth |
As you experiment with combining techniques, don’t forget to practice on scrap fabric. This will allow you to see how different stitches interact without the pressure of ruining your main project. It’s all about finding your rhythm and letting your creativity flow. Once you feel confident, you can start layering techniques in your quilt, allowing each stitch to complement the others.
In conclusion, combining various embroidery techniques is not just about skill; it's about creativity and expression. So, feel free to mix and match, and don't be afraid to break the rules. After all, the most stunning quilts often come from a place of experimentation and passion. Happy quilting!
- What are the best stitches for beginners? Start with basic stitches like running stitch, backstitch, and satin stitch to build your confidence.
- How do I choose the right fabric for hand embroidery? Look for fabrics with a tight weave, like cotton or linen, as they hold stitches well and provide a smooth surface.
- Can I wash my hand-embroidered quilt? Yes, but it’s best to hand wash in cold water and lay it flat to dry to preserve the embroidery.
Designing Your Quilt
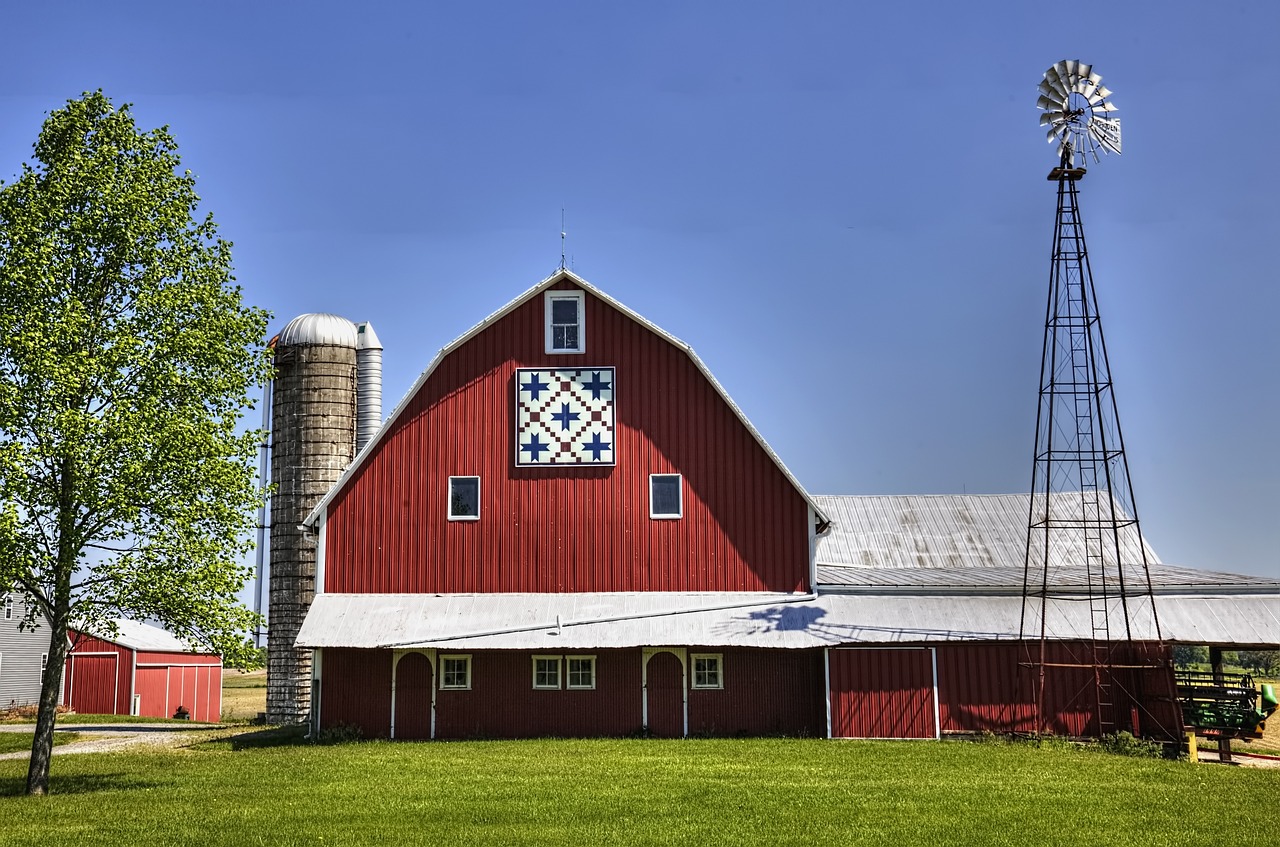
Designing your quilt is like painting a masterpiece; it requires thought, creativity, and a splash of inspiration. When you embark on this artistic journey, you’re not just creating a functional piece of art but also a personal statement that reflects your style and personality. So, where do you begin? First, consider the layout of your quilt. A well-planned layout can make a significant difference in the overall appearance of your quilt. Think about how the different elements will interact with one another. Will you use a traditional grid pattern, or are you feeling adventurous enough to try something asymmetrical? The choice is yours!
Next, let’s dive into color schemes. Colors can evoke emotions and set the mood for your quilt. When selecting a color palette, consider the atmosphere you want to create. Are you aiming for a calming effect with soft pastels, or do you want to make a bold statement with vibrant hues? A good tip is to use the color wheel as your guide. Complementary colors—those that are opposite each other on the wheel—can create striking contrasts, while analogous colors—those next to each other—offer a more harmonious look. Here’s a quick reference table to help you choose:
| Color Type | Color Combination | Effect |
|---|---|---|
| Complementary | Blue & Orange | High contrast, vibrant |
| Analogous | Red, Red-Orange, Orange | Harmonious, warm |
| Monochromatic | Light Blue, Blue, Dark Blue | Subtle, elegant |
Now that you have your colors sorted, let’s talk about patterns. Patterns can add an exciting layer of depth and interest to your quilt. You can incorporate patterns through your fabric choices or your embroidery designs. If you’re using patterned fabrics, consider how they will work together. Will they clash or complement each other? A good rule of thumb is to mix patterns of varying scales; for example, pair a large floral print with a small polka dot. This contrast can create a visually appealing balance.
When it comes to embroidery designs, think about the story you want your quilt to tell. Are you going for a whimsical theme with playful motifs, or are you leaning towards a more classic look with elegant florals? Sketching out your ideas can help you visualize how everything will come together. Don’t be afraid to experiment and let your imagination run wild! Remember, your quilt is a canvas for your creativity, so embrace the process and have fun with it.
Lastly, consider the practical aspects of your design. Think about the size of your quilt and how it will fit into your space. A large quilt can be a stunning focal point in a room, while a smaller one can serve as a cozy accent. Also, keep in mind the intended use of your quilt. Will it be a decorative piece, or do you plan to use it regularly? This can influence your design choices, such as the type of fabrics and the level of durability you need.
Q: How do I choose the right colors for my quilt?
A: Consider the mood you want to create. Use the color wheel to find complementary or analogous colors that work well together.
Q: Can I mix different patterns in my quilt?
A: Absolutely! Just make sure to mix patterns of varying scales to create balance and avoid overwhelming the design.
Q: What should I consider when planning the size of my quilt?
A: Think about where you want to display it and how you'll use it. Larger quilts can serve as focal points, while smaller ones can be used for accents.
Choosing Color Palettes
When it comes to creating stunning hand-embroidered quilts, the color palette you choose can make all the difference. Imagine walking into a room and being greeted by a quilt that radiates warmth and harmony. That’s the power of color! Selecting the right colors not only enhances the aesthetic appeal of your quilt but can also evoke emotions and set the mood for your space. So, how do you go about choosing the perfect color palette? Let's dive in!
First, consider the theme of your quilt. Are you going for a cozy, rustic vibe, or something more modern and vibrant? The theme will guide your color choices. For instance, earthy tones like browns, greens, and soft yellows can create a warm, inviting atmosphere, while bright colors like teal, magenta, and sunshine yellow can inject energy and excitement into your design. Don't be afraid to experiment! Sometimes, unexpected combinations can lead to the most stunning results.
Next, think about the color wheel. This handy tool can help you identify complementary colors that work well together. Complementary colors are those that are opposite each other on the color wheel, like blue and orange. Using these colors can create a striking contrast that draws the eye. Alternatively, you might want to consider analogous colors, which are next to each other on the wheel, such as blue, blue-green, and green. These combinations tend to be more harmonious and can provide a soothing effect.
Another key aspect to consider is the value of the colors you choose. Value refers to how light or dark a color is, and using a mix of values can add depth to your quilt. For example, pairing light pastels with deep jewel tones can create a beautiful balance. You can also play with different shades and tints of the same color to create a more cohesive look. A quilt that uses various shades of blue, from sky to navy, can be incredibly visually appealing.
Don't forget about the fabric patterns you plan to use. The patterns can influence your color choices significantly. If you’re using a fabric with a bold design, you might want to opt for more muted colors to avoid overwhelming the eye. Conversely, if your fabric is simple and understated, a vibrant color palette can breathe life into your quilt. It’s all about finding that perfect balance!
Lastly, always trust your instincts. After all, this quilt is a reflection of your personal style and creativity. If you find yourself drawn to a particular color combination, go for it! Remember, there are no strict rules in art. The beauty of hand-embroidery lies in its uniqueness, and your quilt should be no exception.
In summary, choosing a color palette for your hand-embroidered quilt involves considering your theme, utilizing the color wheel, balancing values, factoring in fabric patterns, and most importantly, trusting your creative instincts. With these tips in mind, you can create a quilt that not only looks stunning but also resonates with your personal style.
- What is the best way to choose a color palette for my quilt?
Start by considering the theme you want to convey, and then use the color wheel to find complementary or analogous colors that resonate with your vision. - Can I use more than three colors in my quilt?
Absolutely! While three colors can create a cohesive look, feel free to experiment with additional colors to add depth and interest to your design. - How do I know if my colors are balanced?
Try to incorporate a mix of light, medium, and dark values of your chosen colors. This will help create a harmonious and visually appealing quilt.
Incorporating Patterns
When it comes to creating a stunning hand-embroidered quilt, the incorporation of patterns can be a game changer. Patterns add depth and interest to your quilt, transforming a simple design into a captivating piece of art. Think of patterns as the spices in a recipe; they enhance the flavor and make everything come together beautifully. So, how do you effectively incorporate patterns into your quilt? Let’s dive into some practical tips and ideas!
First, consider the type of patterns you want to use. There are two main categories: fabric patterns and embroidery patterns. Fabric patterns can range from florals to geometric shapes, while embroidery patterns can include motifs like animals, nature scenes, or abstract designs. The key is to choose patterns that resonate with you and the theme of your quilt. For instance, if you’re going for a vintage look, floral fabrics paired with classic embroidery designs can create a timeless piece.
Next, think about how to combine these patterns. Mixing and matching can create a dynamic visual effect, but it requires a bit of finesse. Here are some strategies to consider:
- Color Coordination: Ensure that the colors in your patterns complement each other. You can use a color wheel to find harmonious combinations that will make your quilt pop.
- Scale Variation: Use patterns of varying scales. For example, pairing a large floral print with smaller polka dots can create an interesting contrast that draws the eye.
- Layering Techniques: Consider layering different patterns using transparent fabrics or varying stitch techniques to add depth.
Another aspect to consider is the placement of your patterns. Think about whether you want them to be the focal point of your quilt or to serve as subtle accents. A well-placed pattern can lead the viewer’s eye across the quilt, creating a story or theme as they explore your work. For example, if you’re creating a nature-themed quilt, you might place larger tree motifs in the center and smaller leaf patterns around the edges to create a sense of movement.
Lastly, don’t shy away from experimenting! Quilting is an art form, and like any artist, you should feel free to break the rules. Try out different combinations and see what resonates with you. Sometimes, the most unexpected pairings can lead to the most stunning results. Keep a sketchbook handy to jot down your ideas and visualize how patterns will work together before you start stitching.
In summary, incorporating patterns into your hand-embroidered quilts is all about balance, coordination, and a touch of creativity. By carefully selecting and combining fabric and embroidery patterns, you can create a quilt that is not only beautiful but also tells a story. So, gather your materials, let your imagination run wild, and start stitching your masterpiece!
Q: What types of patterns work best for hand-embroidered quilts?
A: Both fabric patterns (like florals or geometrics) and embroidery patterns (like motifs or abstract designs) can work well. It's about finding a combination that complements your theme.
Q: How can I ensure my patterns coordinate well?
A: Use a color wheel to find harmonious combinations and consider the scale of your patterns. Mixing large and small patterns can create an interesting visual effect.
Q: Is it okay to mix different styles of patterns?
A: Absolutely! Mixing styles can add depth and interest to your quilt. Just make sure they complement each other in terms of color and theme.
Q: How can I practice incorporating patterns before starting my quilt?
A: Keep a sketchbook to experiment with different combinations of patterns and colors. You can also create small sample pieces to test your ideas before committing to a larger quilt.
Finishing Touches
When it comes to hand-embroidered quilts, the are what truly elevate your creation from simply good to absolutely stunning. Imagine putting in all that effort with beautiful stitches and intricate designs, only to overlook the final details! It's like baking a cake and forgetting the frosting—sure, it's still cake, but it could be so much more. In this section, we'll explore essential techniques for binding, labeling, and caring for your quilt, ensuring that your hard work shines through long after you've completed it.
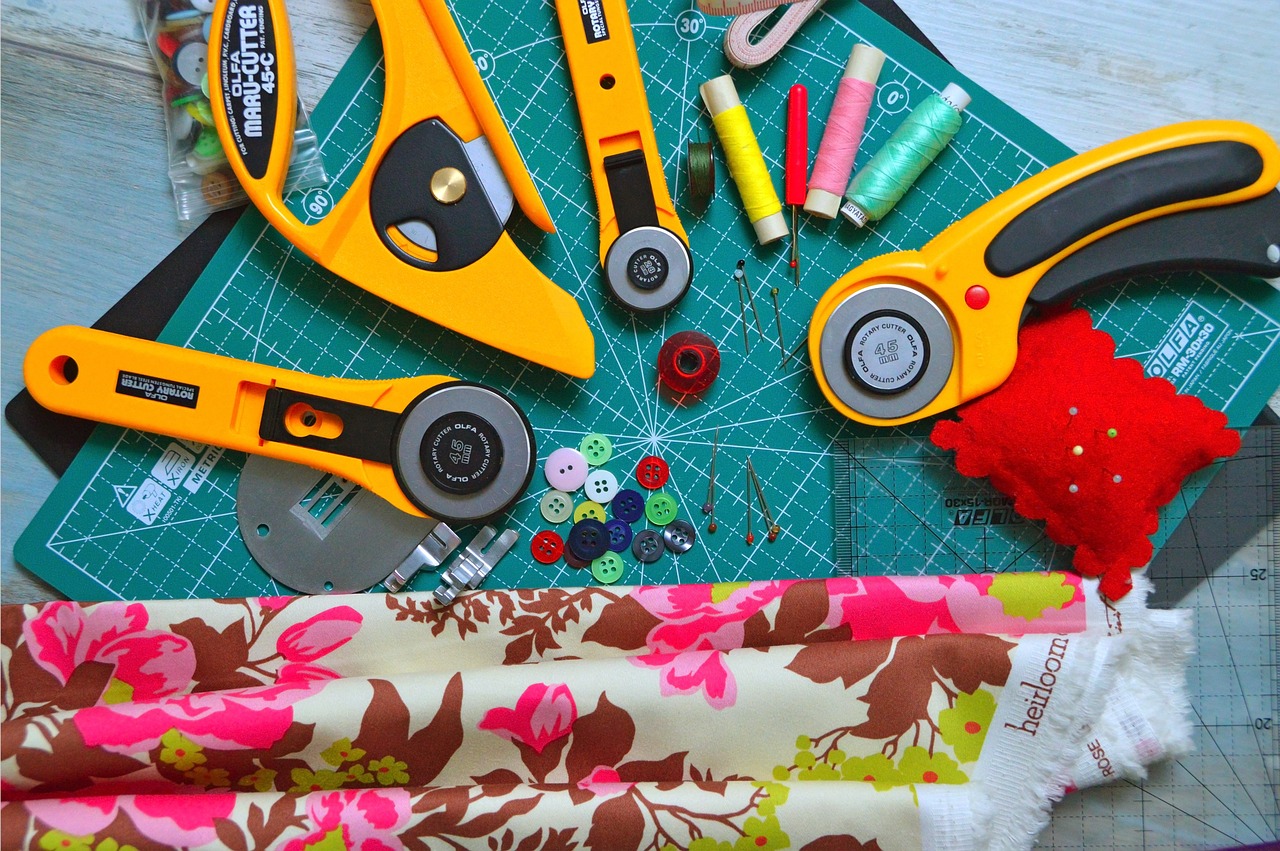
First and foremost, binding is a crucial step that frames your quilt and gives it a polished look. Binding involves sewing a strip of fabric around the edges of your quilt to secure the layers and provide a neat finish. There are various binding methods, but the most popular is the double-fold binding technique. This method not only protects the edges but also adds a splash of color that can complement or contrast with your quilt design. To create a double-fold binding:
- Cut your binding strips to the desired width (typically 2.5 inches).
- Join the strips together to create a continuous length.
- Press the strips in half lengthwise, wrong sides together.
- Attach the binding to the quilt's edge, folding it over to the back and hand-stitching it in place.
Next, let’s talk about labeling your quilt. This is often an overlooked aspect, but it's essential for personalizing your piece and adding a touch of history. A quilt label can include your name, the date of completion, and even a short story or inspiration behind the quilt. This not only adds sentimental value but also serves as a record for future generations. You can create labels using fabric markers, embroidery, or even printed fabric, allowing you to choose a style that matches your quilt's aesthetic.
Finally, caring for your hand-embroidered quilt is paramount to ensure it lasts for years to come. Proper care will keep your quilt looking vibrant and fresh. Here are some important tips:
- Always wash your quilt on a gentle cycle with cold water to prevent fading and damage.
- Use a mild detergent that is free from harsh chemicals.
- Avoid using bleach or fabric softeners, as they can degrade the fabric and threads.
- When drying, opt for air drying instead of a dryer to maintain the integrity of your stitches.
Remember, the are what will make your quilt a cherished piece in your home. By paying attention to binding, labeling, and proper care, you'll create a beautiful, lasting work of art that tells a story and brings warmth to your space.
Here are some common questions regarding the finishing touches for hand-embroidered quilts:
- How do I choose the right fabric for binding? Look for fabrics that complement your quilt's color palette and are durable enough to withstand wear and tear.
- Can I machine sew the binding instead of hand sewing? Yes, you can, but hand sewing often provides a neater finish and is more traditional.
- What materials are best for quilt labels? Fabric labels, either printed or embroidered, are ideal as they can withstand washing and add a personal touch.
- How often should I wash my quilt? It depends on usage, but washing it every few months is a good rule of thumb, especially if it’s used frequently.
Frequently Asked Questions
- What materials do I need for hand-embroidered quilts?
To create stunning hand-embroidered quilts, you'll need high-quality fabrics, embroidery threads, needles, and a sturdy quilting hoop. Cotton fabric is often preferred for its durability and ease of use. Don’t forget to choose threads that not only match your fabric but also add a pop of color!
- What are some basic embroidery techniques I should learn?
As a beginner, focus on mastering a few essential stitches like the satin stitch, chain stitch, and French knots. These stitches form the foundation of many embroidery designs and will give your quilt a professional touch. Practice makes perfect, so don’t hesitate to experiment!
- How can I choose the right color palette for my quilt?
Choosing a color palette is all about creating a mood. Think about the vibe you want your quilt to convey. Use a color wheel to find complementary colors and consider using a mix of shades and tints to add depth. Remember, the right colors can transform your quilt from ordinary to extraordinary!
- Can I combine different embroidery techniques?
Absolutely! Combining various embroidery techniques can enhance your quilt's design and create a unique look. Layering stitches and using different techniques in different areas can add visual interest. Just let your creativity flow and see what beautiful combinations you can come up with!
- What are the best finishing touches for my quilt?
Finishing touches are crucial for elevating your quilt. Consider adding a binding that complements your design, labeling your quilt for a personal touch, and using proper care techniques to ensure its longevity. These small details can make a big difference in the overall presentation of your work!


