
Refurbishing Furniture: DIY Dresser Makeover
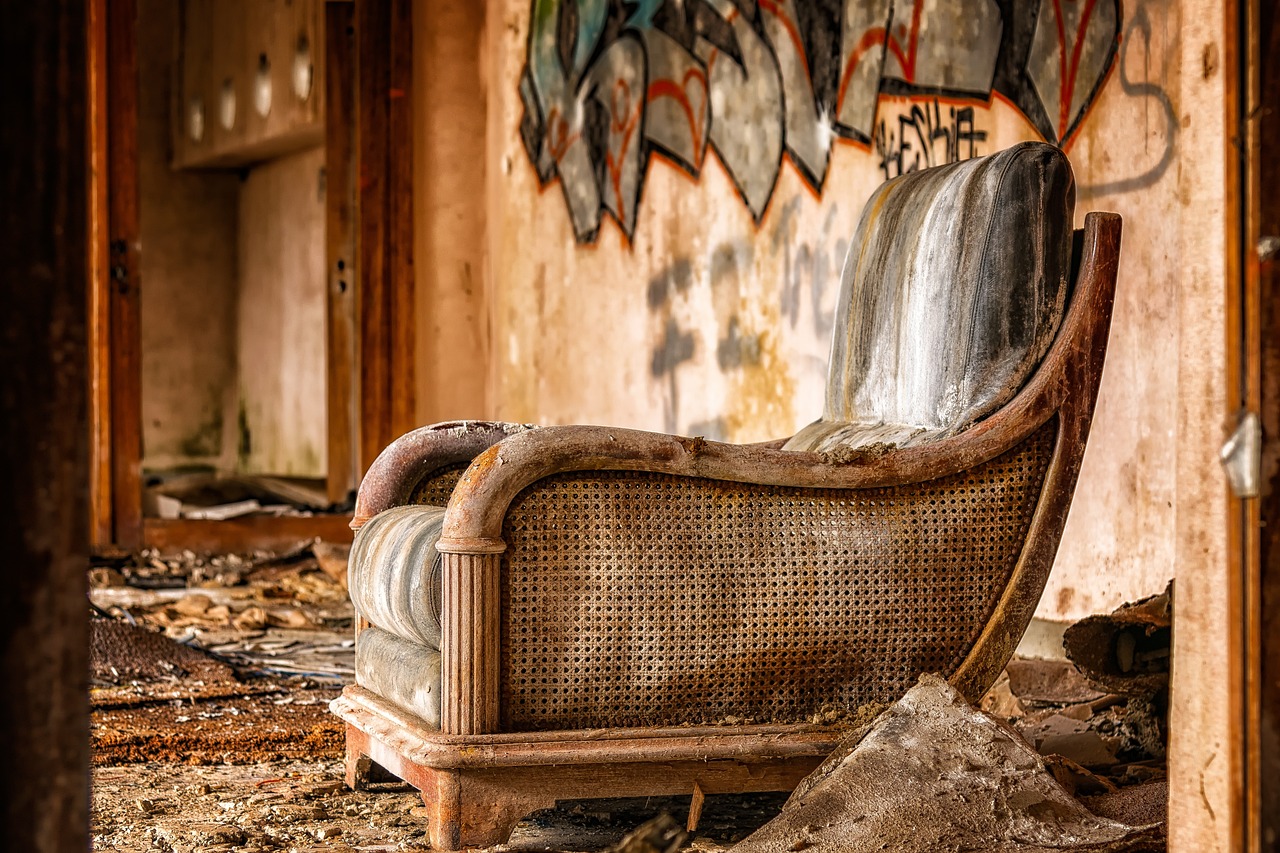
Are you tired of looking at that old, worn-out dresser taking up space in your bedroom? Perhaps it’s time for a change! Refurbishing furniture, especially a dresser, can be a thrilling and rewarding experience. Not only does it breathe new life into a piece that may have lost its charm, but it also allows you to express your creativity and personal style. Imagine transforming a drab dresser into a stunning focal point that complements your home decor perfectly. In this article, we’ll explore the exciting world of DIY dresser makeovers, offering you a treasure trove of tips, techniques, and inspiration to get you started on your very own transformation journey.
Before you dive headfirst into your DIY project, it's essential to choose the right dresser for your makeover. This decision is crucial because the right piece will not only fit your vision but also your space requirements. Consider factors like size; do you have a spacious bedroom or a compact one? Next, think about the style. Are you leaning towards a modern aesthetic, or do you prefer something rustic? Lastly, the material matters too; wooden dressers might require different techniques compared to those made of particle board. So, take a moment to browse your options and envision how each piece could be transformed.
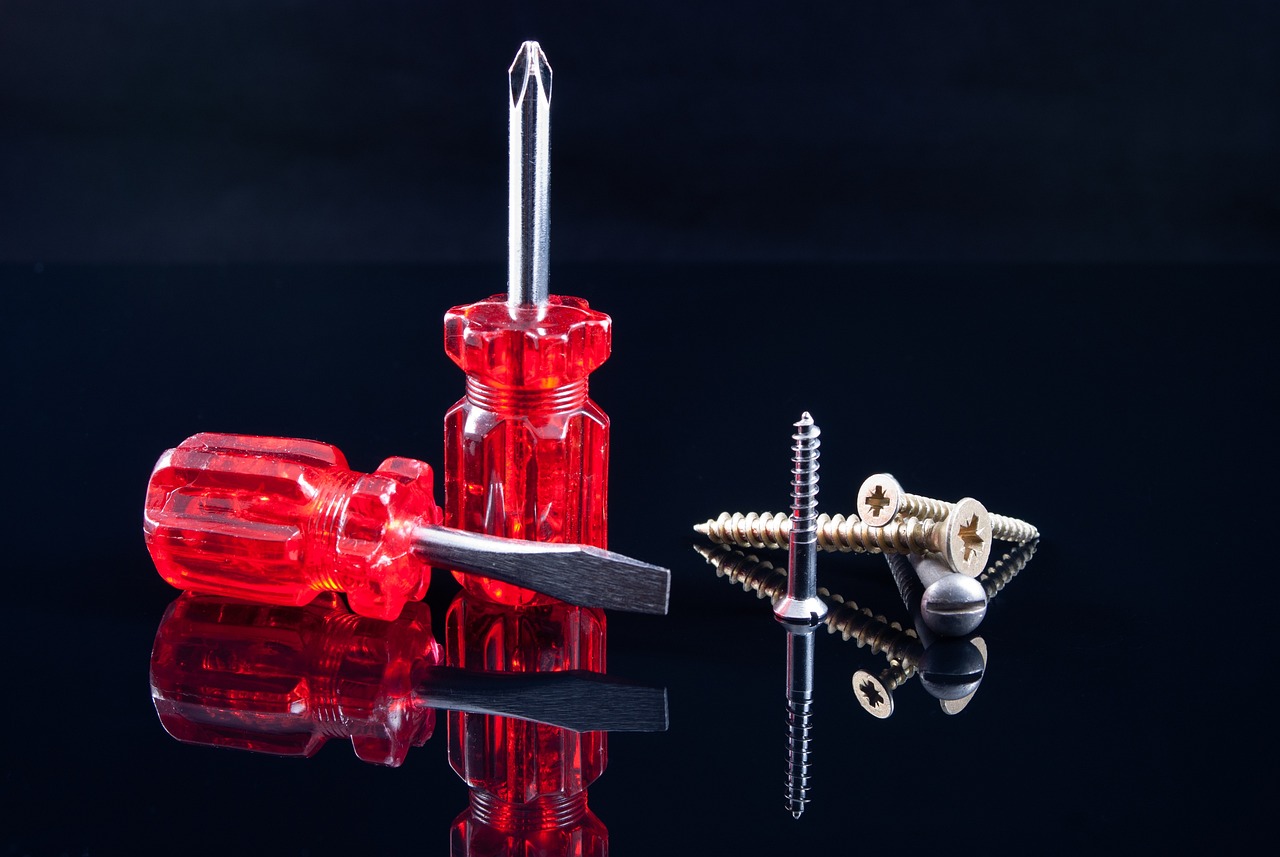
Now that you’ve selected your dresser, it’s time to gather the essential tools and materials for your makeover. Having everything on hand will make your project smoother and more enjoyable. Here’s a comprehensive list of what you’ll need:
- Screwdriver – for removing hardware and disassembling parts
- Sandpaper – to prep the surface for painting or staining
- Paint or Stain – choose your preferred color or finish
- Brushes and Rollers – for applying paint or stain evenly
- Drop Cloths – to protect your workspace
- Sealant – to protect your finished dresser
Gathering these tools before you start will keep your creative juices flowing without interruptions!
A clean and organized workspace is vital for any DIY project. Think of it as your creative sanctuary! To set up an efficient area, clear away any clutter and ensure good lighting. You might want to work in a garage, basement, or even outside if the weather permits. Having a dedicated space not only promotes safety but also sparks creativity. Keep your tools within reach, and consider laying down some drop cloths to catch any spills or drips.
Speaking of safety, it’s paramount to prioritize your well-being during any refurbishing project. Always wear protective gear, such as gloves and goggles, to shield yourself from dust and chemicals. If you’re using power tools, make sure you’re familiar with their operation to avoid accidents. Remember, a safe DIY experience is a happy one!
Before you can start painting or staining, you need to clean and prep your dresser properly. This step is key to achieving that professional finish you desire. Start by removing any hardware, such as knobs and handles, and give the surface a good scrub with soap and water. Once it’s dry, use sandpaper to remove any old finishes or rough spots. A smooth surface is your best friend when it comes to painting!
Ah, painting! It’s where the magic happens. Painting can dramatically change the look of your dresser, and there are various techniques you can explore. Whether you prefer the classic brush method, the speedy spray paint approach, or the unique sponge technique, each has its perks. For a more textured finish, try sponging; for a sleek, modern look, a spray can work wonders. Don’t be afraid to experiment until you find the technique that resonates with your style!
To truly make your dresser stand out, consider adding some decorative touches. Personalizing your dresser can elevate its appeal from ordinary to extraordinary. Think about incorporating unique hardware, stenciling patterns, or even decoupage with your favorite fabrics or papers. Each decorative element adds character and tells a story, making your dresser a true reflection of you.
Don’t underestimate the power of hardware! Selecting the right knobs and handles can completely transform your dresser's appearance. When choosing hardware, consider the style and color scheme of your dresser. Antique brass for a vintage feel, sleek chrome for modern aesthetics, or colorful ceramic for a playful touch? The options are endless!
Finally, the finishing touches can make all the difference in your DIY dresser makeover. After painting, applying a sealant or wax will protect your hard work and give your dresser a polished look. These finishes not only enhance the appearance but also ensure durability, so your beautiful transformation lasts for years to come.
Q: Can I refurbish any type of dresser?
A: Yes, most dressers can be refurbished! Just ensure the structure is sound and worth the effort.
Q: How long does a dresser makeover typically take?
A: Depending on the complexity, it can take anywhere from a few hours to a few days, especially if you’re waiting for paint to dry.
Q: Do I need special skills to refurbish a dresser?
A: Not at all! Basic DIY skills will suffice, and there are plenty of tutorials to guide you.
Q: What if I make a mistake while painting?
A: Don’t worry! Mistakes are part of the process. You can always sand it down and start over.

Choosing the Right Dresser
When it comes to embarking on your DIY dresser makeover, the first step is selecting the right dresser. This decision is not just about picking something that looks good; it's about finding a piece that fits your unique style and the specific needs of your space. Imagine walking into a room where the dresser not only serves its purpose but also acts as a stunning focal point. It's like choosing the perfect outfit that makes you feel confident and stylish!
Start by considering the size of the dresser. You want a piece that complements your room without overwhelming it. Measure the space where you plan to place the dresser, and keep in mind the height, width, and depth. A dresser that is too large can make a room feel cramped, while one that is too small might get lost in the decor. Think of it as finding the right balance in a recipe; too much or too little can spoil the dish!
Next, think about the style. Dressers come in various designs, from modern to vintage, and choosing one that aligns with your aesthetic is crucial. Do you prefer the sleek lines of contemporary furniture, or are you drawn to the intricate details of antique pieces? Take a moment to envision how the dresser will fit into your existing decor. You might even want to consider a style that contrasts with your current theme for a more eclectic look. It's all about expressing your personality!
Material is another important factor to consider. Dressers can be made from a variety of materials, including wood, metal, and even plastic. Each material has its own set of characteristics and can dramatically impact the overall look and feel of the dresser. For instance, a solid wood dresser exudes warmth and durability, while a metal dresser might offer a more industrial vibe. Think about the functionality of the dresser as well; if you need something that can withstand heavy use, opt for sturdier materials.
Lastly, don't forget to consider the condition of the dresser. If you're refurbishing an old piece, inspect it thoroughly for any damage or wear. Look for signs of structural integrity, such as stable drawers and a solid frame. A little wear and tear can add character, but if the dresser is falling apart, it might not be worth the effort. Remember, the goal is to create a beautiful, functional piece that enhances your home decor!
In summary, choosing the right dresser for your makeover involves a thoughtful consideration of size, style, material, and condition. By paying attention to these factors, you can ensure that your refurbished dresser not only meets your practical needs but also becomes a stunning addition to your home. So, are you ready to find that perfect piece? The journey of transformation awaits!
Essential Tools and Materials
Before diving headfirst into your DIY dresser makeover, it’s crucial to gather the that will help you achieve a stunning transformation. Think of this as assembling your own superhero toolkit; each item plays a pivotal role in bringing your creative vision to life. So, what do you need? Let’s break it down!
First and foremost, you’ll need some basic tools that are the backbone of any furniture refurbishing project. A screwdriver (both flathead and Phillips) is indispensable for removing hardware and disassembling parts of your dresser. A hammer can come in handy for those stubborn nails or to gently tap things into place. And don’t forget about a measuring tape; measuring twice and cutting once is a mantra you’ll want to live by!
Next, let’s talk about the tools that will help you transform the surface of your dresser. A sander (either manual or electric) is essential for stripping away old paint or finishes and smoothing out rough surfaces. If you’re planning to paint or stain, having a paintbrush and a roller will be crucial for applying your chosen color evenly. For those who prefer a more modern approach, a spray gun can provide a smooth, professional finish.
In addition to tools, you’ll need a variety of materials. Here’s a quick list to help you keep track:
- Primer - This is essential for preparing the surface and ensuring your paint adheres properly.
- Paint or Stain - Choose a color that resonates with your style; remember, this is your chance to express yourself!
- Varnish or Sealant - Protect your hard work with a good topcoat that adds durability and shine.
- Sandpaper - Various grits will help you achieve that smooth finish.
- Cloth Rags - These are perfect for cleaning up spills and wiping down surfaces.
Lastly, don’t overlook the importance of safety gear. A pair of safety goggles will protect your eyes from dust and debris, while a mask can shield you from harmful fumes when painting or sanding. Wearing gloves not only keeps your hands clean but also protects them from sharp edges and chemicals.
In conclusion, having the right tools and materials at your disposal is key to a successful dresser makeover. Think of your workspace as a battlefield, and your tools as the weapons you’ll wield to conquer the task at hand. With everything prepped and ready, you’ll be well on your way to transforming that tired old dresser into a stunning centerpiece for your home!

Preparing the Workspace
Before diving into your DIY dresser makeover, it’s essential to create a workspace that fosters creativity and efficiency. Think of your workspace as the canvas on which you’ll paint your masterpiece; it needs to be organized, well-lit, and free from distractions. Start by choosing a location that offers ample space to maneuver around your dresser. A garage, basement, or even a spacious room can serve as a great spot, as long as you can control the mess and dust.
Once you’ve selected the perfect area, it’s time to set up your workspace. Clear out any unnecessary items and ensure that your tools and materials are easily accessible. Imagine trying to paint a beautiful landscape while rummaging through a cluttered drawer—frustrating, right? To avoid that, consider using a sturdy table or workbench where you can comfortably place your dresser and work on it without straining your back.
Lighting is another crucial aspect of your workspace. Natural light is ideal, but if that’s not an option, invest in bright, adjustable work lights. Good lighting not only helps you see what you’re doing but also allows you to spot imperfections that need attention. After all, you want your dresser to shine, not to look like it was painted in the dark!
Additionally, think about ventilation. When you’re dealing with paints, stains, and finishes, proper airflow is key to avoiding inhalation of harmful fumes. Open windows or use fans to keep the air circulating. If you have a respirator mask, it’s a great idea to wear one while working with strong chemicals. Safety first, right?
Finally, don’t forget to gather all the tools and materials you’ll need before you start. This includes brushes, rollers, sandpaper, cleaning supplies, and any decorative elements you plan to use. Having everything at your fingertips will make the process smoother and more enjoyable. You wouldn’t want to interrupt your creative flow by searching for a missing paintbrush!
In summary, a well-prepared workspace is the foundation of a successful DIY project. By ensuring you have the right environment, tools, and safety measures in place, you’ll set yourself up for a rewarding and enjoyable dresser transformation. So roll up your sleeves, and let’s get to work!
Safety Precautions
When diving into the exciting world of DIY dresser makeovers, safety should always be your top priority. Just like a superhero dons their cape before saving the day, you need to gear up before tackling your refurbishing project. Imagine wielding a paintbrush like a sword; without the right protection, you might end up with more than just paint on your hands! So, let’s go through some essential safety precautions that will keep you safe and sound while you unleash your creativity.
First off, protective eyewear is a must-have. Dust, paint splatters, and wood shavings can easily find their way into your eyes, causing irritation or injury. A good pair of safety goggles will shield your eyes while you sand, paint, or cut. Additionally, investing in a dust mask is wise, especially if you're working with materials that produce fine particles. Breathing in dust from sanding or fumes from paint can lead to long-term health issues, so don’t skip this step!
Next, let’s talk about gloves. Whether you're dealing with solvents, stains, or just plain old wood, a sturdy pair of gloves will keep your hands safe from harsh chemicals and sharp edges. Choose gloves that are appropriate for the materials you'll be using—latex for light tasks, and heavier-duty gloves for more intense projects. It’s all about finding that balance between protection and dexterity.
Moreover, consider your workspace. A cluttered area can lead to accidents, so ensure that your workspace is organized and free of unnecessary items. If you're using power tools, make sure you have a clear path to move around. You wouldn’t want to trip over a stray paint can while trying to make your dresser look fabulous!
Lastly, always read the labels on your materials. Chemicals in paints and finishes can be hazardous if ingested or inhaled, and many require proper ventilation. Set up your workspace in a well-ventilated area or consider wearing a respirator when working with strong fumes. Think of it as having a secret weapon against harmful vapors!
In summary, taking safety precautions is not just about protecting yourself; it’s about ensuring that your DIY experience is enjoyable and successful. So, gear up, stay organized, and keep those safety tips in mind as you embark on your dresser makeover journey!
Here are some common questions you might have as you prepare for your DIY dresser makeover:
- What type of paint should I use for furniture? - It's best to use furniture paint or chalk paint as they adhere well and provide a durable finish.
- How do I remove old paint or finish from a dresser? - You can use a chemical stripper or sandpaper to carefully remove old finishes.
- Can I paint over stained wood? - Yes, but make sure to clean and prep the surface properly for the best results.
Cleaning and Prepping the Dresser
When it comes to refurbishing your dresser, cleaning and prepping the surface is a crucial step that sets the foundation for a stunning transformation. Imagine trying to paint a canvas that’s covered in dirt and grime; the result would be far from what you envisioned! So, let’s roll up our sleeves and dive into the nitty-gritty of getting your dresser ready for its big makeover.
First things first, you’ll want to gather your cleaning supplies. A simple mixture of warm water and mild soap usually does the trick. Grab a soft cloth or sponge, and start wiping down the entire surface of the dresser. Don’t forget to pay special attention to the corners and crevices where dust and dirt love to hide. Once you’ve given it a good scrub, rinse with clean water and dry it thoroughly. This step is like giving your dresser a refreshing shower before its new outfit!
After cleaning, it’s time to assess the current condition of your dresser. If there are any old finishes, such as paint or varnish, you’ll want to remove them for a smooth application of your new finish. You can use a chemical stripper or sandpaper for this task. If you opt for sanding, start with a coarser grit paper to tackle stubborn areas, then switch to a finer grit for a smooth finish. Remember, the goal here is to create a surface that’s as smooth as a baby’s bottom!
Here’s a quick checklist to ensure you’re not missing any steps:
- Gather cleaning supplies: soap, water, cloths, and possibly a vacuum for dust.
- Remove old hardware to access all surfaces.
- Inspect for damages like scratches or dents—these will need to be repaired before painting.
- Decide if you want to strip the old finish or simply sand it down.
Once your dresser is clean and any old finishes are removed, it’s essential to fill in any cracks or holes. A wood filler can work wonders here. Simply apply it to the damaged areas, smooth it out, and let it dry according to the product instructions. After it’s dried, sand it down so it’s level with the rest of the surface. This step ensures that your dresser not only looks good but also stands the test of time.
Finally, give your dresser one last wipe down with a damp cloth to remove any dust created from sanding. Your dresser is now primed and ready for the exciting part: painting or staining! By taking the time to properly clean and prep your dresser, you’re setting yourself up for success, ensuring that the final result is not just beautiful but also durable. Just like a chef wouldn’t start cooking without prepping their ingredients, you shouldn’t skip these vital steps in your DIY journey!
Painting Techniques
When it comes to transforming your old dresser into a stunning centerpiece, can make all the difference. The right method can breathe new life into your furniture, turning something drab into a statement piece. But with so many options available, how do you choose the best technique for your project? Let’s dive into some popular painting methods that can help you achieve the look you desire.
First up, we have the classic brush technique. This method is ideal for those who enjoy the hands-on approach and want to control every stroke. Using a high-quality brush allows you to apply paint evenly, especially in those tricky corners and crevices. However, it does require some patience and a steady hand. Make sure to use long, smooth strokes to avoid brush marks, and consider using a foam brush for a smoother finish.
If you’re looking for a quicker and more uniform application, the spray technique might be your best bet. Spray painting can cover large areas in a fraction of the time it takes to brush paint. Plus, it creates a sleek, modern finish that’s hard to beat. But beware—spraying requires a well-ventilated area and some practice to avoid drips and uneven patches. To achieve the best results, hold the can about 12 inches from the surface and use a sweeping motion.
Another fun option is the sponge technique. This method is perfect for those who want to add texture and depth to their dresser. By dabbing a sponge into the paint and applying it to the surface, you can create a unique look that mimics natural textures. It’s also a great way to blend colors for an ombre effect. Just remember to choose a sponge that suits your style—whether it's a natural sea sponge for a more organic feel or a synthetic one for a cleaner look.
To help you decide which technique to use, here’s a quick comparison table:
| Technique | Pros | Cons |
|---|---|---|
| Brush | Control over application, great for details | Time-consuming, can leave brush marks |
| Spray | Fast application, smooth finish | Requires ventilation, can be messy |
| Sponge | Adds texture, blends colors easily | May require practice for consistency |
Regardless of the technique you choose, it’s essential to prepare your dresser properly before you start painting. Ensure that the surface is clean, sanded, and primed if necessary. This prep work will help the paint adhere better and result in a more durable finish. After painting, allow adequate drying time between coats, and don't hesitate to apply multiple layers for that professional look.
So, are you ready to unleash your creativity and give your dresser a fabulous makeover? Remember, the painting technique you choose can significantly affect the final result, so take your time to experiment and find what works best for you. Happy painting!
- What type of paint should I use for my dresser? It's best to use furniture paint or chalk paint, as they provide a durable finish and adhere well to wood surfaces.
- Do I need to sand my dresser before painting? Yes, sanding is crucial for removing old finishes and creating a smooth surface for the new paint.
- How long should I wait between coats of paint? Generally, it's advisable to wait at least 2-4 hours between coats, but this can vary based on the paint type and environmental conditions.
- Can I use spray paint on a dresser? Absolutely! Just ensure you’re in a well-ventilated area and follow the manufacturer’s instructions for the best results.
Adding Decorative Touches
When it comes to refurbishing your dresser, the magic often lies in the details. Adding decorative touches can elevate your piece from ordinary to extraordinary, making it a true reflection of your personal style. Think of your dresser as a blank canvas; how will you paint your story? From unique hardware to eye-catching stenciling, the possibilities are endless! Let's dive into some creative ideas that can transform your dresser into a stunning focal point in your home.
One of the easiest and most impactful ways to enhance your dresser is by selecting the right hardware. Knobs and handles are like the jewelry of furniture—small yet significant. They can completely change the vibe of your dresser. For instance, if your dresser has a vintage look, consider opting for ornate brass handles or ceramic knobs with floral patterns. On the other hand, if you prefer a modern aesthetic, sleek metal pulls can offer a clean, minimalist touch. Remember, the hardware should not only complement the color of your dresser but also align with your overall decor theme.
Another fantastic way to personalize your dresser is through stenciling. This technique allows you to add intricate designs without the need for advanced painting skills. You can create patterns that range from simple geometric shapes to elaborate floral motifs. Just imagine a beautiful mandala design gracing the top of your dresser, catching the light and drawing the eye. To get started, choose a stencil that resonates with your style, and use a contrasting color to make it pop. Apply the stencil carefully, ensuring even coverage for a professional finish.
If you're feeling particularly adventurous, you might want to explore decoupage. This technique involves adhering decorative paper or fabric to your dresser, allowing for a unique and customized look. You could use old maps, vintage magazine clippings, or even fabric swatches that match your room's color palette. The process is simple: cut your chosen material into desired shapes, apply a layer of decoupage medium to the surface, place your material, and seal it with another layer of the medium. This not only adds visual interest but also tells a story, making your dresser a conversation starter.
Finally, consider incorporating painted designs directly onto the dresser. This can range from simple stripes or polka dots to more complex murals. A splash of color can breathe new life into an old piece, and it allows for immense creativity. If you're unsure where to start, try sketching your design on paper first or using painter's tape to outline shapes on the dresser. This way, you can visualize how the colors will interact before committing to the brush.
In conclusion, adding decorative touches to your dresser is not just about aesthetics; it’s about making the piece uniquely yours. Whether you choose to enhance it with stylish hardware, intricate stenciling, personalized decoupage, or bold painted designs, each element contributes to the overall charm and character of the dresser. So, gather your materials, unleash your creativity, and watch as your old dresser transforms into a stunning masterpiece that truly reflects your style!
- What type of paint should I use for a dresser makeover?
For best results, use chalk paint or acrylic paint, as they provide good coverage and durability.
- How do I remove old hardware from my dresser?
Use a screwdriver to carefully unscrew the hardware. If it's stuck, a little WD-40 can help loosen it.
- Can I use any type of fabric for decoupage?
Yes, most fabrics work well, but ensure they are thin and flexible for the best results.
Choosing the Right Hardware
When it comes to giving your dresser a stunning makeover, one of the most impactful decisions you'll make is selecting the right hardware. Think of hardware as the jewelry of your furniture; just like a stunning necklace can elevate a simple outfit, the right knobs and handles can transform an ordinary dresser into a statement piece. But how do you choose the best hardware for your project? Let’s dive into some key considerations that will guide you in making the perfect selection!
First, consider the style of your dresser and the overall aesthetic you want to achieve. Are you leaning towards a modern look, or do you prefer something more vintage? The hardware should harmonize with the dresser's design. For instance, sleek metal handles can complement a contemporary dresser, while ornate, antique-style knobs can enhance a vintage piece. It’s essential to envision how the hardware will interact with the dresser's existing features.
Next up, think about scale and proportion. The size of the hardware should be in harmony with the dresser itself. Oversized knobs on a petite dresser can look out of place, while tiny knobs on a large piece may get lost. A good rule of thumb is to choose hardware that is approximately 1/8 to 1/4 of the height of the drawer front. This ensures that the hardware is functional while also being visually appealing.
Color is another crucial factor. The finish of your hardware should either complement or contrast with the dresser’s paint or stain. For example, if you’ve opted for a soft pastel color, consider using brass or gold hardware for a touch of elegance. On the other hand, if you’ve gone with a bold, dark color, white or silver hardware can provide a striking contrast. This is where you can really let your creativity shine!
Here’s a quick tip: mixing and matching different hardware can create a unique, eclectic look. Just ensure that the styles share a common theme or color palette to maintain cohesion. This approach can add character and charm to your dresser, making it truly one-of-a-kind.
Finally, don’t forget about functionality. While aesthetics are important, the hardware must be practical and easy to use. Test out the knobs and handles before making a final decision. They should feel comfortable in your hand and operate smoothly. After all, your dresser is not just a pretty piece; it needs to be functional too!
In summary, choosing the right hardware involves considering style, scale, color, and functionality. By taking the time to select hardware that complements your dresser, you’ll enhance its overall look and feel. Remember, the right hardware can turn a simple dresser into a stunning focal point in your home!
- What type of hardware is best for a modern dresser? Sleek metal handles or minimalist designs often work best for modern styles.
- Can I mix different types of hardware? Yes! Just ensure they share a common theme or color palette for a cohesive look.
- How do I determine the right size for knobs and handles? A good rule of thumb is to choose hardware that is approximately 1/8 to 1/4 of the height of the drawer front.
- Is it necessary to replace all hardware on the dresser? Not at all! You can keep some original pieces if they fit well with your new design.
Finishing Touches
When it comes to refurbishing your dresser, the are what truly bring your masterpiece to life. You might have spent hours painting, sanding, and decorating, but without those final details, your hard work could feel incomplete. Think of these touches as the cherry on top of a sundae; they elevate the entire experience! So, what should you consider as you approach this final stage?
First and foremost, applying a protective finish is crucial. This not only enhances the color and texture of your dresser but also provides a barrier against scratches and stains. You can choose from a variety of finishes, such as polyurethane, wax, or varnish. Each option has its unique characteristics:
| Type of Finish | Pros | Cons |
|---|---|---|
| Polyurethane | Durable, water-resistant | Can yellow over time |
| Wax | Natural look, easy to apply | Requires regular reapplication |
| Varnish | Strong protection, clear finish | Can be tricky to apply evenly |
Once you've chosen the right finish, it's time to apply it. Make sure your dresser is clean and dust-free before you start. Use a clean brush or lint-free cloth to apply your chosen finish evenly. Remember, patience is key! Allow each coat to dry thoroughly before adding another. Depending on the finish, you may need two to three coats for optimal protection and shine.
Don't forget about the hardware! New knobs or handles can completely transform the look of your dresser. Choose hardware that complements your overall design. For instance, if you’ve gone for a rustic look, consider using vintage-style knobs. If your dresser has a modern flair, sleek metal handles can provide that contemporary touch. The right hardware can make your dresser feel cohesive and polished.
Finally, consider adding a personal touch that reflects your style. This could be as simple as a decorative tray on top, some fresh flowers, or even a small piece of artwork hanging above it. These elements not only enhance the dresser's visual appeal but also make it feel like a part of your home. After all, a dresser isn’t just a piece of furniture; it’s a canvas for your creativity!
- How long does it take for the finish to dry? - Drying times vary based on the type of finish used, but typically, you should allow 4-6 hours between coats and 24-48 hours for full curing.
- Can I use leftover paint for my dresser? - Absolutely! Just ensure that the paint is appropriate for furniture and has not expired.
- What if I make a mistake during the finishing process? - Don’t panic! Most mistakes can be fixed by sanding down the area and reapplying the finish.
Frequently Asked Questions
- What kind of dresser is best for a DIY makeover?
When choosing a dresser for your DIY project, look for one that has a solid structure and is made of wood or a sturdy material. Avoid dressers with extensive damage or wear, as they may require more work than they’re worth. A vintage or second-hand dresser can be a great option since they often have unique designs that can be beautifully restored.
- What tools do I need for refurbishing a dresser?
Essential tools for a dresser makeover include sandpaper, a paintbrush or spray gun, a drop cloth, a screwdriver, and a paint scraper. You might also want to have wood filler, primer, and a sealant handy, depending on your project. Having the right tools can make the process smoother and more enjoyable!
- How do I prepare my workspace for a DIY project?
To set up your workspace, choose a well-ventilated area, preferably outdoors or in a garage. Clear the space of any clutter and cover surfaces with a drop cloth to protect them. Make sure you have good lighting, and keep all your tools and materials organized and within reach to avoid unnecessary interruptions.
- What safety precautions should I take while refurbishing furniture?
Safety is key! Always wear gloves, a mask, and goggles when sanding or painting to protect yourself from dust and fumes. Ensure your workspace is well-ventilated, and keep all sharp tools away from children and pets. Being mindful of safety can help you enjoy the process without any accidents.
- How do I clean and prep my dresser before painting?
Start by removing all hardware and drawers. Clean the surface with a mixture of soap and water to remove dirt and grease. If there’s an old finish, use a paint stripper or sandpaper to remove it. Once clean, fill any holes or cracks with wood filler and sand the surface smooth for a professional finish.
- What painting techniques can I use for my dresser?
There are several techniques you can explore! Brush painting is great for precision, while spray painting can provide a smooth, even coat. You can also experiment with sponge painting for a textured effect. Each method can create a unique look, so don’t hesitate to try different techniques until you find the one that suits your style!
- How can I add decorative touches to my dresser?
Get creative! You can add new knobs or handles, use stencils to create patterns, or even try decoupage with decorative paper. These little details can really elevate the overall look of your dresser and make it a true reflection of your personal style.
- What should I consider when choosing hardware for my dresser?
When selecting knobs and handles, think about the style of your dresser and the overall aesthetic you want to achieve. Consider the size and shape of the hardware as well, ensuring it fits comfortably in your hand. Mixing and matching different styles can also create an eclectic look that adds character to your piece!
- What are the final touches I should apply to my refurbished dresser?
To protect your newly painted dresser, apply a sealant or wax finish. This not only enhances the color but also provides durability against scratches and stains. A good finish can make your dresser look professionally done and keep it looking fresh for years to come!


