Budget-Friendly Project: Repurpose Old Doors into a Bed
Are you looking for a unique and budget-friendly way to spruce up your bedroom? If you have some old doors lying around, you’re in for a treat! This article explores creative and cost-effective ways to transform those neglected doors into stunning bed frames. Not only will you save money, but you'll also add a touch of personality and charm to your space. Imagine sleeping on a bed that tells a story, a bed that is not just functional but also a conversation starter. With a little effort and some DIY spirit, you can create a masterpiece that reflects your style and creativity.
Repurposing old doors into a bed frame is not just an eco-friendly choice; it’s also a fantastic way to engage in a hands-on project that can be incredibly rewarding. Whether you’re a seasoned DIY enthusiast or a newbie looking to try something new, this guide will provide you with step-by-step instructions, design inspirations, and tips to make your project a success. So, roll up your sleeves and get ready to dive into the world of DIY, where old doors can become the foundation of your dreams!
When embarking on this exciting journey of repurposing old doors, the first step is selecting the appropriate doors. This choice is crucial as it lays the groundwork for your project. You’ll want to consider several factors, including size, material, and style. For instance, if you envision a grand, statement bed, you might opt for larger doors, while a more compact space might call for smaller, narrower ones. Additionally, the material of the doors—whether they're solid wood, hollow core, or even vintage—can significantly affect the overall aesthetics and sturdiness of your bed frame.
Moreover, think about the style of the doors. Are they ornate and decorative, or are they simple and functional? Matching the doors to your bedroom's existing decor will create a cohesive look. If you’re leaning towards a rustic vibe, reclaimed wood doors might be perfect. On the other hand, if modern minimalism speaks to you, sleek, flat doors could be the way to go. Remember, the doors you choose will not only support your mattress but also define the character of your bedroom, so choose wisely!
Now that you have your doors selected, it’s time to gather the right tools and materials to ensure a successful repurposing project. Having everything on hand before you start will save you time and frustration down the line. Here’s a rundown of what you’ll need:
Basic hand tools are vital for cutting and assembling your bed frame. Here’s a quick list of essential tools:
- Saw: For cutting the doors to your desired length.
- Hammer: For driving in nails and securing components.
- Screwdriver: For assembling parts and putting in screws.
Understanding how to use these tools effectively will streamline your project and enhance your craftsmanship. Each tool plays a specific role in the assembly process, so take some time to familiarize yourself with them if you're not already.
While hand tools are essential, incorporating power tools can significantly speed up the process. For instance, a drill can make creating pilot holes and driving screws a breeze, while a sander will help you achieve a smooth finish on the doors. Investing in a few key power tools can elevate the quality of your work and make your DIY experience much more enjoyable.
Choosing the right materials, such as brackets and screws, is essential for ensuring the bed frame's stability. You’ll want to look for sturdy options that can withstand the weight of the mattress and the occupants. Here are some materials to consider:
- Metal brackets: To reinforce joints and add strength.
- Wood screws: For securely fastening the doors together.
- Wood glue: For added stability.
By selecting the right materials, you’ll ensure that your bed frame not only looks good but also stands the test of time.
Before you dive into assembly, preparing the doors is a crucial step. Cleaning, sanding, and potentially painting or staining the doors will help match your desired aesthetic for the bed frame. Start by giving the doors a thorough cleaning to remove any dust or grime. Once clean, use sandpaper to smooth out any rough edges and imperfections. This step is vital for both aesthetics and safety.
After sanding, you may choose to paint or stain the doors to fit your bedroom's color scheme. This is where you can let your creativity shine! Whether you prefer a bold color or a natural wood finish, the choice is yours. A fresh coat of paint can breathe new life into old doors, making them look brand new and perfectly suited for your bed frame.
With your doors prepped and ready, it’s time to explore various design ideas and styles for your bed frame. The options are endless, and you can truly personalize your creation to reflect your tastes. Let’s dive into a couple of popular styles:
The rustic farmhouse design emphasizes natural materials and a cozy feel. To achieve this look using old doors, consider leaving the wood in its natural state or applying a light stain to enhance its character. Pair your bed frame with soft linens, vintage-inspired decor, and warm lighting to create a warm bedroom ambiance. Think of your bedroom as a cozy retreat where you can escape the hustle and bustle of daily life.
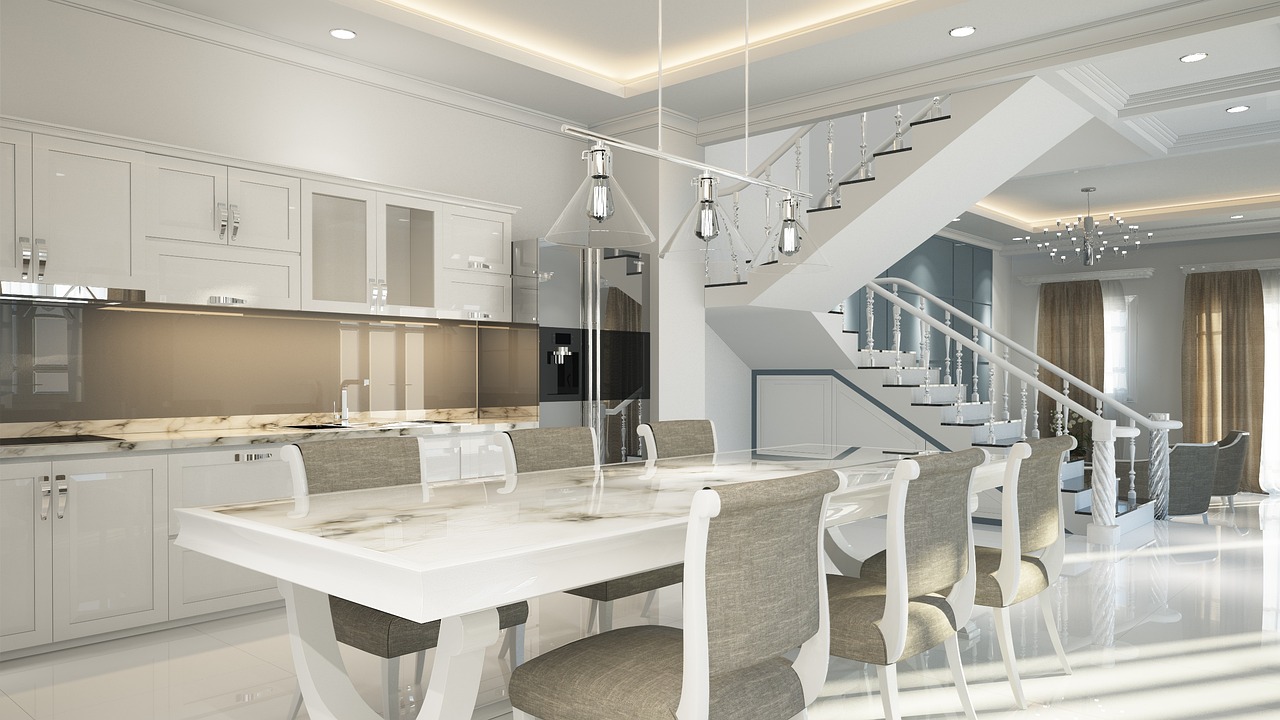
If you’re drawn to sleek and contemporary aesthetics, the modern minimalist approach is for you. This style focuses on clean lines and simplicity, which can be achieved by selecting flat, unembellished doors. Paint them in neutral tones like white, gray, or black for a chic look. Keep decor minimal and functional, allowing the beauty of the doors to shine through without overwhelming the space.
In conclusion, repurposing old doors into a bed frame is not only a budget-friendly project but also a creative endeavor that allows you to express your style. With the right tools, materials, and a little imagination, you can create a stunning centerpiece for your bedroom that is both functional and beautiful.
Q: Can I use any type of door for this project?
A: While you can use various types of doors, it's best to choose solid wood doors for durability and support.
Q: How much does it cost to repurpose old doors into a bed frame?
A: Costs can vary based on the doors you choose and materials needed, but it’s typically much less expensive than buying a new bed frame.
Q: Do I need advanced woodworking skills?
A: No, basic woodworking skills will suffice. This project is great for beginners looking to learn!
[Choosing the Right Doors]
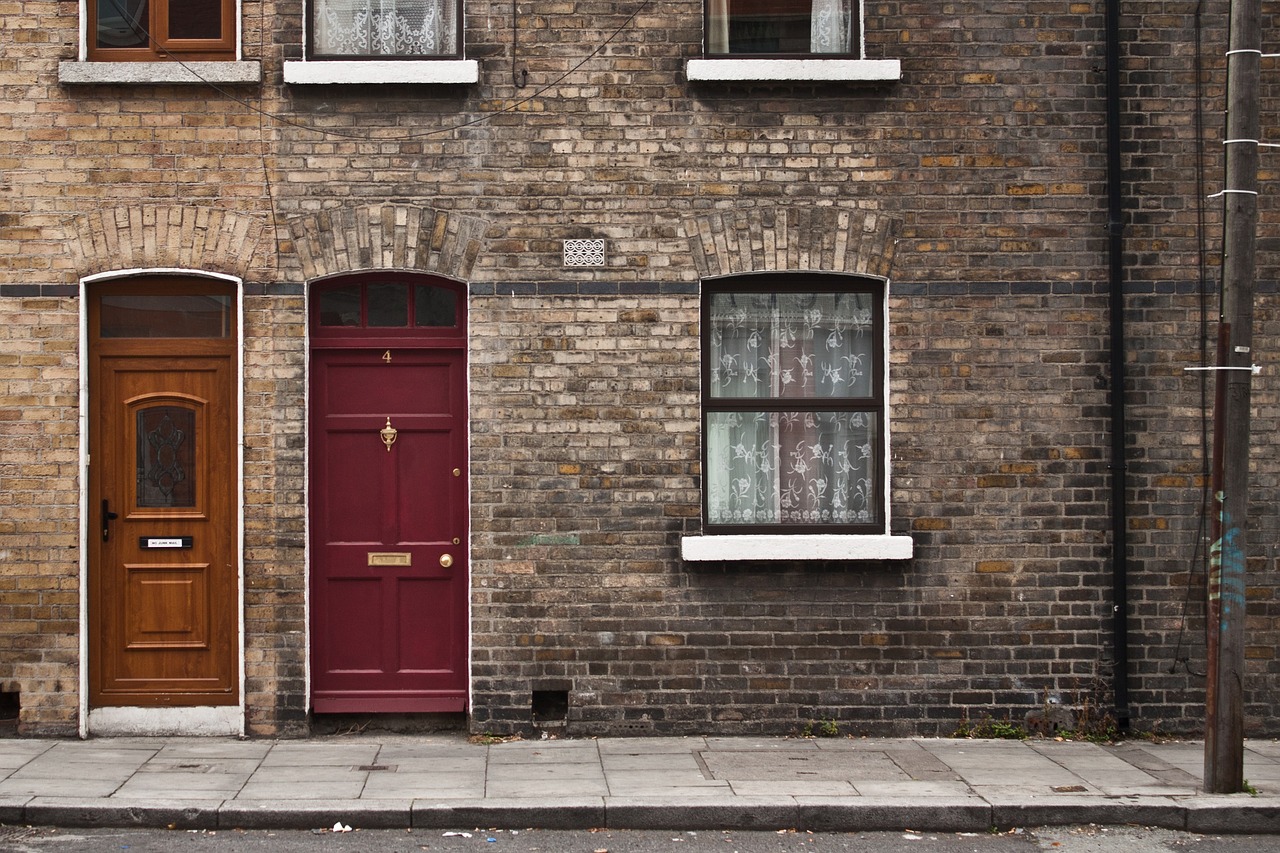
When it comes to transforming old doors into a stunning bed frame, the first step is choosing the right doors. This decision is crucial because the doors you select will not only dictate the aesthetic of your new bed but also its durability and functionality. So, how do you pick the perfect doors for your DIY project? Let’s dive into the factors you need to consider.
First and foremost, you should think about the size of the doors. Standard bed sizes are typically twin, full, queen, or king, and the dimensions of your doors should align with the size of the mattress you plan to use. Measure your mattress and then look for doors that can either be used as panels for the headboard and footboard or as the main structure of the bed frame itself. For instance, if you're aiming for a queen bed, you might want to find two doors that are at least 60 inches wide when placed side by side.
Next, consider the material of the doors. Wooden doors are often the best choice due to their strength and ability to be easily modified. However, you can also repurpose metal doors if you’re going for an industrial look. Each material has its own set of challenges and advantages. For example, wooden doors can be sanded down and stained to match your bedroom decor, while metal doors might require different tools for cutting and finishing.
Another critical factor to keep in mind is the style of the doors. Are you leaning towards a rustic farmhouse aesthetic or something more modern? The style of the doors will significantly influence the overall vibe of your bed frame. Look for doors that resonate with your personal style—perhaps a vintage door with intricate carvings for a classic look, or sleek, flat-panel doors for a contemporary feel. Remember, it’s not just about the doors themselves; it’s about how they fit into your broader design vision.
Additionally, ensure that the doors you choose are in good condition. Inspect them for any signs of damage, such as cracks or rot, which could compromise the integrity of your bed frame. If you find any imperfections, don’t fret! Many DIY enthusiasts embrace the imperfections of old doors, incorporating them into their design to add character and charm.
In summary, when choosing the right doors for your bed frame project, keep these key factors in mind:
- Size: Ensure the doors fit the dimensions of your mattress.
- Material: Opt for sturdy materials like wood or metal based on your desired aesthetic.
- Style: Select doors that align with your overall design vision.
- Condition: Look for doors that are structurally sound and free from significant damage.
By taking these considerations into account, you’ll be well on your way to finding the perfect doors to create a beautiful and functional bed frame. The right doors can turn a simple project into a stunning centerpiece in your bedroom, showcasing your creativity and craftsmanship.
[Tools and Materials Needed]
When embarking on your exciting journey to transform old doors into a stunning bed frame, having the right tools and materials at your disposal is crucial. Imagine trying to bake a cake without the proper ingredients; it just wouldn’t turn out right! Similarly, gathering your tools and materials beforehand will ensure a smooth and enjoyable DIY experience. Let’s dive into what you’ll need to make this project a success.
First and foremost, you’ll need some essential hand tools to cut, assemble, and secure your bed frame. Here’s a quick rundown of the basic tools you should have:
- Saw: A circular saw or hand saw will help you cut the doors to the desired size.
- Hammer: Great for driving in nails and securing joints.
- Screwdriver: Essential for assembling the frame and attaching hardware.
- Measuring Tape: To ensure everything fits perfectly—measure twice, cut once!
In addition to these hand tools, incorporating power tools can elevate your project from good to great. For instance, using a power drill will not only save you time but also help you achieve a more professional finish. A sander is another handy tool that can smooth out rough edges, making your bed frame look polished and inviting. If you’re new to power tools, don’t worry! They can be straightforward to use, and there are plenty of tutorials online to guide you.
Now, let’s talk about the materials you’ll need to ensure your bed frame is sturdy and reliable. Choosing the right materials is like picking the right foundation for a house; it’s essential for stability. Here’s what to consider:
- Brackets: These will provide extra support where the doors meet, ensuring your bed frame can handle the weight of your mattress and sleepers.
- Screws: Opt for heavy-duty screws that can withstand the pressure and ensure everything stays together.
- Wood Glue: This can be a great addition to screws for added strength, especially at the joints.
Finally, don’t forget about finishing materials! Whether you choose to paint or stain your doors, having the right supplies will help you achieve your desired aesthetic. Sandpaper, paintbrushes, and a good-quality wood finish will make all the difference in the final look of your bed frame. Just imagine how satisfying it will be to see your old doors transformed into a beautiful centerpiece for your bedroom!
In summary, preparing for your DIY project by gathering the right tools and materials is key to a successful transformation. With the basics covered, you’ll be ready to dive into the next steps of your project, feeling confident and excited about the creative process ahead. Happy building!
Q: Can I use any type of door for this project?
A: While you can technically use any door, it’s best to choose solid wood doors for better durability and support.
Q: How much weight can a door bed frame hold?
A: This largely depends on the type of doors used and how well they are secured. Generally, a well-constructed door bed frame can support a standard mattress and two adults comfortably.
Q: Do I need special skills to complete this project?
A: No special skills are required! Basic DIY skills and a willingness to learn will go a long way in completing your bed frame.
Q: How long will this project take?
A: The time required can vary, but most people complete it in a weekend, allowing for drying time if you’re painting or staining.
[Essential Hand Tools]
When diving into the exciting world of transforming old doors into a stunning bed frame, having the right tools at your disposal is essential. Think of these tools as your trusty sidekicks, each playing a vital role in bringing your creative vision to life. The first tool you’ll want to grab is a good quality hand saw. This tool is perfect for making precise cuts in the doors, allowing you to shape them to fit your desired dimensions. Whether you're cutting down the height of a door or creating a unique headboard shape, a hand saw will be your go-to.
Next up is the hammer. This isn’t just any hammer; you’ll want a claw hammer for its dual functionality. Not only can you drive nails into the wood, but you can also pull them out if you make a mistake—or if you just need to adjust your design. Speaking of nails, don’t forget to stock up on wood screws. These will provide the stability your bed frame needs, ensuring it can withstand the test of time and the weight of a mattress and sleeper.
Another crucial tool in your arsenal is a screwdriver. A good set of screwdrivers, both flathead and Phillips, will help you fasten everything securely. If you want to take it up a notch, consider a power drill for quicker assembly. This tool will save you time and effort, making it easier to drill pilot holes and drive screws in a flash.
To ensure your cuts are straight and accurate, a measuring tape is essential. It’s the key to precision, helping you measure the doors and the space where your new bed will reside. Pair this with a square to check your angles, and you’ll be well on your way to a professional-looking finish.
Lastly, don’t overlook the importance of a sanding block or an orbital sander. Sanding the edges of your doors will not only enhance their appearance but also ensure safety by smoothing out any rough spots. This step is crucial, especially if you plan to paint or stain the doors later. Remember, a well-prepared surface leads to a better finish!
In summary, here’s a quick overview of the essential hand tools you’ll need:
| Tool | Purpose |
|---|---|
| Hand Saw | To cut doors to size |
| Hammer | To drive nails and remove them |
| Screwdriver | To fasten screws securely |
| Measuring Tape | To measure doors and space |
| Square | To ensure accurate angles |
| Sanding Block/Orbital Sander | To smooth edges and surfaces |
With these essential hand tools in your toolkit, you’re equipped to tackle your DIY project with confidence. Remember, each tool serves a purpose and can significantly impact the quality of your finished bed frame. So, gather your tools, roll up your sleeves, and get ready to create something beautiful!
Q: Can I use any type of old door for this project?
A: While you can technically use any old door, it's best to choose solid wood doors for durability and support. Hollow-core doors may not provide the stability needed for a bed frame.
Q: How do I ensure my bed frame is sturdy?
A: Use quality screws and brackets to secure the doors together. Additionally, consider adding a center support beam for extra stability, especially if you’re using a larger size bed frame.
Q: What if I want to paint or stain my doors?
A: Before painting or staining, make sure to sand the doors thoroughly to create a smooth surface. Use a primer for the best results, and choose a paint or stain that complements your bedroom decor.
Q: How much time will this project take?
A: The time required can vary based on your experience level and the complexity of your design, but most DIY enthusiasts can complete a door bed frame project in a weekend.

[Power Tools for Efficiency]
When it comes to transforming old doors into a stunning bed frame, power tools can be your best friends. They not only speed up the process but also enhance the quality of your work, allowing you to achieve that professional finish you desire. Imagine trying to cut through thick wood with a hand saw—it's a labor of love, but it can take forever! Instead, using a power saw can make those cuts swift and precise.
One of the most essential power tools for this project is the cordless drill. This tool is invaluable for driving screws and making pilot holes, ensuring that your bed frame is securely assembled. A drill with adjustable speed settings can help you tackle different materials with ease. You wouldn't want to strip a screw because you were going too fast, right? Having control over your drill means you can work confidently and efficiently.
Another fantastic tool to consider is the orbital sander. Once you’ve cut and assembled your doors, the last thing you want is to end up with rough edges that snag on sheets or blankets. An orbital sander will help you smooth out those surfaces quickly, giving your bed frame a polished look. Plus, you can choose different grits of sandpaper to get the finish just right—think of it as giving your bed frame a spa day!
For those who want to take their craftsmanship to the next level, a jigsaw can be a game-changer. This tool allows you to make intricate cuts, which can be especially useful if you're looking to create unique shapes or designs with your doors. It opens up a world of possibilities, letting your creativity shine through. Just remember to use the right blade for the material you're working with—wood blades for wood, metal blades for metal, and so on.
Lastly, don’t overlook the importance of a miter saw. If your design includes angled cuts, this tool will help you achieve those perfect 45-degree angles that make your bed frame look seamless and professional. It’s like having a magic wand that transforms your old doors into a work of art! Just set your angle, and let the saw do the hard work while you stand back and admire your vision coming to life.
In summary, investing in these power tools can dramatically increase your efficiency and the quality of your finished product. Whether you're an experienced DIYer or a novice, having the right tools at your disposal can turn a daunting project into an enjoyable adventure. So gear up, and get ready to create something beautiful!
Q: Do I need to have experience with power tools to start this project?
A: Not at all! While having some experience can be helpful, many power tools are user-friendly and come with guides. Just take your time and practice safe handling.
Q: What safety equipment should I wear while using power tools?
A: Always wear safety goggles to protect your eyes from dust and debris. Ear protection is also a good idea, especially when using loud tools like saws. Don’t forget a dust mask if you’re sanding!
Q: Can I use any type of old door for this project?
A: While you can use various types of doors, solid wood doors are often the best choice due to their durability and strength. Hollow-core doors might not provide the same level of support.
Q: How much time should I expect to spend on this project?
A: The time will vary based on your skill level and the complexity of your design, but you can typically complete a bed frame in a weekend if you stay focused and organized.
[Materials for Stability]
When embarking on your exciting journey of transforming old doors into a stunning bed frame, one critical aspect you can't overlook is the selection of materials that ensure the stability and longevity of your creation. Think of your bed frame as the foundation of a house; without a solid base, everything else can crumble. To achieve that sturdy structure, you’ll need to gather a few essential materials that will not only support the weight of the mattress but also withstand the test of time.
First and foremost, brackets are your best friends in this project. These little metal pieces might seem insignificant, but they play a massive role in holding everything together. You can opt for L-brackets or corner braces, which provide extra support at the joints where the doors meet. A well-placed bracket can make all the difference in ensuring your bed frame remains stable, especially if you're planning to add a headboard or footboard.
Next up, you'll need screws. Not just any screws will do; you’ll want to choose screws that are specifically designed for wood. These screws typically have a sharper tip and deeper threads, which allow them to grip the wood securely. Make sure to select a length that penetrates deep enough into the wood without risking any splitting. A good rule of thumb is to use screws that are at least 1.5 inches long for most connections.
Additionally, consider using wood glue as an extra layer of stability. While screws and brackets provide mechanical strength, wood glue can fill in any gaps and create a tighter bond between the pieces. Just remember to clamp the joints together while the glue dries for the best results. This combination of screws, brackets, and glue will ensure that your bed frame can handle the weight of not only the mattress but also the occasional jumping or lounging.
For those looking to add a bit of flair while maintaining strength, you might also explore decorative wooden dowels. These can be used to reinforce joints and add a touch of style to your bed frame. They can be inserted into pre-drilled holes to create a seamless look that enhances the overall aesthetic of your project.
Finally, don't forget about the legs of your bed frame. Depending on the height you desire, you can use sturdy wooden blocks or repurpose old furniture legs. Ensure that whatever you choose is robust enough to support the frame's weight. You might even consider adding felt pads to the bottom of the legs to protect your flooring and provide a little extra stability.
In summary, the right materials for stability are crucial for a successful bed frame project. By focusing on quality brackets, screws, wood glue, decorative dowels, and sturdy legs, you will create a bed frame that is not only beautiful but also built to last. Remember, a well-constructed bed frame is the key to a restful night’s sleep and a stunning focal point in your bedroom.
- What types of doors work best for this project? Solid wood doors are ideal due to their strength and durability.
- Can I use painted doors? Absolutely! Just make sure to sand them down properly for a better finish.
- How do I ensure my bed frame is level? Use a level tool during assembly to make adjustments as needed.
[Preparing the Doors]
Before diving into the assembly of your stunning bed frame, it’s crucial to take a moment to prepare the doors properly. This step is not just about aesthetics; it's about ensuring that your finished product is both beautiful and durable. Start by giving your doors a thorough cleaning. You want to remove any dust, grime, or old paint that might interfere with the new look you’re aiming for. A simple mix of warm water and mild soap can work wonders. Just grab a soft cloth and get to work!
Once your doors are squeaky clean, the next step is sanding. This is where you can really start to bring out the potential of those old doors. Sanding helps to smooth out rough edges and surfaces, making them easier to paint or stain later on. Use a medium-grit sandpaper to begin with, and then switch to a finer grit for a smooth finish. Remember, the goal here is to create a surface that not only looks good but feels good too. You wouldn’t want to sleep on a bed that feels like sandpaper, right?
Now, let’s talk about the fun part: painting or staining. This is where you can unleash your creativity and truly personalize your bed frame. If you’re going for a rustic farmhouse look, consider using a warm stain that highlights the wood grain. On the other hand, if modern minimalism is more your style, a sleek coat of matte paint in a neutral color could be the perfect touch. Whichever route you choose, make sure to apply at least two coats for an even finish. And don’t forget to let each coat dry completely before applying the next; patience is key!
Finally, as you prepare your doors, it’s essential to check for any structural issues. Look for cracks, warps, or other imperfections that could compromise the stability of your bed frame. If you find any, consider reinforcing those areas with wood glue or brackets. This extra step ensures that your bed frame not only looks stunning but is also safe and sturdy for years to come.
In summary, preparing your doors is a vital step in transforming them into a breathtaking bed frame. By cleaning, sanding, painting or staining, and checking for structural integrity, you set a solid foundation for your DIY project. So roll up your sleeves and get ready to create something amazing!
- Can I use any type of door for this project? Yes, you can use wooden doors, hollow core doors, or even vintage doors! Just ensure they are sturdy enough to support the weight of a mattress and occupants.
- What tools do I need to prepare the doors? Basic tools include a cloth for cleaning, sandpaper for smoothing, and brushes or rollers for painting or staining.
- How long does the preparation process take? Depending on the condition of the doors and the drying time for paint or stain, the preparation can take anywhere from a few hours to a couple of days.
[Design Ideas and Styles]
When it comes to transforming old doors into a stunning bed frame, the possibilities are as vast as your imagination! Your choice of design can drastically change the overall vibe of your bedroom. Whether you’re aiming for a cozy, rustic feel or a sleek, modern aesthetic, repurposing doors can cater to both styles beautifully. Let’s dive into some creative ideas that can inspire your DIY project and help you create a unique centerpiece for your sleeping sanctuary.
First up, we have the Rustic Farmhouse Design. This style is all about embracing the natural beauty of materials and creating a warm, inviting atmosphere. Imagine a bed frame made from weathered wood doors, complete with a soft, neutral color palette. To achieve this look, you can leave the doors in their natural state or apply a light stain to enhance the wood grain. Pair your bed frame with vintage-inspired decor, such as distressed nightstands and cozy textiles, to complete the farmhouse vibe. The key here is to focus on comfort and warmth, making your bedroom a true retreat.
Another exciting option is the Modern Minimalist Approach. If you prefer clean lines and a more contemporary feel, this design style might be your go-to. Picture a bed frame that utilizes smooth, flat doors, painted in a crisp white or a bold color to create a striking contrast against your bedroom walls. The minimalist aesthetic thrives on simplicity, so avoid overly ornate decorations. Instead, opt for sleek, functional furniture and a few carefully chosen accessories. This approach not only highlights the beauty of the repurposed doors but also creates a serene and uncluttered space that promotes relaxation.
To give you a clearer picture of how these designs can be achieved, here’s a quick comparison:
| Design Style | Key Features | Color Palette |
|---|---|---|
| Rustic Farmhouse | Weathered doors, cozy textiles, vintage decor | Neutral tones, soft pastels |
| Modern Minimalist | Sleek lines, functional furniture, minimal decor | Crisp whites, bold colors |
Additionally, you can experiment with combining styles! Perhaps you want a rustic frame but with a modern twist—think of mixing reclaimed wood with metal accents. The beauty of repurposing old doors is that you can tailor the design to reflect your personal taste. Don’t be afraid to mix and match elements from different styles to create something entirely your own.
Lastly, consider incorporating some personal touches into your bed frame design. Add decorative elements like fairy lights, or even mount small shelves on the headboard to display your favorite books or plants. These additions not only enhance the aesthetic but also make your bed frame functional and uniquely yours.
Q: Can I use any type of door for this project?
A: While you can technically use any door, it’s best to choose solid wood doors for durability and support. Avoid hollow-core doors as they may not provide the necessary stability for a bed frame.
Q: Do I need special skills to repurpose doors into a bed frame?
A: Basic DIY skills are helpful, but you don’t need to be a professional carpenter. With the right tools and some patience, anyone can tackle this project!
Q: How do I ensure my bed frame is sturdy?
A: Use high-quality brackets and screws to secure the doors together. Additionally, consider adding a center support beam if your design is larger to prevent sagging.
Q: What if I want to change the design later?
A: One of the great things about repurposing old doors is that they can be easily re-painted or refinished. If you ever want a new look, simply update the finish or add new decorative elements!

[Rustic Farmhouse Design]
When you think of a rustic farmhouse design, what comes to mind? Cozy, inviting spaces filled with warmth and charm, right? Transforming old doors into a bed frame is a fantastic way to capture that essence. The beauty of rustic design lies in its ability to blend the old with the new, creating a space that feels both timeless and contemporary. Imagine walking into a bedroom where the bed frame tells a story, each door holding memories of a different time. This is the magic of repurposing!
To achieve this rustic farmhouse look, start by selecting doors that showcase natural wood grains and textures. Look for imperfections—dents, scratches, and weathered finishes add character and authenticity. You might consider using barn doors or those with a distressed finish, as they can serve as stunning focal points in your bedroom. Pair these doors with soft, neutral bedding and vintage decor elements like woven baskets or a reclaimed wood nightstand to enhance the rustic vibe.
Another great idea is to incorporate complementary decor elements. Think about using textiles that reflect the countryside, like linen or cotton in muted tones. Adding a few throw pillows with plaid or floral patterns can soften the look and make it feel more inviting. Don't forget about lighting! A vintage-style pendant or lantern can create that warm glow that perfectly complements your rustic theme.
In terms of color, stick to a palette that reflects nature. Earthy tones such as greens, browns, and creams will help your bed frame stand out while harmonizing with the overall decor. You can even paint the doors in a soft, muted color or leave them in their natural state, depending on your preference. If you choose to paint, consider using a chalk paint for that matte finish that screams farmhouse chic.
Finally, accessorizing your bed frame with rustic elements can elevate the entire design. Think about adding a wooden headboard made from reclaimed wood, or even some decorative elements like antlers or vintage mirrors above the bed. These small touches can tie the whole look together, making your bedroom not just a place to sleep, but a cozy retreat that reflects your personal style.
- Can I use any type of old door for this project? Yes, any door that is structurally sound can be repurposed. However, doors made of solid wood are preferred for durability.
- Do I need special tools to transform old doors into a bed frame? While basic hand tools will suffice, using power tools can make the process easier and more efficient.
- What if I want to change the color of the doors? You can paint or stain the doors to match your desired aesthetic. Just ensure to prep the surface properly for the best results.
- How can I ensure the bed frame is stable? Use sturdy brackets and screws during assembly to ensure that the frame can support the weight of the mattress and sleepers.
[Modern Minimalist Approach]
The modern minimalist approach to designing a bed frame from old doors is all about embracing simplicity and functionality. Imagine walking into a room where the bed is not just a place to sleep, but a stunning centerpiece that speaks volumes about your style. This design philosophy strips away the unnecessary, allowing the beauty of the materials to shine through. To achieve this look, you want to focus on clean lines, neutral colors, and a sense of spaciousness.
When selecting your old doors, opt for those with a sleek, flat design rather than ornate carvings or heavy textures. A pair of simple, solid doors can create a striking headboard while also serving as the foundation for the bed frame. Consider doors that are painted in a soft white, light grey, or even a muted pastel to keep the aesthetic airy and light. If you prefer a more natural look, lightly sand the wood and apply a clear varnish to showcase the grain without overwhelming the space.
In terms of construction, the key is to maintain a low profile. The bed frame should not dominate the room but rather blend seamlessly with the overall decor. A platform style bed is an excellent choice for this approach. It sits closer to the ground, creating an illusion of more space in the room. To achieve this, you can use the doors as the base and pair them with a simple slatted system underneath to support the mattress.
Here are a few tips to keep in mind when working on your modern minimalist bed frame:
- Keep it Low: Aim for a bed height that is comfortable but not towering. This creates a more spacious feel.
- Neutral Palette: Stick to neutral colors for the doors and bedding to enhance the minimalist vibe.
- Functional Decor: Choose decor that serves a purpose, like stylish storage solutions or functional lighting.
Finally, don't forget about the finishing touches. Accessories should be minimal yet impactful. Think about adding a few carefully chosen items like a single piece of artwork above the bed or a simple bedside table that complements the doors. The goal here is to create a serene environment that invites relaxation while showcasing your creativity and resourcefulness.
Q: Can I use any type of old door for this project?
A: While you can technically use any door, it’s best to choose ones that are solid and in good condition. Look for doors that are sturdy and can support the weight of a mattress and sleepers.
Q: Do I need special tools for this project?
A: Basic hand tools like saws, hammers, and screwdrivers are essential. If you want to speed up the process, consider using power tools like drills and sanders.
Q: How can I ensure my bed frame is stable?
A: Use brackets and screws specifically designed for furniture assembly to secure the doors together. Make sure to reinforce the corners and joints to enhance stability.
Frequently Asked Questions
- What types of doors are best for repurposing into a bed frame?
When choosing doors for your bed frame project, look for solid wood doors, as they provide the best support and durability. Hollow-core doors might be lighter, but they lack the strength needed for a stable bed frame. Additionally, consider the style of the doors to match your desired aesthetic, whether it's rustic, modern, or something in between.
- Do I need special tools for this project?
While basic hand tools like saws, hammers, and screwdrivers are essential, using power tools can make the process much smoother and quicker. A drill is particularly useful for assembling the frame, while a sander can help achieve a polished finish. If you're serious about DIY projects, investing in a few power tools can save you time and effort.
- How can I ensure the bed frame is stable?
Stability is key for a bed frame, so using the right materials is crucial. Opt for sturdy brackets, screws, and wood glue to secure the doors together. Additionally, incorporating a center support beam can help distribute weight evenly and prevent sagging. Remember, the goal is to create a frame that not only looks great but also stands the test of time.
- Can I paint or stain the doors before assembling the bed frame?
Absolutely! Preparing the doors by cleaning, sanding, and applying paint or stain is a great way to enhance their appearance. It also allows you to customize the color to fit your bedroom decor. Just make sure the finish is completely dry before you start assembling the frame to avoid any mess.
- What design styles can I achieve with old doors?
Old doors can be transformed into various design styles, from rustic farmhouse to modern minimalist. For a rustic look, focus on natural finishes and complementary decor elements like vintage linens. If you prefer a sleek aesthetic, aim for clean lines and a simple color palette. The versatility of old doors means the possibilities are endless!
- Is this project budget-friendly?
Yes! Repurposing old doors is a fantastic way to create a unique bed frame without breaking the bank. If you can source doors from thrift stores, garage sales, or even your own home, you can save a significant amount compared to buying a new bed frame. Plus, it's a fun DIY project that adds a personal touch to your space!


