DIY: How to Repurpose a Nightstand into a Play Kitchen
Are you ready to embark on a fun and creative journey that will not only enhance your child's playtime but also give new life to an old piece of furniture? Transforming a simple nightstand into an engaging play kitchen is a fantastic way to blend creativity with practicality. This project is not just about crafting; it’s about creating a space where your kids can unleash their imagination, cooking up delightful stories and pretend meals. Imagine the joy on their faces as they play chef in their very own kitchen, complete with all the charm and whimsy of a real one!
In this article, we will guide you through the entire process—from choosing the right nightstand to adding the finishing touches that will make your play kitchen truly special. So, grab your tools, roll up your sleeves, and let's dive into this exciting DIY adventure!
Choosing the perfect nightstand is crucial for your play kitchen project. You want to select a piece that not only fits your space but also has the right features to inspire imaginative play. Consider the following aspects:
- Size: Ensure the nightstand is appropriately sized for your child. It should be low enough for them to reach everything comfortably.
- Sturdiness: Look for a nightstand made of solid materials that can withstand the rigors of playtime.
- Design: Think about how you want the final product to look. A simple design may be easier to customize, while a more ornate piece might add character.
By carefully selecting the right nightstand, you set the foundation for a successful and enjoyable DIY project!
Gathering the right tools and materials is the first step in your DIY journey. Here’s a quick rundown of what you’ll need:
| Tools | Materials |
|---|---|
| Paintbrushes | Non-toxic paint |
| Screwdriver | Wood glue |
| Sander | Decorative knobs |
| Measuring tape | Stickers or decals |
With these tools and materials at your disposal, you’re well on your way to creating a delightful play kitchen for your little ones!
Before diving into your DIY project, it’s important to prioritize safety. Wear protective gear such as gloves, goggles, and masks to shield yourself from dust and chemicals. Setting up a safe workspace is equally essential—ensure your area is clean and organized to prevent accidents during construction.
Wearing the right protective gear can make a significant difference. Gloves will keep your hands safe from splinters and paint, while goggles protect your eyes from dust and debris. A mask can help you avoid inhaling any harmful particles. Remember, safety first!
Creating a clean and organized workspace is essential for efficiency and safety. Clear out a section of your home where you can work without distractions. Lay down a drop cloth to protect your floors, and keep your tools within arm's reach. An organized space not only enhances your productivity but also reduces the risk of accidents.
Now that you’ve got your nightstand and tools ready, it’s time to unleash your creativity! Here are some design ideas to consider:
- Color Palette: Choose bright, cheerful colors that will attract your child's attention. Pastels can create a soft, inviting space, while bold colors can make it pop.
- Themes: Think about themes that resonate with your child. Whether it’s a rustic farmhouse kitchen or a sleek modern design, the possibilities are endless!
- Decorative Elements: Add fun elements like a chalkboard for writing menus, or a faux window with curtains to create a cozy atmosphere.
These design ideas will help you create a play kitchen that is not only functional but also visually appealing!
Ready to get started? Follow these detailed instructions to transform your nightstand into a play kitchen:
Before you start painting and assembling, preparing the nightstand is crucial. Begin by cleaning it thoroughly to remove dust and grime. Next, sand the surface to create a smooth base for painting. Finally, apply a primer to ensure that your paint adheres well and the colors pop!
Choosing the right paint and finishes can elevate your play kitchen's appearance. Opt for non-toxic, child-safe paint to ensure safety during play. Consider using a glossy finish for surfaces that need to look like countertops, and don’t forget to add fun details like colorful knobs and handles to complete the look!
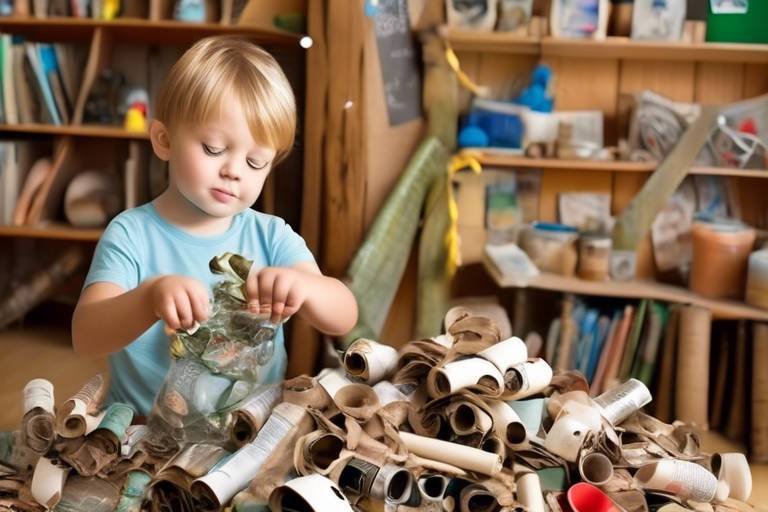
Enhancing your play kitchen with accessories can make it more engaging for children. Think about adding toy pots, pans, and utensils that they can use to cook up imaginary meals. You can also incorporate decorative elements like faux food items or a small apron to make the experience even more immersive.
If you’re feeling crafty, creating your own accessories can add a personal touch to the play kitchen. You can make simple felt food items, DIY aprons, or even small cardboard appliances that fit the theme of your kitchen!
If DIY isn't your style, purchasing accessories is an easy alternative. Many stores offer affordable and fun kitchen toys that can enhance playtime. Look for items that match the color scheme and theme of your play kitchen to create a cohesive look.
Q: How long does this project take?
A: Depending on your experience and the complexity of your design, it can take anywhere from a few hours to a couple of days to complete.
Q: Can I use any type of nightstand?
A: Yes, but it’s best to choose one that is sturdy and has enough surface area for your desired kitchen features.
Q: What if I don't have all the tools?
A: Many tools can be borrowed or rented. Alternatively, you can often find kits that include the essential tools for DIY projects.
Now that you have all the information you need, it’s time to get creative and start your DIY project! Your child’s new play kitchen awaits!
Choosing the Right Nightstand
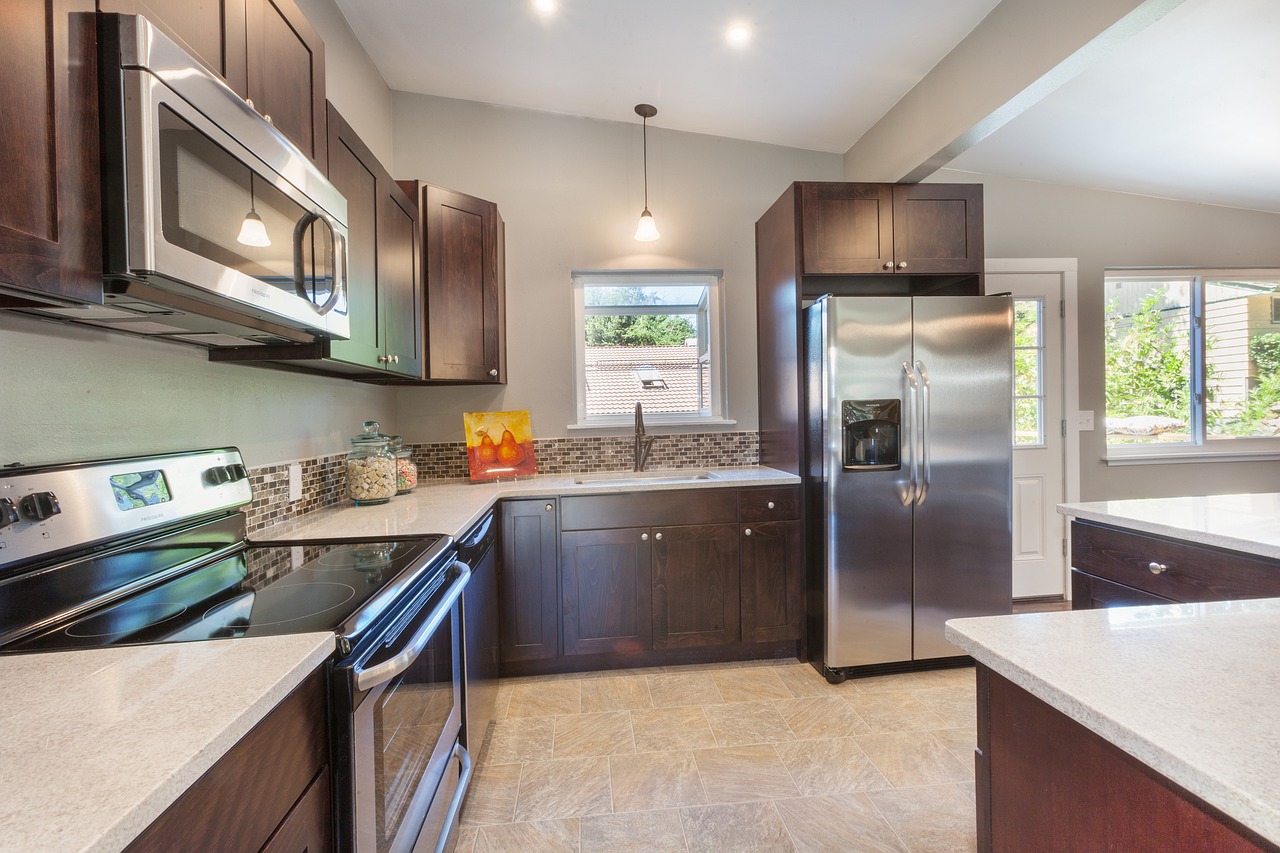
When it comes to transforming a simple nightstand into a delightful play kitchen, selecting the right piece is not just important—it's absolutely crucial. You want a nightstand that is not only functional but also sturdy enough to withstand the enthusiastic play of your little chefs. Start by considering the size of the nightstand. Think about where you plan to place the play kitchen. Is it going to be in a cozy corner of the playroom or out in the open? A compact nightstand might fit perfectly in a small space, while a larger one could provide more room for imaginative play.
Next, evaluate the sturdiness of the nightstand. You wouldn’t want it to wobble or tip over during a busy cooking session! Give it a gentle shake to test its stability. Look for solid wood or a well-constructed piece that can handle the weight of accessories and the inevitable bumps and knocks that come with playtime. Also, consider the design of the nightstand. Does it have a drawer or an open shelf? These features can be fantastic for storage, allowing your child to keep their play kitchen tools organized.
Another factor to ponder is the style of the nightstand. Do you want a modern look with sleek lines, or perhaps something more rustic or vintage? The style can influence the overall aesthetic of your play kitchen, so choose something that aligns with your vision. If you’re feeling particularly adventurous, you could even select a nightstand with unique details, like ornate handles or interesting textures, which can add character to your DIY project.
To make your selection process easier, here's a quick table summarizing the key features to consider:
| Feature | Importance |
|---|---|
| Size | Fits your space and allows for play |
| Sturdiness | Withstands play and prevents tipping |
| Design | Functional features like drawers or shelves |
| Style | Matches your decor and enhances creativity |
In conclusion, choosing the right nightstand is a blend of practicality and creativity. By keeping these factors in mind, you can ensure that your DIY play kitchen not only looks fantastic but also serves as a safe and enjoyable space for your children to explore their culinary imaginations. So take your time, browse through options, and pick a nightstand that will become a centerpiece of fun and creativity in your home!
Essential Tools and Materials
Embarking on a DIY project to transform a nightstand into a playful kitchen can be incredibly rewarding, but it all begins with the right tools and materials. Think of this as your treasure map; without the right markers, you might just end up lost in the wilderness of DIY despair! So, let’s gather what you need to make this journey smooth and enjoyable.
First off, you'll want to have a solid workbench or a sturdy table to work on. This will be your command center, so make sure it’s spacious enough to accommodate your nightstand and all the tools you’ll be using. Next, consider the nightstand itself. Choose one that is not only appealing but also sturdy enough to withstand the rigors of playtime. A wooden nightstand is often the best choice due to its durability and ease of customization.
Now, onto the tools. Here’s a quick rundown of the essentials:
- Screwdriver - A Phillips and flathead screwdriver will be necessary for assembling and disassembling parts.
- Saw - Depending on your design, a jigsaw or hand saw might be needed for cutting out windows or doors.
- Drill - A power drill will make your life easier when it comes to making holes for knobs and handles.
- Sandpaper - To smooth out surfaces and edges, making it safe for little hands.
- Paintbrushes - Various sizes for painting and detailing your kitchen.
In terms of materials, you’ll need:
- Paint - Non-toxic, child-safe paint in vibrant colors will bring your kitchen to life.
- Knobs and Handles - These can be found at any hardware store and will add a functional touch to your kitchen.
- Wood Glue - For those extra secure joints and to keep everything in place.
- Sealant - A clear sealant will protect the paint and make the surface easier to clean.
Additionally, don’t forget to gather some decorative items to really make your play kitchen pop! This could include fabric for curtains, stickers for decoration, or even small shelves to display toy food. The more personalized your kitchen is, the more your child will love it!
By ensuring you have all these tools and materials at your disposal, you set yourself up for a successful and enjoyable DIY project. Remember, preparation is key! So take the time to gather everything you need before diving into the fun part of creating your little chef's paradise.

Safety Precautions
Before diving into your exciting DIY project of transforming a nightstand into a play kitchen, it's crucial to prioritize safety. Working with tools and materials can pose risks, but with the right precautions, you can ensure a smooth and enjoyable crafting experience. First and foremost, always wear protective gear. This includes gloves to protect your hands from sharp edges and chemicals, goggles to shield your eyes from dust and debris, and a mask if you're working with paints or sprays that release harmful fumes. Imagine you're a superhero gearing up for battle; your protective gear is your armor!
Setting up a safe workspace is equally important. A clean and organized area not only boosts your efficiency but also minimizes the chances of accidents. Make sure to clear any clutter from your work surface and keep tools and materials within easy reach. Think of your workspace as a stage; the better it's set, the more impressive your performance will be. If you're working with power tools, ensure that you have a stable surface and that your tools are in good condition. Remember, a little preparation goes a long way in preventing mishaps!
Additionally, it's wise to keep children and pets away from your workspace while you're busy crafting. Even the most well-behaved kids can be curious about what you're doing, and we want to avoid any unexpected interruptions or accidents. If you have young children, consider involving them in the process only when it's safe, such as during the decorating phase. This way, they can enjoy the fun without being in harm's way.
In summary, taking these safety precautions will help you focus on your creative process without unnecessary worries. Here’s a quick recap of essential safety measures:
- Wear protective gear: gloves, goggles, and masks.
- Set up a clean workspace: free of clutter and organized.
- Keep children and pets away: ensure a safe environment.
- Check tools: ensure everything is in good condition before use.
By following these guidelines, you're not just safeguarding yourself; you're also setting the stage for a successful and enjoyable DIY experience. So, gear up and get ready to unleash your creativity!
Q: What kind of nightstand works best for this project?
A: Look for a nightstand that is sturdy and has enough surface area to accommodate kitchen elements like a stove or sink. A simple design is easier to customize!
Q: Can I involve my kids in the DIY process?
A: Absolutely! Kids can help with painting or decorating, but ensure they stay away from tools and hazardous materials.
Q: What type of paint is safe for children's toys?
A: Use non-toxic, water-based paints that are safe for children. Always check the label to verify safety standards.
Q: How can I personalize the play kitchen?
A: You can add personal touches through color choices, fun decals, or even custom accessories that reflect your child's interests!

Protective Gear
When diving into a DIY project like transforming a nightstand into a playful kitchen, safety should always be your top priority. Just as a chef wouldn’t enter the kitchen without their apron, you shouldn’t start your crafting adventure without the right . Wearing the appropriate safety equipment can make a world of difference in ensuring a smooth and accident-free experience. So, what exactly do you need to keep yourself safe while you unleash your creativity?
First and foremost, let’s talk about gloves. Whether you're painting, sanding, or handling tools, gloves are essential for protecting your hands from splinters, chemicals, and potential cuts. Choose a sturdy pair that provides a good grip while still allowing you to maneuver your tools with ease. Next up, goggles are a must-have when working with power tools or sanding materials. They shield your eyes from dust and debris that can fly around, ensuring you can see your masterpiece come to life without any interruptions.
Don’t forget about a mask! If you’re working with paint, varnish, or any materials that produce fumes, a mask can protect your lungs from harmful particles. It’s like having a shield that allows you to focus on your project without worrying about what you’re inhaling. In addition to these essentials, consider wearing long sleeves and sturdy shoes to protect your skin and feet from any unexpected accidents. Remember, a little precaution goes a long way in making your DIY experience enjoyable and safe.
To summarize, here’s a quick overview of the protective gear you should consider:
- Gloves: Protect your hands from splinters and chemicals.
- Goggles: Shield your eyes from dust and debris.
- Mask: Safeguard your lungs from harmful fumes.
- Long Sleeves: Protect your skin from scratches and paint.
- Sturdy Shoes: Keep your feet safe from heavy objects.
By equipping yourself with the right protective gear, you not only ensure your safety but also set the stage for a successful DIY project. So, gear up, and let your imagination run wild as you create a delightful play kitchen for your little ones!

Workspace Setup
Setting up your workspace is a crucial step in ensuring that your DIY project runs smoothly and efficiently. Imagine trying to cook in a messy kitchen; you’d likely feel overwhelmed and distracted, right? The same principle applies here. A clean and organized workspace not only boosts your productivity but also enhances your creativity. Start by choosing a location that is spacious enough for your nightstand and all the materials you’ll be using. Ideally, this should be a well-lit area, whether it’s indoors or outdoors, where you can comfortably work without feeling cramped.
Next, gather all the tools and materials you’ll need for your project. Lay them out on a sturdy table or surface, ensuring that everything is within arm’s reach. This not only saves time but also minimizes the risk of accidents. You’ll want to include items like sandpaper, paintbrushes, a screwdriver, and any decorative elements you plan to add. Here’s a quick checklist of what to have ready:
- Tools: Hammer, screwdriver, drill, etc.
- Materials: Paint, brushes, sandpaper, primer, etc.
- Safety Gear: Gloves, goggles, mask, etc.
It’s also important to create a safe environment. Clear away any clutter or unnecessary items that could become hazards. If you're working with paint or any chemicals, ensure that you have proper ventilation. Open windows or work outside if possible to avoid inhaling fumes. Additionally, consider placing a drop cloth or old newspapers on the floor to catch any spills or splatters. This will help you maintain a tidy area and prevent any damage to your flooring.
Lastly, don’t forget to have a comfortable chair or stool if you plan to be working for an extended period. Comfort is key! You want to be able to focus on your project without constantly shifting around or feeling uncomfortable. With your workspace set up, you’re now ready to dive into the exciting world of DIY and transform that nightstand into a fantastic play kitchen!
Design Ideas for Your Play Kitchen
Transforming a nightstand into a play kitchen is not just about functionality; it's also about creating a magical space that sparks your child's imagination. The design of the play kitchen can reflect your child's personality and interests, making it a special place for them to explore and create. Think of it as a canvas where you can paint their dreams! You can start by selecting a color scheme that resonates with your little one. Bright, vibrant colors like sunny yellow or cheerful red can energize the space, while softer pastels can create a calm, inviting atmosphere. Consider incorporating elements that reflect their favorite themes—perhaps a whimsical fairy tale kitchen or a sleek, modern chef's corner.
Another fantastic idea is to add thematic decals or stickers. These can be easily applied and removed, allowing you to change the look of the kitchen as your child grows. For instance, if they love animals, you could adorn the kitchen with cute animal stickers or even create a farm-themed kitchen with barn designs. Don't forget about the countertop! You can use contact paper in fun patterns or even paint it with chalkboard paint for an interactive surface where your child can doodle or write their own recipes.
Incorporating functional elements can also add to the play kitchen's charm. For instance, you might add a small sink made from a bowl or a faucet using a simple pipe. These features not only enhance the play experience but also encourage imaginative role-playing. You can even create a mini oven door with a small piece of wood and some hinges, making it feel like a real kitchen! The more interactive the kitchen is, the more fun your child will have.
Lighting is another important aspect to consider. Adding a small LED light above the kitchen can create a cozy ambiance, especially during playtime in the evenings. You can also hang some fairy lights around the kitchen area to give it a magical touch. Remember, the goal is to make the play kitchen a place where your child feels inspired to cook, create, and play!
Lastly, don't underestimate the power of accessories. A few well-placed items can really bring the design together. Think about adding a small shelf for toy pots and pans, or a hanging rack for utensils. These small details not only enhance the aesthetic but also teach your child about organization and tidiness. By considering these design ideas, you're not just creating a play kitchen; you're crafting a world of wonder and creativity that your child will cherish for years to come.
Q: What materials do I need to start my DIY play kitchen project?
A: You will need a nightstand, paint, brushes, sandpaper, hardware (like knobs and hinges), and decorative elements like stickers or decals.
Q: How long does it typically take to complete the project?
A: Depending on your experience and the complexity of your design, it can take anywhere from a few hours to a couple of days, especially if you allow time for paint to dry.
Q: Can I use any nightstand for this project?
A: Yes, but it's best to choose one that is sturdy and has enough space to accommodate the features you want to add, like a sink or an oven.
Step-by-Step Instructions
Transforming your nightstand into a delightful play kitchen can be an exciting project, and following these will ensure you create a fun and functional space for your little ones. First things first, you’ll want to gather your materials and tools before diving in. Having everything at hand will help you stay organized and focused, making the process smoother. So, let’s roll up those sleeves and get started!
Begin by preparing the nightstand. This is crucial to achieving a polished final product. Start by cleaning the surface thoroughly to remove any dust or grime. Once it’s clean, grab some sandpaper and gently sand the surfaces. This step is essential because it helps the paint adhere better, giving you a professional-looking finish. After sanding, wipe down the nightstand again to eliminate any dust particles. If your nightstand has any scratches or imperfections, consider applying a coat of primer to create a smooth base for painting.
Now that your nightstand is prepped, it’s time to unleash your creativity with paint! Choose a color that resonates with your child's personality or matches the decor of your home. Bright colors like red, yellow, or turquoise can create a vibrant play space, while softer pastels might offer a calming effect. When painting, use a brush for detailed areas and a roller for larger surfaces to save time. Apply at least two coats for even coverage, allowing adequate drying time between applications. Don't forget to paint the inside of the nightstand as well; it can serve as a hidden storage area for toys or kitchen accessories!
Once the paint has dried, it’s time for the finishing touches. Consider adding some fun elements like knobs or handles that resemble kitchen appliances. You can find these at your local hardware store or online. Installing a small mirror can mimic a backsplash, giving your play kitchen a more realistic feel. Additionally, think about adding a faux stove top using round wooden discs painted black. These can be glued onto the surface to represent burners, and they are easy to clean!
Now, let’s talk about the accessories. A play kitchen wouldn’t be complete without some fun toys and utensils. You can make your own DIY accessories like play food, pots, and pans using materials you have around the house. For instance, old cardboard can be transformed into pizza slices or burgers. If crafting isn't your forte, don’t worry! There are plenty of affordable options available online or at toy stores. Just ensure that any purchased items are safe for your child's age group.
Lastly, take a moment to step back and admire your handiwork. It’s important to remember that this play kitchen is not just a toy; it’s a space where your child can explore their imagination and creativity. Encourage them to play and engage with their new kitchen, and watch as they whip up imaginary meals and host tea parties with their friends!
Q: How long will this project take?
A: Depending on your experience and the complexity of your design, the project can take anywhere from a few hours to a couple of days, especially if you include drying times for paint.
Q: Can I use any type of nightstand?
A: Yes, as long as it is sturdy and has enough surface area for your desired kitchen features, almost any nightstand can be repurposed!
Q: What if I make a mistake while painting?
A: Don’t worry! Mistakes can be fixed. If you accidentally paint outside the lines, wait for the paint to dry and then sand it down gently before repainting.
Q: How can I ensure the play kitchen is safe for my child?
A: Always use non-toxic paints and finishes. Additionally, check for any sharp edges and consider rounding them off or covering them to prevent accidents.

Preparing the Nightstand
Before diving into the fun part of painting and assembling your play kitchen, it's essential to prepare your nightstand properly. Think of this step as laying the foundation for a beautiful house; without a solid base, everything else can crumble. First and foremost, start by giving your nightstand a thorough cleaning. Dust and dirt can interfere with paint adhesion, so grab a damp cloth and wipe down all surfaces. If your nightstand has any old stickers or residue, a bit of rubbing alcohol can work wonders.
Once clean, it’s time to assess the surface of your nightstand. Look for any scratches or dents that need attention. If you find any, don’t fret! A little bit of sanding can go a long way. Use medium-grit sandpaper to smooth out rough spots and ensure a flat surface. Remember, the goal is to create a canvas that’s ready for your creative masterpiece. After sanding, wipe the surface again to remove any dust particles created during the process.
Next up is priming. Think of primer as the magic potion that helps your paint stick better and last longer. Choose a quality primer that suits the material of your nightstand—whether it’s wood, laminate, or something else entirely. Apply a thin layer of primer using a brush or roller, ensuring even coverage. Allow it to dry completely, as this will set the stage for your vibrant paint colors.
To make the preparation process even smoother, here’s a quick overview of what you should do:
- Clean: Wipe down the nightstand to remove dust and debris.
- Sand: Smooth out any imperfections with medium-grit sandpaper.
- Prime: Apply a coat of primer for better paint adhesion.
Once you’ve completed these steps, your nightstand will be prepped and primed for transformation! This preparation is crucial because it not only enhances the final look of your play kitchen but also ensures that your hard work lasts through countless play sessions. So, take your time with this part; it’s all about setting the right tone for the fun that’s about to unfold!

Painting and Finishing Touches
When it comes to transforming your nightstand into a stunning play kitchen, the painting and finishing touches are where the magic truly happens. This is your chance to let your creativity shine and make the kitchen come alive with vibrant colors and delightful details. First off, choosing the right paint is essential. You’ll want to opt for non-toxic, child-safe paint, especially since little ones will be playing in this space. Acrylic paints are a popular choice due to their durability and ease of use.
Before you dive into painting, ensure that the surface of your nightstand is properly prepared. This means cleaning off any dust or grime and lightly sanding the surface to create a smooth base for your paint. Once your nightstand is prepped, it’s time to get creative! Think about a color scheme that will inspire your child’s imagination. You could go with a classic kitchen look, using whites and pastels, or choose bold, bright colors that pop. Don't forget to consider adding fun patterns or decals to enhance the visual interest. For instance, you could paint a whimsical backsplash or add stickers of fruits and vegetables to mimic a real kitchen.
As you start painting, remember that technique matters. Use a brush for detailed areas and a roller for larger surfaces to ensure an even coat. If you’re feeling adventurous, you might even consider using a sponge for a textured effect. Once the first coat is dry, assess whether you need a second coat for full coverage. This is also a great time to think about the finishing touches that will elevate the look of your play kitchen. Consider using a clear sealant to protect your paint job from wear and tear, especially if your little chef is particularly enthusiastic during playtime.
Finally, don’t underestimate the power of hardware! Swapping out the standard knobs for some fun, themed ones can add a unique touch that makes your play kitchen truly one-of-a-kind. Think about using knobs shaped like fruits, vegetables, or even tiny kitchen utensils. These small details can make a big difference in the overall aesthetic of your DIY project.
In summary, painting and finishing touches are crucial for making your repurposed nightstand into a delightful play kitchen. With the right paint, a splash of creativity, and attention to detail, you can create a space that not only looks great but also encourages imaginative play. So grab your brushes, let your imagination run wild, and watch as your nightstand transforms into a magical culinary playground!
Q: What type of paint should I use for the play kitchen?
A: It’s best to use non-toxic, child-safe acrylic paint for durability and safety.
Q: How can I ensure the paint lasts?
A: Properly prepare the surface by cleaning and sanding, and apply a clear sealant once the paint is dry.
Q: Can I use wallpaper for the backsplash?
A: Absolutely! Wallpaper can add a fun and colorful touch to your play kitchen.
Q: What if I don’t want to paint?
A: You can also use adhesive vinyl or contact paper for a quick and mess-free option.
Q: How do I clean the play kitchen after it’s done?
A: Use a damp cloth with mild soap to clean the surfaces, avoiding any harsh chemicals.
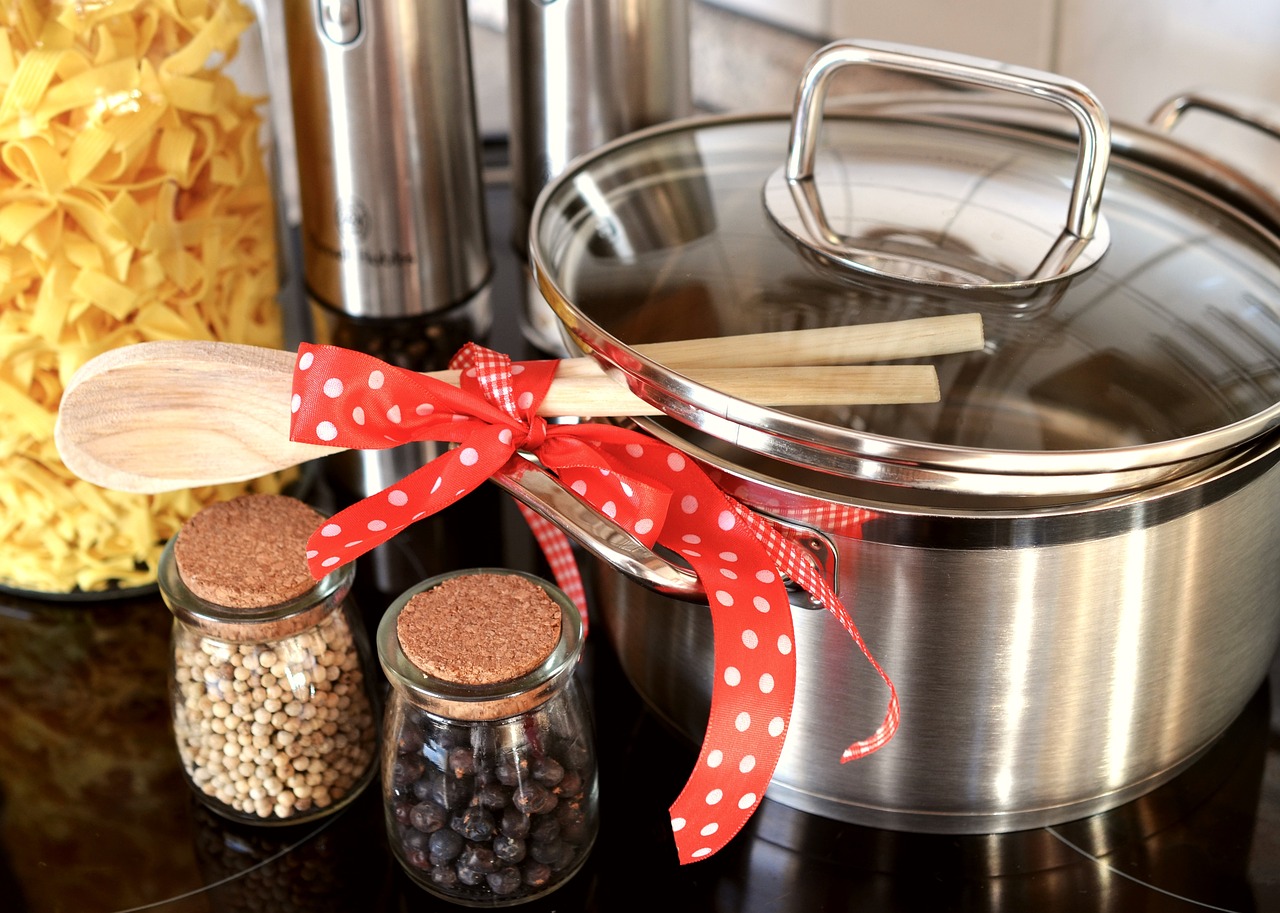
Adding Fun Accessories
Once you've transformed your nightstand into a delightful play kitchen, it's time to sprinkle in some fun accessories that will truly bring the space to life! Imagine your little ones pretending to whip up gourmet meals, all while surrounded by vibrant, playful elements that spark their imagination. Accessories can range from simple DIY creations to store-bought treasures, and each addition can enhance the overall experience of playtime.
One of the best parts of creating a play kitchen is that you can customize it to fit your child's interests. For instance, if your child loves baking, consider adding a mini oven mitt and a set of colorful baking utensils. You could even craft some faux pastries from felt or foam—these can be both fun to make and delightful to play with! Additionally, think about including a small apron that your child can wear while they cook. This not only adds to the realism but also makes them feel like a true chef!
When it comes to purchasing accessories, you can find a plethora of options both online and in local stores. Look for items that are safe for children and made from durable materials. Here are some ideas to consider:
- Play Food: Realistic fruits, vegetables, and pretend meals can stimulate imaginative play.
- Utensils: Spoons, spatulas, and measuring cups can be found in child-friendly sizes.
- Decorative Elements: Stickers, decals, or even small wall art can personalize the kitchen space.
Another fun idea is to create a small chalkboard section on the play kitchen where your child can write their 'menu' for the day. This not only encourages creativity but also helps with their writing skills! You can easily make a chalkboard by painting a section of the nightstand with chalkboard paint. It’s a simple touch that can provide endless entertainment!
For those who prefer a more hands-off approach, many stores offer adorable kitchen playsets that can complement your DIY kitchen perfectly. From miniature pots and pans to sets of colorful plates and cups, these accessories can be found at various price points, making it easy to find something that fits your budget. Plus, they often come in sets, which can save you time when accessorizing your kitchen.
Incorporating these fun accessories not only enhances the aesthetic appeal of your play kitchen but also encourages imaginative play, helping your child develop important skills. So, whether you decide to dive into some DIY projects or shop for ready-made items, remember that the goal is to create a magical space where your child can explore, learn, and have a blast!
Q: What materials are best for DIY accessories?
A: Felt, foam, and wood are great materials to use for creating durable and safe accessories. They can be easily cut and shaped into various food items or utensils.
Q: Where can I find affordable play kitchen accessories?
A: Check local thrift stores, online marketplaces, or toy stores. Many retailers offer seasonal sales on children's toys, so keep an eye out for discounts!
Q: How can I ensure the accessories are safe for my child?
A: Always look for non-toxic materials and check for any small parts that could pose a choking hazard. Reading product reviews can also help you determine the safety of an item.
DIY Accessories
Creating your own accessories for the play kitchen not only adds a personal touch but also allows you to get creative and resourceful. Imagine the joy on your child's face when they see a unique set of utensils that you've crafted just for them! DIY accessories can range from simple items like pots and pans to more intricate creations like a mini refrigerator or a spice rack. The beauty of DIY is that you can tailor each piece to match the theme of your play kitchen, whether it’s a cozy cottage style or a sleek modern design.
To get started, think about the essential items that would enhance your child's cooking experience. Here are some fun ideas to inspire your DIY journey:
- Utensils: Use wooden dowels or popsicle sticks to create spoons, spatulas, and forks. A little paint can turn these simple items into colorful kitchen tools!
- Pots and Pans: Old tin cans or small bowls can be transformed into pots and pans. Just clean them up, paint them in bright colors, and add some handles made from wire or ribbon.
- Food Items: Consider making play food from felt or foam. You can create everything from fruits and vegetables to pretend cakes and pizzas. This not only sparks imagination but also helps with fine motor skills.
Additionally, think about incorporating interactive elements into your accessories. For example, you could create a mini chalkboard menu where your child can write down their daily specials or a small shelf for storing their handmade food items. These elements encourage role-playing and make the play kitchen even more engaging.
As you embark on your DIY accessory journey, remember to involve your child in the process. Let them paint their own utensils or help you design the play food. This not only makes the project more fun but also fosters a sense of ownership and pride in their new play kitchen. Plus, it’s a fantastic opportunity for quality bonding time!
In summary, DIY accessories are a wonderful way to enhance your child's play kitchen. They encourage creativity, provide opportunities for learning, and make playtime all the more enjoyable. So gather your materials, unleash your imagination, and get crafting!
Q: What materials do I need for DIY accessories?
A: You can use a variety of materials such as wood, felt, foam, tin cans, and even recycled items from your home. The key is to be creative and resourceful!
Q: How can I ensure the accessories are safe for my child?
A: Always use non-toxic paints and materials, and avoid small parts that could be choking hazards. Supervise your child during playtime to ensure safety.
Q: Can I purchase accessories if I don't want to make them?
A: Absolutely! There are many affordable options available online and in stores that can complement your DIY kitchen beautifully.

Purchasing Accessories
When it comes to enhancing your newly crafted play kitchen, purchasing accessories can be a fun and rewarding experience. There’s an entire world of kitchen toys and utensils out there, just waiting to spark your child's imagination and creativity. The right accessories not only add to the aesthetic appeal of the play kitchen but also encourage interactive play, helping children develop essential skills.
One of the first things you might want to consider is the theme of your play kitchen. Whether you’re going for a classic farmhouse look or a vibrant modern kitchen, the accessories should complement this theme. For instance, if you’ve painted your nightstand in pastel colors, look for utensils and play food that reflect those hues. This creates a cohesive and inviting environment that will delight your little chef.
Now, let's talk about where to find these accessories. Here are a few fantastic places to start your search:
- Online Retailers: Websites like Amazon, eBay, and Etsy offer a vast selection of kitchen toys, from miniature pots and pans to realistic play food sets. The convenience of shopping online allows you to compare prices and read reviews before making a purchase.
- Local Toy Stores: Don’t overlook your local toy stores! They often carry unique and high-quality items that you might not find online. Plus, supporting local businesses is always a great idea!
- Thrift Stores and Garage Sales: For those who love a good bargain, thrift stores and garage sales can be treasure troves for gently used kitchen accessories. You might find charming vintage items that add a special touch to your play kitchen.
Additionally, think about the types of accessories that will encourage imaginative play. Here are some ideas to get you started:
- Play Food: Look for sets that include fruits, vegetables, and even pretend baked goods. These can be great for teaching kids about healthy eating while they play.
- Utensils: Miniature pots, pans, spatulas, and cutting boards can help your child mimic real cooking activities, enhancing the role-play experience.
- Decorative Items: Consider adding items like a small kitchen clock, a pretend spice rack, or even a chalkboard for writing down recipes. These details can make the play kitchen feel more authentic and engaging.
Lastly, don’t forget to involve your child in the shopping process! Let them pick out some of their favorite items to personalize their play kitchen. This not only makes the experience more enjoyable but also fosters a sense of ownership and creativity in their playtime.
In summary, purchasing accessories for your play kitchen can be an exciting adventure. With the right choices, you can create a vibrant and engaging space that will inspire countless hours of imaginative play. So, grab your shopping list and get ready to fill your child’s new kitchen with delightful treasures!
Frequently Asked Questions
- What type of nightstand is best for a play kitchen?
When selecting a nightstand for your play kitchen, look for one that is sturdy and has enough surface area to accommodate cooking activities. A nightstand with drawers can also provide extra storage for accessories. Ideally, choose a nightstand that is at a comfortable height for your child to encourage imaginative play.
- What tools do I need for this DIY project?
For your DIY play kitchen, you’ll need some essential tools, including a screwdriver, paintbrushes, sandpaper, and a drill. Don’t forget to gather materials like paint, knobs, and any additional decorative items you want to use. Having everything ready will make your project smoother and more enjoyable!
- Are there any safety precautions I should take?
Absolutely! Always wear protective gear such as gloves and goggles to keep yourself safe from dust and chemicals. Make sure your workspace is organized and free from clutter to prevent accidents. Taking these precautions will help ensure a fun and safe DIY experience.
- How can I customize the design of the play kitchen?
The sky's the limit when it comes to customizing your play kitchen! You can choose fun colors, themes, and decorative elements that reflect your child's interests. Think about adding stickers, decals, or even chalkboard paint for a creative twist. Let your imagination run wild!
- What are some easy DIY accessories I can make?
Creating your own accessories can be a blast! Consider making simple items like a cardboard oven, fabric curtains, or even DIY utensils using wooden spoons. These personal touches will not only enhance the play kitchen but also give your child a sense of ownership in their play space.
- Where can I buy accessories if I prefer not to DIY?
If DIY isn’t your thing, there are plenty of places to find affordable kitchen toys! Check out local toy stores, online marketplaces, or even thrift shops for unique finds. You can easily enhance your play kitchen with fun accessories that will keep your child entertained for hours!