Making a DIY Tissue Paper Pom Pom Decor
Welcome to the wonderful world of DIY tissue paper pom poms! If you're looking to add a splash of color and a touch of whimsy to your next celebration or home decor, you've landed in the right place. These fluffy, vibrant decorations are not only easy to make but also incredibly versatile. Imagine walking into a room adorned with these delightful creations, instantly lifting the mood and creating an inviting atmosphere. Whether you're planning a birthday party, a baby shower, or just want to brighten up your living space, tissue paper pom poms are the perfect solution.
Creating your own pom poms is a fantastic way to unleash your inner artist. Plus, it’s a fun activity that you can enjoy alone or with friends and family. As you dive into this project, you'll discover the joy of crafting, and who knows, you might even start a new hobby! Throughout this article, we will guide you through the entire process, from selecting the right materials to hanging your finished creations. So, grab your scissors and let’s get started on this colorful adventure!
First things first, let's talk about the materials you'll need. Having everything ready before you start will make the crafting process smoother and more enjoyable. Here’s a quick rundown of essential items:
- Tissue Paper: Choose your favorite colors!
- Scissors: For cutting the tissue paper.
- Wire or String: To secure and hang your pom poms.
- Optional: A ruler and pencil for precise measurements.
With your materials in hand, you're all set to create stunning pom poms that will surely impress your guests. In the following sections, we will delve deeper into the specifics of choosing the right tissue paper, step-by-step instructions for crafting, and creative ways to display your beautiful pom poms. So, let’s get crafting!

Materials Needed
Before diving into the delightful world of DIY tissue paper pom poms, it’s essential to gather all the necessary materials. Having everything on hand not only streamlines the crafting process but also ensures that you can let your creativity flow without interruptions. Here’s what you’ll need:
- Tissue Paper: The star of the show! Choose vibrant colors that resonate with your theme. You can opt for standard tissue paper, or get creative with patterned or metallic options for a unique twist.
- Scissors: A reliable pair of scissors is crucial for cutting your tissue paper to the right size. Make sure they are sharp to avoid tearing the delicate paper.
- Floral Wire or String: You’ll need this to secure the center of your pom pom. Floral wire is sturdy and easy to manipulate, while string can give a softer look.
- Ruler: For measuring your tissue paper accurately. Consistent sizes will help your pom poms look uniform and professional.
- Optional: Glitter or Decorative Items: If you want to add a little sparkle or flair to your pom poms, consider incorporating glitter or other embellishments.
Once you have these materials ready, you’re all set to embark on your crafting adventure! Remember, the beauty of DIY projects is that you can personalize your pom poms to match your style and occasion. Whether it’s a birthday party, wedding, or a cozy home decor upgrade, your tissue paper pom poms will surely add a splash of color and joy to any setting.
In addition to these basic supplies, you might want to prepare a clean workspace. Lay down some newspaper or a crafting mat to catch any stray bits of tissue paper. This little tip will make clean-up a breeze, allowing you to enjoy your crafting experience without the worry of a messy aftermath. Now, let’s get ready to create something beautiful!
Choosing the Right Tissue Paper
When it comes to crafting stunning tissue paper pom poms, the choice of tissue paper plays a pivotal role in the overall aesthetic. Imagine walking into a room where vibrant, fluffy pom poms hang gracefully from the ceiling, instantly transforming the space into a whimsical wonderland. To achieve this, you need to select tissue paper that not only fits your theme but also complements the atmosphere you wish to create.
First and foremost, consider the color of your tissue paper. The color palette you choose can evoke different emotions and set the tone for your event or decor. For instance, soft pastels can create a serene and calming environment, perfect for baby showers or weddings, while bold and bright colors can add energy and excitement to birthday parties or festive gatherings. Think about the overall theme and color scheme of your celebration—this will guide your selection process.
Next, let’s talk about texture. Tissue paper comes in various textures, and this can significantly affect the look of your pom poms. Smooth tissue paper offers a classic and elegant appearance, while crinkled or patterned tissue paper can add a fun and playful twist. Mixing different textures can also create a visually intriguing effect, making your decorations truly unique. Don't be afraid to experiment! You could even layer different textures to add depth to your pom poms.
Another important factor is the size of the tissue paper sheets. Standard sheets typically measure 20x30 inches, but you can find larger or smaller options depending on how grand you want your pom poms to be. Larger sheets can create more voluminous pom poms, ideal for making a bold statement, while smaller sheets are perfect for creating clusters of smaller pom poms that can be hung together for a more delicate effect. Consider the space where you’ll be displaying your pom poms; if it’s a large venue, oversized pom poms may be the way to go!
To help you navigate through your options, here’s a quick comparison table of tissue paper characteristics:
| Type of Tissue Paper | Color Variety | Texture | Best Use |
|---|---|---|---|
| Standard Tissue | Wide range | Smooth | Classic decor |
| Crinkled Tissue | Vibrant options | Textured | Playful themes |
| Metallic Tissue | Limited | Shiny | Glamorous events |
| Printed Tissue | Varies | Patterned | Unique and themed parties |
Ultimately, choosing the right tissue paper is about personal preference and the mood you want to create. Don’t hesitate to mix and match colors, textures, and sizes to craft a look that is distinctly yours. Remember, crafting is all about having fun and expressing your creativity!
Here are some common questions about choosing tissue paper for pom poms:
- Can I use regular wrapping paper instead of tissue paper? While wrapping paper can work in a pinch, it may not create the same fluffy effect as tissue paper.
- How many sheets of tissue paper do I need for one pom pom? Typically, 8-12 sheets are ideal for a full pom pom, but you can adjust based on the size you want.
- Where can I buy tissue paper? Tissue paper is widely available at craft stores, big-box retailers, and online.
Step-by-Step Instructions
Creating your own tissue paper pom poms is not only a fun activity but also a rewarding one. Whether you're gearing up for a birthday bash, a wedding, or just want to add a splash of color to your living space, these fluffy decorations are a fantastic choice. Let’s dive into the step-by-step process that will guide you through making these delightful adornments.
First things first, you’ll want to gather your materials. As mentioned earlier, you’ll need tissue paper, scissors, and wire. You can also use string or ribbon if you prefer to hang your pom poms. Once you have everything ready, it’s time to get your hands a little messy and let your creativity flow!
Now, let’s start with the folding technique. Take about 8 to 10 sheets of tissue paper, depending on how fluffy you want your pom pom to be. Lay them flat on a clean surface, and make sure they are aligned. Fold the stack accordion-style, making each fold about 1 to 2 inches wide. Think of it like folding a fan! This is crucial, as the more folds you create, the fuller your pom pom will be. After folding, secure the center tightly with a piece of wire or string. Make sure it’s snug, as this will hold your pom pom together.
Next, it’s time to trim the edges. This step is where you can really personalize your pom pom! You can choose to round the edges for a softer look or cut them into a point for a more dramatic flair. To do this, simply take your scissors and gently trim each end of the folded tissue paper. Be careful not to cut too deep; you want to maintain that accordion shape. Once you’ve shaped the edges, it’s time for the fun part—fluffing your pom pom!
To fluff, gently pull apart each layer of tissue paper, starting from the top. This is where the magic happens! As you pull, you’ll see your pom pom come to life. Take your time with this step; the more you fluff, the fuller and more beautiful your pom pom will be. Once you’ve achieved your desired fluffiness, you can use the wire or string to hang it up or attach it to a backdrop for a party.
Here’s a quick summary of the steps:
- Gather materials: tissue paper, scissors, wire/string.
- Fold the tissue paper accordion-style.
- Secure the center with wire or string.
- Trim the edges to your desired shape.
- Fluff the layers to create a full pom pom.
And there you have it! With just a few simple steps, you’ve created a stunning tissue paper pom pom that will surely impress your guests. Remember, practice makes perfect, so don’t hesitate to experiment with different colors and sizes. The more you create, the better you’ll get!
As you embark on your pom pom-making journey, you might have a few questions. Here are some common inquiries from fellow crafters:
- How many sheets of tissue paper should I use? For a fuller pom pom, aim for 8-10 sheets. However, you can adjust this based on your preference.
- Can I use other types of paper? Absolutely! While tissue paper is the most common choice, you can experiment with crepe paper or even colored paper for different textures.
- How do I hang my pom poms? You can use string, fishing line, or even a simple thumbtack to hang them. Be creative with your display!
- Can I reuse my pom poms? Yes! If you handle them gently, you can store them flat and reuse them for different occasions.
Folding Techniques
When it comes to creating those stunning tissue paper pom poms, the folding technique is where the magic begins. Think of it as the foundation of a house; if it's not solid, everything else may crumble. The goal here is to achieve a full and fluffy pom pom that looks like it just floated out of a fairy tale. So, let’s dive into the art of folding!
To start, you’ll want to stack several sheets of tissue paper together. The number of sheets you use will impact the pom pom's fullness. Typically, using 8 to 12 sheets works wonders. Once you have your stack, it’s time to fold. Here’s a simple technique:
- Accordian Fold: Begin folding the stack in an accordion style, making each fold about 1 to 2 inches wide. This method creates the fluffy layers that give your pom pom its volume.
- Consistent Pressure: Apply consistent pressure while folding to ensure evenness. If one fold is larger than the others, your pom pom may end up lopsided!
- Secure the Center: Once you’ve finished folding, take a piece of wire or string and tie it tightly around the center of the folded tissue. This is crucial as it holds everything together.
After securing the center, you can trim the ends of your folded tissue paper. This step is optional, but it can add a lovely touch to your pom pom. You can choose to round the edges or cut them into a point for a different effect. Remember, the way you trim can change the overall look of your pom pom, so don’t be afraid to experiment!
Once you’ve folded and trimmed your tissue paper, gently pull apart each layer, starting from the top. This is where the fluffy magic happens! Be patient and take your time; you want to avoid tearing the delicate tissue paper. As you fluff, you’ll see your pom pom take shape, transforming from a flat stack into a beautiful, voluminous decoration.
In summary, mastering the folding technique is essential for creating beautiful tissue paper pom poms. It’s all about the right number of sheets, consistent folding, and a little bit of fluffing finesse. So grab your materials and let your creativity soar!
Q: How many sheets of tissue paper should I use for my pom pom?
A: Generally, using 8 to 12 sheets will give you a full and fluffy pom pom. However, you can adjust this based on how dense you want your final product to be.
Q: Can I use different colors of tissue paper?
A: Absolutely! Layering different colors can create stunning effects. Just make sure to coordinate colors that complement each other.
Q: How can I make my pom poms last longer?
A: To increase durability, consider using a spray starch or fabric stiffener after fluffing your pom pom. This will help maintain its shape over time.
Q: Where can I hang my pom poms?
A: Pom poms can be hung from ceilings, used as table centerpieces, or even attached to backdrops for parties. Get creative with your displays!
Trimming for Shape
Once you've successfully folded your tissue paper into a beautiful pom pom, the next crucial step is . This is where the magic happens! Trimming not only enhances the overall look of your pom pom but also helps achieve that full and fluffy appearance that everyone loves. Imagine your pom pom as a bushy shrub; a little pruning can make it bloom beautifully!
To get started, lay your folded tissue paper on a flat surface. You’ll want to make sure that the edges are even before you begin trimming. A good rule of thumb is to cut the edges into a rounded or pointy shape, depending on the style you’re going for. If you want a more traditional look, rounded edges work wonders. However, if you’re feeling adventurous, try pointy tips for a more whimsical feel. Here’s a quick guide:
| Edge Style | Description | Best For |
|---|---|---|
| Rounded | Soft, smooth edges | Classic celebrations, baby showers |
| Pointy | Sharp, spiky edges | Modern decor, birthday parties |
As you trim, be sure to cut evenly across all layers of tissue paper. This ensures that each layer fluffs up uniformly, creating a balanced look. If you notice any uneven spots, don’t hesitate to trim them down—this is your chance to craft the perfect pom pom! Remember, practice makes perfect; don’t be afraid to experiment with different shapes until you find what works best for you.
Once you've achieved the desired shape, gently separate each layer of tissue paper and fluff them out. This is where you'll see your pom pom come to life! Fluffing is an art in itself; think of it as giving your pom pom a little love and attention. The more you fluff, the more voluminous and vibrant your creation will be. So go ahead, get in there and give it a good shake!
In conclusion, trimming your pom pom is an essential step that can significantly impact its final appearance. With a bit of practice and creativity, you can master this technique and create stunning tissue paper pom poms that will wow your friends and family. So grab those scissors, let your imagination run wild, and transform simple tissue paper into a gorgeous decoration!
- How many layers of tissue paper should I use? - Typically, using 8-12 layers will give you a nice, full pom pom.
- Can I use other types of paper? - Yes! Experiment with crepe paper or even lightweight fabric for different textures.
- How do I hang my pom poms? - Use fishing line or ribbon to hang them from the ceiling or walls for a festive look.

Color Combinations
When it comes to creating stunning tissue paper pom poms, play a pivotal role in elevating the overall aesthetic of your decor. The right mix of colors can transform a simple pom pom into a show-stopping centerpiece that catches the eye and sparks conversation. So, how do you choose the perfect palette? Let’s dive into some ideas and inspirations that will help you make your creations truly pop!
First off, consider the theme of your event or the ambiance of your space. Are you decorating for a birthday party, a wedding, or perhaps a cozy home gathering? Each occasion has its own vibe, and your color choices should reflect that. For instance, if you’re going for a festive feel, vibrant colors like hot pink, bright yellow, and electric blue can create an atmosphere of joy and excitement. On the other hand, softer hues such as pastels—think mint green, blush pink, and lavender—can provide a more elegant and serene touch, perfect for weddings or baby showers.
Another great way to find inspiration is by using a color wheel. Complementary colors, which are opposite each other on the wheel, tend to create a striking contrast that can make your pom poms stand out. For example, pairing a rich purple with a bright yellow can create a visually stunning effect that draws the eye. Alternatively, you can opt for analogous colors—those that are next to each other on the wheel, like blue, teal, and green—for a more harmonious and soothing look.
| Color Scheme | Description | Occasions |
|---|---|---|
| Vibrant Mix | Bright and bold colors that create a lively atmosphere. | Birthday Parties, Festivals |
| Pastel Palette | Soft, muted colors for a gentle and elegant touch. | Weddings, Baby Showers |
| Complementary Colors | Colors opposite each other on the color wheel for high contrast. | Art Exhibitions, Theme Parties |
| Analogous Colors | Colors next to each other on the color wheel for a cohesive look. | Relaxed Gatherings, Home Decor |
Additionally, don't be afraid to experiment with patterns and textures. Mixing solid colors with patterned tissue paper can add depth and interest to your pom poms. Imagine a stunning pom pom made from polka dot tissue paper combined with a solid color—talk about a conversation starter! You can also incorporate metallics like gold or silver for a touch of glam that elevates your decor to the next level.
In conclusion, choosing the right color combinations for your tissue paper pom poms is all about expressing your creativity and enhancing the mood of your space or event. Whether you go for bold and bright or soft and subtle, the possibilities are endless. So gather your materials, unleash your imagination, and let your pom poms reflect your unique style!
- What is the best type of tissue paper to use for pom poms? Generally, standard tissue paper works well. However, you can also use crepe paper for a different texture.
- How long do tissue paper pom poms last? If stored properly, they can last for several events. Just be sure to keep them away from moisture and sunlight.
- Can I reuse my pom poms? Yes! Just fluff them up again and they’ll look as good as new!
Hanging and Displaying Your Pom Poms
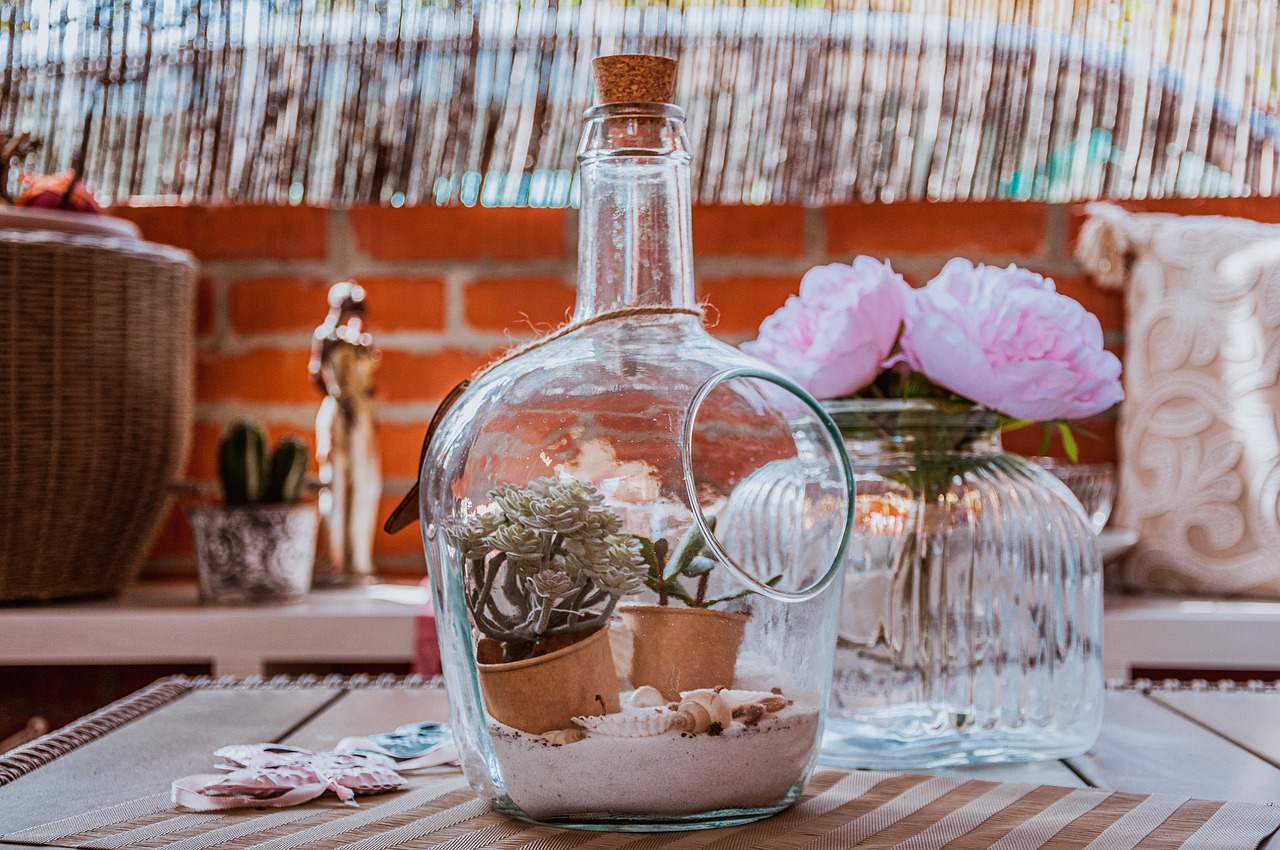
Now that you've created your stunning tissue paper pom poms, the next exciting step is figuring out how to hang and display them! These delightful decorations can transform any space, adding a touch of whimsy and color. The great thing about pom poms is that they are incredibly versatile, allowing you to get creative with their placement. So, how do you make them truly shine?
First off, think about the location. Are you decorating for a party, a wedding, or perhaps just sprucing up your living room? Each setting might call for a different approach. For example, if you’re throwing a birthday bash, hanging pom poms from the ceiling can create a festive atmosphere. You can use clear fishing line or decorative string to suspend them at varying heights, giving a sense of depth and movement. Imagine walking into a room filled with colorful pom poms swaying gently—it's like stepping into a dream!
Another fantastic option is to use your pom poms as part of a backdrop. Picture this: a stunning wall adorned with a cascade of pom poms in different sizes and colors. This not only serves as a beautiful focal point for photos but also adds an element of fun to your event. You can use a simple adhesive or command hooks to secure them to the wall. Just make sure to mix up the colors and sizes to create a dynamic look that draws the eye.
If you're looking for something a bit more unconventional, consider using your pom poms as table centerpieces. Place a few large pom poms on a table surrounded by smaller ones, or combine them with candles and flowers for a chic arrangement. This setup works beautifully for both casual gatherings and more formal events. Not only does it add a pop of color, but it also creates a warm and inviting atmosphere.
Lastly, don’t forget about the outdoor possibilities. Pom poms can be a delightful addition to garden parties or outdoor weddings. Hang them from trees or pergolas to create a magical canopy effect. Just be mindful of the weather; if it’s windy, secure them well to prevent them from flying away!
In summary, the way you hang and display your pom poms can greatly enhance their impact. Whether you choose to suspend them from the ceiling, create a backdrop, use them as centerpieces, or take them outdoors, the key is to let your creativity run wild. Don’t be afraid to experiment with different arrangements until you find the perfect setup that reflects your style and the occasion!
Q: How do I ensure my pom poms stay securely hung?
A: Use strong adhesive hooks or fishing line to hang your pom poms. Make sure to check the weight limit of your hooks to avoid any mishaps!
Q: Can I reuse my pom poms for different events?
A: Absolutely! Just store them carefully to maintain their shape, and you can reuse them for any occasion you like.
Q: What is the best way to clean pom poms?
A: If they get dusty, you can gently shake them out or use a soft brush to clean them. Avoid using water as it may ruin the tissue paper.
Q: How can I make my pom poms more durable for outdoor use?
A: Consider using heavier tissue paper or even fabric for outdoor pom poms, as they will withstand wind and moisture better than standard tissue paper.
Creative Uses for Pom Poms
Tissue paper pom poms are not just for birthday parties or baby showers; their versatility allows them to shine in a variety of settings. Imagine walking into a room adorned with these fluffy wonders, instantly transforming the atmosphere into something magical. Whether you’re looking to brighten up your home, add flair to a special event, or create unique gifts, pom poms can do it all!
One of the most popular uses for pom poms is as party decorations. You can hang them from ceilings, drape them over tables, or even attach them to chairs for a whimsical touch. They can create a festive vibe that makes any gathering feel more celebratory. Plus, they’re easy to customize to match your party theme—think bright colors for a summer bash or pastel tones for a baby shower.
But don’t stop there! Pom poms can also be a fantastic addition to your home decor. Consider creating a stunning centerpiece for your dining table by grouping several pom poms of different sizes and colors in a decorative bowl. You can even use them to adorn lampshades or picture frames, adding a playful touch to your living space. The best part? They’re lightweight and easy to change out with the seasons, so you can keep your decor fresh and exciting.
If you’re feeling particularly crafty, why not incorporate pom poms into your gift wrapping? Instead of a traditional bow, attach a small pom pom to your gift for a delightful surprise. This little detail can make your present stand out and show that you put extra thought into it. You can even create themed pom poms for holidays or special occasions, adding a personal touch that your friends and family will appreciate.
For those with children, pom poms can also be used in educational activities. They can be great for teaching colors, counting, and even fine motor skills. Set up a fun game where kids sort pom poms by color or size, or use them in crafts to create animals or other shapes. The possibilities are endless, and your kids will love the vibrant colors and textures!
In addition to these ideas, consider using pom poms for seasonal decorations. For example, you can make orange and black pom poms for Halloween or red and green ones for Christmas. They can be strung together to create festive garlands, or you can hang them in clusters to evoke the spirit of the season. It’s a fun and creative way to bring a bit of seasonal cheer into your home.
To sum it all up, the creative uses for tissue paper pom poms are limited only by your imagination. They can be used for:
- Party decorations
- Home decor accents
- Unique gift wrapping
- Educational activities for kids
- Seasonal decorations
So, gather your materials and let your creativity flow! With tissue paper pom poms, you can add a splash of color and fun to any occasion or space.
Q: How long do pom poms last?
A: When made from tissue paper, pom poms can last for several weeks to months if stored properly. Keep them in a cool, dry place to maintain their shape and color.
Q: Can I reuse pom poms?
A: Yes! If you handle them gently and store them carefully, you can reuse pom poms for different events or decorations.
Q: What is the best way to hang pom poms?
A: You can use clear fishing line, ribbon, or even tape to hang pom poms from ceilings or walls. For a more dynamic display, try varying the heights of the pom poms.
Q: Are there any alternatives to tissue paper for making pom poms?
A: Absolutely! You can use fabric, crepe paper, or even yarn to create pom poms. Each material gives a different texture and look, so feel free to experiment!
Frequently Asked Questions
- What materials do I need to make tissue paper pom poms?
To create beautiful tissue paper pom poms, you will need the following materials: tissue paper (in your choice of colors), scissors, floral wire or string, and optionally, a ruler and pencil for measuring. Having these items on hand will make your crafting experience smooth and enjoyable!
- How do I choose the right tissue paper for my pom poms?
Choosing the right tissue paper can significantly enhance the look of your pom poms. Consider the color, texture, and size of the tissue paper. For a vibrant effect, opt for bright colors or a mix of shades. If you're looking for a more elegant touch, metallic or patterned tissue paper can add a unique flair!
- Can I use other types of paper besides tissue paper?
Absolutely! While tissue paper is the most common choice, you can experiment with other lightweight papers like crepe paper or even wrapping paper. Just keep in mind that the folding and fluffing techniques may vary slightly with different paper types.
- What are some tips for folding tissue paper effectively?
To achieve a full and fluffy pom pom, try the accordion folding technique. Stack several sheets of tissue paper, fold them in 1-2 inch increments, and secure the center tightly with wire. The more folds you make, the fuller your pom pom will be!
- How do I trim my pom pom for the perfect shape?
Trimming is key to getting that stunning finished look. Once you’ve folded and secured your tissue paper, use scissors to trim the ends into a rounded or pointed shape, depending on your desired style. Just remember, practice makes perfect!
- What are some creative color combinations for pom poms?
When it comes to color combinations, the sky's the limit! You can go for a monochromatic scheme for a chic look, or mix complementary colors for a vibrant display. For example, pairing pastel pink and mint green can create a soft, dreamy effect, while bright yellow and turquoise can add a pop of fun!
- How can I hang and display my pom poms?
Displaying your pom poms can be as creative as making them! You can hang them from the ceiling, attach them to walls, or use them as centerpieces on tables. For a festive touch, try stringing them together to create a garland or using them in clusters for a stunning visual impact.
- What are some unique uses for tissue paper pom poms?
Tissue paper pom poms are incredibly versatile! Use them for birthday parties, weddings, baby showers, or even as everyday home decor. They can also be used in photo backdrops, gift wrapping, or as part of a fun DIY project. The possibilities are endless, so let your creativity shine!


