Interesting DIY Keychain Crafts for Kids
Are you ready to embark on a delightful crafting adventure with your kids? DIY keychain crafts are not just a fun way to spend an afternoon; they also offer a fantastic opportunity for children to express their creativity while honing their fine motor skills. Imagine the joy on their faces as they create personalized keepsakes that can be proudly displayed or gifted to friends and family! In this article, we will explore a variety of engaging keychain projects that are simple enough for kids to tackle, yet creative enough to keep them engaged and excited.
From colorful beaded keychains to unique shrink plastic creations, the world of DIY keychains is bursting with possibilities. These crafts encourage kids to think outside the box, experiment with colors, and develop their own unique styles. Plus, crafting together can strengthen bonds between parents and children, making it a wonderful way to spend quality time. So, let’s dive into the materials needed to get started on this creative journey!
Before jumping into the fun of creating keychains, it’s crucial to gather all the necessary materials. Having everything ready at hand not only makes the crafting process smoother but also keeps the kids engaged without interruptions. Here’s a quick overview of some basic supplies you might need:
- Beads: Different shapes, sizes, and colors can spark creativity.
- Strings or cords: For threading beads and attaching keychains.
- Fabric scraps: Perfect for making soft, personalized keychains.
- Shrink plastic sheets: These allow for magical transformations into unique designs.
- Scissors: Essential for cutting materials to the desired shape and size.
- Keychain rings: The final touch that holds everything together.
Having these materials on hand will set the stage for a fun-filled crafting session. Remember, the beauty of DIY crafts lies in their flexibility, so feel free to add any other materials you think might inspire your little ones!
One of the easiest and most enjoyable projects for kids is making beaded keychains. The process of stringing beads together not only allows children to express their creativity but also helps improve their hand-eye coordination. To get started, simply gather a selection of colorful beads and a sturdy string or cord. Kids can choose their favorite colors or even follow a theme, like rainbow colors or their favorite sports team.
When it comes to selecting beads, the options are nearly endless! Here are a few types that are particularly suitable for kids:
| Type of Bead | Description |
|---|---|
| Plastic Beads | Lightweight and available in various colors and shapes. |
| Wooden Beads | Natural and sturdy, perfect for a rustic look. |
| Foam Beads | Soft and colorful, they are great for younger kids. |
Choosing the right beads is crucial, as it can significantly affect the final look of the keychain. Encourage kids to mix and match different types and sizes to create something truly one-of-a-kind!
Understanding color theory can greatly enhance the visual appeal of their creations. For example, pairing complementary colors can make the keychain pop, while analogous colors can create a soothing effect. Encourage kids to experiment with different combinations and see what resonates with them!
Incorporating patterns can add a unique touch to beaded keychains. Kids can follow simple patterns, such as alternating colors or creating shapes, or they can let their imagination run wild and create their own designs. The sky’s the limit!
If your kids are interested in textiles, fabric keychains are a fantastic option. Using simple sewing techniques, they can create soft and personalized keychains that showcase their favorite fabric patterns or colors. This project not only teaches them basic sewing skills but also allows for endless creativity.
Shrink plastic keychains are a magical craft that kids will love! The process involves designing, cutting, and then shrinking the plastic sheets in the oven to create unique and durable keychains. This craft is perfect for children who enjoy drawing and want to see their artwork transformed into a tangible item.
Kids can unleash their creativity by designing their own shrink plastic keychains. Whether it’s their favorite cartoon character, a beloved pet, or an abstract design, the possibilities are endless! Encourage them to think about what represents their personality the best.
While crafting with shrink plastic is incredibly fun, safety should always come first. Here are a few essential tips:
- Always supervise children when using scissors and an oven.
- Use safety scissors for younger kids.
- Ensure the area is well-ventilated when shrinking plastic.
DIY keychains make excellent gifts for friends and family. Kids can create personalized keychains for special occasions like birthdays, holidays, or just as a sweet surprise! This encourages a sense of giving and allows them to put their creative skills to use.
Q: What age is appropriate for DIY keychain crafts?
A: Most keychain crafts are suitable for children aged 6 and up, with adult supervision for younger kids, especially when using scissors or heat.
Q: Can I use recycled materials for keychains?
A: Absolutely! Using recycled materials can add a unique touch and teach kids about sustainability.
Q: How long do these crafts take?
A: The time varies by project, but most keychain crafts can be completed in 1-2 hours, making them perfect for a fun afternoon activity.
Materials Needed for Keychain Crafts
Before diving into the world of DIY keychain crafts, it's essential to gather all the materials you'll need to ensure a smooth and enjoyable crafting experience. Think of this as gathering your treasure map before embarking on an exciting adventure! The right supplies can make all the difference between a chaotic crafting session and a fun-filled one. Here’s a rundown of the basic materials that will help spark creativity and keep the crafting spirit alive.
First and foremost, you'll need a variety of beads if you’re planning to create beaded keychains. These come in countless shapes, sizes, and colors, so let your imagination run wild! Along with beads, having a selection of stringing materials such as elastic cord or nylon thread is crucial. This allows for flexibility and durability, ensuring your keychains can withstand the test of time, much like a superhero's cape!
If fabric keychains are more your style, then gather some colorful fabric scraps, scissors, and a sewing kit. You don’t need to be a sewing expert; simple stitches can create beautiful designs. Additionally, having some embellishments like buttons, ribbons, or fabric paint can add that extra flair, making your keychains truly unique.
For those venturing into the magical realm of shrink plastic keychains, you’ll need shrink plastic sheets, permanent markers for drawing, and a hole punch to create holes for attaching key rings. It’s like crafting your own mini art pieces that can shrink into adorable keychains! Remember, a baking tray and an oven are also essential for the shrinking process, but don’t forget to have an adult assist with this part for safety.
Lastly, let’s not overlook the importance of some keychain rings or clips to complete your creations. These will hold your masterpieces together and allow them to be attached to bags, backpacks, or even as gifts for friends! To summarize, here’s a quick table of materials you might need:
| Type of Keychain | Materials Needed |
|---|---|
| Beaded Keychains | Beads, stringing materials (elastic cord, nylon thread) |
| Fabric Keychains | Fabric scraps, scissors, sewing kit, embellishments |
| Shrink Plastic Keychains | Shrink plastic sheets, permanent markers, hole punch, baking tray |
| All Keychains | Keychain rings or clips |
With these materials in hand, you’re ready to unleash your creativity and craft some amazing keychains! Remember, crafting is not just about the end product; it’s about the joy of creating something with your own hands. So gather your supplies, invite some friends, and let the crafting fun begin!
Simple Beaded Keychains
Beaded keychains are a fantastic starting point for kids who are eager to dive into the world of crafting. These little projects not only serve as a fun activity but also help children enhance their fine motor skills and unleash their creativity. Imagine the joy on their faces as they string together colorful beads to create something uniquely theirs! It's like painting a canvas, but in three dimensions. Plus, they get to carry their creations everywhere, turning a simple keychain into a cherished keepsake.
To kick off this crafting adventure, you'll need a few basic supplies. Gather some colorful beads, a sturdy keychain ring, and a length of elastic cord or string. The beauty of beaded keychains lies in their simplicity; you can use any type of beads you have on hand—plastic, wooden, or even glass! Each type brings a different texture and personality to the keychain.
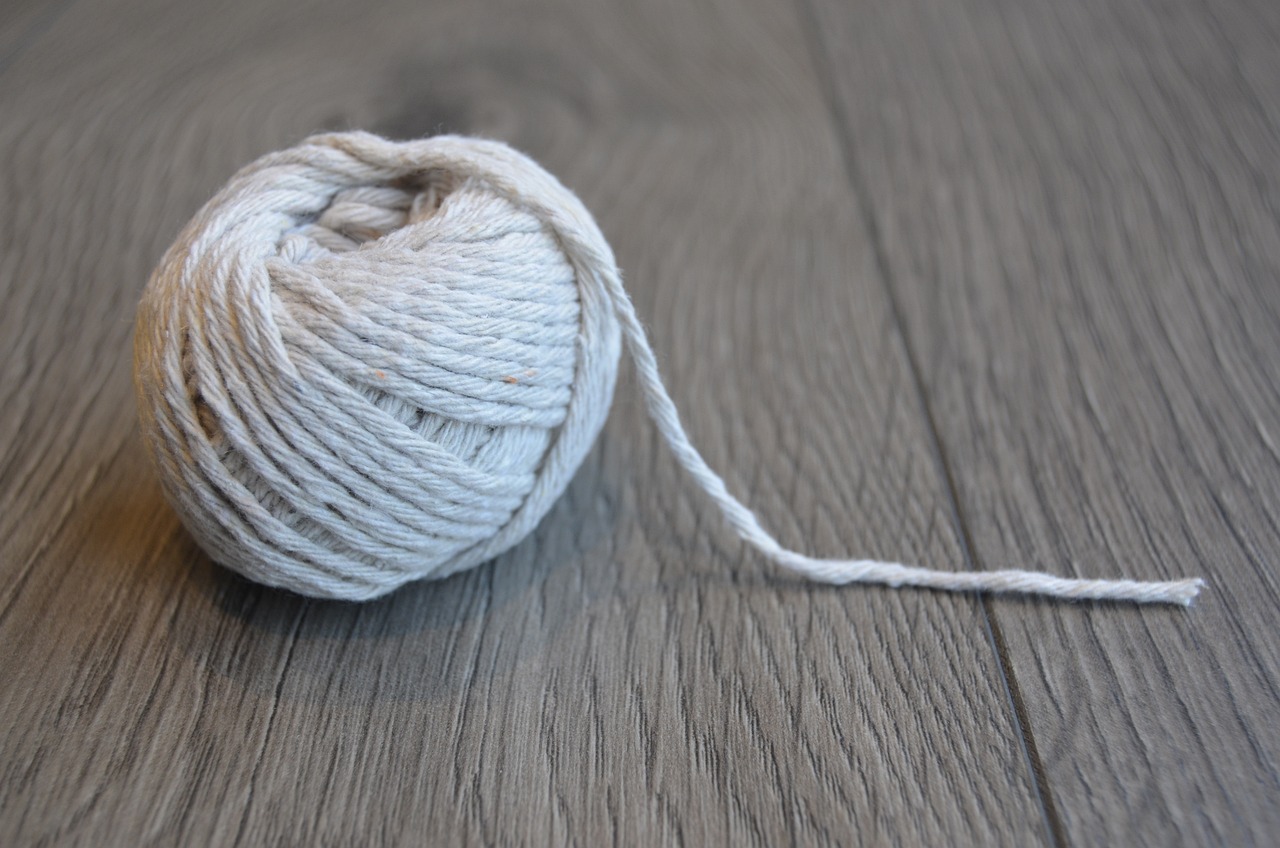
Now, let's talk about the actual process of making these keychains. Start by cutting a piece of cord that’s about 10-12 inches long. This length allows enough room for kids to work without feeling restricted. Next, tie a knot at one end of the cord to prevent the beads from slipping off. Then, let the fun begin! Kids can choose their favorite beads and start stringing them onto the cord. Encourage them to think about patterns and color combinations as they go. This is where their creativity shines!
Selecting the right beads can make a significant difference in the final product. For younger children, larger beads are easier to handle and string, while older kids may enjoy more intricate designs with smaller beads. Here are some popular bead types:
- Plastic Beads: Lightweight and come in various colors and shapes.
- Wooden Beads: Offer a natural look and are often more durable.
- Glass Beads: These can add a touch of elegance but require careful handling.
As they string the beads, remind them that there are no rules in creativity. If they want to mix and match different types of beads, let them go wild! It’s all about personal expression. Once they have strung enough beads to their liking, it’s time to finish the keychain. Simply tie another knot at the end of the cord, ensuring it’s secure so that the beads don’t slide off. Trim any excess cord, and voilà! They have their very own beaded keychain.
Understanding color theory can enhance the visual appeal of keychains. Encourage kids to experiment with different color combinations. For example, they can create a vibrant rainbow effect by arranging beads in a gradient or opt for a monochromatic look using varying shades of a single color. This not only makes the keychain visually striking but also teaches them about color harmony. A simple tip is to use the color wheel as a guide—colors opposite each other, like blue and orange, create a stunning contrast, while analogous colors, like blue and green, provide a more harmonious look.
Incorporating patterns can add uniqueness to beaded keychains. Kids can follow simple designs or modify them to create their own. For instance, they might alternate between two colors or create a repeating sequence of three different beads. This not only makes the crafting process more enjoyable but also allows them to develop a sense of design. Patterns can be as simple as:
| Pattern Type | Example |
|---|---|
| Alternating Colors | Red, Blue, Red, Blue |
| Repeating Sequence | Star, Heart, Circle, Star, Heart, Circle |
Encouraging kids to explore these patterns can spark their imagination and lead to some truly unique creations. Remember, the goal is to have fun and express themselves through their crafting!
Choosing the Right Beads
When it comes to crafting beaded keychains, the choice of beads can make or break your project. Imagine walking into a candy store, where every color and shape tempts you to create something delightful! In the same way, selecting the right beads allows children to express their individuality and creativity. There are various types of beads available, each with its unique characteristics, and understanding these can elevate a simple keychain into a cherished keepsake.
First, consider the material of the beads. Common options include:
- Plastic Beads: Lightweight and available in numerous colors and shapes, perfect for beginners.
- Wooden Beads: These add a natural touch and can be painted or left in their rustic state.
- Glass Beads: A bit heavier and more fragile, but they can add a touch of elegance.
- Metal Beads: These offer a shiny finish and durability, great for older kids who can handle them responsibly.
Next, think about the size of the beads. Smaller beads can create intricate designs, while larger beads can serve as focal points. Mixing different sizes can add depth and interest to the keychain. For example, a combination of large, colorful beads with smaller, delicate ones can create a visually stunning contrast. But remember, if the beads are too small, they might pose a choking hazard for younger children, so always supervise them during the crafting process.
Another important factor is the shape of the beads. Round beads are classic, but there are countless shapes to explore, including stars, hearts, and animals. Using a variety of shapes can make the keychain more playful and engaging. Imagine a keychain adorned with star-shaped beads and colorful round ones; it’s sure to catch the eye of friends and family!
Lastly, don't forget about color. Color theory plays a significant role in design, and understanding how colors work together can enhance the overall appeal of the keychain. Here are a few tips to consider:
- Complementary Colors: Colors opposite each other on the color wheel, like blue and orange, create a vibrant look.
- Analogous Colors: Colors next to each other, like blue, green, and teal, provide a harmonious feel.
- Monochromatic Schemes: Using different shades of the same color can create a sophisticated and cohesive design.
By paying attention to these factors—material, size, shape, and color—children can choose beads that not only look great but also reflect their personal style. This thoughtful selection process not only enhances the crafting experience but also boosts their confidence as they create something uniquely theirs. So, gather those beads and let the creativity flow!

Color Combinations
When it comes to creating eye-catching keychains, play a pivotal role in making your designs stand out. Just like a painter chooses colors to evoke emotions, kids can learn to select hues that reflect their personalities and preferences. Imagine walking into a candy store; the vibrant colors of sweets can instantly brighten your mood. Similarly, the right mix of colors in a keychain can turn an ordinary piece into a delightful accessory.
To start off, understanding the basics of color theory can be incredibly beneficial. Colors can be grouped into categories like primary, secondary, and tertiary. For instance, primary colors—red, blue, and yellow—are the building blocks of all other colors. By mixing these, kids can create secondary colors such as green, orange, and purple. This knowledge can help them experiment with their bead selections to create stunning combinations that pop!
One effective way to choose color combinations is through the use of the color wheel. The color wheel is a visual representation of colors arranged in a circle, showing the relationships between them. Kids can use this tool to find complementary colors—those that are opposite each other on the wheel, like blue and orange. These pairs create a vibrant contrast that can make any keychain visually appealing. Alternatively, they might opt for analogous colors, which are next to each other on the wheel, such as blue, teal, and green, for a more harmonious look.
Here’s a quick reference table to help kids understand some popular color combinations:
| Color Combination | Effect |
|---|---|
| Red & Green | Festive and vibrant |
| Blue & Orange | Dynamic and energetic |
| Purple & Yellow | Playful and cheerful |
| Black & Gold | Elegant and classy |
Another fun way to explore color combinations is through nature. Take a walk outside and observe how colors blend beautifully in flowers, leaves, and even the sky. Kids can draw inspiration from their surroundings, imitating the way nature effortlessly combines colors. For example, a sunset with shades of pink, orange, and purple can inspire a warm and inviting keychain design.
Lastly, don’t forget the power of personal preference. Encourage kids to choose colors that resonate with them personally. Whether it’s their favorite sports team, a beloved cartoon character, or a cherished memory, personal connections to colors can make the crafting experience even more meaningful. After all, a keychain is not just a decorative item; it’s a little piece of art that carries a story!
So, the next time kids set out to create their beaded keychains, remind them to embrace their creativity through color. By understanding color theory, utilizing the color wheel, drawing inspiration from nature, and trusting their instincts, they can craft keychains that are not only visually stunning but also uniquely theirs.
- What materials do I need for DIY keychains? Basic materials include beads, string, scissors, and keychain rings. Additional items can include fabric, shrink plastic, or paint for more advanced projects.
- Can younger kids participate in making keychains? Absolutely! Just ensure that the materials used are safe and age-appropriate, and provide supervision as necessary.
- How do I ensure the keychain is durable? Make sure to securely knot the string and consider using strong materials like metal rings for the keychain attachment.
Patterns and Designs
When it comes to creating beaded keychains, incorporating can truly elevate a simple project into something extraordinary. Patterns not only add visual interest but also allow kids to express their unique style. Think of it like painting a canvas; while a single color can be beautiful, a mix of colors and shapes creates a masterpiece!
One of the easiest ways to start is by choosing a theme. For instance, children can create keychains inspired by their favorite animals, colors, or even hobbies! This thematic approach gives them a clear direction and makes the crafting process more engaging. For example, a nature theme might include earthy tones and leaf shapes, while a sports theme could incorporate colors of their favorite team.
Here are a few simple pattern ideas that kids can follow:
- Stripes: Alternating colors in a striped pattern can add a fun twist. Kids can choose two or three colors and repeat them in a sequence.
- Spots: Using different colored beads to create a polka dot effect can be playful and eye-catching. Kids can scatter the colors randomly or follow a specific order.
- Chevron: For those feeling a bit more adventurous, a chevron pattern can be created by arranging beads in a zigzag formation. This can be a bit tricky but is very rewarding!
Moreover, children can experiment with shapes and sizes of beads. Mixing larger beads with smaller ones can create depth and interest. Additionally, using different textures, such as smooth, matte, or glittery beads, can make the keychain more tactile and engaging. Encouraging kids to play around with these elements fosters creativity and helps them develop a keen eye for design.
To aid in the design process, parents can provide children with a simple sketch pad where they can draft their ideas before starting to string the beads. This not only helps in organizing their thoughts but also builds their planning skills. After all, creating a keychain is like building a story; it needs a beginning, a middle, and an end!
Finally, remind kids that there are no strict rules in crafting. If they feel inspired to break away from traditional patterns and come up with something totally unique, they should go for it! The beauty of DIY crafts lies in their ability to reflect personal style and creativity. So, let the little ones unleash their imagination and watch as their beaded keychains come to life with their own signature patterns!
Q: What age is appropriate for kids to start making keychains?
A: Generally, children aged 6 and up can start making simple keychains with supervision. Younger kids may need help with stringing beads or using scissors.
Q: What materials are safest for kids to use?
A: Non-toxic beads and sturdy string or elastic are the best options. Always check for age recommendations on craft supplies.
Q: Can keychains be made without beads?
A: Absolutely! Kids can use fabric, shrink plastic, or even recycled materials to create unique keychains.
Q: How can I encourage my child to be more creative with their designs?
A: Encourage them to look for inspiration in nature, art, or even their favorite characters. Providing them with a variety of materials can also spark creativity!
Fabric Keychains
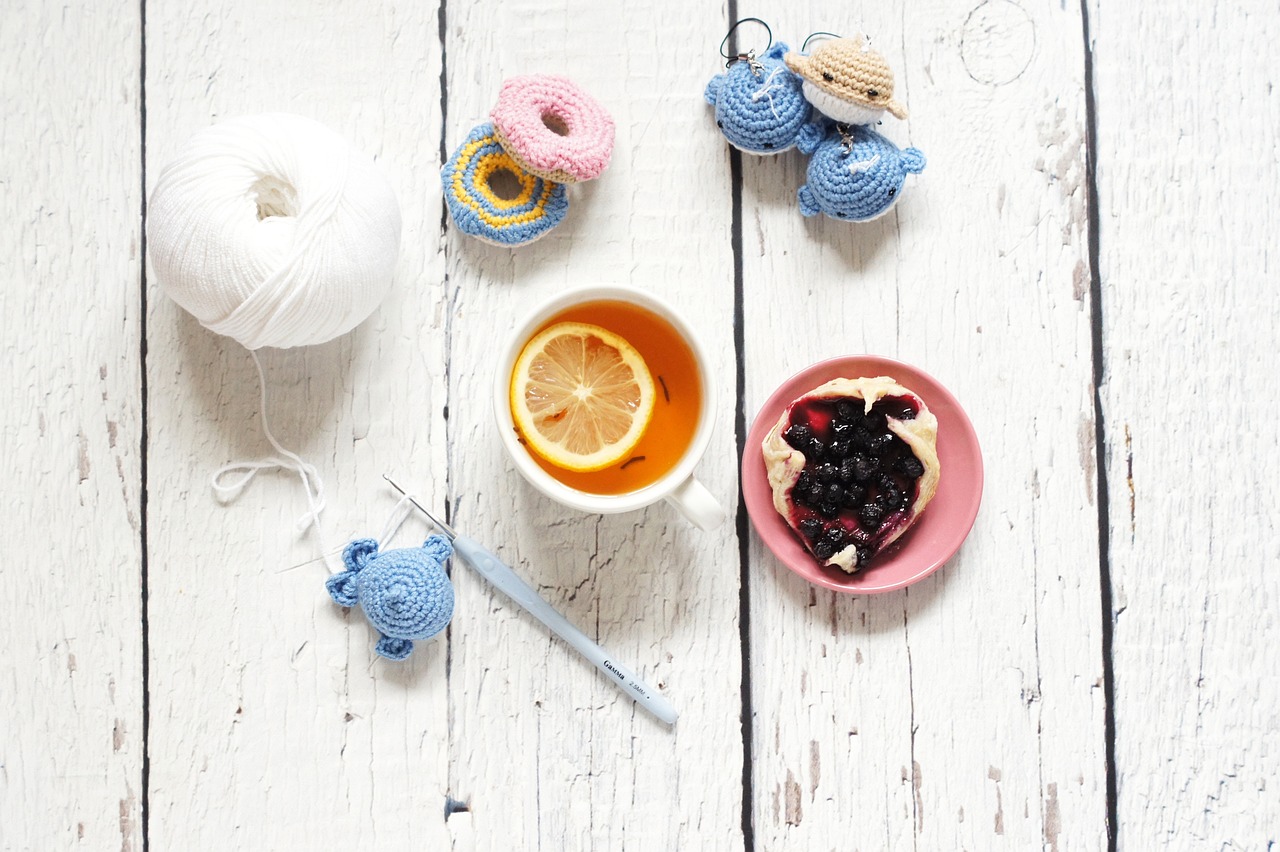
Creating is a delightful way for kids to express their creativity while learning some basic sewing skills. These keychains not only serve as a fun crafting project but also allow children to make personalized gifts for friends and family. The beauty of fabric keychains lies in their versatility; you can use a variety of fabrics, colors, and patterns to create something truly unique. Imagine a rainbow of fabric swatches, each one waiting to be transformed into a cherished keepsake!
To get started, gather some essential materials. You'll need fabric (cotton works great), scissors, a sewing needle, thread, and a keychain ring. If you're feeling adventurous, you can also add embellishments like buttons, sequins, or even fabric paint to make the keychains stand out even more. The process is simple and can be a great bonding activity for parents and kids. It’s like building a tiny little world where every keychain tells a story!
Once you have your materials ready, the first step is to cut the fabric into your desired shape. Common shapes include hearts, stars, or even simple rectangles. The size can vary, but a good rule of thumb is to keep it around 3-4 inches, making it easy to handle and attach to keys or bags. After cutting, it's time to sew! Kids can practice their stitching skills by sewing around the edges, leaving a small opening to stuff the keychain with a bit of cotton or fabric scraps for a plush effect. This part not only enhances their fine motor skills but also teaches them the importance of patience and precision.
As they sew, encourage kids to think about the design and color combinations. A well-thought-out color palette can make a simple keychain look professional. For example, pairing bright colors with neutral tones can create a visually appealing contrast. You can even introduce them to the concept of color theory—the idea that certain colors complement each other beautifully! This is where creativity meets learning, and it can spark a lifelong interest in art and design.
Finally, once the keychain is sewn and stuffed, all that’s left is to attach it to a keychain ring. This is where the magic happens! Kids can now proudly display their creations or gift them to someone special. It’s not just a keychain; it’s a little piece of love and effort that they’ve put into making something unique. Not only does this project enhance their crafting skills, but it also fosters a sense of accomplishment and pride.
In conclusion, fabric keychains are a fantastic way for kids to dive into the world of crafting. They provide an opportunity to learn new skills, express creativity, and create meaningful gifts. So, gather those materials, unleash your imagination, and let the sewing adventures begin!
- What age is appropriate for kids to start making fabric keychains?
Kids as young as 6 can start with simple fabric keychains, especially with adult supervision for sewing tasks. - Do I need any special tools for making fabric keychains?
No special tools are required, just basic sewing supplies like fabric, scissors, and a needle and thread. - Can I use old clothes or fabric scraps for this project?
Absolutely! Upcycling old clothes is a great way to be eco-friendly while creating fun projects. - How can I personalize fabric keychains?
You can personalize them by using favorite colors, adding initials, or incorporating unique embellishments.

Creative Shrink Plastic Keychains
When it comes to crafting, few things are as exciting as creating shrink plastic keychains. These magical little creations start as flat plastic sheets and transform into vibrant, miniature masterpieces that kids can proudly show off or gift to friends. The process is not just about the end product; it's about the joy of designing, cutting, and watching those designs shrink right before your eyes. Imagine the thrill of seeing a drawing you made become a tangible, durable keychain! It’s like bringing your imagination to life, right in your hands.
To get started, you'll need some shrink plastic sheets, which are readily available at craft stores or online. These sheets come in various types, including clear, frosted, and colored varieties, giving kids plenty of options to choose from. Once you have your materials, the real fun begins. Kids can draw their designs directly on the plastic using permanent markers, colored pencils, or even paint. The key is to make the designs bold and vibrant, as they will shrink down significantly, and finer details may get lost in the process.
After the designs are ready, it's time to cut them out. This is where kids can really get creative—encourage them to cut their shapes into fun and unique forms. Whether it’s a favorite animal, a beloved cartoon character, or an abstract design, the possibilities are endless! Once the shapes are cut out, place them on a baking sheet lined with parchment paper and pop them in the oven. Watching the plastic curl, shrink, and then flatten out is nothing short of mesmerizing. It’s a real-life science experiment combined with art!
However, before diving into this fun project, it’s essential to consider a few safety tips to ensure that crafting remains a positive experience:
- Supervision: Always have an adult supervise the oven process to prevent any accidents.
- Ventilation: Make sure the crafting area is well-ventilated while the plastic is heating up.
- Hot Surfaces: Remind kids to be cautious around the oven as it will be very hot.
Once the keychains are cool, kids can add additional embellishments like beads, ribbons, or even attach them to a keyring. This is where the personal touch really comes into play! They can create matching keychains for friends or family, making them perfect gifts for birthdays, holidays, or just because. The joy of giving something handmade is a wonderful experience that fosters creativity and connection.
In summary, creating shrink plastic keychains is not only a fun and creative activity but also a fantastic way for kids to express themselves. It combines art, science, and a bit of magic, making it an unforgettable crafting experience. So, gather those materials and let the creativity flow—your next favorite keychain is just a few steps away!
Here are some common questions kids and parents might have about making shrink plastic keychains:
- What type of markers can I use on shrink plastic? It's best to use permanent markers or specially designed shrink plastic pens to ensure vibrant colors that won't wash away.
- Can I reuse shrink plastic? Unfortunately, once it's been heated and shrunk, it can't be reused. However, you can always create new designs!
- How do I attach my keychain to a keyring? Simply use a small hole punch to create a hole in your design before shrinking it, then slide it onto a keyring after it's cooled.
Designing Your Shrink Plastic Keychain
Creating your own shrink plastic keychain is like stepping into a world of imagination where your ideas come to life! The process begins with a blank canvas, which in this case, is a sheet of shrink plastic. Kids can grab their favorite markers, colored pencils, or even stamps to start designing. The beauty of shrink plastic is that it allows for a wide range of creativity. Whether it's a simple heart, a favorite cartoon character, or even an abstract design, the possibilities are endless!
When designing, it's important to remember that the keychain will shrink to about one-third of its original size. This means that details should be bold and clear. Encourage kids to use thick lines and vibrant colors to ensure their designs stand out after shrinking. They can also play with layering colors—using lighter shades underneath darker ones can create a beautiful depth in the final product.
Here are a few tips to inspire your kids as they get started:
- Think Big: Start with larger designs that can be easily recognized after shrinking.
- Use Stencils: If drawing isn't their strongest suit, using stencils can help create cleaner shapes.
- Personal Touch: Adding initials or small messages can make the keychain even more special.
Once the designs are ready, kids can cut them out carefully, leaving a small border around the edges. This will help prevent any jagged edges after the shrinking process. If they want to add holes for the keychain ring, it's best to do this before shrinking, using a hole puncher. This step is crucial because once the plastic is heated, it becomes much more difficult to make adjustments.
After cutting and punching holes, it’s time for the magic to happen! The pieces can be placed on a baking sheet lined with parchment paper and popped into an oven (with adult supervision, of course!). Watching the plastic curl and shrink is a mesmerizing experience for kids, often leading to excited squeals and gasps. Once they’ve shrunk and flattened out, they need to cool down, and then voilà! They have their very own custom shrink plastic keychain ready to be attached to their bags, backpacks, or even given as gifts!
The process of designing shrink plastic keychains not only fosters creativity but also teaches kids about planning and executing a project from start to finish. Plus, it’s a fantastic opportunity for them to express their individuality. So, gather those materials and let the crafting adventure begin!
Q: What materials do I need to create shrink plastic keychains?
A: You'll need shrink plastic sheets, permanent markers or colored pencils, scissors, a hole punch, and an oven.
Q: How do I ensure my design looks good after shrinking?
A: Make sure to use bold lines and bright colors, as designs will shrink to about one-third of their original size.
Q: Can I make multiple keychains at once?
A: Yes, you can place several designs on the same baking sheet, just make sure they don’t touch each other while shrinking.
Q: Is it safe for kids to use the oven?
A: Yes, but always ensure adult supervision during the baking process to avoid any accidents.
Safety Tips for Using Shrink Plastic
Crafting with shrink plastic is an exciting adventure, but it does come with its own set of safety considerations. Before diving into the fun, it's crucial to ensure that kids understand the importance of safety while using this material. First and foremost, always supervise children when they are handling hot equipment, such as an oven or heat gun, as these can pose a burn risk. It's best to designate a safe crafting area, away from any flammable materials, to keep the environment secure.
Additionally, when working with shrink plastic, it's essential to use non-toxic markers and paints. Kids should be encouraged to read labels and choose products that are safe for their age group. This not only protects their health but also ensures that the final product is safe to use. Also, remind them to wash their hands after crafting, especially if they have been using any inks or paints, to avoid any potential irritation.
Another important tip is to ensure that the shrink plastic is cut with safety scissors or a craft knife, under adult supervision. This will help prevent any accidental cuts or injuries. When it comes to the shrinking process, always use a baking sheet lined with parchment paper to avoid any sticking, and be sure to keep a close eye on the plastic as it shrinks. It can warp quickly, and having a pair of oven mitts handy will ensure safe handling once it’s out of the oven.
In summary, while crafting with shrink plastic is a fantastic way for kids to express their creativity, adhering to these safety tips will help create a fun and hazard-free crafting experience. Remember, safety first means more fun later!
Here are some common questions that arise when crafting with shrink plastic:
- What type of plastic should I use for shrink plastic crafts? It's best to use sheets specifically labeled as shrink plastic, as they are designed to shrink properly when heated.
- Can I use regular markers on shrink plastic? No, it's essential to use non-toxic permanent markers or inks that are safe for children's use to ensure the best results and safety.
- How do I know when the shrink plastic is done shrinking? Watch for the plastic to flatten out and become slightly thicker. It usually takes about 2-3 minutes in a preheated oven at 325°F (163°C).
- Is it safe to use a heat gun instead of an oven? Yes, a heat gun can be used, but it requires careful handling and supervision, as it can get very hot and may cause the plastic to shrink unevenly if not used correctly.
Keychain Gift Ideas
DIY keychains are not just fun to make; they also make fantastic gifts for friends and family! Imagine the joy on a loved one's face when they receive a personalized keychain crafted with care. These little treasures can be tailored to suit anyone's taste, making them perfect for birthdays, holidays, or just because. Plus, creating a keychain allows kids to express their creativity while learning the value of giving. So, let’s dive into some exciting keychain gift ideas that will inspire your young crafters!
One wonderful idea is to create themed keychains. For example, kids can design keychains based on their friends' favorite animals, colors, or hobbies. If a friend loves cats, they could make a cute cat-shaped keychain using shrink plastic or fabric. Not only does this show thoughtfulness, but it also ensures that the gift is unique and special. Here's a quick breakdown of some themed keychain ideas:
| Theme | Materials | Design Ideas |
|---|---|---|
| Animals | Shrink plastic, beads, fabric | Animal shapes, paw prints |
| Sports | Wooden charms, paint | Team logos, sports equipment |
| Hobbies | Clay, fabric | Musical instruments, art supplies |
Another delightful option is to create friendship keychains. Kids can make matching keychains for themselves and their best friends, symbolizing their bond. This could be as simple as making two identical beaded keychains or designing complementary shrink plastic pieces that fit together like puzzle pieces. The process of making these keychains can also serve as a fun activity to strengthen their friendship!
For a more personalized touch, consider using initials or names. Kids can craft keychains that feature the initials of their friends or family members. This could be done with beads or by painting wooden letters. Not only does this make the gift feel special, but it also adds a layer of thoughtfulness that is sure to be appreciated. Imagine the delight of receiving a keychain that has your name beautifully displayed on it!
Lastly, seasonal keychains are a hit! Kids can create festive keychains for various holidays. For instance, they can design Christmas-themed keychains using red and green beads or Halloween keychains with spooky motifs. These seasonal gifts not only spread joy during the holidays but also serve as delightful keepsakes that can be cherished for years to come.
In conclusion, the possibilities for DIY keychain gifts are truly endless! Whether it’s themed keychains, friendship sets, personalized initials, or seasonal designs, each handcrafted keychain carries a piece of the creator’s heart. So grab those crafting supplies, unleash your creativity, and start making some memorable gifts that will surely bring smiles to your loved ones' faces!
Q: What materials do I need to start making keychains?
A: Basic materials include beads, shrink plastic, fabric, scissors, and keychain rings. You can also use paints, markers, and other embellishments to personalize your creations!
Q: Are there any safety tips for kids while crafting?
A: Yes! Always supervise children when using scissors or heat sources. Ensure they wear safety goggles when necessary and keep small items away from younger siblings to prevent choking hazards.
Q: How can I personalize a keychain further?
A: You can add charms, initials, or even small photos to make the keychain more personal. Using favorite colors or designs that reflect the recipient's personality also adds a special touch!
Frequently Asked Questions
- What materials do I need to start making DIY keychains?
To kick off your DIY keychain journey, gather some essential materials! You'll need beads, strings, fabric, scissors, shrink plastic sheets, and markers. Don't forget to have some keychain rings or clips on hand to finish your creations!
- Can kids of all ages participate in making keychains?
Absolutely! DIY keychain crafts are perfect for kids of various ages. Younger kids might need a bit more supervision, especially with tools like scissors or hot glue. But older kids can really dive into the creative process and experiment with different designs!
- How do I choose the right beads for my keychain?
Choosing the right beads is like picking the perfect toppings for your pizza! Consider the size, shape, and color of the beads. Mix and match different types to create unique patterns. Remember, the more colorful, the better!
- What is shrink plastic, and how is it used in keychain making?
Shrink plastic is a magical material that shrinks when heated, allowing kids to create fun, custom designs. They can draw or color on it, cut it out, and then bake it in the oven. Once shrunk, it becomes a sturdy and unique keychain!
- Are there any safety tips I should keep in mind while crafting?
Yes, safety is super important! When using shrink plastic, ensure kids are supervised while using the oven. Also, keep scissors and other sharp tools out of reach of younger children. Always encourage them to wash their hands after crafting!
- What are some creative gift ideas using DIY keychains?
DIY keychains make fantastic gifts! Kids can personalize them for friends and family by adding initials, favorite colors, or even tiny charms that reflect their interests. These heartfelt creations can be perfect for birthdays, holidays, or just to say "I care!"


