A Helpful Guide for Troubleshooting your Sewing Machine
Have you ever been in the middle of a sewing project, and suddenly your machine starts acting up? It’s frustrating, isn’t it? But don’t worry! This article provides practical tips and solutions for common sewing machine problems. Whether you're a beginner just starting out or an experienced sewist with years of experience, these troubleshooting steps will help you get back to sewing smoothly in no time.
Understanding the most frequent problems that arise with sewing machines is crucial for any sewist. The first step in troubleshooting is recognizing these common issues. Here are some typical problems you might encounter:
- Thread Jams: Often caused by incorrect threading or a tangled upper thread.
- Skipped Stitches: Usually a result of a dull or incorrectly inserted needle.
- Tension Problems: Can lead to loose stitches or thread breakage, often due to incorrect tension settings.
By identifying these issues, you can start to tackle them one by one, making your sewing experience much more enjoyable.
Proper threading is essential for smooth operation. If your machine isn’t threaded correctly, it can lead to a host of problems, including inconsistent stitches and even thread breakage. To ensure that both the upper and lower threads are correctly positioned, follow these steps:
Learn the step-by-step process for threading the upper part of your sewing machine. Start by raising the presser foot, which allows the tension discs to open up. Next, guide the thread through the thread guide and down into the tension mechanism. Finally, thread the needle from front to back. This ensures that the thread flows smoothly through the needle and prevents common issues.
Correct needle positioning is vital for effective sewing. Make sure to insert the needle with the flat side facing the back of the machine. This alignment not only helps in avoiding skipped stitches but also prevents potential fabric damage. Always double-check that the needle is securely tightened to avoid any mishaps while sewing.
Installing the bobbin correctly is key to preventing thread jams. To do this, wind the bobbin evenly and place it in the bobbin case, ensuring that it rotates in the correct direction. This part covers the proper techniques for winding and placing the bobbin in your machine, which is crucial for seamless sewing.
This section details how to thread the bobbin and lower thread correctly. Start by ensuring that the bobbin is properly wound. Then, insert the bobbin into its case and pull the thread through the slot. Proper lower threading ensures consistent stitch quality and prevents tangles and jams, allowing you to focus on your creative projects without interruptions.
Tension settings can greatly affect stitching quality. If your stitches are too loose or too tight, it may be time to adjust your machine's tension. This section provides guidance on how to adjust your machine's tension for different fabrics and stitch types to achieve the best results. Remember, finding the right tension is often a matter of trial and error, so don’t be afraid to experiment!
Learn how to read and interpret tension indicators on your sewing machine. These indicators are your best friends when it comes to making precise adjustments. A simple turn of the dial can make all the difference in your sewing experience, so familiarize yourself with these settings.
Explore the most frequent tension-related issues and how to troubleshoot them. Common symptoms of incorrect tension include:
- Loopy stitches on the underside of the fabric.
- Thread breaking frequently.
- Uneven stitching.
By identifying these symptoms early, you can apply effective solutions and keep your sewing projects on track.
Regular maintenance is essential for optimal sewing machine performance. Just like a car needs regular oil changes, your sewing machine requires cleaning and maintenance to function at its best. This section outlines cleaning procedures and maintenance tips to keep your machine in top condition and prevent issues before they arise.
Discover the importance of cleaning the feed dogs and how it affects fabric movement. Lint and dust can accumulate over time, causing your fabric to snag or not feed properly. Regular cleaning helps prevent lint buildup and ensures smooth feeding of materials. A quick brush with a soft cloth can work wonders!
Learn about the importance of lubricating the moving parts of your sewing machine. Proper lubrication reduces friction and wear, extending the life of your machine. Just a few drops of sewing machine oil in the right spots can keep your machine running smoothly for years to come.
Q: How often should I clean my sewing machine?
A: It's best to clean your sewing machine after every few sewing sessions, especially if you're working with fabric that sheds lint.
Q: What type of oil should I use for lubrication?
A: Always use sewing machine oil, as it is specifically designed for the delicate moving parts of your machine.
Q: Why are my stitches skipping?
A: Skipped stitches can be caused by a dull needle, incorrect needle positioning, or improper threading. Always check these factors first!
Identifying Common Issues
This article provides practical tips and solutions for common sewing machine problems. Whether you're a beginner or an experienced sewist, these troubleshooting steps will help you get back to sewing smoothly.
When it comes to sewing, nothing can be more frustrating than dealing with a faulty machine. Understanding the most frequent problems that arise with sewing machines is crucial for any sewist. By identifying these issues early on, you can save yourself a lot of time and headaches. Typical problems include thread jams, skipped stitches, and tension problems. Each of these issues can stem from various causes, and knowing what to look for can make all the difference.
For instance, thread jams often occur due to improper threading or a tangled bobbin. Imagine trying to drive a car with a flat tire; it's not going to get you far, right? Similarly, a thread jam can halt your sewing progress completely. On the other hand, skipped stitches can be a sign that your needle is either dull or incorrectly positioned. A needle that isn't aligned properly is like a dancer out of sync with the music—no matter how good the dance moves are, it just won't work.
Another common issue is tension problems, which can lead to uneven stitches that look less than professional. Tension settings can be influenced by several factors, including the type of fabric you're using and the kind of thread. It's essential to understand that each fabric has its own "personality," and adjusting the tension accordingly is like tuning a musical instrument; it requires a bit of finesse and attention to detail.
Here's a quick overview of some common sewing machine issues and their potential causes:
| Issue | Potential Causes |
|---|---|
| Thread Jam | Improper threading, tangled bobbin, or debris in the machine. |
| Skipped Stitches | Dull needle, incorrect needle position, or unsuitable thread. |
| Tension Problems | Incorrect tension settings, wrong type of thread, or fabric type. |
By keeping an eye out for these common issues and understanding their potential causes, you can troubleshoot effectively and get back to creating beautiful projects. Remember, every sewist faces challenges, but with a little knowledge and patience, you can conquer them all!
Proper threading is essential for smooth operation. This section discusses how to check and correct the threading of your sewing machine, ensuring that both the upper and lower threads are correctly positioned.
Learn the step-by-step process for threading the upper part of your sewing machine. This ensures that the thread flows smoothly through the needle and prevents common issues.
Correct needle positioning is vital for effective sewing. This subsection explains how to properly insert and align the needle to avoid skipped stitches and fabric damage.
Installing the bobbin correctly is key to preventing thread jams. This part covers the proper techniques for winding and placing the bobbin in your machine.
This section details how to thread the bobbin and lower thread correctly. Proper lower threading ensures consistent stitch quality and prevents tangles and jams.
Tension settings can greatly affect stitching quality. This section provides guidance on how to adjust your machine's tension for different fabrics and stitch types to achieve the best results.
Learn how to read and interpret tension indicators on your sewing machine. This knowledge helps in making precise adjustments to improve stitching performance.
Explore the most frequent tension-related issues and how to troubleshoot them. This includes identifying symptoms of incorrect tension and applying effective solutions.
Regular maintenance is essential for optimal sewing machine performance. This section outlines cleaning procedures and maintenance tips to keep your machine in top condition and prevent issues.
Discover the importance of cleaning the feed dogs and how it affects fabric movement. Regular cleaning helps prevent lint buildup and ensures smooth feeding of materials.
Learn about the importance of lubricating the moving parts of your sewing machine. Proper lubrication reduces friction and wear, extending the life of your machine.
Here are some common questions and answers that might help you further:
- What should I do if my sewing machine keeps jamming? Check the threading and ensure that the bobbin is correctly installed.
- How often should I clean my sewing machine? It's recommended to clean your machine after every few projects or at least once a month.
- Why are my stitches uneven? This could be due to incorrect tension settings or a dull needle.
Checking the Threading
This article provides practical tips and solutions for common sewing machine problems. Whether you're a beginner or an experienced sewist, these troubleshooting steps will help you get back to sewing smoothly.
Understanding the most frequent problems that arise with sewing machines is crucial. This section highlights typical issues such as thread jams, skipped stitches, and tension problems, along with their potential causes.
Proper threading is essential for smooth operation. Many sewing machine problems can be traced back to incorrect threading, which can lead to frustrating situations like thread jams and uneven stitches. To ensure that your sewing machine operates efficiently, it's important to check both the upper and lower threading. A well-threaded machine is like a well-oiled machine; it runs smoothly and produces beautiful stitches.
When checking the threading, start by examining the upper thread. Make sure it is correctly threaded through the tension discs, the take-up lever, and the needle. If the thread isn’t seated properly in these areas, you may experience problems such as skipped stitches or thread breakage. Similarly, check the lower thread by inspecting the bobbin. Ensure that it is wound evenly and placed correctly in the bobbin case. An improperly wound or positioned bobbin can cause significant issues, including thread jams that can halt your sewing project.
Here are some key points to remember when checking the threading:
- Ensure the upper thread is threaded through all necessary components.
- Check the needle for proper insertion and alignment.
- Inspect the bobbin for correct winding and placement.
By following these steps, you can prevent many common sewing machine issues that arise from threading mistakes. If you find that your machine is still misbehaving after checking the threading, it may be time to explore other troubleshooting avenues.
Learn the step-by-step process for threading the upper part of your sewing machine. This ensures that the thread flows smoothly through the needle and prevents common issues.
Correct needle positioning is vital for effective sewing. This subsection explains how to properly insert and align the needle to avoid skipped stitches and fabric damage.
Installing the bobbin correctly is key to preventing thread jams. This part covers the proper techniques for winding and placing the bobbin in your machine.
This section details how to thread the bobbin and lower thread correctly. Proper lower threading ensures consistent stitch quality and prevents tangles and jams.
Tension settings can greatly affect stitching quality. This section provides guidance on how to adjust your machine's tension for different fabrics and stitch types to achieve the best results.
Learn how to read and interpret tension indicators on your sewing machine. This knowledge helps in making precise adjustments to improve stitching performance.
Explore the most frequent tension-related issues and how to troubleshoot them. This includes identifying symptoms of incorrect tension and applying effective solutions.
Regular maintenance is essential for optimal sewing machine performance. This section outlines cleaning procedures and maintenance tips to keep your machine in top condition and prevent issues.
Discover the importance of cleaning the feed dogs and how it affects fabric movement. Regular cleaning helps prevent lint buildup and ensures smooth feeding of materials.
Learn about the importance of lubricating the moving parts of your sewing machine. Proper lubrication reduces friction and wear, extending the life of your machine.
Here are some common questions that many sewists have regarding their machines:
- What should I do if my thread keeps breaking? - Check the threading and ensure the needle is appropriate for your fabric.
- How often should I clean my sewing machine? - It’s best to clean it after every few projects or if you notice lint buildup.
- Why are my stitches uneven? - This could be due to incorrect tension or threading issues.
Upper Threading Techniques
Threading the upper part of your sewing machine might seem like a simple task, but it’s one of the most critical steps for achieving flawless stitches. If you’ve ever experienced frustrating thread breaks or uneven stitches, chances are the culprit was improper upper threading. So, let’s dive into the step-by-step process to ensure that your thread flows smoothly through the needle, giving you the perfect sewing experience.
First things first, always start with a clean slate. Before you begin threading, make sure your sewing machine is turned off. This not only keeps you safe but also prevents any accidental mishaps. Grab your spool of thread and place it on the spool pin, ensuring it's secure. This might sound basic, but a secure spool is essential for consistent tension.
Next, you’ll want to follow the threading path indicated on your machine. Most machines have a diagram that shows you the exact threading route. This usually involves guiding the thread through various guides and tension discs. Make sure to pull the thread through these components gently but firmly, as this ensures that the thread is seated correctly. If you skip any steps or rush through this process, you might end up with a tangled mess or, worse, a broken needle!
As you thread the machine, pay special attention to the tension discs. The thread must sit snugly between these discs to maintain proper tension. If the thread is not seated correctly, you may notice that your stitches are either too tight or too loose. After threading, don’t forget to pull a few inches of thread through the needle’s eye. This will help you gauge whether the threading is correct.
Here’s a quick checklist to ensure you’ve threaded your machine correctly:
- Is the spool placed correctly on the spool pin?
- Have you followed the threading path as indicated on your machine?
- Is the thread seated properly between the tension discs?
- Have you pulled enough thread through the needle?
Once you're confident that the upper threading is done right, it’s time to check the needle positioning. Proper needle alignment is crucial for effective sewing. Make sure the needle is inserted with the flat side facing the back of the machine. This small detail can make a world of difference. If the needle is inserted incorrectly, you might experience skipped stitches or even damage to your fabric.
After threading and positioning the needle, it’s wise to do a quick test run. Take a scrap piece of fabric and sew a few stitches. This will help you confirm that the threading is correct and that everything is working smoothly. If you notice any issues, don’t hesitate to recheck your threading and needle alignment.
Remember, mastering the upper threading technique is like learning to ride a bike; it may take a few tries, but once you get the hang of it, you’ll be zooming through your sewing projects with ease!
Q: What should I do if my thread keeps breaking?
A: If your thread keeps breaking, check for any tangles or knots in the thread, ensure the upper threading is correct, and confirm that you're using the right needle for your fabric.
Q: How can I tell if my tension is off?
A: You can usually tell if your tension is off if your stitches appear uneven or if the thread is bunching up on the underside of your fabric. Adjust the tension dial accordingly and test on a scrap piece.
Q: Is it necessary to clean my sewing machine before threading?
A: Yes, cleaning your sewing machine regularly helps prevent lint buildup that can affect threading and overall performance. A clean machine is a happy machine!
Needle Positioning
When it comes to sewing, is a critical factor that can make or break your project. Imagine trying to paint a masterpiece with a brush that's not properly aligned; the same principle applies to sewing. If your needle isn’t positioned correctly, you may end up with skipped stitches, uneven seams, or even damage to your fabric. So, let’s dive into how to ensure your needle is set up for success!
First and foremost, it’s essential to understand that the needle must be inserted into the machine in a specific way. Most sewing machines have a flat side on the needle shaft. This flat side should always face the back of the machine. If it’s not aligned this way, you might be in for a world of frustration. To insert the needle correctly, follow these easy steps:
- Turn off your machine: Safety first! Always turn off your sewing machine before making any adjustments.
- Loosen the needle clamp: Use the appropriate screwdriver to loosen the clamp that holds the needle in place.
- Insert the needle: Slide the needle up into the clamp until it cannot go any further. Ensure the flat side is facing the back.
- Tighten the clamp: Secure the needle by tightening the clamp, ensuring it is firmly in place.
After positioning the needle, it’s also essential to check its height. The needle should be set high enough to allow the bobbin thread to catch it but low enough to penetrate the fabric effectively. A good rule of thumb is to have the needle enter just slightly below the surface of the fabric. This will help you avoid fabric damage and ensure a smooth stitching process.
Another point to consider is the type of needle you are using. Different fabrics require different needle types. For instance, a universal needle works well for most woven fabrics, while a ballpoint needle is ideal for knits. Using the right needle not only improves stitch quality but also reduces the chances of skipped stitches. If you’re unsure which needle to use, refer to the needle chart below for guidance.
| Fabric Type | Recommended Needle |
|---|---|
| Woven Fabrics | Universal Needle |
| Knit Fabrics | Ballpoint Needle |
| Denim | Denim Needle |
| Silk | Microtex Needle |
In summary, proper needle positioning is not just a minor detail; it’s a significant aspect of your sewing success. By ensuring your needle is correctly inserted, at the right height, and suited for the fabric you’re working with, you can avoid a myriad of problems that could derail your sewing project. So, take a moment to double-check your needle positioning before you start sewing, and you’ll be amazed at the difference it makes!
- What should I do if my needle keeps breaking? - Ensure that you are using the correct needle type for your fabric and that it is properly positioned.
- How often should I change my sewing machine needle? - It’s a good idea to change your needle after every 8 hours of sewing or when you notice any stitching issues.
- Can I use a sewing machine needle for hand sewing? - No, sewing machine needles are designed for machines and may not work well for hand sewing.
Bobbin Installation
Installing the bobbin correctly is crucial for smooth sewing and to prevent frustrating thread jams. Think of the bobbin as the heart of your sewing machine; if it’s not working well, the whole operation can come to a halt. Let’s dive into the steps you need to follow to ensure your bobbin is installed correctly, so you can get back to creating beautiful projects without a hitch.
First, start by winding your bobbin properly. Most sewing machines come with a bobbin winder that allows you to fill the bobbin with thread evenly. Place your thread spool on the spool pin and pull the thread through the thread guide. Then, wrap it around the bobbin a few times before placing it on the bobbin winder spindle. Press the foot pedal or engage the bobbin winder to fill it up. Make sure to stop when it’s about three-quarters full to avoid overfilling, which can cause issues later.
Once your bobbin is wound, it’s time to install it. Open the bobbin case or compartment, which is usually located under the needle plate. Carefully place the bobbin into the case, ensuring that the thread unwinds in the correct direction. For most machines, this means the thread should come off the bobbin in a clockwise direction. If you're unsure, consult your sewing machine's manual for specific instructions tailored to your model.
After positioning the bobbin, pull the thread through the slot in the bobbin case and under the tension spring. This step is critical as it ensures the thread tension is just right for smooth stitching. If the thread is not secured properly, you might encounter issues like uneven stitches or thread breaks.
Now, pull the thread out slightly and close the bobbin case. Make sure it clicks into place securely. To check if everything is set correctly, you can gently pull on the thread; it should have a little resistance but should not be too tight. If it feels too loose or too tight, you may need to adjust the tension settings on the bobbin case.
Finally, re-thread the upper part of your sewing machine and prepare to start sewing. It’s always a good idea to test on a scrap piece of fabric first to ensure everything is working as it should. If you notice any issues, don't hesitate to revisit the installation process to make sure everything is in order.
Remember, a well-installed bobbin can make the difference between a smooth sewing experience and a frustrating one. By following these steps, you'll be well on your way to mastering your sewing machine!
Lower Threading Techniques
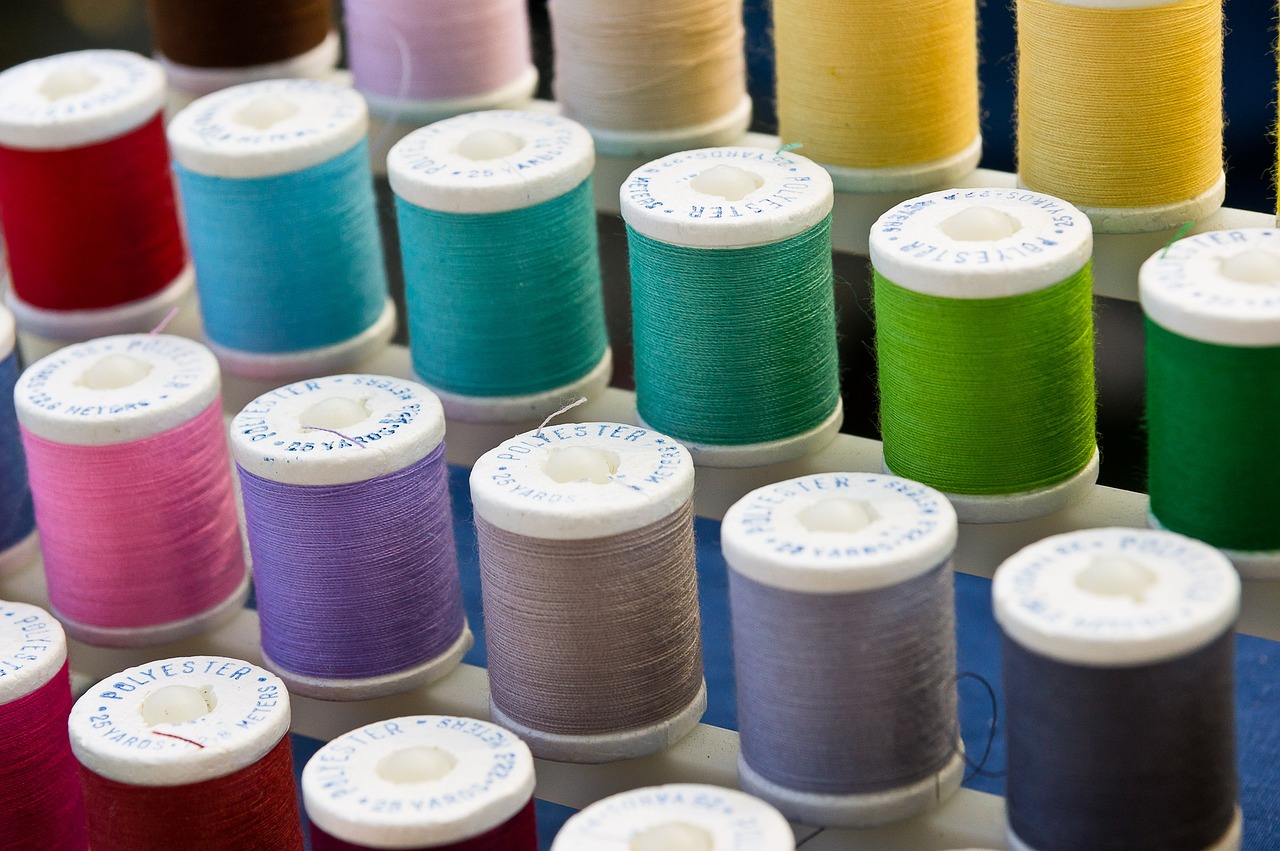
When it comes to sewing, the lower threading process is just as crucial as the upper threading. If the lower thread isn't set up properly, you might find yourself facing frustrating issues like thread jams or inconsistent stitch quality. So, let's dive into the steps to ensure your bobbin and lower thread are threaded correctly, allowing your sewing machine to perform at its best.
The first step in the lower threading process is to wind the bobbin. Make sure to use the right type of thread for your project, as different fabrics may require different thread types. To wind the bobbin, place the thread spool on the spool pin, then guide the thread through the tension disc and around the bobbin winder. Once you have the thread securely in place, push the bobbin winder to the right to engage it, and start the machine. Keep an eye on the bobbin as it winds evenly; this will help prevent future snags.
After winding the bobbin, it’s time to install it correctly into the sewing machine. Open the bobbin case and place the bobbin inside, ensuring that the thread unwinds in the correct direction. Typically, the thread should come off the bobbin in a clockwise direction. This is an essential detail that can often be overlooked, leading to further complications. Once the bobbin is in place, pull the thread through the slot in the bobbin case and under the tension spring. Make sure it’s snug but not too tight.
Now, let’s talk about threading the lower thread through the needle. This step is vital for achieving that smooth sewing experience. With the bobbin case closed, you’ll want to raise the needle to its highest position. This is usually done by turning the handwheel toward you. Next, hold the upper thread and gently pull it to bring the lower thread up through the needle plate. You should see a small loop of the lower thread emerge, which you can then grab with your fingers or a small tool.
Finally, pull both threads to the back of the machine, ensuring they’re out of the way as you start sewing. It’s a good idea to keep about 6 inches of thread behind the presser foot. This simple step helps prevent any tangling as you begin your project. Remember, if you encounter any snags or skipped stitches, it may be worth double-checking your lower threading technique.
In conclusion, mastering the lower threading techniques is essential for any sewist looking to enhance their sewing experience. By taking the time to ensure your bobbin is wound, installed, and threaded correctly, you will set yourself up for success, allowing your creativity to flow without interruption.
Here are some common questions that many sewists have regarding lower threading:
- What should I do if my bobbin thread keeps jamming? - Check to see if the bobbin is wound correctly and installed in the right direction. Also, ensure that the thread is threaded properly through the bobbin case.
- How can I tell if my lower thread tension is off? - If you notice uneven stitches or the fabric is puckering, your lower thread tension may need adjustment. Refer to your machine's manual for specific tension settings.
- Can I use any type of thread for my bobbin? - It's best to use the same type of thread for both the upper and lower threads to ensure consistent stitch quality.
Adjusting Tension Settings
When it comes to sewing, tension settings can make or break your project. Imagine trying to create a beautiful quilt, only to find that your stitches are either too tight or too loose. Frustrating, right? Properly adjusting the tension on your sewing machine is essential for achieving that perfect stitch quality, and it can vary depending on the fabric you're using and the type of stitch you want to create. In this section, we’ll dive into how to adjust your machine's tension settings and ensure that your sewing experience is as smooth as possible.
First off, let’s talk about why tension matters. The tension of the upper and lower threads must be balanced. If your upper thread is too tight, it can cause puckering on the fabric. Conversely, if it’s too loose, you might end up with loops on the underside of your fabric. To achieve that sweet spot, you'll need to experiment a bit, adjusting the tension dial on your machine. Most machines have a range of tension settings, typically from 0 to 9 or 0 to 10, depending on the model.
To make your life easier, here’s a quick reference table that outlines how to adjust tension based on common fabric types:
| Fabric Type | Recommended Tension Setting |
|---|---|
| Cotton | 4-5 |
| Silk | 2-3 |
| Denim | 6-7 |
| Knits | 3-4 |
As you can see, different fabrics require different tension settings. If you're working with a new type of fabric, it's a good idea to run a few test stitches on a scrap piece before diving into your project. This way, you can see how the tension affects the stitch quality without risking your main fabric.
Now, let’s dive deeper into understanding tension indicators. Most sewing machines come equipped with a tension dial or a digital display that shows you the current setting. Familiarizing yourself with these indicators will help you make precise adjustments. If your machine has a numerical scale, start at the middle setting and adjust from there based on your test stitches. If you notice that the stitches are too tight, try lowering the tension by one notch and test again. Alternatively, if they’re too loose, increase the tension.
Common tension problems can often be diagnosed by observing the stitch quality. For instance, if you see puckering on the fabric, this usually indicates that the upper thread tension is too tight. On the other hand, if your stitches appear loopy or uneven, it’s likely that the tension is too loose. In these cases, make small adjustments and continue testing until you achieve the desired results.
In summary, adjusting the tension settings on your sewing machine is a crucial step in ensuring quality stitching. It may take a bit of practice, but once you get the hang of it, you’ll find that it significantly enhances your sewing projects. Remember, every fabric is unique, so don’t hesitate to experiment and make adjustments as needed!
Understanding Tension Indicators
This article provides practical tips and solutions for common sewing machine problems. Whether you're a beginner or an experienced sewist, these troubleshooting steps will help you get back to sewing smoothly.
Understanding the most frequent problems that arise with sewing machines is crucial. This section highlights typical issues such as thread jams, skipped stitches, and tension problems, along with their potential causes.
Proper threading is essential for smooth operation. This section discusses how to check and correct the threading of your sewing machine, ensuring that both the upper and lower threads are correctly positioned.
Learn the step-by-step process for threading the upper part of your sewing machine. This ensures that the thread flows smoothly through the needle and prevents common issues.
Correct needle positioning is vital for effective sewing. This subsection explains how to properly insert and align the needle to avoid skipped stitches and fabric damage.
Installing the bobbin correctly is key to preventing thread jams. This part covers the proper techniques for winding and placing the bobbin in your machine.
This section details how to thread the bobbin and lower thread correctly. Proper lower threading ensures consistent stitch quality and prevents tangles and jams.
Tension settings can greatly affect stitching quality. This section provides guidance on how to adjust your machine's tension for different fabrics and stitch types to achieve the best results.
Understanding the tension indicators on your sewing machine is like having a roadmap for your sewing journey. These indicators are crucial for achieving the perfect stitch and can save you from a world of frustration. Most machines have a tension dial marked with numbers, often ranging from 0 to 9 or even higher. Each number corresponds to a specific tension setting, which affects how tightly or loosely the upper thread pulls against the lower thread.
When you start sewing, it’s essential to pay attention to the tension indicators. If the tension is too tight, you might notice that the fabric puckers or gathers, creating a less-than-desirable effect. On the other hand, if the tension is too loose, you may end up with thread loops on the underside of your fabric, which can be equally annoying. To achieve the best results, you might find it helpful to adjust the tension dial based on the type of fabric you are using. For instance:
| Fabric Type | Recommended Tension Setting |
|---|---|
| Lightweight Fabrics (like silk) | 2-4 |
| Medium Weight Fabrics (like cotton) | 4-6 |
| Heavyweight Fabrics (like denim) | 6-8 |
As you adjust the tension, take a moment to sew a test stitch on a scrap piece of the same fabric. This simple step can save you from ruining your project. If you notice any irregularities in the stitching, go back and tweak the tension dial until you achieve a smooth, even stitch.
In addition to the tension dial, some machines come equipped with tension indicators that visually show you whether the tension is balanced. A little arrow or color-coded system can help you quickly identify if your settings are on point. If you see that the indicator is in the red zone, it’s time to make some adjustments!
Ultimately, understanding and adjusting the tension indicators on your sewing machine is a skill that will improve with practice. Don’t be afraid to experiment with different settings until you find what works best for you and your projects. Remember, sewing is as much about creativity as it is about precision, so have fun with it!
Regular maintenance is essential for optimal sewing machine performance. This section outlines cleaning procedures and maintenance tips to keep your machine in top condition and prevent issues.
Discover the importance of cleaning the feed dogs and how it affects fabric movement. Regular cleaning helps prevent lint buildup and ensures smooth feeding of materials.
Learn about the importance of lubricating the moving parts of your sewing machine. Proper lubrication reduces friction and wear, extending the life of your machine.
- What should I do if my sewing machine is skipping stitches? - Check the needle, ensure it's inserted correctly, and adjust the tension settings.
- How often should I clean my sewing machine? - It's recommended to clean your machine after every few projects, or at least once a month if you sew regularly.
- Can I use any type of thread with my sewing machine? - While most sewing machines can handle a variety of threads, always check your machine's manual for recommendations on thread types.
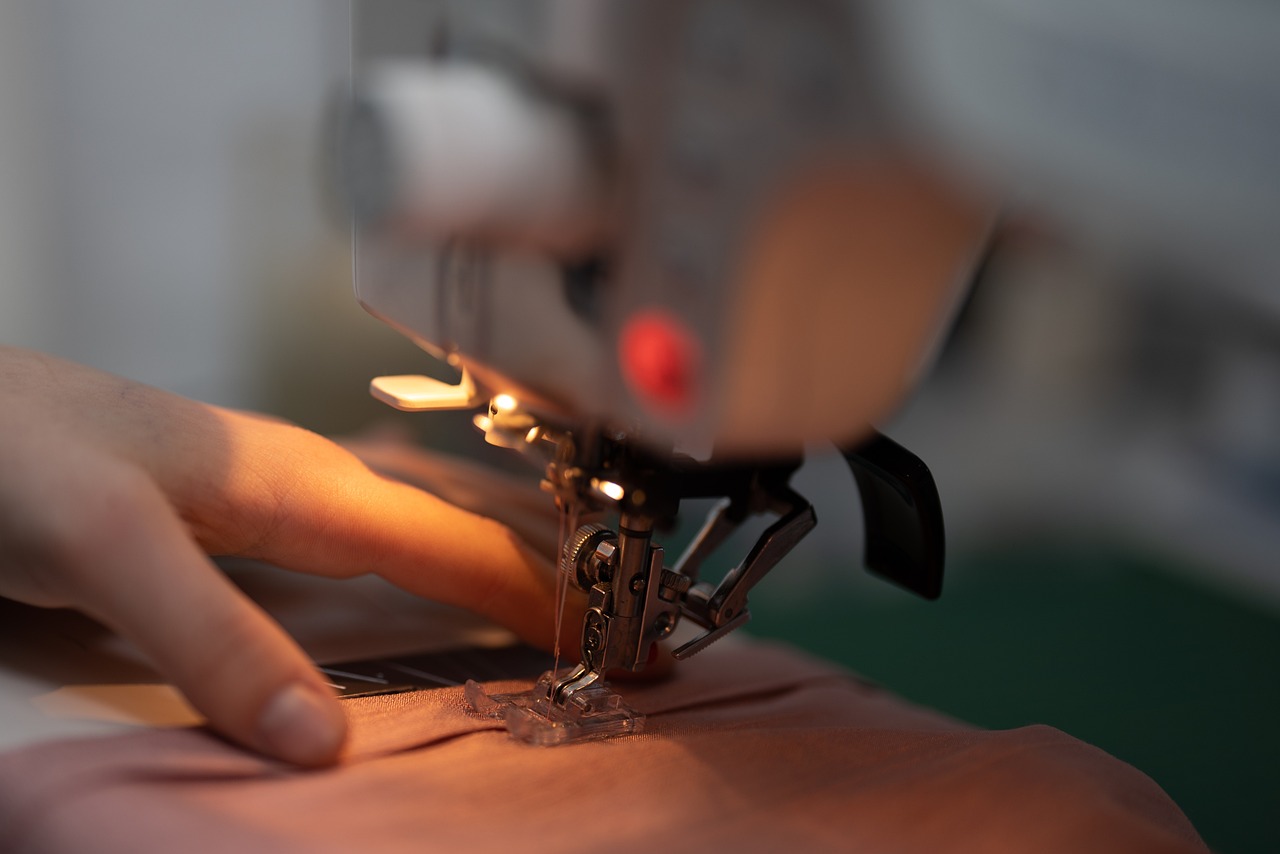
Common Tension Problems
This article provides practical tips and solutions for common sewing machine problems. Whether you're a beginner or an experienced sewist, these troubleshooting steps will help you get back to sewing smoothly.
Understanding the most frequent problems that arise with sewing machines is crucial. This section highlights typical issues such as thread jams, skipped stitches, and tension problems, along with their potential causes.
Proper threading is essential for smooth operation. This section discusses how to check and correct the threading of your sewing machine, ensuring that both the upper and lower threads are correctly positioned.
Learn the step-by-step process for threading the upper part of your sewing machine. This ensures that the thread flows smoothly through the needle and prevents common issues.
Correct needle positioning is vital for effective sewing. This subsection explains how to properly insert and align the needle to avoid skipped stitches and fabric damage.
Installing the bobbin correctly is key to preventing thread jams. This part covers the proper techniques for winding and placing the bobbin in your machine.
This section details how to thread the bobbin and lower thread correctly. Proper lower threading ensures consistent stitch quality and prevents tangles and jams.
Tension settings can greatly affect stitching quality. This section provides guidance on how to adjust your machine's tension for different fabrics and stitch types to achieve the best results.
Learn how to read and interpret tension indicators on your sewing machine. This knowledge helps in making precise adjustments to improve stitching performance.
When it comes to sewing, the importance of proper tension cannot be overstated. Tension problems can lead to a variety of frustrating issues, and understanding these can save you a lot of time and effort. One of the most common signs of tension problems is uneven stitches. If you notice that your stitches are too tight or too loose, it could be due to incorrect tension settings. For instance, if the upper thread is too tight, it may cause the fabric to pucker, while loose tension can result in threads looping on the underside of your fabric.
Another common issue is thread breakage. If your thread keeps breaking, it might be a sign that the tension is set too high. Additionally, if you’re using a heavier fabric, you may need to adjust the tension accordingly. Remember, the type of thread and needle you use also plays a significant role in tension settings. For example, using a thicker thread with a fine needle can lead to breakage.
One way to troubleshoot tension issues is by performing a simple tension test. To do this, sew a few test stitches on a scrap piece of fabric. Examine the stitches closely. If they appear uneven or if you see loops on the underside, it’s time to adjust your tension. Here’s a quick guide to help you identify common symptoms:
| Symptom | Possible Cause | Solution |
|---|---|---|
| Stitches too tight | High upper tension | Reduce upper tension setting |
| Stitches too loose | Low upper tension | Increase upper tension setting |
| Thread breaks frequently | Too high tension or wrong needle | Adjust tension or change needle |
| Loops on underside | Low upper tension or incorrect threading | Increase upper tension or rethread |
By being aware of these common tension problems and their symptoms, you can quickly diagnose and rectify issues, allowing you to get back to creating beautiful projects!
Regular maintenance is essential for optimal sewing machine performance. This section outlines cleaning procedures and maintenance tips to keep your machine in top condition and prevent issues.
Discover the importance of cleaning the feed dogs and how it affects fabric movement. Regular cleaning helps prevent lint buildup and ensures smooth feeding of materials.
Learn about the importance of lubricating the moving parts of your sewing machine. Proper lubrication reduces friction and wear, extending the life of your machine.
- What should I do if my sewing machine keeps jamming? - Check for thread tangles, ensure proper threading, and clean the bobbin area.
- How often should I clean my sewing machine? - It's recommended to clean your machine after every few projects or every few months, depending on usage.
- Can I use any thread for my sewing machine? - Not all threads are suitable; always check your machine's manual for recommended thread types.
Cleaning and Maintenance
Maintaining your sewing machine is like giving it a refreshing spa day—it rejuvenates its performance and extends its lifespan! Regular cleaning and maintenance are essential to keep your machine running smoothly and to prevent any pesky issues that might interrupt your sewing projects. Just imagine trying to sew a beautiful quilt, only to be thwarted by a thread jam or skipped stitches due to neglect. By dedicating a little time to maintenance, you can ensure that your sewing machine remains your trusty companion for years to come.
First and foremost, one of the most critical aspects of cleaning your sewing machine is removing lint and dust. Lint can accumulate in various parts of the machine, especially around the feed dogs and the bobbin area. This buildup can lead to poor stitch quality and even cause the machine to jam. To tackle this, make sure to unplug your machine before you start cleaning. Use a small brush or a vacuum attachment designed for delicate electronics to gently remove any lint. Don't forget to check the bobbin case and the area under the needle plate; these spots can often hide the most lint!
Next, let’s talk about cleaning the feed dogs. The feed dogs are essential for moving your fabric through the machine. If they’re dirty, they can’t do their job effectively. To clean them, you’ll need to remove the needle plate, which may involve unscrewing a couple of screws. Once you have access, use a soft brush to clear away any debris. If you notice any sticky residue, a small amount of rubbing alcohol on a cotton swab can help to clean it up. Just make sure everything is completely dry before reassembling!
Another vital maintenance task is lubricating the moving parts of your sewing machine. Over time, the oil used in your machine can dry up, leading to increased friction and wear on the components. Check your user manual for the specific lubrication points and recommended oil type for your machine. A few drops of oil can go a long way in keeping your machine running smoothly. Just like a well-oiled machine, your sewing machine will thank you by delivering consistent performance!
To help you remember the essential cleaning and maintenance tasks, here’s a handy table summarizing what to do and how often:
| Maintenance Task | Frequency |
|---|---|
| Remove lint and dust | After every project |
| Clean feed dogs | Once a month |
| Lubricate moving parts | Every 3-6 months |
| Check tension settings | Before starting a new project |
Finally, don’t underestimate the importance of reading your sewing machine's manual. It’s packed with specific instructions and tips tailored to your machine model. Following the manufacturer’s recommendations can save you a lot of headaches down the road. Remember, a well-cared-for sewing machine not only enhances your sewing experience but also ensures that you can tackle any project with confidence!
Q: How often should I clean my sewing machine?
A: It's best to clean your sewing machine after every project to prevent lint and dust buildup. Regular maintenance ensures optimal performance.
Q: What type of oil should I use for lubricating my sewing machine?
A: Always refer to your machine's manual for the recommended oil type. Most machines require a special sewing machine oil, which is lightweight and designed for delicate parts.
Q: Can I use compressed air to clean my sewing machine?
A: While compressed air can help blow out dust from hard-to-reach areas, it can also push lint further into the machine. It's best to use a soft brush or a vacuum attachment.
Q: What should I do if my sewing machine is still having issues after cleaning?
A: If problems persist, consider taking your machine to a professional for servicing. Sometimes, internal issues require expert attention.
Cleaning the Feed Dogs
Cleaning the feed dogs of your sewing machine is an often overlooked yet crucial aspect of maintaining your machine's performance. The feed dogs are the little metal teeth that move the fabric through your sewing machine, and if they are clogged with lint, dust, or thread bits, they can cause all sorts of problems, from uneven stitches to fabric jams. Imagine trying to drive a car with a dirty windshield; it just wouldn't work well, right? The same principle applies here. A clean set of feed dogs ensures that your fabric moves smoothly and evenly, allowing for precise stitching.
To effectively clean your feed dogs, you first need to access them. Most sewing machines have a removable plate that covers the feed dogs, making it easy to get to them. Here’s a simple step-by-step guide to help you through the process:
- Turn off your sewing machine: Safety first! Always make sure your machine is turned off and unplugged before you start any cleaning.
- Remove the needle and presser foot: This will give you better access and prevent any accidental injuries.
- Take off the needle plate: Use a screwdriver to remove the screws holding the needle plate in place. Set the screws aside in a safe spot.
- Brush away lint and debris: Use a soft brush or a lint roller to gently remove any lint or thread from the feed dogs. You can also use a small vacuum attachment to get into those hard-to-reach areas.
- Wipe with a damp cloth: After brushing, use a damp cloth to wipe down the feed dogs. Make sure not to use excessive moisture, as you don’t want to damage any electrical components.
- Reassemble your machine: Once everything is clean, reattach the needle plate, presser foot, and needle, and you're ready to sew!
Regular cleaning of the feed dogs is essential, especially if you sew frequently or work with fabrics that shed a lot of fibers. Aim to clean them at least once a month or more often if you notice any issues. By keeping your feed dogs clean, you not only enhance the performance of your sewing machine but also prolong its lifespan. Think of it as giving your machine a little spa day; it will thank you with smoother stitching and fewer headaches!
Now that you understand the importance of keeping your feed dogs clean, you might be wondering how to maintain other parts of your sewing machine. Regular maintenance, like cleaning and lubricating, can save you from unexpected breakdowns and help you enjoy your sewing projects without interruptions.
- How often should I clean my feed dogs? It's recommended to clean your feed dogs at least once a month, or more often if you sew frequently or use fabrics that produce a lot of lint.
- Can I use compressed air to clean my sewing machine? While compressed air can be effective, it’s best to avoid using it directly on sensitive parts. Instead, opt for a soft brush or lint roller.
- What should I do if my machine is still having issues after cleaning the feed dogs? If problems persist, it may be time to check other components, such as the tension settings or the needle. If you're still stuck, consulting a professional may be necessary.
Lubricating Moving Parts
When it comes to keeping your sewing machine in prime condition, lubricating the moving parts is like giving it a refreshing spa day. Just like how our joints need a bit of oil to keep moving smoothly, your sewing machine requires the same treatment to function optimally. Regular lubrication not only enhances performance but also extends the lifespan of your beloved machine. If you’ve ever felt that your machine is struggling to stitch through fabric or making weird noises, it might be time for a little TLC.
First things first, you need to identify which parts of your sewing machine require lubrication. Typically, the moving parts include the needle bar, presser foot lift, and the feed dogs. Each of these components plays a crucial role in the sewing process, and when they’re well-lubricated, they work together harmoniously. To make your life easier, here’s a quick overview of the parts that benefit from a little oil:
| Part | Function | Lubrication Frequency |
|---|---|---|
| Needle Bar | Moves up and down to create stitches | Every 3-6 months |
| Presser Foot Lift | Raises and lowers the presser foot | Every 3-6 months |
| Feed Dogs | Moves fabric through the machine | Every 6 months |
Now, let’s talk about how to actually perform this essential maintenance step. First, gather your supplies: a good quality sewing machine oil and a few cotton swabs or a small brush. Before you start, make sure your machine is turned off and unplugged. Safety first, right? Then, follow these simple steps:
- Clean First: Before applying oil, ensure that the parts are free from dust and lint. Use a soft brush or a vacuum attachment to remove any debris.
- Apply Oil Sparingly: Using a few drops of oil, apply it directly to the moving parts. Remember, less is more! You don't want excess oil to create a mess.
- Run the Machine: After lubricating, run your machine for a few minutes without fabric. This helps distribute the oil evenly and ensures everything is functioning smoothly.
It’s important to note that not all sewing machines require the same type of oil. Always refer to your machine’s manual for specific instructions regarding lubrication. Some machines are self-lubricating, while others need manual oiling. If you’re unsure, doing a little research or consulting with a professional can save you from potential mishaps.
In conclusion, regular lubrication of your sewing machine’s moving parts is an essential step in maintaining its performance and longevity. Just like how a well-oiled machine runs smoothly, your sewing machine will thank you for the care you provide. So, don’t skip this vital step in your maintenance routine, and keep your creativity flowing!
Q: How often should I lubricate my sewing machine?
A: It’s generally recommended to lubricate your machine every 3 to 6 months, depending on usage. If you sew frequently, you might want to do it more often.
Q: What type of oil should I use?
A: Always use sewing machine oil, as it is specifically designed for the delicate mechanisms of your machine. Avoid using household oils, as they may damage your machine.
Q: Can I over-lubricate my sewing machine?
A: Yes, over-lubrication can lead to excess oil buildup, which can attract dust and lint. Always apply oil sparingly.
Frequently Asked Questions
- What should I do if my sewing machine is skipping stitches?
If your sewing machine is skipping stitches, it could be due to a few reasons. First, check if the needle is properly inserted and not damaged. A bent or dull needle can cause this issue. Additionally, make sure you are using the correct needle type for your fabric. Lastly, examine the tension settings; incorrect tension can also lead to skipped stitches.
- How can I fix thread jams in my sewing machine?
Thread jams can be frustrating, but they are usually easy to fix. Start by turning off your machine and gently removing the fabric. Check the upper threading and ensure it is correctly threaded through the tension discs and needle. Don't forget to inspect the bobbin area for tangled threads and re-thread the bobbin if necessary. Regular cleaning of the bobbin case can also help prevent jams.
- How do I know if my sewing machine's tension is off?
Identifying tension issues can be straightforward. If your stitches appear loose or uneven, or if you see loops on the underside of your fabric, it’s a sign that your tension may be off. To troubleshoot, try adjusting the tension dial slightly and test sew on a scrap piece of fabric to see if the stitch quality improves.
- What maintenance should I perform on my sewing machine?
Regular maintenance is vital for keeping your sewing machine in top shape. This includes cleaning the feed dogs and bobbin area to prevent lint buildup, lubricating moving parts as recommended in your machine's manual, and checking for any loose screws or parts. A little care goes a long way in extending the life of your machine!
- Can I use any type of thread with my sewing machine?
While many types of thread can be used, it’s best to select thread that matches your project and machine specifications. For example, using a heavier thread on a lightweight fabric can cause issues. Always refer to your sewing machine manual for recommendations on thread types and sizes for optimal results.
- Why is my sewing machine making a strange noise?
If your sewing machine is making unusual noises, it could indicate a problem. Common causes include lack of lubrication, misaligned parts, or debris caught in the mechanism. Turn off the machine, inspect it for any visible issues, and refer to your manual for troubleshooting steps. If the noise persists, it might be time to consult a professional.


