
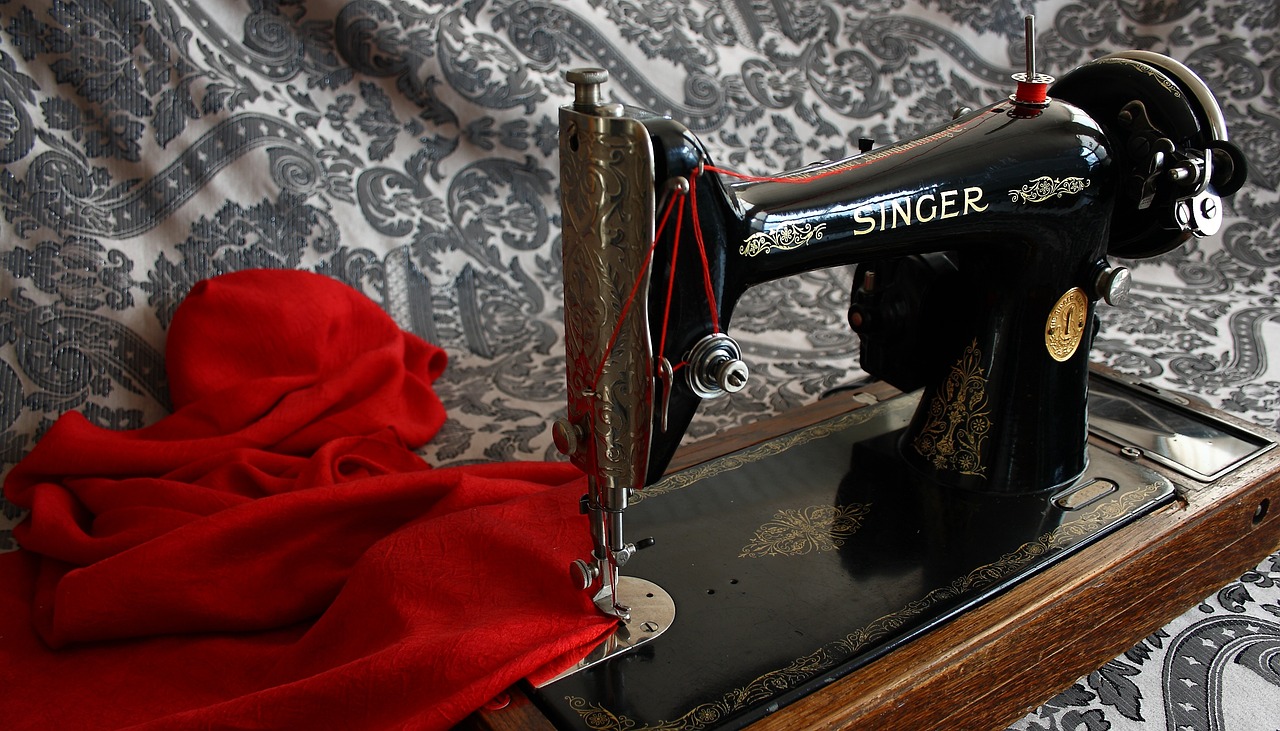
Simple Steps on How to Thread a Sewing Machine
Welcome to the world of sewing! If you're just starting out or looking to refresh your skills, you've landed in the right place. This article provides a clear guide on threading a sewing machine, ensuring beginners can easily follow along and enhance their sewing skills with simple and effective techniques. Imagine finally being able to create beautiful garments or crafts without the frustration of tangled threads or skipped stitches. Sounds great, right? Let’s dive into the essentials of threading your sewing machine like a pro!
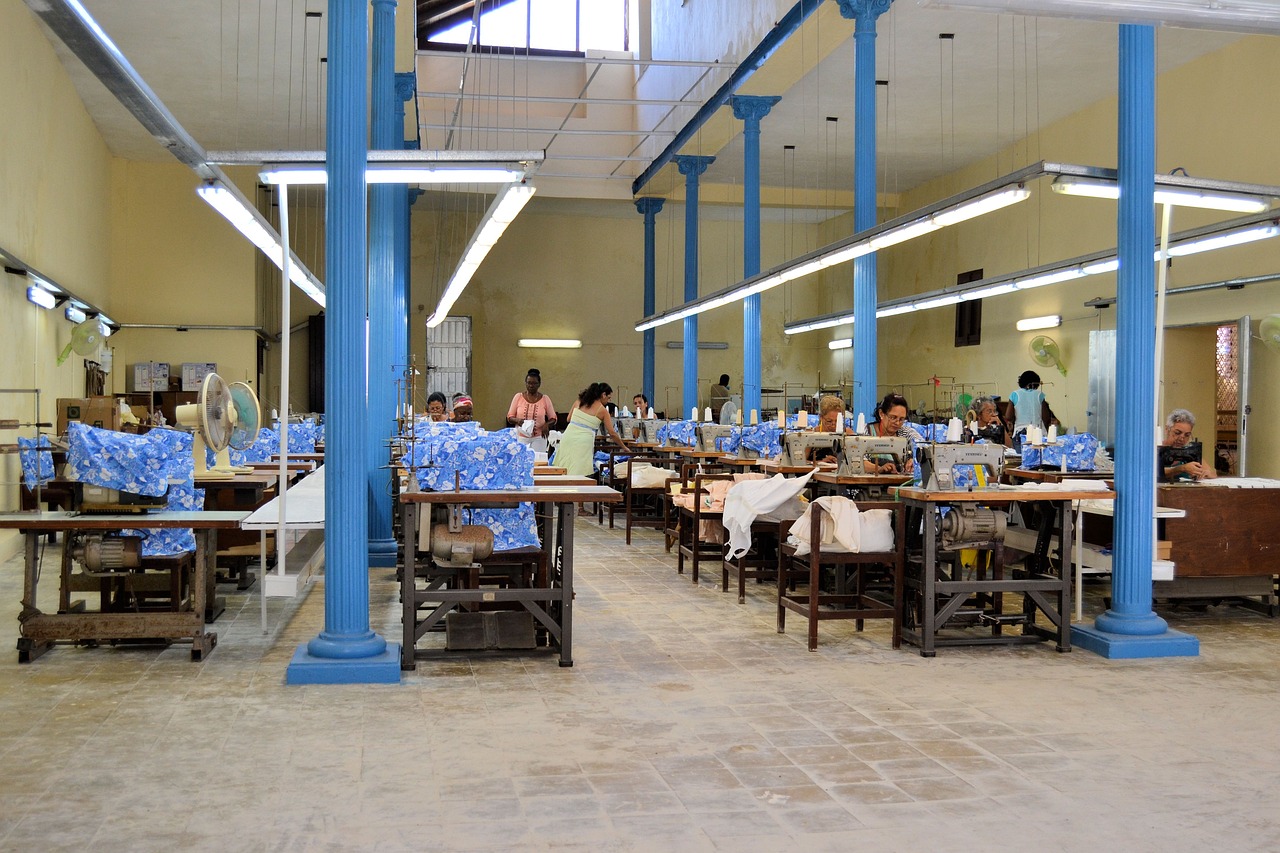
Before you even think about threading, it’s crucial to familiarize yourself with the different parts of your sewing machine. Think of your sewing machine as a car; you wouldn’t drive without knowing where the steering wheel and pedals are! Here are the key components you should know:
- Needle: This is where the magic happens! The needle pierces the fabric and pulls the thread through.
- Bobbin: This small spool holds the lower thread and works in tandem with the needle.
- Tension Settings: These control how tight or loose your thread is, which is essential for achieving the perfect stitch.
Understanding these parts will not only make threading easier but will also enhance your overall sewing experience. So, take a moment to explore your machine and get to know it!
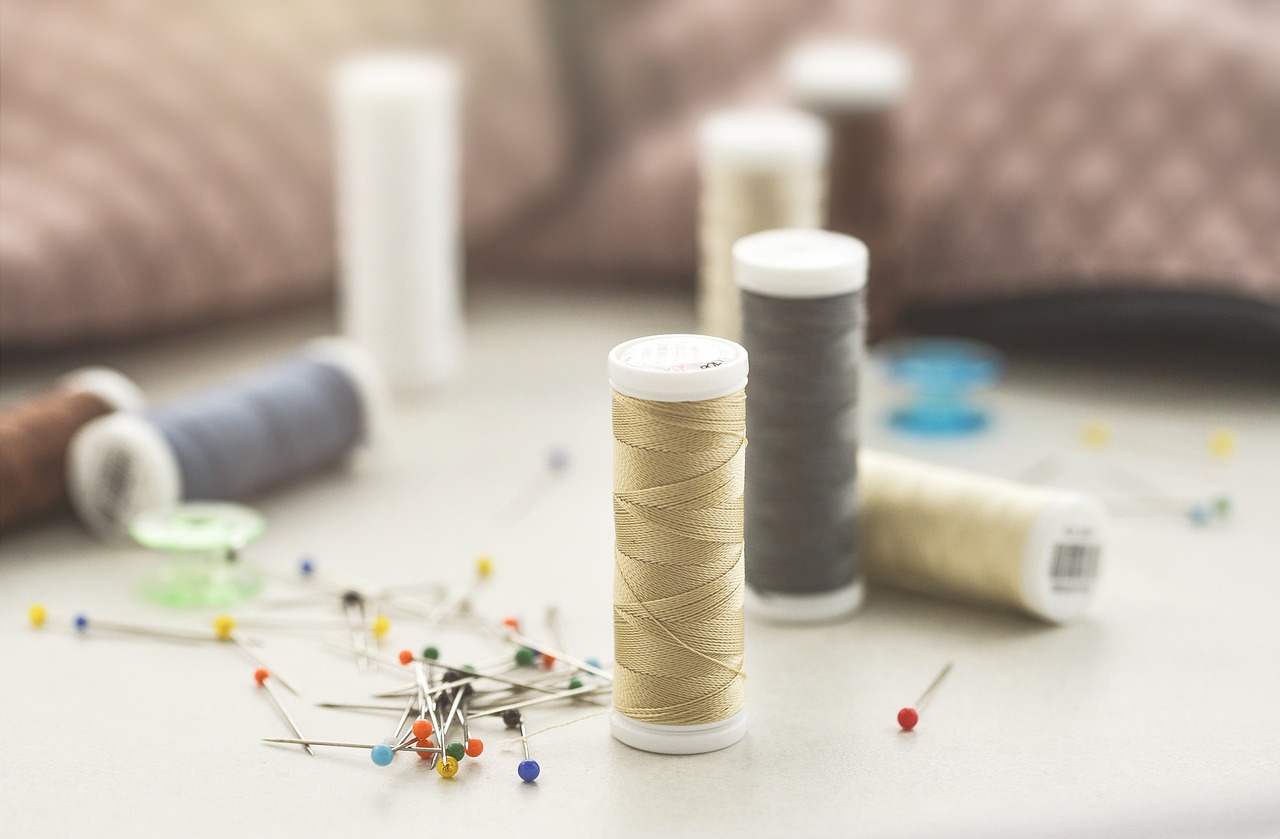
Now that you’re acquainted with your machine, let’s gather the necessary materials. Think of this step as preparing for a big dinner; you wouldn’t want to start cooking without all your ingredients in place! Here’s what you’ll need:
- Your sewing machine
- Thread (make sure it matches your fabric)
- Scissors
- Fabric
Having everything at hand will ensure a seamless threading process without interruptions. Nothing is more frustrating than getting halfway through and realizing you’re missing something!
Proper preparation of your sewing machine is crucial. This includes cleaning the machine to remove any dust or lint, ensuring the needle is correctly installed, and winding the bobbin before you start threading. Think of this as tuning a guitar before a concert; you want everything to be in perfect working order to avoid any hiccups during your sewing session.
Winding the bobbin correctly is a fundamental step in threading your sewing machine. If the bobbin is not wound properly, you might find yourself with uneven stitches or thread breakage. To wind the bobbin:
- Place your thread on the spool pin.
- Guide the thread through the tension disc.
- Wrap the thread around the bobbin a few times before placing it on the bobbin winder.
- Press the pedal to start winding.
- Once it’s full, cut the thread and remove the bobbin.
Following these steps ensures that your bobbin is ready to go, providing optimal thread tension and performance.
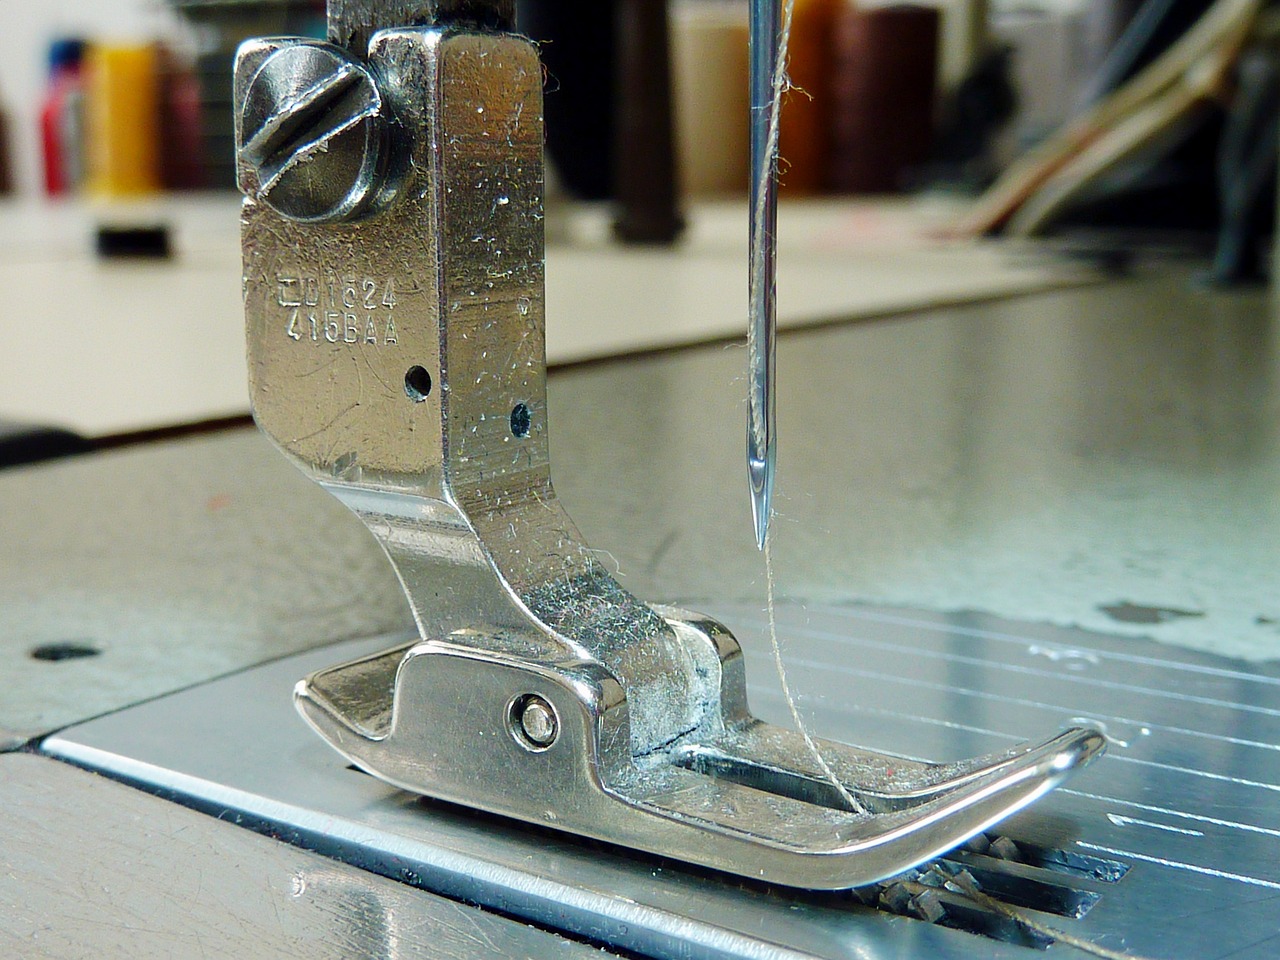
Threading the upper thread involves several steps that must be followed precisely. It’s like following a recipe; one wrong move can lead to a culinary disaster! Here’s how to do it:
- Start by raising the presser foot.
- Guide the thread through the thread guide, then down through the tension mechanism.
- Pull the thread back up through the take-up lever.
- Finally, thread the needle from front to back.
This process may seem intricate, but with a little practice, you’ll be threading your machine in no time!
Inserting the bobbin correctly is vital for proper machine operation. If the bobbin is not placed correctly, you could face thread jams or uneven stitches. To insert the bobbin:
1. Open the bobbin case.
2. Place the bobbin in the case, ensuring the thread unwinds in the correct direction (usually counterclockwise).
3. Pull the thread through the slot and under the tension spring.
4. Close the bobbin case and insert it back into the machine.
This simple yet essential step ensures your sewing machine runs smoothly.
Correct thread tension is key to achieving professional-looking stitches. Think of thread tension like the strings on a guitar; too tight or too loose can ruin the sound. To adjust the tension:
- Consult your sewing machine manual for specific settings based on fabric type.
- Test on a scrap piece of fabric to see how the stitches look.
- Make minor adjustments until you achieve the desired result.
With the right tension, your stitches will look flawless, making your projects stand out!
After threading, it’s important to test the machine to ensure everything is functioning properly. Think of this as a sound check before a performance. To perform a test stitch:
- Place a scrap piece of fabric under the presser foot.
- Lower the presser foot and start sewing.
- Check the stitches for consistency and adjust if necessary.
This step is crucial to catch any potential issues before you start on your actual project.
Even with careful threading, issues may arise. It’s like a bump in the road during a smooth drive. Common problems include:
- Thread bunching up under the fabric
- Skipped stitches
- Thread breaking
For each of these issues, check your threading path, ensure the needle is correctly inserted, and adjust the tension settings. Remember, practice makes perfect!
Q: How often should I clean my sewing machine?
A: It's best to clean your sewing machine after every few projects to keep it running smoothly.
Q: What type of thread should I use?
A: Use thread that matches your fabric type; for example, polyester thread works well for most fabrics.
Q: How do I know if my tension is correct?
A: If your stitches look even on both sides of the fabric, your tension is likely correct.
With these simple steps and tips, you’ll be threading your sewing machine like a pro in no time. Happy sewing!
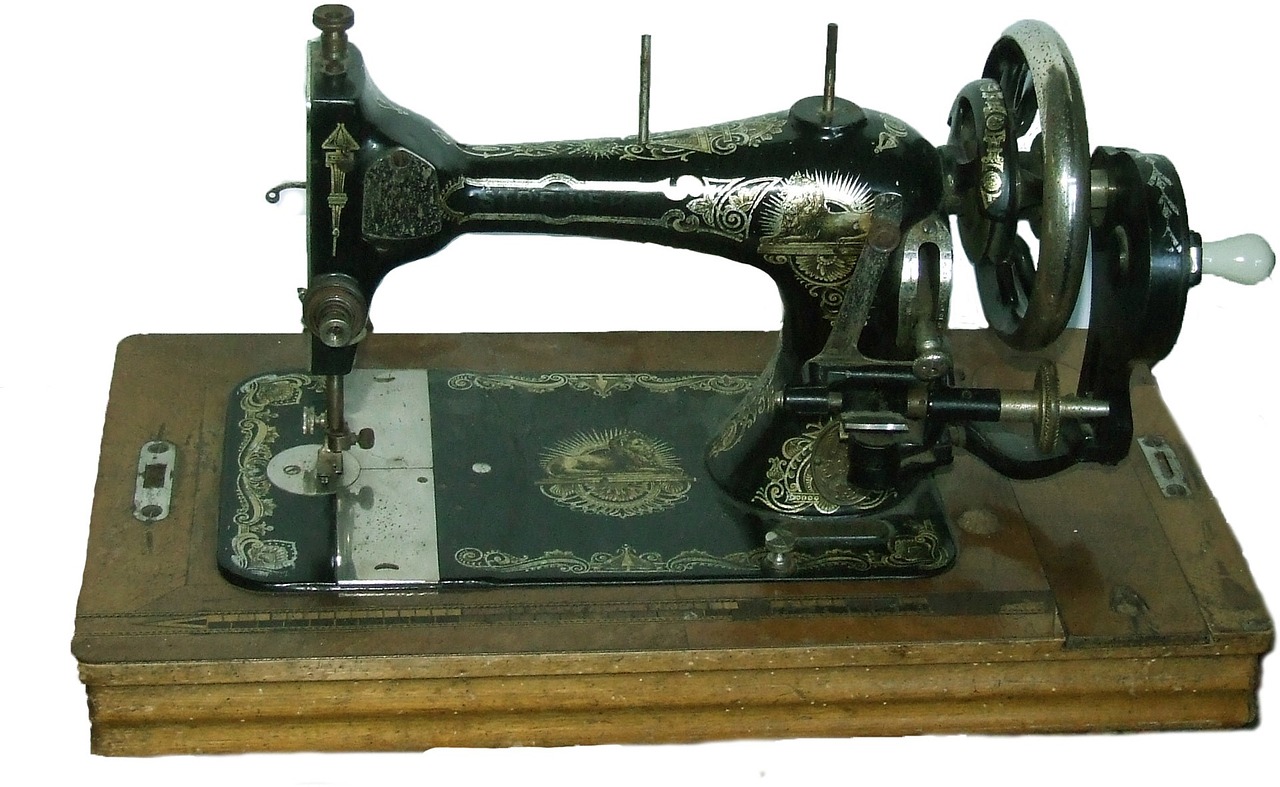
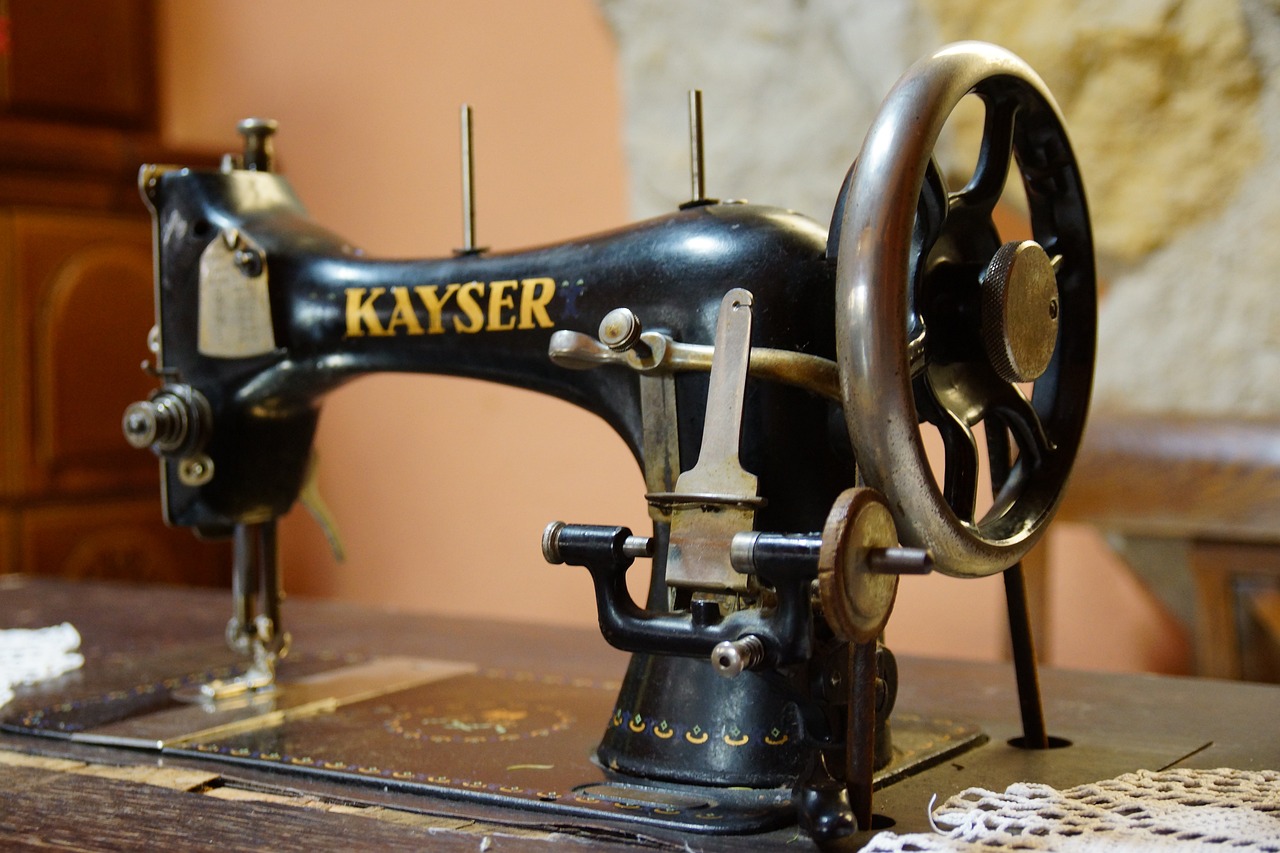
Understanding Your Sewing Machine
Before you dive into the world of sewing, it's crucial to get acquainted with your sewing machine. Think of it as getting to know a new friend; the more familiar you are with its quirks and features, the smoother your sewing journey will be. Every sewing machine has its unique parts, and understanding these components will help you make the most of your machine. Let's break it down!
First off, the needle is your primary tool for stitching fabric together. It comes in various sizes and types, each designed for specific fabrics. For instance, a universal needle works well for most materials, but if you're working with knits, you’ll want a ballpoint needle. The right needle can make a world of difference in your sewing experience, just like using the right key to unlock a door.
Next, we have the bobbin. This little spool of thread sits beneath the needle and is essential for creating stitches. It's like the unsung hero of your sewing machine—without it, your sewing project would come to a screeching halt. Make sure you understand how to wind and insert the bobbin correctly, as it directly affects your sewing efficiency.
Another vital aspect is the tension settings. These settings control how tight or loose the thread is as it passes through the needle and bobbin. Imagine trying to play a guitar with strings that are either too tight or too loose; it just won’t sound right! Proper tension is key to achieving those beautiful, professional-looking stitches. Most machines have a tension dial that you can adjust based on the fabric you’re using.
Lastly, don't forget about the presser foot. This component holds the fabric in place while you sew, ensuring that your stitches are even and consistent. Different types of presser feet are available for various techniques, such as zippers, buttonholes, or quilting. Knowing which foot to use can elevate your sewing projects to the next level.
To summarize, here are the essential parts of your sewing machine to familiarize yourself with:
- Needle: Choose the right type based on your fabric.
- Bobbin: Understand how to wind and insert it correctly.
- Tension Settings: Adjust for different fabrics to achieve perfect stitches.
- Presser Foot: Use the appropriate foot for your specific sewing needs.
By understanding these components, you'll not only enhance your sewing skills but also gain confidence in using your machine. So, take a moment to explore your sewing machine, and don’t hesitate to refer back to your manual for more detailed information on each part. Trust me, your future sewing projects will thank you!
Gathering Necessary Supplies
Before diving into the world of sewing, it's crucial to gather all the necessary supplies. Imagine embarking on a road trip without checking your fuel gauge or packing snacks; it just doesn't make sense! The same goes for sewing. Having everything you need at your fingertips will not only make the process smoother but also more enjoyable. So, what exactly do you need?
First and foremost, you'll need your sewing machine. This is the heart of your project, so make sure it's in good working condition. If it's been a while since you last used it, give it a quick check-up to ensure everything is functioning properly. Next, you'll require some quality thread. The type of thread can vary depending on the fabric you're using, but a good rule of thumb is to match the thread with the fabric. For instance, use cotton thread for cotton fabrics and polyester thread for stretchy materials.
In addition to the machine and thread, don’t forget about scissors! A sharp pair of fabric scissors is essential for clean cuts, which can make a significant difference in your sewing projects. You might also want to have a pair of smaller scissors handy for snipping threads. Another important supply is fabric. Choose your fabric wisely; it should be appropriate for your project and easy to work with, especially if you're a beginner.
Here’s a quick list of the essential supplies you should gather:
- Sewing Machine
- Thread (matching your fabric)
- Fabric (for your project)
- Scissors (both fabric and thread scissors)
- Measuring Tape (for accurate measurements)
- Pins or Clips (to hold fabric pieces together)
- Seam Ripper (for fixing mistakes)
Having these supplies ready will make your sewing experience much more efficient. You won’t have to pause your creative flow to hunt down that elusive pair of scissors or the right color thread. It's all about creating a seamless workflow so you can focus on what you love most—sewing!
Lastly, consider adding a few optional items to your toolkit. A cutting mat can provide a protective surface for your workspace, while a rotary cutter can make cutting fabric a breeze. If you're feeling particularly adventurous, you might want to explore specialty threads or tools that can elevate your sewing game even further.
In summary, gathering your supplies is not just a mundane task; it’s the first step in preparing for a fun and creative sewing journey. So take a moment to collect everything you need, and get ready to unleash your inner fashion designer!
Preparing the Machine
Proper preparation of your sewing machine is crucial for a seamless sewing experience. Just like you wouldn't start cooking without prepping your ingredients, you shouldn't dive into sewing without ensuring your machine is ready. Think of your sewing machine as a trusty steed; it needs to be well-groomed and equipped before you embark on your sewing journey. Here are the essential steps to prepare your machine:
First and foremost, it's important to clean your machine. Dust and lint can accumulate in the machine's crevices, affecting its performance. Use a soft brush or a vacuum attachment to gently remove any debris from the feed dogs and the bobbin area. Regular maintenance not only prolongs the life of your sewing machine but also enhances its efficiency. If you haven't cleaned your machine in a while, now's the time to do it!
Next, ensure that the needle is correctly installed. A dull or incorrectly placed needle can lead to skipped stitches or fabric snags. Check that the needle is securely inserted with the flat side facing the back of the machine. If it looks worn out or damaged, don’t hesitate to replace it. After all, a sharp needle is essential for achieving those beautiful, professional-looking stitches.
Another important step is winding the bobbin. This might seem like a simple task, but it’s vital for the overall performance of your sewing machine. A well-wound bobbin ensures that your thread tension is consistent and helps prevent tangles. Make sure to use the correct thread type for your fabric and follow the machine’s instructions for winding the bobbin. If you're unsure how to do this, refer to your sewing machine manual, as each model can have slightly different winding methods.
Finally, double-check your machine’s tension settings. Every fabric has its own unique requirements, and the tension settings may need to be adjusted accordingly. A good rule of thumb is to start with the manufacturer's recommended settings and make adjustments based on your fabric type. For instance, lightweight fabrics may require a looser tension, while heavier fabrics might need a tighter setting. This attention to detail will pay off in the form of flawless stitches.
By following these preparation steps, you’ll ensure that your sewing machine is in tip-top shape and ready to tackle any project you have in mind. Remember, a well-prepared machine is the key to a successful sewing experience!
- How often should I clean my sewing machine? It’s recommended to clean your sewing machine after every few sewing projects or at least once a month if you sew regularly.
- What type of needle should I use for different fabrics? Use a universal needle for most fabrics, a ballpoint needle for knits, and a sharp needle for woven fabrics.
- How do I know if my tension is set correctly? A good test is to sew a few stitches on a scrap piece of fabric. If the stitches are even on both sides, your tension is likely set correctly.
Winding the Bobbin
This article provides a clear guide on threading a sewing machine, ensuring beginners can easily follow along and enhance their sewing skills with simple and effective techniques.
Before threading, it's essential to familiarize yourself with the different parts of your sewing machine, including the needle, bobbin, and tension settings, to ensure a smooth sewing experience.
Before starting, gather all required materials such as the sewing machine, thread, scissors, and fabric to ensure a seamless threading process without interruptions.
Proper preparation of the sewing machine is crucial. This includes cleaning the machine, ensuring the needle is correctly installed, and winding the bobbin before threading.
Winding the bobbin correctly is a fundamental step in threading your sewing machine. Think of the bobbin as the heart of your machine; if it’s not functioning well, your sewing project can quickly turn into a nightmare. To start, you’ll need to gather your thread and ensure that the bobbin is empty or has enough thread to work with. Place the bobbin on the bobbin winder spindle, which is usually located on the top of the machine. Make sure it clicks into place, as a secured bobbin will save you from unnecessary headaches later.
Next, take the thread spool and place it on the spool pin. This pin is designed to hold the thread in place while you wind it onto the bobbin. Now, pull the thread from the spool and guide it through the thread guide, which is often a small hook or lever located near the spool pin. This step is crucial as it helps maintain the right tension while winding.
Once you have the thread in place, you’ll want to wrap the thread around the bobbin a few times. This initial wrap helps anchor the thread and prevents it from slipping off when you start winding. After you’ve done this, you can press the bobbin winder mechanism, which usually involves pushing it to the right. This action engages the motor, and you’ll hear a satisfying whir as the thread begins to wind onto the bobbin.
As the bobbin fills, keep an eye on the thread tension. If the thread appears too loose or too tight, adjust the tension accordingly. A good rule of thumb is to stop winding once the bobbin is full but not overflowing. An overfilled bobbin can lead to uneven stitching and may even jam your machine.
Once you've reached the desired amount of thread on the bobbin, stop the machine and disengage the bobbin winder. Carefully cut the thread, leaving a small tail, and remove the bobbin from the spindle. At this point, you should have a perfectly wound bobbin, ready for use. Remember, practice makes perfect, so don’t be discouraged if it takes a few tries to get it just right!
Threading the upper thread involves several steps that must be followed precisely. This section breaks down the process to ensure you do it correctly for smooth sewing.
Inserting the bobbin correctly is vital for proper machine operation. This section provides detailed instructions on how to place the bobbin in its designated compartment.
Correct thread tension is key to achieving professional-looking stitches. This section will explain how to adjust the tension settings for various fabrics and sewing techniques.
After threading, it's important to test the machine to ensure everything is functioning properly. This section will guide you on how to perform a test stitch.
Even with careful threading, issues may arise. This section will address common problems and provide solutions to help you troubleshoot effectively while sewing.
- How do I know if my bobbin is wound correctly? A correctly wound bobbin should have even tension and should not be overfilled. If it feels loose or uneven, rewind it.
- Can I use any type of thread for my sewing machine? It's best to use thread that is specifically designed for sewing machines. Cotton, polyester, and blends are commonly used.
- What should I do if the thread keeps breaking? Check the thread tension, ensure you’re using the right needle for your fabric, and make sure the thread is properly threaded through all guides.
Threading the Upper Thread
Threading the upper thread of your sewing machine may seem daunting at first, but with a little practice, it can become second nature. Think of it as a dance; each step has its rhythm, and once you get the hang of it, everything flows smoothly. To begin, ensure you have your sewing machine turned off, as this will prevent any accidental starts while you’re threading. Grab your spool of thread, and let’s dive into the process!
Start by placing the spool of thread on the spool pin, which is usually located at the top of the machine. If you have a vertical spool pin, make sure the thread unwinds off the back. For a horizontal spool pin, the thread should come off the side. This is a crucial step because the direction in which the thread unwinds can affect how smoothly it feeds through the machine.
Next, locate the thread guide, which is typically a small metal or plastic hook near the spool pin. Pull the thread through this guide, ensuring it sits snugly. This little step is like a warm-up before the main act; it sets the stage for a smooth threading experience. Following the thread guide, you’ll find the tension discs. Carefully thread the thread between these discs, making sure it’s seated properly. If the thread isn’t positioned correctly here, you might end up with uneven stitches, which can be frustrating.
Now, let’s move on to the take-up lever, which is often located towards the front of the machine. This lever is crucial for controlling the upward movement of the thread during sewing. To thread it, pull the thread up and around the take-up lever, ensuring it slips into the slot. This step is akin to threading a needle; it requires a bit of finesse but is essential for the sewing process.
After you’ve threaded the take-up lever, guide the thread down to the needle. You’ll find a needle thread guide, which is another small hook that helps guide the thread into the needle. Make sure to pass the thread through this guide before finally threading the needle itself. When it comes to threading the needle, you can either do it by hand or use a needle threader for ease. If you’re doing it manually, it’s best to cut the end of the thread at an angle to create a point, making it easier to pass through the needle's eye.
Once the thread is through the needle, pull a few inches of thread through and let it hang. Congratulations! You’ve successfully threaded the upper thread of your sewing machine. This process, while it may seem lengthy, becomes quicker and more intuitive with practice. Just remember, each step is essential for achieving that perfect stitch!
As a quick recap, here are the key steps to remember:
- Place the spool on the spool pin.
- Guide the thread through the thread guide and tension discs.
- Thread the take-up lever.
- Guide the thread down to the needle and thread it.
If you encounter any issues while threading, don’t hesitate to consult your sewing machine’s manual. Each machine can have slightly different threading paths, so it’s always a good idea to refer to the specific instructions for your model. Now that you’ve mastered this step, you’re well on your way to creating beautiful sewing projects!
Inserting the Bobbin
Inserting the bobbin into your sewing machine might seem like a small task, but it's absolutely crucial for ensuring your machine runs smoothly and produces beautiful stitches. Think of the bobbin as the heart of your sewing machine; without it, you simply can't get the job done. So, let's dive into the steps to insert the bobbin correctly, ensuring you're set up for sewing success!
First things first, locate the bobbin compartment on your sewing machine. Depending on the model, this could be on the top, side, or front. For many machines, you’ll need to lift a small cover to access the compartment. Once you’ve got that cover open, take a moment to admire the neat little space where your bobbin will reside. Now, it’s time to prepare your bobbin!
Before inserting the bobbin, ensure it’s wound correctly. A well-wound bobbin allows for even thread tension and prevents any snags or jams while sewing. If you need a refresher on winding a bobbin, check out the previous sections of this article. Now, let’s get that bobbin into place! Here’s a quick rundown of the steps:
- Place the bobbin in the compartment with the thread unwinding in the correct direction—this is usually counterclockwise. If you’re unsure, just give it a little spin; it should move freely!
- Pull the thread through the designated slot or guide, which will help maintain tension. This step is vital because incorrect tension can lead to frustrating sewing experiences.
- Finally, make sure the thread is securely positioned in the tension spring. This ensures that your machine will pull the thread properly as you sew.
Once the bobbin is in place, close the compartment cover securely. It should click into place, giving you that satisfying feeling that everything is set up just right. Now, here’s a pro tip: always check that the bobbin is inserted correctly before starting your sewing project. A quick visual inspection can save you from potential headaches later on.
After you’ve inserted the bobbin, the next step is to pull the upper thread through the needle. But before you do that, take a moment to appreciate how this simple little component—the bobbin—plays such a significant role in the overall sewing process. It’s like the unsung hero of your sewing machine, quietly working behind the scenes to create those stunning stitches.
In summary, inserting the bobbin is a straightforward yet essential process that sets the stage for your sewing adventures. By following these steps, you’ll ensure that your sewing machine is primed and ready to go, allowing you to focus on unleashing your creativity without any hiccups!
Adjusting Thread Tension
Getting the thread tension just right is like finding the sweet spot in a recipe; it can make all the difference in your sewing projects. If your stitches are too tight, you might end up with puckering fabric that looks more like a wrinkled shirt than a beautifully crafted garment. On the other hand, if the tension is too loose, your stitches may look like a tangled mess, leaving you frustrated and ready to toss your sewing machine out the window! So, how do you achieve that perfect balance?
First, it’s essential to understand what thread tension is. Simply put, it's the amount of pull on the thread as it passes through your sewing machine. This pull needs to be just right for your fabric type and the stitch style you're using. Most machines come with a tension dial that you can easily adjust. Typically, the dial ranges from 0 to 9, with 4 being the standard setting for most fabrics.
When adjusting the tension, consider the type of fabric you’re working with. For example, lightweight fabrics like silk or chiffon may require a lower tension setting, while heavier fabrics like denim or canvas might need a higher setting. Here’s a quick reference table to help you determine the right tension based on fabric type:
| Fabric Type | Recommended Tension Setting |
|---|---|
| Silk | 2-3 |
| Cotton | 4-5 |
| Denim | 6-7 |
| Knits | 3-4 |
To adjust the tension, follow these simple steps:
- Start with your machine set to the default tension.
- Run a test stitch on a scrap piece of the same fabric you plan to use.
- Examine the stitches. If the top thread is too tight, loosen the tension by turning the dial down. If it’s too loose, increase the tension by turning the dial up.
- Repeat the test until you achieve the desired stitch quality.
Remember, the goal is to have the top and bottom threads meet in the middle of the fabric, creating a balanced stitch. If you see the top thread pulling through to the back, it indicates that the tension is too tight. Conversely, if the bobbin thread is visible on the top, it’s too loose. Adjusting the tension may seem tedious, but it’s a crucial step in ensuring your sewing projects turn out beautifully.
Lastly, don’t forget that different sewing techniques may also require different tension settings. For instance, when sewing a zigzag stitch, you might need to adjust the tension differently than when doing a straight stitch. So, always keep an eye on your stitches as you change techniques!
With practice and a bit of experimentation, you'll become a pro at adjusting thread tension, leading to professional-looking results in your sewing endeavors. Happy sewing!
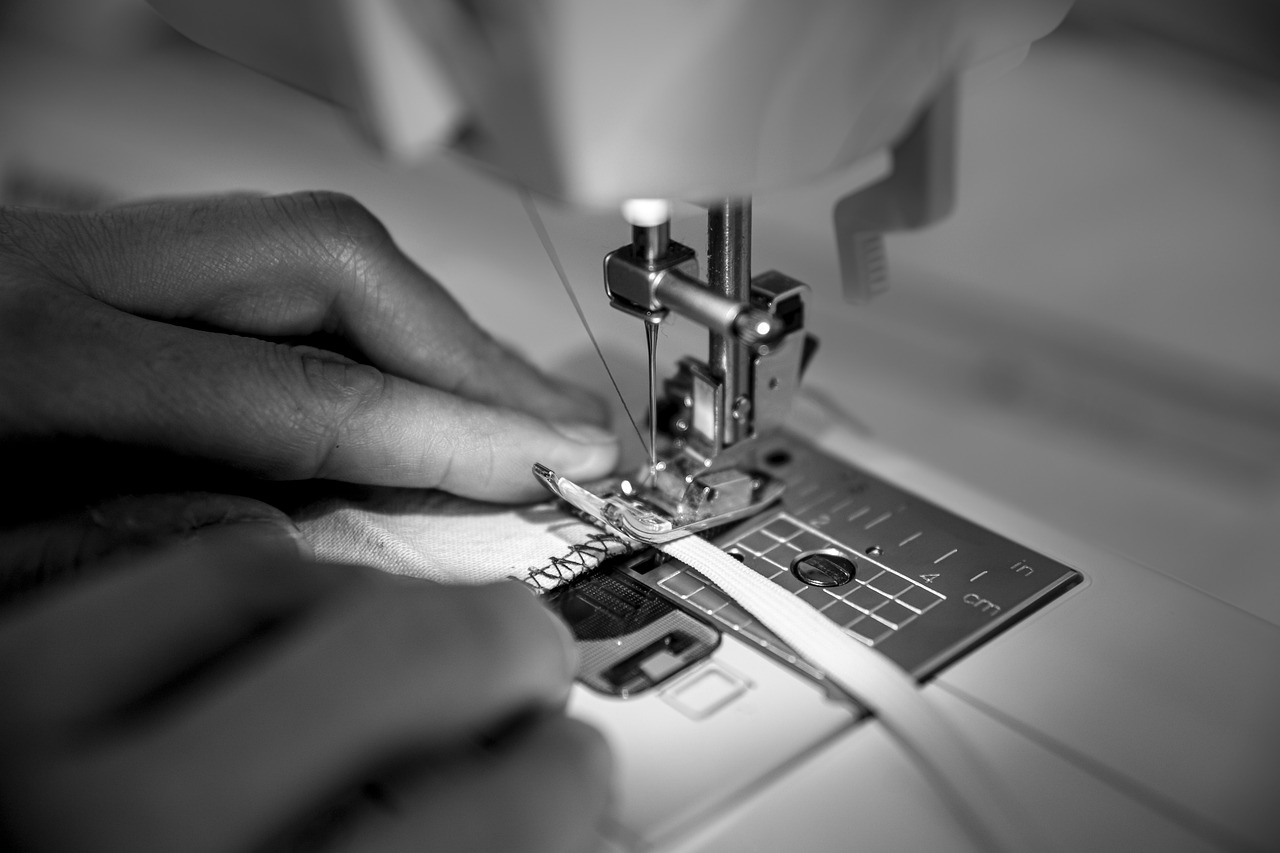
Testing the Threading
Once you've gone through the entire process of threading your sewing machine, it’s time to put your skills to the test! Think of this as the moment of truth—the grand reveal of whether all your hard work has paid off. Testing the threading is not just a formality; it's a crucial step to ensure everything is functioning as it should. After all, what’s more frustrating than sitting down to sew only to find out that something is off?
To start, grab a piece of scrap fabric—this is your practice canvas. You don’t want to risk ruining your actual project if something goes awry. Now, follow these simple steps to test your threading:
- First, ensure your presser foot is up. This allows the tension discs to open, making it easier for the thread to pass through.
- Next, gently pull the upper thread to make sure it moves freely. If it feels tight or snagged, you might need to re-thread the machine.
- Now, lower the presser foot and prepare to sew. Start with a few stitches on the scrap fabric. Keep an eye on the stitches as you go.
As you sew, pay close attention to the stitches. They should be even and consistent, with no loops or skipped stitches. If you notice any irregularities, it might indicate a problem with your threading. Common issues include:
| Issue | Possible Cause | Solution |
|---|---|---|
| Skipped Stitches | Incorrect needle type or size | Change to the appropriate needle for your fabric. |
| Thread Bunching | Incorrect threading or tension | Re-thread the machine and adjust the tension settings. |
| Loopy Stitches | Bobbin incorrectly inserted | Remove and reinsert the bobbin correctly. |
If everything looks good, congratulations! You've successfully threaded your sewing machine. But if you encounter any issues, don’t be discouraged. Troubleshooting is part of the sewing journey. Take a deep breath, refer back to your machine's manual, and make the necessary adjustments. Remember, practice makes perfect, and soon you'll be threading like a pro!
Q: How do I know if my thread tension is correct?
A: The best way to check your thread tension is by sewing a few test stitches on scrap fabric. The stitches should look balanced on both sides. If they are too tight or too loose, adjust the tension accordingly.
Q: What should I do if my machine keeps jamming?
A: A jam can often be caused by incorrect threading or a dirty bobbin area. Re-thread your machine, clean the bobbin case, and try again. If the problem persists, consult your sewing machine manual for further troubleshooting tips.
Q: Can I use any type of thread for my sewing machine?
A: It's best to use thread specifically designed for sewing machines. Different types of thread can affect the tension and stitch quality, so always choose thread that suits your project.

Troubleshooting Common Issues
Even the most experienced sewists encounter hiccups while threading their machines. Don't worry; you're not alone! Understanding how to troubleshoot common issues can save you time and frustration, allowing you to get back to your creative projects in no time. Let’s dive into some typical problems and their solutions, ensuring that you can sew with confidence.
One of the most frequent issues is thread bunching. If you notice that the thread is gathering in a messy clump under your fabric, it usually indicates a problem with the upper thread tension. Start by checking if the thread is correctly threaded through the tension discs. If it’s not seated properly, the tension can be too loose, leading to that unsightly bunching. Adjust the tension dial slightly and run a test stitch to see if the problem persists.
Another common issue is skipped stitches. This can be incredibly frustrating, especially when you’re working on a project that requires precision. Skipped stitches often happen due to a dull or damaged needle. It’s essential to replace your needle regularly—think of it as changing the oil in your car. A fresh needle can make all the difference! Additionally, ensure that you’re using the right needle type for your fabric. For instance, a ballpoint needle works best for knits, while a universal needle is versatile for woven fabrics.
Sometimes, you might encounter thread breaking. This can happen for several reasons, including incorrect threading, using low-quality thread, or even sewing too fast. If the thread keeps snapping, take a moment to double-check your threading path. Make sure the thread is going through all the necessary guides and tension discs. If everything looks good but the problem continues, consider switching to a higher quality thread. It can make a world of difference!
Another issue to be aware of is fabric not feeding properly. If your fabric isn’t moving through the machine smoothly, the feed dogs might be lowered. These little teeth are responsible for pulling your fabric through as you sew. Ensure they’re raised and functioning correctly. If the feed dogs are fine, check your presser foot; it should be down while sewing for proper fabric movement.
Here’s a quick reference table summarizing these common issues and their solutions:
| Issue | Possible Cause | Solution |
|---|---|---|
| Thread Bunching | Improper upper thread tension | Check and adjust the tension settings |
| Skipped Stitches | Dull or incorrect needle | Replace needle and ensure it's the right type |
| Thread Breaking | Incorrect threading or low-quality thread | Re-thread machine and use better quality thread |
| Fabric Not Feeding | Feed dogs lowered | Raise feed dogs and check presser foot position |
Lastly, if you encounter any other issues that aren’t listed here, don’t hesitate to consult your sewing machine manual or reach out to online sewing communities. They can be a treasure trove of information and support. Remember, troubleshooting is just part of the sewing journey. With practice and patience, you’ll be able to tackle any problem that comes your way!
Q: What should I do if my machine jams?
A: If your machine jams, stop sewing immediately. Remove the fabric and check for any tangled threads. Clear any obstructions and re-thread the machine if necessary.
Q: How often should I clean my sewing machine?
A: It’s a good habit to clean your machine after every few projects. Dust and lint can accumulate and affect performance, so regular maintenance is crucial.
Q: Can I use any type of thread for my sewing machine?
A: While many threads can be used, it’s best to choose a thread that matches your fabric type. For example, polyester thread works well for most fabrics, while cotton thread is excellent for quilting.
Q: Why is my sewing machine making a strange noise?
A: Strange noises can indicate that your machine needs oiling or that something is out of alignment. Check the manual for maintenance tips and consider taking it for a professional tune-up if the noise persists.
Frequently Asked Questions
- What are the essential parts of a sewing machine I should know before threading?
Before you start threading your sewing machine, it's crucial to familiarize yourself with its key components. These include the needle, which pierces the fabric; the bobbin, which holds the lower thread; and the tension settings, which control the tightness of the stitches. Understanding these parts will help you navigate the threading process with ease.
- How do I know if my thread tension is set correctly?
Thread tension is vital for achieving beautiful, even stitches. To check if your tension is set correctly, sew a few test stitches on a scrap piece of fabric. If the stitches look tight and balanced on both sides, you're good to go! If not, you may need to adjust the tension settings. Think of it like tuning a guitar—just a little tweak can make a big difference!
- What should I do if my sewing machine keeps jamming?
Jamming can be frustrating, but it's often an easy fix! First, check if the bobbin is inserted correctly and that the thread is threaded properly. Also, ensure that the needle is not bent or dull. If everything looks good and it still jams, try cleaning the machine to remove any lint or debris that could be causing the issue.
- Can I use any type of thread for my sewing machine?
While you might be tempted to use any thread you have lying around, it's best to stick with threads that are specifically designed for sewing machines. Cotton, polyester, and rayon threads are great options! Using the right thread ensures smoother stitching and reduces the risk of breakage.
- How do I perform a test stitch after threading?
Testing your machine after threading is super important! Simply take a scrap piece of fabric and sew a few lines. This will help you see if the stitches are even and if the tension is right. If you notice any issues, it's a good time to troubleshoot before starting your actual project.
- What are some common mistakes to avoid when threading a sewing machine?
There are a few common pitfalls that can trip you up when threading your machine. Make sure to avoid these:
- Not following the threading path as indicated on your machine.
- Forgetting to raise the presser foot before threading the upper thread.
- Using the wrong bobbin type for your machine.
By steering clear of these mistakes, you'll set yourself up for sewing success!


