
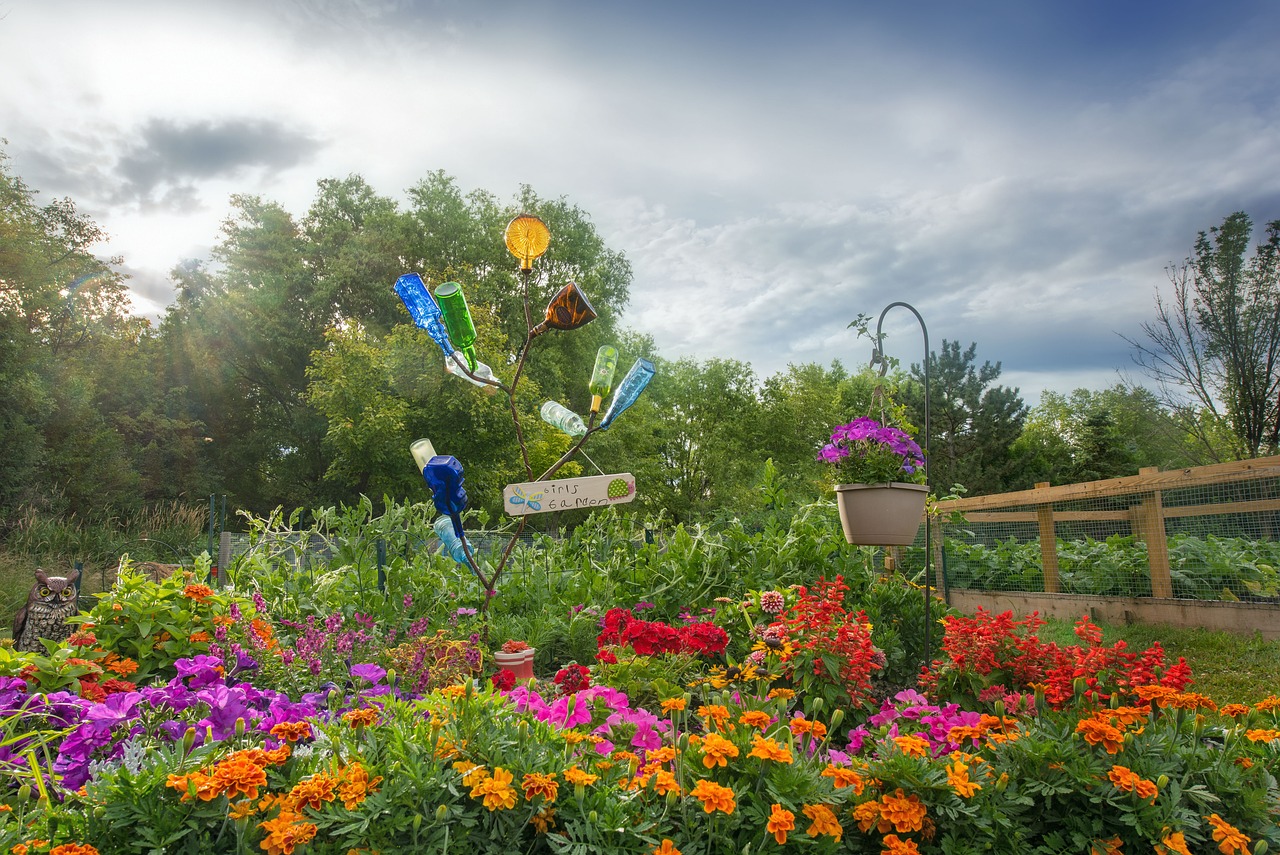
Eco-Friendly Garden Craft Ideas for Kids
In a world where technology often overshadows nature, it's essential to spark a love for the environment in our children. What better way to do this than through eco-friendly garden crafts? These creative projects not only keep kids engaged but also teach them valuable lessons about sustainability, creativity, and the beauty of nature. Imagine your kids getting their hands dirty while learning about plants, insects, and the ecosystem! These activities are perfect for rainy days, sunny afternoons, or any time when you want to connect with nature. So, let’s dig in and explore some fun and sustainable garden craft ideas that your kids will love!
Transforming everyday items into colorful planters is a fantastic way for kids to learn about repurposing materials. Think about those old plastic bottles or tin cans collecting dust in your kitchen. With a little creativity, these items can become vibrant homes for plants! Kids can paint them, decorate them with stickers, or even wrap them in twine. Not only do they get to express their artistic side, but they also learn about the importance of caring for plants. This hands-on activity fosters responsibility and gives them a sense of accomplishment as they watch their plants grow.
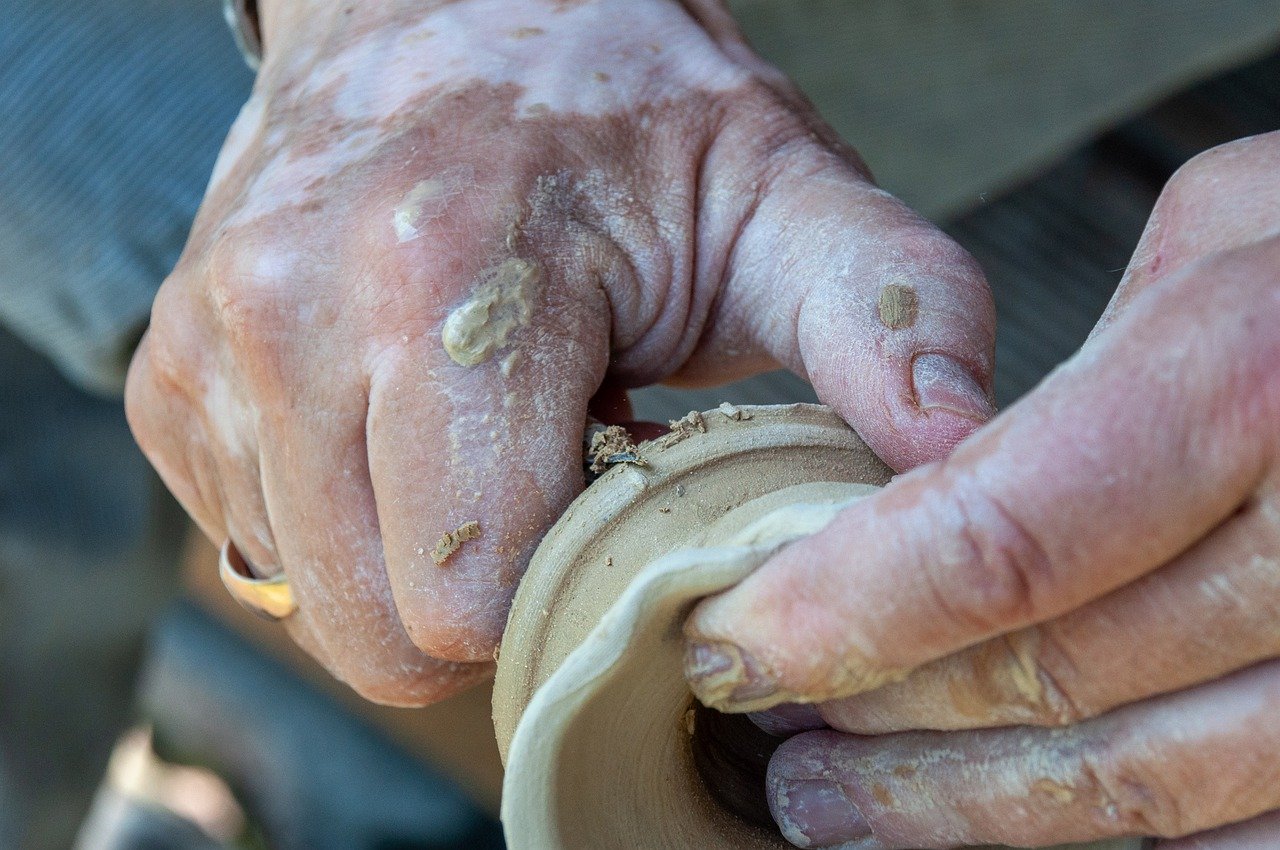
Have you ever heard of seed bombs? Making these little balls of joy is a fun and engaging way for kids to dive into the world of planting. Seed bombs are made from a mixture of seeds, clay, and compost, and they can be tossed into gardens or bare patches of soil. It’s like a surprise explosion of greenery! This activity not only teaches kids about the planting process but also encourages them to think about how they can beautify their surroundings. Just imagine the thrill of watching their creations sprout into life!
Encouraging kids to collect leaves, flowers, and other natural materials to create beautiful collages is a wonderful way to blend art with nature. This craft promotes exploration of the outdoors while fostering creativity and artistic expression. As they gather items, they’ll learn about different plants and their characteristics. Once they have their collection, they can arrange everything into stunning designs on paper. It's a fantastic way to appreciate the beauty of nature while having fun!
Creating personalized garden markers from stones or recycled wood is another excellent project for kids. Not only does this craft add a decorative touch to the garden, but it also helps children learn about the plants they are growing. They can paint or carve the names of herbs, vegetables, or flowers onto their markers. This way, they’ll remember what they’ve planted and take pride in their garden. Plus, it’s a great opportunity to teach them about the different types of plants and their growth habits.
Building bird feeders from recycled materials is a delightful way for kids to connect with local wildlife. This project teaches them about the importance of providing food for birds, especially during the winter months. Using items like pine cones, peanut butter, and birdseed, children can create simple feeders that attract various bird species. Watching birds visit their feeders can spark curiosity about nature and the ecosystem, making it a rewarding experience.
Involving kids in making a compost bin is a fantastic way to introduce them to the concept of recycling organic waste. This hands-on project helps them understand the composting process and its benefits for the garden. Kids can gather kitchen scraps, yard waste, and other organic materials to fill their compost bin. As they learn about decomposition, they’ll also see firsthand how waste can be transformed into nutrient-rich soil. It’s a practical lesson in sustainability that will stick with them for life!
Constructing bug hotels from natural materials is not just fun; it’s also educational! This project encourages children to learn about beneficial insects and their roles in the ecosystem. By creating a cozy space for bugs, kids can observe how different insects interact with each other and their environment. This hands-on experience promotes biodiversity and teaches kids about the importance of every creature in maintaining a balanced ecosystem. Who knew bugs could be so fascinating?
Decorating rocks with eco-friendly paint can create unique garden art that adds charm to any outdoor space. This fun activity allows kids to express their creativity while beautifying their garden. They can paint cheerful designs, inspirational quotes, or even their favorite animals. Once their rocks are dry, they can place them around the garden to create a whimsical atmosphere. Not only will this craft brighten up the space, but it will also instill a sense of ownership and pride in their outdoor environment.
Creating simple herb planting kits can teach kids about growing their own food and encourage them to appreciate fresh herbs in cooking. Kids can select their favorite herbs, such as basil, mint, or cilantro, and learn how to plant and care for them. This project fosters responsibility and provides a tangible way for them to connect with their food. Imagine the joy of harvesting their own herbs and using them in family meals!
Q: What materials do I need for these crafts?
A: Most of the materials are everyday items you can find at home, like plastic bottles, tin cans, stones, and recycled wood. You can also use natural items like leaves and flowers.
Q: Are these projects safe for young children?
A: Yes! Most of these activities are safe for kids, but adult supervision is recommended, especially when using tools or sharp objects.
Q: How can I make these crafts more educational?
A: You can incorporate lessons about plants, insects, and the environment into each activity. Discuss the importance of sustainability while crafting!
Q: Can these crafts be done indoors?
A: Absolutely! Many of these projects can be adapted for indoor spaces, especially during rainy days.
Recycled Planters
Transforming everyday items like plastic bottles and tin cans into colorful planters is not just a fun activity, but it also serves as a fantastic opportunity for children to learn about sustainability and the environment. Imagine turning a simple soda bottle into a vibrant home for a blossoming flower or a tiny herb! This hands-on project teaches kids the importance of repurposing materials, showing them that waste can be transformed into something beautiful and useful.
To get started on this creative journey, gather some common household items. Here are a few ideas:
- Plastic Bottles: Cut them in half, decorate them, and fill them with soil and seeds.
- Tin Cans: Remove the labels, punch some drainage holes in the bottom, and paint them in bright colors.
- Old Shoes: Yes, you can even use an old pair of shoes as quirky planters!
Once you have your materials ready, it’s time to unleash your creativity! Kids can paint the planters with eco-friendly paints, add stickers, or even glue on natural materials like twigs and leaves. This not only makes the planters visually appealing but also gives children a chance to express their artistic side.
As they plant seeds or small plants in their new creations, children will learn about plant care, including the importance of sunlight, water, and nutrients. They can track the growth of their plants, which can spark conversations about nature, responsibility, and the cycle of life. Plus, seeing their handiwork flourish can instill a sense of pride and accomplishment.
To further enhance this activity, consider setting up a small competition among kids to see who can create the most unique planter or grow the tallest plant. This adds an element of fun and friendly rivalry, making the learning experience even more engaging.
In conclusion, recycled planters are not just a craft; they are a gateway to understanding sustainability and the beauty of nature. By encouraging kids to think creatively about waste, we can plant the seeds of environmental consciousness in their minds, nurturing a generation that cares for our planet.
| Question | Answer |
|---|---|
| What materials can we use for recycled planters? | Common materials include plastic bottles, tin cans, old shoes, and even yogurt cups. |
| How can we decorate the planters? | Kids can use eco-friendly paints, stickers, and natural materials like leaves and twigs to personalize their planters. |
| What plants are suitable for recycled planters? | Herbs, small flowers, and succulents are great choices for recycled planters. |
Seed Bombs
Making is one of the most exciting and hands-on activities for kids that combines creativity with environmental awareness. Imagine tiny balls of potential, each packed with seeds, clay, and compost, ready to be tossed into gardens or vacant lots, sprouting life wherever they land! This activity not only engages children in the art of gardening but also teaches them about the importance of biodiversity and the role they can play in nurturing the planet.
To get started, gather some simple materials that you likely already have at home. You'll need:
- Seeds: Choose native plants or flowers that are suited to your local environment.
- Clay: Natural clay works best, but you can also use air-dry clay.
- Compost: This will provide nutrients for the seeds to germinate and grow.
- Water: Just a little to moisten the mixture.
Now, let’s dive into the fun part! Mixing these ingredients is a fantastic way for kids to get their hands dirty and connect with nature. Start by combining the seeds, clay, and compost in a bowl. Add a little water, just enough to make the mixture damp but not soggy. The goal is to create a moldable consistency. Once the mixture is ready, roll it into small balls—about the size of a marble. Lay them out on a tray to dry for a day or two.
After the seed bombs have dried, it’s time for the real adventure! Kids can take their creations outside and toss them into bare patches of soil or areas that could use a splash of color. But here’s the twist: encourage them to think about where they’re throwing these bombs. Are they choosing spots that need some love? Are they considering the local wildlife or the ecosystem? This not only makes the activity more meaningful but also instills a sense of responsibility in the young gardeners.
In addition to being a fun craft, seed bombs can also spark conversations about environmental stewardship. Discuss with your kids how plants help clean the air, provide food for animals, and create beautiful landscapes. You can even turn this into a mini science lesson, explaining how seeds germinate and grow. By the end of this project, kids won’t just have created something tangible; they’ll also have gained a deeper appreciation for nature and how they can contribute to it.
So, are you ready to make some seed bombs? This simple yet impactful activity is a fantastic way to engage kids with the environment while having a blast. Who knew that a little bit of dirt and some seeds could lead to such a big adventure? Let your creativity flow, and watch your garden—and your children—thrive!
Q: What types of seeds should we use in our seed bombs?
A: It's best to use native seeds that are well-suited to your local climate and soil conditions. Consider flowers, herbs, or even vegetables that will thrive in your area.
Q: Can we use any type of clay for seed bombs?
A: Natural clay is ideal, but air-dry clay can also work. Just make sure it's non-toxic and safe for children to handle.
Q: How long do seed bombs take to germinate?
A: This can vary based on the type of seeds used and environmental conditions. Generally, you can expect to see sprouts within a few weeks after tossing them into the soil.
Q: Is this activity suitable for all ages?
A: Absolutely! Kids of all ages can participate, though younger children may need more supervision. It's a great family project!
Nature Collages
Creating is a delightful way for kids to explore the great outdoors while expressing their artistic flair. Imagine the excitement on their faces as they venture into the garden or park, collecting vibrant leaves, delicate flowers, and intriguing twigs! This activity not only sparks creativity but also enhances their connection to nature. Why not turn a simple walk into an artistic adventure?
To start, gather a few essential supplies: a large piece of sturdy paper or cardboard, some glue, and a pair of scissors. As your little ones collect their natural treasures, encourage them to observe the different colors, shapes, and textures. This is a fantastic opportunity to teach them about the diversity of plant life in your area. You might say, "Look how the leaves change color with the seasons!" or "Feel the rough texture of this bark compared to the soft petals of this flower!"
Once they have a collection of materials, it’s time to unleash their creativity! Kids can arrange their finds in any way they like, creating beautiful compositions that reflect their personal style. They might want to make a themed collage, such as a “Garden Party” featuring flowers and leaves, or a “Forest Adventure” with twigs and moss. The possibilities are endless! After gluing their pieces onto the paper, they can even add some drawings or words to describe their artwork. This is a wonderful way to encourage storytelling through art.
Not only does this activity promote creativity, but it also instills a sense of appreciation for the environment. Kids learn to see beauty in the natural world and understand the importance of preserving it. Plus, it’s a great conversation starter about the different ecosystems and the roles various plants play in our environment. You could even take it a step further by discussing how to protect these natural resources.
For a fun twist, consider hosting a nature collage exhibition at home! Invite family members to come and admire the kids' artwork. This not only boosts their confidence but also makes them feel proud of their creations. They can share their favorite finds and what inspired them, turning a simple craft into a memorable event.
Q: What materials do I need for making nature collages?
A: You will need sturdy paper or cardboard, glue, scissors, and natural materials like leaves, flowers, and twigs.
Q: Can we use any type of natural materials?
A: Yes! Encourage kids to collect a variety of items, but remind them to be respectful of nature and only take what they need.
Q: How can I make this activity more educational?
A: Discuss the different types of plants they collect, their colors, textures, and the ecosystems they belong to. You can also talk about the importance of preserving these natural resources.
Garden Markers
Creating personalized is not only a fun craft project for kids but also a fantastic way to enhance their gardening experience. Imagine transforming plain stones or recycled wood into unique markers that reflect the personality of each plant in your garden! This hands-on activity encourages children to learn about the different plants they are growing while adding a splash of creativity to the garden.
To get started, gather some materials. You can use smooth stones, wooden sticks, or even old spoons as the base for your markers. The idea is to repurpose items that might otherwise end up in the trash, making this project eco-friendly right from the start. Once you have your materials, it’s time to unleash the kids' creativity. They can use non-toxic paints, markers, or even natural dyes to decorate their markers. Let them paint the names of the plants or draw fun designs that represent each herb or flower. The sky's the limit!
As they paint, engage them in conversations about the plants they are marking. Ask questions like, “What do you think this herb needs to grow well?” or “How can we attract more bees to our flowers?” This not only makes the activity educational but also fosters a deeper connection between the children and nature. You might even consider creating a small table to track what each plant needs in terms of sunlight, water, and care. Here’s a simple format you could follow:
| Plant Name | Sunlight | Water | Notes |
|---|---|---|---|
| Basil | Full Sun | Moderate | Great for cooking! |
| Marigold | Full Sun | Low | Attracts pollinators. |
| Mint | Partial Shade | High | Can spread quickly! |
Once the markers are ready, place them in the garden next to the corresponding plants. This not only helps the kids remember what they planted but also makes the garden look vibrant and organized. Plus, it’s a great conversation starter when friends and family come over. They’ll be impressed by the creativity and effort the kids put into their gardening!
Involving kids in such projects teaches them valuable lessons about responsibility and the importance of caring for the environment. They learn that gardening isn't just about growing plants; it's about nurturing life, understanding ecosystems, and appreciating the beauty of nature. So, gather your supplies, let the kids' imaginations run wild, and watch as they create a garden that reflects their unique personalities!
Q: What materials are best for garden markers?
A: You can use stones, wooden sticks, old spoons, or any other durable material that can withstand the elements. Just make sure the paint or markers used are non-toxic and safe for outdoor use.
Q: How can I make the markers last longer?
A: To protect your markers from the weather, consider sealing them with a clear, eco-friendly sealant. This will help keep the colors vibrant and prevent fading.
Q: Can we use this project to teach kids about plant care?
A: Absolutely! While creating the markers, discuss each plant's needs and care requirements. It’s a perfect opportunity to teach kids about responsibility and the lifecycle of plants.
DIY Bird Feeders
Creating is a fantastic way for kids to connect with nature and learn about the importance of wildlife conservation. Not only does this project provide a fun and engaging activity, but it also allows children to observe local birds up close as they flock to the feeders you create together. Imagine the joy on their faces as they spot a colorful finch or a chirpy sparrow enjoying a meal right in your backyard!
To get started, you'll need some common materials that you can find around the house. You might be surprised at how easy it is to repurpose items that would otherwise end up in the trash. Here’s a simple list of materials you can use for making bird feeders:
- Plastic bottles
- Tin cans
- Wooden spoons
- Old teacups
- Cardboard tubes (like from toilet paper rolls)
Once you’ve gathered your materials, the next step is to assemble your bird feeder. For instance, if you’re using a plastic bottle, you can cut small holes in the sides to allow the seeds to spill out. Attach a wooden spoon to catch the seeds underneath, creating a little feeding platform. All you need to do then is fill the bottle with birdseed, hang it from a tree branch, and watch as feathered friends come to feast!
Not only does this project teach kids about the different types of birds that visit their yard, but it also encourages them to think about how they can help these creatures thrive. You can even turn this into a mini-science project by asking questions like:
- What types of birds are visiting the feeder?
- How does the weather affect bird activity?
- What types of food do different birds prefer?
As they observe the birds, encourage them to keep a journal of their findings. This will help them develop observational skills and a deeper understanding of the ecosystem. Plus, it’s a great way to incorporate some STEM learning into your crafting session!
Another exciting aspect of making DIY bird feeders is the opportunity for creativity. Kids can paint the feeders or decorate them with natural materials like twigs and leaves. This not only adds a personal touch but also makes the feeders more appealing to the birds. Just remember to use non-toxic paints if you choose to decorate!
In conclusion, DIY bird feeders are not just fun to make; they are a wonderful way to engage children with nature and teach them about the importance of caring for wildlife. So gather your materials, roll up your sleeves, and let the adventure begin!
Q: What types of food should I put in my bird feeder?
A: You can use a variety of birdseed blends, sunflower seeds, or even peanut butter mixed with birdseed. Just make sure to avoid using bread, as it can be harmful to birds.
Q: How can I attract more birds to my feeder?
A: Placing your feeder near shrubs or trees can provide birds with a safe place to perch. Additionally, consider using a variety of feeders and foods to attract different species.
Q: How often should I refill the bird feeder?
A: It’s best to check your feeder regularly and refill it when it’s low. During peak feeding times, such as spring and fall, you may need to refill it more frequently.
Compost Bin Creation
Creating a compost bin is not just an exciting project for kids; it's a fantastic way to teach them about sustainability and the environment. Imagine transforming kitchen scraps and yard waste into nutrient-rich soil for your garden! This hands-on activity allows children to participate in the entire process, from collecting organic waste to observing how it breaks down over time. It’s like magic, but rooted in science!
To get started, you'll need a few materials. You can use a simple plastic bin, a wooden crate, or even build a compost pile in a designated area of your yard. The best part? You can involve your kids in gathering materials, making it a family affair. As they gather items, explain the importance of composting and how it helps reduce landfill waste.
Here’s a quick checklist of what you can include in your compost bin:
- Green materials: These are nitrogen-rich items like fruit and vegetable scraps, grass clippings, and coffee grounds.
- Brown materials: Carbon-rich materials such as dried leaves, paper, and cardboard.
- Water: Keeping the compost moist is essential for decomposition.
- Air: Turn the compost regularly to introduce oxygen, which accelerates the breakdown process.
As your kids add materials to the compost bin, encourage them to observe how the mixture changes over time. They can even keep a "compost diary," noting down what they added and how the compost evolves. This practice not only enhances their observational skills but also instills a sense of responsibility as they watch their contributions turn into valuable compost.
Once the compost is ready, which typically takes a few months, you can use it to enrich your garden soil. This process will not only make your plants thrive but also give your kids a sense of accomplishment. They’ll take pride in knowing they helped create something beneficial for the environment.
Incorporating compost bin creation into your gardening activities can also lead to discussions about waste reduction, recycling, and the importance of caring for our planet. It’s a wonderful way to bond with your children while instilling eco-friendly values that will last a lifetime.
| Question | Answer |
|---|---|
| What materials can I compost? | You can compost fruit and vegetable scraps, coffee grounds, eggshells, grass clippings, and dried leaves. Avoid meat, dairy, and oily foods. |
| How long does it take for compost to be ready? | It generally takes 2 to 6 months for compost to decompose, depending on the materials used and environmental conditions. |
| Can kids really help with composting? | Absolutely! Kids can help collect materials, turn the compost, and monitor its progress, making it a fun educational experience. |
| What should I do if my compost smells bad? | Bad odors often indicate that the compost is too wet or contains too many green materials. Adding more brown materials and turning the pile can help. |
Bug Hotels
Have you ever thought about how important bugs are to our ecosystem? Creating is not just a fun craft project; it’s an adventure into the fascinating world of beneficial insects! These little habitats provide shelter for a variety of insects, including ladybugs, bees, and butterflies, which play crucial roles in pollination and pest control. By involving kids in this project, you’re not only sparking their creativity but also teaching them valuable lessons about biodiversity and the environment.
To get started, gather some natural materials like twigs, straw, pine cones, and hollow stems. You can use an old wooden crate or even a stack of bricks to create the structure. The beauty of a bug hotel is that it can be as simple or as elaborate as you want it to be. Just think of it as a cozy apartment complex for insects! You can even decorate the outside with paint or natural elements to make it visually appealing.
Here’s a simple step-by-step guide to building your very own bug hotel:
- Choose a Location: Find a spot in your garden that’s sheltered from strong winds and has some sunlight.
- Gather Materials: Collect items like bamboo sticks, wood logs, straw, and dried leaves.
- Assemble the Structure: Start stacking your materials in layers, leaving spaces for insects to crawl in and out.
- Decorate: Let your kids paint or embellish the hotel with natural decorations to make it unique.
Once your bug hotel is complete, place it in your garden and watch as it attracts a variety of insects. Encourage your kids to observe the different species that come to visit. This can lead to discussions about the roles these insects play in our ecosystem, such as pollination and decomposition.
Building bug hotels is not only a fantastic way to engage kids in nature but also a step towards fostering a love for the environment. It’s a hands-on project that teaches responsibility, as they will need to check on the hotel regularly to see who has moved in! Plus, it’s an excellent opportunity for them to learn about the delicate balance of ecosystems and how every creature, no matter how small, has a role to play.
So, are you ready to dive into this exciting project? Grab your materials, gather the kids, and let’s create a buzzing community for our tiny friends!
Q: What materials can I use to build a bug hotel?
A: You can use natural materials like twigs, straw, pine cones, and hollow stems. Old wooden crates or bricks can serve as the structure.
Q: How do I know if my bug hotel is successful?
A: Check for insect activity! If you see bugs coming and going, that’s a great sign that your bug hotel is working.
Q: Can we decorate the bug hotel?
A: Absolutely! Let your kids get creative with eco-friendly paints or natural decorations to make it visually appealing.

Painted Rocks
If you're looking for a delightful and creative way to engage your kids in gardening, are the perfect project! This activity not only allows children to express their artistic flair, but it also adds a splash of color and personality to any garden space. Imagine walking through your garden and being greeted by vibrant, hand-painted stones that tell a story or reflect the imagination of your little ones. It's like having a gallery of nature right in your backyard!
To get started, all you need are some smooth, clean rocks, eco-friendly paint, and a bit of inspiration. Encourage your kids to think about what they want to paint. It could be anything from their favorite animals, whimsical patterns, or even motivational quotes. The beauty of this craft is that there are no strict rules—just let their creativity flow!
Here’s a simple step-by-step guide to creating your own painted rocks:
- Gather Your Supplies: Collect some smooth rocks, non-toxic acrylic paints, paintbrushes, and a sealant to protect the finished art.
- Clean the Rocks: Rinse the rocks under water to remove any dirt and let them dry completely.
- Plan Your Design: Sketch out designs on paper or let the kids brainstorm ideas.
- Start Painting: Let the kids unleash their creativity on the rocks! Encourage them to use multiple colors and techniques.
- Seal the Artwork: Once the paint is dry, apply a clear sealant to protect the designs from weather elements.
Not only will these painted rocks brighten up your garden, but they can also serve as garden markers! Kids can paint the names of their favorite plants or herbs on the rocks, creating a personalized touch that helps them learn about the plants they’re growing. It’s a charming way to blend art with education.
Moreover, this project is a fantastic opportunity to discuss the importance of using eco-friendly materials. Talk to your kids about how their choices can impact the environment, and encourage them to think about sustainability in their art projects. By using non-toxic paints and natural rocks, they’ll be contributing to a healthier planet while having fun!
As a bonus, consider making a rock scavenger hunt in your garden. Hide the painted rocks around your yard and have the kids search for them. This will not only get them moving but will also give them a sense of accomplishment when they find their own creations. It’s a delightful way to combine creativity with outdoor play!
Q: What kind of paint should we use for painted rocks?
A: It’s best to use non-toxic acrylic paints or eco-friendly paints that are safe for both children and the environment.
Q: How can we make the painted rocks last longer?
A: After the paint has dried, apply a clear outdoor sealant to protect the rocks from rain and fading.
Q: Can we use any type of rock?
A: Smooth river rocks or flat stones work best for painting, as they provide a good surface area for your designs.
Q: What if it rains after we paint the rocks?
A: If you’ve applied a sealant, the rocks should withstand light rain. However, it’s best to keep them under cover until the sealant fully cures.
In conclusion, painted rocks are more than just a fun craft; they are a wonderful way to connect with nature, express creativity, and learn about gardening. So gather those rocks, unleash your imagination, and let the garden art begin!
Herb Planting Kits
Creating is not just a fun activity; it's a gateway for kids to dive into the world of gardening and learn about the joy of growing their own food! Imagine the excitement on their faces when they see those tiny seeds sprouting into vibrant green herbs. This project is perfect for fostering a sense of responsibility, as kids learn to care for their plants daily. Plus, it introduces them to the delicious world of fresh herbs, which can elevate any meal! What could be more rewarding than snipping some fresh basil or parsley for dinner?
To get started, you'll need a few simple materials, many of which you might already have at home. Here’s a quick list of what you’ll need:
- Small pots or recycled containers (like yogurt cups)
- Potting soil
- Herb seeds (basil, cilantro, parsley, or any favorites)
- Watering can or spray bottle
- Labels (optional, but fun!)
First, let your kids decorate their pots. This can be a fantastic opportunity to unleash their creativity! They can use eco-friendly paints or even natural materials like twine and fabric scraps. Once the pots are ready, fill them with potting soil, leaving about an inch of space at the top. Now comes the exciting part—planting the seeds! Teach your kids how to plant the seeds according to the instructions on the seed packet, emphasizing the importance of spacing and depth.
After planting, it’s crucial to water the seeds gently. Kids can use a watering can or a spray bottle to avoid washing the soil away. Remind them that just like us, plants need water to grow, but too much can be harmful. This balance teaches them about nurturing and patience, as they will need to check their plants daily, ensuring they get enough sunlight and water.
As the herbs begin to grow, encourage your children to observe the changes. They can keep a gardening journal, noting the height of their plants and any changes they see. This not only enhances their observational skills but also makes them feel like true gardeners! And when it’s time to harvest, let them snip some herbs to use in a family meal. It’s a delightful way to connect their efforts in the garden with the food on the table.
Incorporating herb planting kits into your child's routine can spark a lifelong love for gardening and sustainability. Not only do they learn about the environment, but they also develop essential life skills such as responsibility, patience, and an appreciation for healthy eating. Plus, it’s a fantastic way to spend quality time together as a family!
| Question | Answer |
|---|---|
| What herbs are best for beginners? | Basil, parsley, and cilantro are great choices for kids starting their herb garden. |
| How often should I water the herbs? | Water them when the top inch of soil feels dry, usually every few days, but it can vary based on the environment. |
| Can we grow herbs indoors? | Absolutely! Just ensure they get plenty of sunlight, or consider using grow lights. |
| How long does it take for herbs to grow? | It varies by type, but most herbs can take anywhere from 1 to 4 weeks to sprout. |
Frequently Asked Questions
- What are some eco-friendly materials I can use for garden crafts?
You can use a variety of recycled materials like plastic bottles, tin cans, cardboard, and even old clothes. Think about what you have at home that could be repurposed into something useful for your garden. The sky's the limit!
- How can making seed bombs benefit the environment?
Seed bombs are a fantastic way to promote plant growth in neglected areas. By tossing these little balls of seeds, clay, and compost, you can help restore green spaces and provide habitats for local wildlife. It's like giving nature a little nudge!
- What types of plants are best for kids to grow?
Kids love growing plants that are easy to care for and quick to sprout. Consider herbs like basil and mint, or flowers like marigolds and sunflowers. These plants not only grow quickly but also provide a sense of accomplishment for young gardeners.
- How do I teach my kids about composting?
Start by showing them what can and cannot go into a compost bin. Make it a fun project by letting them decorate the bin or add kitchen scraps. Explain how composting reduces waste and enriches the soil, making it a win-win for the environment!
- Can we use any paint for decorating rocks?
It's best to use eco-friendly paints for decorating rocks. These paints are safer for the environment and won't harm local wildlife. Plus, they come in vibrant colors that will make your garden art pop!
- What is a bug hotel and why should we make one?
A bug hotel is a structure made from natural materials that provides shelter for beneficial insects like ladybugs and bees. Building one can teach kids about the important roles these insects play in our ecosystem, promoting biodiversity and environmental awareness.
- How can I make gardening more fun for my kids?
Incorporate games and challenges into gardening tasks! For instance, turn planting seeds into a race or create a scavenger hunt for different plant types. The more interactive and playful, the more your kids will enjoy it!


