Guide to Growing an Organic Vegetable Garden
Growing your own organic vegetable garden is not just a hobby; it’s a rewarding journey that connects you with nature and provides fresh, nutritious food for you and your family. Imagine stepping into your backyard and plucking ripe tomatoes or crisp lettuce right off the vine—there's something incredibly satisfying about that! In this guide, we’ll explore essential tips and techniques to help you cultivate a thriving organic vegetable garden. From choosing the right location to managing pests and harvesting your crops, we’ll cover everything you need to know to make your gardening experience both enjoyable and fruitful.
Selecting the ideal spot for your garden is crucial for optimal growth. Think of your garden as a sunbather; it needs plenty of sunlight to thrive! Most vegetables require at least 6 to 8 hours of direct sunlight each day. Additionally, consider factors like drainage and proximity to water sources. A well-drained area prevents waterlogging, which can harm your plants. Ask yourself: Is there a spot in your yard that gets the morning sun but is shaded in the afternoon? This could be a perfect location for your garden!
Healthy soil is the foundation of a successful garden. Think of soil as the lifeblood of your plants; without it, they simply can’t flourish! Start by conducting a soil test to determine its pH and nutrient levels. You can easily purchase a soil testing kit online or at your local garden center. Once you know what your soil needs, you can amend it with organic matter like compost, manure, or peat moss. This not only improves soil structure but also creates a nutrient-rich environment for your vegetables to thrive.
Composting is an excellent way to enrich your soil naturally. It’s like giving your garden a nutritious meal! To create a compost pile, gather materials such as vegetable scraps, grass clippings, and leaves. Avoid meat, dairy, and oily foods, as they can attract pests. Maintain your compost by turning it regularly to aerate it and speed up decomposition. In just a few months, you’ll have rich compost that can dramatically improve your soil quality.
There are various composting methods to choose from, each offering unique benefits. Here are a few popular ones:
- Traditional Composting: This involves creating a pile of organic waste that decomposes over time.
- Vermicomposting: Using worms to break down food scraps into nutrient-rich worm castings.
- Bokashi: A fermentation method that allows you to compost food scraps quickly and without odor.
Once your compost is ready, it’s time to put it to work! Incorporate it into your garden beds by mixing it into the top few inches of soil. This helps improve soil structure and provides essential nutrients to your plants. Be mindful of application rates; a thin layer of compost (about 1 to 2 inches) is usually sufficient. Timing is also key—apply compost in the spring before planting or in the fall to prepare your soil for the next growing season.
When it comes to selecting seeds, opt for organic varieties. Organic seeds are produced without synthetic fertilizers or pesticides, ensuring that your garden is as healthy as possible. Heirloom varieties are also a great choice, as they are open-pollinated and have been passed down through generations. You can find organic seeds at local garden centers or online retailers. Remember, the seeds you choose can significantly impact the success of your garden!
Organic gardening requires effective pest management techniques. It’s important to protect your crops without resorting to harmful chemicals. Natural methods such as companion planting, where certain plants are grown together to deter pests, can be very effective. For example, planting marigolds alongside your vegetables can help repel nematodes and other pests.
Beneficial insects play a vital role in pest control. Think of them as your garden's little superheroes! Ladybugs, lacewings, and parasitic wasps can help keep harmful pests in check. To attract these helpful creatures, plant a variety of flowers, herbs, and native plants. Creating a balanced ecosystem in your garden will make it more resilient and productive.
Explore various natural remedies that can help keep pests at bay. Homemade sprays made from garlic or hot pepper can deter unwanted visitors without harming beneficial insects. Physical barriers like row covers can also protect your plants from pests while allowing sunlight and moisture in. By using these techniques, you can cultivate a healthy garden environment.
Proper watering is critical for healthy plant growth. Think of watering as a lifeline for your plants; too little, and they’ll wilt, too much, and they’ll drown! Effective irrigation methods, such as drip systems or soaker hoses, can help deliver water directly to the roots while conserving moisture. Rainwater harvesting is another excellent way to collect water for your garden, reducing your dependence on municipal supplies.
Different plants have varying water requirements. For instance, leafy greens typically need more water than root vegetables. Assess your garden’s needs by checking the moisture level of the soil with your finger. If the top inch feels dry, it’s time to water! Adjust your watering schedule based on the weather and the specific needs of your vegetables.
Mulching is an effective way to retain moisture, suppress weeds, and improve soil health. Think of mulch as a protective blanket for your garden! Organic materials like straw, wood chips, or shredded leaves can be used. Apply a layer of mulch about 2 to 4 inches thick around your plants to keep the soil cool and moist while preventing weed growth.
Knowing when and how to harvest your vegetables is key to enjoying their full flavor and nutritional benefits. Timing is everything! Each vegetable has its own signs of ripeness. For example, cucumbers should be harvested when they are firm and green, while tomatoes should be picked when they are fully colored and slightly soft to the touch. Proper harvesting techniques can prevent damage to your plants and ensure a bountiful yield.
Understanding the right time to harvest each vegetable ensures peak flavor and texture. Pay attention to the specific indicators for each crop in your garden. For instance, beans should be harvested when they are young and tender, while squash should be picked when they reach the desired size but before they begin to harden. This attention to detail can make all the difference in your cooking!
Proper storage methods can extend the freshness of your harvest. After picking, handle your vegetables gently to avoid bruising. Refrigeration is great for leafy greens and some root vegetables, while others like tomatoes and squash prefer a cool, dry place. If you have an abundance of produce, consider freezing or canning to enjoy your garden's bounty year-round. With the right techniques, you can savor the taste of summer even in the dead of winter!
Q: How do I start my organic vegetable garden?
A: Begin by selecting a sunny spot in your yard, preparing the soil, and choosing organic seeds. Plan your layout and start planting!
Q: What are the best vegetables for beginners?
A: Easy-to-grow vegetables include radishes, lettuce, and zucchini. These crops are forgiving and can yield a quick harvest.
Q: How can I control pests organically?
A: Use natural deterrents, encourage beneficial insects, and practice companion planting to manage pests in your garden.
Q: When is the best time to harvest my vegetables?
A: Each vegetable has its own harvest time; generally, look for signs of ripeness based on color, size, and firmness.
Q: What should I do with excess produce?
A: You can freeze, can, or share with friends and neighbors. Consider starting a community exchange to share your bounty!
Choosing the Right Location
This article provides essential tips and techniques for cultivating a thriving organic vegetable garden, focusing on sustainable practices and the benefits of growing your own food.
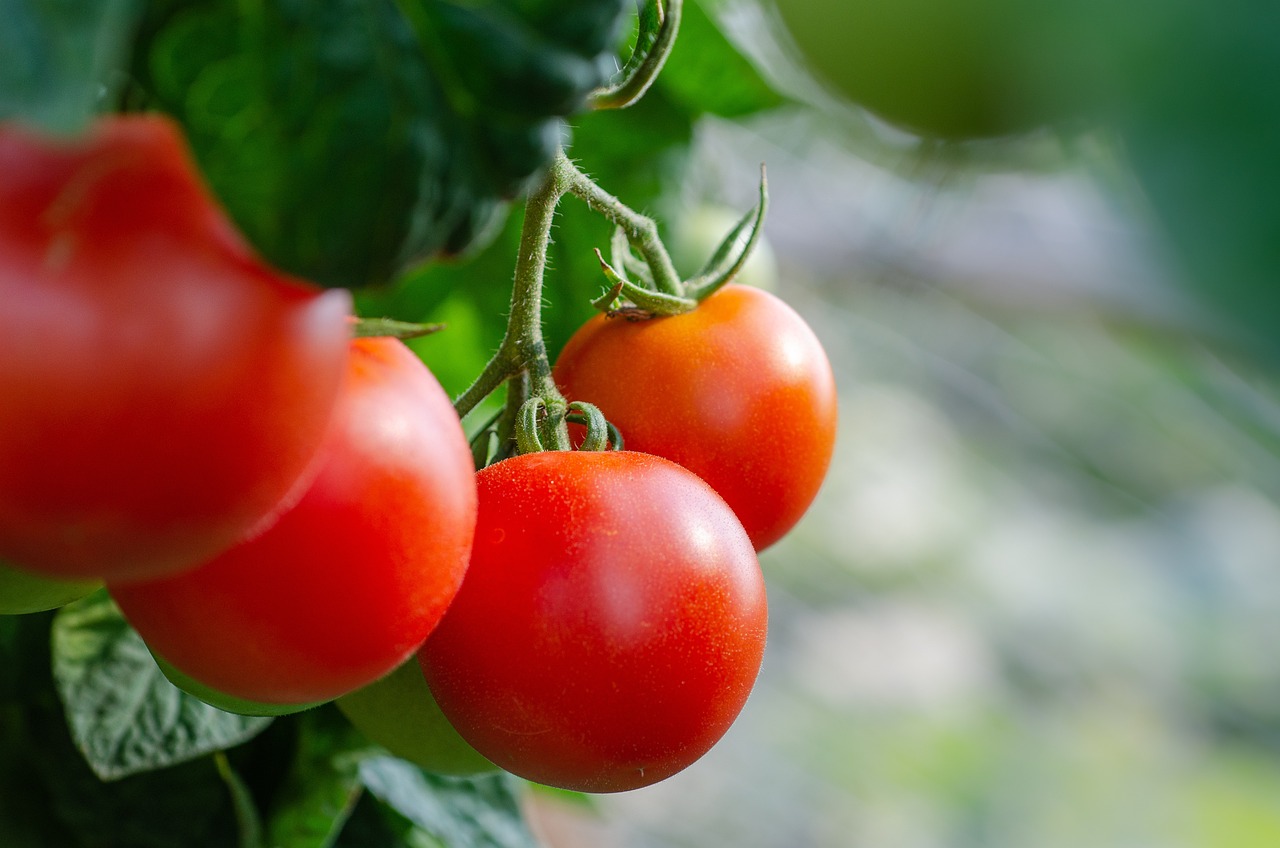
Choosing the right location for your organic vegetable garden is like picking the perfect spot for a picnic; it can make all the difference between a delightful experience and a disappointing one. The first thing to consider is sunlight. Most vegetables require at least 6 to 8 hours of direct sunlight each day. So, take a moment to observe your yard throughout the day. Are there areas that bask in the sun? If your garden is in a shaded spot, you might end up with leggy, weak plants that struggle to produce.
Next up is drainage. Poor drainage can lead to waterlogged soil, which is a sure-fire way to invite root rot and other diseases into your garden. To test the drainage of your chosen spot, dig a hole about a foot deep and fill it with water. If it drains within a few hours, you’re on the right track. If it takes longer, you may need to consider raised beds or amending the soil to improve drainage.
Another essential factor is the proximity to water sources. Watering your garden should be as easy as reaching for a glass of water on a hot day. If you have to lug heavy buckets from the other side of the yard every time your plants need a drink, you might find yourself neglecting them. Ideally, your garden should be within easy access to a hose or a rainwater collection system.
When planning your garden layout, consider the wind exposure as well. Strong winds can damage delicate seedlings and even uproot established plants. If your chosen location is windy, think about planting a natural windbreak, like a hedge or a row of taller plants, to protect your garden.
Lastly, take into account the soil quality. If your garden is in an area with poor soil, you may need to invest more time and resources into soil amendments. A quick soil test can reveal the pH and nutrient levels, helping you determine what you need to add to create a thriving environment for your vegetables. Remember, healthy soil is the foundation of a successful garden!
To summarize, here are the key factors to consider when choosing the right location for your organic vegetable garden:
- Sunlight: Ensure at least 6-8 hours of direct sunlight.
- Drainage: Test soil drainage to avoid waterlogged conditions.
- Water Access: Make sure it's easy to water your plants.
- Wind Protection: Consider natural barriers against strong winds.
- Soil Quality: Test and amend soil as needed for optimal growth.
Organic gardening requires effective pest management techniques. Discover natural methods to control pests, including companion planting, beneficial insects, and organic pesticides to protect your crops.
Beneficial insects play a vital role in pest control. Learn how to attract and retain these helpful creatures in your garden for a balanced ecosystem.
Explore various natural remedies and deterrents that can help keep pests at bay without harming the environment, including homemade sprays and physical barriers.
Proper watering is critical for healthy plant growth. Learn about effective irrigation methods, including drip systems and rainwater harvesting, to conserve water and ensure your plants thrive.
Different plants have varying water requirements. Discover how to assess the needs of your vegetables and adjust your watering schedule accordingly for optimal growth.
Mulching is an effective way to retain moisture, suppress weeds, and improve soil health. Learn about the best materials to use and how to apply mulch in your garden.
Knowing when and how to harvest your vegetables is key to enjoying their full flavor and nutritional benefits. Explore best practices for harvesting and storing your organic produce.
Understanding the right time to harvest each vegetable ensures peak flavor and texture. Learn how to identify signs of ripeness for various crops in your garden.
Proper storage methods can extend the freshness of your harvest. Discover various techniques for storing vegetables, including refrigeration, freezing, and canning, to enjoy your bounty year-round.
Q: How much sunlight do my vegetables need?
A: Most vegetables require at least 6-8 hours of direct sunlight daily to thrive.
Q: What can I do if my soil is poor?
A: You can amend your soil with organic matter such as compost or well-rotted manure to improve its quality.
Q: How can I manage pests organically?
A: Use natural methods like companion planting, introducing beneficial insects, and applying organic pesticides.
Soil Preparation Techniques
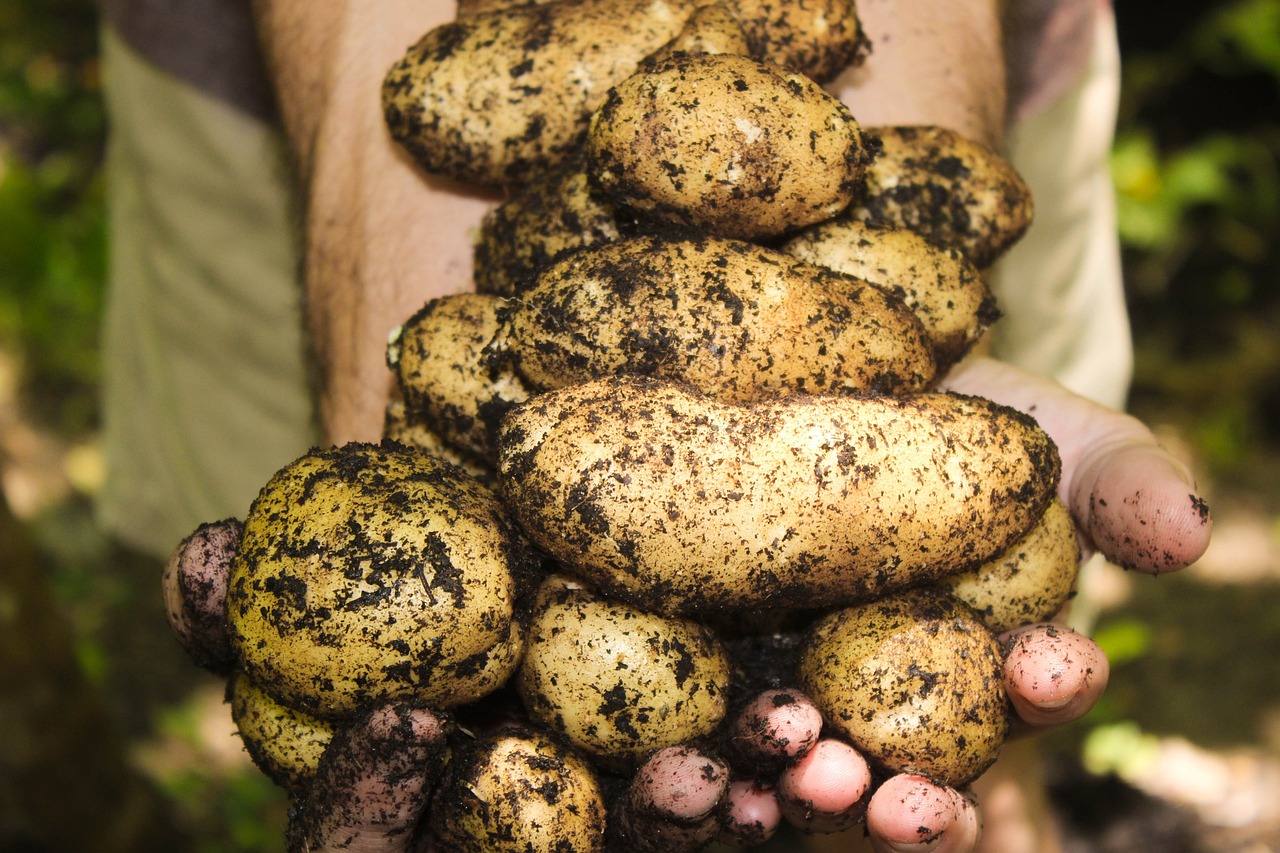
When it comes to cultivating a thriving organic vegetable garden, healthy soil is your best friend. Think of soil as the foundation of a house; without a solid base, everything else crumbles. Preparing your soil properly can make a significant difference in the health and productivity of your plants. The first step in this process is to test your soil. Soil testing kits are widely available and can help you understand the pH level, nutrient content, and overall health of your soil. This information is crucial as it guides you on what amendments you may need to add to create a nutrient-rich environment for your vegetables.
Once you've tested your soil, it's time to consider amendments. These are materials that you can add to your soil to improve its structure and nutrient content. Common amendments include compost, well-rotted manure, and peat moss. Each of these contributes differently: compost adds nutrients while improving soil structure, manure enriches the soil with organic matter, and peat moss helps with moisture retention. By incorporating these materials, you're essentially feeding your soil, which in turn nourishes your plants.
Another essential aspect of soil preparation is improving the soil structure. Compacted soil can hinder root growth and water drainage, leading to poor plant health. To combat this, consider using a method called double digging. This technique involves loosening the soil to a depth of about two feet, which not only aerates it but also allows roots to penetrate deeper and access more nutrients. If you're short on time or energy, simply turning the top six to eight inches of soil can still make a significant difference.
As you prepare your garden bed, remember to incorporate a layer of organic matter to improve moisture retention and provide nutrients. This can be done through a simple layering technique, where you alternate between different organic materials. For example, you could start with a layer of straw, followed by a layer of compost, and then topped off with a layer of soil. This not only enriches your soil but also creates a micro-environment that benefits your plants.
Finally, don't forget about drainage. Poor drainage can lead to waterlogged soil, which can be detrimental to your plants. If your garden area tends to retain water, consider creating raised beds. Raised beds improve drainage and can also warm the soil faster in the spring, giving your plants a head start. Additionally, you might want to incorporate organic materials like sand or perlite into your soil mix to enhance drainage further.
In summary, preparing your soil is a multi-step process that involves testing, amending, improving structure, and ensuring proper drainage. By investing time and effort into soil preparation, you're laying the groundwork for a flourishing organic vegetable garden.
- How often should I test my soil? It's a good practice to test your soil every 2-3 years to monitor its health and nutrient levels.
- Can I use regular garden soil for my vegetable garden? While you can use garden soil, it's best to amend it with organic matter to improve its quality for vegetable growth.
- What is the best time to prepare my soil? The best time to prepare your soil is in the fall or early spring before planting your vegetables.
- Is composting necessary for soil preparation? Composting is not strictly necessary, but it greatly enhances soil health and fertility.

Composting Basics
Composting is one of the most rewarding practices you can adopt for your organic vegetable garden. Not only does it help reduce waste, but it also creates a nutrient-rich soil amendment that can significantly enhance the health of your plants. Think of composting as nature's way of recycling. Instead of tossing your kitchen scraps and yard waste in the trash, you can transform them into a valuable resource that your garden will love.
To start your compost pile, you'll need a mix of green materials (like vegetable scraps, grass clippings, and coffee grounds) and brown materials (such as dried leaves, straw, and cardboard). This balance is crucial because green materials provide nitrogen, while brown materials supply carbon, creating the perfect environment for microorganisms to thrive. Remember, a well-aerated compost pile will break down faster, so turning it regularly is key!
Here’s a quick look at what you can and cannot compost:
| Compostable Materials | Non-Compostable Materials |
|---|---|
| Fruit and vegetable scraps | Meat and dairy products |
| Grass clippings | Oils and fats |
| Eggshells | Diseased plants |
| Leaves and small branches | Weeds with seeds |
Maintaining your compost pile is straightforward. Aim for a size of about 3 feet by 3 feet to ensure it heats up properly. The pile should be kept moist but not soggy, resembling a damp sponge. If it starts to smell bad, it’s usually a sign that it’s too wet or lacking in oxygen, so turning it will help aerate the pile and reduce odors.
One of the greatest joys of composting is watching the transformation from scraps to rich, dark compost. This usually takes anywhere from a few weeks to several months, depending on conditions like temperature, moisture, and the materials used. When your compost is ready, it will look like dark, crumbly soil and have an earthy smell. You can then use it to enrich your garden beds, providing your vegetables with the nutrients they need to thrive.
So, whether you're a seasoned gardener or just starting out, composting is a simple yet powerful way to boost your garden's productivity while also being kind to the environment. It's a win-win situation! Ready to dig in?
- How long does it take to create compost? Composting can take anywhere from a few weeks to several months, depending on the materials and conditions.
- Can I compost meat and dairy? It's best to avoid composting meat and dairy as they can attract pests and create odors.
- What should I do if my compost pile smells? If your compost pile has a foul odor, it may be too wet or lacking oxygen. Turning it and adding more brown materials can help.
- How do I know when my compost is ready? Your compost is ready when it looks dark and crumbly, resembling rich soil, and smells earthy.
Types of Composting
When it comes to composting, there isn't a one-size-fits-all method; different techniques can suit different gardeners and their unique situations. Understanding the various available can help you choose the right approach for your organic vegetable garden. Here, we will explore three popular methods: traditional composting, vermicomposting, and bokashi composting.
Traditional composting is perhaps the most well-known method. This process involves layering organic waste materials like fruit and vegetable scraps, grass clippings, and leaves in a compost bin or pile. The key to success is maintaining the right balance of green materials (nitrogen-rich) and brown materials (carbon-rich). As microorganisms break down these materials, they generate heat, which speeds up decomposition. Traditional composting is ideal for those with enough space and patience, as it can take anywhere from a few months to a year to produce finished compost.
On the other hand, if you're short on space or want to compost indoors, vermicomposting might be the perfect solution. This method utilizes red wigglers—special worms that thrive on organic waste. By setting up a worm bin, you can efficiently convert kitchen scraps into nutrient-rich worm castings in a matter of weeks. Not only does vermicomposting produce excellent fertilizer, but it also helps reduce kitchen waste significantly. It's like having a mini-composting factory right under your kitchen sink!
Lastly, we have bokashi composting, a method that originates from Japan. Bokashi involves fermenting organic waste using a special mix of microorganisms. This process allows you to compost not just fruit and vegetable scraps but also meat and dairy products, which are typically not recommended in traditional composting. The bokashi method is quick, often taking just a few weeks, and the resulting compost can be buried in your garden to enrich the soil. However, it does require a bokashi bin and the specific bokashi mix, which may be a bit of an investment upfront.
To summarize, here’s a quick comparison of the three composting methods:
| Type of Composting | Best For | Time to Compost | Materials Allowed |
|---|---|---|---|
| Traditional Composting | Outdoor gardeners with space | 3 months to 1 year | Fruit/vegetable scraps, leaves, grass |
| Vermicomposting | Indoor composters, small spaces | 3 to 6 weeks | Fruit/vegetable scraps, coffee grounds |
| Bokashi Composting | Those who want to compost all food scraps | 2 to 4 weeks | All food scraps, including meat and dairy |
Each composting method has its own unique benefits, and the best choice ultimately depends on your gardening goals, space, and the types of waste you generate. By selecting the method that aligns with your lifestyle, you can create a sustainable and enriching composting system that will nourish your organic vegetable garden.
Q: What can I compost?
A: Most organic materials can be composted, including fruit and vegetable scraps, coffee grounds, eggshells, grass clippings, and dried leaves. Avoid meat, dairy, and oily foods in traditional composting.
Q: How often should I turn my compost?
A: For traditional composting, turning your pile every few weeks helps aerate it and speeds up the decomposition process. With vermicomposting and bokashi, turning is not necessary.
Q: Can I compost in winter?
A: Yes! Composting can continue in winter, but decomposition will slow down due to colder temperatures. Insulating your compost pile can help maintain warmth.
Q: What is the ideal moisture level for compost?
A: Your compost should feel like a damp sponge—moist but not soggy. If it's too dry, add water or green materials; if too wet, add brown materials.
Using Compost in Your Garden
When it comes to nurturing your organic vegetable garden, compost is like the secret sauce that enhances flavor, nutrition, and growth. Using compost effectively can transform your garden into a lush paradise, bursting with health and vitality. So, how do you incorporate this magical mixture into your garden beds? Let's dive into some essential tips!
First and foremost, it's crucial to understand the right timing for applying compost. Ideally, you want to enrich your soil with compost before planting your seeds or seedlings. This gives your plants a solid foundation to grow on, promoting strong root development. A good rule of thumb is to mix in a layer of compost about 2-4 inches thick into your soil during the fall or early spring. This allows the nutrients to mingle with the soil, creating a rich environment for your plants to thrive.
Once your plants are established, you can continue to reap the benefits of compost throughout the growing season. A top dressing of compost can be applied around the base of your plants to provide a slow release of nutrients. Think of it as a nourishing blanket that keeps your plants cozy and well-fed. However, avoid piling it directly against the stems, as this can lead to rot.
Another effective method is to create a compost tea. This liquid gold is made by steeping compost in water for a few days. The result is a nutrient-rich solution that can be used to water your plants or as a foliar spray. Not only does this provide an instant nutrient boost, but it also encourages beneficial microorganisms to flourish in your garden. Just remember to dilute it with water to avoid overwhelming your plants.
Now, let’s talk about application rates. A general guideline is to use about 1-2 inches of compost per year. This can vary depending on the specific needs of your plants and the quality of your compost. Always keep an eye on your plants; if they appear to be struggling, it might be time to reassess your compost application.
Incorporating compost into your garden is not just about adding nutrients; it’s also about improving soil structure. Compost enhances soil aeration and drainage, which is vital for healthy root growth. It helps retain moisture during dry spells, reducing the need for frequent watering. Plus, it fosters a thriving ecosystem of beneficial microbes, worms, and other organisms that contribute to soil health.
To make the most of your compost, consider the following table that outlines the benefits of using compost in your garden:
| Benefit | Description |
|---|---|
| Nutrient-Rich | Provides essential nutrients for plant growth. |
| Improves Soil Structure | Enhances aeration and drainage, promoting healthy roots. |
| Moisture Retention | Helps retain moisture, reducing the need for watering. |
| Encourages Beneficial Microbes | Supports a healthy ecosystem in the soil. |
In summary, using compost in your garden is a game changer. Not only does it enrich the soil, but it also creates a sustainable environment for your vegetables to grow. By understanding the proper application techniques and timing, you can ensure that your plants receive the best care possible. So grab that compost and get ready to watch your garden flourish like never before!
Q: How often should I apply compost to my garden?
A: It's recommended to apply compost once a year, ideally before planting or as a top dressing during the growing season.
Q: Can I use compost tea on all my plants?
A: Yes, compost tea can be used on most plants, but always dilute it with water to prevent overwhelming them.
Q: What if I don’t have enough compost for my entire garden?
A: You can prioritize high-value plants or areas that need the most improvement. Even small amounts of compost can make a difference!
Q: Is store-bought compost as good as homemade compost?
A: While store-bought compost can be convenient, homemade compost is often richer in nutrients and tailored to your specific garden needs.
Choosing Organic Seeds and Plants
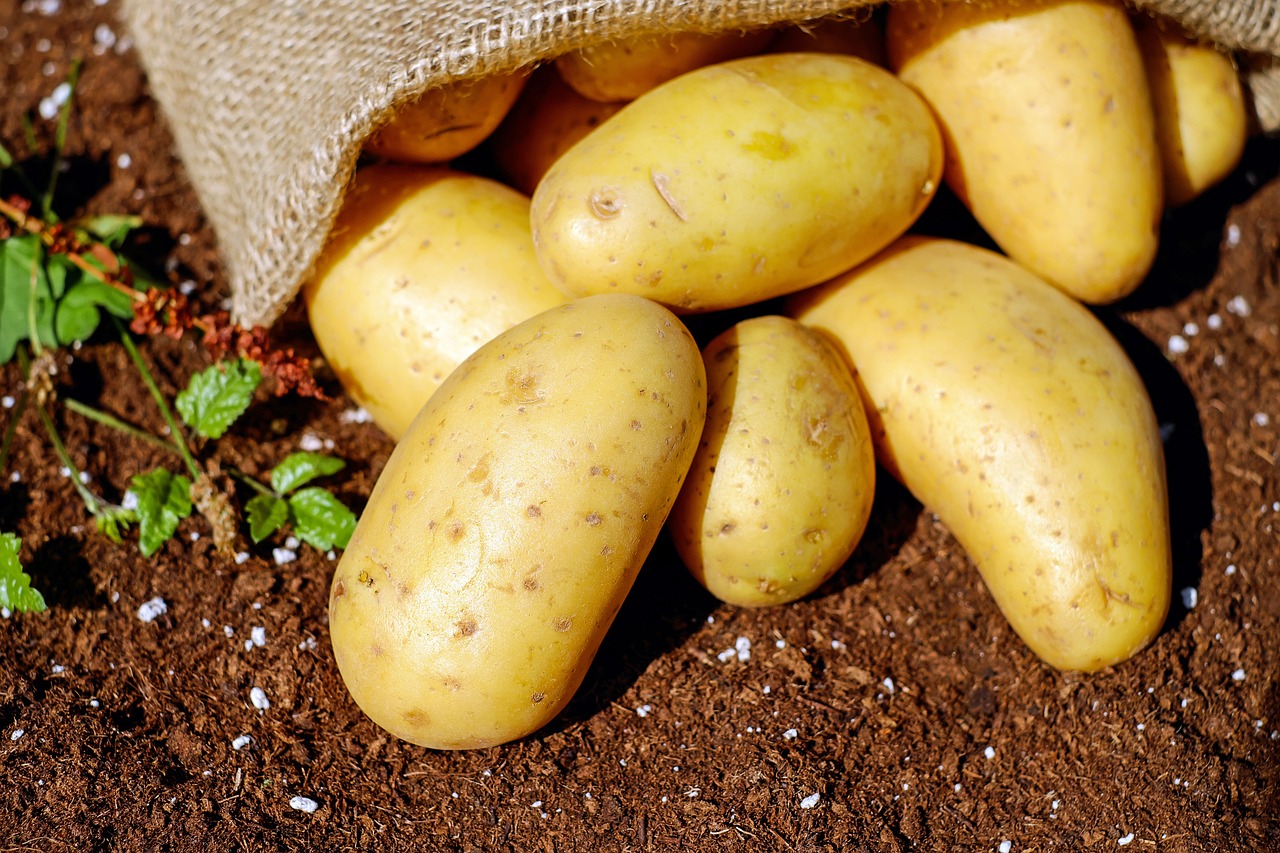
When it comes to cultivating a thriving organic vegetable garden, choosing the right seeds and plants is like picking the perfect ingredients for a gourmet dish. The quality of your seeds will directly impact the health and productivity of your garden. So, why settle for anything less than the best? Organic seeds are not only better for the environment, but they also offer a plethora of benefits that can lead to a more fruitful harvest.
First and foremost, organic seeds are derived from plants that have been grown without synthetic fertilizers, pesticides, or genetically modified organisms (GMOs). This means that when you plant these seeds, you're ensuring that your garden remains free from harmful chemicals. Additionally, organic seeds tend to be more resilient, as they are adapted to local growing conditions and have a natural resistance to pests and diseases. Isn't it amazing how nature has its own way of ensuring the survival of the fittest?
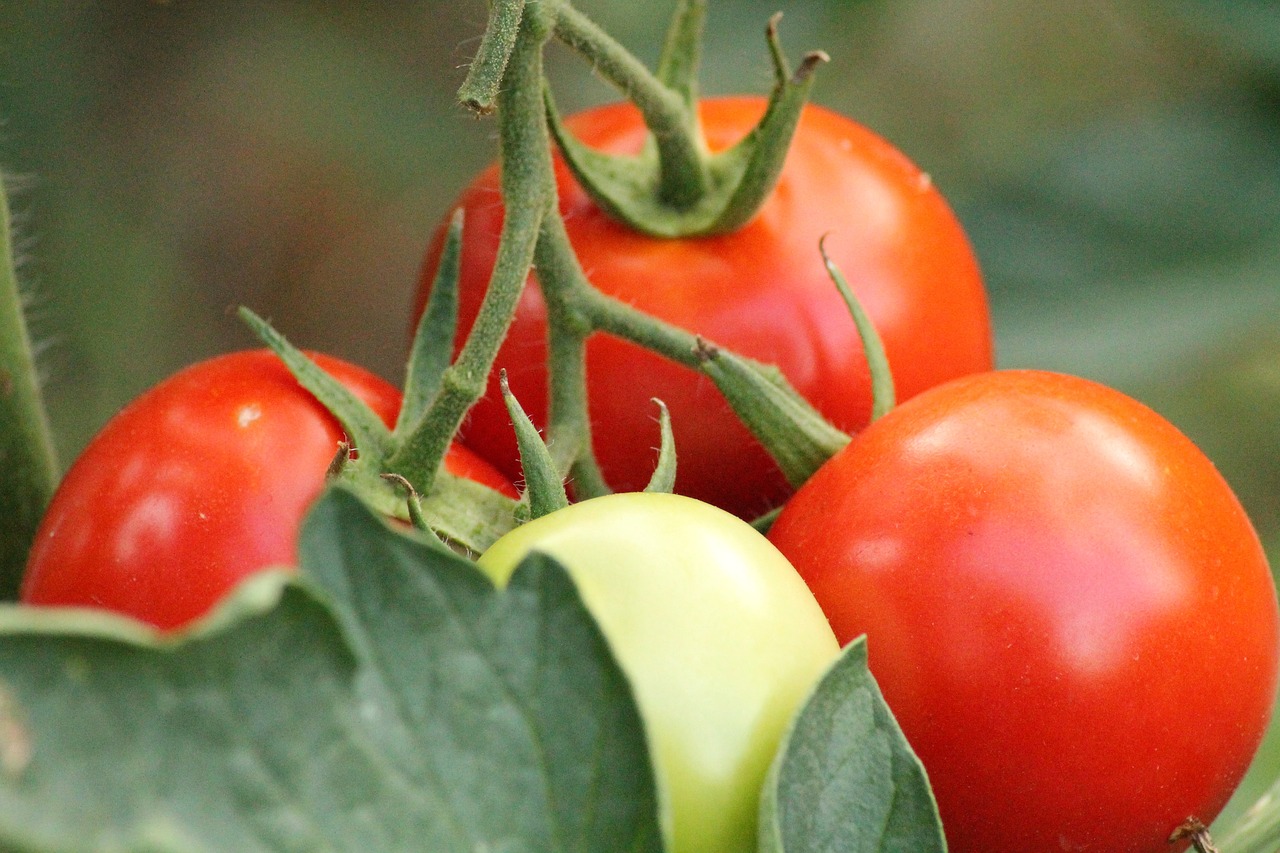
Another aspect to consider is the allure of heirloom varieties. These seeds have been passed down through generations and are often prized for their unique flavors, colors, and textures. Imagine biting into a juicy, heirloom tomato that bursts with flavor, far superior to the bland varieties found in the supermarket! Heirloom plants not only contribute to biodiversity but also allow you to connect with gardening traditions that span centuries.
So, where can you find these precious organic seeds? While many garden centers now offer a selection of organic options, the best place to source them is from reputable seed companies that specialize in organic and heirloom varieties. Look for companies that provide detailed information about their seeds, including their growing conditions and any certifications they may have. Here’s a quick rundown of some popular sources:
| Seed Company | Specialty | Website |
|---|---|---|
| Seed Savers Exchange | Heirloom Seeds | www.seedsavers.org |
| Baker Creek Heirloom Seeds | Rare & Unusual Varieties | www.rareseeds.com |
| Johnny's Selected Seeds | Organic Seeds | www.johnnyseeds.com |
As you embark on your gardening journey, remember that patience is key. Seeds are like tiny gifts waiting to unfold their potential. Whether you’re starting from seed or purchasing young plants from a nursery, be sure to provide them with the right conditions to thrive. This includes adequate sunlight, proper watering, and nutrient-rich soil. Your plants will thank you with vibrant growth and delicious produce!
In summary, choosing organic seeds and plants is not just about making a choice; it’s about embracing a lifestyle that promotes health, sustainability, and biodiversity. By investing in quality seeds, you’re not only setting the stage for a successful harvest but also contributing to a healthier planet. So, roll up your sleeves, get your hands dirty, and watch your garden flourish!
- What are organic seeds? Organic seeds are sourced from plants that are grown without synthetic chemicals or GMOs.
- Can I save seeds from my organic plants? Yes! Many gardeners save seeds from heirloom varieties to plant in future seasons.
- How do I know if a seed company is reputable? Look for companies that provide detailed information about their seeds and have positive customer reviews.
- Are heirloom seeds better than hybrid seeds? Heirloom seeds often have unique flavors and are more resilient, while hybrids can offer higher yields.
Pest Management Strategies
When it comes to nurturing your organic vegetable garden, one of the biggest challenges you'll face is managing pests. But fear not! With the right , you can protect your precious crops while keeping your garden eco-friendly. Instead of reaching for chemical pesticides that can harm beneficial insects and the environment, consider implementing natural methods that not only keep pests at bay but also promote a thriving ecosystem.
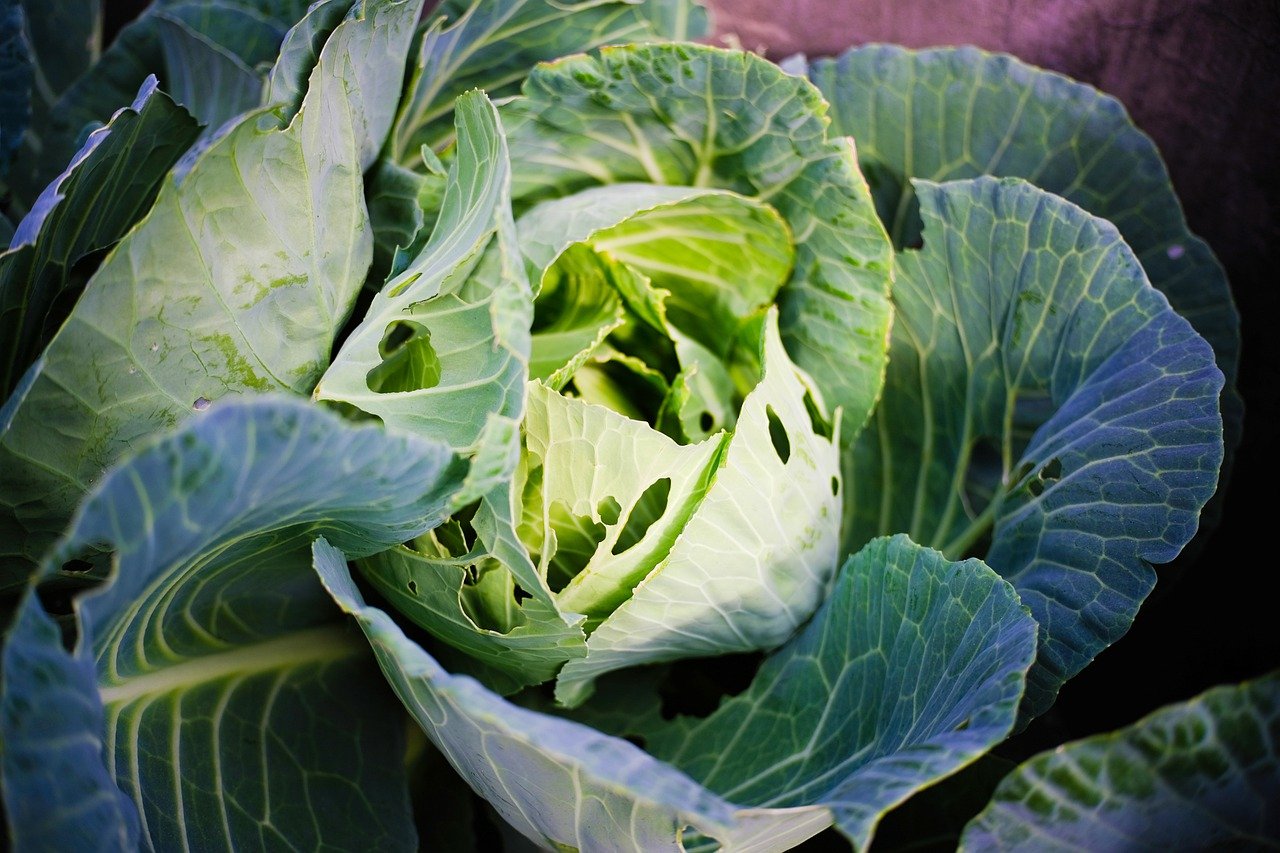
First and foremost, understanding the types of pests that may invade your garden is crucial. Common garden pests include aphids, caterpillars, and beetles, each with its own set of habits and vulnerabilities. By identifying these pests early on, you can take proactive measures to control their populations before they wreak havoc on your plants. For instance, did you know that some insects are actually beneficial? Ladybugs, for example, love munching on aphids, making them your garden's best friend. So, how can you attract these helpful critters? You can plant flowers like marigolds and dill, which serve as a magnet for beneficial insects.
Another effective strategy is companion planting. This technique involves planting certain crops together to naturally deter pests. For example, planting basil alongside tomatoes can repel tomato hornworms while enhancing the flavor of your tomatoes. It's like creating a natural defense system for your garden! Not only does this method help in pest control, but it also promotes biodiversity, which is essential for a healthy garden.
In addition to companion planting, you can also explore the use of organic pesticides. These are derived from natural sources and are generally less harmful to the environment. Common organic options include neem oil, insecticidal soap, and diatomaceous earth. However, it's important to apply these treatments judiciously, as overuse can disrupt the delicate balance of your garden's ecosystem. Always follow the instructions carefully and consider spot-treating affected areas instead of blanket applications.
Moreover, physical barriers can be a game-changer in pest management. Using row covers or netting can protect young plants from pests while allowing sunlight and moisture to reach them. This method is particularly effective for preventing damage from larger pests like birds and rabbits. Think of it as putting a protective shield around your plants, ensuring they grow strong and healthy.
Lastly, adopting a holistic approach to pest management can yield the best results. This means regularly monitoring your garden, maintaining healthy soil, and ensuring your plants are well-watered and nourished. Healthy plants are less susceptible to pests, so investing time in soil health and plant care will pay off in the long run. Remember, gardening is a journey, and with patience and the right strategies, you can create a flourishing organic vegetable garden free from harmful chemicals.
- What are some natural ways to deter pests? You can use companion planting, beneficial insects, and homemade sprays made from garlic or hot pepper.
- How do I attract beneficial insects to my garden? Plant a variety of flowers, such as marigolds, dill, and yarrow, which are known to attract ladybugs, lacewings, and other helpful insects.
- Are organic pesticides safe for my garden? Yes, organic pesticides are generally safer for the environment and beneficial insects, but they should be used carefully and sparingly.
- What should I do if I notice pest damage on my plants? Inspect the affected plants, identify the pest, and apply appropriate natural remedies or physical barriers to control the situation.
Understanding Beneficial Insects
When it comes to gardening, many people focus solely on the plants, but what about the tiny allies that can make or break your garden's success? Beneficial insects are nature's little helpers, playing a vital role in maintaining a healthy ecosystem in your vegetable garden. These insects not only help with pest control but also promote pollination and improve soil health. So, how can you attract these helpful creatures to your garden and ensure they thrive?
First off, let's dive into the types of beneficial insects you might encounter. You might be surprised to learn that not all bugs are bad! In fact, some of the most common beneficial insects include:
- Ladybugs: Known for their voracious appetite for aphids, these little beetles can devour hundreds of pests in a single day.
- Lacewings: Often called "aphid lions," lacewing larvae are fierce predators that help keep pest populations in check.
- Parasitic Wasps: These tiny wasps lay their eggs inside pest insects, effectively controlling their populations without harming your plants.
- Bees and Butterflies: While they are primarily known for pollination, they also contribute to the overall health of your garden.
To attract these beneficial insects, you can create a welcoming environment in your garden. Here are some simple yet effective strategies:
- Plant a variety of flowers that bloom at different times throughout the growing season. This ensures a continuous food source for beneficial insects.
- Avoid using chemical pesticides, as they can harm beneficial insects along with the pests you're trying to eliminate.
- Include native plants in your garden, as they are more likely to attract local beneficial insect populations.
- Provide shelter by incorporating diverse plant structures, such as tall grasses or flowering herbs, where beneficial insects can hide and breed.
In addition to attracting beneficial insects, it's essential to understand their lifecycle and behavior. For instance, ladybugs start as larvae before becoming adults, and during this larval stage, they are even more effective at consuming pests. By recognizing the different stages of these insects, you can better appreciate their role in your garden and avoid mistakenly viewing them as pests themselves.
Lastly, consider creating a pollinator garden to enhance the presence of beneficial insects. This can be a small section of your garden dedicated to flowering plants that attract bees, butterflies, and other pollinators. Not only does this support beneficial insects, but it also encourages better fruit and vegetable production in your garden.
In summary, understanding beneficial insects and their role in your organic vegetable garden is crucial for creating a balanced ecosystem. By fostering an environment that attracts these helpful creatures, you can reduce pest populations naturally, ensure healthy pollination, and ultimately enjoy a more bountiful harvest. So, the next time you spot a bug in your garden, take a moment to consider whether it might be a friend rather than a foe!
Q: How can I identify beneficial insects in my garden?
A: Beneficial insects often have distinctive features. For example, ladybugs are red with black spots, while lacewings have delicate, green wings. You can also find identification guides online or in gardening books.
Q: Are all insects harmful to my garden?
A: No, not all insects are harmful. Many insects play essential roles in pest control and pollination. It's important to learn about the different types of insects to differentiate between pests and beneficial ones.
Q: Can I introduce beneficial insects to my garden?
A: Yes, you can purchase beneficial insects, such as ladybugs and lacewings, from garden centers or online. However, creating a welcoming environment is often more effective than introducing them artificially.
Natural Pest Deterrents
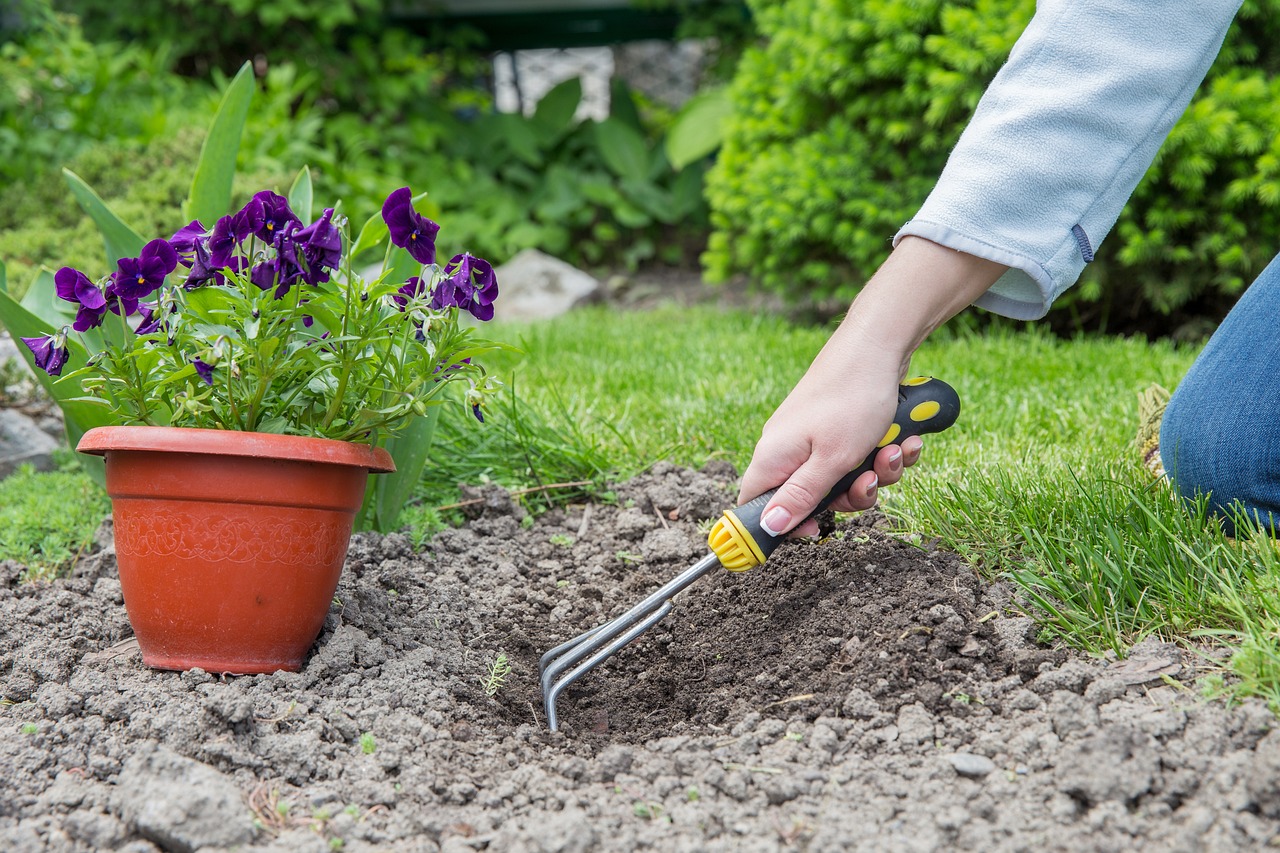
When it comes to maintaining a thriving organic vegetable garden, one of the biggest challenges gardeners face is dealing with pesky pests. Instead of reaching for chemical pesticides that can harm the environment, why not explore ? These methods not only protect your plants but also promote a healthy ecosystem. Imagine your garden as a vibrant community, where every insect has a role to play—some as friends and others as foes. By using natural deterrents, you can encourage the good while keeping the bad at bay.
One effective approach is to use homemade sprays made from common household ingredients. For instance, a simple mixture of water, soap, and a few drops of essential oil can create a potent spray that repels many soft-bodied insects like aphids and spider mites. Additionally, garlic and chili pepper sprays can work wonders; the strong scents deter pests while being harmless to beneficial insects. Just think of it as creating a shield around your plants that keeps unwanted visitors away!
Another strategy involves the use of physical barriers. Floating row covers, for example, can protect your crops from flying pests while allowing sunlight and rain to nourish them. These covers act like a cozy blanket, shielding your veggies from harm. Additionally, planting certain herbs and flowers can naturally repel pests. Marigolds, for example, are known to deter nematodes and aphids, while basil can help keep flies away. By interplanting these natural deterrents, you create a diverse ecosystem that works in harmony.
Finally, consider introducing beneficial insects into your garden. Ladybugs, lacewings, and predatory wasps are all natural predators of common garden pests. By creating an inviting habitat for these allies—such as providing nectar-rich flowers and a water source—you can establish a balanced environment where pests are kept in check. Think of it as inviting the superheroes of the insect world to your garden party!
In summary, natural pest deterrents not only protect your organic vegetable garden but also enhance its health and biodiversity. By utilizing homemade sprays, physical barriers, companion planting, and beneficial insects, you can cultivate a thriving garden that flourishes without the need for harsh chemicals. Remember, every little step you take towards natural pest management contributes to a healthier planet and a more bountiful harvest!
- What are some common natural pest deterrents? Homemade sprays, physical barriers like row covers, and planting companion plants such as marigolds and basil.
- How can I attract beneficial insects to my garden? Plant nectar-rich flowers, provide water sources, and avoid using chemical pesticides that can harm them.
- Are natural pest deterrents effective? Yes, when used correctly, they can significantly reduce pest populations without harming beneficial insects or the environment.
- Can I use essential oils for pest control? Absolutely! Essential oils like peppermint, lavender, and tea tree oil can be mixed with water and soap to create effective sprays.
Watering and Irrigation Practices
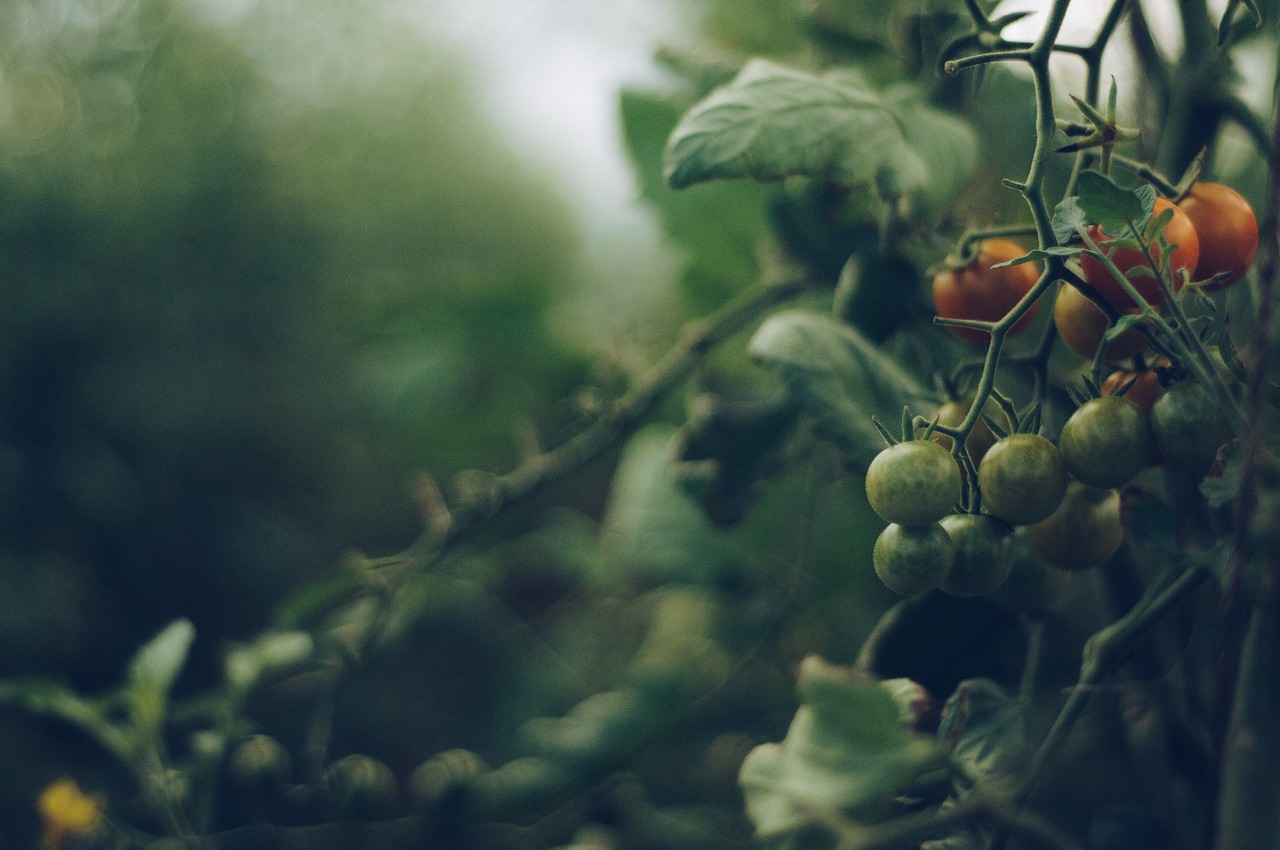
When it comes to nurturing your organic vegetable garden, proper watering is like giving your plants a refreshing drink on a hot summer day. Just like humans, plants need water to survive and thrive, but the key is knowing how much and how often to water them. Overwatering can drown your plants, while underwatering can leave them parched and lifeless. So, how do you strike the perfect balance? Let's dive into some effective watering and irrigation practices that will keep your garden lush and productive.
First off, understanding your plants' water needs is crucial. Different vegetables have varying requirements. For example, leafy greens like lettuce and spinach prefer moist soil, while root vegetables such as carrots and potatoes thrive in drier conditions. To make it easier, you can categorize your plants based on their water needs:
| Plant Type | Water Needs |
|---|---|
| Leafy Greens | High moisture |
| Root Vegetables | Moderate moisture |
| Fruiting Plants | Regular watering |
| Herbs | Low to moderate moisture |
Next, consider the method of irrigation you want to use. Traditional watering with a hose or watering can is effective, but it can be time-consuming, especially for larger gardens. That's where drip irrigation comes into play. This method delivers water directly to the roots of your plants, minimizing evaporation and runoff. It's like giving your plants a targeted drink, ensuring they get exactly what they need without wasting a drop.
Another fantastic option is rainwater harvesting. By collecting rainwater in barrels, you can provide your garden with a sustainable water source. Not only does this practice save you money on your water bill, but it also reduces your environmental footprint. Plus, plants tend to thrive on rainwater, which is naturally soft and free from chemicals found in tap water.
Now, let's talk about timing. Watering early in the morning or late in the afternoon is ideal, as it allows the moisture to soak into the soil before the sun's heat causes evaporation. If you're watering during the heat of the day, you might as well be pouring money down the drain! To help you remember the best times to water, consider setting a reminder on your phone.
Moreover, mulching can be a game-changer when it comes to retaining moisture in your garden beds. A layer of organic mulch, such as straw or wood chips, acts like a blanket for the soil, reducing evaporation and keeping the roots cool. It's like a cozy comforter for your plants, helping them stay hydrated even during hot spells. Just remember to apply a 2-3 inch layer around your plants, but be careful not to smother them!
In summary, watering and irrigation practices are essential components of a successful organic vegetable garden. By understanding your plants' needs, choosing the right irrigation methods, timing your watering, and using mulch, you can ensure your garden stays vibrant and productive. So, grab that watering can, set up your drip system, or collect some rainwater, and watch your garden flourish!
- How often should I water my vegetable garden? It depends on the type of plants and the weather. Generally, watering 1-2 times a week is sufficient, but check the soil moisture regularly.
- What's the best time to water? Early morning or late afternoon is ideal to minimize evaporation and ensure your plants get the moisture they need.
- Can I use tap water for my garden? Yes, but it's best to let it sit for 24 hours to allow chlorine to dissipate, or consider using rainwater for its natural benefits.
- How can I tell if my plants need water? Check the soil; if it's dry an inch below the surface, it's time to water. You can also look for droopy leaves as a sign of thirst.
Understanding Plant Water Needs
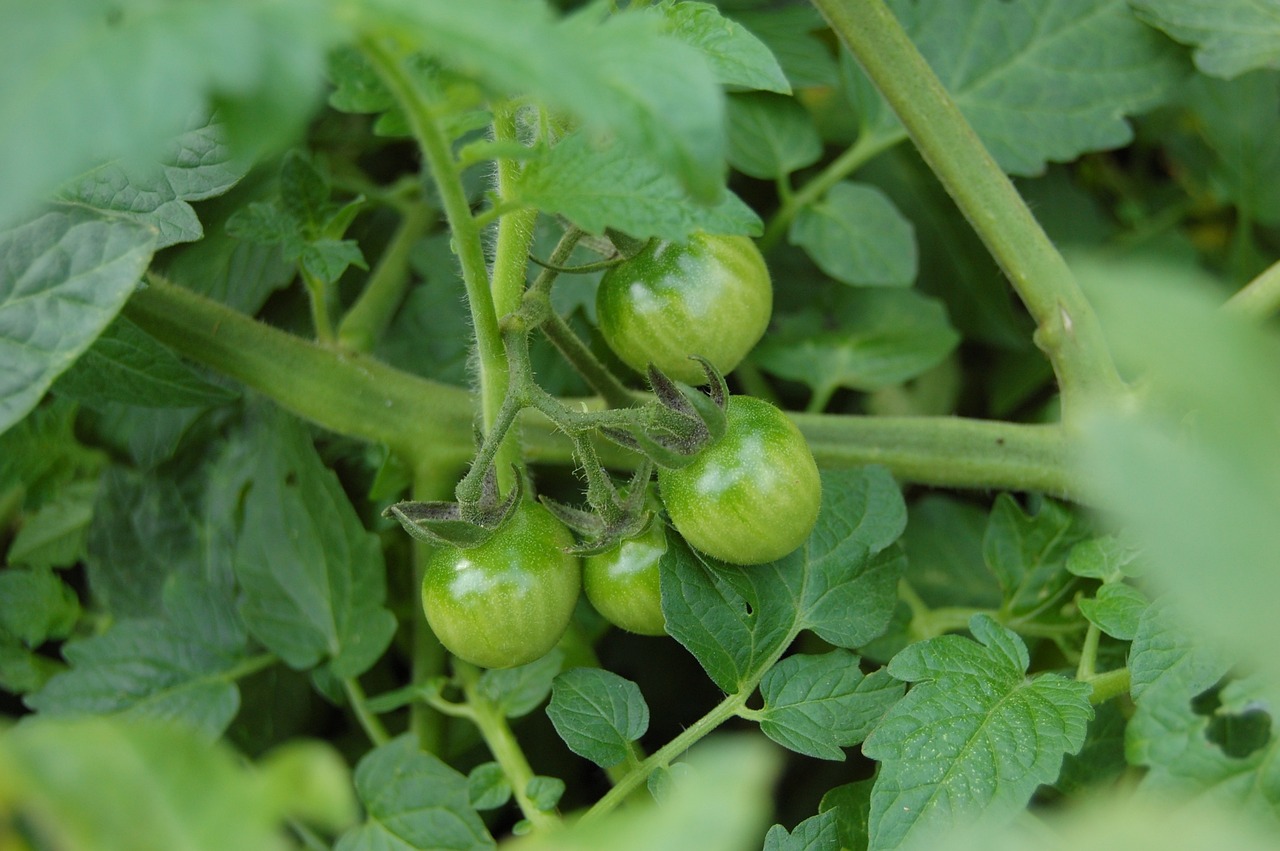
When it comes to growing a thriving organic vegetable garden, understanding plant water needs is crucial. Just like us, plants have their own unique thirst levels that depend on various factors such as species, growth stage, and environmental conditions. Imagine trying to quench a cactus's thirst with a bucket of water—it just wouldn't work! Similarly, each type of vegetable has its own requirements that need to be met for optimal growth.
To get started, it's essential to recognize that different plants have varying water needs. For instance, leafy greens like lettuce and spinach thrive in moist soil, while drought-tolerant plants such as tomatoes and peppers prefer a more balanced approach. This means you’ll need to adjust your watering schedule based on the specific needs of each vegetable. A good rule of thumb is to give your plants about 1 to 2 inches of water per week, but this can vary based on the weather and soil type.
Another important aspect to consider is the soil type. Sandy soils drain quickly and may require more frequent watering, while clay soils hold moisture longer but can become compacted. To understand how your garden's soil retains water, you might want to conduct a simple soil moisture test. Just grab a handful of soil and squeeze it; if it crumbles easily, it's too dry, but if it holds together and feels muddy, it’s time to ease up on the watering.
Here’s a quick overview of how different factors influence your plants' water needs:
| Factor | Effect on Water Needs |
|---|---|
| Plant Type | Different plants have varying thirst levels based on their natural habitats. |
| Soil Type | Sandy soils require more frequent watering, while clay soils retain moisture longer. |
| Weather Conditions | Hot, windy days increase evaporation, necessitating more water. |
| Growth Stage | Seedlings generally need more consistent moisture than established plants. |
Moreover, the time of day you water can also influence how well your plants absorb moisture. Early morning is often the best time to water, as it allows plants to soak up the moisture before the sun heats up and causes evaporation. On the contrary, watering in the evening can leave your plants vulnerable to disease due to prolonged moisture on the leaves overnight.
In addition to understanding the basic watering requirements, consider implementing a drip irrigation system. This method delivers water directly to the roots, minimizing waste and keeping your plants happy. Plus, it’s a fantastic way to save time and conserve water in your organic garden.
Lastly, always be attentive to your plants. They can often communicate their needs through their appearance. Wilting leaves, yellowing foliage, or dry soil are clear signs that your plants are thirsty. By observing these cues and adjusting your watering practices accordingly, you’ll ensure your garden flourishes with health and vitality.
- How often should I water my vegetable garden? It typically depends on the plant type and weather, but aim for 1 to 2 inches of water per week.
- What is the best time to water my plants? Early morning is ideal as it allows for maximum absorption before the heat of the day.
- Can I overwater my plants? Yes, overwatering can lead to root rot and other diseases. Always check soil moisture before watering.
- What signs indicate my plants need more water? Look for wilting leaves, dry soil, or yellowing foliage.
Mulching Benefits
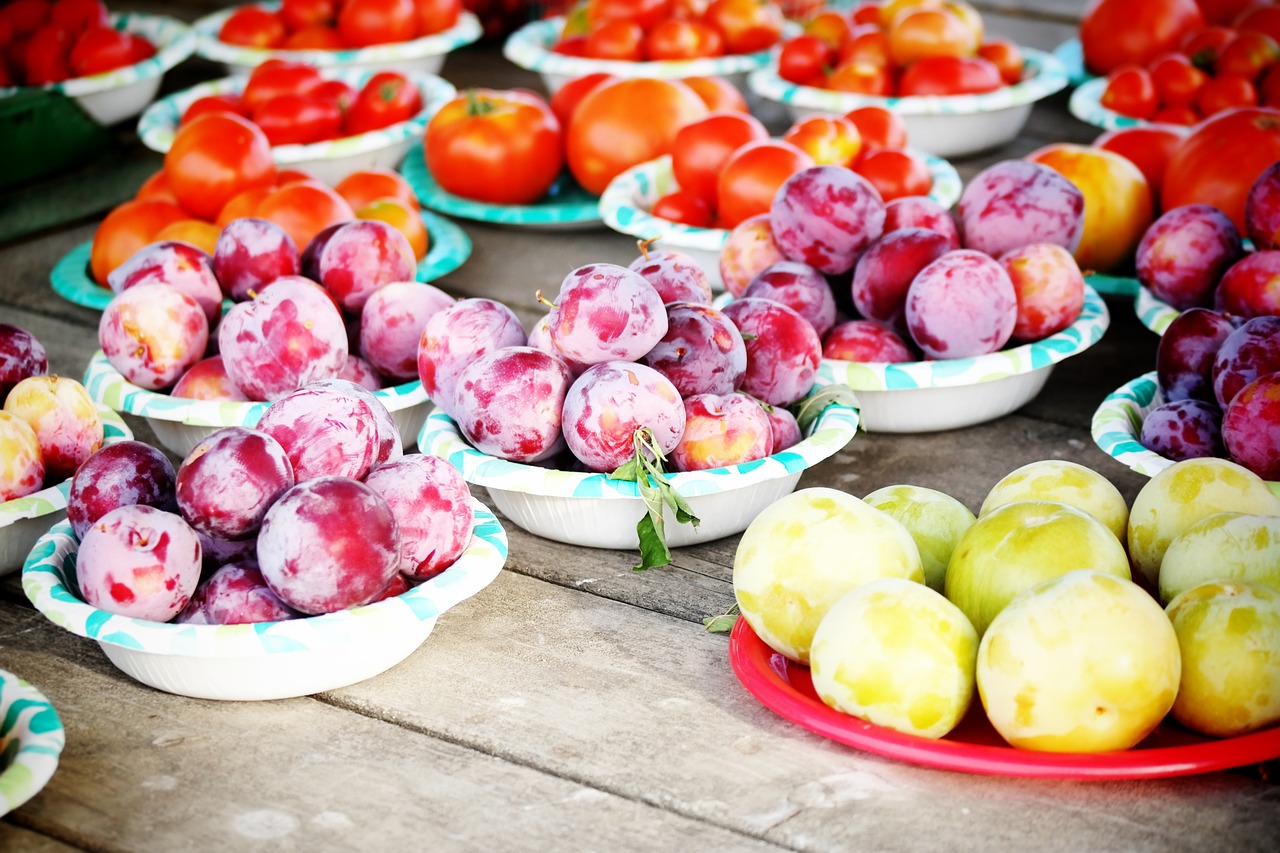
Mulching is one of those gardening techniques that often gets overlooked, but it can be a game changer for your organic vegetable garden. Imagine walking into your garden and seeing vibrant, healthy plants thriving in a neat and tidy environment. That's the magic of mulch! Not only does it enhance the aesthetic appeal of your garden, but it also serves several practical purposes that can significantly improve your gardening success.
First and foremost, mulching helps to retain moisture in the soil. This is especially important during hot summer months when your plants are thirsty and the sun is relentless. A layer of mulch acts like a protective blanket, reducing evaporation and keeping the soil consistently moist. This means less frequent watering for you, which is a win-win!
Additionally, mulching plays a crucial role in weed suppression. Weeds compete with your vegetables for nutrients, water, and light, which can stunt their growth. By applying a thick layer of mulch, you create a barrier that prevents sunlight from reaching weed seeds, inhibiting their growth. It’s like giving your vegetables a head start in the race for resources!
Another fantastic benefit of mulching is its ability to improve soil health. As organic mulch breaks down over time, it enriches the soil with nutrients, fostering a thriving ecosystem for beneficial microorganisms. This natural process enhances soil structure, promotes better aeration, and increases the soil's ability to hold water and nutrients. Think of it as a buffet for your soil—more nutrients lead to healthier plants!
Moreover, mulching can help regulate soil temperature. During the heat of summer, mulch keeps the soil cooler, protecting the roots of your plants from extreme temperatures. Conversely, in the colder months, it can insulate the soil, preventing it from freezing too quickly. This temperature regulation is vital for the overall health and longevity of your plants.
When it comes to choosing the right material for your mulch, you have a variety of options. Here are a few popular choices:
- Wood chips: Great for long-lasting coverage and moisture retention.
- Straw: An excellent choice for vegetable gardens, as it decomposes quickly and adds nutrients.
- Grass clippings: Readily available and can be a great nitrogen source, but be cautious of using clippings from chemically treated lawns.
- Leaves: Shredded leaves can provide excellent insulation and nutrient value as they decompose.
Applying mulch is simple! Aim for a layer that is about 2 to 4 inches thick, making sure to keep the mulch a few inches away from the stems of your plants to prevent rot. Replenish your mulch as it breaks down to maintain its effectiveness. With the right approach, you’ll soon see the benefits of mulching reflected in the health and productivity of your garden.
Q: How often should I replace my mulch?
A: It’s a good idea to check your mulch every season and replenish it as needed, especially if it has broken down significantly or if you notice weeds starting to come through.
Q: Can I use any type of mulch in my vegetable garden?
A: While many types of mulch are suitable, it’s best to avoid using treated wood or materials that may contain chemicals harmful to your plants.
Q: Will mulch attract pests?
A: Mulch can attract certain pests, but it can also deter others. Using organic materials and maintaining good garden hygiene can help minimize pest issues.
Q: Is it necessary to use mulch in an organic garden?
A: While not strictly necessary, mulching provides numerous benefits that can enhance the health of your plants and the productivity of your garden, making it highly recommended for organic gardening.
Harvesting and Storage Tips
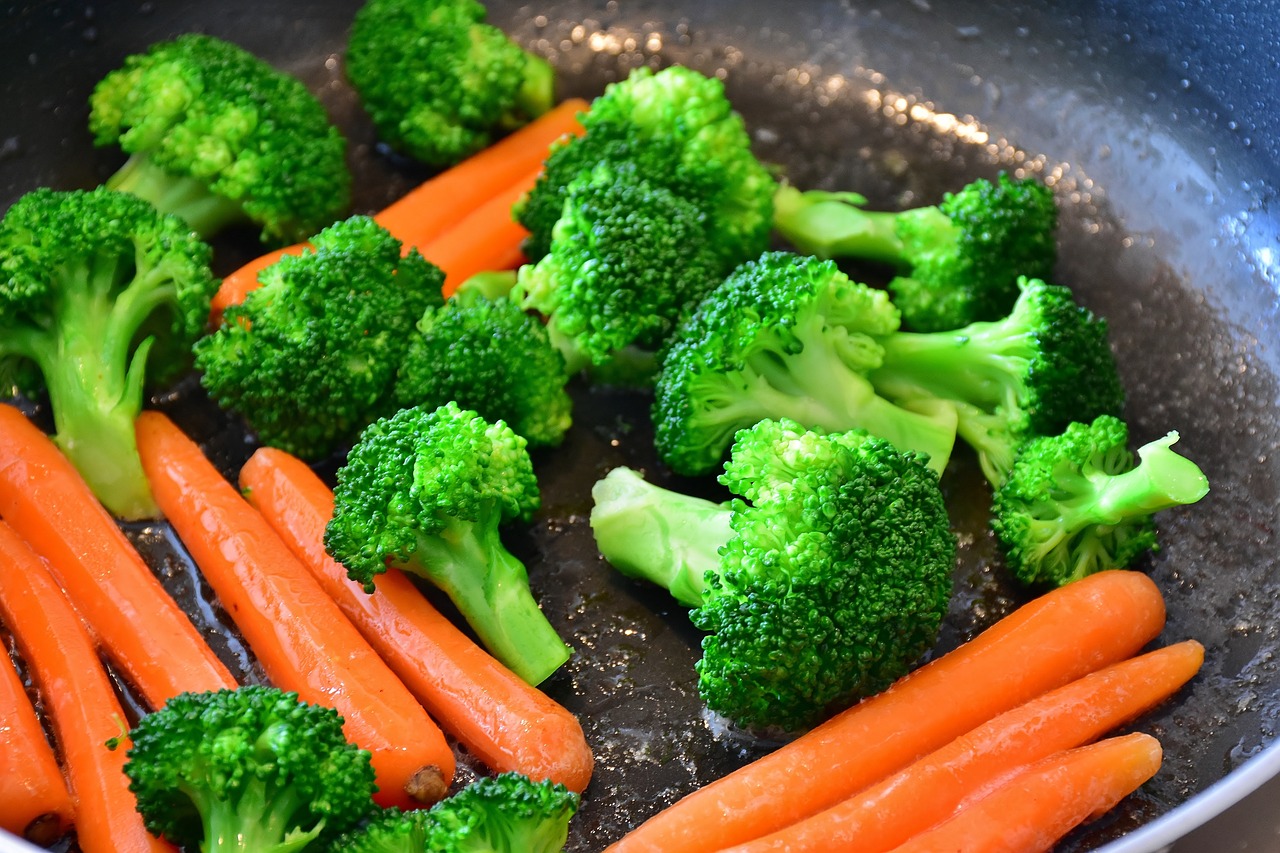
Knowing when and how to harvest your vegetables is key to enjoying their full flavor and nutritional benefits. Each vegetable has its own unique signs of ripeness, and understanding these indicators can make all the difference in your cooking and eating experience. For instance, tomatoes should be harvested when they are fully colored and slightly soft to the touch, while cucumbers are best picked when they are still firm and before they turn yellow. This attention to detail not only enhances the taste of your meals but also maximizes the nutritional value of your harvest.
Timing your harvest is essential. It's not just about picking vegetables; it's about knowing the right moment to do so. Vegetables left too long on the vine can become overripe, losing their flavor and texture. To help you with this, here’s a quick reference table that outlines the ideal harvest times for some common garden vegetables:
| Vegetable | Ideal Harvest Time | Signs of Ripeness |
|---|---|---|
| Tomatoes | 70-85 days after planting | Fully colored and slightly soft |
| Cucumbers | 50-70 days after planting | Firm and before turning yellow |
| Carrots | 70-80 days after planting | Top of the root is visible and about 1 inch in diameter |
| Bell Peppers | 60-90 days after planting | Glossy and firm; can be harvested green or left to ripen |
Once you’ve harvested your vegetables, proper storage techniques are vital for maintaining their freshness. You wouldn’t want all your hard work to go to waste, right? Here are some effective storage methods to consider:
- Refrigeration: Many vegetables, like leafy greens and bell peppers, thrive in cooler temperatures. Store them in the crisper drawer of your refrigerator, ideally in perforated bags to maintain airflow.
- Freezing: For longer-term storage, freezing is an excellent option. Blanch vegetables like green beans and broccoli before freezing to preserve their color and nutrients.
- Canning: If you have an abundance of produce, canning can be a great way to enjoy your harvest throughout the year. Just make sure to follow safe canning practices to avoid spoilage.
Remember, the key to successful storage is to keep your vegetables in conditions that mimic their natural environment as closely as possible. For example, root vegetables like carrots and potatoes do well in a cool, dark place, while herbs should be kept in a well-ventilated area to prevent wilting.
In summary, understanding the nuances of harvesting and storage can significantly enhance your organic gardening experience. By paying attention to the signs of ripeness and employing effective storage techniques, you can enjoy the fruits of your labor long after the growing season ends. So, when the time comes to harvest, don’t rush it—take a moment to appreciate the process and the delicious meals that await you!
Q: When is the best time to harvest vegetables?
A: The best time to harvest vegetables varies by type. Generally, it’s best to harvest in the morning when temperatures are cooler, and plants are hydrated.
Q: How can I tell if my vegetables are ripe?
A: Each vegetable has specific signs of ripeness. For example, tomatoes should be fully colored, while cucumbers should be firm and green.
Q: What are the best storage practices for vegetables?
A: Refrigeration, freezing, and canning are effective methods. Each vegetable may have different needs, so it’s essential to know how to store each type properly.
Timing Your Harvest
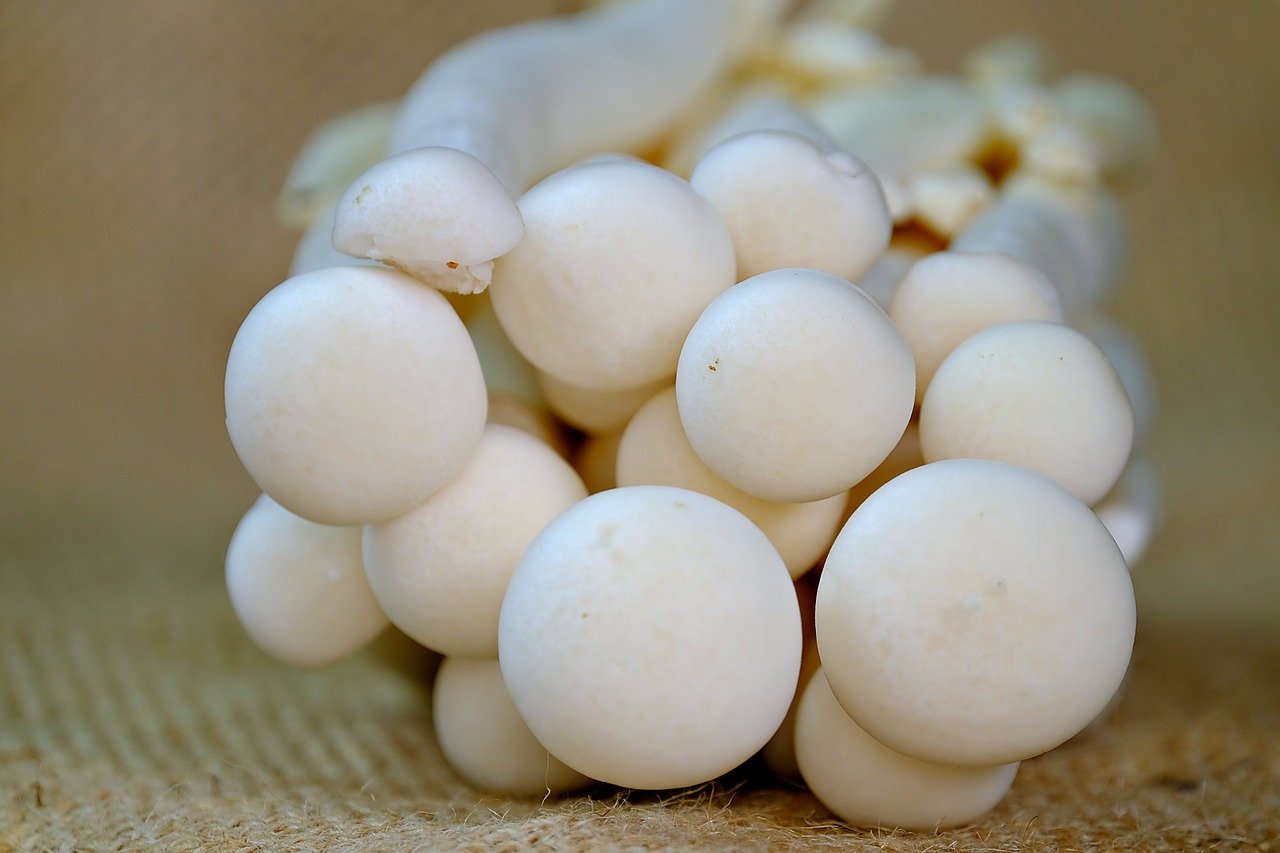
Understanding the right time to harvest your vegetables is absolutely crucial for maximizing their flavor, texture, and nutritional value. Just think of it as waiting for the perfect moment to pop open that bottle of wine; timing can make all the difference! Each vegetable has its own unique signs of ripeness, which can sometimes feel like a secret code only seasoned gardeners can decipher. But fear not! With a little guidance, you'll become a harvesting pro in no time.
For instance, tomatoes should be harvested when they are fully colored and slightly soft to the touch. If you pick them too early, you might end up with a bland, unripe fruit that lacks that sweet, juicy burst we all crave. On the other hand, cucumbers are best when they are firm and still small—letting them grow too large can lead to bitterness. This nuanced understanding of when to harvest can truly elevate your gardening experience.
Here’s a handy table to help you identify the signs of ripeness for some common vegetables:
| Vegetable | Signs of Ripeness |
|---|---|
| Tomatoes | Fully colored (red, yellow, etc.) and slightly soft. |
| Cucumbers | Firm and small, typically 6-8 inches long. |
| Carrots | Foliage is about 6-8 inches tall; check size by gently pulling. |
| Bell Peppers | Fully colored and firm; can be harvested green or allowed to ripen. |
| Zucchini | Harvest when 6-8 inches long; larger zucchinis can become tough. |
Additionally, it's important to consider the weather conditions when planning your harvest. Harvesting during a dry spell can help prevent excess moisture from spoiling your vegetables, while picking in the early morning can ensure they are crisp and fresh. Remember, the goal is to enjoy the fruits of your labor at their peak, so keep an eye on your garden and don’t hesitate to check on your plants regularly.
In essence, timing your harvest is all about being attentive and responsive to the needs of your plants. Just like a chef knows when to pull a dish from the oven, you’ll learn to recognize when your vegetables are ready to shine. With practice, you’ll develop an instinct for harvesting that will make your organic vegetable garden not just productive, but also a source of immense satisfaction. So grab your basket, keep your eyes peeled, and get ready to enjoy the delicious rewards of your hard work!
- When is the best time to harvest vegetables? The best time is usually in the morning when temperatures are cooler, and moisture levels are higher, making the vegetables crisp and fresh.
- Can I harvest vegetables too early? Yes, harvesting too early can lead to underdeveloped flavors and textures. It’s essential to wait until they’ve reached their peak ripeness.
- How do I store my harvested vegetables? Proper storage depends on the type of vegetable. Some can be refrigerated, while others may be best frozen or canned for longer shelf life.
Storage Techniques for Freshness
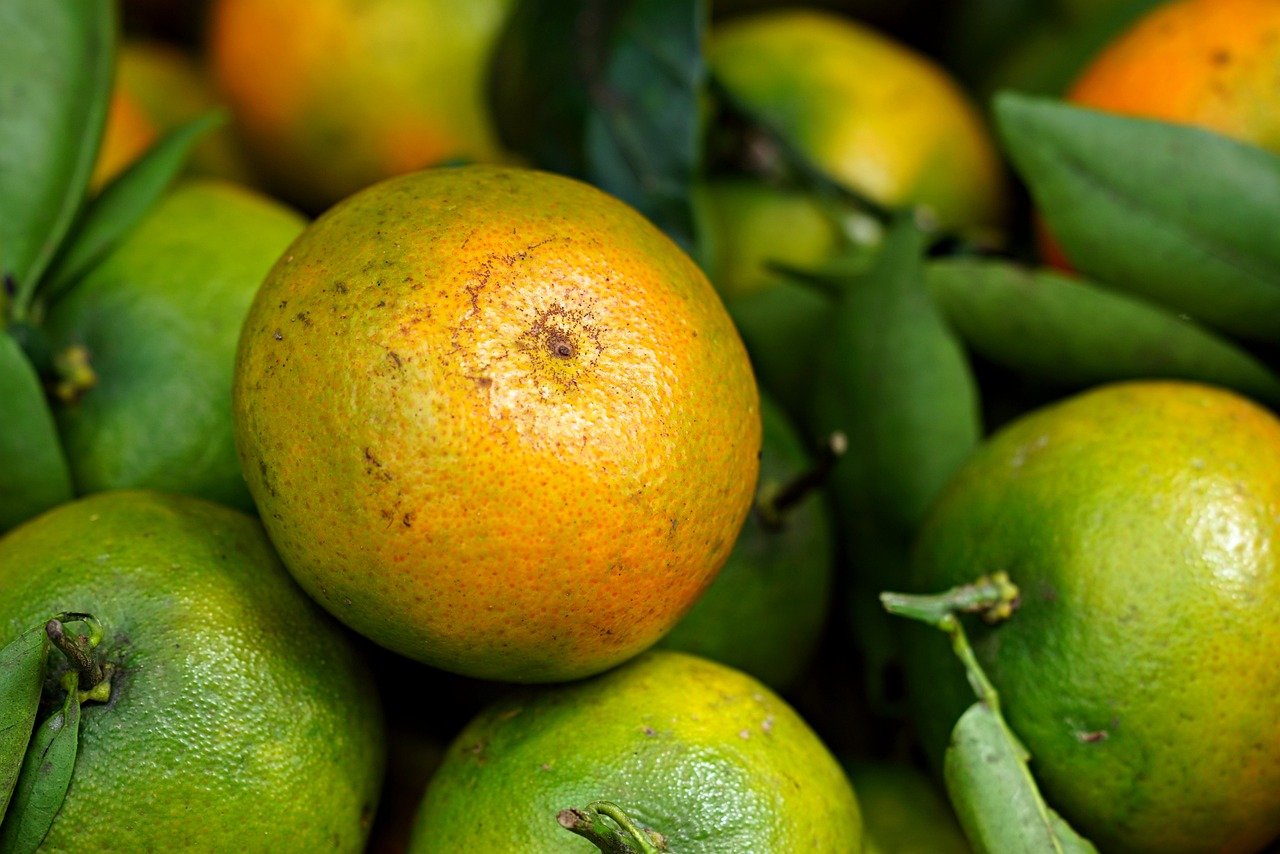
When it comes to enjoying the fruits (and vegetables) of your labor, knowing how to store them properly can make all the difference. You’ve put in the hard work growing your organic garden, and now it’s time to ensure that your harvest stays fresh and delicious for as long as possible. Think of your vegetables as delicate treasures; treat them right, and they will reward you with flavor and nutrition.
One of the most effective techniques for preserving the freshness of your vegetables is refrigeration. Many vegetables, such as leafy greens, carrots, and bell peppers, thrive in cooler temperatures. However, it’s essential to store them correctly to prevent spoilage. For instance, leafy greens should be washed, dried, and stored in a breathable container or a produce bag with a few holes to allow air circulation. This helps to keep them crisp without turning them into a soggy mess.
Another fantastic method for long-term storage is freezing. Freezing allows you to enjoy your garden’s bounty even in the off-season. To freeze vegetables, first blanch them in boiling water for a few minutes to halt enzyme activity, which can affect flavor and texture. After blanching, plunge them into ice water to stop the cooking process, drain them well, and then pack them into airtight containers or freezer bags. This technique is perfect for vegetables like green beans, peas, and zucchini, ensuring you have fresh tastes at your fingertips, even in the dead of winter.
Canning is yet another option for preserving your harvest. This method involves sealing vegetables in jars and heating them to kill bacteria, yeasts, and molds that could spoil your food. You can can a variety of vegetables, from tomatoes to pickles, and even create delicious relishes. Just remember to follow safe canning practices to avoid the risk of foodborne illnesses. If you’re new to canning, consider starting with simple recipes and gradually exploring more complex ones.
Here’s a quick overview of the best storage techniques for your organic vegetables:
| Storage Method | Best For | Tips |
|---|---|---|
| Refrigeration | Leafy greens, carrots, bell peppers | Use breathable containers and avoid excess moisture. |
| Freezing | Green beans, peas, zucchini | Blanch before freezing to maintain quality. |
| Canning | Tomatoes, pickles, relishes | Follow safe canning practices to avoid spoilage. |
Lastly, consider the art of drying. This method not only preserves your vegetables but also concentrates their flavors. Dehydrating vegetables like tomatoes, peppers, and herbs can create delightful additions to your culinary creations. You can use a food dehydrator or even your oven at a low temperature to achieve this. Once dried, store them in airtight containers away from light and moisture.
In conclusion, mastering these storage techniques will not only help you enjoy your organic vegetables longer but also reduce waste and make the most of your gardening efforts. Remember, the key to freshness lies in understanding the unique needs of each vegetable and applying the right storage method. So go ahead, harvest your garden goodies, and savor the flavors of your hard work!
- How long can I store vegetables in the refrigerator? Most vegetables can last anywhere from a few days to a couple of weeks, depending on the type and storage conditions.
- Can I freeze vegetables without blanching them? While you can freeze vegetables without blanching, it may lead to loss of flavor and texture over time.
- What is the best way to store herbs? Fresh herbs can be stored in the refrigerator wrapped in a damp paper towel, or you can freeze them in ice cube trays with olive oil.
Frequently Asked Questions
- What is the best location for my organic vegetable garden?
Choosing the right location is crucial for your garden's success. Look for a spot that gets at least 6-8 hours of sunlight daily, has good drainage, and is close to a water source. Avoid areas with too much shade or poor soil conditions to ensure your veggies thrive.
- How can I prepare my soil for planting?
Soil preparation is key to a healthy garden. Start by testing your soil to understand its pH and nutrient levels. You can improve it by adding organic matter like compost or well-rotted manure to create a nutrient-rich environment for your plants.
- What are the basics of composting?
Composting enriches your soil naturally. To start, gather kitchen scraps, yard waste, and other organic materials. Layer them in a compost bin, and maintain the pile by turning it regularly and keeping it moist. In a few months, you'll have rich compost ready for your garden!
- How do I choose the right organic seeds?
Selecting organic seeds is essential for a successful garden. Look for heirloom varieties that are well-suited to your climate. You can find them at local nurseries, farmer's markets, or online seed companies that specialize in organic gardening.
- What are effective pest management strategies?
Organic pest management involves using natural methods to control pests. Consider companion planting, which involves growing certain plants together to deter pests. You can also attract beneficial insects like ladybugs, or use organic pesticides made from natural ingredients to protect your crops.
- How can I water my garden effectively?
Proper watering is essential for plant health. Drip irrigation systems are great for conserving water while ensuring your plants get what they need. Also, consider rainwater harvesting to make the most of natural resources and keep your garden hydrated.
- When is the best time to harvest my vegetables?
Timing your harvest is crucial for flavor and nutrition. Each vegetable has its own signs of ripeness, so familiarize yourself with these indicators. Generally, harvesting in the morning when temperatures are cooler can help preserve freshness and taste.
- What are some storage techniques for fresh vegetables?
To extend the freshness of your harvest, use proper storage methods. Refrigeration works well for many veggies, while freezing and canning are great for long-term storage. Make sure to handle your produce gently and store them in appropriate containers to maintain quality.


